以下两篇文章已经较好的介绍IndexTTS项目,本文基于这两篇文件对该项目安装实现的一些细节再做更详细的说明,也算对自己的折腾做下总结。
https://www.cnblogs.com/cj8988/p/18973016 (windows conda)
https://www.cnblogs.com/h5l0/p/18907633 (windows wsl)
1 基于conda环境
1.1 项目安装
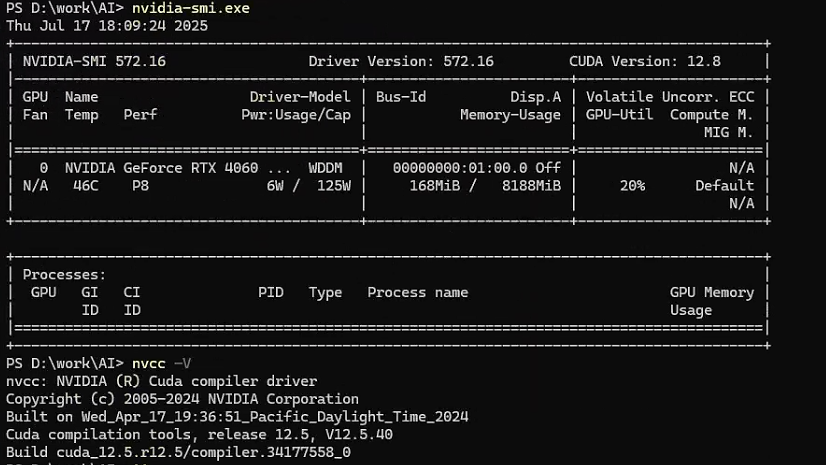
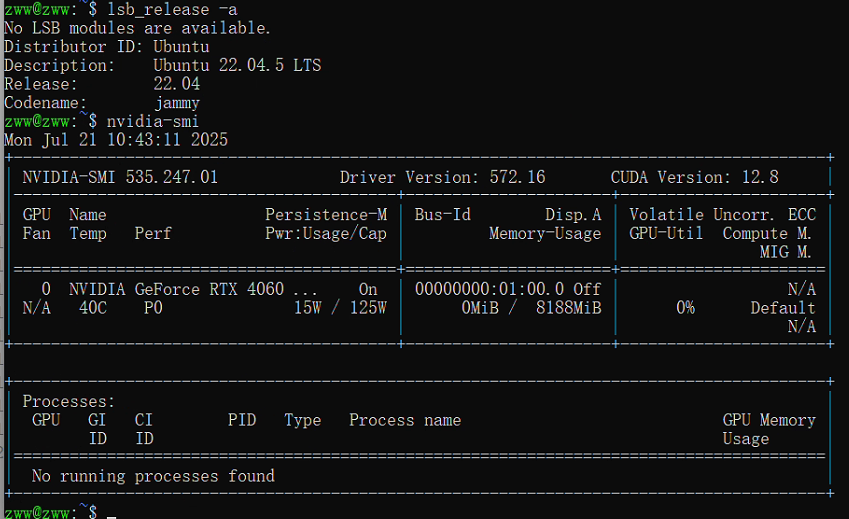
1. 照例显示下本地软硬件环境
2. 从github上下载项目
git clone https://github.com/index-tts/index-tts.git3. 创建环境并安装依赖
conda create -n index-tts python=3.10
conda activate index-tts

pip install torch torchvision torchaudio --index-url https://download.pytorch.org/whl/cu128
pip install -r requirements.txt
因为是windows环境,这里和项目官方安装稍有区别,没有安装ffmpeg(如遇问题请参考后续小节解决方案),且是根据nvidia-smi显示的驱动信息安装的相对应版本的pytorch。pytorch安装过程信息如下:
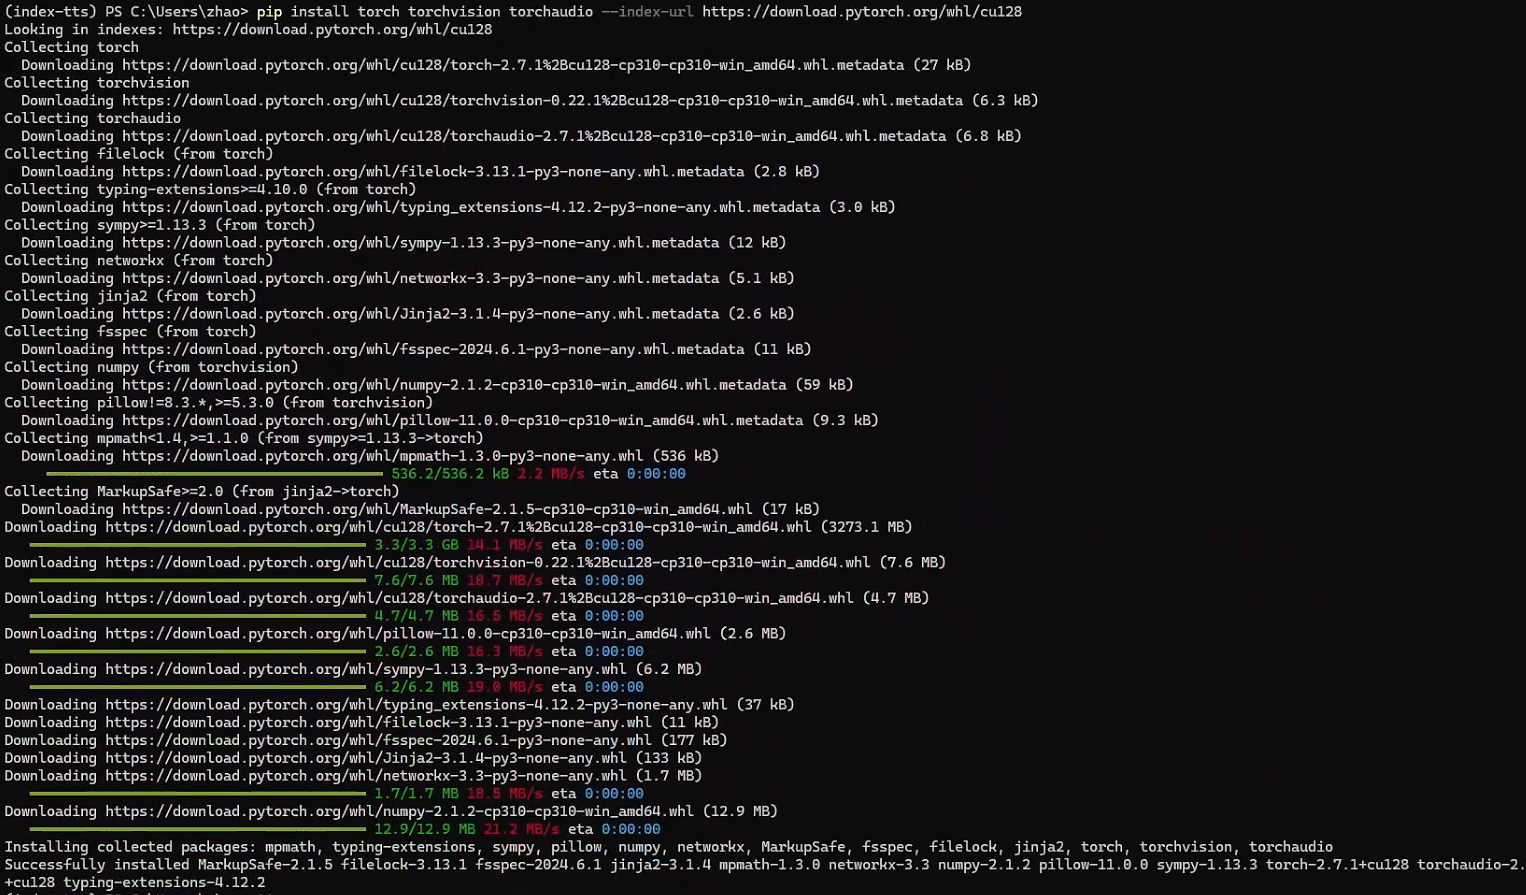
从安装过程信息可知安装的pytorch版本是2.7.1。在安装requirements.txt时,正如官网所说在windows下安装pynini时会提示错误:ERROR: Failed building wheel for pynini

仍按官网解决方式进行conda安装:
# after conda activate index-tts
conda install -c conda-forge pynini==2.1.6
pip install WeTextProcessing --no-deps
4. 将项目以 "开发模式" 安装到当前 Python 环境
cd index-tts
pip install -e .执行后,Python环境会在site-packages目录中创建一个特殊的链接(.egg-link文件),指向 index-tts项目的根目录,使得你在任何地方都能像导入普通包一样导入该项目的模块(例如import index_tts),命令还会根据项目根目录下的setup.py或pyproject.toml中的配置,自动安装项目所需的依赖包。
关键参数说明:
-e:是 --editable 的缩写,指定 "可编辑模式"。
.:表示当前目录,即告诉 pip 从当前目录的 setup.py 或 pyproject.toml 读取包的配置信息。
这种安装方式常用于开发阶段,如果你只是想使用该包而不修改源码,直接用pip install .即可(非编辑模式,源码修改后需重新安装才会生效,否则其他项目import index_tts时仍使用的是之前安装)。
5. 下载模型
通过huggingface-cli工具下载,如果该工具未安装,请使用pip install huggingface-hub进行安装,huggingface-cli是huggingface-hub包的一部分,安装该包后即可使用huggingface-cli命令。
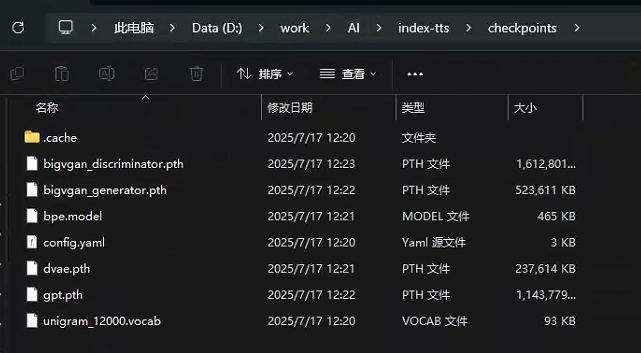
huggingface-cli download IndexTeam/IndexTTS-1.5 config.yaml bigvgan_discriminator.pth bigvgan_generator.pth bpe.model dvae.pth gpt.pth unigram_12000.vocab --local-dir checkpoints可见命令会将模型下载到当前目录的checkpoints下:
项目官方后续还介绍了对于中国用户如何使用镜像加速下载,这里并没有实际尝试,而是直接使用的代理进行下载(涉及github的项目不配置代理基本没法操作,这里鄙视下国内的网络环境)。
6. 运行Web Demo
接下并没有运行测试脚本,而是直接运行了Web Demo:
pip install -e ".[webui]" --no-build-isolation
python webui.py
# use another model version:
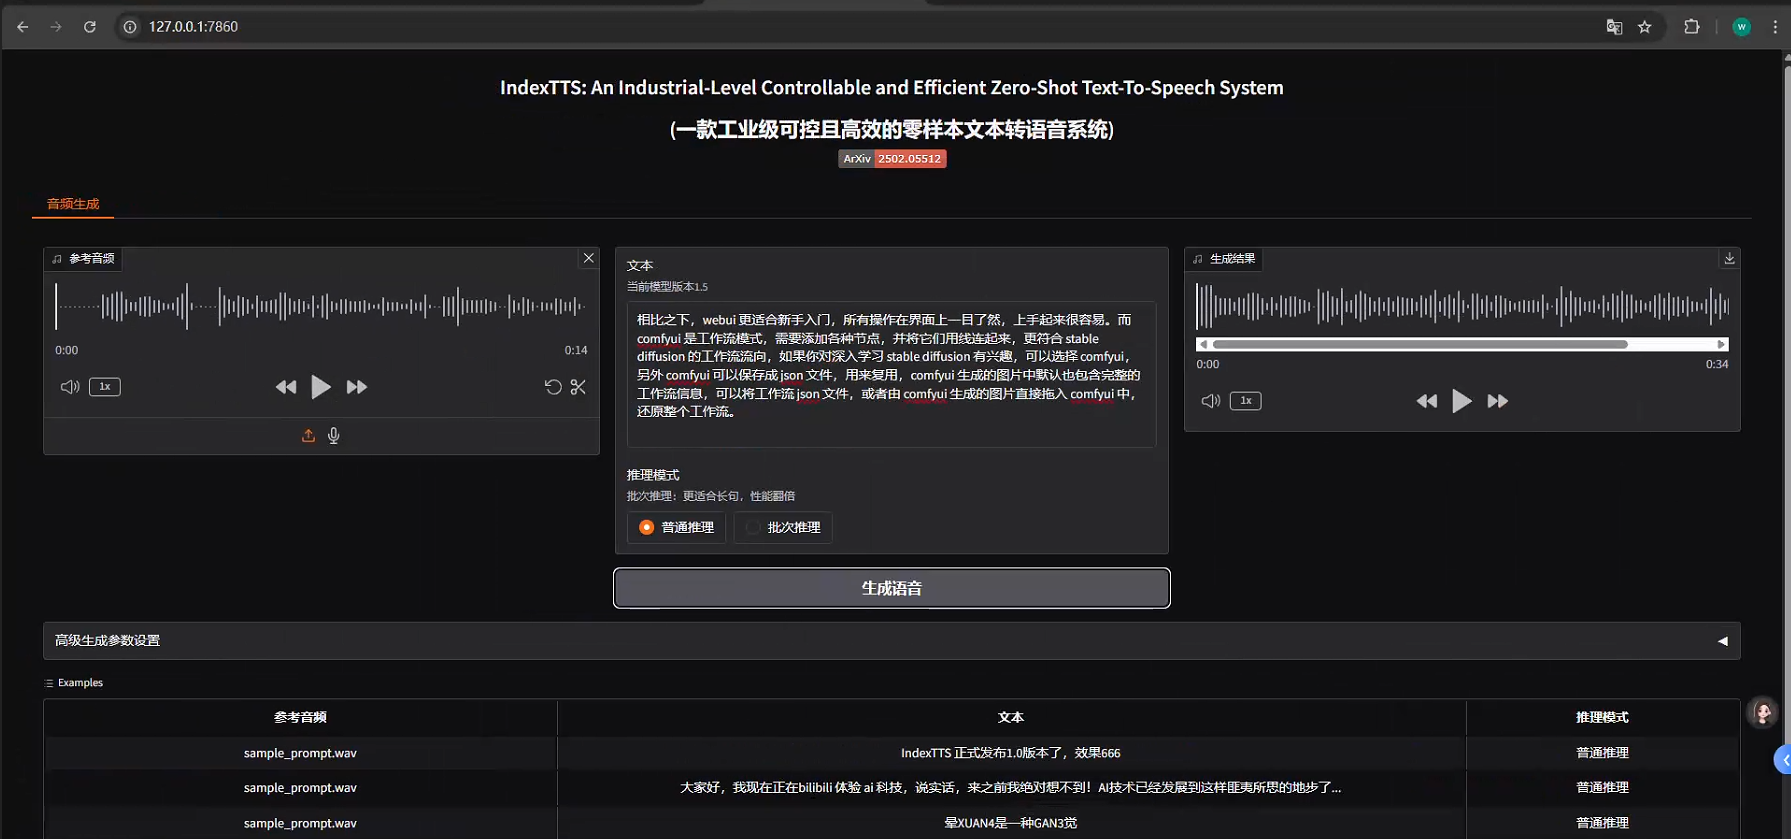
python webui.py --model_dir IndexTTS-1.5直接访问http://127.0.0.1:7860即可加载该项目,最左边上传样例声音文件,中间文本是要进行样例声音克隆的文本信息,单击生成语音即可在最右边产生出克隆声音。
以下是声音样例下载:
|--------------------|--------------------|
| 源音频 | 克隆的音频 |
| 您的浏览器不支持 audio 标签。 | 您的浏览器不支持 audio 标签。 |
1.2 其他问题
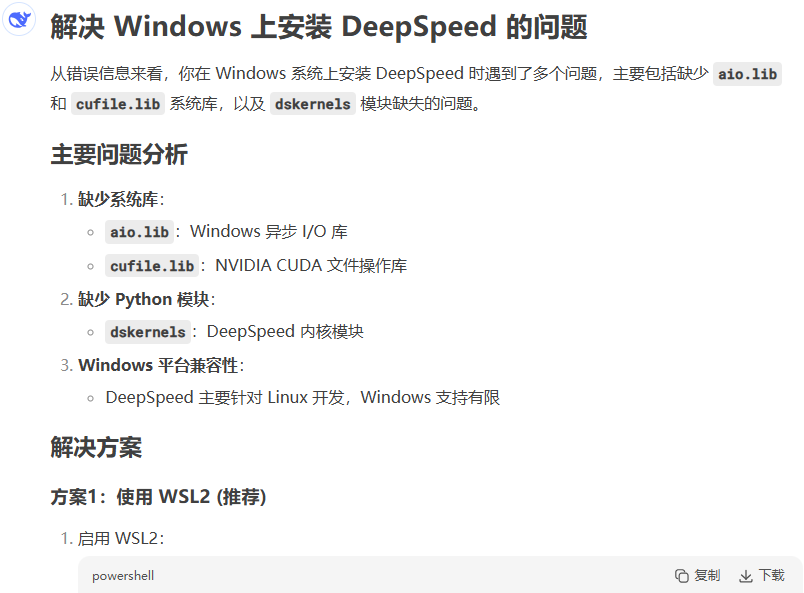
1. Deepspeed问题
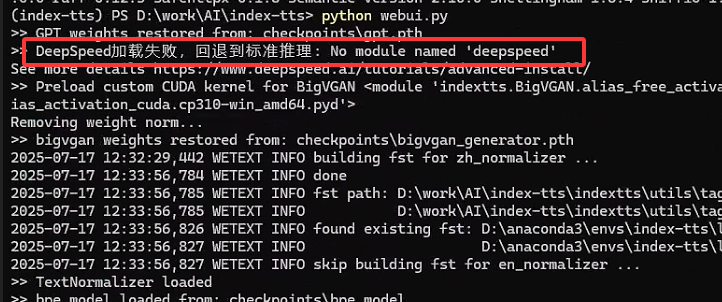
在上一节虽然已经运行起来,但是生成语音时明显感觉生成速度比较慢,第一感觉就是根本没有用上GPU,在后台一看果然有问题,说是DeepSpeed加载失败:
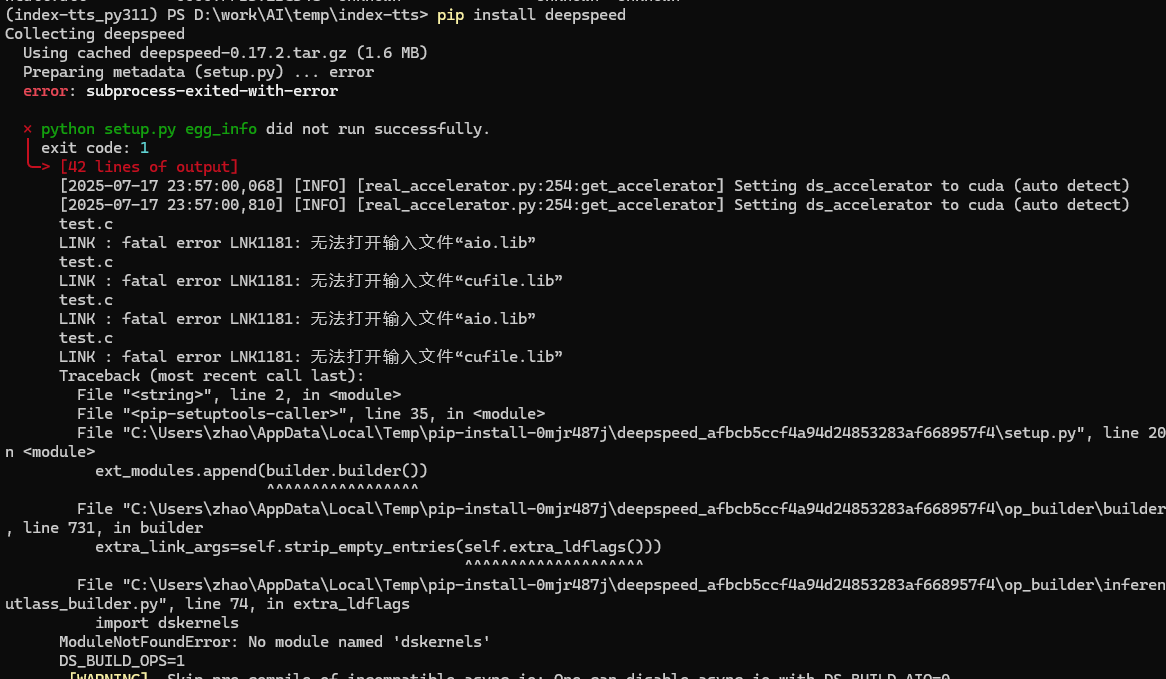
直接用pip install deepspeed进行安装,安装失败:
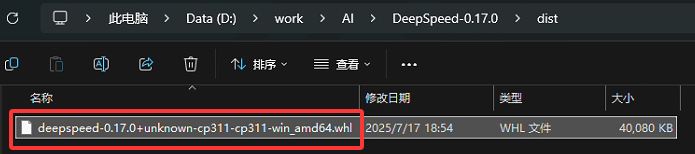
自动安装不成功,只能自己源码编译,这里下载deepspeed的0.17.0版本,以下是官网的在windows下编译的步骤:
1 Install PyTorch, such as pytorch 2.3+cu121.
2 Install Visual C++ build tools, such as VS2022 C++ x64/x86 build tools.
3 Launch Cmd console with Administrator permissions for creating required symlink folders and ensure MSVC tools are added to your PATH or launch the Developer Command Prompt for Visual Studio 2022 with administrator permissions.
4 Run build_win.bat to build wheel in dist folder.
参照编译步骤进行编译,最后产生deepspeed-0.17.0+unknown-cp311-cp311-win_amd64.whl安装文件,并对该文件进行安装。
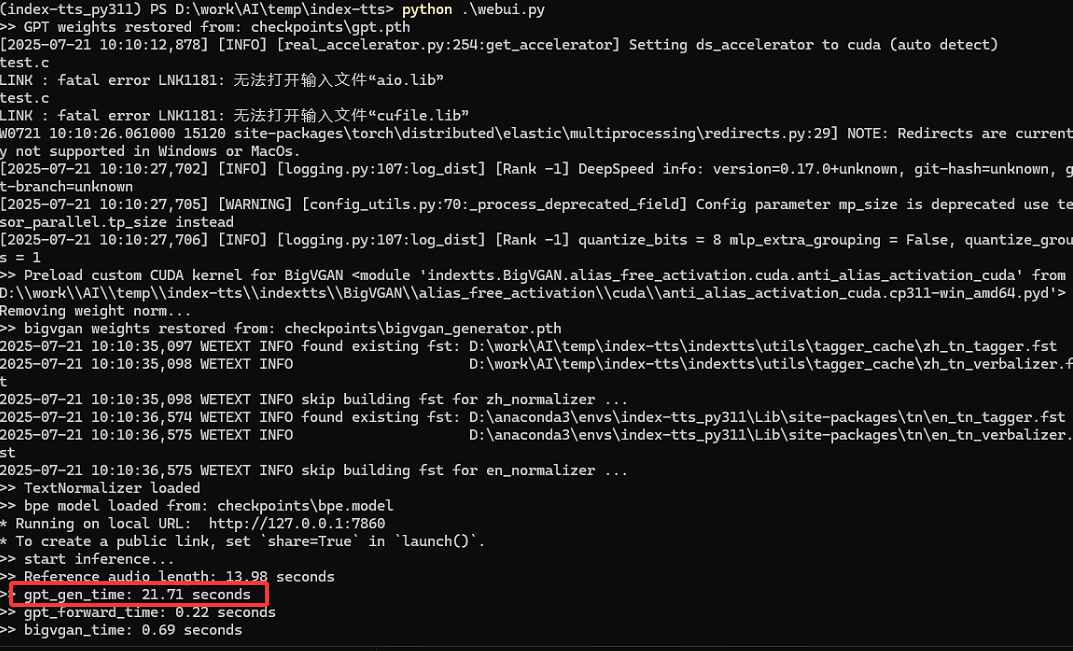
其实在编译deepspeed中会有两个错误提示,说是缺少aio.lib和cufile.lib,没有处理也能编译通过。之后重新运行web demo时虽然不再提示"deepspeed加载失败",但仍会提示缺少两个文件的错误,感觉gpu还是有问题,随便找两句话进行语音生成,果然时间比较长,应该是GPU还是没有用上。
问了下deepseek,看来deepspeed对windows的支持还是不太行,如果哪位大神能搞定windows下gpu使用请在评论区告诉我一声。deepseek给出了其他解决方案,使用wsl,这正是本文第2节的内容。
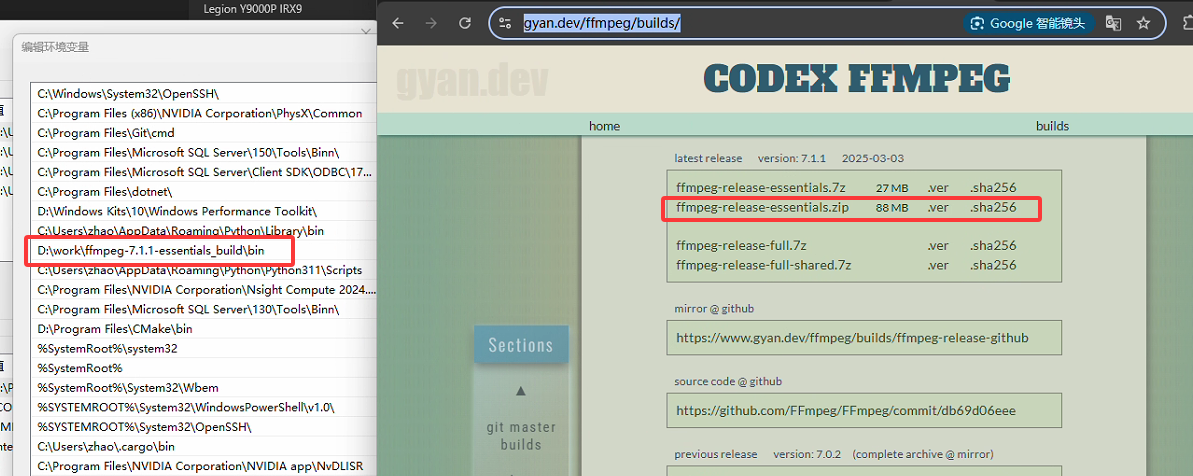
2. 缺失ffmpeg问题
在折腾过程中,还有一次提示缺少ffmpeg的问题,顺便记录下,首先下载ffmpeg的gyan预编译版本,然后解压到本地,再配置path环境变量。
2 基于wsl环境
2.1 WSL安装及环境配置
这部分内容不再详细说明,请参照本文最前面的第二个参考链接及之前的博文进行,这里使用的Linux版本是Ubuntu 22.04,并且已经在WSL可以访问到GPU。
除此之外,为了能在Windows下能直接访问Ubuntu,需将Ubuntu的localhost暴露在Windows下:
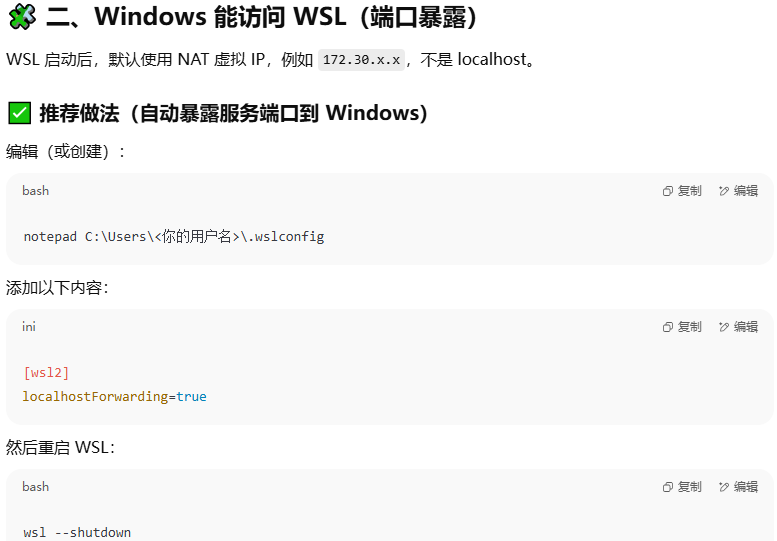
2.2 配置项目
1. clone项目
使用如下命令先将index-tts-vllm项目clone下来:
git clone https://github.com/Ksuriuri/index-tts-vllm.git然后进入项目目录,后文的工作目录都必须是此项目目录。
cd index-tts-vllm2. 配置uv虚拟环境
使用以下指令,创建一个虚拟环境.venv,并激活该虚拟环境
uv .venv
source .venv/bin/activate
执行完该命令会创建了名为.venv的虚拟环境,并在当前目录下创建.venv目录对该虚拟环境进行管理
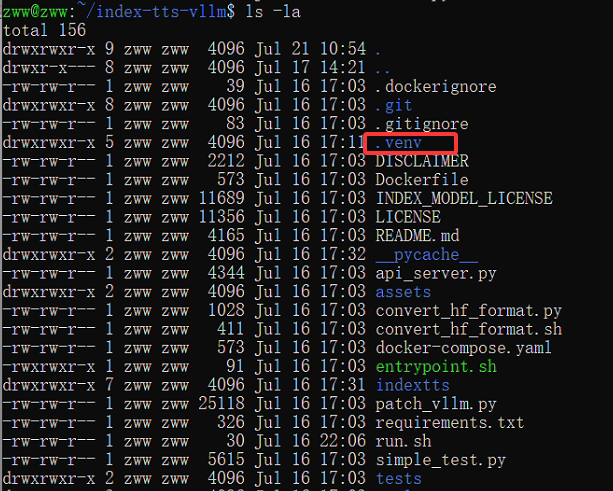
安装python版本3.12:
uv python install 3.123. 安装依赖包
执行以下指令,在uv内安装包:
uv pip install -r requirements.txt4. 生成模型文件
官方https://github.com/Ksuriuri/index-tts-vllm给出了两个权重文件下载链接:
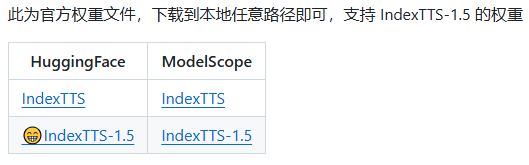
这里选择第一进行下载,执行以下命令中的前两行即可,第3行命令是不下载大文件的操作方式,第4行命令是用huggingface-cli的下载方式(在本文中将权重文件IndexTTS-1.5下载到了和index-tts-vllm的同一级目录):
git lfs install
git clone https://huggingface.co/IndexTeam/IndexTTS-1.5

# If you want to clone without large files - just their pointers
GIT_LFS_SKIP_SMUDGE=1 git clone https://huggingface.co/IndexTeam/IndexTTS-1.5
# Use huggingface-cli to download in a specific directory
huggingface-cli download IndexTeam/IndexTTS-1.5
下载完成后重新进入到index-tts-vllm目录下执行如下命令,将官方的模型权重转换为 transformers 库兼容的版本,保存在模型权重路径下的vllm文件夹中,方便后续vllm库加载模型权重。
bash convert_hf_format.sh /home/zww/IndexTTS-1.5/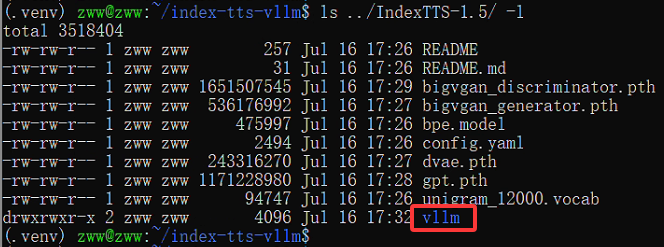
2.3 运行项目
将webui.py中的model_dir修改为模型权重下载路径:
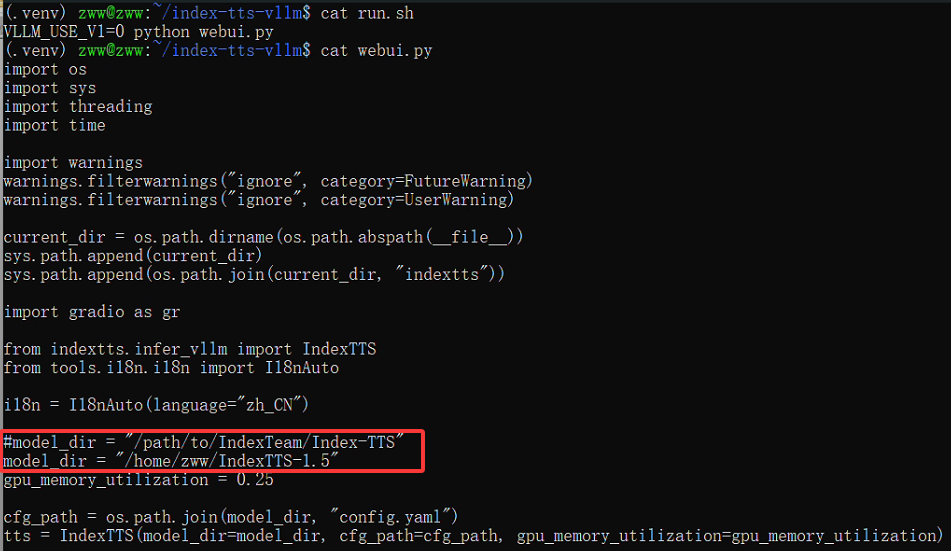
运行以下命令启动程序:
VLLM_USE_V1=0 python webui.py如官方所说,第一次启动可能会久一些,因为要对 bigvgan 进行 cuda 核编译,注:一定要带上VLLM_USE_V1=0,因为本项目没有对 vllm 的 v1 版本做兼容。启动log信息如下:


INFO 07-21 11:44:08 [__init__.py:243] Automatically detected platform cuda.
✅ Registry GPT2TTSModel to vllm
⚠️  SamplingParams._verify_args Patched
⚠️  ModelInputForGPUBuilder._compute_lens Patched
INFO 07-21 11:44:13 [__init__.py:31] Available plugins for group vllm.general_plugins:
INFO 07-21 11:44:13 [__init__.py:33] - lora_filesystem_resolver -> vllm.plugins.lora_resolvers.filesystem_resolver:register_filesystem_resolver
INFO 07-21 11:44:13 [__init__.py:36] All plugins in this group will be loaded. Set `VLLM_PLUGINS` to control which plugins to load.
INFO 07-21 11:44:14 [config.py:3131] Downcasting torch.float32 to torch.float16.
INFO 07-21 11:44:14 [config.py:793] This model supports multiple tasks: {'embed', 'generate', 'score', 'classify', 'reward'}. Defaulting to 'generate'.
INFO 07-21 11:44:14 [llm_engine.py:230] Initializing a V0 LLM engine (v0.9.0) with config: model='/home/zww/IndexTTS-1.5/vllm', speculative_config=None, tokenizer='/home/zww/IndexTTS-1.5/vllm', skip_tokenizer_init=False, tokenizer_mode=auto, revision=None, override_neuron_config={}, tokenizer_revision=None, trust_remote_code=False, dtype=torch.float16, max_seq_len=803, download_dir=None, load_format=LoadFormat.AUTO, tensor_parallel_size=1, pipeline_parallel_size=1, disable_custom_all_reduce=False, quantization=None, enforce_eager=False, kv_cache_dtype=auto,  device_config=cuda, decoding_config=DecodingConfig(backend='xgrammar', disable_fallback=False, disable_any_whitespace=False, disable_additional_properties=False, reasoning_backend=''), observability_config=ObservabilityConfig(show_hidden_metrics_for_version=None, otlp_traces_endpoint=None, collect_detailed_traces=None), seed=None, served_model_name=/home/zww/IndexTTS-1.5/vllm, num_scheduler_steps=1, multi_step_stream_outputs=True, enable_prefix_caching=None, chunked_prefill_enabled=False, use_async_output_proc=True, pooler_config=None, compilation_config={"compile_sizes": [], "inductor_compile_config": {"enable_auto_functionalized_v2": false}, "cudagraph_capture_sizes": [256, 248, 240, 232, 224, 216, 208, 200, 192, 184, 176, 168, 160, 152, 144, 136, 128, 120, 112, 104, 96, 88, 80, 72, 64, 56, 48, 40, 32, 24, 16, 8, 4, 2, 1], "max_capture_size": 256}, use_cached_outputs=False,
WARNING 07-21 11:44:14 [interface.py:344] Using 'pin_memory=False' as WSL is detected. This may slow down the performance.
INFO 07-21 11:44:14 [cuda.py:292] Using Flash Attention backend.
INFO 07-21 11:44:15 [parallel_state.py:1064] rank 0 in world size 1 is assigned as DP rank 0, PP rank 0, TP rank 0, EP rank 0
INFO 07-21 11:44:15 [model_runner.py:1170] Starting to load model /home/zww/IndexTTS-1.5/vllm...
Loading safetensors checkpoint shards:   0% Completed | 0/1 [00:00<?, ?it/s]
Loading safetensors checkpoint shards: 100% Completed | 1/1 [00:01<00:00,  1.40s/it]
Loading safetensors checkpoint shards: 100% Completed | 1/1 [00:01<00:00,  1.40s/it]

INFO 07-21 11:44:16 [default_loader.py:280] Loading weights took 1.42 seconds
INFO 07-21 11:44:16 [model_runner.py:1202] Model loading took 0.9209 GiB and 1.489495 seconds
WARNING 07-21 11:44:17 [profiling.py:72] `get_dummy_processor_inputs` has been split up into `get_dummy_text` and `get_dummy_mm_data`. These two methods will be marked as abstract in an upcoming release.
INFO 07-21 11:44:17 [worker.py:291] Memory profiling takes 0.77 seconds
INFO 07-21 11:44:17 [worker.py:291] the current vLLM instance can use total_gpu_memory (8.00GiB) x gpu_memory_utilization (0.25) = 2.00GiB
INFO 07-21 11:44:17 [worker.py:291] model weights take 0.92GiB; non_torch_memory takes 0.03GiB; PyTorch activation peak memory takes 0.17GiB; the rest of the memory reserved for KV Cache is 0.88GiB.
INFO 07-21 11:44:17 [executor_base.py:112] # cuda blocks: 482, # CPU blocks: 2184
INFO 07-21 11:44:17 [executor_base.py:117] Maximum concurrency for 803 tokens per request: 9.60x
INFO 07-21 11:44:18 [model_runner.py:1512] Capturing cudagraphs for decoding. This may lead to unexpected consequences if the model is not static. To run the model in eager mode, set 'enforce_eager=True' or use '--enforce-eager' in the CLI. If out-of-memory error occurs during cudagraph capture, consider decreasing `gpu_memory_utilization` or switching to eager mode. You can also reduce the `max_num_seqs` as needed to decrease memory usage.
Capturing CUDA graph shapes: 100%|██████████████████████████████████████████████████████| 35/35 [00:13<00:00,  2.65it/s]
INFO 07-21 11:44:31 [model_runner.py:1670] Graph capturing finished in 11 secs, took 0.21 GiB
INFO 07-21 11:44:31 [llm_engine.py:428] init engine (profile, create kv cache, warmup model) took 14.54 seconds
>> GPT weights restored from: /home/zww/IndexTTS-1.5/gpt.pth
Detected CUDA files, patching ldflags
Emitting ninja build file /home/zww/index-tts-vllm/indextts/BigVGAN/alias_free_activation/cuda/build/build.ninja...
Building extension module anti_alias_activation_cuda...
Allowing ninja to set a default number of workers... (overridable by setting the environment variable MAX_JOBS=N)
ninja: no work to do.
Loading extension module anti_alias_activation_cuda...
>> Preload custom CUDA kernel for BigVGAN <module 'anti_alias_activation_cuda' from '/home/zww/index-tts-vllm/indextts/BigVGAN/alias_free_activation/cuda/build/anti_alias_activation_cuda.so'>
No modifications detected for re-loaded extension module anti_alias_activation_cuda, skipping build step...
Loading extension module anti_alias_activation_cuda...
Removing weight norm...
>> bigvgan weights restored from: /home/zww/IndexTTS-1.5/bigvgan_generator.pth
2025-07-21 11:44:34,427 WETEXT INFO found existing fst: /home/zww/index-tts-vllm/indextts/utils/tagger_cache/zh_tn_tagger.fst
2025-07-21 11:44:34,427 WETEXT INFO                     /home/zww/index-tts-vllm/indextts/utils/tagger_cache/zh_tn_verbalizer.fst
2025-07-21 11:44:34,427 WETEXT INFO skip building fst for zh_normalizer ...
2025-07-21 11:44:34,567 WETEXT INFO found existing fst: /home/zww/index-tts-vllm/.venv/lib/python3.12/site-packages/tn/en_tn_tagger.fst
2025-07-21 11:44:34,567 WETEXT INFO                     /home/zww/index-tts-vllm/.venv/lib/python3.12/site-packages/tn/en_tn_verbalizer.fst
2025-07-21 11:44:34,567 WETEXT INFO skip building fst for en_normalizer ...
>> TextNormalizer loaded
>> bpe model loaded from: /home/zww/IndexTTS-1.5/bpe.model
* Running on local URL:  http://0.0.0.0:7860
* To create a public link, set `share=True` in `launch()`.
>> start inference...
View Code
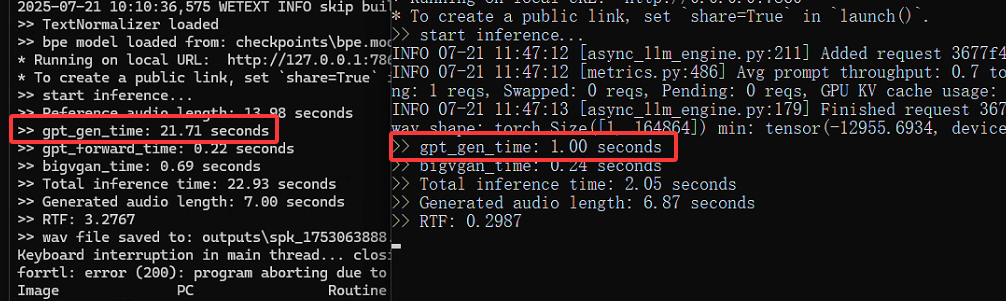
用同样的文本产生音频文件,可以看出在使用GPU后会大大减小生成时间,如下图所示:
2.4 API调用
正如官网说明,该项目使用fastapi封装了api接口,调用如下命令可以启动相关示例:
VLLM_USE_V1=0 python api_server.py --model_dir /home/zww/IndexTTS-1.5 --port 11996编写如下python文件testindex-tts-vllm.py,注意这里两个音频文件在index-tts-vllm目录下要存在。
import requests

url = "http://127.0.0.1:11996/tts_url"
data = {
    "text": "还是会想你,还是想登你",
    "audio_paths": [  # 支持多参考音频
        "spk_1752726968.wav",
        "spk_1753063888.wav"
    ]
}

response = requests.post(url, json=data)
with open("output.wav", "wb") as f:
    f.write(response.content)
直接运行python testindex-tts-vllm.py命令,则会在当前目录下产生输出结果output.wav音频文件:

参考: