背景
这篇文章主要记录,个人开发者在获取华为用户授权后,拿到用户的头像和名字。获取用户的电话号码的获取需要应用获得scope权限 ,现仅对企业开发者开放。 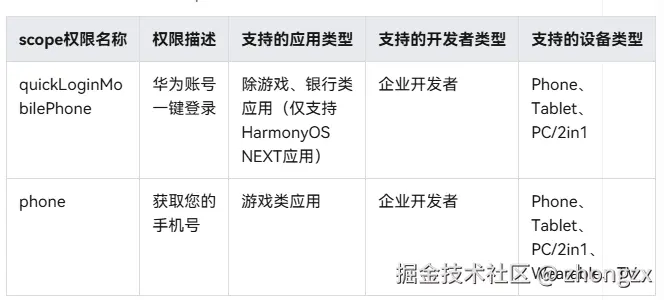
环境配置
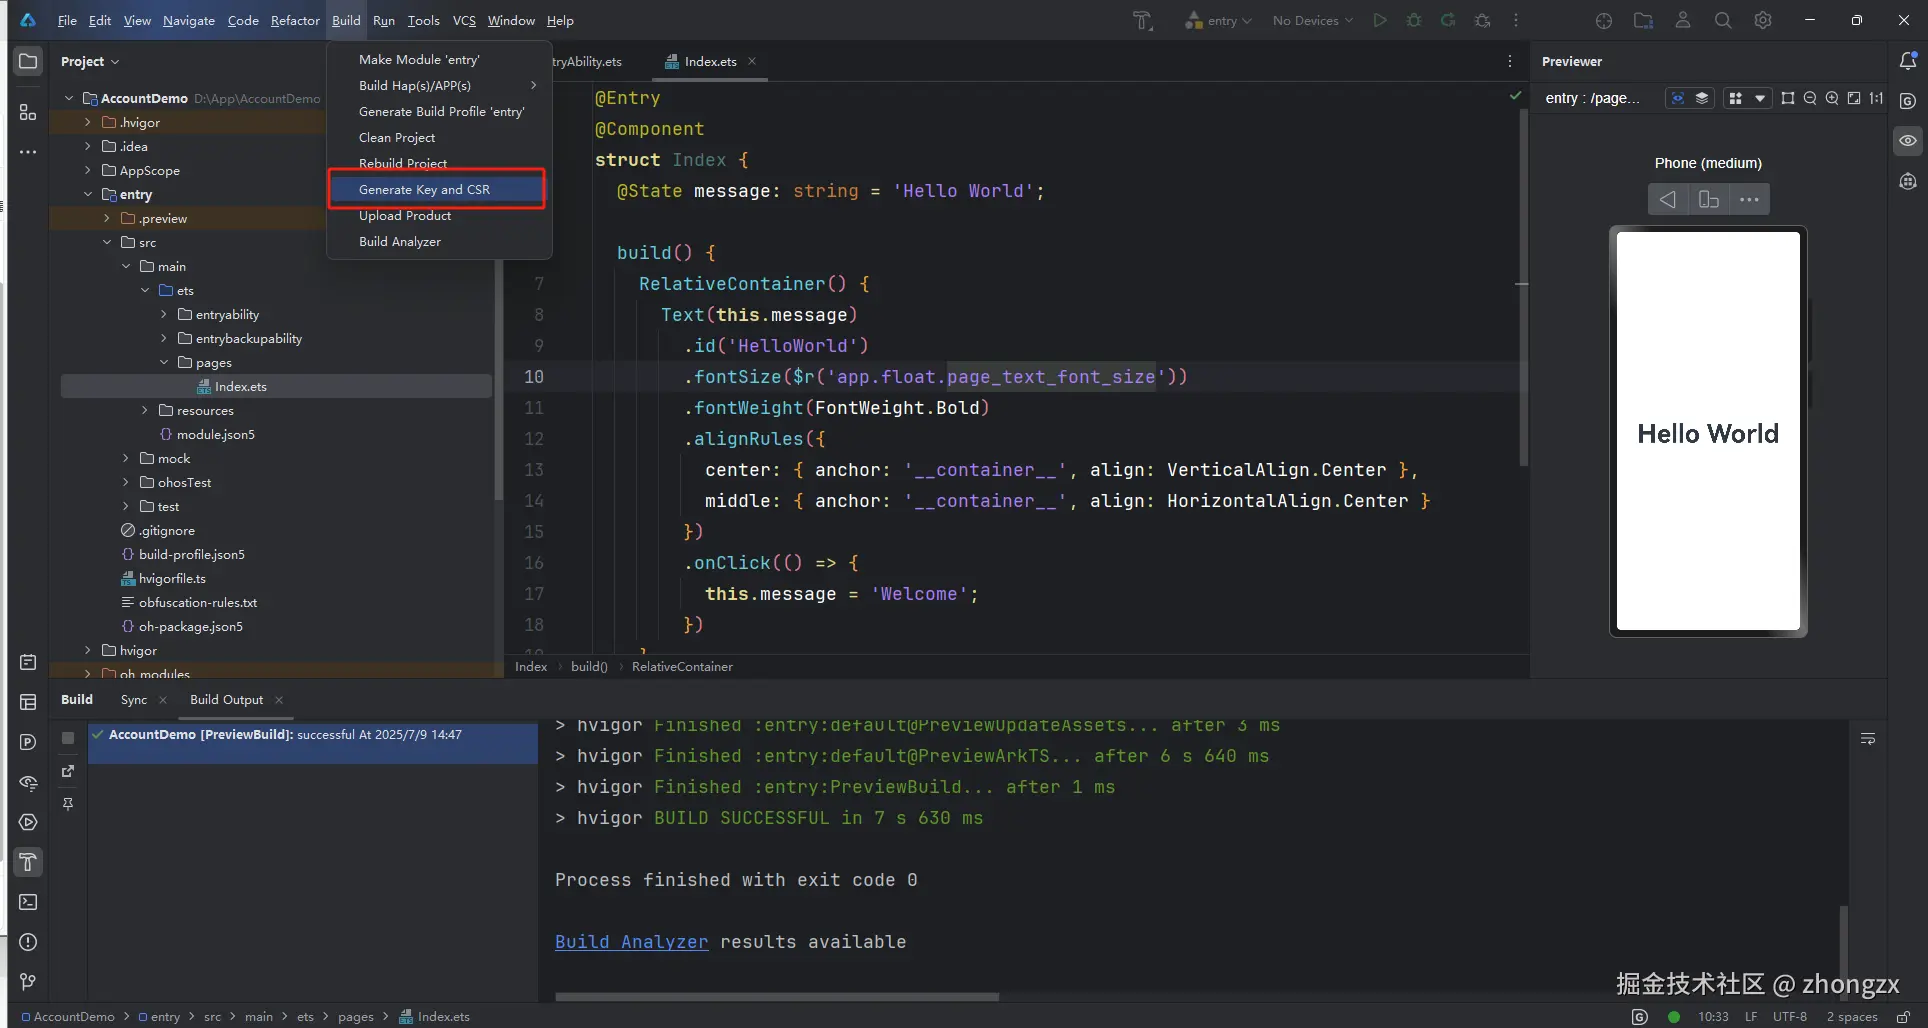
在项目中生成证书请求文件(CSR)
- 在build->Generate Key and CSR中选择
- 根据下面填写内容生成CSR文件
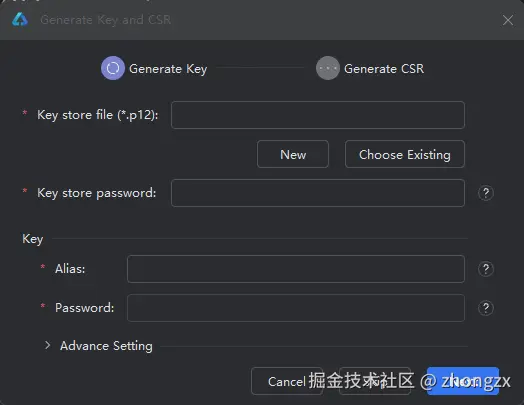
- 创建Key store,密码要记住的哈~~

- 输入Alias(别名)后面再项目结构配置的时候需要填写的哈,要记住。(尴尬,写到才发现单词写错了。。。)
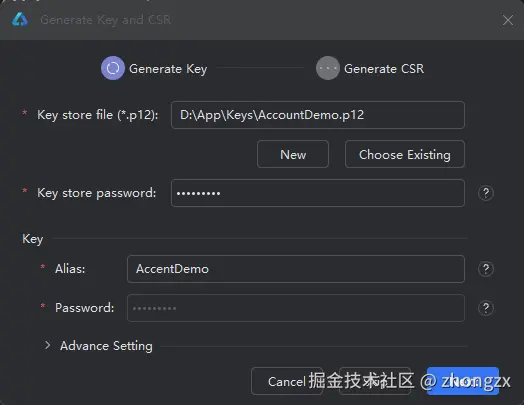
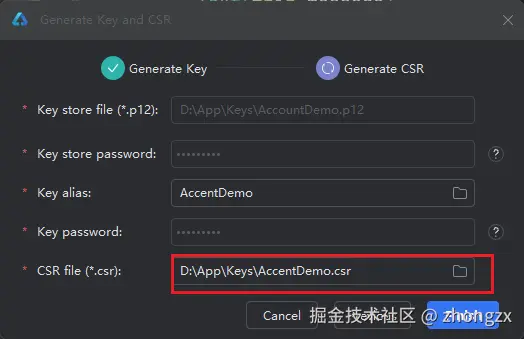
- 保存CSR地址,点击Finish完成创建
在AGC中创建项目
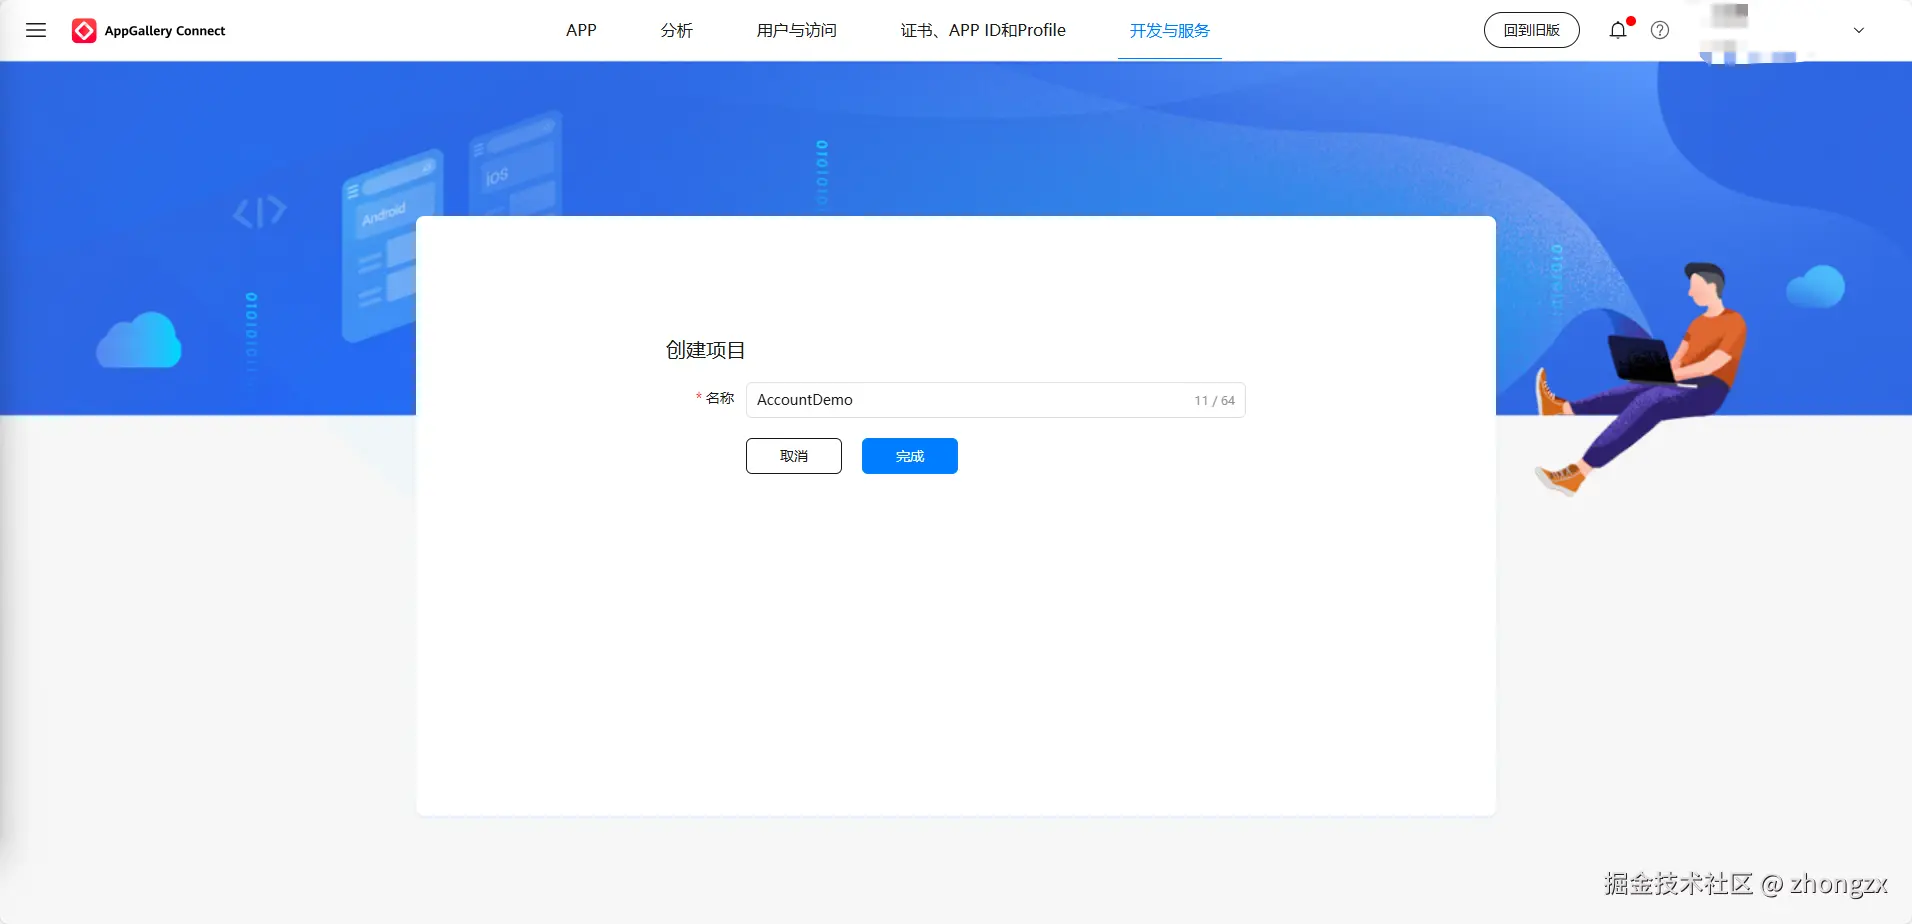
- 在证书、APPID和Profile中创建APP

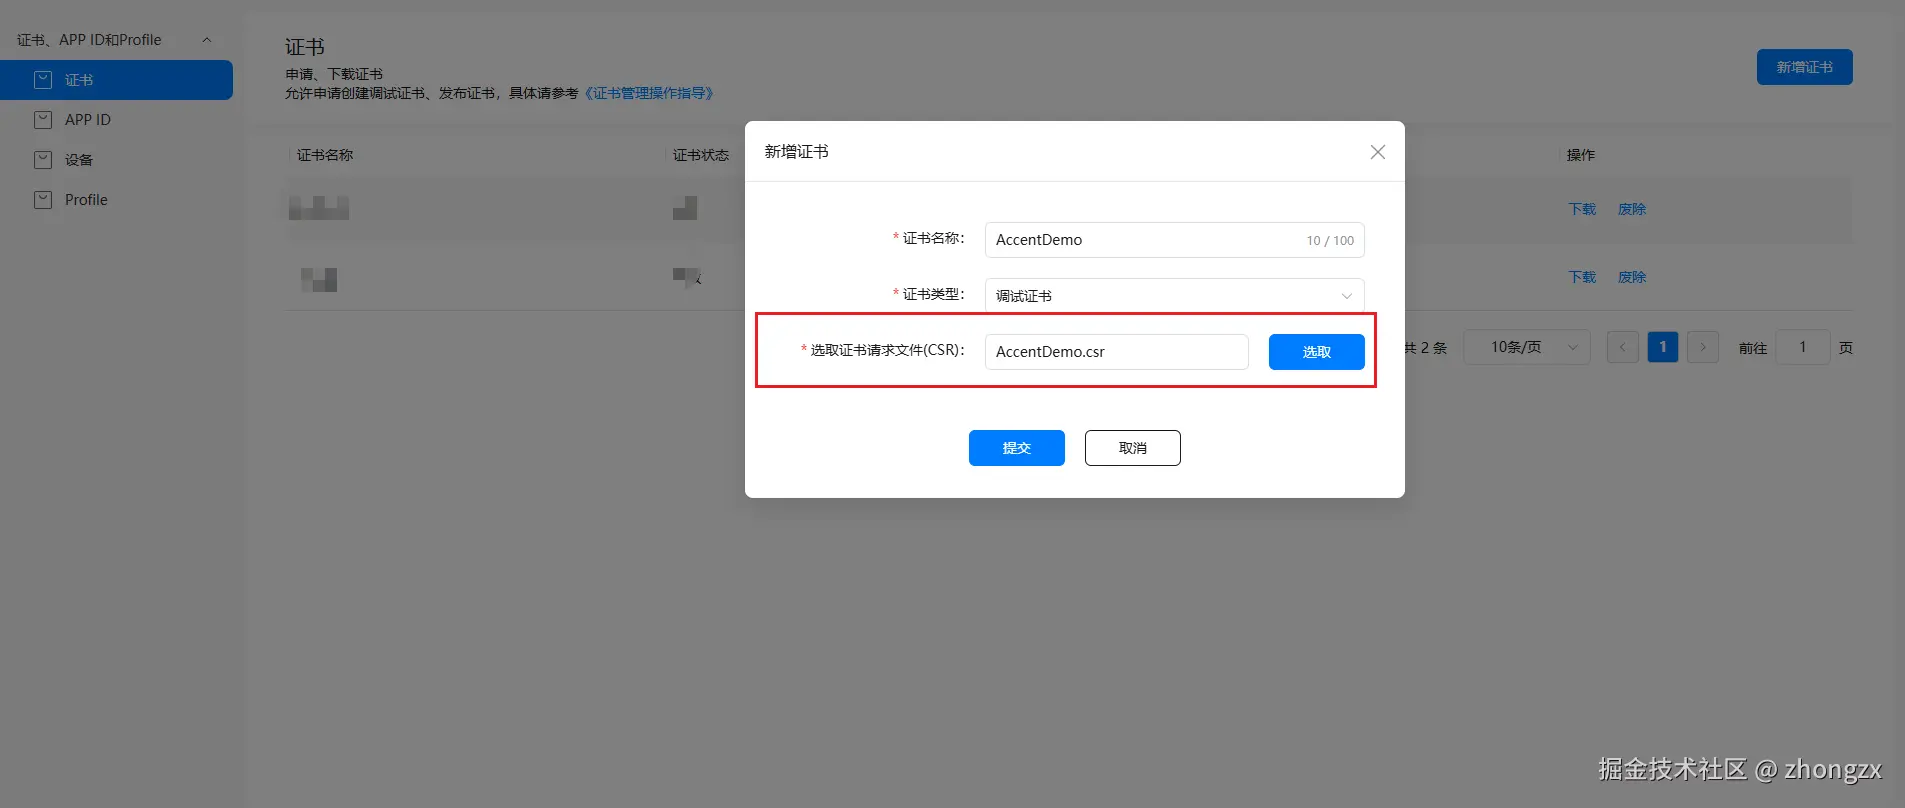
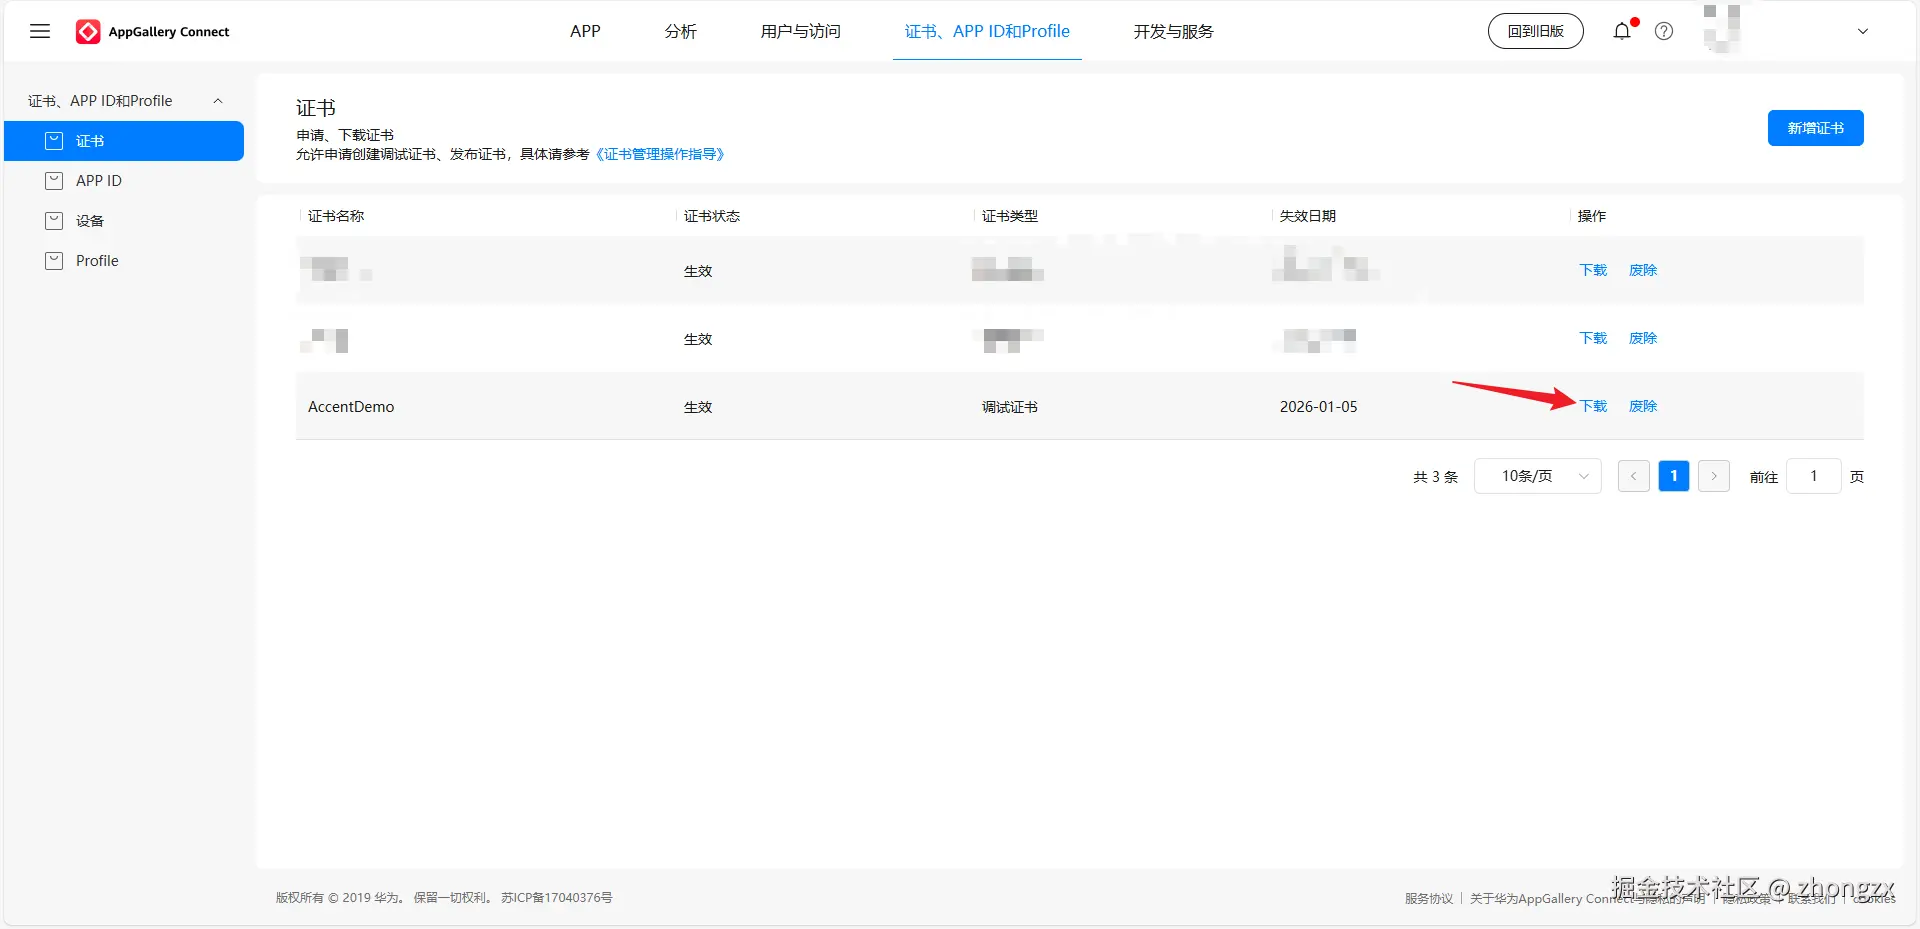
- 新建证书,然后下载证书,后续的项目配置需要使用
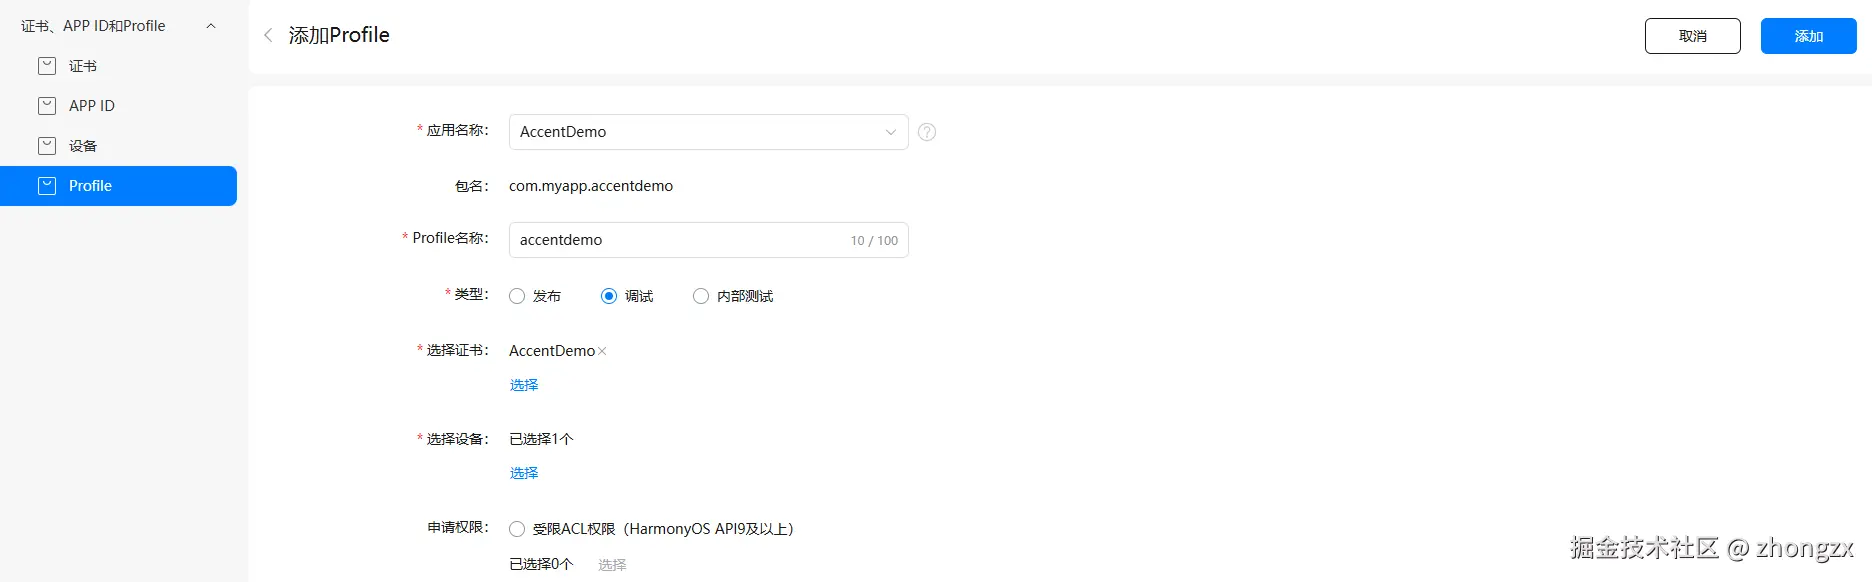
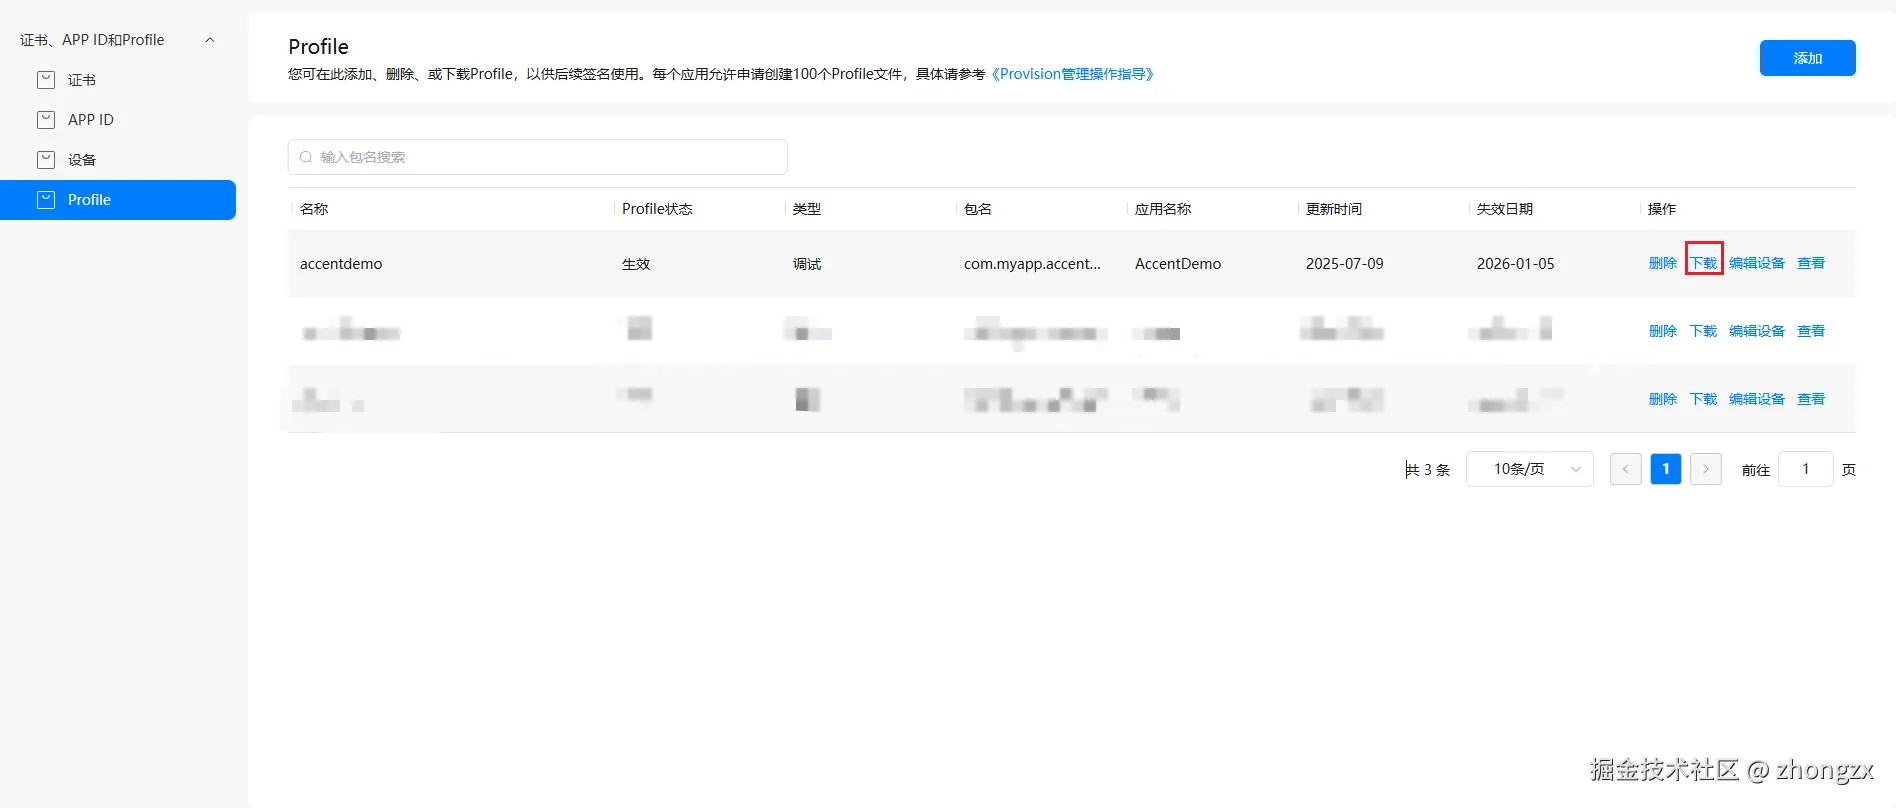
- 新建Profile,并下载后续给项目配置使用
- 在项目中添加公钥指纹,选择自己新建的公钥

在项目结构中手动添加证书
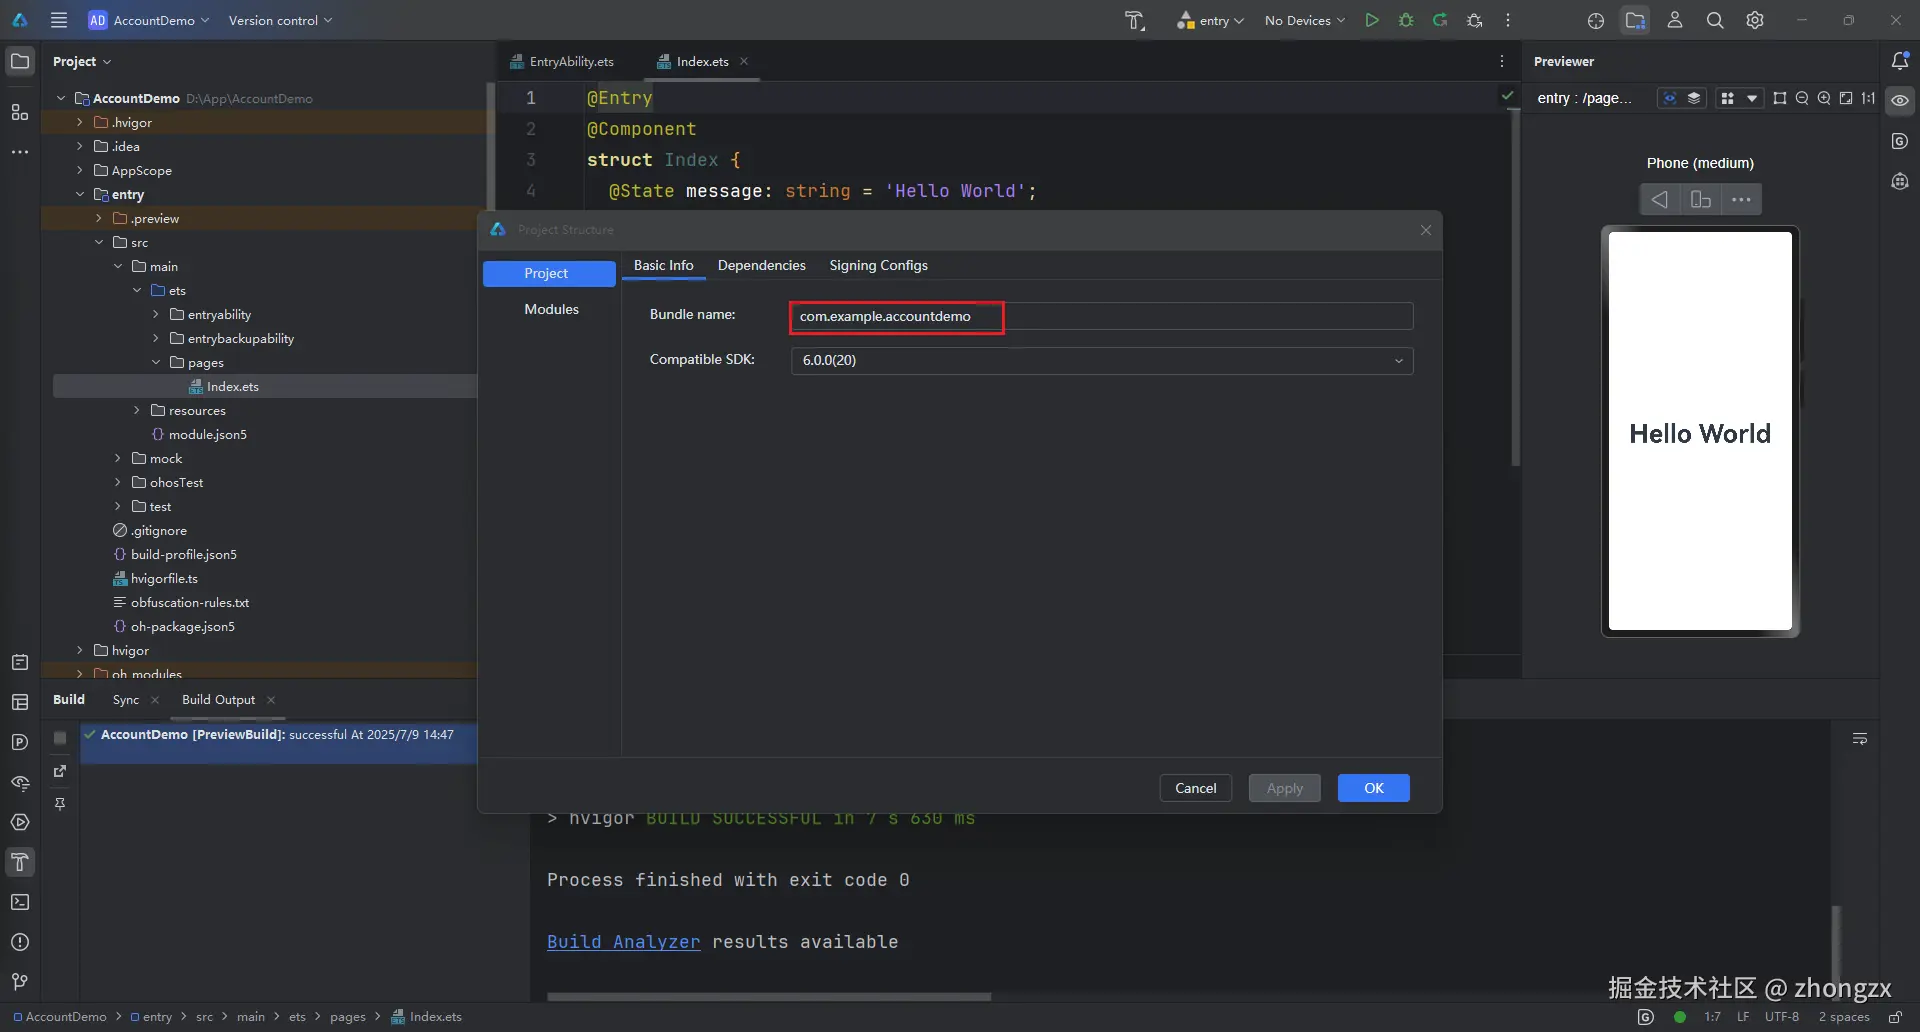
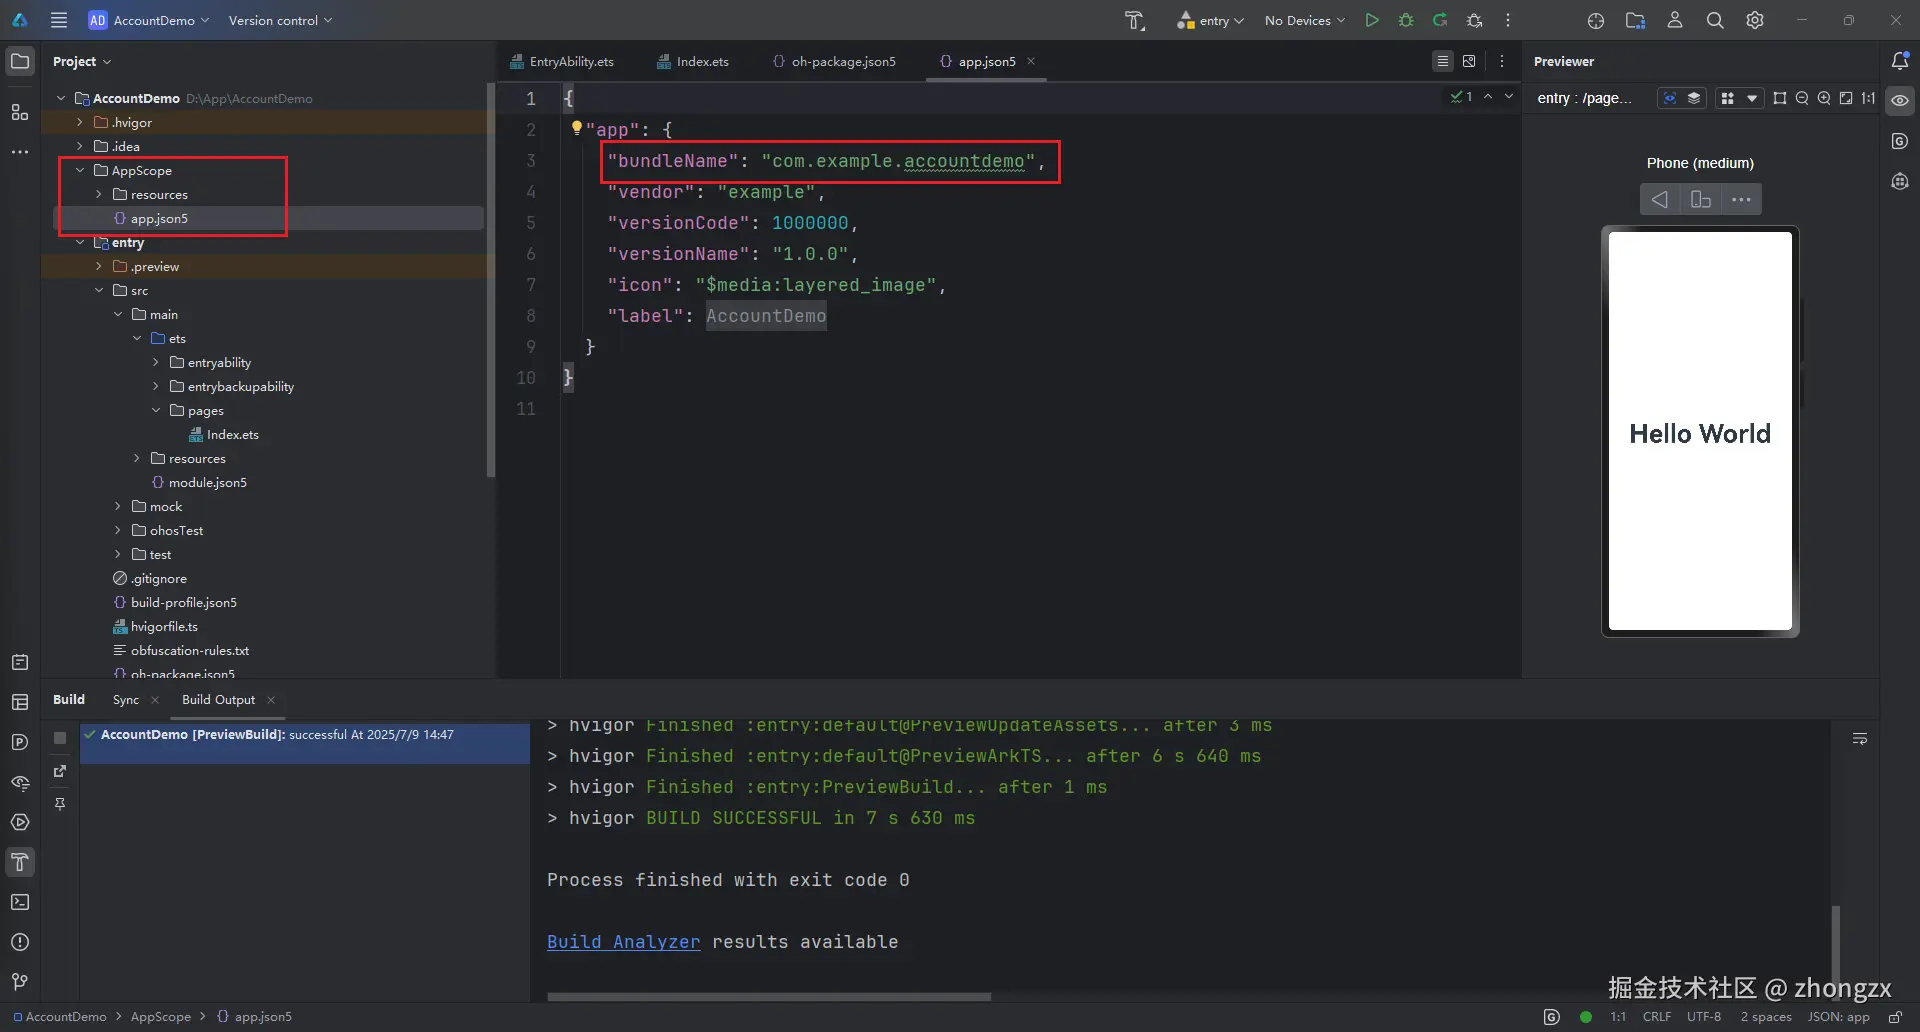
- 先查看Bundle name和AGC的项目上填写的是否一致。像我这里的,AGC是com.myapp.accentdemo,项目的是com.example.accountdemo,因此,需要先调整好Bundle name
- 在AppScope的app.json5文件中进行修改
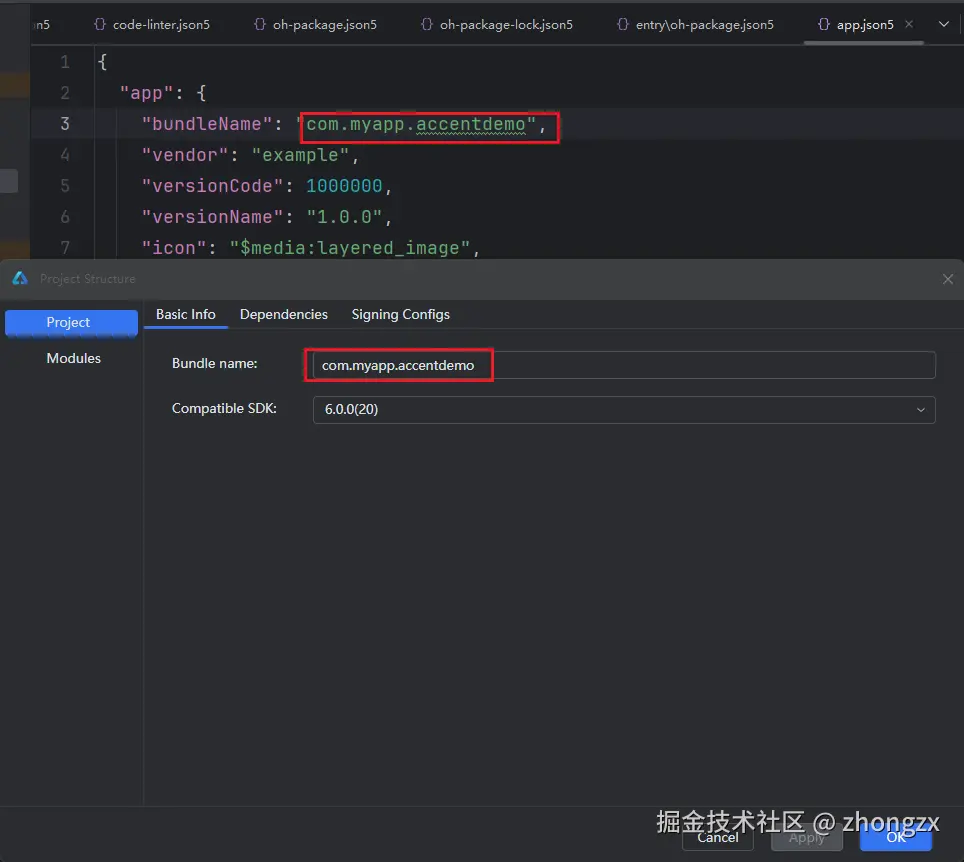
- 在Signing Configs选项卡中配置项目信息

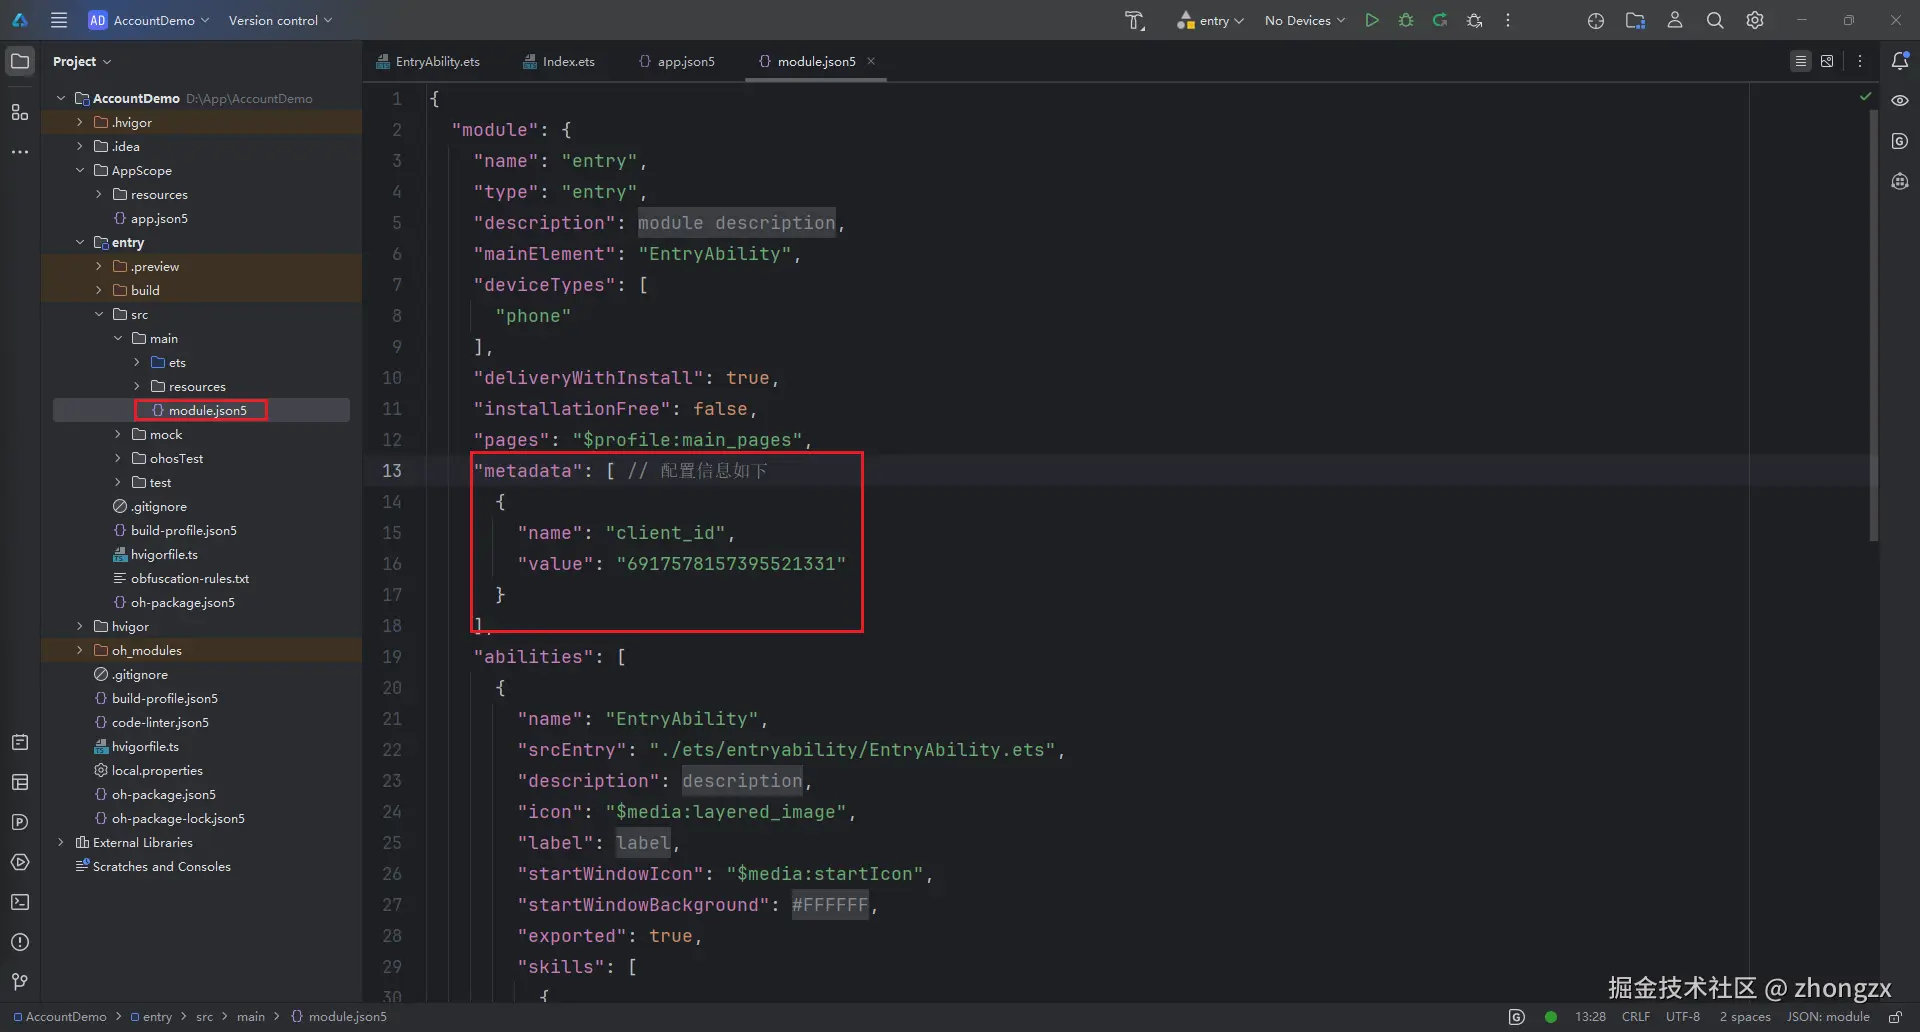
- 配置Client ID,在Entry->module.json5中添加Client ID,在AGC中复制ID

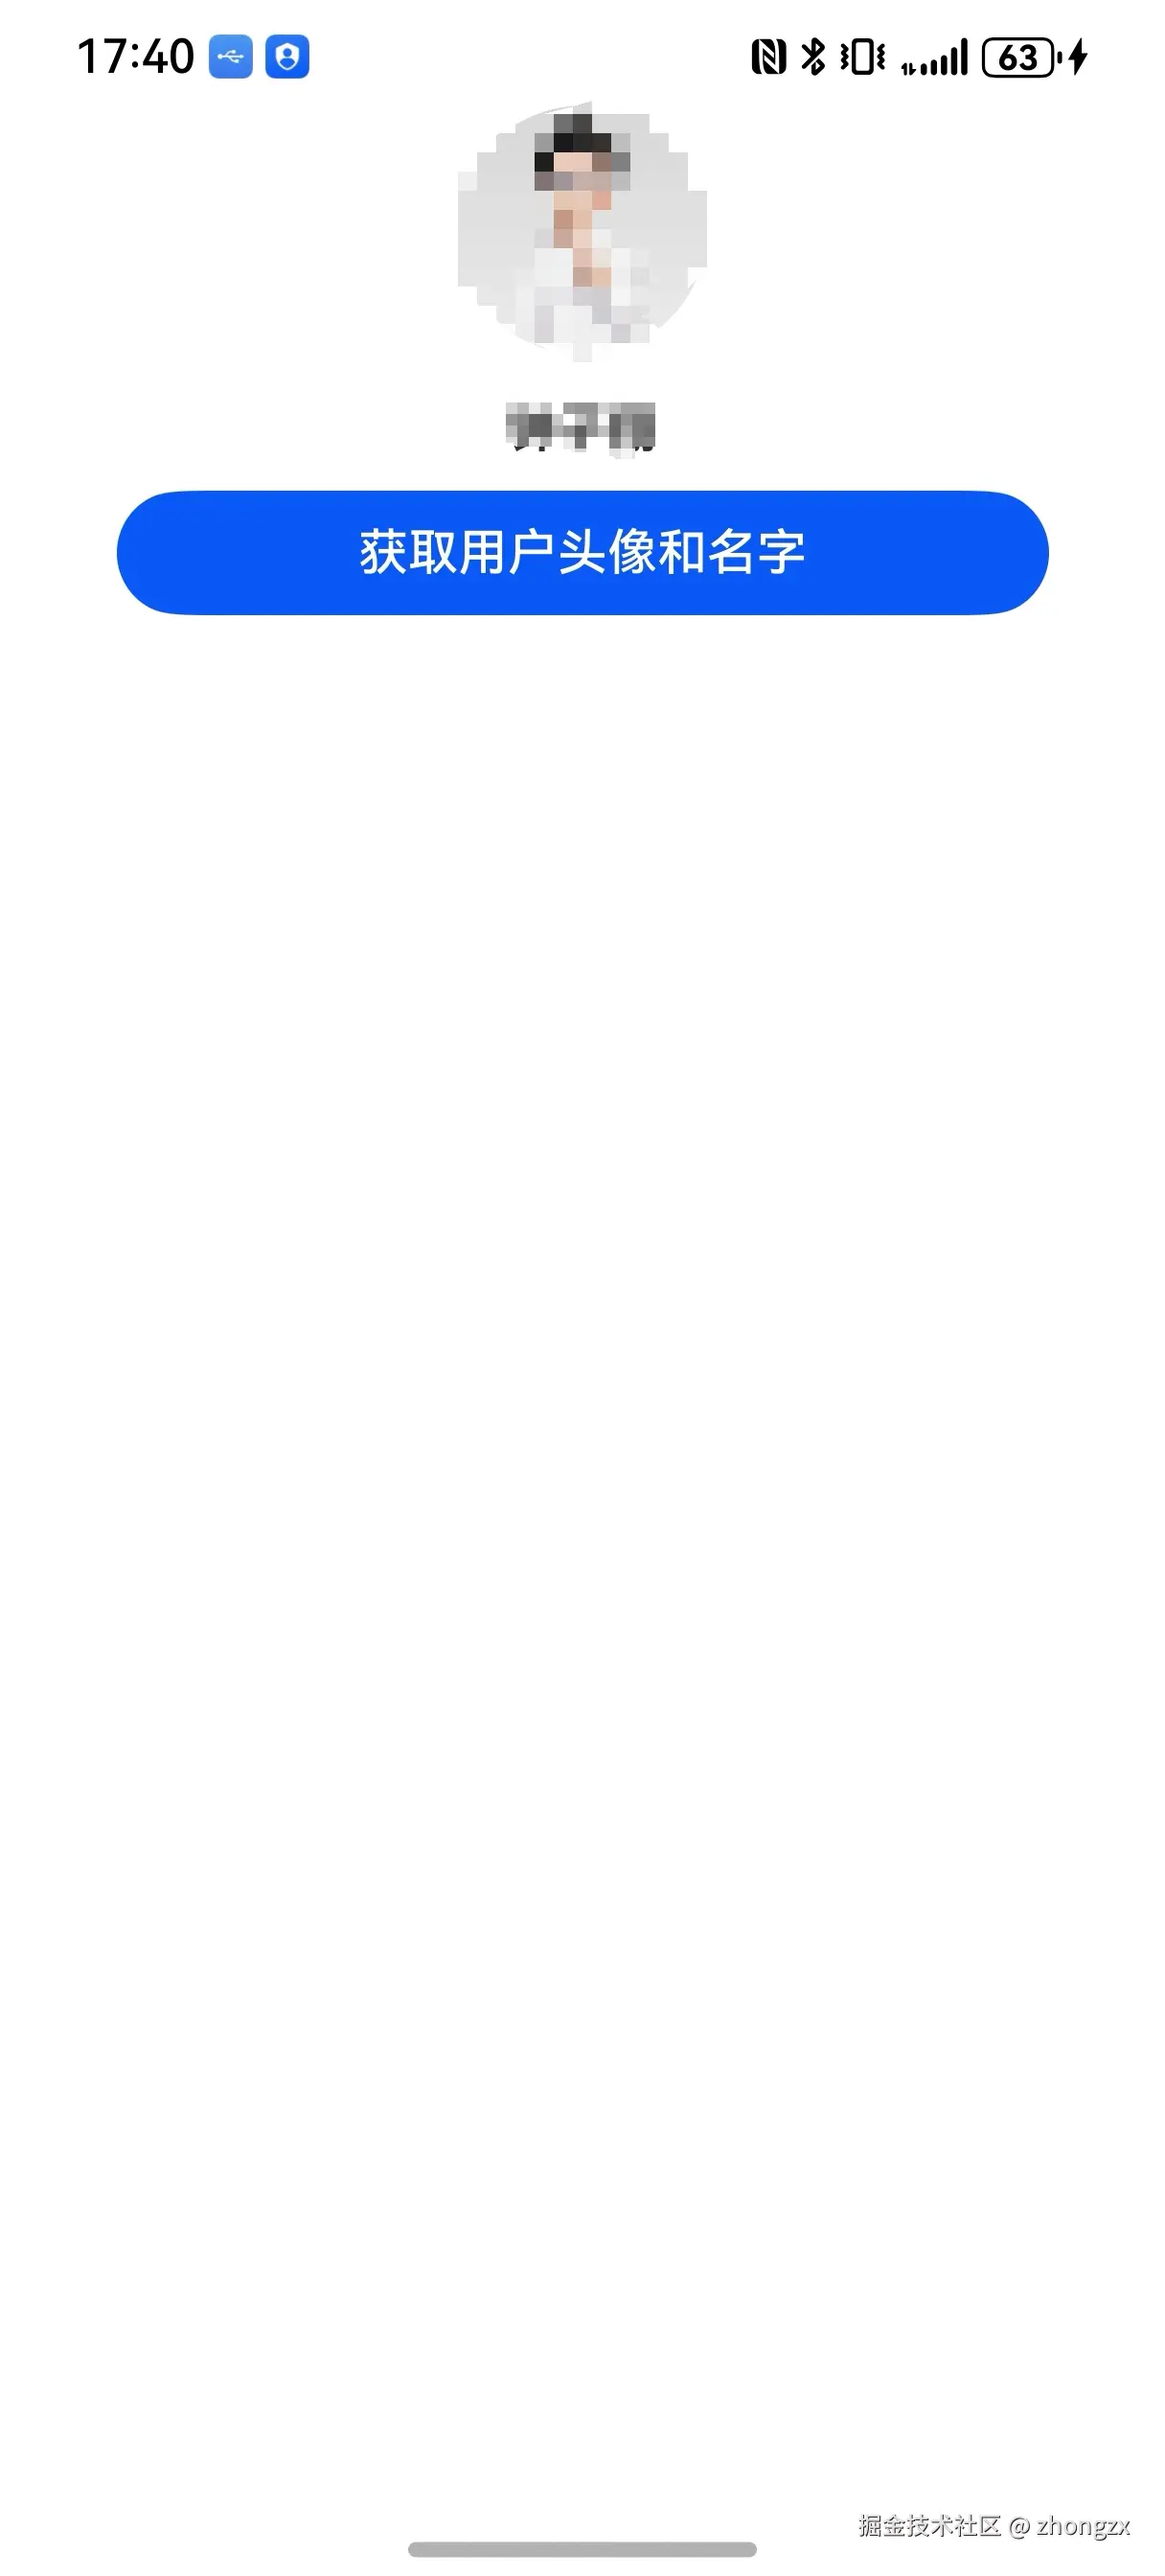
获取用户信息代码编写
UI
- 需要引用 authentication 和 ImageType
less
import { ImageType } from '@kit.UIDesignKit'
import { authentication } from '@kit.AccountKit'
import { util } from '@kit.ArkTS'
@Entry
@ComponentV2
struct Index {
@Local UserIcon: ImageType = $r('app.media.user_dark')
@Local UserName: string = "炸鸡仔"
AuthRequest?: authentication.AuthorizationWithHuaweiIDRequest
build() {
Column({ space: 10 }) {
Image(this.UserIcon)
.width(80)
.height(80)
.borderRadius(40)
Text(this.UserName)
.fontWeight(FontWeight.Bold)
.margin({ top: 5 })
Button("获取用户头像和名字")
.width("80%")
.onClick(async () => {
}
}
.height('100%')
.width('100%')
}
}
获取用户信息请求对象代码
- 通过authentication.HuaweiIDProvider().createAuthorizationWithHuaweiIDRequest()的方式创建请求对象
ini
this.AuthRequest = new authentication.HuaweiIDProvider().createAuthorizationWithHuaweiIDRequest();
 // 获取头像昵称需要传如下scope
          this.AuthRequest.scopes = ['profile', 'openid'];
          // 若开发者需要进行服务端开发,则需传如下permission获取authorizationCode
          this.AuthRequest.permissions = ['serviceauthcode'];
          // 用户是否需要登录授权,该值为true且用户未登录或未授权时,会拉起用户登录或授权页面
          this.AuthRequest.forceAuthorization = false;
          // 用于防跨站点请求伪造
          this.AuthRequest.state = util.generateRandomUUID();
          // 用户没有授权的时候,是否弹窗提示用户授权
this.AuthRequest.forceAuthorization = true;-
授权请求对象几个重要的属性:
-
scopes:获取用户数据,与permissions属性不能同时为空,否则会报错,默认值:'openid'。其中的参数有
- profile:华为账号用户的基本信息,如昵称头像等。
- openid:华为账号用户的OpenID、UnionID。UnionID作为用户标识,OpenID为用户在当前应用的用户标识。
- phone:华为账号快速验证手机号,需要scope权限,也就是企业用户哈。
- quickLoginAnonymousPhone:获取华为账号绑定的匿名手机号,需要scope权限,也就是企业用户哈。
-
permissions:用于获取用户授权临时凭据和用户身份认证信息,与scopes属性不能同时为空。
- serviceauthcode:用户授权临时凭据。
- idtoken:用户身份认证信息。
-
forceAuthorization:表示华为账号未登录时,是否需要强制拉起华为账号登录页。默认值:true。
-
state:随机数并做一致性校验。该参数与响应体中返回的state比较。
-
nonce:该参数会包含在返回的ID Token中,通过校验一致性,可用于防止重放攻击。
-
idTokenSignAlgorithm:默认值:PS256,用于指定ID Token的签名算法。
-
supportAtomicService:在元服务场景下,当传入scopes包含profile时,是否支持获取用户头像昵称。如果该值为true,可以正常获取用户头像昵称。如果该值为false,执行授权请求将返回1001500003 错误代码。
-
获取请求数据
kotlin
const controller = new authentication.AuthenticationController(this.getUIContext().getHostContext());
          const data: authentication.AuthorizationWithHuaweiIDResponse =
            await controller.executeRequest(this.AuthRequest);
          const authorizationWithHuaweiIDResponse = data as authentication.AuthorizationWithHuaweiIDResponse;
          const state = authorizationWithHuaweiIDResponse.state;
          if (state && this.AuthRequest.state !== state) {
            console.error(`Failed to authorize. The state is different, response state: ${state}`);
            return;
          }
          if (authorizationWithHuaweiIDResponse && authorizationWithHuaweiIDResponse.data) {
            //用户头像链接,有效期较短,建议先将头像下载保存后再使用,这里只是用于演示哈
            if (authorizationWithHuaweiIDResponse.data.avatarUri) {
              this.UserIcon = authorizationWithHuaweiIDResponse.data.avatarUri;
            }
            //用户昵称
            if (authorizationWithHuaweiIDResponse.data.nickName) {
              this.UserName = authorizationWithHuaweiIDResponse.data.nickName;
            }
            //唯一ID
            const userUnionID = authorizationWithHuaweiIDResponse?.data?.unionID;
            //当前应用ID
            const userOpenID = authorizationWithHuaweiIDResponse?.data?.openID;
          }
请求返回的结果
- data:用户授权结果数据,可以查看SDK文档,AuthorizationWithHuaweiIDCredential
- state:响应体中返回的state
完整代码
kotlin
import { ImageType } from '@kit.UIDesignKit'
import { authentication } from '@kit.AccountKit'
import { util } from '@kit.ArkTS'
@Entry
@ComponentV2
struct Index {
@Local UserIcon: ImageType = $r('app.media.user_dark')
@Local UserName: string = "炸鸡仔"
AuthRequest?: authentication.AuthorizationWithHuaweiIDRequest
build() {
Column({ space: 10 }) {
Image(this.UserIcon)
.width(80)
.height(80)
.borderRadius(40)
Text(this.UserName)
.fontWeight(FontWeight.Bold)
.margin({ top: 5 })
Button("获取用户头像和名字")
.width("80%")
.onClick(async () => {
this.AuthRequest = new authentication.HuaweiIDProvider().createAuthorizationWithHuaweiIDRequest();
// 获取头像昵称需要传如下scope
this.AuthRequest.scopes = ['profile', 'openid'];
// 若开发者需要进行服务端开发,则需传如下permission获取authorizationCode
this.AuthRequest.permissions = ['serviceauthcode'];
// 用户是否需要登录授权,该值为true且用户未登录或未授权时,会拉起用户登录或授权页面
this.AuthRequest.forceAuthorization = false;
// 用于防跨站点请求伪造
this.AuthRequest.state = util.generateRandomUUID();
// 用户没有授权的时候,是否弹窗提示用户授权
this.AuthRequest.forceAuthorization = true;
const controller = new authentication.AuthenticationController(this.getUIContext().getHostContext());
const data: authentication.AuthorizationWithHuaweiIDResponse =
await controller.executeRequest(this.AuthRequest);
const authorizationWithHuaweiIDResponse = data as authentication.AuthorizationWithHuaweiIDResponse;
const state = authorizationWithHuaweiIDResponse.state;
if (state && this.AuthRequest.state !== state) {
console.error(`Failed to authorize. The state is different, response state: ${state}`);
return;
}
if (authorizationWithHuaweiIDResponse && authorizationWithHuaweiIDResponse.data) {
//用户头像链接,有效期较短,建议先将头像下载保存后再使用,这里只是用于演示哈
if (authorizationWithHuaweiIDResponse.data.avatarUri) {
this.UserIcon = authorizationWithHuaweiIDResponse.data.avatarUri;
}
//用户昵称
if (authorizationWithHuaweiIDResponse.data.nickName) {
this.UserName = authorizationWithHuaweiIDResponse.data.nickName;
}
//唯一ID
const userUnionID = authorizationWithHuaweiIDResponse?.data?.unionID;
//当前应用ID
const userOpenID = authorizationWithHuaweiIDResponse?.data?.openID;
}
})
}
.height('100%')
.width('100%')
}
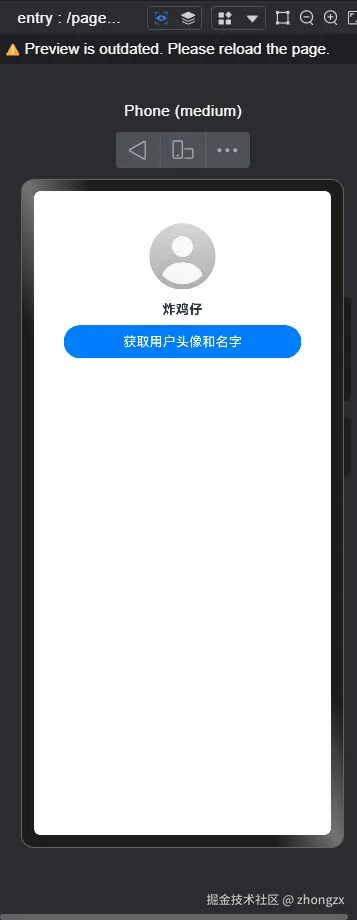
}实现的效果如下
- 未授权时,会有弹窗提示:
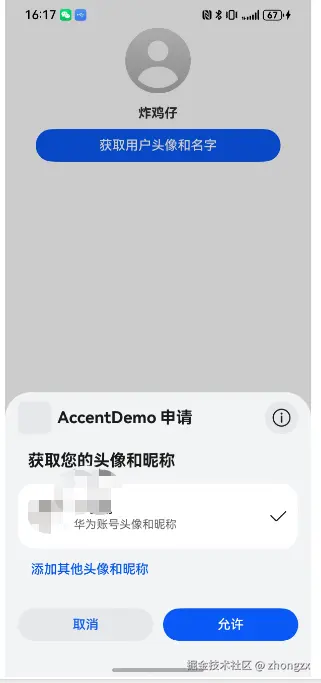
- 然后就可以显示用户头像和名字了