Centos 7.9安装部署cobbler-自动化部署服务器完整教程
1.Cobbler简介
1.1.cobbler介绍
Cobbler 是一款开源的 Linux 服务器自动化安装和管理工具,基于 Python2 开发,结合了 DHCP、DNS、TFTP、Apache 和 Kickstart 等技术,能够实现自动化的操作系统部署和配置管理。它主要用于大规模服务器的快速部署、系统镜像管理和网络引导等场景
1.2.主要功能
一.自动化安装:通过 Kickstart 文件实现无人值守安装多种 Linux 发行版(如 CentOS、RHEL、Ubuntu 等);
二.镜像管理:支持导入和管理 ISO 镜像,避免重复下载;
三.DHCP/DNS 服务:内置 DHCP 和 DNS 服务,可自动分配 IP 地址和域名解析;
四.PXE 引导:通过网络引导(PXE)实现裸机服务器的自动化安装;
五.模板化配置:使用模板系统动态生成 Kickstart 文件和系统配置;
六.系统快照:支持创建系统配置的快照,方便回滚和复制;
1.3.环境部署要求
硬件要求
服务器配置:建议至少 2 核 CPU、4GB 内存、50GB 磁盘空间(镜像存储在/var目录下,具体分配资源大小根据管理的镜像数量调整)。
网络接口:需要至少一个可用的网络接口,建议使用独立网卡用于 PXE 网络。
软件要求
操作系统:主流 Linux 发行版(如 CentOS 7/8、RHEL、Ubuntu 等)。
Python 版本:Python 2.7 或 3.x(根据 Cobbler 版本选择)。
服务依赖:需预先安装并配置以下服务:
DHCP 服务(如dhcpd)
TFTP 服务(如tftp-server)
HTTP 服务(如httpd或nginx)
DNS服务
fence-agents 服务
2.Cobbler部署
一.配置yum源,使得可以从aliyun拉取软件包,当然如果是离线环境下,也可以配置成本地镜像源,本地源部署参考链接
centos7 yum源下载
mv /etc/yum.repos.d/CentOS-Base.repo /etc/yum.repos.d/CentOS-Base.repo.bak
cp Centos-7.repo /etc/yum.repos.d/CentOS-Base.repo
yum clean all
yum makecache
二.相关软件安装以及服务关闭
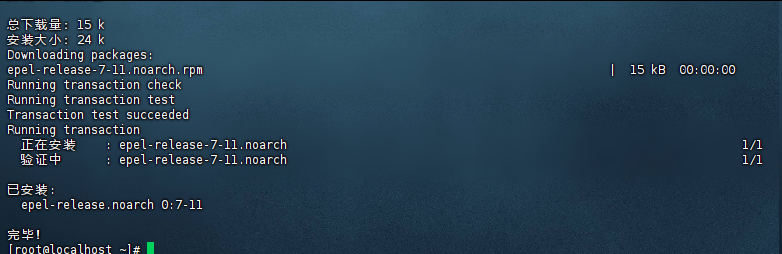
yum install -y epel-release
yum install -y cobbler dhcp fence-agents
安装cobbler会自动安装tftp和httpd
systemctl stop firewalld && systemctl disable firewalld
setenforce 0
vim /etc/selinux/config
修改如下选项
bash
SELINUX=disabled
systemctl enable --now cobblerd httpd tftp

三.Cobbler检查和配置
cobbler check
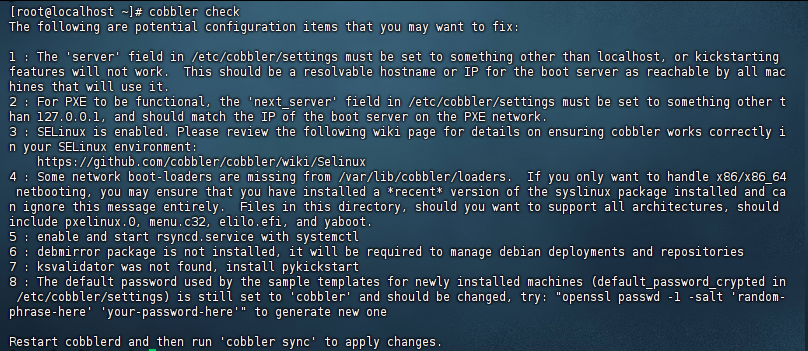
1:必须将/ etc / cobbler / settings中的'server'字段设置为localhost以外的其他内容,否则kickstarting功能将不起作用。这应该是启动服务器的可解析主机名或IP,所有使用它的计算机都可以访问该主机名或IP;
2:要使PXE起作用,必须将/ etc / cobbler / settings中的'next_server'字段设置为127.0.0.1以外的其他值,并且该字段应与PXE网络上的引导服务器的IP地址匹配;
3:在/etc/xinetd.d/tftp中将"禁用"更改为"否";
4:/ var / lib / cobbler / loaders中缺少某些网络引导加载程序,您可以运行'cobbler get-loaders'下载它们,或者,如果您只想处理x86 / x86_64网络引导程序,则可以确保已经安装了最新版本的syslinux软件包,可以完全忽略此消息。如果要支持所有体系结构,此目录中的文件应包括pxelinux.0,menu.c32,elilo.efi和yaboot。 'cobbler get-loaders'命令是解决这些要求的最简单方法。
5:使用systemctl启用并启动rsyncd.service
6:未安装debmirror软件包,它将需要管理debian部署和存储库
7:未找到ksvalidator,安装pykickstart
8:样本模板为新安装的机器使用的默认密码(在/ etc / cobbler / settings中的default_password_crypted)仍然设置为'cobbler',应该更改,请尝试:" openssl passwd -1 -salt'random-phrase-在这里''您的密码在这里'"生成新的
四.修改cobbler配置文件
vim /etc/cobbler/settings
bash
278 next_server: 192.168.81.67 # tftp地址
390 server: 192.168.81.67 # cobbler服务器地址
242 manage_dhcp: 1 # 管理1个dhcp服务器
生成cobbler客户端安装之后的初始密码
bash
openssl passwd -1 -salt `openssl rand -hex 4` 'Admin@123'
将密码添加到配置文件中
bash
101 default_password_crypted: "$1$75e21fba$unl9WPZZaGB0kKG/JEsRX0"五.修改dhcp模板配置文件
vim /etc/cobbler/dhcp.template
bash
subnet 192.168.81.0 netmask 255.255.255.0 {
     option routers             192.168.81.3;
     option domain-name-servers 192.168.81.3;
     option subnet-mask         255.255.255.0;
     range dynamic-bootp        192.168.81.200 192.168.81.250;
     default-lease-time         21600;
     max-lease-time             43200;
     next-server                $next_server;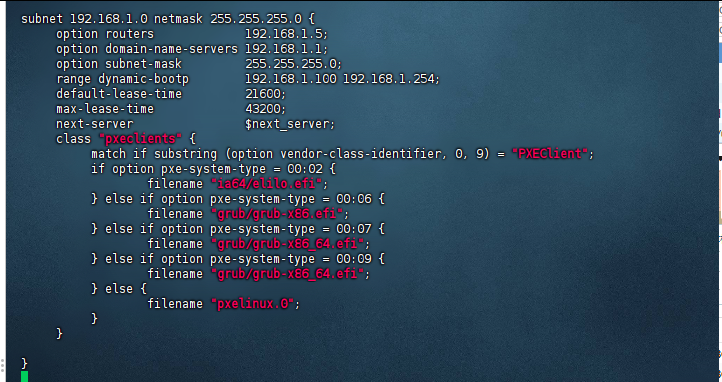
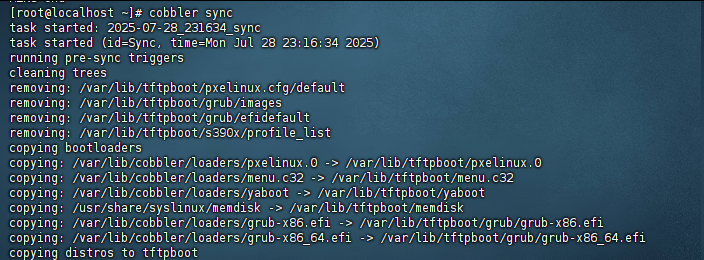
六.重启cobbler再同步配置
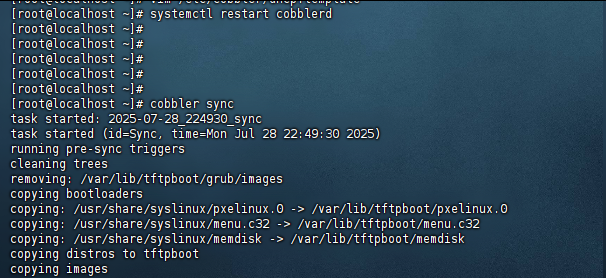
systemctl restart cobblerd
cobbler sync
七.重启dhcp并设置开机自启
systemctl restart dhcpd && systemctl enable dhcpd

八.下载启动加载器
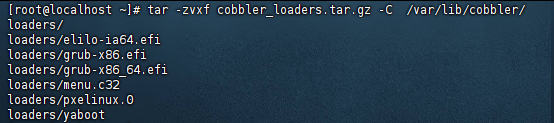
get-loders 加载器下载
tar -zvxf cobbler_loaders.tar.gz -C /var/lib/cobbler/

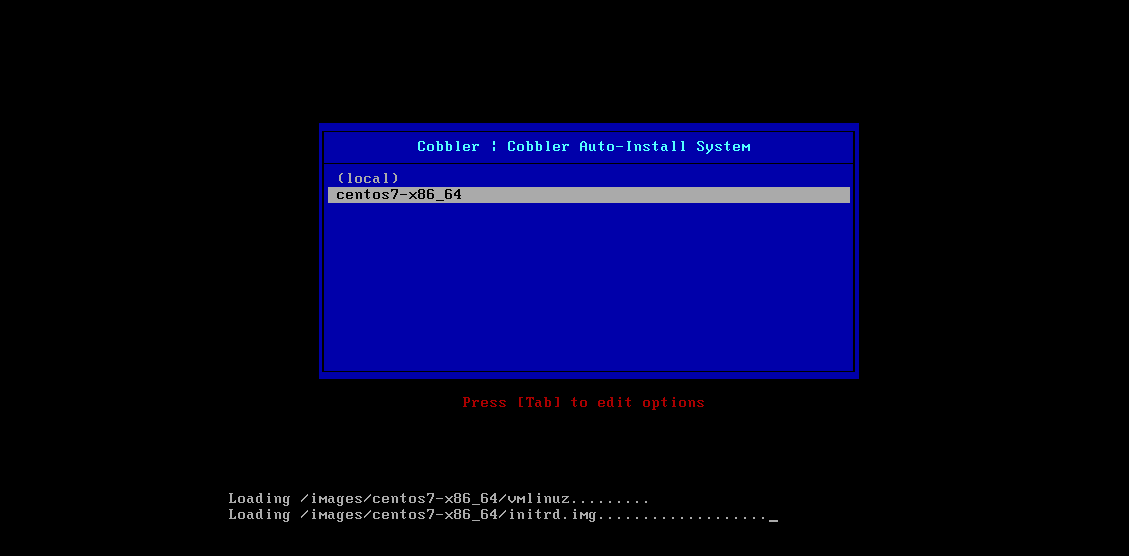
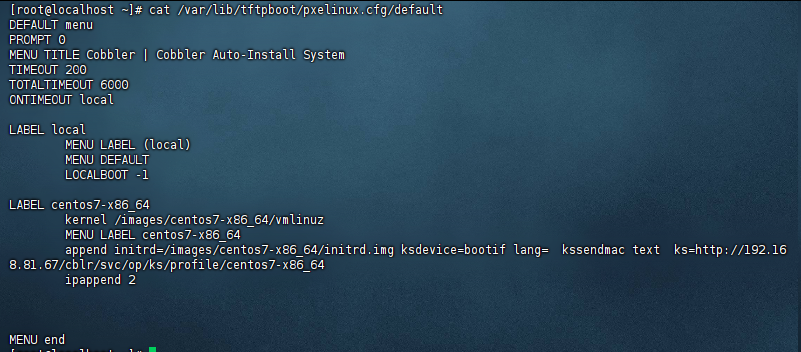
九.修改启动cobbler加载时的标题,并同步配置
vim /etc/cobbler/pxe/pxedefault.template
bash
DEFAULT menu
PROMPT 0
MENU TITLE Cobbler | Cobbler Auto-Install System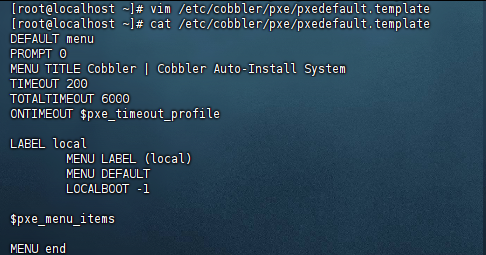
cobbler sync
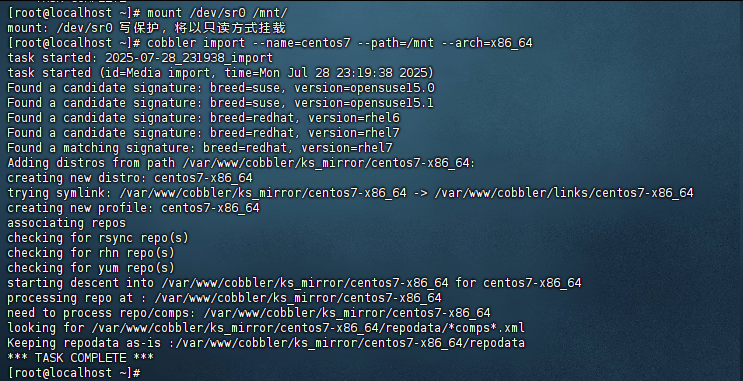
10.挂载镜像并写入kickstart文件
挂载镜像文件:mount /dev/sr0 /mnt/
导入cobbler:cobbler import --name=centos7 --path=/mnt --arch=x86_64
cobbler自动导入的路径是:/var/www/cobbler
cobbler会自动修改default文件,生成label:/var/lib/tftpboot/pxelinux.cfg/default
cobbler存放ks文件的位置:/var/lib/cobbler/kickstarts
导入centos7的ks文件
cd /var/lib/cobbler/kickstarts
cp sample.ks centos7.ks
清除原有内容,复制进下面内容,注意KS文件中一定不能有中文,不然cobbler无法读取
bash
# The Cobbler-Automate Installation
# For older versions please use the sample.ks kickstart file.

#platform=x86, AMD64, or Intel EM64T
# System authorization information
auth  --useshadow  --passalgo=sha512
# System bootloader configuration
bootloader --location=mbr
# Partition clearing information
clearpart --all --initlabel
# Use text mode install
text
# graphical
# Firewall configuration
firewall --disabled
# Run the Setup Agent on first boot
firstboot --disable
# System keyboard
keyboard --vckeymap=us --xlayouts='us'
# System language
lang en_US.UTF-8
# Use network installation
url --url=$tree
# If any cobbler repo definitions were referenced in the kickstart profile, include them here.
$yum_repo_stanza
# Network information
$SNIPPET('network_config')
# Reboot after installation
reboot

#Root password
rootpw --iscrypted $default_password_crypted
# SELinux configuration
selinux --disabled
# Do not configure the X Window System
skipx
# System timezone
timezone  Asia/Shanghai
# Install OS instead of upgrade
install
# Clear the Master Boot Record
zerombr
# disk partioning
part /boot --fstype="xfs" --asprimary --size=2048
part / --fstype="xfs" --asprimary --size=10240
part /home --fstype="xfs" --asprimary --size=10240
part /var --fstype="xfs" --grow --asprimary --size=1

%pre
$SNIPPET('log_ks_pre')
$SNIPPET('kickstart_start')
$SNIPPET('pre_install_network_config')
# Enable installation monitoring
$SNIPPET('pre_anamon')
%end

%packages
$SNIPPET('func_install_if_enabled')
@^minimal
@core


%end

%post --nochroot
$SNIPPET('log_ks_post_nochroot')
%end

%post
$SNIPPET('log_ks_post')
# Start yum configuration
$yum_config_stanza
# End yum configuration
$SNIPPET('post_install_kernel_options')
$SNIPPET('post_install_network_config')
$SNIPPET('func_register_if_enabled')
$SNIPPET('download_config_files')
$SNIPPET('koan_environment')
$SNIPPET('redhat_register')
$SNIPPET('cobbler_register')
# Enable post-install boot notification
$SNIPPET('post_anamon')
# Start final steps
$SNIPPET('kickstart_done')
# End final steps
%end
11.cobbler镜像管理相关操作命令
cobbler profile list
查看当前导入镜像列表

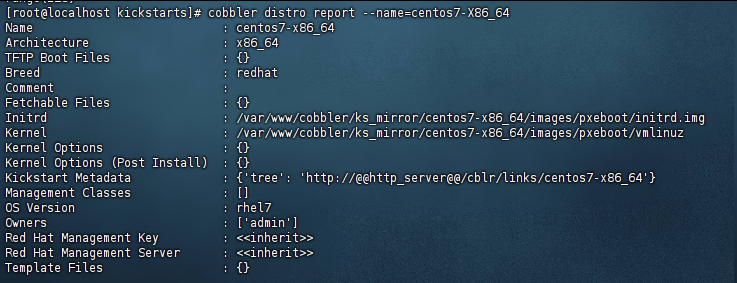
cobbler distro report --name=centos7-X86_64
查看该镜像的配置
cobbler profile edit --name=centos7-x86_64 --kickstart=/var/lib/cobbler/kickstarts/centos7.ks
指定KS文件
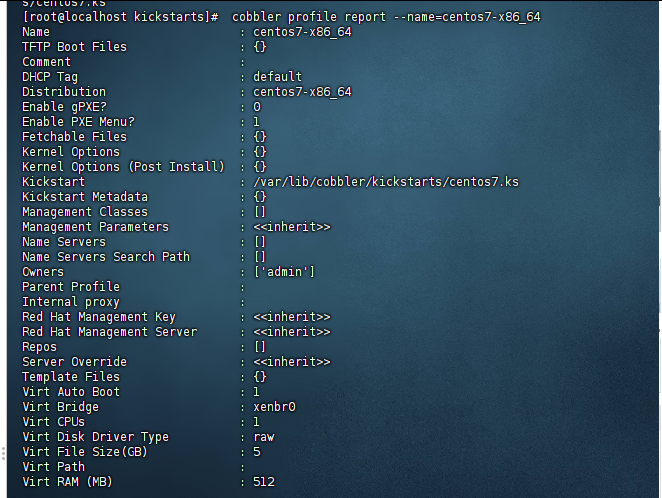
cobbler profile report --name=centos7-x86_64
确认KS文件是否指定成功
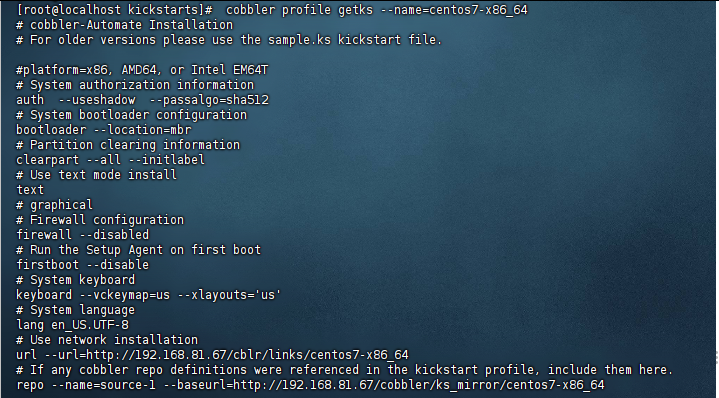
cobbler profile getks --name=centos7-x86_64
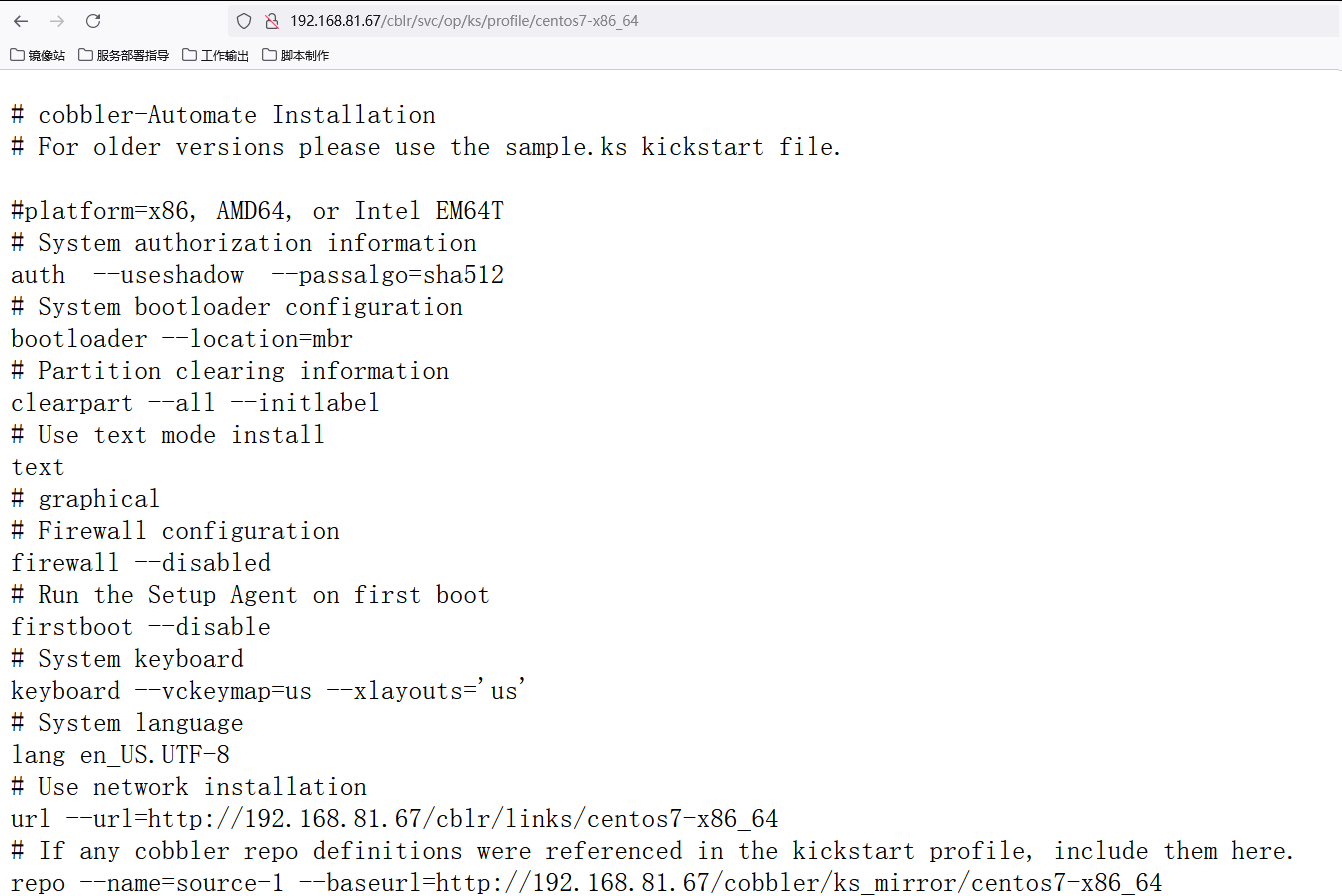
浏览器访问http://192.168.81.67/cobbler/ks_mirror/centos7-x86_64地址,确认能正常访问
数据同步以及相关服务重启
cobbler sync
systemctl restart --now dhcpd httpd tftp cobblerd

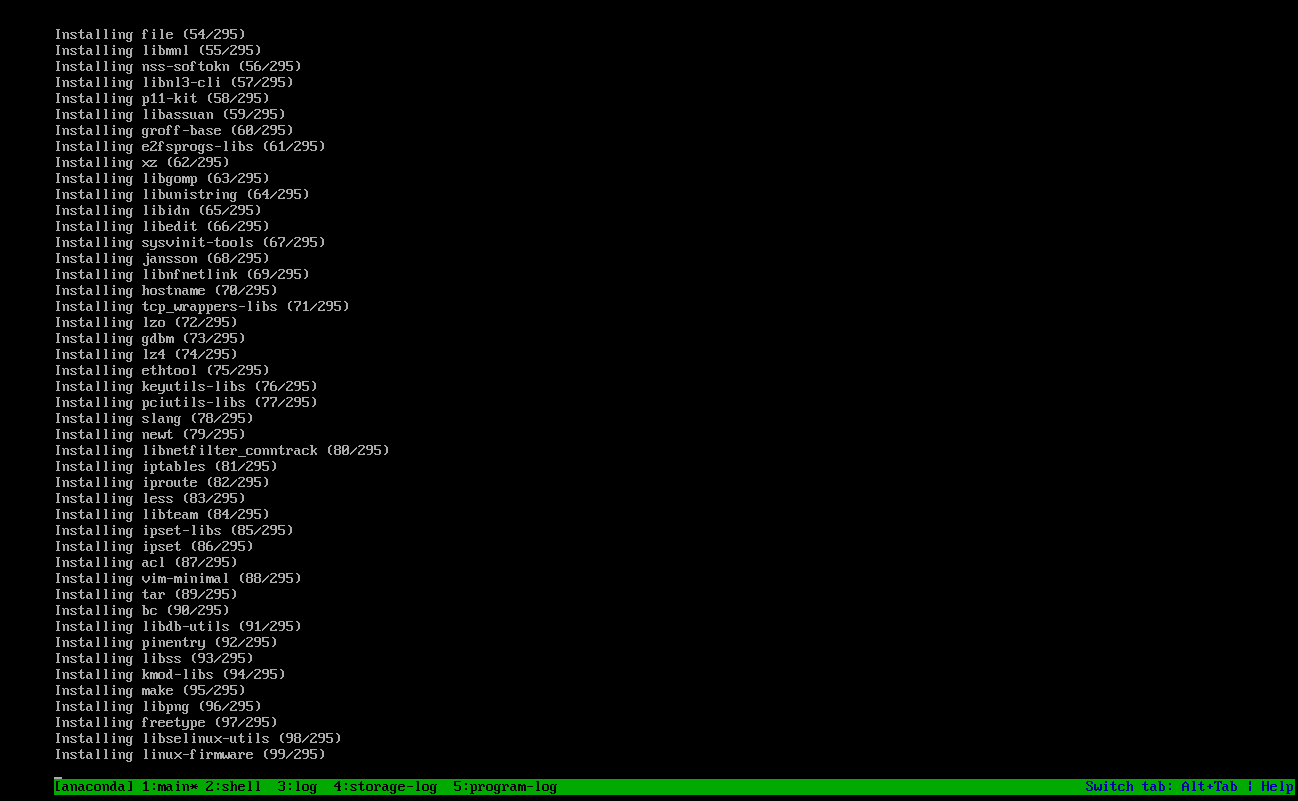
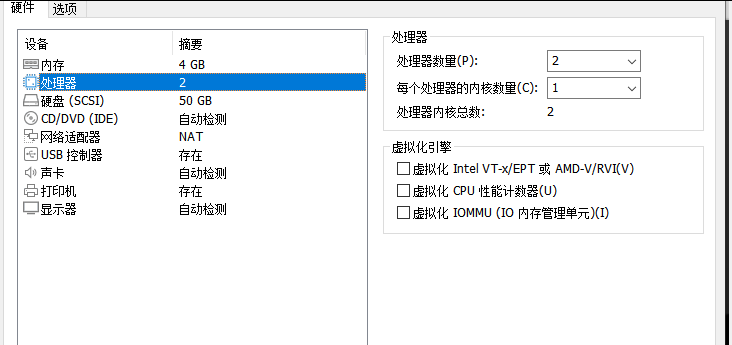
3.客户端装机实测
客户端资源要求,按照ks文件里面配置的进行划分,我是至少2核 4g,50G
menu装机,直到看到安装系统文件,那么cobbler就安装成功了