在使用 FastMCP 开发 MCP 服务器时经常会用到
@mcp.tool()等装饰器。虽然它们用起来很简单,但当作黑匣子总让人感觉"不得劲"。接下来我们将深入相关的源码实现,别担心,不会钻没有意义的"兔子洞",你可以通过这篇文章了解到:
- 如何简单启动本地的 MCP Server 和 MCP Inspector
- 这些装饰器具体做了什么
- @mcp.tool()
- @mcp.resource()
- @mcp.prompt()
MCP 官方 Python SDK 地址:https://github.com/modelcontextprotocol/python-sdk。
代码文件下载 :server.py,debug_func_metadata.py,debug_message_validator.py
文章目录
安装库
bash
# 项目依赖已在 pyproject.toml 中配置,运行 uv sync 即可安装
# 文章中重复的 uv add 是旧版本 pip install 的遗留(默认仅配置了 PyTorch 等基础深度学习环境)
uv add mcp
server.py
下面是一个简化的 server.py 示例:
python
from mcp.server.fastmcp import FastMCP

# 初始化 FastMCP server
mcp = FastMCP(
    name="weather",
    #host="0.0.0.0",
    #port="8234"
)

@mcp.tool()
def get_weather(city: str) -> str:
    """获取指定城市的天气信息"""
    # 简单模拟数据,实际应用中应该调用对应的API
    weather_data = {
        "北京": "晴天,温度 22°C",
        "上海": "多云,温度 25°C",
        "广州": "小雨,温度 28°C",
        "深圳": "阴天,温度 26°C"
    }
    return weather_data.get(city, f"{city} 的天气数据暂不可用")

@mcp.prompt()
def weather(city: str = "北京") -> list:
    """提供天气查询的对话模板"""
    return [
        {
            "role": "user",
            "content": f"请帮我查询{city}的天气情况,并提供详细的天气信息。"
        }
    ]

@mcp.resource("resource://cities")
def get_cities():
    """返回支持查询天气的城市列表"""
    cities = ["北京", "上海", "广州", "深圳"]
    return f"Cities: {', '.join(cities)}"

@mcp.resource("resource://{city}/weather")
def get_city_weather(city: str) -> str:
    return f"Weather for {city}"

if __name__ == "__main__":
    mcp.run(transport="stdio")
将其保存为 server 后,可以使用以下命令直接进行调试:
python
mcp dev server.py
# 如果克隆了仓库,可以指定 Demos 文件夹下的路径,比如:mcp dev Demos/mcp/server.py
mcp dev 会在运行MCP服务器的同时启动 MCP Inspector:
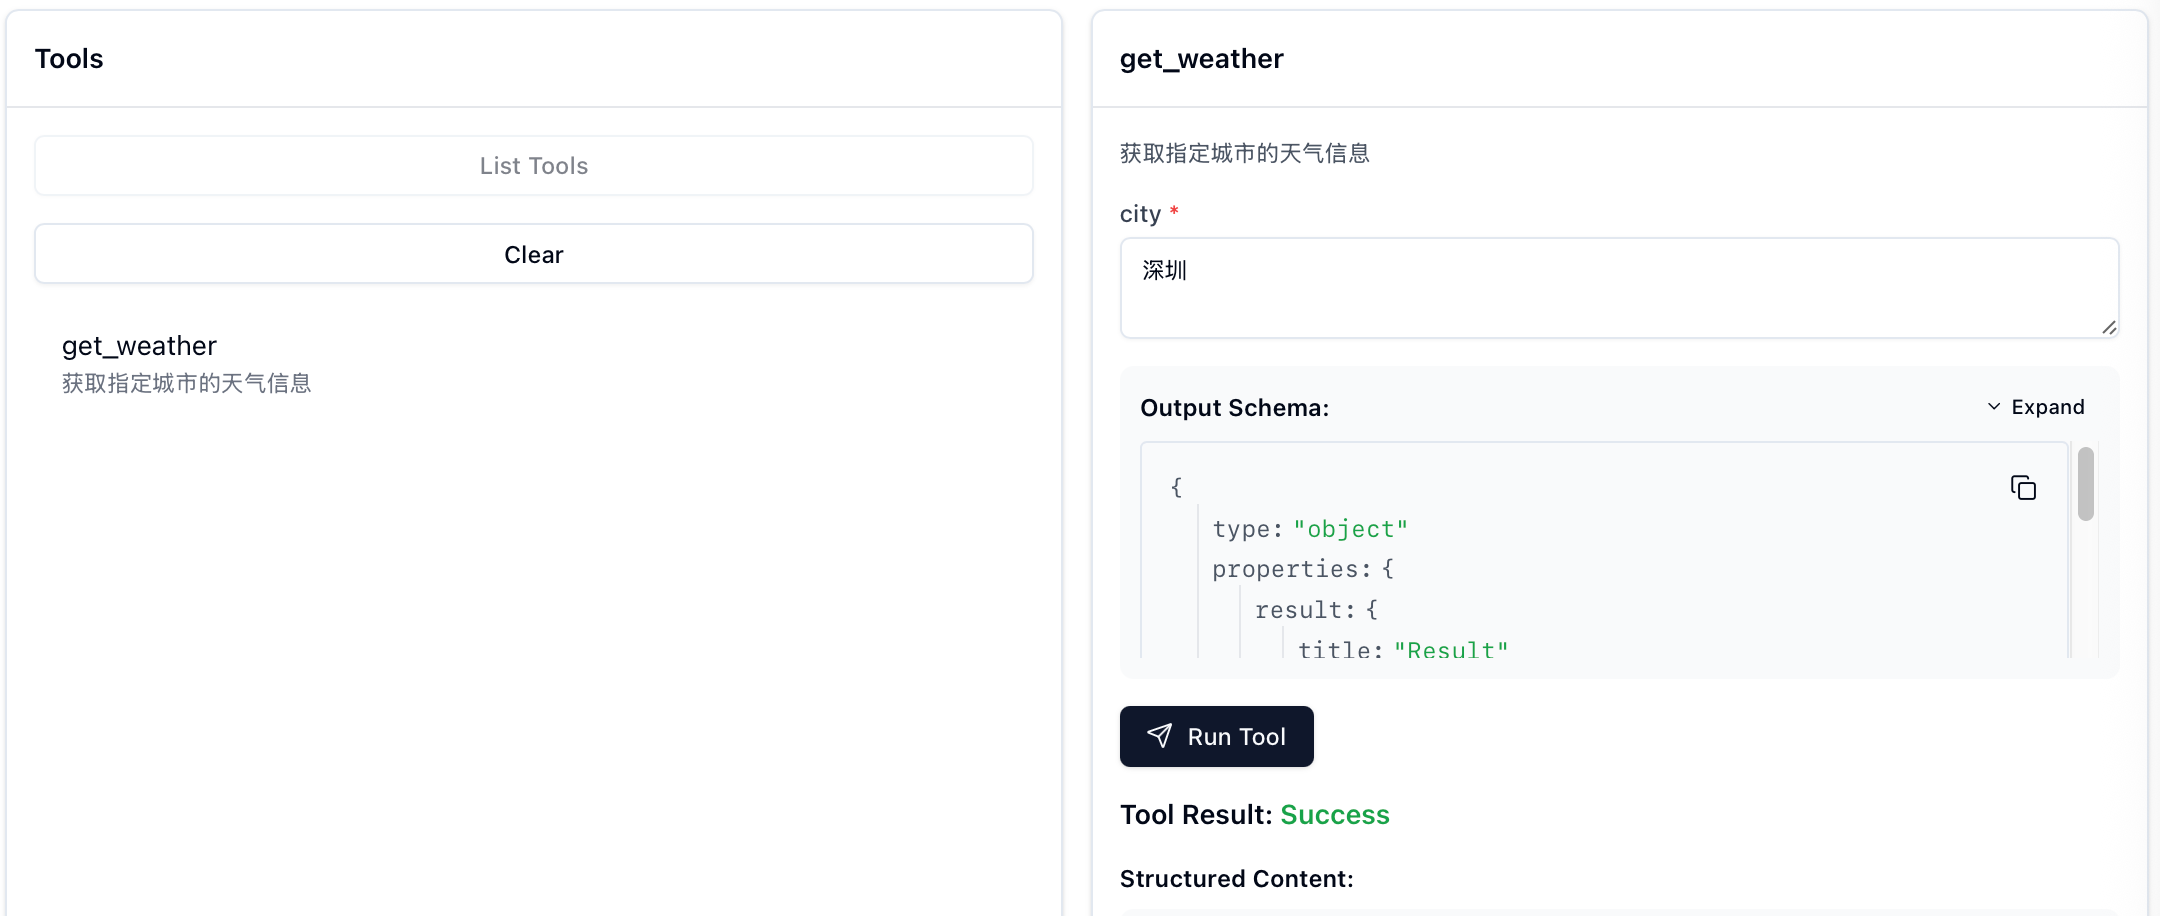
MCP Inspector 界面配置如下图左框:
配置项(Command + Arguments)实际对应于能够运行服务器的命令,所以并不局限,有很多组合可以使用:
| Command | Arguments |
|---|---|
| mcp | run server.py |
| python | server.py |
| uv | run server.py |
| uv | run mcp run server.py |
| uv | run --with mcp mcp run server.py |
| uv | run python server.py |
最后三行命令实际只是 uv 对前两行命令的封装(uv 可以替代 pip/conda,目前已经被广泛使用)。
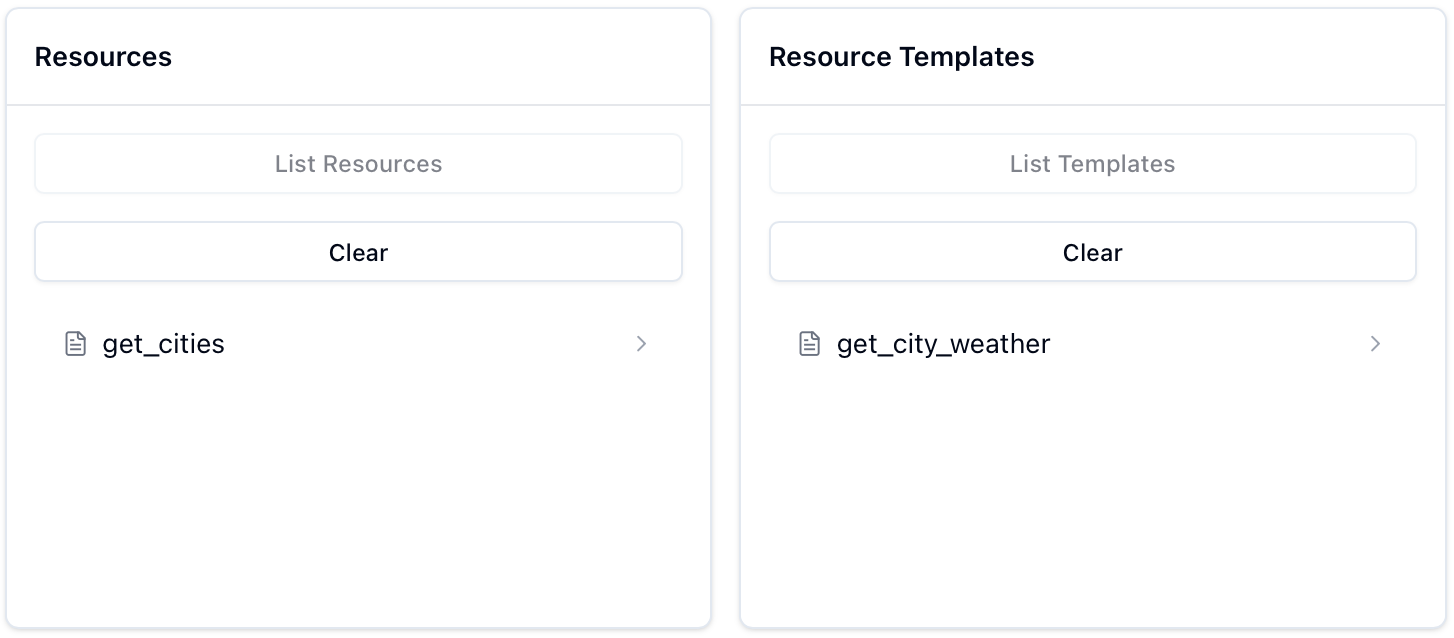
连接成功后,你可以在 MCP Inspector 中看到注册的 Resources、Prompts 和 Tools:
| Resources | Prompts | Tools |
|---|---|---|
 |
 |
 |
什么是 FastMCP?
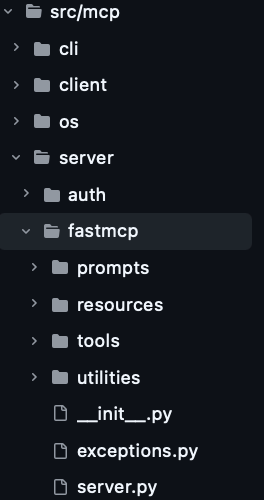
官方仓库中对应的路径为 src/mcp/server/fastmcp:
从 from mcp.server.fastmcp import FastMCP 开始,既然能够直接 import FastMCP,那先查看 __init__.py:
python
"""FastMCP - 一个更人性化的 MCP 服务器接口。"""

from importlib.metadata import version

from .server import Context, FastMCP
from .utilities.types import Image

__version__ = version("mcp")
__all__ = ["FastMCP", "Context", "Image"]
可以看到 FastMCP 是从当前文件夹的 server.py 中导入的,所以接下来查看 server.py(省略部分初始化逻辑):
python
class FastMCP:
    def __init__(
        self,
        name: str | None = None,
        instructions: str | None = None,
        auth_server_provider: OAuthAuthorizationServerProvider[Any, Any, Any] | None = None,
        token_verifier: TokenVerifier | None = None,
        event_store: EventStore | None = None,
        *,
        tools: list[Tool] | None = None,
        **settings: Any,
    ):
        ...

        self._tool_manager = ToolManager(tools=tools, warn_on_duplicate_tools=self.settings.warn_on_duplicate_tools)
        self._resource_manager = ResourceManager(warn_on_duplicate_resources=self.settings.warn_on_duplicate_resources)
        self._prompt_manager = PromptManager(warn_on_duplicate_prompts=self.settings.warn_on_duplicate_prompts)

...初始化(__init__)的代码中有三个很眼熟的部分:
_tool_manager:管理工具(Tools)_resource_manager:管理资源(Resources)_prompt_manager:管理提示词(Prompts)
这三者分别对应于之后要介绍的装饰器。
FastMCP 初始化的具体解析不会在本文进行,后续相关文章完结时此行会替换为索引链接。
装饰器
什么是装饰器?
装饰器可以理解为一个接受函数作为参数,并返回一个新函数的函数。这可以让我们在不修改原函数代码的情况下添加通用的行为,通过一个简单的例子来理解:
python
def decorator(func):
    """一个简单的装饰器示例"""
    def wrapper(*args, **kwargs):
        print(f"调用函数 {func.__name__} 之前")
        result = func(*args, **kwargs)
        print(f"调用函数 {func.__name__} 之后\n")
        return result
    return wrapper

# 方式1:使用 @ 语法糖
@decorator
def say_hello(name):
    print(f"Hello, {name}!")
say_hello("Xiaoming")

# 方式2:直接调用装饰器函数
def say_hello(name):
    print(f"Hello, {name}!")
say_hello = decorator(say_hello)
say_hello("Xiaoming")输出:
python
调用函数 say_hello 之前
Hello, Xiaoming!
调用函数 say_hello 之后

调用函数 say_hello 之前
Hello, Xiaoming!
调用函数 say_hello 之后
在 FastMCP 中,装饰器的工作方式类似,但并不是简单地 print,而是将函数注册到对应的管理器中:
@mcp.tool()- 将函数注册为工具@mcp.resource()- 将函数注册为资源@mcp.prompt()- 将函数注册为提示词模板
接下来会着重讲解 tool() 装饰器,resource() 和 prompt() 的处理逻辑基本是 tool() 的简化版本,所以部分逻辑会带过。
!note
使用
@mcp.*的格式是因为初始化mcp=FastMCP(),如果变量名从mcp改为了server,即:server=FastMCP(),那么装饰器就应该使用@server.*的格式。
@mcp.tool()
@mcp.tool() 装饰器用于将 Python 函数自动注册为当前 mcp 服务器中的工具。摘选之前的片段:
python
@mcp.tool()
def get_weather(city: str) -> str:
    """获取指定城市的天气信息"""
    # 简单模拟数据,实际应用中应该调用对应的API
    weather_data = {
        "北京": "晴天,温度 22°C",
        "上海": "多云,温度 25°C",
        "广州": "小雨,温度 28°C",
        "深圳": "阴天,温度 26°C"
    }
    return weather_data.get(city, f"{city} 的天气数据暂不可用")
这段代码实际上会:
-
自动提取函数的参数类型信息,以及文档字符串(下面的信息由之后的
debug_func_metadata打印)。json============================================================ 🔍 开始解析函数: get_weather 文档字符串: 获取指定城市的天气信息 ============================================================ 函数签名分析: 完整签名: (city: str) -> str 返回类型: <class 'str'> 参数数量: 1 参数名: city 原始注解: <class 'str'> 参数种类: POSITIONAL_OR_KEYWORD 默认值: <class 'inspect._empty'> 类型化注解: <class 'str'> 字段信息: annotation=<class 'str'>, default=PydanticUndefined -
生成参数的 JSON Schema(函数名+Arguments)。
json🏗️ 创建 Pydantic 模型: 模型名称: get_weatherArguments 基类: <class 'mcp.server.fastmcp.utilities.func_metadata.ArgModelBase'> ✅ 模型创建成功: <class '__main__.get_weatherArguments'> get_weatherArguments JSON Schema: { "properties": { "city": { "title": "City", "type": "string" } }, "required": [ "city" ], "title": "get_weatherArguments", "type": "object" } -
将函数注册为 MCP 工具(
self._tools[tool.name] = tool)。
mcp.tool() 可以接受以下参数(此处参数解释参考 tool 和 func_metadata):
-
name: 可选的工具名称,默认为函数名
-
title: 可选的工具标题(用于人类阅读)
-
description: 可选的工具功能描述,默认使用函数的文档字符串
-
annotations: 可选的 ToolAnnotations,提供额外的工具信息
-
structured_output:控制工具输出是结构化还是非结构化的
-
None: 基于函数的返回类型注解自动检测 -
True: 无条件创建结构化工具(在返回类型注解允许的情况下)如果是结构化,会根据函数的返回类型注释创建 Pydantic 模型。支持各种返回类型:
- BaseModel 子类(直接使用)
- 原始类型(str、int、float、bool、bytes、None)- 包装在带有 'result' 字段的模型中
- TypedDict - 转换为具有相同字段的 Pydantic 模型
- 数据类和其他带注释的类 - 转换为 Pydantic 模型
- 泛型类型(list、dict、Union 等)- 包装在带有 'result' 字段的模型中
-
False: 无条件创建非结构化工具
-
!note
如果你只想了解如何使用
@mcp.tool(),可以跳过下面的源码部分。
追溯源码
python
class FastMCP:
    ...
    def tool(
            self,
            name: str | None = None,
            title: str | None = None,
            description: str | None = None,
            annotations: ToolAnnotations | None = None,
            structured_output: bool | None = None,
        ) -> Callable[[AnyFunction], AnyFunction]:
        """用于注册工具的装饰器。

        工具可以通过添加 Context 类型注解的参数来可选地请求一个 Context 对象。
        Context 提供对 MCP 功能的访问,包括日志记录、进度报告和资源访问。
        """
        # 检查装饰器是否被正确使用(需要带括号调用)
        if callable(name):
            raise TypeError(
                "The @tool decorator was used incorrectly. Did you forget to call it? Use @tool() instead of @tool"
            )

        def decorator(fn: AnyFunction) -> AnyFunction:
            self.add_tool(
                fn,
                name=name,
                title=title,
                description=description,
                annotations=annotations,
                structured_output=structured_output,
            )
            return fn

        return decorator
这里的 self.add_tool() 就是 mcp.add_tool(),所以也可以不使用装饰器达到一样的目的:
python
def get_weather():
    pass

mcp = FastMCP(name="weather")
mcp.add_tool(get_weather)  # 和 get_weather 使用@mcp.tool()效果一样
这一行为最终调用的是 self._tool_manager.add_tool(),self._tool_manager 在__init__() 中对应的是 tools/tool_manager.py 中的 ToolManager 类:
python
class ToolManager:
    """管理 FastMCP 工具."""

    def __init__(
        self,
        warn_on_duplicate_tools: bool = True,
        *,
        tools: list[Tool] | None = None,
    ):
        self._tools: dict[str, Tool] = {}
        if tools is not None:
            for tool in tools:
                if warn_on_duplicate_tools and tool.name in self._tools:
                    logger.warning(f"Tool already exists: {tool.name}")
                self._tools[tool.name] = tool

        self.warn_on_duplicate_tools = warn_on_duplicate_tools

    def add_tool(
        self,
        fn: Callable[..., Any],
        name: str | None = None,
        title: str | None = None,
        description: str | None = None,
        annotations: ToolAnnotations | None = None,
        structured_output: bool | None = None,
    ) -> Tool:
        """添加 tool 到 server。"""
        tool = Tool.from_function(
            fn,
            name=name,
            title=title,
            description=description,
            annotations=annotations,
            structured_output=structured_output,
        )
        existing = self._tools.get(tool.name)
        if existing:
            if self.warn_on_duplicate_tools:
                logger.warning(f"Tool already exists: {tool.name}")
            return existing
        self._tools[tool.name] = tool
        return tool
我们不需要关注 ToolManager 是怎么进行管理的,这不重要,重要的是装饰器怎么处理我们自定义的函数。
整个 @mcp.tool() 装饰器的工作按执行顺序可以拆分为:
-
装饰器检查调用方式是否正确(必须带括号),然后将被装饰的函数传递给
ToolManager.add_tool()。pythonclass FastMCP: ... def tool(self, name, ...): if callable(name): raise TypeError( "The @tool decorator was used incorrectly. Did you forget to call it? Use @tool() instead of @tool" ) def decorator(fn: AnyFunction) -> AnyFunction: self.add_tool( fn, # 被装饰的函数 name=name, title=title, description=description, annotations=annotations, structured_output=structured_output, ) return fn return decorator -
Tool.from_function()处理函数元数据。pythonclass ToolManager: ... def add_tool(self, ...): tool = Tool.from_function( fn, # 被装饰的函数 name=name, title=title, description=description, annotations=annotations, structured_output=structured_output, ) ...!note
tool = Tool.from_function(...)是当前最重要的处理部分,对应代码位于 tools/base.py,其主要步骤如下(代码按顺序拼接等价于 Tool.from_function(),出于讲解目的将其进行了拆分):a. 解析函数签名,提取参数信息。
pythonclass Tool(BaseModel): ... @classmethod def from_function( cls, # 这里的 cls 就是 Tool 类本身,不是实例 fn: Callable[..., Any], name: str | None = None, title: str | None = None, description: str | None = None, context_kwarg: str | None = None, annotations: ToolAnnotations | None = None, structured_output: bool | None = None, ) -> Tool: """从函数创建工具.""" from mcp.server.fastmcp.server import Context func_name = name or fn.__name__ # Lambda 函数必须提供 name 参数 if func_name == "<lambda>": raise ValueError("You must provide a name for lambda functions") # 如果没有传入 description,则使用函数的文档字符串 func_doc = description or fn.__doc__ or "" is_async = _is_async_callable(fn) ...b. 自动检测 Context 参数 ,
inspect.signature()会遍历函数的所有参数,检查参数类型是否为 Context 的子类,如果是的话会记录为context_kwarg,这个参数会被传入func_metadata()的skip_names(可以跳过这一步的理解,等真正涉及到的时候再探究),不会出现在工具对应的 JSON Schema 中。pythonclass Tool(BaseModel): ... @classmethod def from_function(...): ... # 自动检测 Context 参数 if context_kwarg is None: sig = inspect.signature(fn) for param_name, param in sig.parameters.items(): # 跳过泛型类型 if get_origin(param.annotation) is not None: continue # 检查参数类型是否是 Context 的子类 if issubclass(param.annotation, Context): context_kwarg = param_name breakc. 生成参数的 JSON Schema:
pythonclass Tool(BaseModel): ... @classmethod def from_function(...): ... # 生成函数元数据,包括参数的 JSON Schema func_arg_metadata = func_metadata( fn, skip_names=[context_kwarg] if context_kwarg is not None else [], structured_output=structured_output, ) # 从 Pydantic 模型生成 JSON Schema parameters = func_arg_metadata.arg_model.model_json_schema(by_alias=True)func_metadata相关源代码位于 utilities/func_metadata.py,这里我们进行主体逻辑的抽取打印(完整 debug_func_metadata 函数见附录):pythondef func( data, # 无类型注解 format: str = "json", # 有注解+默认值 count: Optional[int] = None, # 复杂类型+默认值 validate: bool = True # 基础类型+默认值 ): # 无返回类型注解 """展示各种注解情况""" return data debug_func_metadata(func, skip_names="count")输出:
json============================================================ 🔍 开始解析函数: func 文档字符串: 展示各种注解情况 ============================================================ 📋 函数签名分析: 完整签名: (data, format: str = 'json', count: Optional[int] = None, validate: bool = True) 返回类型: <class 'inspect._empty'> 参数数量: 4 🔧 参数处理详情: 跳过的参数名: ['c', 'o', 'u', 'n', 't'] [1] 参数名: data 原始注解: <class 'inspect._empty'> 参数种类: POSITIONAL_OR_KEYWORD 默认值: <class 'inspect._empty'> ⚠️ 处理: 无类型注解,默认为 Any 🔄 类型化注解: typing.Annotated[typing.Any, FieldInfo(annotation=NoneType, required=True), WithJsonSchema(json_schema={'title': 'data', 'type': 'string'}, mode=None)] ✅ 字段信息: annotation=typing.Any, default=PydanticUndefined [2] 参数名: format 原始注解: <class 'str'> 参数种类: POSITIONAL_OR_KEYWORD 默认值: json 🔄 类型化注解: <class 'str'> ✅ 字段信息: annotation=<class 'str'>, default=json [3] 参数名: count 原始注解: typing.Optional[int] 参数种类: POSITIONAL_OR_KEYWORD 默认值: None ⏭️ 跳过此参数 [4] 参数名: validate 原始注解: <class 'bool'> 参数种类: POSITIONAL_OR_KEYWORD 默认值: True 🔄 类型化注解: <class 'bool'> ✅ 字段信息: annotation=<class 'bool'>, default=True ⚠️ 冲突处理: 参数名 'validate' 与 BaseModel 方法冲突 -> 使用内部名称: field_validate 📊 参数处理总结: 总参数数: 4 处理参数数: 3 模型字段: ['data', 'format', 'field_validate'] 🏗️ 创建 Pydantic 模型: 模型名称: funcArguments 基类: <class 'mcp.server.fastmcp.utilities.func_metadata.ArgModelBase'> ✅ 模型创建成功: <class '__main__.funcArguments'> 📄 funcArguments JSON Schema: { "properties": { "data": { "title": "data", "type": "string" }, "format": { "default": "json", "title": "Format", "type": "string" }, "validate": { "default": true, "title": "Validate", "type": "boolean" } }, "required": [ "data" ], "title": "funcArguments", "type": "object" } 🎯 返回值处理: structured_output 参数: None 返回注解: <class 'inspect._empty'> 经过_get_typed_annotation处理后的类型: <class 'inspect._empty'> ℹ️ 未创建输出模型 wrap_output: False ✨ func_metadata 处理完成! 最终结果: arg_model=<class '__main__.funcArguments'> output_schema=None output_model=None wrap_output=False ============================================================ FuncMetadata(arg_model=<class '__main__.funcArguments'>, output_schema=None, output_model=None, wrap_output=False)d. 创建 Tool 实例(
Tool.from_function的return cls(...))。pythonclass Tool(BaseModel): ... @classmethod def from_function(...): return cls( # 使用 cls() 创建 Tool 实例,等价于 Tool() fn=fn, name=func_name, title=title, description=func_doc, parameters=parameters, fn_metadata=func_arg_metadata, is_async=is_async, context_kwarg=context_kwarg, annotations=annotations, ) -
将 Tool 实例注册到工具管理器中。
pythonclass ToolManager: ... def add_tool(...) -> Tool: """添加 tool 到 server。""" tool = Tool.from_function(...) existing = self._tools.get(tool.name) if existing: if self.warn_on_duplicate_tools: logger.warning(f"Tool already exists: {tool.name}") return existing self._tools[tool.name] = tool return tool
@mcp.resource()
@mcp.resource() 装饰器用于定义可供访问的资源,需要注意的是:
-
必须 提供一个资源 URI(如
@mcp.resource("resource://cities")) -
资源可以是静态的(每次调用返回相同内容)或动态的(根据参数填充内容)。
-
静态对应于 MCP Inspector 中的
Resources,动态对应于Resources Templates,以下面两个资源为例进行展示:pythonfrom mcp.server.fastmcp import FastMCP # 初始化 FastMCP server mcp = FastMCP("cities") @mcp.resource("resource://cities") def get_cities(): """返回支持查询天气的城市列表""" cities = ["北京", "上海", "广州", "深圳"] return f"Cities: {', '.join(cities)}" @mcp.resource("resource://{city}/weather") def get_city_weather(city: str) -> str: return f"Weather for {city}" if __name__ == "__main__": mcp.run(transport="stdio")此时 MCP Inspector 的 Resources 模块显示如下:
-
追溯源码
查看 server.py 中的 resource 方法:
python
class FastMCP:
...
def resource(
self,
uri: str,
*,
name: str | None = None,
title: str | None = None,
description: str | None = None,
mime_type: str | None = None,
) -> Callable[[AnyFunction], AnyFunction]:
"""用于将函数注册为资源的装饰器。
当资源被读取时,将调用被装饰的函数来动态生成资源内容。
函数可以返回:
- str: 文本内容
- bytes: 二进制内容
- 其他类型: 将自动转换为 JSON 格式
如果 URI 包含参数占位符(如 "resource://{param}")或者函数本身有参数,
该资源将被注册为模板资源。
参数:
uri: 资源的 URI(如 "resource://my-resource" 或 "resource://{param}")
name: 可选的资源名称
title: 可选的资源标题(用于人类阅读)
description: 可选的资源描述
mime_type: 可选的 MIME 类型
使用示例:
# 静态资源
@server.resource("resource://my-resource")
def get_data() -> str:
return "Hello, world!"
# 参数化模板资源
@server.resource("resource://{city}/weather")
def get_weather(city: str) -> str:
return f"Weather for {city}"
"""
# 检查装饰器是否被正确使用(需要带括号调用)
if callable(uri):
raise TypeError(
"The @resource decorator was used incorrectly. Did you forget to call it? Use @resource('uri') instead of @resource"
)
def decorator(fn: AnyFunction) -> AnyFunction:
# 通过 URI 中的 "{}" 和函数自身的参数来检查是否是模版
has_uri_params = "{" in uri and "}" in uri
has_func_params = bool(inspect.signature(fn).parameters)
if has_uri_params or has_func_params:
# (有参数)提取 URI 参数和函数参数
uri_params = set(re.findall(r"{(\w+)}", uri))
func_params = set(inspect.signature(fn).parameters.keys())
# 验证 URI 参数和函数参数是否匹配
if uri_params != func_params:
raise ValueError(
f"Mismatch between URI parameters {uri_params} and function parameters {func_params}"
)
# 注册为模板资源,调用 _resource_manager.add_template()
self._resource_manager.add_template(
fn=fn,
uri_template=uri,
name=name,
title=title,
description=description,
mime_type=mime_type,
)
else:
# (无参数)注册为普通资源
resource = FunctionResource.from_function(
fn=fn,
uri=uri,
name=name,
title=title,
description=description,
mime_type=mime_type,
)
self.add_resource(resource) # 调用 self._resource_manager.add_resource(resource)
return fn
return decoratorResourceManager 的实现位于 resources/resource_manager.py:
python
class ResourceManager:
"""管理 FastMCP 资源。"""
def __init__(self, warn_on_duplicate_resources: bool = True):
self._resources: dict[str, Resource] = {}
self._templates: dict[str, ResourceTemplate] = {}
self.warn_on_duplicate_resources = warn_on_duplicate_resources
def add_resource(self, resource: Resource) -> Resource:
"""向管理器中添加资源。
参数:
resource: 要添加的 Resource 实例
返回:
当前添加的资源。如果具有相同 URI 的资源已存在,则返回现有的资源。
"""
logger.debug(
"Adding resource",
extra={
"uri": resource.uri,
"type": type(resource).__name__,
"resource_name": resource.name,
},
)
existing = self._resources.get(str(resource.uri))
if existing:
if self.warn_on_duplicate_resources:
logger.warning(f"Resource already exists: {resource.uri}")
return existing
self._resources[str(resource.uri)] = resource
return resource
def add_template(
self,
fn: Callable[..., Any],
uri_template: str,
name: str | None = None,
title: str | None = None,
description: str | None = None,
mime_type: str | None = None,
) -> ResourceTemplate:
"""根据函数添加模版。"""
template = ResourceTemplate.from_function(
fn,
uri_template=uri_template,
name=name,
title=title,
description=description,
mime_type=mime_type,
)
self._templates[template.uri_template] = template
return template
...对于静态资源,add_resource 方法会直接将 FunctionResource 实例存储在 _resources 字典中。对于动态资源,add_template 方法会创建 ResourceTemplate 实例并存储在 _templates 字典中。
-
静态 :
FunctionResource位于 resources/types.py:pythonclass FunctionResource(Resource): """通过包装函数来延迟加载数据的资源。 函数只有在资源被读取时才会被调用,允许对可能昂贵的数据进行延迟加载。 这在列出资源时特别有用,因为函数不会被调用,直到资源被实际访问。 函数可以返回: - str 表示文本内容(默认) - bytes 表示二进制内容 - 其他类型将被转换为 JSON """ fn: Callable[[], Any] = Field(exclude=True) ... @classmethod def from_function( cls, fn: Callable[..., Any], uri: str, name: str | None = None, title: str | None = None, description: str | None = None, mime_type: str | None = None, ) -> "FunctionResource": """从函数创建 FunctionResource。""" func_name = name or fn.__name__ if func_name == "<lambda>": raise ValueError("You must provide a name for lambda functions") # 确保参数被正确转换 fn = validate_call(fn) return cls( uri=AnyUrl(uri), name=func_name, title=title, description=description or fn.__doc__ or "", mime_type=mime_type or "text/plain", fn=fn, ) -
动态 :
ResourceTemplate位于 resources/templates.py:pythonclass ResourceTemplate(BaseModel): """动态创建资源的模板。""" uri_template: str = Field(description="URI template with parameters (e.g. weather://{city}/current)") name: str = Field(description="Name of the resource") title: str | None = Field(description="Human-readable title of the resource", default=None) description: str | None = Field(description="Description of what the resource does") mime_type: str = Field(default="text/plain", description="MIME type of the resource content") fn: Callable[..., Any] = Field(exclude=True) parameters: dict[str, Any] = Field(description="JSON schema for function parameters") @classmethod def from_function( cls, fn: Callable[..., Any], uri_template: str, name: str | None = None, title: str | None = None, description: str | None = None, mime_type: str | None = None, ) -> ResourceTemplate: """从函数创建模板。""" func_name = name or fn.__name__ if func_name == "<lambda>": raise ValueError("You must provide a name for lambda functions") # 从 TypeAdapter 获取 schema - 如果函数没有正确的类型注解会失败 parameters = TypeAdapter(fn).json_schema() # 确保参数被正确转换 fn = validate_call(fn) return cls( uri_template=uri_template, name=func_name, title=title, description=description or fn.__doc__ or "", mime_type=mime_type or "text/plain", fn=fn, parameters=parameters, )
@mcp.prompt()
@mcp.prompt() 装饰器用于定义提示词模板,这部分的实现只是简单维护了一个字典。
追溯源码
查看 server.py 中的 prompt 方法:
python
class FastMCP:
...
def prompt(
self,
name: str | None = None,
title: str | None = None,
description: str | None = None,
annotations: PromptAnnotations | None = None,
) -> Callable[[AnyFunction], AnyFunction]:
"""注册提示词的装饰器。
参数:
name: 可选的提示词名称(默认使用函数名)
title: 可选的提示词人类可读标题
description: 可选的提示词功能描述
使用示例:
@server.prompt()
def analyze_table(table_name: str) -> list[Message]:
schema = read_table_schema(table_name)
return [
{
"role": "user",
"content": f"Analyze this schema:\n{schema}"
}
]
@server.prompt()
async def analyze_file(path: str) -> list[Message]:
content = await read_file(path)
return [
{
"role": "user",
"content": {
"type": "resource",
"resource": {
"uri": f"file://{path}",
"text": content
}
}
}
]
"""
# 同样的验证逻辑
if callable(name):
raise TypeError(
"The @prompt decorator was used incorrectly. Did you forget to call it? Use @prompt() instead of @prompt"
)
def decorator(func: AnyFunction) -> AnyFunction:
prompt = Prompt.from_function(
func,
name=name,
title=title,
description=description
)
self.add_prompt(prompt) # 调用 self._prompt_manager.add_prompt(prompt)
return func
return decoratorPromptManager 的实现位于 prompts/prompt_manager.py:
python
class PromptManager:
"""管理 FastMCP 提示词。"""
def __init__(self, warn_on_duplicate_prompts: bool = True):
self._prompts: dict[str, Prompt] = {}
self.warn_on_duplicate_prompts = warn_on_duplicate_prompts
def add_prompt(self, prompt: Prompt) -> Prompt:
"""添加提示词到管理器。"""
logger.debug(f"Adding prompt: {prompt.name}")
existing = self._prompts.get(prompt.name)
if existing:
if self.warn_on_duplicate_prompts:
logger.warning(f"Prompt already exists: {prompt.name}")
return existing
self._prompts[prompt.name] = prompt
return prompt
def get_prompt(self, name: str) -> Prompt | None:
"""根据名称获取提示词。"""
return self._prompts.get(name)
def list_prompts(self) -> list[Prompt]:
"""列出所有已注册的提示词。"""
return list(self._prompts.values())P.S. 文章跳过了 from_function 部分的源码追溯(感兴趣的同学可以点击链接查看)。
!note
关于 @mcp.prompt() 的使用或许还需要多聊几句,摘选之前的片段:
python@mcp.prompt() def weather(city: str = "北京") -> list: """提供天气查询的对话模板""" return [ { "role": "user", "content": f"请帮我查询{city}的天气情况,并提供详细的天气信息。" } ]其实我们也可以这样写:
python@mcp.prompt() def weather(city: str = "北京") -> str: """提供天气查询的对话模板""" return f"请帮我查询{city}的天气情况,并提供详细的天气信息。"最终客户端获取的对象都是:
json{ "messages": [ { "role": "user", "content": { "type": "text", "text": "请帮我查询北京的天气情况" } } ] }简单来说,如果被装饰的函数直接返回字符串类型,就会被转换为 UserMessage 对象(字典等类型的处理返回见附录的 debug_message_validator.py 运行结果)。
那么,这个自动转换的逻辑在哪实现呢?
当 MCP 客户端请求提示词时,FastMCP 会调用对应 Prompt 的
render()方法:
pythonclass FastMCP: ... async def get_prompt(self, name: str, arguments: dict[str, Any] | None = None) -> GetPromptResult: """通过 name 和 arguments 获取提示词。""" try: prompt = self._prompt_manager.get_prompt(name) if not prompt: raise ValueError(f"Unknown prompt: {name}") # 调用 Prompt.render() 方法 messages = await prompt.render(arguments) return GetPromptResult( description=prompt.description, messages=pydantic_core.to_jsonable_python(messages), ) except Exception as e: logger.exception(f"Error getting prompt {name}") raise ValueError(str(e))这个方法位于 prompts/base.py:
pythonclass Prompt(BaseModel): ... async def render(self, arguments: dict[str, Any] | None = None) -> list[Message]: """根据arguments渲染提示词。""" # 验证必需参数 if self.arguments: required = {arg.name for arg in self.arguments if arg.required} provided = set(arguments or {}) missing = required - provided if missing: raise ValueError(f"Missing required arguments: {missing}") try: # self.fn 就是被 mcp.prompt() 装饰的函数 # 这里是为了获取 result(自定义函数执行后的返回值),并检查是否为协程 result = self.fn(**(arguments or {})) if inspect.iscoroutine(result): result = await result # 如果 result 不是列表或元组,转换为列表 if not isinstance(result, list | tuple): result = [result] # 转换 result 为消息 messages: list[Message] = [] for msg in result: # type: ignore[reportUnknownVariableType] try: if isinstance(msg, Message): # 如果是 Message 对象,直接使用 messages.append(msg) elif isinstance(msg, dict): # 如果是字典,验证并转换为消息 # message_validator = TypeAdapter[UserMessage | AssistantMessage](UserMessage | AssistantMessage) # Pydantic 的 TypeAdapter。用于验证和转换字典为 UserMessage 或 AssistantMessage 对象。 # 当用户返回字典格式的消息时,message_validator.validate_python(msg) 会根据字典中的 role 字段自动选择合适的消息类型进行验证和转换。 # https://docs.pydantic.dev/latest/api/type_adapter/?query=validate_python messages.append(message_validator.validate_python(msg)) elif isinstance(msg, str): # 如果是字符串,转换为用户消息 content = TextContent(type="text", text=msg) messages.append(UserMessage(content=content)) else: # 其他类型转换为 JSON 字符串 content = pydantic_core.to_json(msg, fallback=str, indent=2).decode() messages.append(Message(role="user", content=content)) except Exception: raise ValueError(f"Could not convert prompt result to message: {msg}") return messages except Exception as e: raise ValueError(f"Error rendering prompt {self.name}: {e}")
附录
debug_func_metadata.py
官方源码:utilities/func_metadata.py
调试文件下载 :debug_func_metadata.py
python
#!/usr/bin/env python3
"""
func_metadata 调试工具,可以保存为 debug_func_metadata.py 执行
"""
import inspect
import json
from typing import Any, Callable, Sequence, Optional, List, Dict
from pydantic import BaseModel, Field, create_model
from pydantic.fields import FieldInfo
from typing_extensions import Annotated
from mcp.server.fastmcp.utilities.func_metadata import (
FuncMetadata,
ArgModelBase,
_get_typed_signature,
_get_typed_annotation,
_try_create_model_and_schema,
InvalidSignature,
PydanticUndefined,
WithJsonSchema
)
def print_json(data, title="JSON数据"):
"""打印JSON数据"""
try:
print(f"\n📄 {title}:")
print(json.dumps(data, indent=2, ensure_ascii=False))
except Exception as e:
print(f"❌ JSON打印失败: {e}")
print(f"原始数据类型: {type(data)}")
print(f"原始数据: {data}")
def debug_func_metadata(
func: Callable[..., Any],
skip_names: Sequence[str] = (),
structured_output: bool | None = None,
) -> Any:
"""
调试版本的 func_metadata 实现,会用到一些 from_function 中的逻辑,比如:func.__name__,func.__doc__ ...
"""
print(f"\n{'='*60}")
print(f"🔍 开始解析函数: {func.__name__}")
print(f" 文档字符串: {func.__doc__}")
print(f"{'='*60}")
try:
# 从这里开始 func_metadata()
# 步骤1: 获取函数签名
sig = _get_typed_signature(func)
params = sig.parameters
print(f"\n📋 函数签名分析:")
print(f" 完整签名: {sig}")
print(f" 返回类型: {sig.return_annotation}")
print(f" 参数数量: {len(params)}")
# 准备构建动态 Pydantic 模型的参数字典
dynamic_pydantic_model_params: dict[str, Any] = {}
globalns = getattr(func, "__globals__", {})
print(f"\n🔧 参数处理详情:")
print(f" 跳过的参数名: {list(skip_names)}")
# 步骤2: 遍历每个参数
processed_count = 0
for idx, param in enumerate(params.values()):
print(f"\n [{idx+1}] 参数名: {param.name}")
print(f" 原始注解: {param.annotation}")
print(f" 参数种类: {param.kind}")
print(f" 默认值: {param.default}")
# 验证参数名
if param.name.startswith("_"):
print(f" ❌ 错误: 参数名不能以 '_' 开头")
raise InvalidSignature(f"{func.__name__} 的参数 {param.name} 不能以 '_' 开头")
if param.name in skip_names:
print(f" ⏭️ 跳过此参数")
continue
processed_count += 1
annotation = param.annotation
# 处理 `x: None` 或 `x: None = None` 的情况
if annotation is None:
print(f" 📝 处理: 类型为 None,添加默认值字段")
annotation = Annotated[
None,
Field(default=param.default if param.default is not inspect.Parameter.empty else PydanticUndefined),
]
if annotation is inspect.Parameter.empty:
print(f" ⚠️ 处理: 无类型注解,默认为 Any")
annotation = Annotated[
Any,
Field(),
# 🤷 默认将无类型参数视为字符串
WithJsonSchema({"title": param.name, "type": "string"}),
]
# 获取类型化注解
typed_annotation = _get_typed_annotation(annotation, globalns)
print(f" 🔄 类型化注解: {typed_annotation}")
# 创建字段信息
field_info = FieldInfo.from_annotated_attribute(
typed_annotation,
param.default if param.default is not inspect.Parameter.empty else PydanticUndefined,
)
print(f" ✅ 字段信息: annotation={field_info.annotation}, default={field_info.default}")
# 处理参数名与 BaseModel 内置方法冲突的情况,这是必要的,因为 Pydantic 会因此发出警告
# 例如:'dict' 或 'json' 等
if hasattr(BaseModel, param.name) and callable(getattr(BaseModel, param.name)):
print(f" ⚠️ 冲突处理: 参数名 '{param.name}' 与 BaseModel 方法冲突")
# 使用别名机制避免警告
field_info.alias = param.name
field_info.validation_alias = param.name
field_info.serialization_alias = param.name
# 内部使用带前缀的参数名
internal_name = f"field_{param.name}"
dynamic_pydantic_model_params[internal_name] = (field_info.annotation, field_info)
print(f" -> 使用内部名称: {internal_name}")
else:
dynamic_pydantic_model_params[param.name] = (field_info.annotation, field_info)
print(f"\n📊 参数处理总结:")
print(f" 总参数数: {len(params)}")
print(f" 处理参数数: {processed_count}")
print(f" 模型字段: {list(dynamic_pydantic_model_params.keys())}")
# 步骤3: 动态创建一个 Pydantic 模型来表示函数参数
arguments_model_name = f"{func.__name__}Arguments"
print(f"\n🏗️ 创建 Pydantic 模型:")
print(f" 模型名称: {arguments_model_name}")
print(f" 基类: {ArgModelBase}")
arguments_model = create_model(
arguments_model_name,
**dynamic_pydantic_model_params,
__base__=ArgModelBase,
)
print(f" ✅ 模型创建成功: {arguments_model}")
# 生成并打印 JSON Schema
try:
# 这部分对应于 func_metadata() 之后的那行代码,提前进行查看
schema = arguments_model.model_json_schema(by_alias=True)
print_json(schema, f"{arguments_model_name} JSON Schema")
except Exception as e:
print(f"❌ Schema 生成失败: {e}")
# 步骤4: 处理返回值(完全按照原版本逻辑)
print(f"\n🎯 返回值处理:")
print(f" structured_output 参数: {structured_output}")
print(f" 返回注解: {sig.return_annotation}")
if structured_output is False:
print(f" 🔚 明确不需要结构化输出")
result = FuncMetadata(arg_model=arguments_model)
print(f" ✅ 返回元数据: {result}")
return result
# 基于返回类型注释设置结构化输出支持
if sig.return_annotation is inspect.Parameter.empty and structured_output is True:
print(f" ❌ 错误: 要求结构化输出但无返回注解")
raise InvalidSignature(f"函数 {func.__name__}: 结构化输出需要返回注释")
output_info = FieldInfo.from_annotation(_get_typed_annotation(sig.return_annotation, globalns))
annotation = output_info.annotation
print(f" 经过_get_typed_annotation处理后的类型: {annotation}")
output_model, output_schema, wrap_output = _try_create_model_and_schema(
annotation, func.__name__, output_info
)
if output_model:
print(f" ✅ 输出模型创建成功: {output_model}")
if output_schema:
print_json(output_schema, "返回值 JSON Schema")
else:
print(f" ℹ️ 未创建输出模型")
print(f" wrap_output: {wrap_output}")
# 模型创建失败或产生警告 - 无结构化输出
if output_model is None and structured_output is True:
print(f" ❌ 结构化输出失败: 返回类型不可序列化")
raise InvalidSignature(
f"函数 {func.__name__}: 返回类型 {annotation} 不支持结构化输出"
)
# 创建最终结果
result = FuncMetadata(
arg_model=arguments_model,
output_schema=output_schema,
output_model=output_model,
wrap_output=wrap_output,
)
print(f"\n✨ func_metadata 处理完成!")
print(f" 最终结果: {result}")
print(f"{'='*60}\n")
return result
except Exception as e:
print(f"❌ 处理过程中出错: {e}")
import traceback
print(f"详细错误信息:\n{traceback.format_exc()}")
return None
def test():
"""测试各种类型的函数"""
# 混合注解
print("\n\n📌 测试1: 混合类型注解")
def func(
    data,  # 无类型注解
    format: str = "json",  # 有注解+默认值
    count: Optional[int] = None,  # 复杂类型+默认值
    validate: bool = True  # 基础类型+默认值
):  # 无返回类型注解
    """展示各种注解情况"""
    return data

debug_func_metadata(func, skip_names="count")
# 前缀参数测试
print("\n\n📌 测试2: 前缀参数冲突")
def prefix_func(_private: str, field_test: int) -> str:
"""前缀参数"""
return "test"
debug_func_metadata(prefix_func)
print("\n\n📌 测试3: 结构化输出对比")
def add(a: int, b: int) -> str:
return a + b
print("📌 无结构化")
debug_func_metadata(add, structured_output=False)
print("\n\n📌 结构化")
debug_func_metadata(add, structured_output=True)
if __name__ == "__main__":
test()输出:
json
📌 测试1: 混合类型注解

============================================================
🔍 开始解析函数: func
   文档字符串: 展示各种注解情况
============================================================

📋 函数签名分析:
   完整签名: (data, format: str = 'json', count: Optional[int] = None, validate: bool = True)
   返回类型: <class 'inspect._empty'>
   参数数量: 4

🔧 参数处理详情:
   跳过的参数名: ['c', 'o', 'u', 'n', 't']

   [1] 参数名: data
        原始注解: <class 'inspect._empty'>
        参数种类: POSITIONAL_OR_KEYWORD
        默认值: <class 'inspect._empty'>
        ⚠️  处理: 无类型注解,默认为 Any
        🔄 类型化注解: typing.Annotated[typing.Any, FieldInfo(annotation=NoneType, required=True), WithJsonSchema(json_schema={'title': 'data', 'type': 'string'}, mode=None)]
        ✅ 字段信息: annotation=typing.Any, default=PydanticUndefined

   [2] 参数名: format
        原始注解: <class 'str'>
        参数种类: POSITIONAL_OR_KEYWORD
        默认值: json
        🔄 类型化注解: <class 'str'>
        ✅ 字段信息: annotation=<class 'str'>, default=json

   [3] 参数名: count
        原始注解: typing.Optional[int]
        参数种类: POSITIONAL_OR_KEYWORD
        默认值: None
        ⏭️  跳过此参数

   [4] 参数名: validate
        原始注解: <class 'bool'>
        参数种类: POSITIONAL_OR_KEYWORD
        默认值: True
        🔄 类型化注解: <class 'bool'>
        ✅ 字段信息: annotation=<class 'bool'>, default=True
        ⚠️  冲突处理: 参数名 'validate' 与 BaseModel 方法冲突
            -> 使用内部名称: field_validate

📊 参数处理总结:
   总参数数: 4
   处理参数数: 3
   模型字段: ['data', 'format', 'field_validate']

🏗️  创建 Pydantic 模型:
   模型名称: funcArguments
   基类: <class 'mcp.server.fastmcp.utilities.func_metadata.ArgModelBase'>
   ✅ 模型创建成功: <class '__main__.funcArguments'>

📄 funcArguments JSON Schema:
{
  "properties": {
    "data": {
      "title": "data",
      "type": "string"
    },
    "format": {
      "default": "json",
      "title": "Format",
      "type": "string"
    },
    "validate": {
      "default": true,
      "title": "Validate",
      "type": "boolean"
    }
  },
  "required": [
    "data"
  ],
  "title": "funcArguments",
  "type": "object"
}

🎯 返回值处理:
   structured_output 参数: None
   返回注解: <class 'inspect._empty'>
      经过_get_typed_annotation处理后的类型: <class 'inspect._empty'>
      ℹ️  未创建输出模型
      wrap_output: False

✨ func_metadata 处理完成!
   最终结果: arg_model=<class '__main__.funcArguments'> output_schema=None output_model=None wrap_output=False
============================================================


📌 测试2: 前缀参数冲突

============================================================
🔍 开始解析函数: prefix_func
   文档字符串: 前缀参数
============================================================

📋 函数签名分析:
   完整签名: (_private: str, field_test: int) -> str
   返回类型: <class 'str'>
   参数数量: 2

🔧 参数处理详情:
   跳过的参数名: []

   [1] 参数名: _private
        原始注解: <class 'str'>
        参数种类: POSITIONAL_OR_KEYWORD
        默认值: <class 'inspect._empty'>
        ❌ 错误: 参数名不能以 '_' 开头
❌ 处理过程中出错: prefix_func 的参数 _private 不能以 '_' 开头
详细错误信息:
Traceback (most recent call last):
  File "/tmp/ipython-input-16-54014459.py", line 78, in debug_func_metadata
    raise InvalidSignature(f"{func.__name__} 的参数 {param.name} 不能以 '_' 开头")
mcp.server.fastmcp.exceptions.InvalidSignature: prefix_func 的参数 _private 不能以 '_' 开头


📌 测试3: 结构化输出对比
📌 无结构化

============================================================
🔍 开始解析函数: add
   文档字符串: None
============================================================

📋 函数签名分析:
   完整签名: (a: int, b: int) -> str
   返回类型: <class 'str'>
   参数数量: 2

🔧 参数处理详情:
   跳过的参数名: []

   [1] 参数名: a
        原始注解: <class 'int'>
        参数种类: POSITIONAL_OR_KEYWORD
        默认值: <class 'inspect._empty'>
        🔄 类型化注解: <class 'int'>
        ✅ 字段信息: annotation=<class 'int'>, default=PydanticUndefined

   [2] 参数名: b
        原始注解: <class 'int'>
        参数种类: POSITIONAL_OR_KEYWORD
        默认值: <class 'inspect._empty'>
        🔄 类型化注解: <class 'int'>
        ✅ 字段信息: annotation=<class 'int'>, default=PydanticUndefined

📊 参数处理总结:
   总参数数: 2
   处理参数数: 2
   模型字段: ['a', 'b']

🏗️  创建 Pydantic 模型:
   模型名称: addArguments
   基类: <class 'mcp.server.fastmcp.utilities.func_metadata.ArgModelBase'>
   ✅ 模型创建成功: <class '__main__.addArguments'>

📄 addArguments JSON Schema:
{
  "properties": {
    "a": {
      "title": "A",
      "type": "integer"
    },
    "b": {
      "title": "B",
      "type": "integer"
    }
  },
  "required": [
    "a",
    "b"
  ],
  "title": "addArguments",
  "type": "object"
}

🎯 返回值处理:
   structured_output 参数: False
   返回注解: <class 'str'>
   🔚 明确不需要结构化输出
   ✅ 返回元数据: arg_model=<class '__main__.addArguments'> output_schema=None output_model=None wrap_output=False


📌 结构化

============================================================
🔍 开始解析函数: add
   文档字符串: None
============================================================

📋 函数签名分析:
   完整签名: (a: int, b: int) -> str
   返回类型: <class 'str'>
   参数数量: 2

🔧 参数处理详情:
   跳过的参数名: []

   [1] 参数名: a
        原始注解: <class 'int'>
        参数种类: POSITIONAL_OR_KEYWORD
        默认值: <class 'inspect._empty'>
        🔄 类型化注解: <class 'int'>
        ✅ 字段信息: annotation=<class 'int'>, default=PydanticUndefined

   [2] 参数名: b
        原始注解: <class 'int'>
        参数种类: POSITIONAL_OR_KEYWORD
        默认值: <class 'inspect._empty'>
        🔄 类型化注解: <class 'int'>
        ✅ 字段信息: annotation=<class 'int'>, default=PydanticUndefined

📊 参数处理总结:
   总参数数: 2
   处理参数数: 2
   模型字段: ['a', 'b']

🏗️  创建 Pydantic 模型:
   模型名称: addArguments
   基类: <class 'mcp.server.fastmcp.utilities.func_metadata.ArgModelBase'>
   ✅ 模型创建成功: <class '__main__.addArguments'>

📄 addArguments JSON Schema:
{
  "properties": {
    "a": {
      "title": "A",
      "type": "integer"
    },
    "b": {
      "title": "B",
      "type": "integer"
    }
  },
  "required": [
    "a",
    "b"
  ],
  "title": "addArguments",
  "type": "object"
}

🎯 返回值处理:
   structured_output 参数: True
   返回注解: <class 'str'>
      经过_get_typed_annotation处理后的类型: <class 'str'>
      ✅ 输出模型创建成功: <class 'mcp.server.fastmcp.utilities.func_metadata.addOutput'>

📄 返回值 JSON Schema:
{
  "properties": {
    "result": {
      "title": "Result",
      "type": "string"
    }
  },
  "required": [
    "result"
  ],
  "title": "addOutput",
  "type": "object"
}
      wrap_output: True

✨ func_metadata 处理完成!
   最终结果: arg_model=<class '__main__.addArguments'> output_schema={'properties': {'result': {'title': 'Result', 'type': 'string'}}, 'required': ['result'], 'title': 'addOutput', 'type': 'object'} output_model=<class 'mcp.server.fastmcp.utilities.func_metadata.addOutput'> wrap_output=True
============================================================
debug_message_validator.py
官方源码:prompts/base.py
调试文件下载 :debug_message_validator.py
python
#!/usr/bin/env python3
"""
message_validator 调试工具,可以保存为 debug_message_validator.py 执行

演示 FastMCP 中 message_validator.validate_python 的实际作用,
展示如何将字典转换为 Message 对象,以及 Pydantic Union 类型的选择行为。
"""

from typing import Any, Literal
from pydantic import BaseModel, TypeAdapter
from mcp.types import ContentBlock, TextContent


class Message(BaseModel):
    """基础消息类 - MCP 协议中所有消息的基类"""
    role: Literal["user", "assistant"]
    content: ContentBlock

    def __init__(self, content: str | ContentBlock, **kwargs: Any):
        # 如果内容是字符串,自动包装为 TextContent
        if isinstance(content, str):
            content = TextContent(type="text", text=content)
        super().__init__(content=content, **kwargs)


class UserMessage(Message):
    """来自用户的消息

    注意:role 字段允许 "user" 或 "assistant",默认为 "user"
    """
    role: Literal["user", "assistant"] = "user"

    def __init__(self, content: str | ContentBlock, **kwargs: Any):
        super().__init__(content=content, **kwargs)


class AssistantMessage(Message):
    """来自助手的消息

    注意:role 字段允许 "user" 或 "assistant",默认为 "assistant"
    """
    role: Literal["user", "assistant"] = "assistant"

    def __init__(self, content: str | ContentBlock, **kwargs: Any):
        super().__init__(content=content, **kwargs)


# FastMCP 中的 message_validator 定义
# TypeAdapter 用于验证和转换数据为 Union 类型
message_validator = TypeAdapter[UserMessage | AssistantMessage](UserMessage | AssistantMessage)


def demo_message_validator():
    """
    调试版本的 message_validator 演示
    展示 FastMCP 中字典如何转换为 Message 对象
    """
    print(f"\n{'='*60}")
    print(f"🔍 开始调试 message_validator")
    print(f"   展示字典 → Message 对象的转换过程")
    print(f"{'='*60}")

    # 步骤1: 分析类型定义
    print(f"\n📋 类型定义分析:")

    # 正确获取 Pydantic 字段默认值
    user_role_field = UserMessage.model_fields.get('role')
    assistant_role_field = AssistantMessage.model_fields.get('role')

    user_default = user_role_field.default if user_role_field else "无字段"
    assistant_default = assistant_role_field.default if assistant_role_field else "无字段"

    print(f"   UserMessage 默认 role: {user_default}")
    print(f"   AssistantMessage 默认 role: {assistant_default}")
    print(f"   Union 类型顺序: UserMessage | AssistantMessage")

    # 验证实际行为
    print(f"\n🔧 实例化验证:")
    user_instance = UserMessage(content="测试")
    assistant_instance = AssistantMessage(content="测试")
    print(f"   UserMessage() 实际 role: {user_instance.role}")
    print(f"   AssistantMessage() 实际 role: {assistant_instance.role}")

    # 准备测试用例
    test_cases = [
        {
            "name": "用户消息字典",
            "data": {
                "role": "user",
                "content": "简单的文本消息"
            }
        },
        {
            "name": "助手消息字典",
            "data": {
                "role": "assistant",
                "content": "我是助手的回复"
            }
        }
    ]

    print(f"\n🔧 转换测试详情:")
    print(f"   测试数量: {len(test_cases)}")

    # 步骤2: 执行转换测试
    for idx, test_case in enumerate(test_cases, 1):
        print(f"\n   [{idx}] 测试名称: {test_case['name']}")
        print(f"        输入数据: {test_case['data']}")
        print(f"        字段分析:")
        print(f"            role = '{test_case['data']['role']}'")
        print(f"            content = '{test_case['data']['content']}'")

        try:
            # 调用 message_validator.validate_python
            result = message_validator.validate_python(test_case['data'])

            print(f"        ✅ 转换成功!")
            print(f"        🔄 转换结果:")
            print(f"            类型: {type(result).__name__}")
            print(f"            角色: {result.role}")
            print(f"            内容类型: {type(result.content).__name__}")

            if hasattr(result.content, 'text'):
                print(f"            内容文本: {result.content.text}")

            # 分析异常情况
            if test_case['data']['role'] == 'assistant' and isinstance(result, UserMessage):
                print(f"        ⚠️  异常发现: role='assistant' 但返回了 UserMessage")
                print(f"            -> 原因: Pydantic Union 按顺序验证")
                print(f"            -> UserMessage 也接受 role='assistant'")
                print(f"            -> 第一个成功验证的类型被选择")

        except Exception as e:
            print(f"        ❌ 转换失败:")
            print(f"            错误类型: {type(e).__name__}")
            print(f"            错误信息: {e}")

    # 步骤3: 测试错误处理
    print(f"\n📊 错误处理测试:")
    print(f"   测试 message_validator 的错误处理能力")

    # 准备错误测试用例
    error_cases = [
        {
            "name": "缺少 role 字段",
            "data": {
                "content": "没有角色信息"
            },
            "expected": "应该使用默认角色或报错"
        },
        {
            "name": "错误的 role 值",
            "data": {
                "role": "system",  # 不支持的角色
                "content": "系统消息"
            },
            "expected": "应该验证失败"
        },
        {
            "name": "缺少 content 字段",
            "data": {
                "role": "user"
            },
            "expected": "必需字段缺失"
        }
    ]

    for idx, test_case in enumerate(error_cases, 1):
        print(f"\n   [{idx}] 错误场景: {test_case['name']}")
        print(f"        输入数据: {test_case['data']}")
        print(f"        预期行为: {test_case['expected']}")

        try:
            result = message_validator.validate_python(test_case['data'])
            print(f"        ✅ 意外成功!")
            print(f"            结果: {result}")
            print(f"            类型: {type(result).__name__}")
        except Exception as e:
            print(f"        ❌ 预期的错误:")
            print(f"            错误类型: {type(e).__name__}")
            print(f"            错误信息: {str(e)}")


def demo_prompt_render_simulation():
    """
    模拟 Prompt.render() 中的消息转换过程
    展示用户函数返回值如何被处理成标准 MCP 消息
    """
    print(f"\n{'='*60}")
    print(f"🔄 模拟 Prompt.render() 消息转换")
    print(f"   展示用户函数返回值 → 标准 MCP 消息的过程")
    print(f"{'='*60}")

    # 准备用户函数可能返回的各种类型
    user_returns = [
        "简单字符串",
        {
            "role": "user",
            "content": "字典格式的用户消息"
        },
        {
            "role": "assistant",
            "content": "字典格式的助手消息"
        },
        UserMessage(content="直接的 UserMessage 对象"),
        AssistantMessage(content="直接的 AssistantMessage 对象"),
        ["多个", "字符串"],
        [
            "混合类型",
            {"role": "user", "content": "字典消息"},
            AssistantMessage(content="对象消息")
        ]
    ]

    print(f"\n📋 模拟场景分析:")
    print(f"   返回类型数量: {len(user_returns)}")
    print(f"   覆盖场景: 字符串、字典、对象、列表、混合类型")

    def simulate_render_conversion(result):
        """
        模拟 render() 方法中的转换逻辑
        按照 FastMCP 的实际处理顺序进行转换
        """
        print(f"        🔄 开始转换处理:")
        print(f"            原始类型: {type(result).__name__}")

        # 步骤1: 规范化为列表
        if not isinstance(result, list | tuple):
            result = [result]
            print(f"            -> 单项转为列表: [1项]")
        else:
            print(f"            -> 已是列表: [{len(result)}项]")

        # 步骤2: 逐项转换为消息
        messages = []
        for idx, msg in enumerate(result, 1):
            print(f"            项目{idx}: {type(msg).__name__}")

            try:
                if isinstance(msg, Message):
                    # Message 对象直接使用
                    messages.append(msg)
                    print(f"                ✅ 直接使用: {type(msg).__name__}({msg.role})")
                    print(f"                   内容: {str(msg.content)}")

                elif isinstance(msg, dict):
                    # 字典通过 message_validator 转换
                    converted = message_validator.validate_python(msg)
                    messages.append(converted)
                    print(f"                🔄 字典转换: {msg}")
                    print(f"                   结果: {type(converted).__name__}({converted.role})")

                elif isinstance(msg, str):
                    # 字符串包装为 UserMessage
                    content = TextContent(type="text", text=msg)
                    user_msg = UserMessage(content=content)
                    messages.append(user_msg)
                    print(f"                📝 字符串转换: '{msg}'")
                    print(f"                   结果: UserMessage(user)")

                else:
                    # 其他类型序列化为 JSON
                    import json
                    content_str = json.dumps(msg, ensure_ascii=False, indent=2)
                    user_msg = UserMessage(content=content_str)
                    messages.append(user_msg)
                    print(f"                📦 JSON转换: {type(msg).__name__}")
                    print(f"                   结果: UserMessage(user)")

            except Exception as e:
                print(f"                ❌ 转换失败: {str(e)}")

        return messages

    # 步骤3: 执行场景测试
    print(f"\n🔧 场景测试详情:")

    for idx, user_return in enumerate(user_returns, 1):
        print(f"\n   [{idx}] 场景名称: 用户返回 {type(user_return).__name__}")
        print(f"        原始数据: {str(user_return)}")

        messages = simulate_render_conversion(user_return)

        print(f"        📊 转换总结:")
        print(f"            生成消息数: {len(messages)}")

        for msg_idx, msg in enumerate(messages, 1):
            print(f"            消息{msg_idx}: {type(msg).__name__}({msg.role})")
            print(f"                     内容: {str(msg.content)}")


def debug_pydantic_union_behavior():
    """
    深入分析 Pydantic Union 类型选择行为
    解释为什么 role='assistant' 时返回 UserMessage 而不是 AssistantMessage
    """
    print(f"\n{'='*60}")
    print(f"🔍 深入分析 Pydantic Union 类型选择")
    print(f"   解释 Union 类型的验证顺序和选择逻辑")
    print(f"{'='*60}")

    # 准备测试数据
    test_data = {
        "role": "assistant",
        "content": "助手消息"
    }

    print(f"\n📋 测试数据分析:")
    print(f"   输入数据: {test_data}")
    print(f"   预期类型: AssistantMessage(因为 role='assistant')")

    print(f"\n🔧 验证步骤:")

    # 步骤1: 直接构造 UserMessage
    print(f"\n   [1] 直接构造 UserMessage:")
    try:
        user_msg = UserMessage(**test_data)
        print(f"        ✅ 构造成功!")
        print(f"            结果类型: {type(user_msg).__name__}")
        print(f"            角色字段: {user_msg.role}")
        print(f"            ℹ️  说明: UserMessage 接受 role='assistant'")
    except Exception as e:
        print(f"        ❌ 构造失败: {e}")

    # 步骤2: 直接构造 AssistantMessage
    print(f"\n   [2] 直接构造 AssistantMessage:")
    try:
        assistant_msg = AssistantMessage(**test_data)
        print(f"        ✅ 构造成功!")
        print(f"            结果类型: {type(assistant_msg).__name__}")
        print(f"            角色字段: {assistant_msg.role}")
        print(f"            ℹ️  说明: AssistantMessage 也接受 role='assistant'")
    except Exception as e:
        print(f"        ❌ 构造失败: {e}")

    # 步骤3: TypeAdapter 选择
    print(f"\n   [3] TypeAdapter Union 选择:")
    try:
        adapter_result = message_validator.validate_python(test_data)
        print(f"        📊 最终结果:")
        print(f"            选择类型: {type(adapter_result).__name__}")
        print(f"            角色字段: {adapter_result.role}")
    except Exception as e:
        print(f"        ❌ TypeAdapter 转换失败: {e}")

    print(f"\n✨ 结论总结:")
    print(f"   📝 核心原理: Pydantic Union 按顺序验证")
    print(f"       1. Union[UserMessage, AssistantMessage] 先验证 UserMessage")
    print(f"       2. UserMessage.role 允许 'user' | 'assistant'")
    print(f"       3. role='assistant' 通过 UserMessage 验证")
    print(f"       4. 验证成功,返回 UserMessage 实例")
    print(f"       5. 不再尝试 AssistantMessage")
    print(f"   🎯 实际影响:")
    print(f"       - role='assistant' 总是返回 UserMessage")
    print(f"       - 只有明确指定类型才能获得 AssistantMessage")
    print(f"       - 或许是 bug,但本来二者的定义就一样,只是类名不同,不再继续深究")


def test():
    """测试各种类型的 message_validator 行为"""
    print("\n\n📌 测试1: 基础转换行为")
    demo_message_validator()

    print("\n\n📌 测试2: Prompt.render() 模拟")
    demo_prompt_render_simulation()

    print("\n\n📌 测试3: Pydantic Union 选择分析")
    debug_pydantic_union_behavior()


if __name__ == "__main__":
test()输出:
json
📌 测试1: 基础转换行为

============================================================
🔍 开始调试 message_validator
   展示字典 → Message 对象的转换过程
============================================================

📋 类型定义分析:
   UserMessage 默认 role: user
   AssistantMessage 默认 role: assistant
   Union 类型顺序: UserMessage | AssistantMessage

🔧 实例化验证:
   UserMessage() 实际 role: user
   AssistantMessage() 实际 role: assistant

🔧 转换测试详情:
   测试数量: 2

   [1] 测试名称: 用户消息字典
        输入数据: {'role': 'user', 'content': '简单的文本消息'}
        字段分析:
            role = 'user'
            content = '简单的文本消息'
        ✅ 转换成功!
        🔄 转换结果:
            类型: UserMessage
            角色: user
            内容类型: TextContent
            内容文本: 简单的文本消息

   [2] 测试名称: 助手消息字典
        输入数据: {'role': 'assistant', 'content': '我是助手的回复'}
        字段分析:
            role = 'assistant'
            content = '我是助手的回复'
        ✅ 转换成功!
        🔄 转换结果:
            类型: UserMessage
            角色: assistant
            内容类型: TextContent
            内容文本: 我是助手的回复
        ⚠️  异常发现: role='assistant' 但返回了 UserMessage
            -> 原因: Pydantic Union 按顺序验证
            -> UserMessage 也接受 role='assistant'
            -> 第一个成功验证的类型被选择

📊 错误处理测试:
   测试 message_validator 的错误处理能力

   [1] 错误场景: 缺少 role 字段
        输入数据: {'content': '没有角色信息'}
        预期行为: 应该使用默认角色或报错
        ✅ 意外成功!
            结果: role='user' content=TextContent(type='text', text='没有角色信息', annotations=None, meta=None)
            类型: UserMessage

   [2] 错误场景: 错误的 role 值
        输入数据: {'role': 'system', 'content': '系统消息'}
        预期行为: 应该验证失败
        ❌ 预期的错误:
            错误类型: ValidationError
            错误信息: 2 validation errors for union[UserMessage,AssistantMessage]
UserMessage.role
  Input should be 'user' or 'assistant' [type=literal_error, input_value='system', input_type=str]
    For further information visit https://errors.pydantic.dev/2.9/v/literal_error
AssistantMessage.role
  Input should be 'user' or 'assistant' [type=literal_error, input_value='system', input_type=str]
    For further information visit https://errors.pydantic.dev/2.9/v/literal_error

   [3] 错误场景: 缺少 content 字段
        输入数据: {'role': 'user'}
        预期行为: 必需字段缺失
        ❌ 预期的错误:
            错误类型: TypeError
            错误信息: UserMessage.__init__() missing 1 required positional argument: 'content'


📌 测试2: Prompt.render() 模拟

============================================================
🔄 模拟 Prompt.render() 消息转换
   展示用户函数返回值 → 标准 MCP 消息的过程
============================================================

📋 模拟场景分析:
   返回类型数量: 7
   覆盖场景: 字符串、字典、对象、列表、混合类型

🔧 场景测试详情:

   [1] 场景名称: 用户返回 str
        原始数据: 简单字符串
        🔄 开始转换处理:
            原始类型: str
            -> 单项转为列表: [1项]
            项目1: str
                📝 字符串转换: '简单字符串'
                   结果: UserMessage(user)
        📊 转换总结:
            生成消息数: 1
            消息1: UserMessage(user)
                     内容: type='text' text='简单字符串' annotations=None meta=None

   [2] 场景名称: 用户返回 dict
        原始数据: {'role': 'user', 'content': '字典格式的用户消息'}
        🔄 开始转换处理:
            原始类型: dict
            -> 单项转为列表: [1项]
            项目1: dict
                🔄 字典转换: {'role': 'user', 'content': '字典格式的用户消息'}
                   结果: UserMessage(user)
        📊 转换总结:
            生成消息数: 1
            消息1: UserMessage(user)
                     内容: type='text' text='字典格式的用户消息' annotations=None meta=None

   [3] 场景名称: 用户返回 dict
        原始数据: {'role': 'assistant', 'content': '字典格式的助手消息'}
        🔄 开始转换处理:
            原始类型: dict
            -> 单项转为列表: [1项]
            项目1: dict
                🔄 字典转换: {'role': 'assistant', 'content': '字典格式的助手消息'}
                   结果: UserMessage(assistant)
        📊 转换总结:
            生成消息数: 1
            消息1: UserMessage(assistant)
                     内容: type='text' text='字典格式的助手消息' annotations=None meta=None

   [4] 场景名称: 用户返回 UserMessage
        原始数据: role='user' content=TextContent(type='text', text='直接的 UserMessage 对象', annotations=None, meta=None)
        🔄 开始转换处理:
            原始类型: UserMessage
            -> 单项转为列表: [1项]
            项目1: UserMessage
                ✅ 直接使用: UserMessage(user)
                   内容: type='text' text='直接的 UserMessage 对象' annotations=None meta=None
        📊 转换总结:
            生成消息数: 1
            消息1: UserMessage(user)
                     内容: type='text' text='直接的 UserMessage 对象' annotations=None meta=None

   [5] 场景名称: 用户返回 AssistantMessage
        原始数据: role='assistant' content=TextContent(type='text', text='直接的 AssistantMessage 对象', annotations=None, meta=None)
        🔄 开始转换处理:
            原始类型: AssistantMessage
            -> 单项转为列表: [1项]
            项目1: AssistantMessage
                ✅ 直接使用: AssistantMessage(assistant)
                   内容: type='text' text='直接的 AssistantMessage 对象' annotations=None meta=None
        📊 转换总结:
            生成消息数: 1
            消息1: AssistantMessage(assistant)
                     内容: type='text' text='直接的 AssistantMessage 对象' annotations=None meta=None

   [6] 场景名称: 用户返回 list
        原始数据: ['多个', '字符串']
        🔄 开始转换处理:
            原始类型: list
            -> 已是列表: [2项]
            项目1: str
                📝 字符串转换: '多个'
                   结果: UserMessage(user)
            项目2: str
                📝 字符串转换: '字符串'
                   结果: UserMessage(user)
        📊 转换总结:
            生成消息数: 2
            消息1: UserMessage(user)
                     内容: type='text' text='多个' annotations=None meta=None
            消息2: UserMessage(user)
                     内容: type='text' text='字符串' annotations=None meta=None

   [7] 场景名称: 用户返回 list
        原始数据: ['混合类型', {'role': 'user', 'content': '字典消息'}, AssistantMessage(role='assistant', content=TextContent(type='text', text='对象消息', annotations=None, meta=None))]
        🔄 开始转换处理:
            原始类型: list
            -> 已是列表: [3项]
            项目1: str
                📝 字符串转换: '混合类型'
                   结果: UserMessage(user)
            项目2: dict
                🔄 字典转换: {'role': 'user', 'content': '字典消息'}
                   结果: UserMessage(user)
            项目3: AssistantMessage
                ✅ 直接使用: AssistantMessage(assistant)
                   内容: type='text' text='对象消息' annotations=None meta=None
        📊 转换总结:
            生成消息数: 3
            消息1: UserMessage(user)
                     内容: type='text' text='混合类型' annotations=None meta=None
            消息2: UserMessage(user)
                     内容: type='text' text='字典消息' annotations=None meta=None
            消息3: AssistantMessage(assistant)
                     内容: type='text' text='对象消息' annotations=None meta=None


📌 测试3: Pydantic Union 选择分析

============================================================
🔍 深入分析 Pydantic Union 类型选择
   解释 Union 类型的验证顺序和选择逻辑
============================================================

📋 测试数据分析:
   输入数据: {'role': 'assistant', 'content': '助手消息'}
   预期类型: AssistantMessage(因为 role='assistant')

🔧 验证步骤:

   [1] 直接构造 UserMessage:
        ✅ 构造成功!
            结果类型: UserMessage
            角色字段: assistant
            ℹ️  说明: UserMessage 接受 role='assistant'

   [2] 直接构造 AssistantMessage:
        ✅ 构造成功!
            结果类型: AssistantMessage
            角色字段: assistant
            ℹ️  说明: AssistantMessage 也接受 role='assistant'

   [3] TypeAdapter Union 选择:
        📊 最终结果:
            选择类型: UserMessage
            角色字段: assistant

✨ 结论总结:
   📝 核心原理: Pydantic Union 按顺序验证
       1. Union[UserMessage, AssistantMessage] 先验证 UserMessage
       2. UserMessage.role 允许 'user' | 'assistant'
       3. role='assistant' 通过 UserMessage 验证
       4. 验证成功,返回 UserMessage 实例
       5. 不再尝试 AssistantMessage
   🎯 实际影响:
       - role='assistant' 总是返回 UserMessage
       - 只有明确指定类型才能获得 AssistantMessage
       - 或许是 bug,但本来二者的定义就一样,只是类名不同,不再继续深究