市面上存在着各种文件存储平台,例如阿里云 OSS、腾讯云 COS、Amazon S3、MinIO、RustFS等。对接不同的文件存储平台需要使用不同的SDK,一旦切换平台代码改动非常麻烦。那么有没有一种万能通用的解决方案呢?今天给大家分享一款通用的文件存储解决方案
x-file-storage,能一行代码搞定文件存储!
简介
x-file-storage是一款通用的文件存储解决方案,能一行代码将实现文件存储,目前在Github上已有2k+Star。对接不同存储平台时,只需添加对应平台的SDK依赖即可,使用方法完全一致。
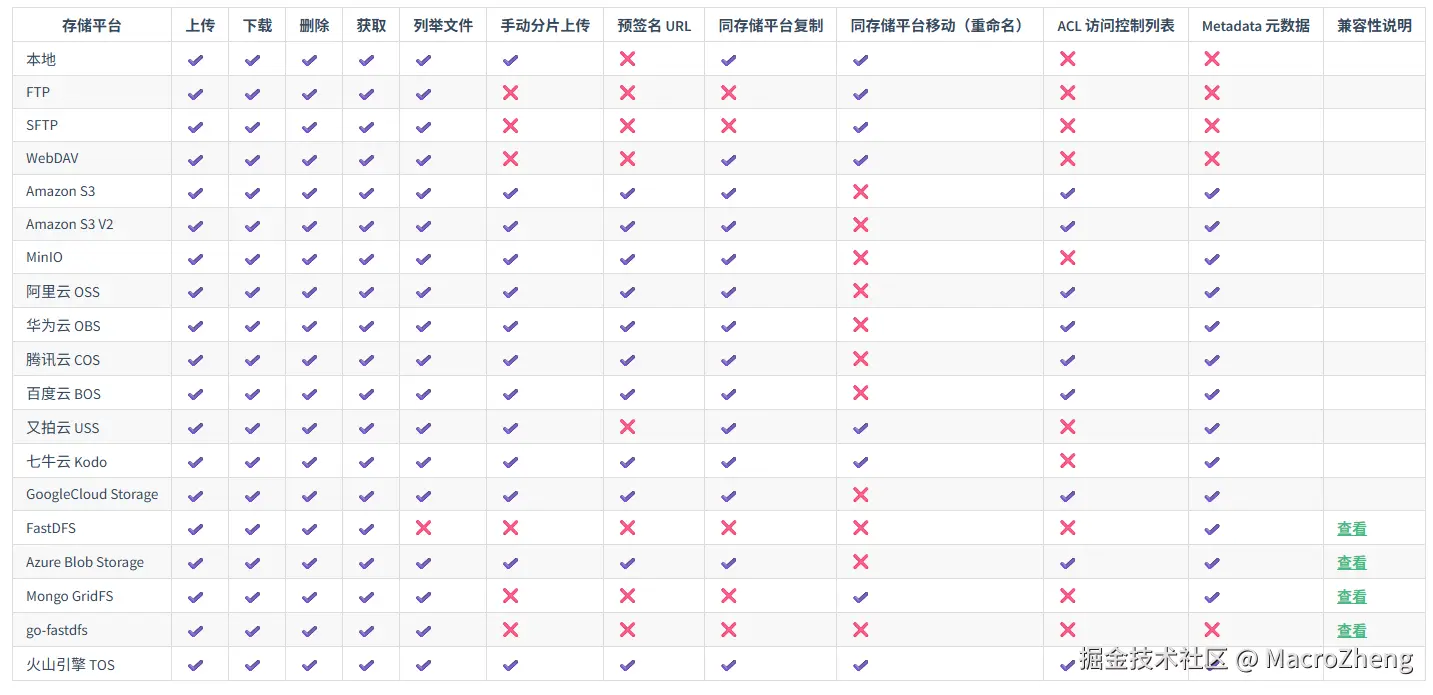
对于主流的存储平台,x-file-storage基本都支持,具体支持平台如下:
使用
这里以兼容Amazon S3 V2的RustFS和MinIO为例,来讲解下
x-file-storage的使用。
RustFS
RustFS是兼容Amazon S3 V2的对象存储平台,我们可以直接按Amazon S3 V2的方式实现文件存储。
- 这里以Docker环境下RustFS的运行为例,运行命令如下;
bash
docker run -p 9000:9000 --name rustfs \
-e RUSTFS_ACCESS_KEY=rustfsadmin \
-e RUSTFS_SECRET_KEY=rustfsadmin \
-v /mydata/rustfs/data:/data \
-v /etc/localtime:/etc/localtime \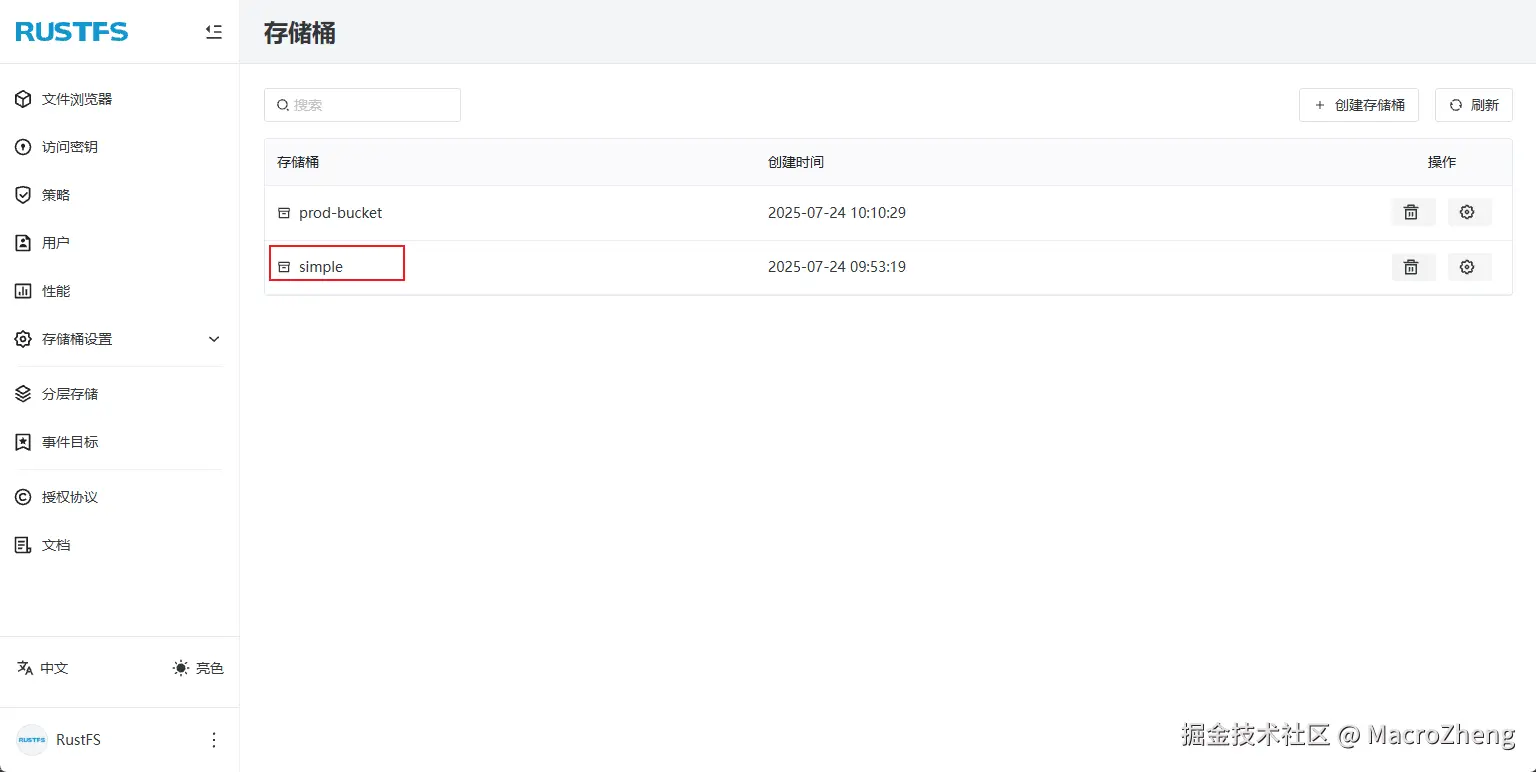
-d rustfs/rustfs- 运行成功后登录RustFS的控制台,创建一个叫
simple的Bucket,控制台访问地址:http://192.168.3.101:9000
- 接下来创建一个SpringBoot项目,在
pom.xml中添加x-file-storage和Amazon S3 V2的相关依赖;
xml
<!--x-file-storage相关依赖-->
<dependency>
    <groupId>org.dromara.x-file-storage</groupId>
    <artifactId>x-file-storage-spring</artifactId>
    <version>${x-file-storage.version}</version>
</dependency>
<!--AWS S3 Java SDK相关依赖-->
<dependency>
    <groupId>software.amazon.awssdk</groupId>
    <artifactId>s3</artifactId>
    <version>${aws-s3-sdk.version}</version>
</dependency>- 然后在
application.yml配置中添加amazon-s3-v2相关连接配置;
yaml
dromara:
  x-file-storage:
    default-platform: amazon-s3-v2-1
    amazon-s3-v2: # Amazon S3 V2
      - platform: amazon-s3-v2-1 # 存储平台标识
        enable-storage: true  # 启用存储
        access-key: rustfsadmin
        secret-key: rustfsadmin
        region: ap-east-1 # 必填
        end-point: http://192.168.3.101:9000 # 必填
        bucket-name: simple #桶名称
domain: http://192.168.3.101:9000/ # 访问域名- 之后在启动类上添加
@EnableFileStorage来启用文件存储功能;
java
@EnableFileStorage
@SpringBootApplication
public class SpringFileStorageApplication {
    public static void main(String[] args) {
        SpringApplication.run(SpringFileStorageApplication.class, args);
    }
}- 然后创建Controller,通过注入的FileStorageService中的方法,一行代码即可实现文件上传和删除操作!
java
/**
* @auther macrozheng
* @description x-file-storage文件存储存储管理Controller
* @date 2025/7/24
* @github https://github.com/macrozheng
*/
@Controller
@Tag(name = "FileStorageController", description = "x-file-storage文件存储存储管理")
@RequestMapping("/storage")
public class FileStorageController {
@Autowired
private FileStorageService fileStorageService;//注入实列
@Operation(summary = "文件上传")
@RequestMapping(value = "/upload", method = RequestMethod.POST, consumes = MediaType.MULTIPART_FORM_DATA_VALUE)
@ResponseBody
public CommonResult<FileStorageResult> upload(@RequestPart("file") MultipartFile file) {
FileInfo fileInfo = fileStorageService.of(file).upload();
FileStorageResult result = new FileStorageResult();
result.setName(fileInfo.getFilename());
result.setUrl(fileInfo.getUrl());
return CommonResult.success(result);
}
@Operation(summary = "文件删除")
@RequestMapping(value = "/delete", method = RequestMethod.POST)
@ResponseBody
public CommonResult delete(@RequestParam("objectName") String objectName) {
FileInfo fileInfo = new FileInfo().setFilename(objectName).setPlatform("amazon-s3-v2-1");
fileStorageService.delete(fileInfo);
return CommonResult.success(null);
}
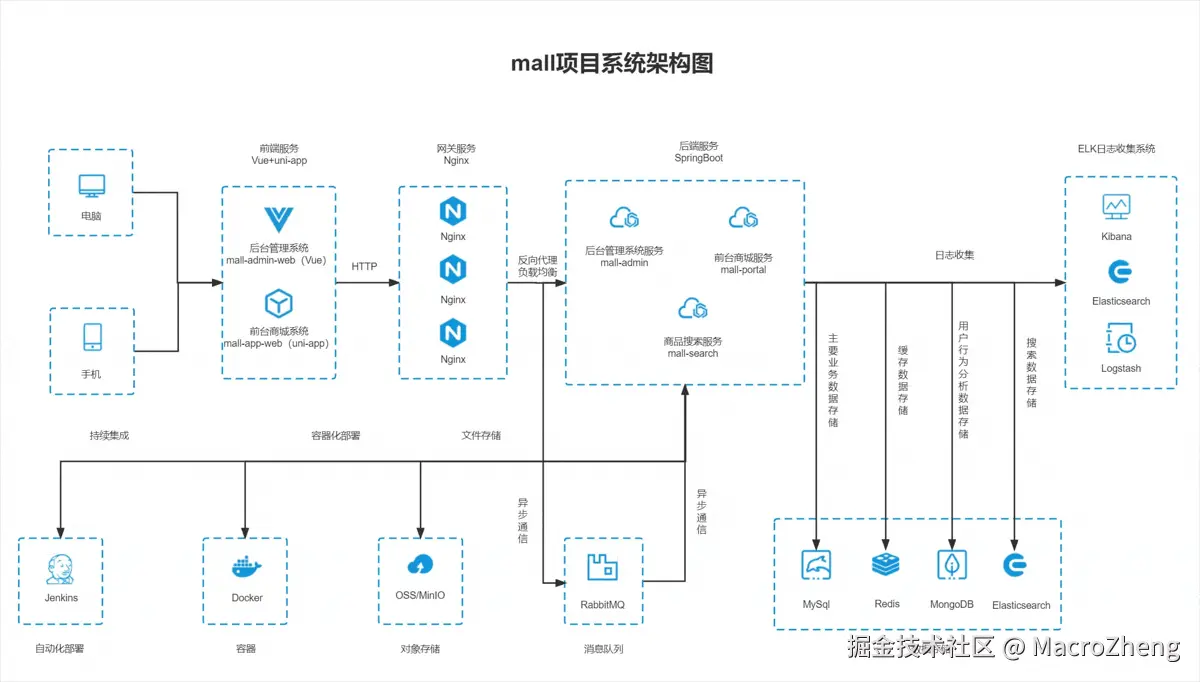
}这或许是一个对你有用的开源项目,mall项目是一套基于
SpringBoot3+ Vue 的电商系统(Github标星60K),后端支持多模块和2024最新微服务架构,采用Docker和K8S部署。包括前台商城项目和后台管理系统,能支持完整的订单流程!涵盖商品、订单、购物车、权限、优惠券、会员、支付等功能!
- Boot项目:github.com/macrozheng/...
- Cloud项目:github.com/macrozheng/...
- 教程网站:www.macrozheng.com
项目演示:
MinIO
- 这里以Docker环境下MinIO的运行为例,运行命令如下;
bash
docker run -p 9090:9000 -p 9001:9001 --name minio \
-v /mydata/minio/data:/data \
-e MINIO_ROOT_USER=minioadmin \
-e MINIO_ROOT_PASSWORD=minioadmin \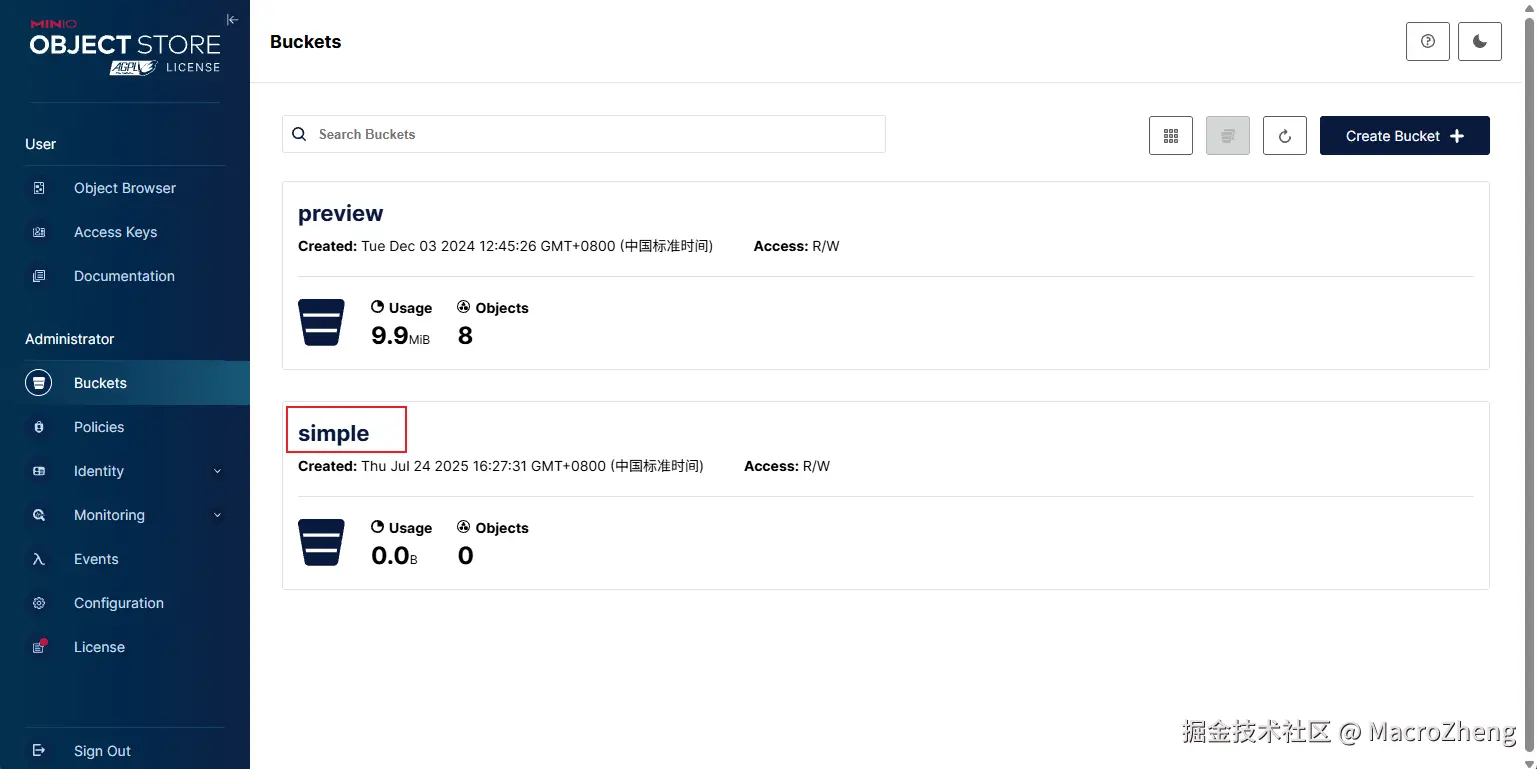
-d minio/minio server /data --console-address ":9001"- 运行成功后登录MinIO的控制台,创建一个叫
simple的Bucket,控制台访问地址:http://192.168.3.101:9001
- 在
pom.xml中再添加MinIO的相关依赖;
xml
<!--MinIO相关依赖-->
<dependency>
    <groupId>io.minio</groupId>
    <artifactId>minio</artifactId>
    <version>${minio-sdk.version}</version>
</dependency>- 然后在
application.yml配置中添加minio相关连接配置;
yaml
dromara:
  x-file-storage:
    minio:
      - platform: minio-1 # 存储平台标识
        enable-storage: true  # 启用存储
        access-key: minioadmin
        secret-key: minioadmin
        end-point: http://192.168.3.101:9090
        bucket-name: simple
domain: http://192.168.3.101:9090/ # 访问域名- 然后在Controller中添加MinIO的文件上传和删除接口,和之前的代码对比,只需用
setPlatform设置上传平台为minio-1即可。
java
/**
 * @auther macrozheng
 * @description x-file-storage文件存储存储管理Controller
 * @date 2025/7/24
 * @github https://github.com/macrozheng
 */
@Controller
@Tag(name = "FileStorageController", description = "x-file-storage文件存储存储管理")
@RequestMapping("/storage")
public class FileStorageController {

    @Autowired
    private FileStorageService fileStorageService;//注入实列

    @Operation(summary = "文件上传")
    @RequestMapping(value = "/upload-minio", method = RequestMethod.POST, consumes = MediaType.MULTIPART_FORM_DATA_VALUE)
    @ResponseBody
    public CommonResult<FileStorageResult> uploadMinIO(@RequestPart("file") MultipartFile file) {
        FileInfo fileInfo = fileStorageService.of(file).setPlatform("minio-1").upload();
        FileStorageResult result = new FileStorageResult();
        result.setName(fileInfo.getFilename());
        result.setUrl(fileInfo.getUrl());
        return CommonResult.success(result);
    }

    @Operation(summary = "文件删除")
    @RequestMapping(value = "/delete-minio", method = RequestMethod.POST)
    @ResponseBody
    public CommonResult deleteMinio(@RequestParam("objectName") String objectName) {
        FileInfo fileInfo = new FileInfo().setFilename(objectName).setPlatform("minio-1");
        fileStorageService.delete(fileInfo);
        return CommonResult.success(null);
    }
}
测试
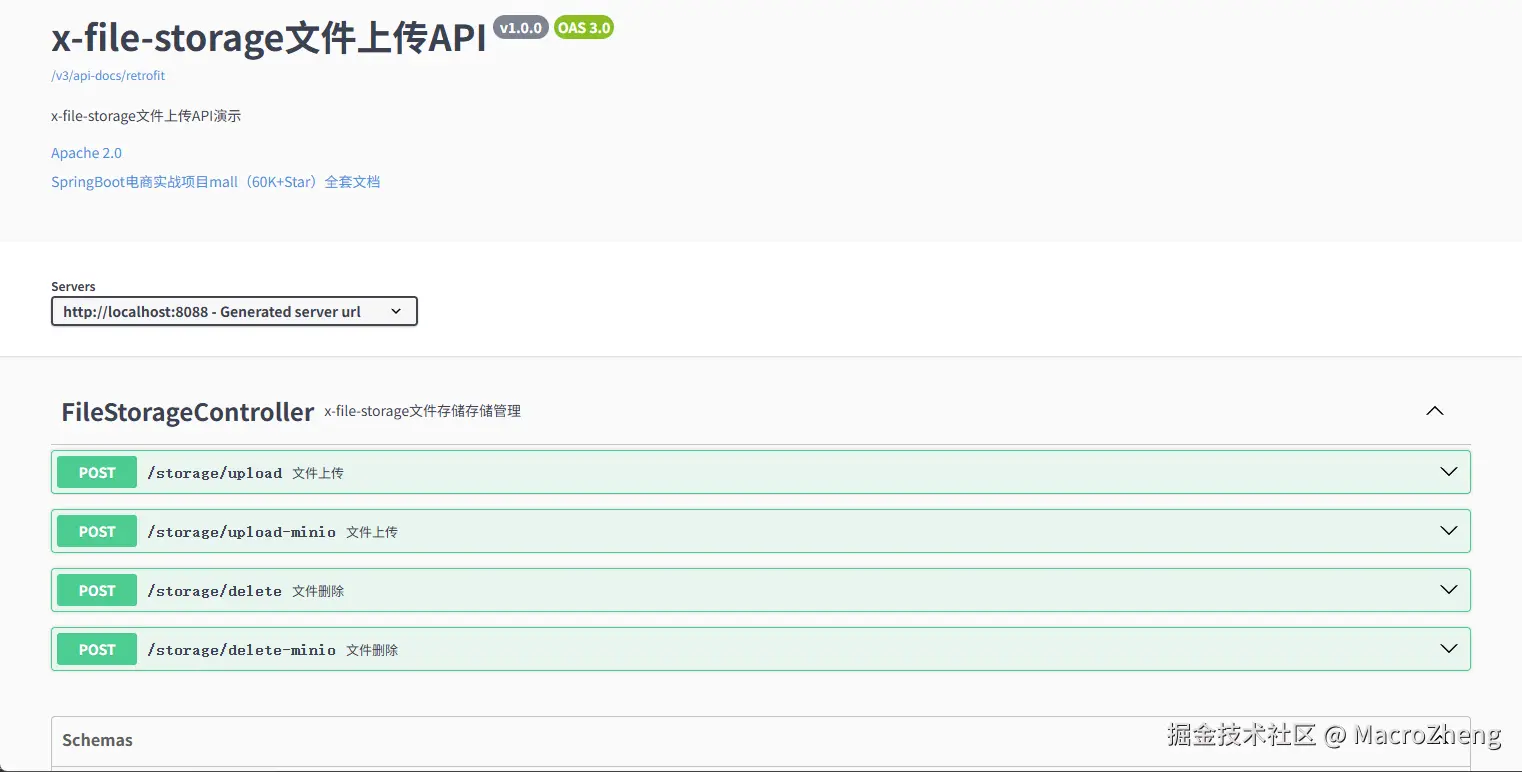
- 代码编写完毕后将项目给运行起来,运行成功后可通过Swagger文档测试接口,访问地址:http://localhost:8088/swagger-ui/index.html
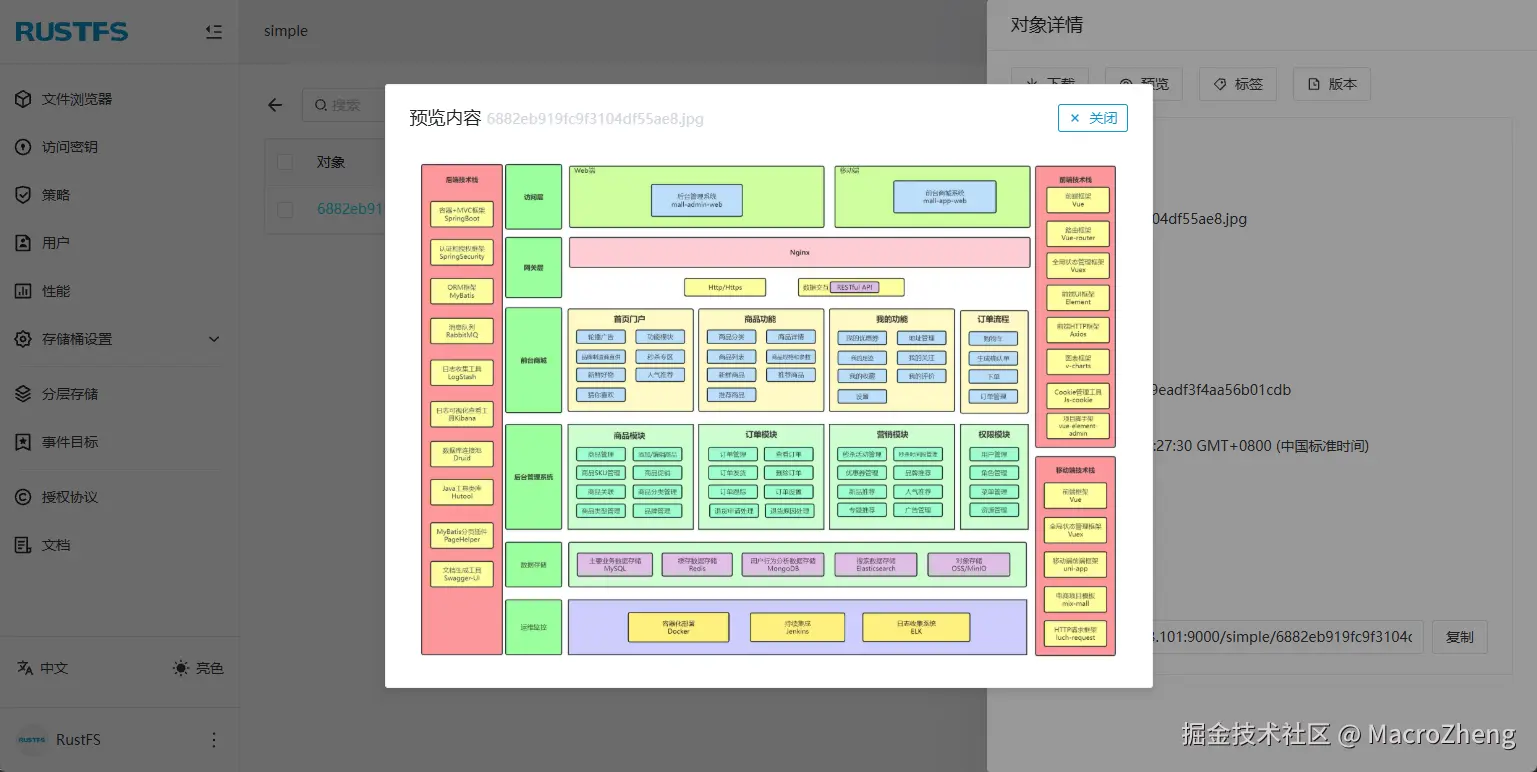
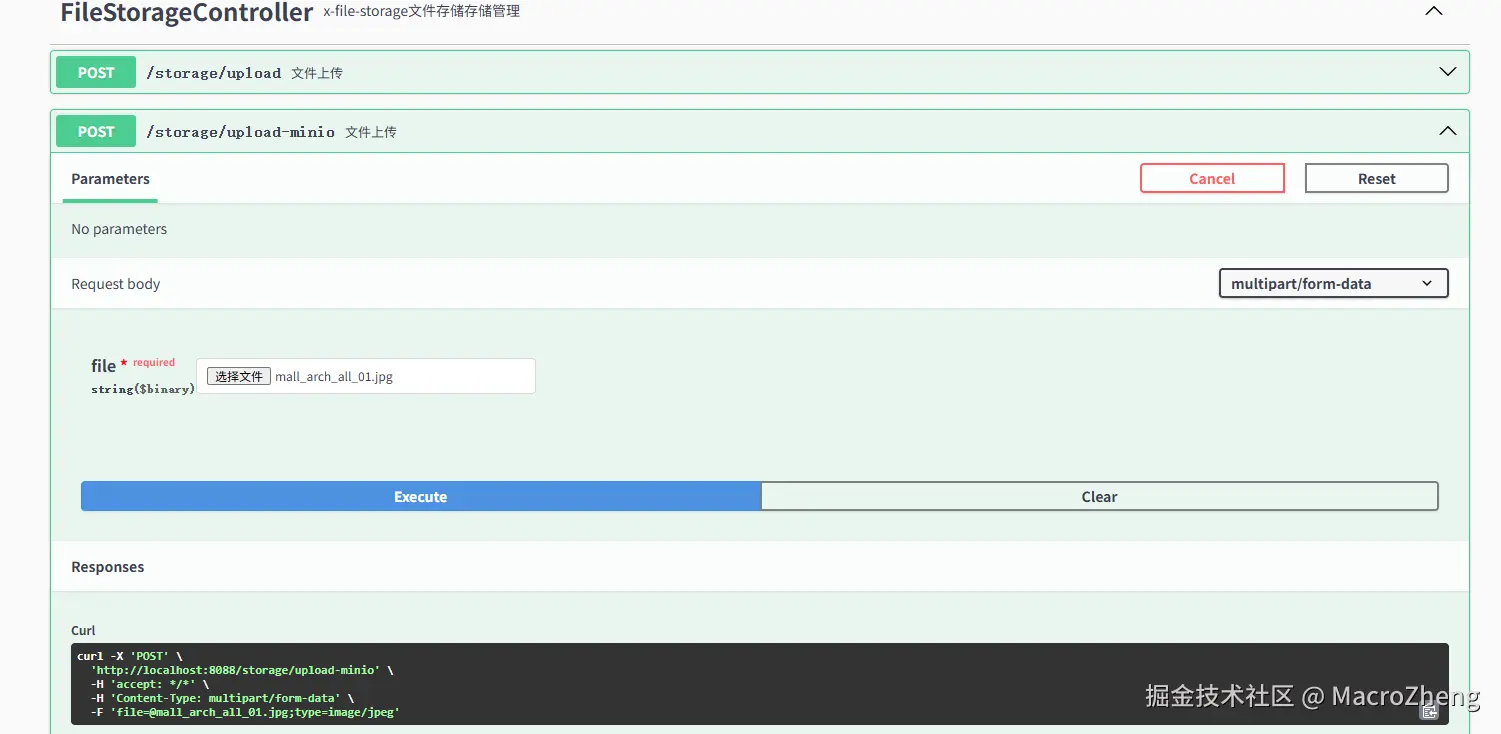
- 首先我们来调用下RustFS的文件上传接口;

- 上传成功后即可在RustFS的控制台中查看到对应的文件了;
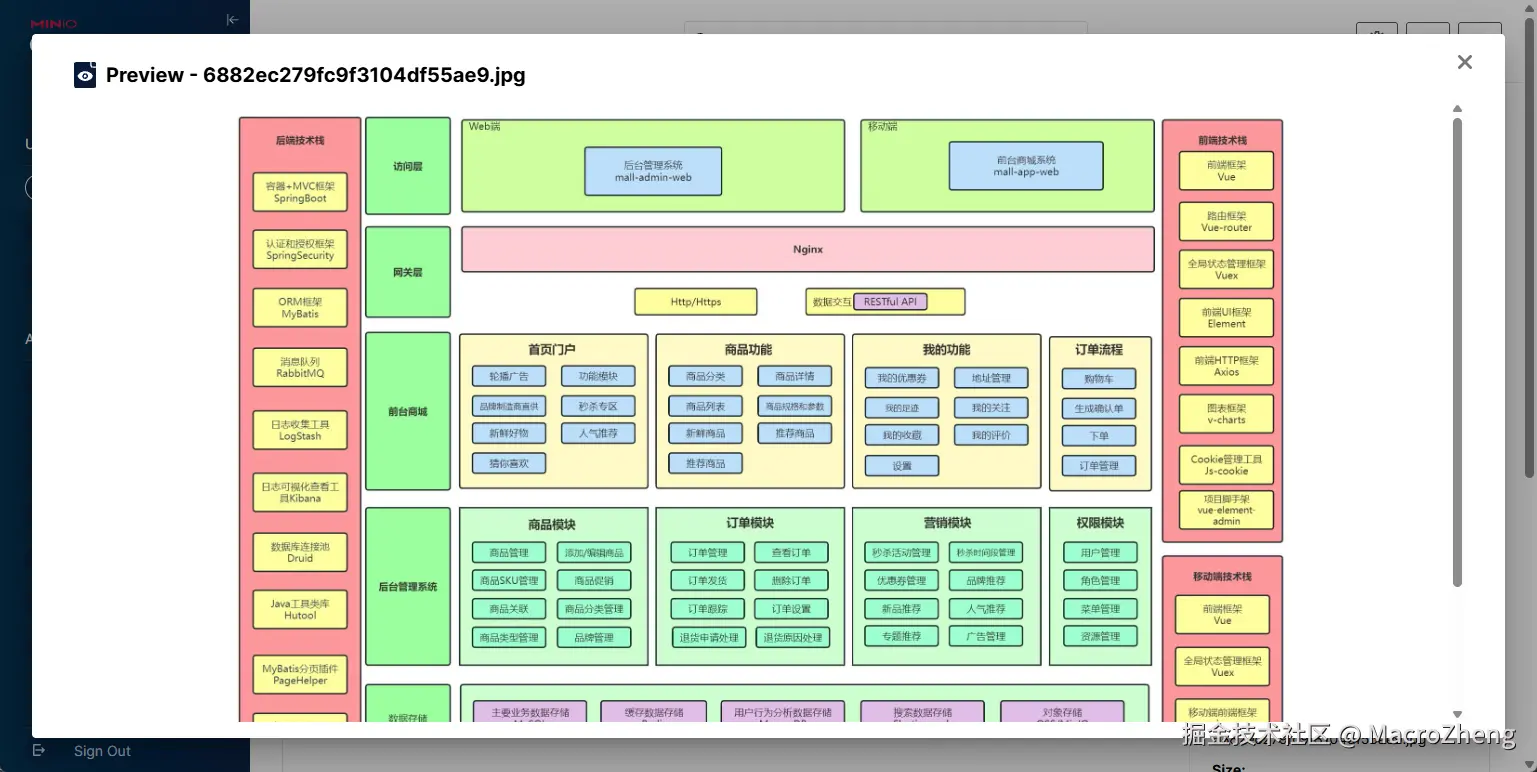
- 再调用下MinIO的文件上传接口;
- 上传成功后在MinIO的控制台中同样可以查看到对应的文件。
总结
今天给大家分享了下x-file-storage的使用,对于不同的存储平台,它的用法基本上是一致的,有了它我们就可以轻松切换到不同的存储平台了,感兴趣的小伙伴可以尝试下!