一、简介
模型部署时,常常面临模型精度与执行效率之间的权衡。查表(Look-Up Table, LUT)是一种在推理过程中用空间换时间的技巧,尤其适用于非线性映射函数的加速。本文将介绍如何在地平线平台上通过 SegmentLUT 实现一个自定义查表算子,并对它进行量化与导出。
本文以实现一个 DecInt 模块为例,将输入的 12bit 图像数据(值域为 0, 4095),通过自定义查找表进行非线性解码,模拟某种数值映射,然后进行归一化处理,最终输出一个 -1, 1 范围的结果图像。
查表算子常用于:实现数据非线性幅度调整、进行颜色空间的转换或者对比度的增强等场景。
二、SegmentLUT 模块
SegmentLUT 是地平线提供的用于查表操作的模块,具备以下特性:
- 支持将输入索引映射到查找表指定输出;
- 支持对 LUT 函数进行量化;
- 可导出为 HBIR,用于 BPU 编译执行。
Plain
from horizon_plugin_pytorch.nn import SegmentLUT
class SegmentLUT(Module):
    """
    Simulate any elementwise function by:
        Segment Look Up Table for int16 input.
        Look Up Table for int8 input.

    Args:
        simulated_func (Callable): Simulated function.
        is_centrosymmetric (bool): Whether F(x)=-F(-x). Deprecated.
            Use symmetric_mode instead.
        dividing_points (Optional[Union[List[Real], Tuple[Real]]]):
            Manually set the max input value of each segment.
            Defaults to None.
        input_range (Optional[Union[List[Real], Tuple[Real]]]):
            Manually set the valid input range.
        auto_divide_strategy (str):
            Strategy used to generate dividing points when
            dividing_points is None, only support 'evenly' and 'curvature'.
        inverse_func (Callable): The inverse function of the simulated function
            used to compute the input range in int-infer stage.
            !!!Note: Can only be used in monotonically decreasing function!!!
            Otherwise, the result of int-infer may be unexpected.
            Default to None
        gradients (Optional[Union[List[Real], Tuple[Real]]]):
            Manually set the gradient of linear interval on both side.
        symmetric_mode (str): It can be "ASYM", "YSYM" or "CSYM".
            Defaults to "ASYM".
            "ASYM": No symmetry.
            "YSYM": F(x)=F(-x).
            "CSYM": F(x)=-F(-x).
    """
三、构建查找表函数
定义一个将 0, 4095 映射到 0, 16777215 的函数。这里使用 numpy.interp 插值得到完整 4096 项的查表数组:
Plain
def get_dec_func():
    # 样本点
    # 代表的是位置索引
    x = [0, 938, 1851, 2396, 3251, 4095]
    # 对应的是与x位置相对应的目标值
    y = [0, 3132, 105740, 387380, 3818601, 16777215]

    # 插值构造查表表项(共 4096 项)
    lookup_table = np.interp(np.arange(4096), x, y).astype(np.int32)
    to_dec = torch.from_numpy(lookup_table).to(torch.float32)

    def to_dec_func(x):
        indices = x.to(torch.int64)
        dec = torch.take(to_dec.to(x.device), indices)
        return dec
    return to_dec_func
通过这种方式,任意输入 0, 4095 的整数值,都可以在查表中获得对应的输出结果,实现近似非线性函数。
在这里,重点解释下
Plain
lookup_table = np.interp(np.arange(4096), x, y).astype(np.int32)借助 np.interp 函数来完成线性插值工作,进而生成查找表
- np.arange(4096)会生成从 0 到 4095 的整数序列,这些整数代表了查找表的索引。
- np.interp(...)会在已知的点(x, y)之间进行线性插值,从而计算出每个索引所对应的插值结果。
- .astype(np.int32)会把插值得到的浮点数结果转换为 32 位整数,这样做是为了符合查找表对整数的使用需求。
四、示例运行
示例很简单,主体包括:
- 为了方便部署,插入量化、反量化节点
- 调用 SegmentLUT 查表
- 数据归一化
Plain
class DecInt(nn.Module):
    def __init__(self):
        super(DecInt, self).__init__()
        to_dec_func = get_dec_func()
        self.to_dec = SegmentLUT(to_dec_func, is_centrosymmetric=True)
        self.sub = FloatFunctional()
        self.quant = QuantStub()
        self.dequant = DeQuantStub()

    def forward(self, img):
        img = self.quant(img)
        img = self.to_dec(img)

        # 找到每张图像的最大值与最小值
        max_vals = img.view(img.size(0), -1).max(dim=1)[0].view(-1, 1, 1, 1)
        min_vals = img.view(img.size(0), -1).min(dim=1)[0].view(-1, 1, 1, 1)
        # 归一化到 [0, 1]
        diff = (max_vals - min_vals) + 1e-6
        img = img - min_vals
        img = torch.clamp(img / diff, 0, 1.0)
        # 乘以 2,再减去 1,将其变换到 [-1, 1] 区间
        img = img * 2
        img = self.sub.sub(img, 1)
        return self.dequant(img)
全部示例代码:
Plain
from horizon_plugin_pytorch.nn import SegmentLUT
from horizon_plugin_pytorch.nn.quantized import FloatFunctional
from horizon_plugin_pytorch.quantization import QuantStub, qint16
from torch.quantization import DeQuantStub
import numpy as np
import torch
import copy
import torch.nn as nn
from horizon_plugin_pytorch.quantization import QConfig, FakeQuantize, observer_v2
from horizon_plugin_pytorch import set_march, March
set_march(March.NASH_M)
from horizon_plugin_pytorch.quantization import prepare, set_fake_quantize, FakeQuantState, FixedScaleObserver, FakeCast
from horizon_plugin_pytorch.quantization import QuantStub
from horizon_plugin_pytorch.quantization.hbdk4 import export
from horizon_plugin_pytorch.quantization.qconfig_template import calibration_8bit_weight_16bit_act_qconfig_setter, ModuleNameQconfigSetter
from horizon_plugin_pytorch.quantization.qconfig import get_qconfig, MSEObserver, MinMaxObserver
from horizon_plugin_pytorch.dtype import qint8, qint16
from torch.quantization import DeQuantStub
import torch.nn as nn
from horizon_plugin_pytorch.quantization import hbdk4 as hb4
from hbdk4.compiler import convert, save, hbm_perf, visualize, compile
def get_dec_func():
# LUT 映射表:输入值 12bit范围
x = [0, 938, 1851, 2396, 3251, 4095]
# 对应的输出值
y = [0, 3132, 105740, 387380, 3818601, 16777215]
lookup_table = np.interp(np.arange(4096), list(x), list(y)).astype(np.int32)
print(len(lookup_table))
exit()
to_dec = torch.from_numpy(lookup_table).to(torch.float32)
def to_dec_func(x):
indices = x.to(torch.int64)
dec = torch.take(to_dec.to(x.device), indices)
return dec
return to_dec_func
class DecInt(nn.Module):
def __init__(self):
super(DecInt, self).__init__()
to_dec_func = get_dec_func()
self.to_dec = SegmentLUT(to_dec_func, is_centrosymmetric=True)
self.sub = FloatFunctional()
self.quant = QuantStub()
self.dequant = DeQuantStub()
def forward(self, img):
img = self.quant(img)
img = self.to_dec(img)
# 找到每张图像的最大值与最小值
max_vals = img.view(img.size(0), -1).max(dim=1)[0].view(-1, 1, 1, 1)
min_vals = img.view(img.size(0), -1).min(dim=1)[0].view(-1, 1, 1, 1)
# 归一化到 [0, 1]
diff = (max_vals - min_vals) + 1e-6
img = img - min_vals
img = torch.clamp(img / diff, 0, 1.0)
# 乘以 2,再减去 1,将其变换到 [-1, 1] 区间
img = img * 2
img = self.sub.sub(img, 1)
return self.dequant(img)
# 构造模拟输入数据:batch_size=1,单通道图像 4x4,值范围是0~4095(12bit)
input_data = torch.randint(low=0, high=4096, size=(1, 1, 4, 4), dtype=torch.float32)
# 初始化模型
model = DecInt()
model.eval()
# 执行推理
with torch.no_grad():
output = model(input_data)
print("输入图像:", input_data)
print("输出:", output)
# A global march indicating the target hardware version must be setted before prepare qat.
set_march(March.NASH_M)
calib_model = prepare(model.eval(), input_data,
qconfig_setter=(
calibration_8bit_weight_16bit_act_qconfig_setter,
),
)
calib_model.eval()
set_fake_quantize(calib_model, FakeQuantState.CALIBRATION)
calib_model(input_data)
calib_model.eval()
set_fake_quantize(calib_model, FakeQuantState.VALIDATION)
calib_out = calib_model(input_data)
print("calib输出数据:", calib_out)
qat_bc = export(calib_model, input_data)
# save(qat_bc, "qat.bc")
# visualize(qat_bc, "qat.onnx")
hb_quantized_model = convert(qat_bc, March.NASH_M)
# save(hb_quantized_model,"quantized.bc")
# 可视化
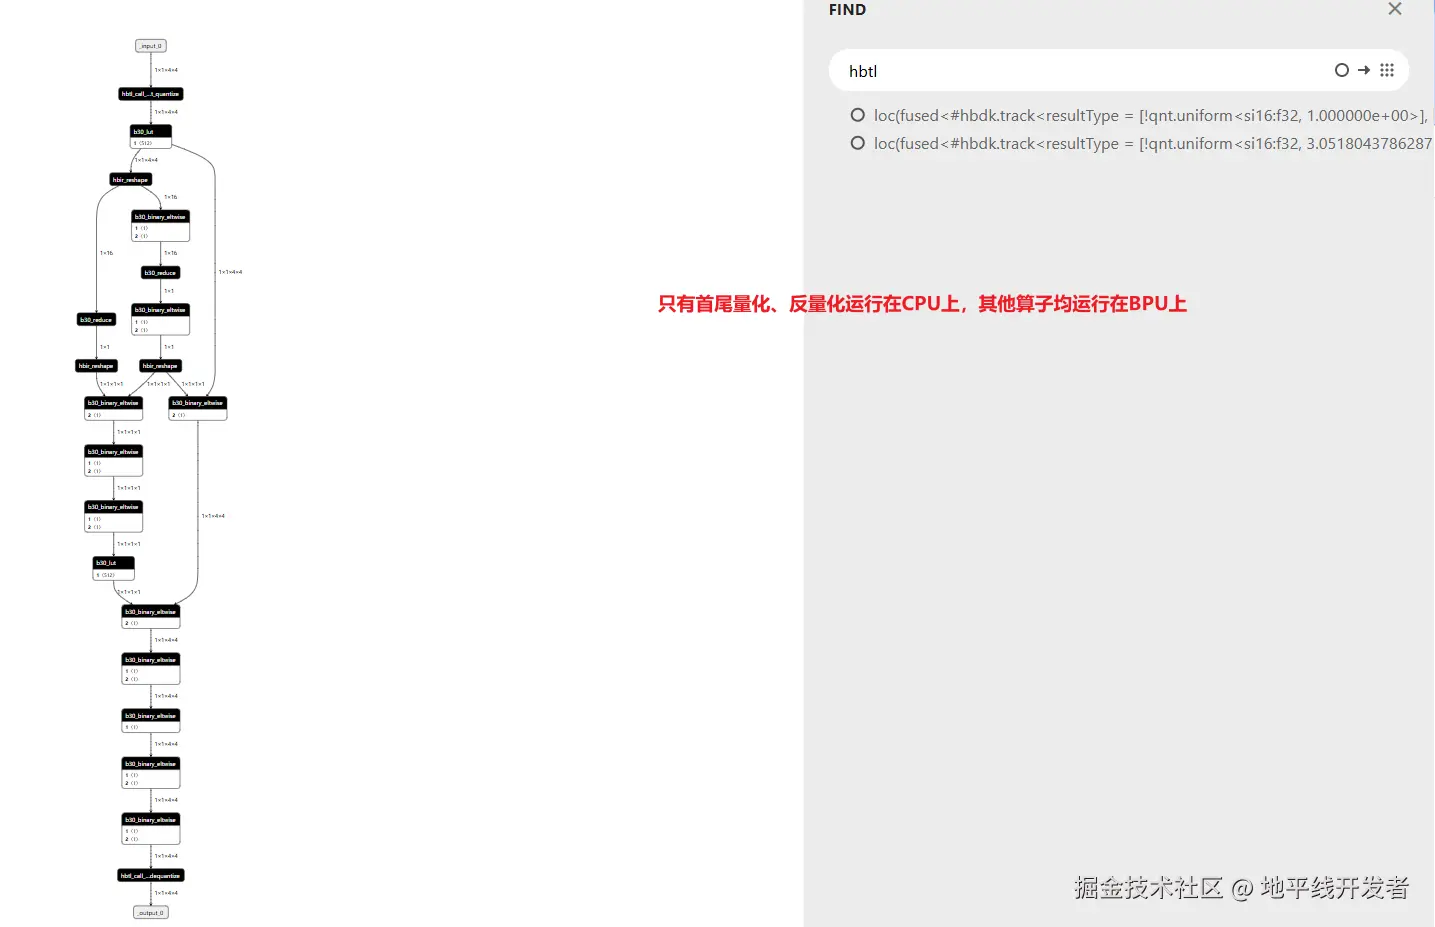
visualize(hb_quantized_model, "quantized.onnx")验证运行在 BPU 上