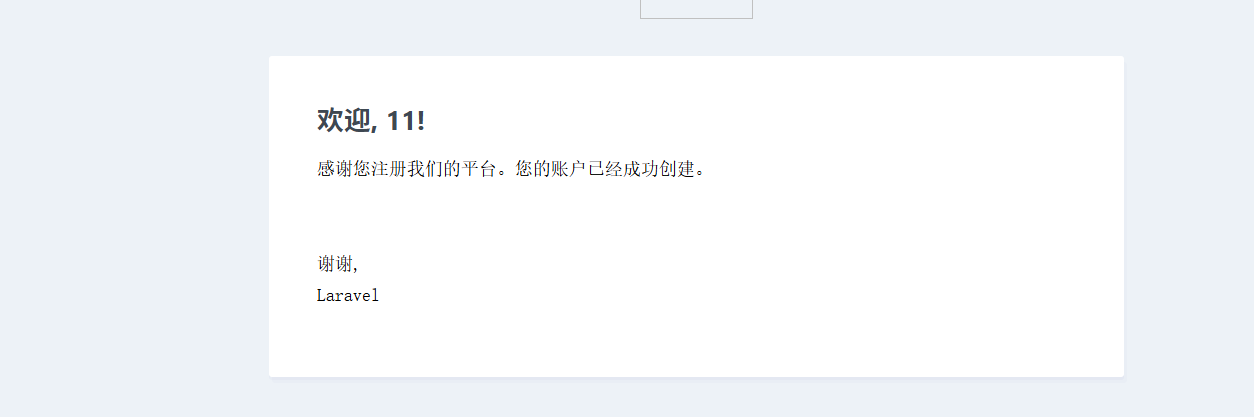
下面是一个完整的用户注册事件和监听器的实现示例,包含事件、监听器、注册、触发等完整流程。
一、软件版本
- php:
8.2.20 - laravel:
11 - mysql:
8.0.29
二、完整实现过程
1.创建事件
1.1 首先创建用户注册事件
bash
php artisan make:event UserRegistered1.2 编辑app/Events/UserRegistered.php
php
<?php
namespace App\Events;

use App\Models\User;
use Illuminate\Broadcasting\InteractsWithSockets;
use Illuminate\Foundation\Events\Dispatchable;
use Illuminate\Queue\SerializesModels;

class UserRegistered
{
    use Dispatchable, InteractsWithSockets, SerializesModels;

    /**
     * 创建一个新的事件实例
     */
    public function __construct(public User $user)
    {

    }
}
2. 创建监听器
2.1 创建两个监听器:发送欢迎邮件 和记录注册日志。
bash
php artisan make:listener SendWelcomeEmail --event=UserRegistered
php artisan make:listener LogUserRegistration --event=UserRegistered
2.2 编辑 app/Listeners/SendWelcomeEmail.php
php
<?php

namespace App\Listeners;

use App\Events\UserRegistered;
use App\Mail\WelcomeEmail;
use Illuminate\Contracts\Queue\ShouldQueue;
use Illuminate\Support\Facades\Mail;

class SendWelcomeEmail implements ShouldQueue
{
    /**
     * 处理事件
     *
     * @param UserRegistered $event
     * @return void
     */
    public function handle(UserRegistered $event)
    {
        Mail::to($event->user->email)
            ->send(new WelcomeEmail($event->user));
    }

    /**
     * 处理失败的任务
     *
     * @param UserRegistered $event
     * @param \Throwable $exception
     * @return void
     */
    public function failed(UserRegistered $event, $exception)
    {
        // 发送失败通知给管理员
    }
}
2.3 编辑 app/Listeners/LogUserRegistration.php
php
<?php

namespace App\Listeners;

use App\Events\UserRegistered;
use Illuminate\Contracts\Queue\ShouldQueue;
use Illuminate\Queue\InteractsWithQueue;
use Illuminate\Support\Facades\Log;

class LogUserRegistration
{
    /**
     * Create the event listener.
     */
    public function __construct()
    {
        //
    }

    /**
     * Handle the event.
     */
    public function handle(UserRegistered $event): void
    {
        Log::info('新用户注册完成: '.$event->user->email);
    }
}
3. 注册事件和监听器
3.1 创建 app/Providers/EventServiceProvider.php
bash
php artisan make:provider EventServiceProvider3.2 编辑 app/Providers/EventServiceProvider.php
php
<?php

namespace App\Providers;

use App\Events\UserRegistered;
use App\Listeners\LogUserRegistration;
use App\Listeners\SendWelcomeEmail;
use Illuminate\Support\ServiceProvider;

class EventServiceProvider extends ServiceProvider
{
    /**
     * 事件与监听器的映射关系
     */
    protected $listen = [
        UserRegistered::class => [
            SendWelcomeEmail::class,
            LogUserRegistration::class
        ],
    ];

    /**
     * Register services.
     */
    public function register(): void
    {
        //
    }

    /**
     * Bootstrap services.
     * 注册任何其他事件
     */
    public function boot(): void
    {
        //
    }
}
4. 创建邮件类
4.1 创建欢迎邮件模板
bash
php artisan make:mail WelcomeEmail --markdown=emails.welcome4.2 编辑 app/Mail/WelcomeEmail.php
php
<?php

namespace App\Mail;

use App\Models\User;
use Illuminate\Bus\Queueable;
use Illuminate\Mail\Mailable;
use Illuminate\Queue\SerializesModels;

class WelcomeEmail extends Mailable
{
    use Queueable, SerializesModels;

    /**
     * 创建一个新的消息实例
     *
     * @param User $user
     */
    public function __construct(public User $user)
    {

    }

    /**
     * 构建消息
     *
     * @return $this
     */
    public function build()
    {
        return $this->markdown('emails.welcome')
                    ->subject('欢迎加入我们的平台');
    }
}
4.2 编辑 resources/views/emails/welcome.blade.php
html
@component('mail::message')
    # 欢迎, {{ $user->name }}!

    感谢您注册我们的平台。您的账户已经成功创建。

    @component('mail::button', ['url' => url('/dashboard')])
        访问仪表盘
    @endcomponent

    谢谢,
    {{ config('app.name') }}
@endcomponent
4.3 邮件配置 .env
bash
MAIL_MAILER=smtp
MAIL_SCHEME=null
MAIL_HOST=smtp.163.com
MAIL_PORT=465
MAIL_ENCRYPTION=ssl
MAIL_USERNAME=xxx@163.com
MAIL_PASSWORD=GTkCEsxxxxxxx
MAIL_FROM_ADDRESS="xxxx@163.com"
MAIL_FROM_NAME="${APP_NAME}"
5. 测试事件
5.1 创建测试
bash
php artisan make:test UserRegistrationTest5.2 编辑 tests/Feature/UserRegistrationTest.php
php
<?php

namespace Tests\Feature;

use App\Events\UserRegistered;
use App\Mail\WelcomeEmail;
use App\Models\User;
use Illuminate\Foundation\Testing\RefreshDatabase;
use Illuminate\Foundation\Testing\WithFaker;
use Illuminate\Support\Facades\Event;
use Illuminate\Support\Facades\Mail;
use Tests\TestCase;

class UserRegistrationTest extends TestCase
{
    use RefreshDatabase;

    public function test_user_registration_dispatches_event()
    {
        Event::fake();

        $user = User::factory()->create();

        event(new UserRegistered($user));

        Event::assertDispatched(UserRegistered::class, function ($event) use ($user) {
            return $event->user->id === $user->id;
        });
    }

    public function test_welcome_email_is_sent()
    {
        Mail::fake();

        $user = User::factory()->create();

        event(new UserRegistered($user));

        Mail::assertSent(WelcomeEmail::class, function ($mail) use ($user) {
            return $mail->user->id === $user->id;
        });
    }
}
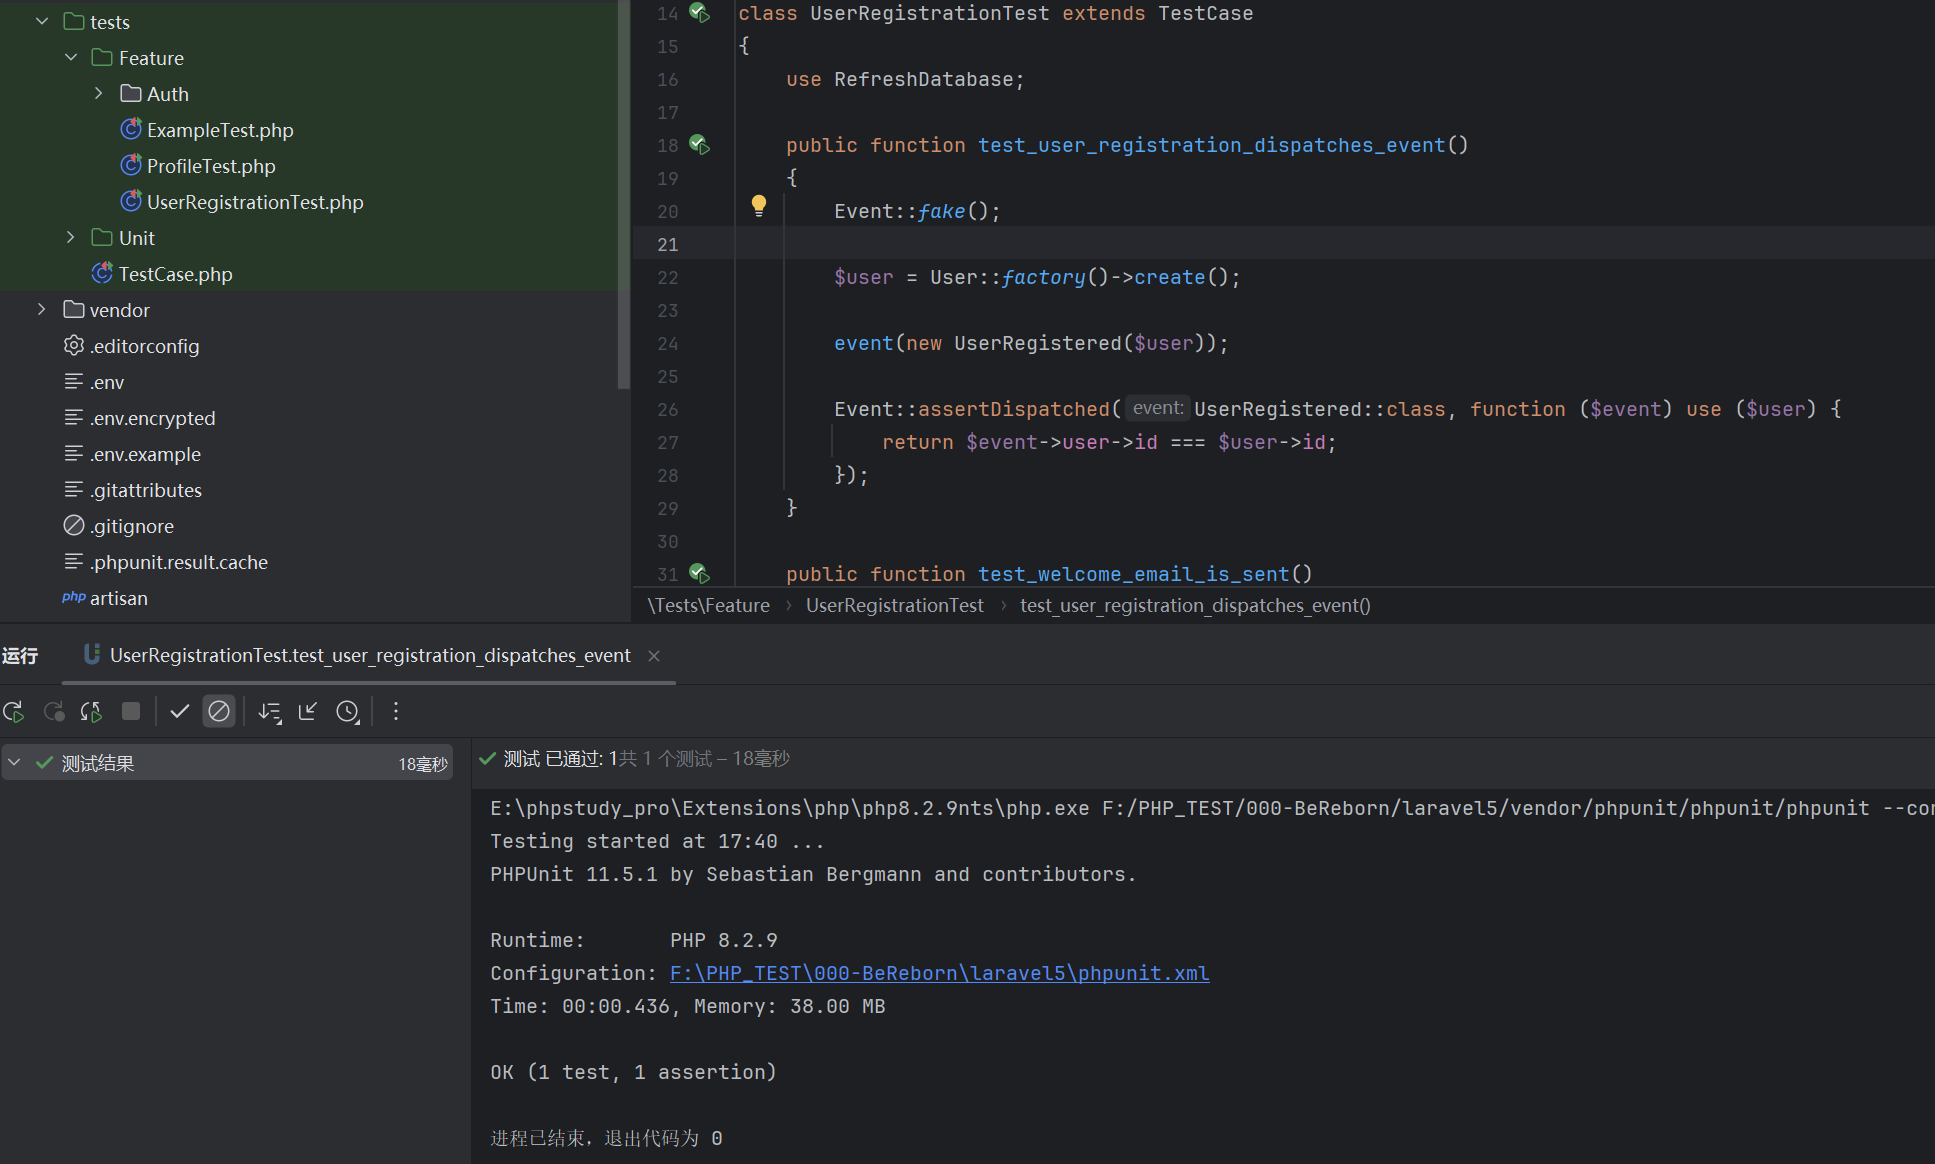
5.3 测试结果
6. 在控制器中触发事件
6.1 编辑 app/Http/Controllers/Auth/RegisterController.php
php
<?php

namespace App\Http\Controllers\Auth;

use App\Events\UserRegistered;
use App\Http\Controllers\Controller;
use App\Models\User;
use Illuminate\Support\Facades\Hash;

class RegisterController extends Controller
{
    public function register()
    {
        // 验证逻辑...

        $user = User::create([
            'name' => request('name'),
            'email' => request('email'),
            'password' => Hash::make(request('password')),
        ]);

        // 触发用户注册事件
        event(new UserRegistered($user));

        // 或者使用静态方法
        // UserRegistered::dispatch($user);

        return redirect('/home')->with('success', '注册成功!');
    }
}
7. 访问控制器后
7.1 laravel日志中显示

7.2 目标邮箱收到邮件