前言
我们经常会遇到原生控件无法满足需求的时候,比如需要一个严格正方形的头像,又或是需要一个能根据内部元素自适应大小的控件。这时,我们就可以通过自定义 View 来解决。
自定义 View 的布局过程通常可分为三种:
-
继承已有的 View,通过重写
onMeasure方法简单修改尺寸。 -
同样是重写
onMeasure方法,但完全自定义 View 的尺寸计算。 -
通过重写
onMeasure和onLayout方法,自定义 ViewGroup。
我们现在只讲前两种较为简单的情况。
第一种:修改已有尺寸
这种方式最简单,也最直接,它的流程为:
-
重写
onMeasure方法; -
调用
super.onMeasure()完成默认测量,通过getMeasuredWidth和getMeasuredHeight方法获取到父类计算出的初步测量结果。 -
根据测量结果,计算出最终的实际尺寸,调用
setMeasuredDimension方法把最终结果保存下来。
现在,我们就来实现一个 SquareImageView,它会使得图片总是以正方形显示。
首先,创建 SquareImageView,继承自 AppCompatImageView,并重写 onMeasure 方法。
kotlin
class SquareImageView(context: Context, attrs: AttributeSet?) : AppCompatImageView(context, attrs) {
    override fun onMeasure(widthMeasureSpec: Int, heightMeasureSpec: Int) {
        // 让父类测量,获取初步测量结果
        super.onMeasure(widthMeasureSpec, heightMeasureSpec)

    }
}
根据测量结果,计算出最终尺寸并保存。
kotlin
class SquareImageView(context: Context, attrs: AttributeSet?) : AppCompatImageView(context, attrs) {
    override fun onMeasure(widthMeasureSpec: Int, heightMeasureSpec: Int) {
        super.onMeasure(widthMeasureSpec, heightMeasureSpec)

        // 宽高较小值作为边长
        val size = min(measuredWidth, measuredHeight)

        // 保存最终尺寸
        setMeasuredDimension(size, size)
    }
}
在布局中使用,并将宽高设为不一致。
xml
<?xml version="1.0" encoding="utf-8"?>
<FrameLayout xmlns:android="http://schemas.android.com/apk/res/android"
    android:layout_width="match_parent"
    android:layout_height="match_parent">

    <com.example.customview.SquareImageView
        android:layout_width="400dp"
        android:layout_height="300dp"
        android:scaleType="centerCrop"
        android:src="@drawable/avatar" />

</FrameLayout>
运行效果如下:
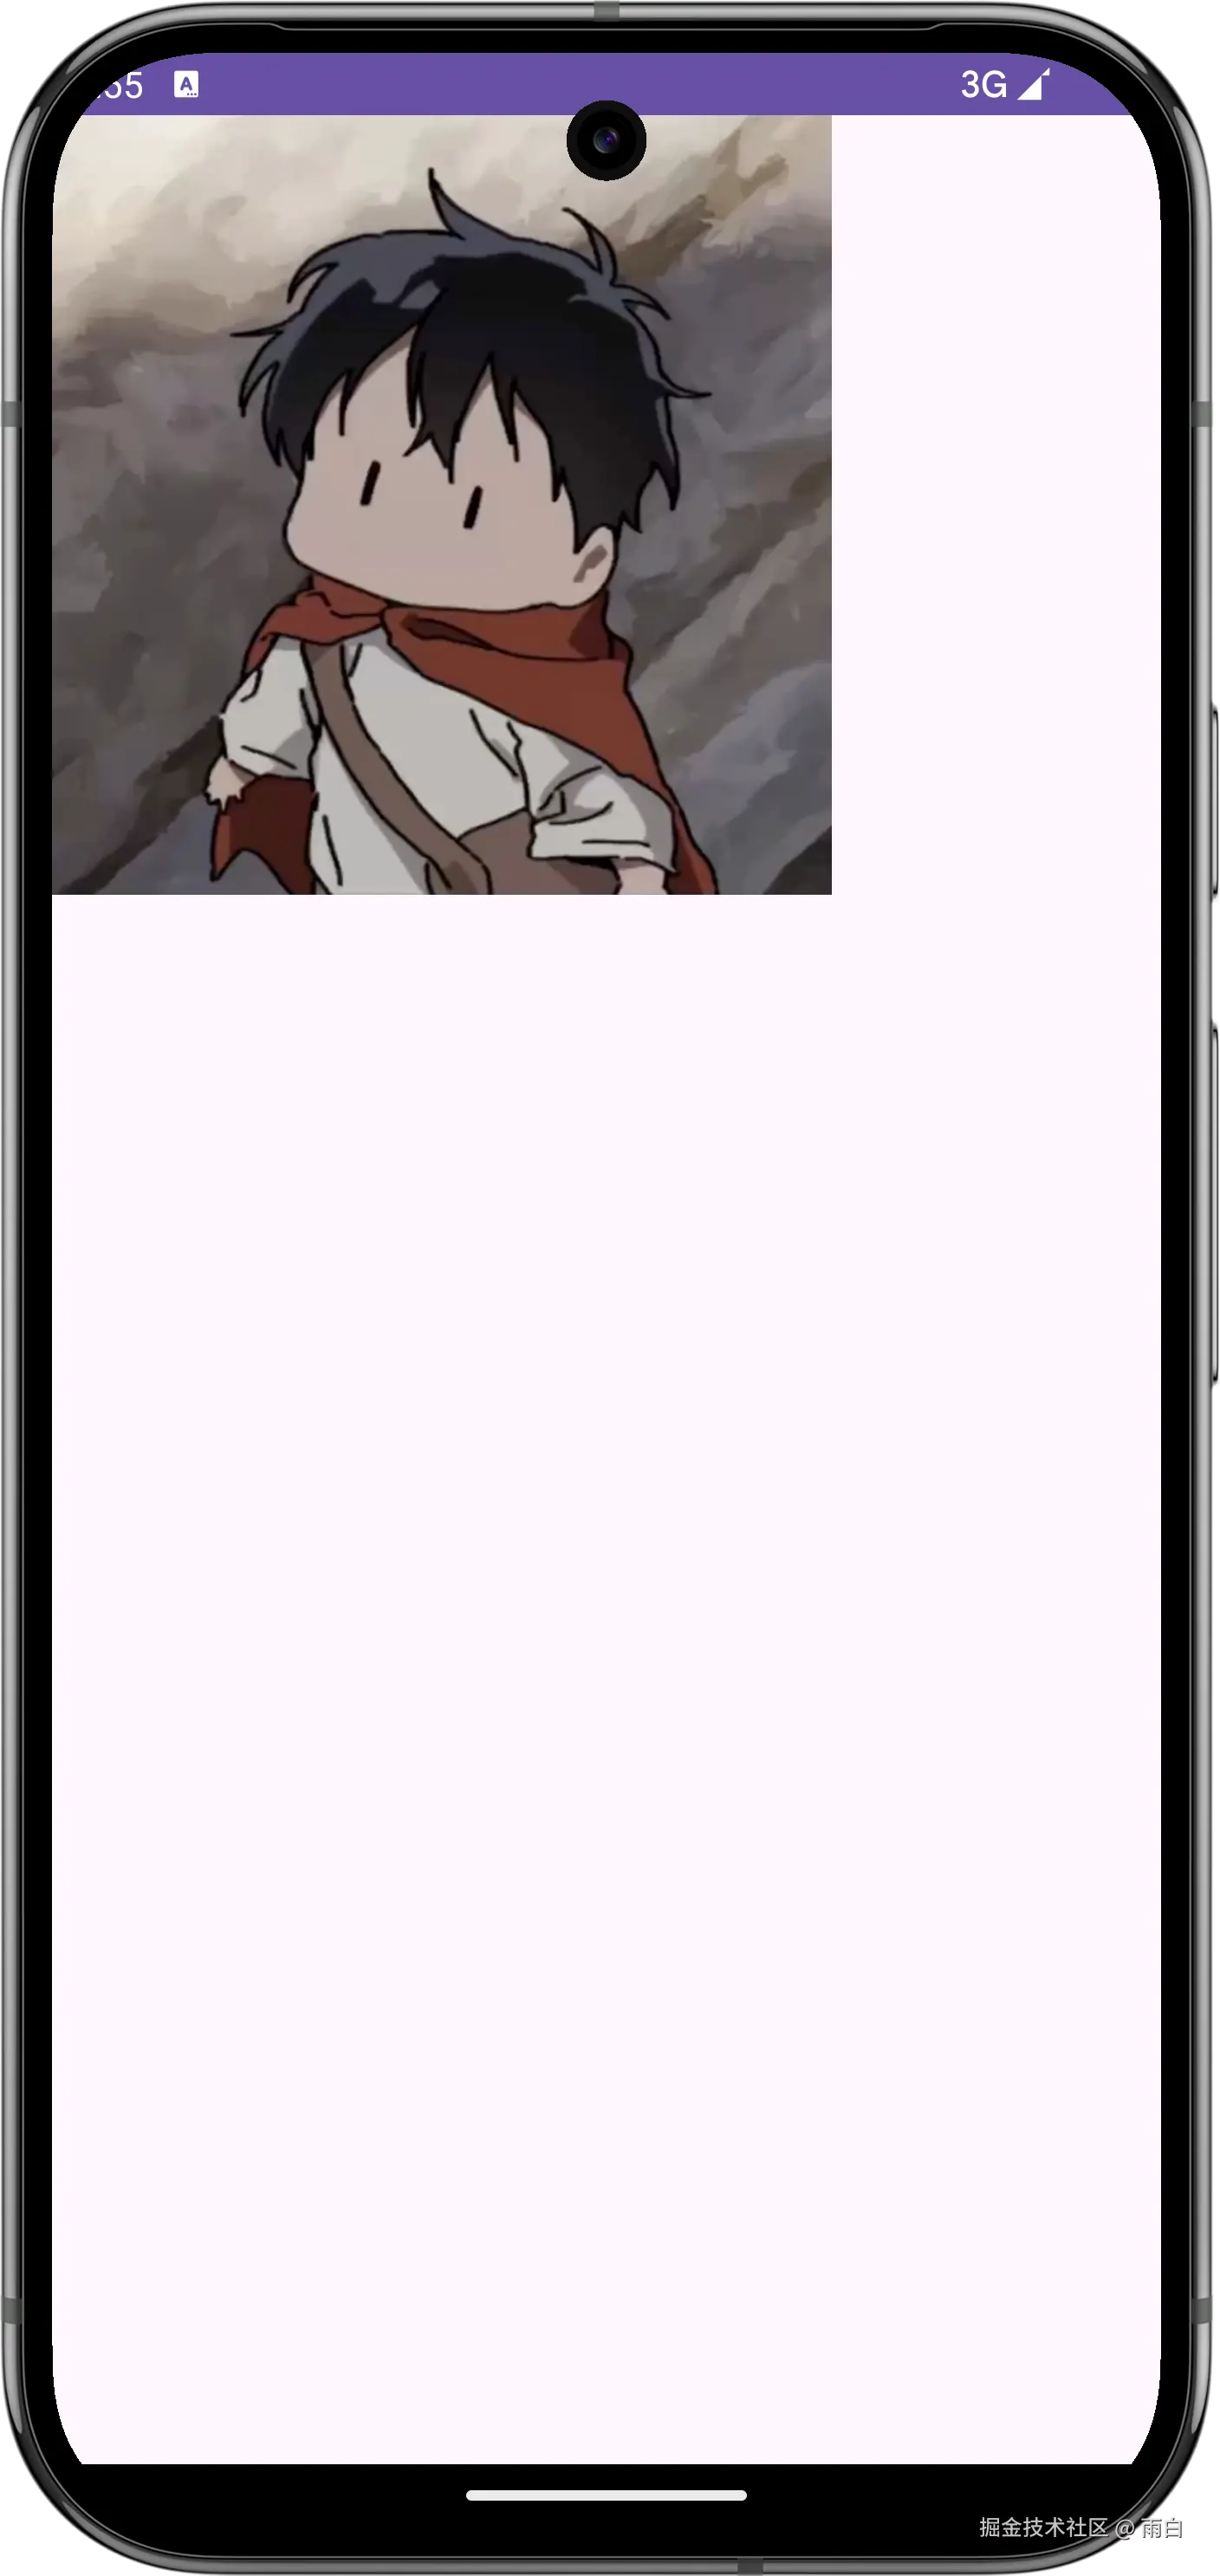
可以看到,即使布局要求是 400x300,SquareImageView 仍然是一个正方形。
第二种:完全自定义尺寸
再来看看第二种,它的流程为:
-
重写
onMeasure方法。 -
根据内部的元素,计算出自己期望的尺寸。
-
使用
resolveSize或resolveSizeAndState方法,将结果修正。 -
使用
setMeasuredDimension(width, height)方法保存结果。
我们来创建一个 CircleView,它的尺寸由内部的圆以及边距决定。先重写 onDraw 方法绘制一个圆形:
kotlin
val Float.dp: Float
    get() = TypedValue.applyDimension(
        TypedValue.COMPLEX_UNIT_DIP,
        this,
        Resources.getSystem().displayMetrics
    )

class CircleView(
    context: Context,
    attrs: AttributeSet? = null,
) : View(context, attrs) {

    private val myPaint = Paint(Paint.ANTI_ALIAS_FLAG)

    private val circleRadius = 75f.dp
    private val circleColor = Color.parseColor("#FF4081")

    // 圆的边距
    private val circlePadding = 50f.dp

    override fun onDraw(canvas: Canvas) {
        super.onDraw(canvas)

        myPaint.color = circleColor
        canvas.drawCircle(
            circlePadding + circleRadius,
            circlePadding + circleRadius,
            circleRadius,
            myPaint
        )
    }
}
在布局中使用:
xml
<?xml version="1.0" encoding="utf-8"?>
<FrameLayout xmlns:android="http://schemas.android.com/apk/res/android"
    android:layout_width="match_parent"
    android:layout_height="match_parent">

    <com.example.customview.CircleView
        android:layout_width="wrap_content"
        android:layout_height="wrap_content"
        android:background="#2196F3" />

</FrameLayout>
运行效果为:
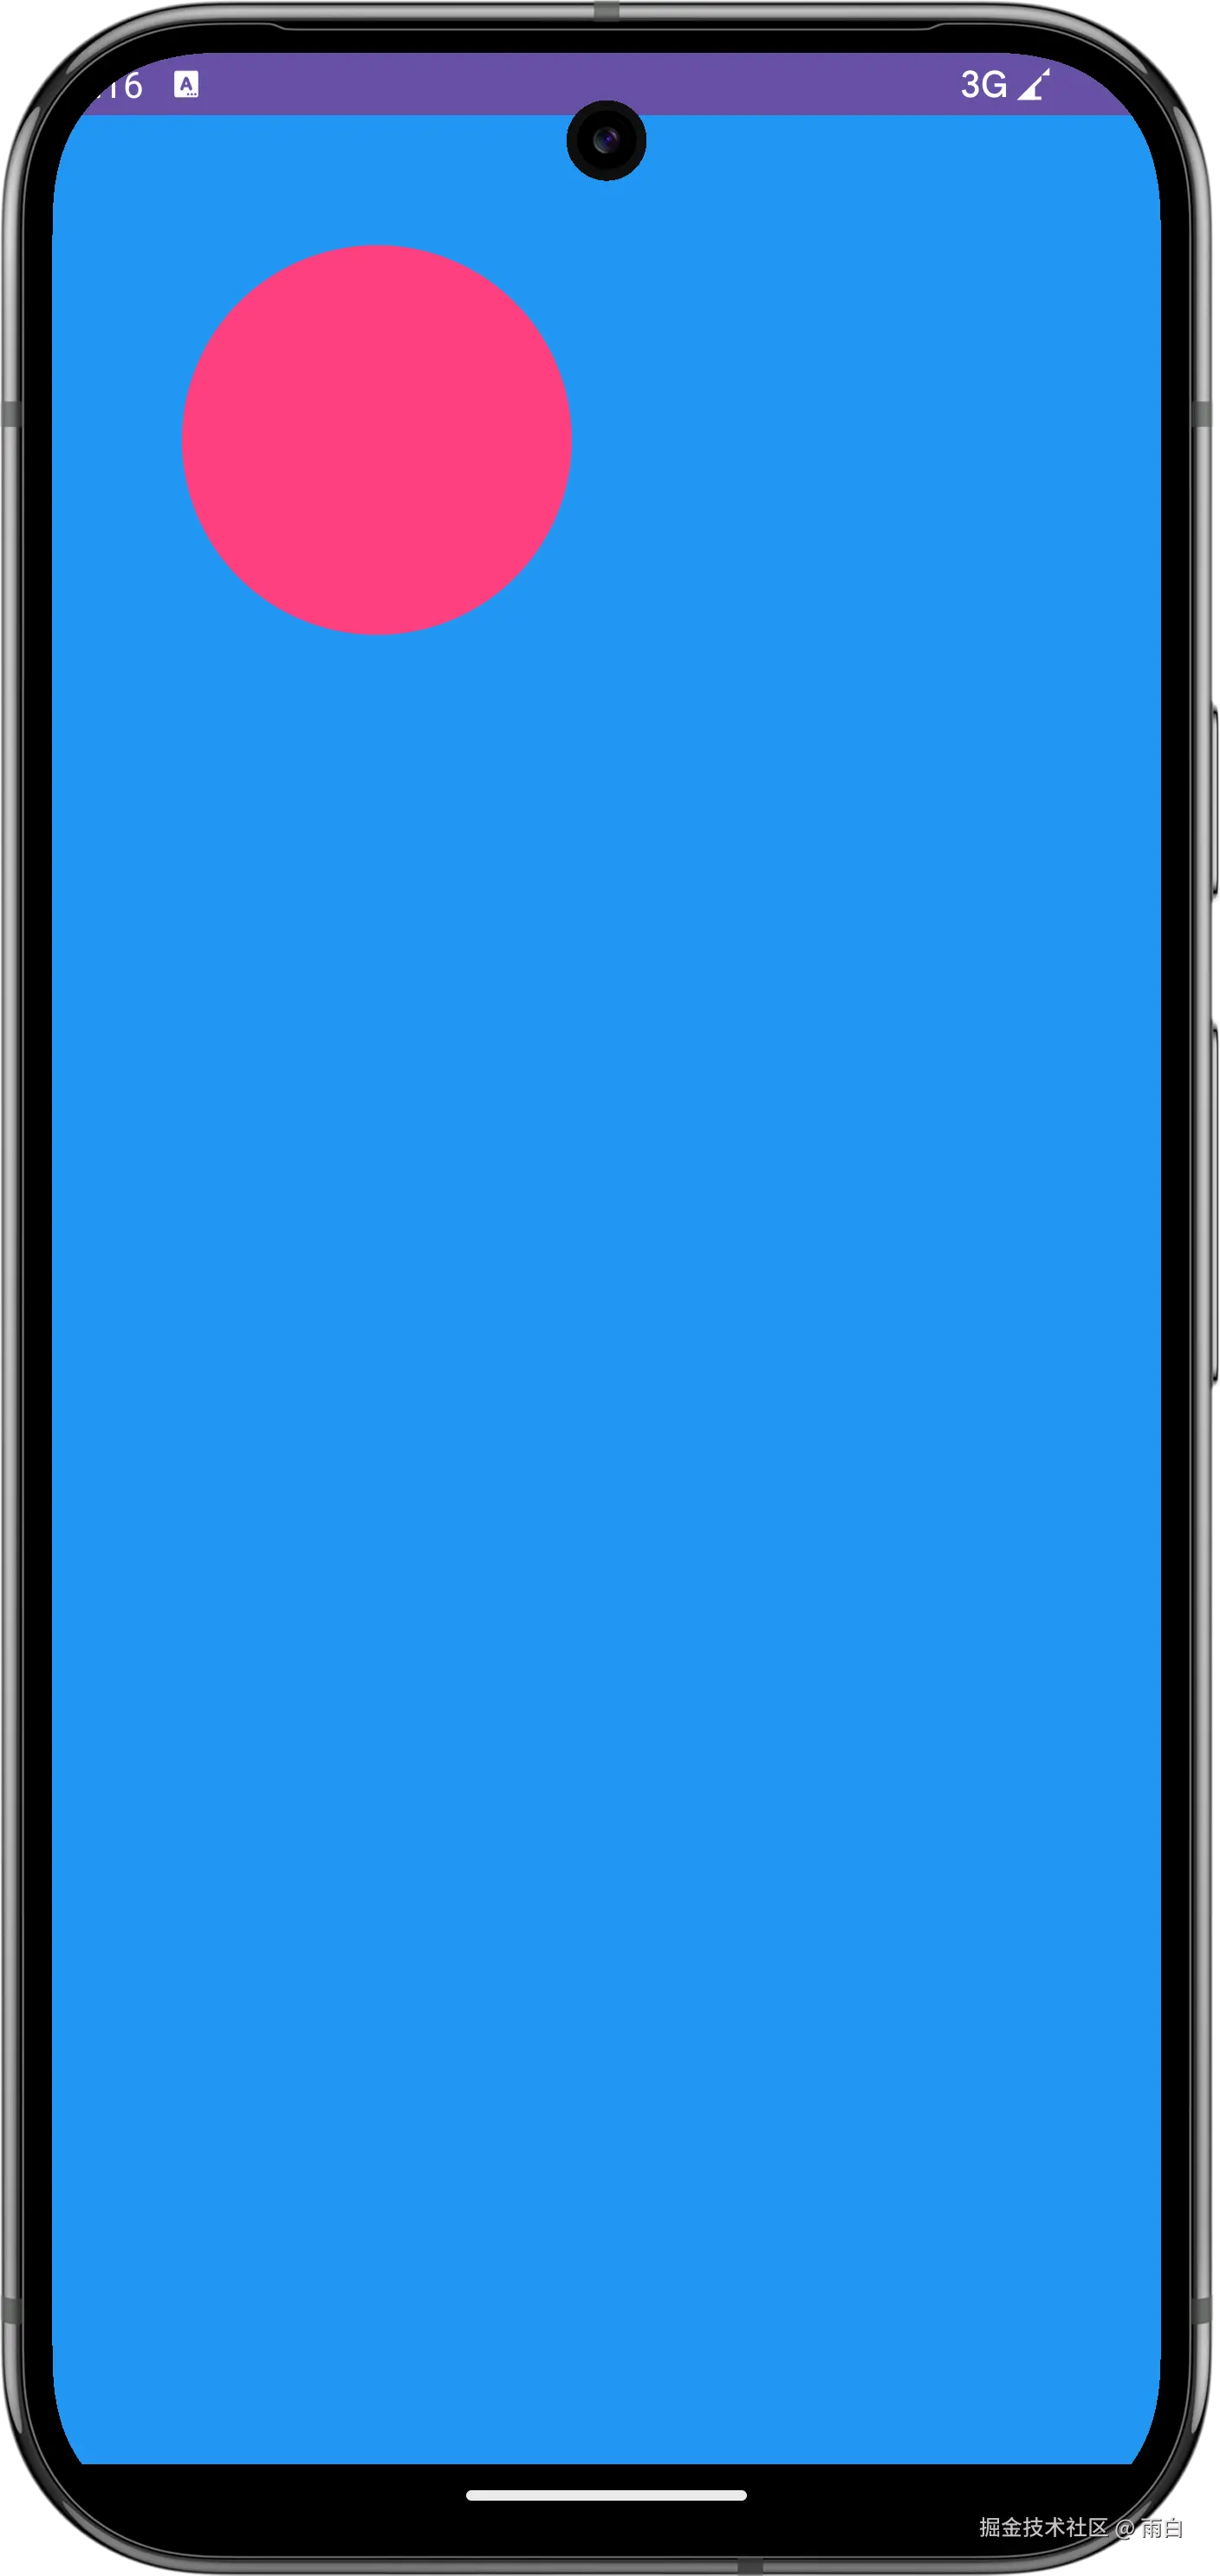 为什么
为什么 wrap_content 会占满屏幕?
因为 View 的默认
onMeasure方法实现,并不知道如何处理wrap_content,当父 View 让它自己决定大小时,它只会变为父 View 允许的最大尺寸,所以看起来像是match_parent。
我们的目标是让 CircleView 的尺寸能够包住圆,并且带有边距。
kotlin
override fun onMeasure(widthMeasureSpec: Int, heightMeasureSpec: Int) {
    // 计算期望尺寸
    val desiredSize = (circlePadding * 2 + circleRadius * 2).toInt()

    // 保存最终尺寸
    setMeasuredDimension(desiredSize, desiredSize)
}
运行效果:
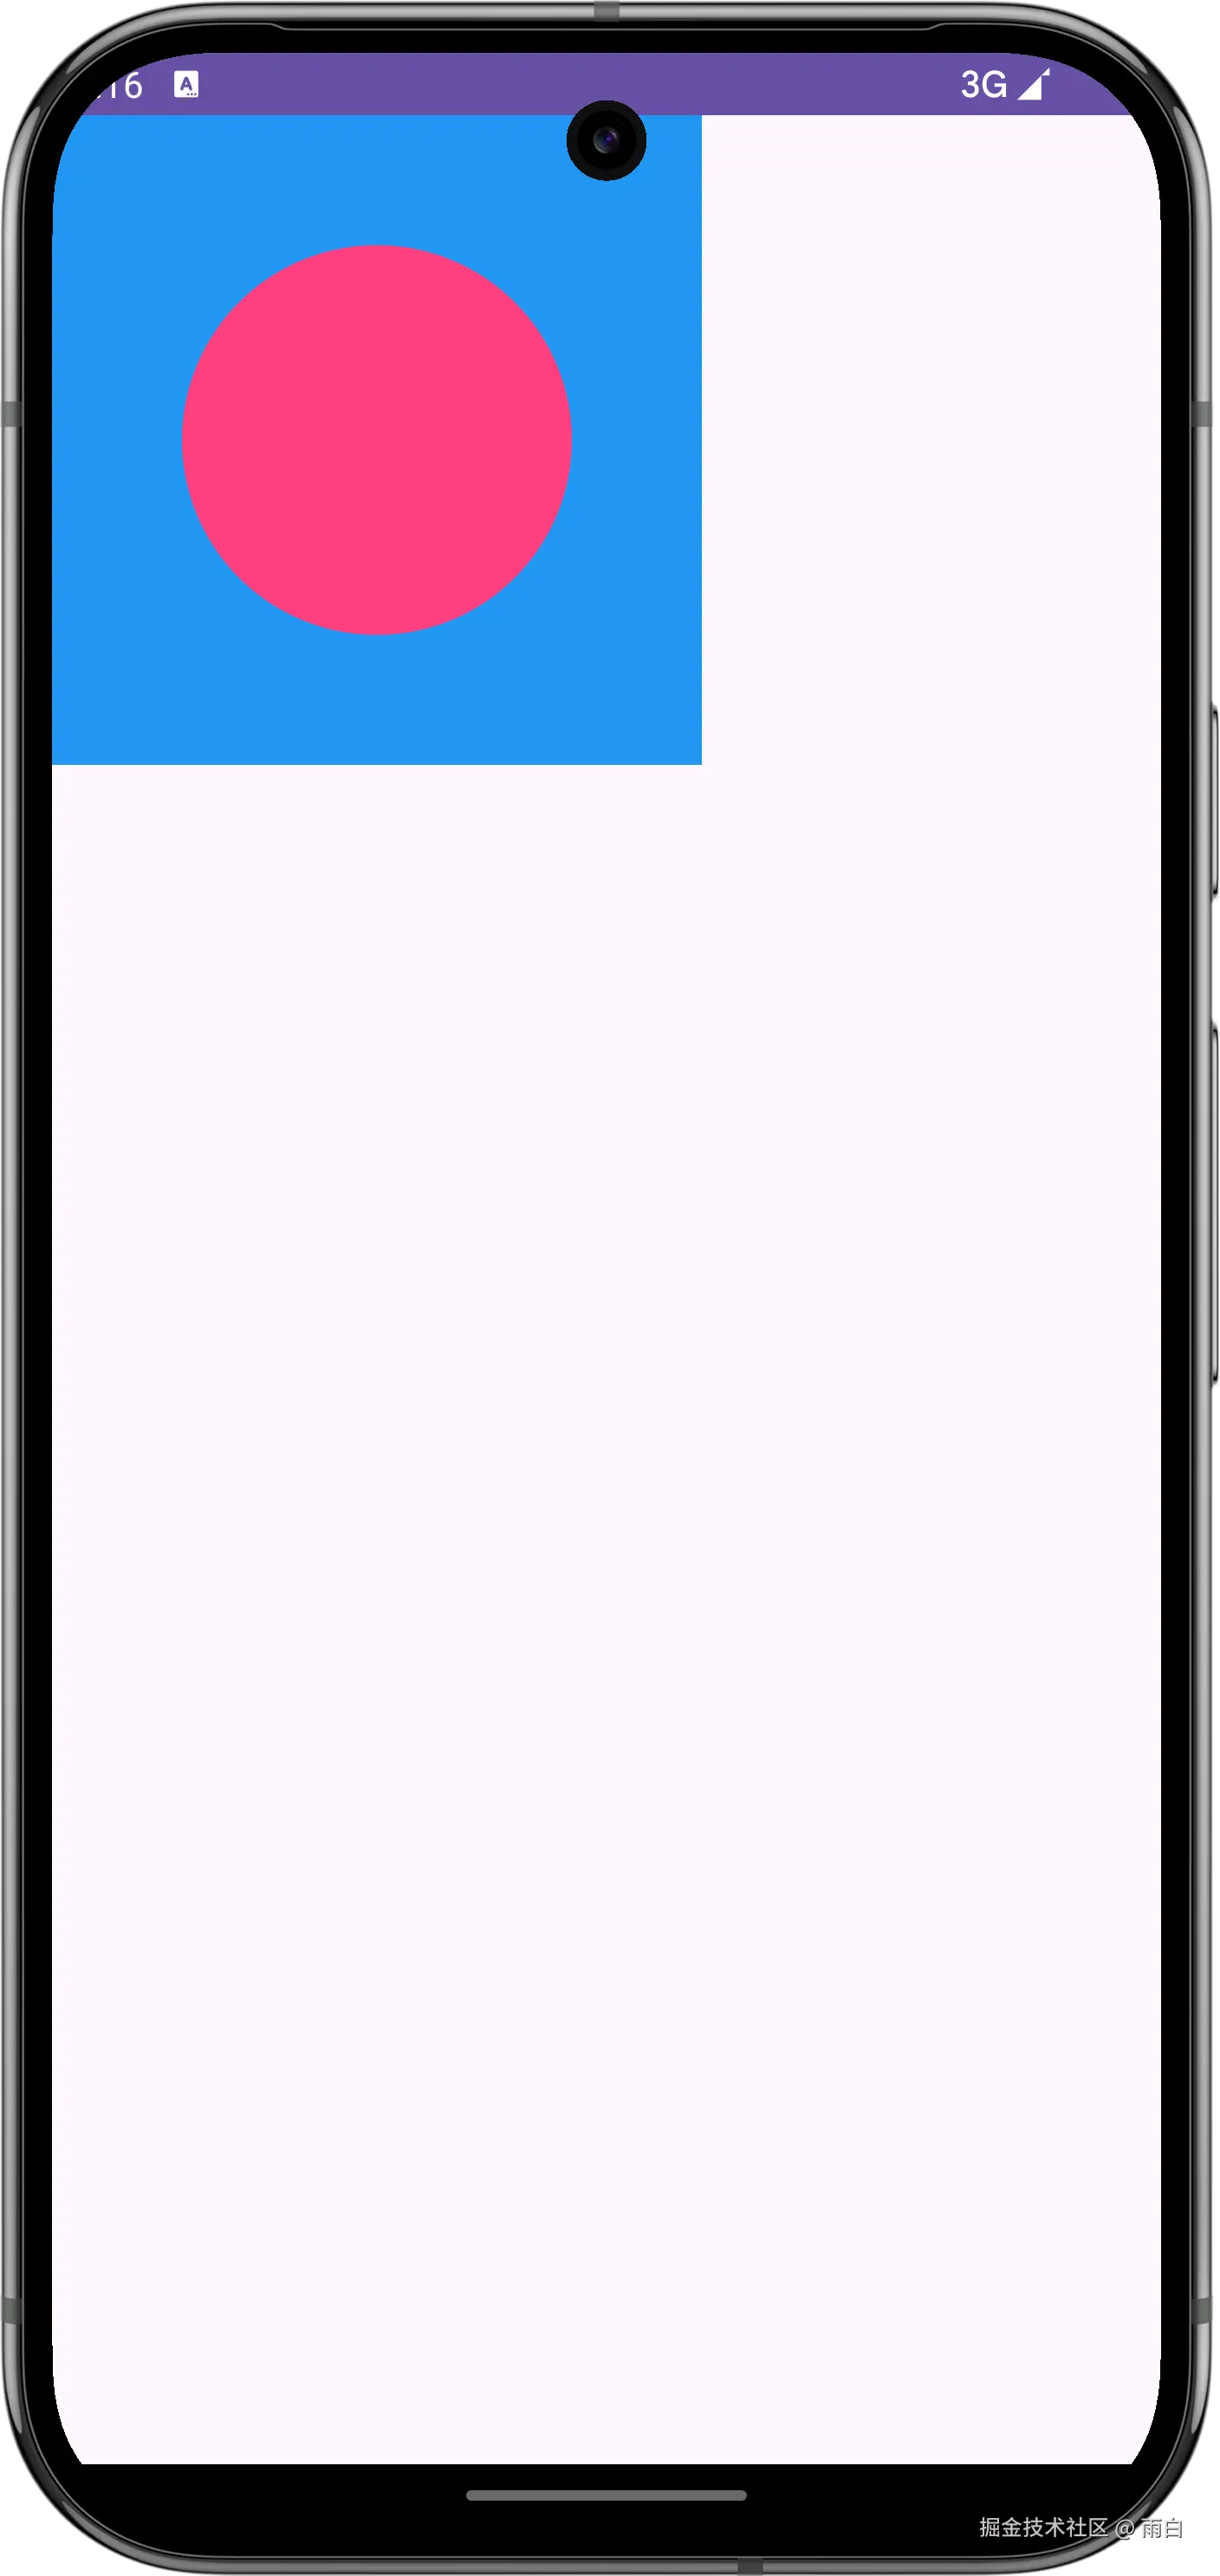
这样看起来好像没问题,但其实它忽略了开发者传入的尺寸要求。
我们来解析父 View 传来的 MeasureSpec。
MeasureSpec包括了模式以及尺寸,模式有三种:
- EXACTLY: 精确值,对应 match_parent 或是具体的尺寸值。
- AT_MOST: 最大值,对应 wrap_content。
- UNSPECIFIED: 不限制。
我们可以通过 MeasureSpec.getMode 和 MeasureSpec.getSize 方法来获取这些信息,然后手动处理逻辑。
kotlin
override fun onMeasure(widthMeasureSpec: Int, heightMeasureSpec: Int) {
    // 计算在 wrap_content 时期望的默认尺寸
    val desiredWidth = (circlePadding * 2 + circleRadius * 2)
    val desiredHeight = (circlePadding * 2 + circleRadius * 2)

    // 获取父 View 的约束
    val widthMode = MeasureSpec.getMode(widthMeasureSpec)
    val widthSize = MeasureSpec.getSize(widthMeasureSpec)
    val heightMode = MeasureSpec.getMode(heightMeasureSpec)
    val heightSize = MeasureSpec.getSize(heightMeasureSpec)

    // 根据不同的模式,计算最终的宽高
    val finalWidth = when (widthMode) {
        MeasureSpec.EXACTLY -> {
            // 父 View 要求了精确尺寸,我们必须遵守
            widthSize
        }

        MeasureSpec.AT_MOST -> {
            // 父 View 给了一个最大值,我们不能超过它
            min(desiredWidth.toInt(), widthSize)
        }

        else -> { // UNSPECIFIED
            // 父 View 不作限制,我们用自己的期望尺寸
            desiredWidth.toInt()
        }
    }

    val finalHeight = when (heightMode) {
        MeasureSpec.EXACTLY -> {
            heightSize
        }

        MeasureSpec.AT_MOST -> {
            min(desiredHeight.toInt(), heightSize)
        }

        else -> {
            desiredHeight.toInt()
        }
    }

    // 保存最终结果
    setMeasuredDimension(finalWidth, finalHeight)
}
其实这部分代码都是固定的。为此,Android 给我们提供了 resolveSize() 方法,封装了上述 when 代码块逻辑判断,我们只需这样即可:
kotlin
override fun onMeasure(widthMeasureSpec: Int, heightMeasureSpec: Int) {
    // 计算期望的尺寸
    val desiredSize = (circlePadding * 2 + circleRadius * 2).toInt()

    // 使用 resolveSize 自动结合父View的约束,得出最终尺寸
    val width = resolveSize(desiredSize, widthMeasureSpec)
    val height = resolveSize(desiredSize, heightMeasureSpec)

    // 保存最终尺寸
    setMeasuredDimension(width, height)
}
再来看效果,非常符合预期。
-
在宽高都为
wrap_content的情况下,尺寸刚好包住内容。
-
在宽为
300dp,高为200dp的情况下,能够遵守精确尺寸。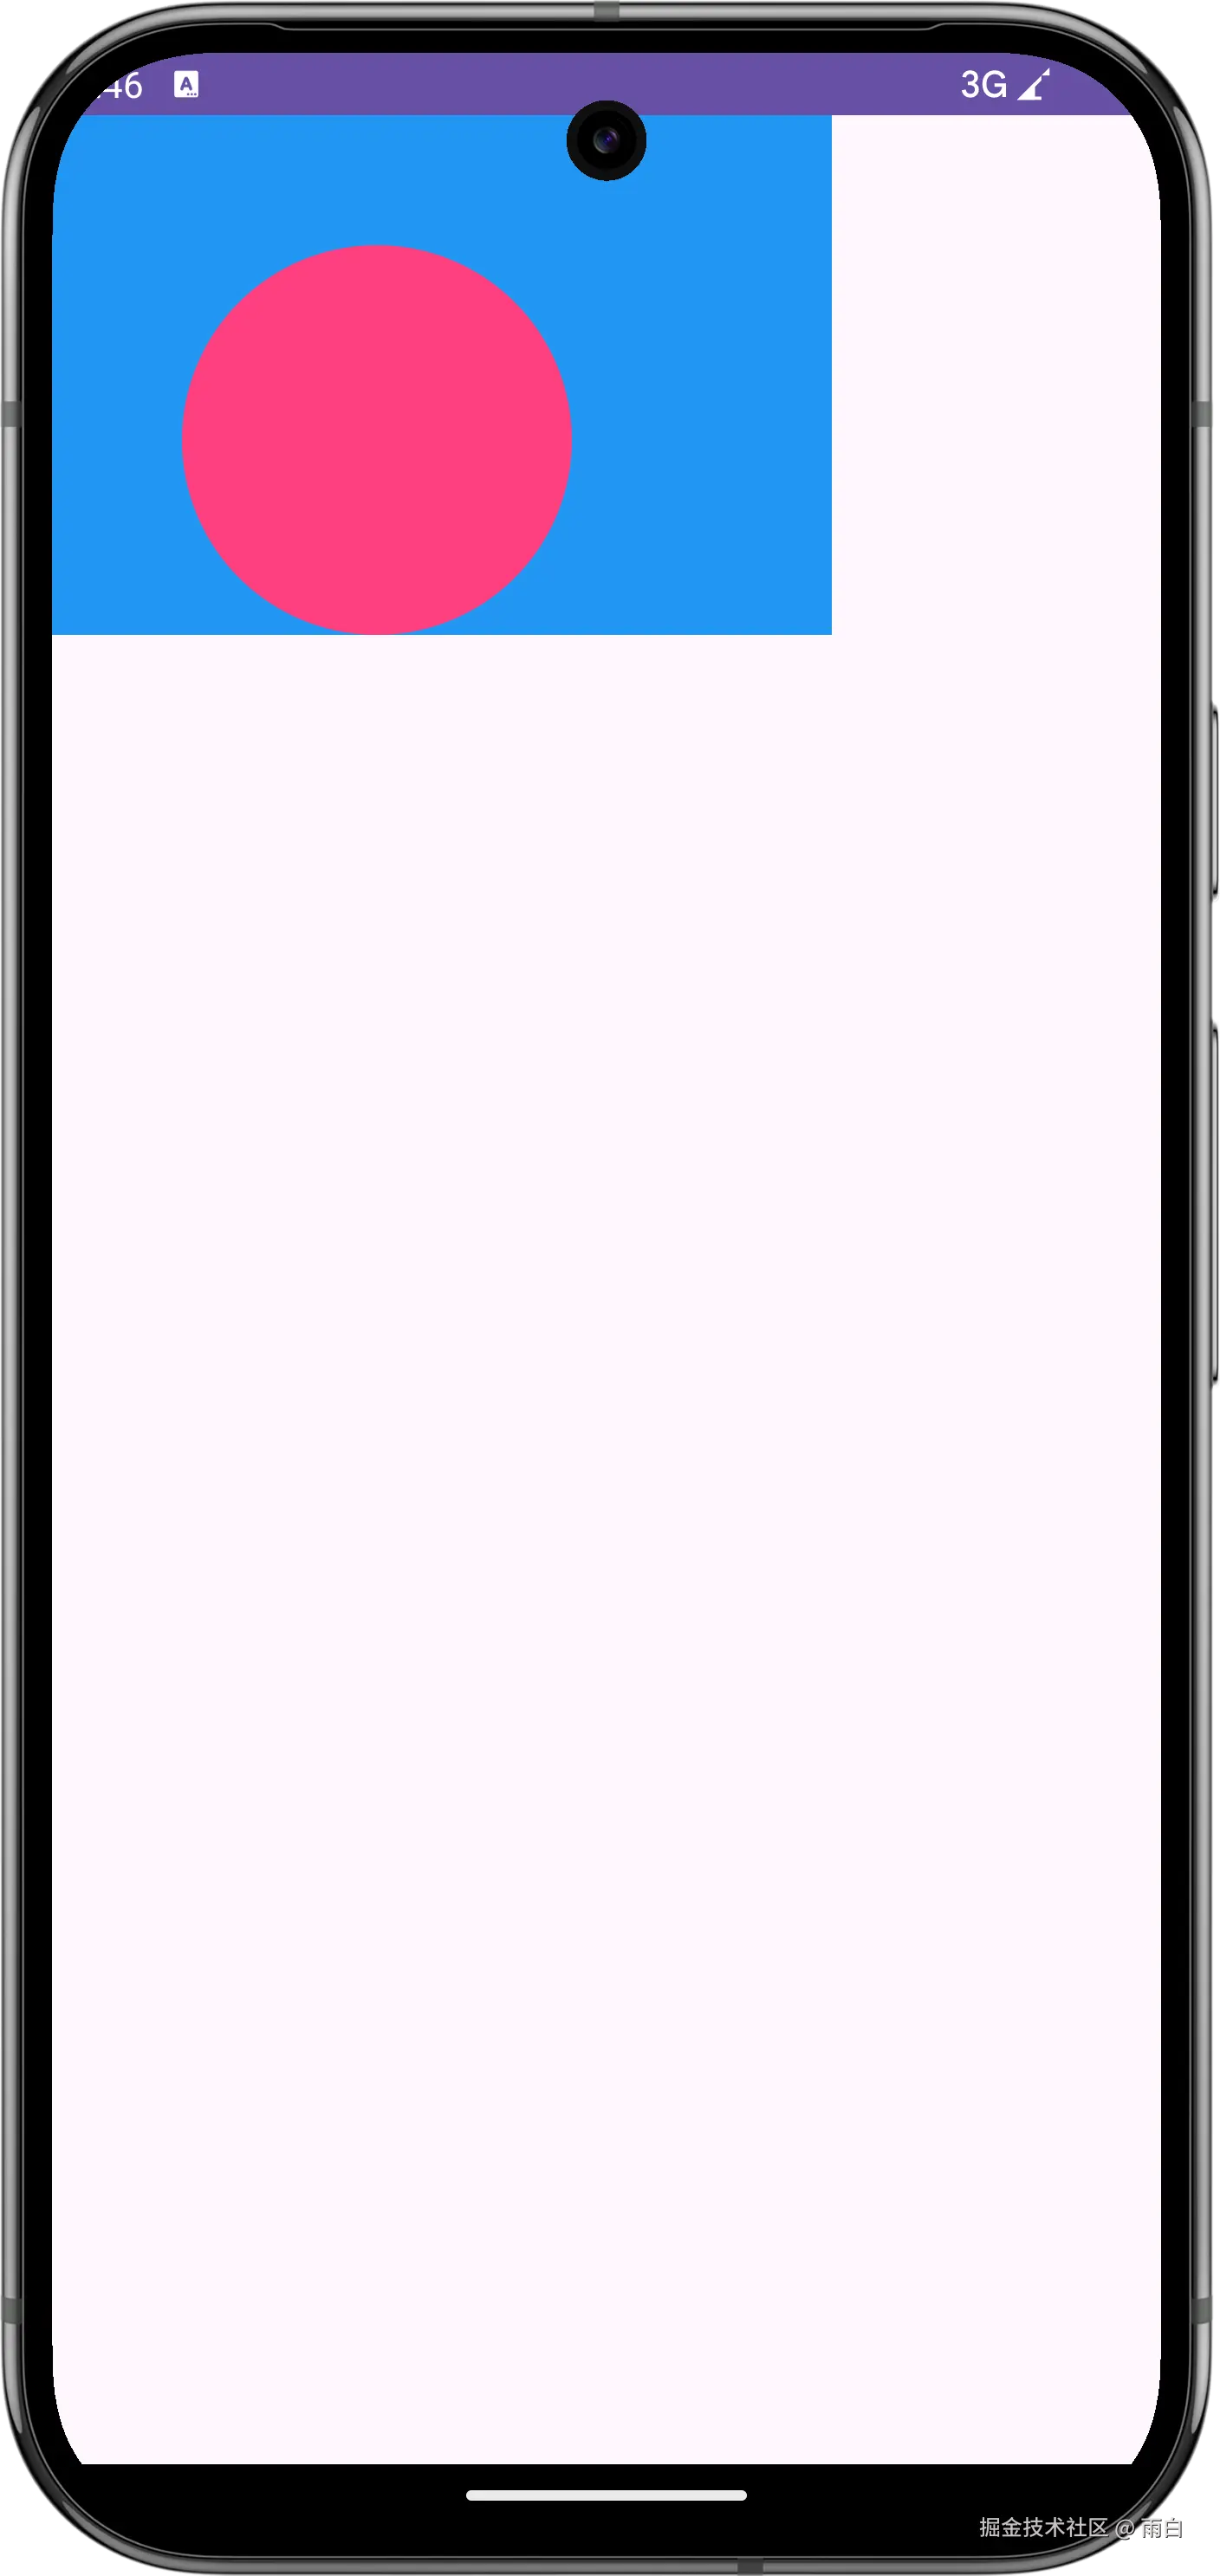
前面我们还提到了 resolveSizeAndState,它的源码为:
java
public static int resolveSizeAndState(int size, int measureSpec, int childMeasuredState) {
    // ...
    switch (specMode) {
        case MeasureSpec.AT_MOST:
            if (specSize < size) {
                result = specSize | MEASURED_STATE_TOO_SMALL; // 🔎
            } else {
                result = size;
            }
            break;
        // ...
    }
    return result | (childMeasuredState & MEASURED_STATE_MASK);
}
在空间不够时,它会加上一个 MEASURED_STATE_TOO_SMALL 状态标记。
这个标记可以被父 ViewGroup 拿到,从而稍后可以以更大的尺寸重新测量当前 View。但遗憾的是,连很多官方的 ViewGroup 都没有实现这个逻辑,所以一般用不上这个方法,通常使用 resolveSize 方法就行。