目录
[三、配置GitLab Runner](#三、配置GitLab Runner)
[1、安装GitLab Runner](#1、安装GitLab Runner)
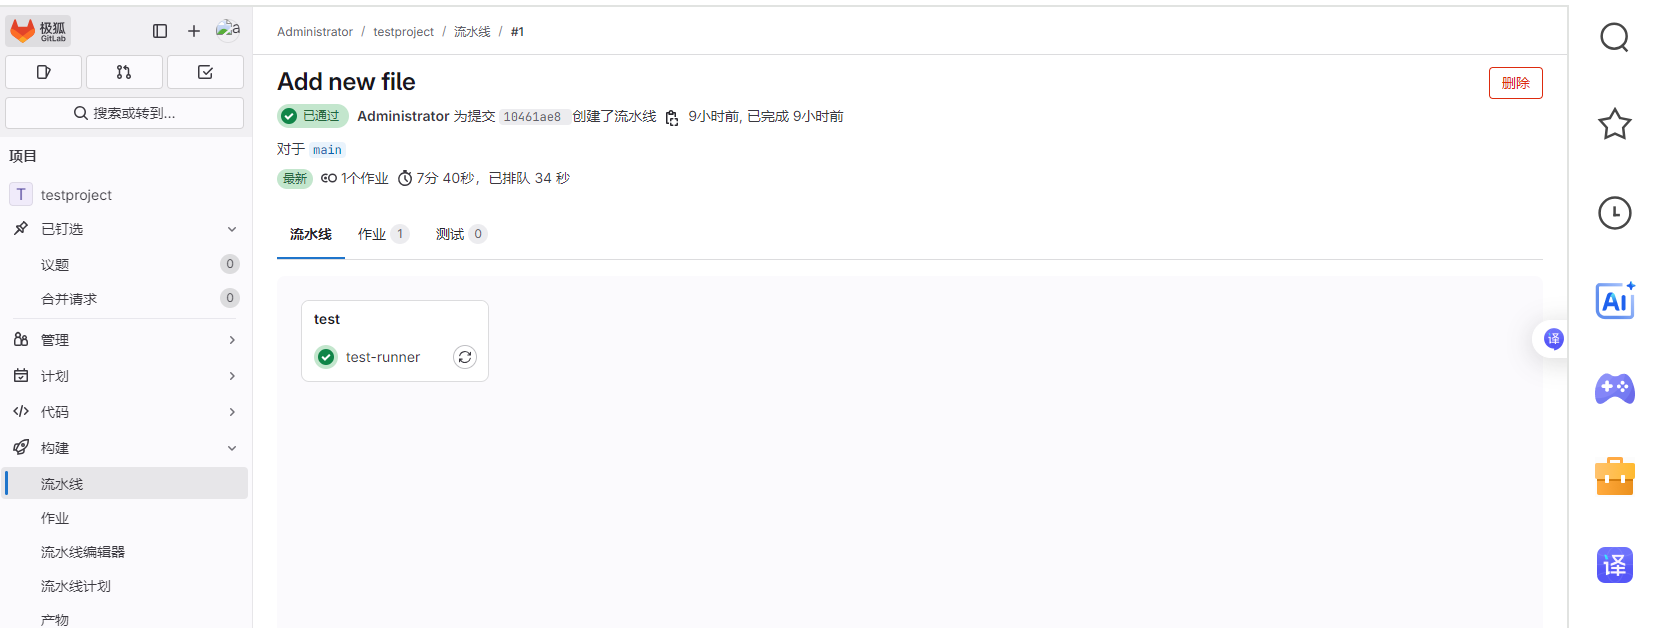
[3、测试 Runner](#3、测试 Runner)
一、安装gitlab
1、安装gitlab
yum localinstall -y gitlab-jh-17.7.0-jh.0.el8.x86_64.rpm2、修改配置文件
cd /etc/gitlab/
vim gitlab.rb
#修改配置


##初始化
gitlab-ctl reconfigure
##查看密码
cat initial_root_password
netstat -anptu | grep 80
##启动服务
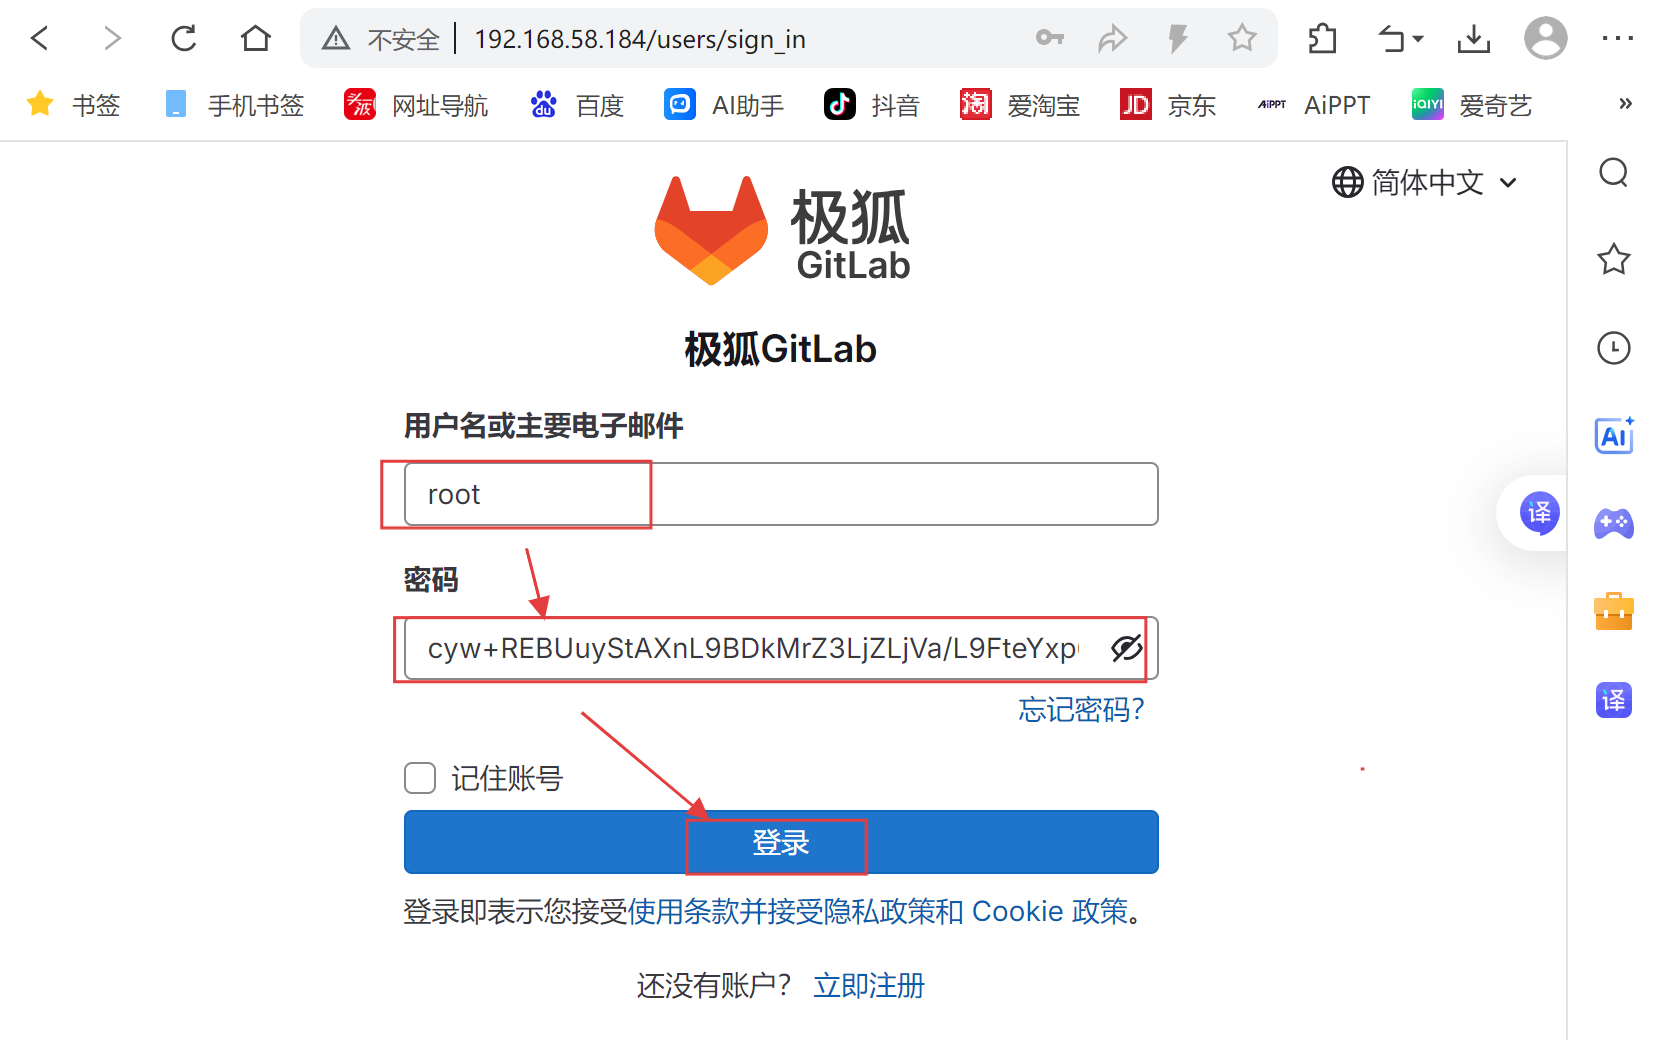
gitlab-ctl start网站访问:192.168.58.184
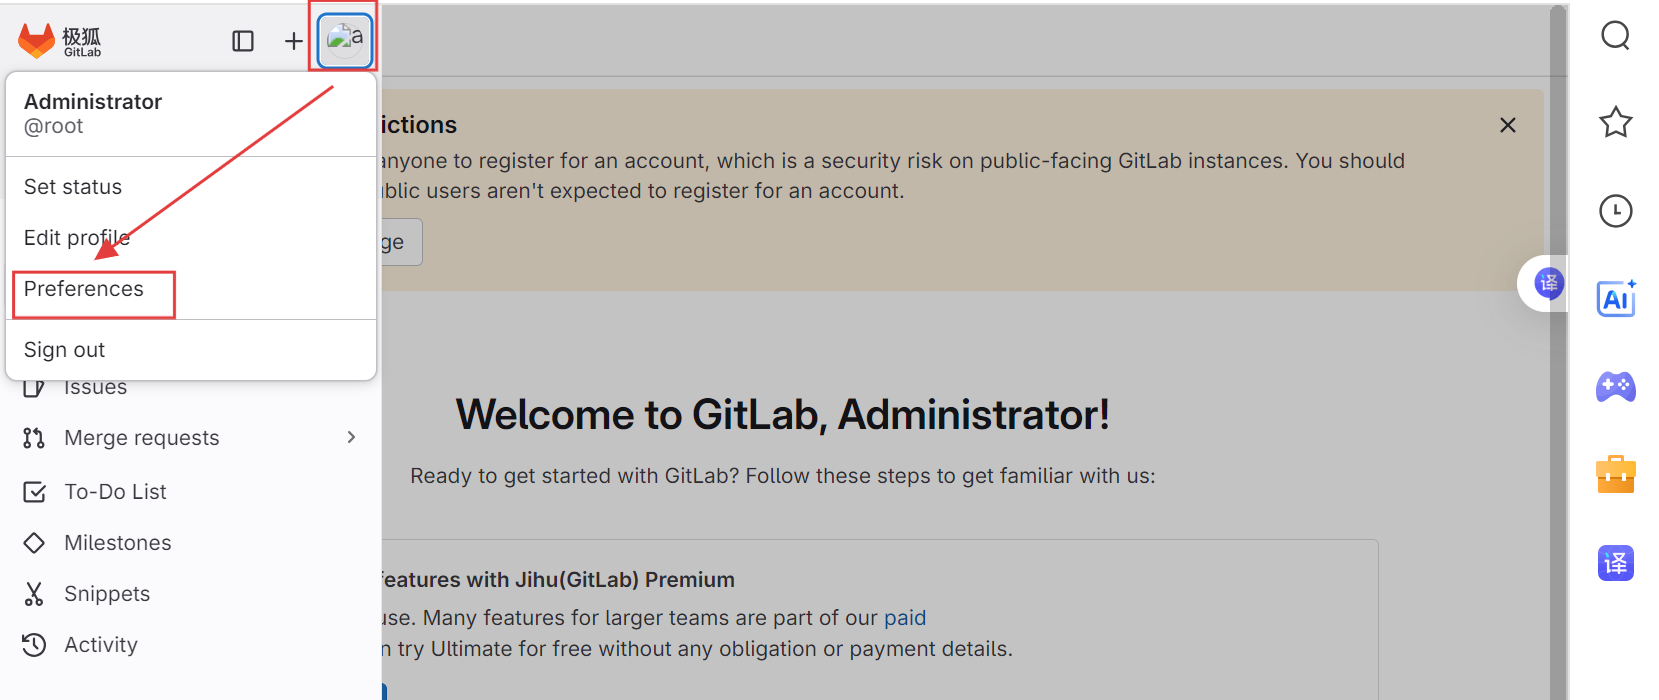
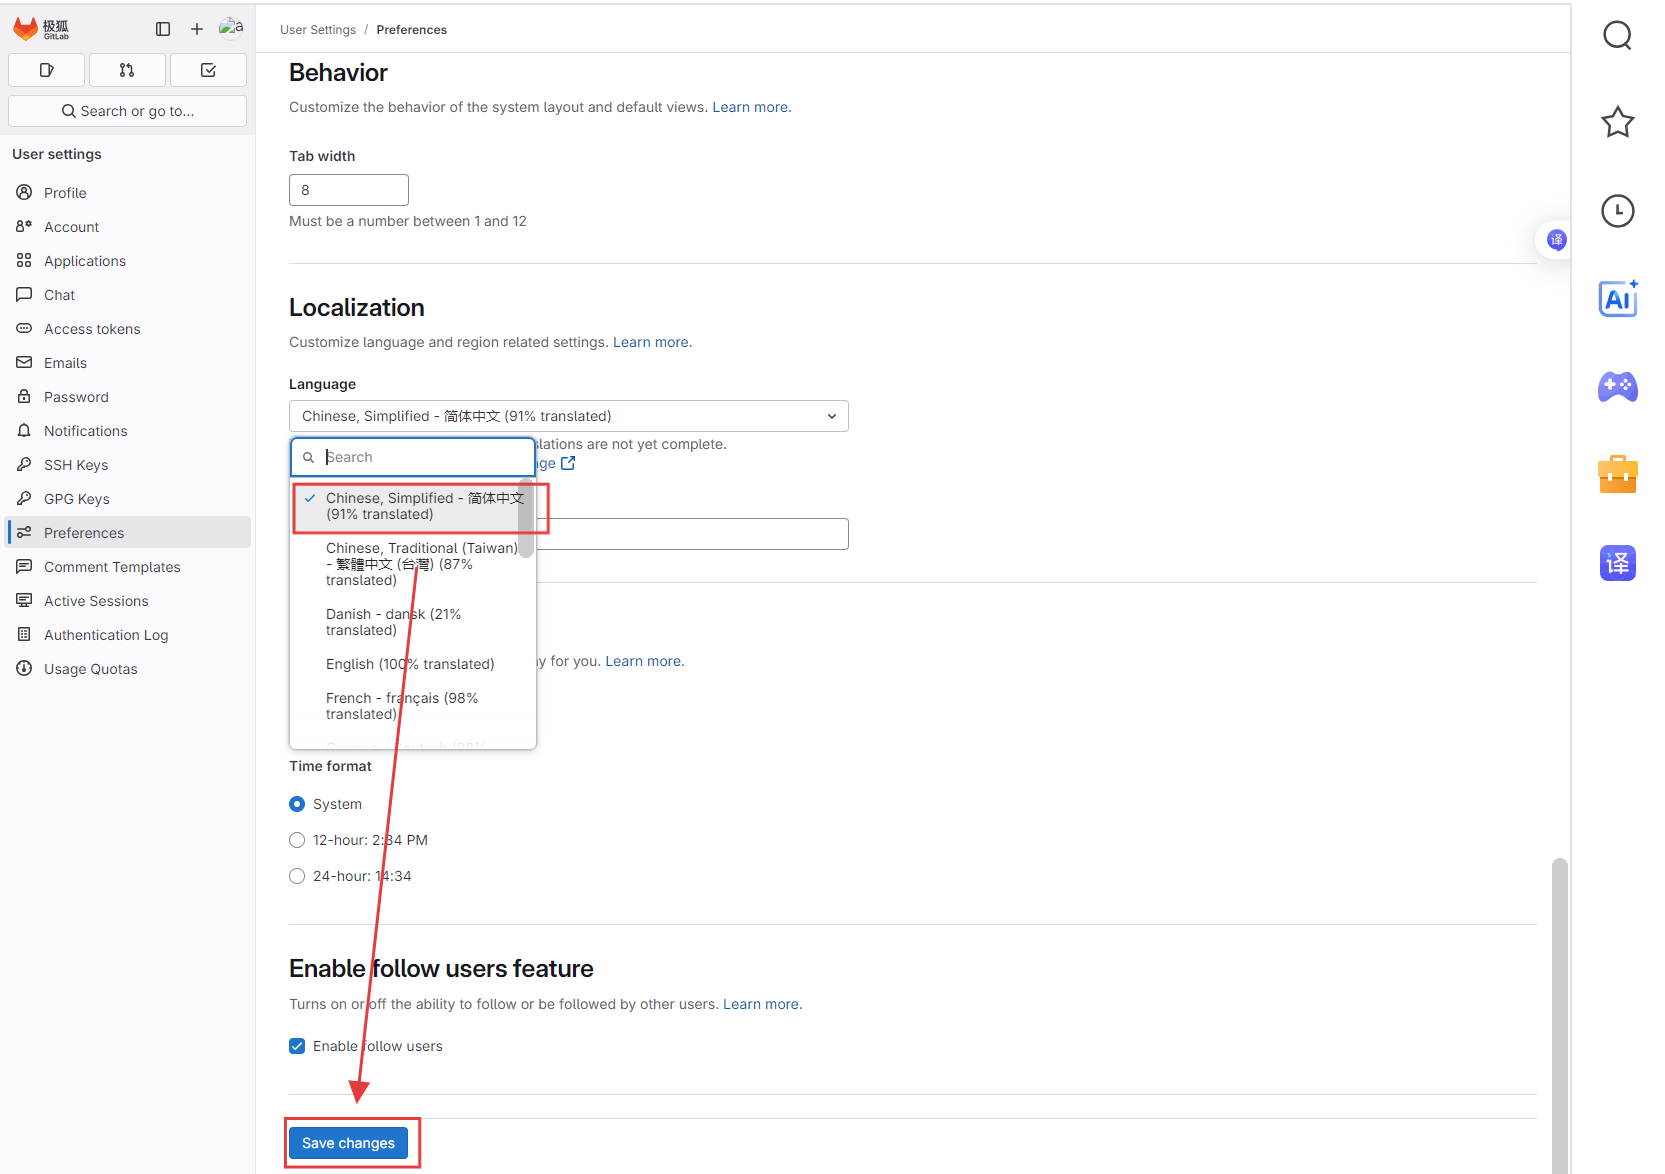
更改语言环境
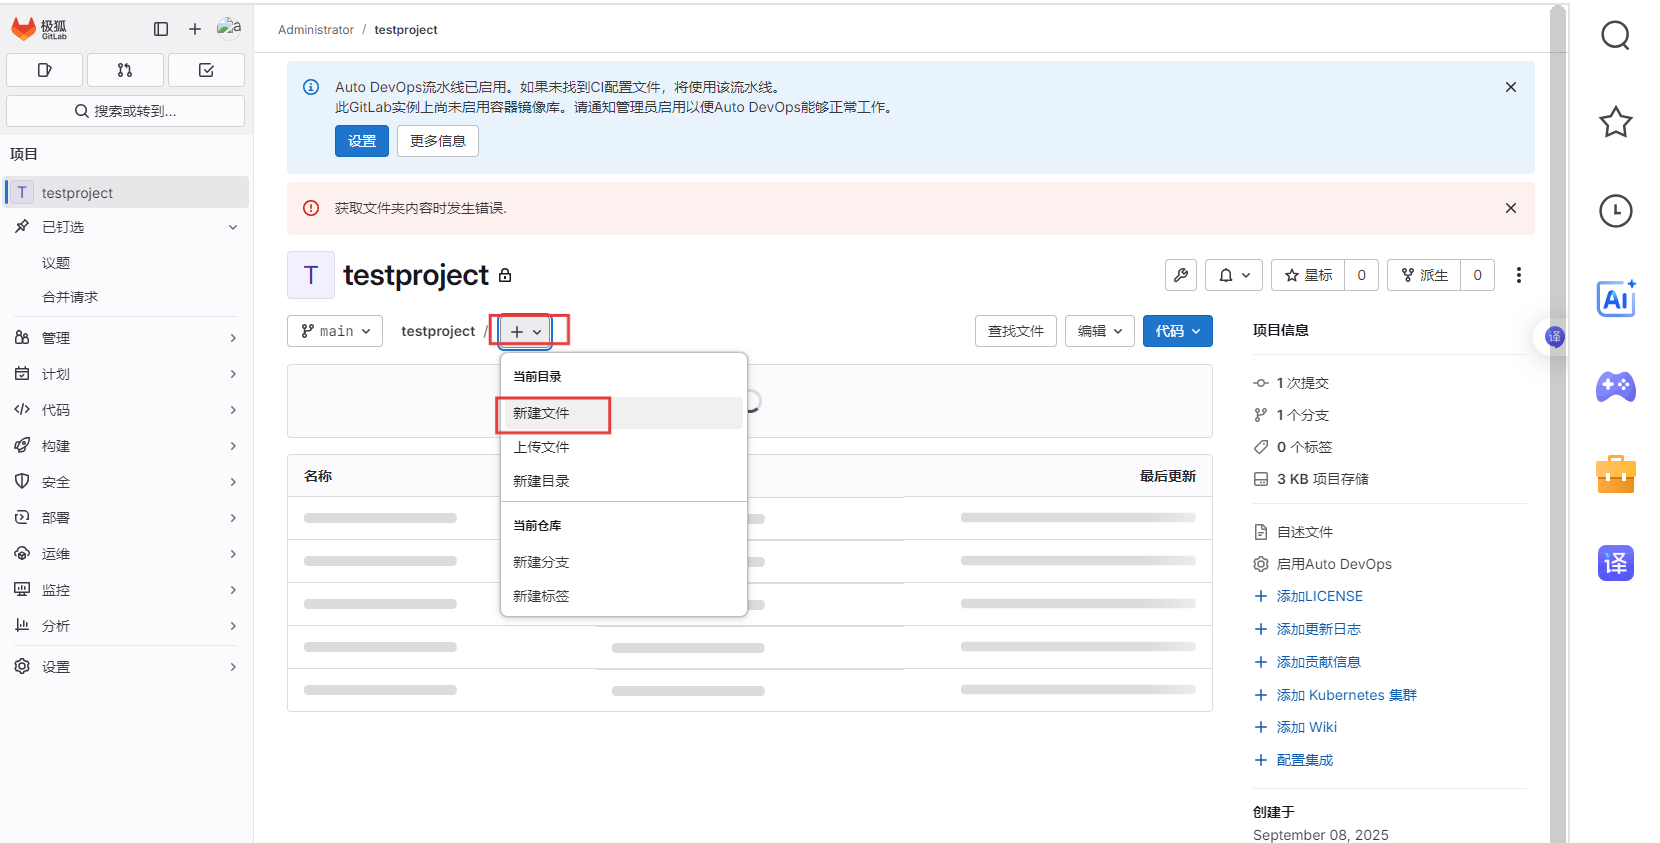
二、创建项目
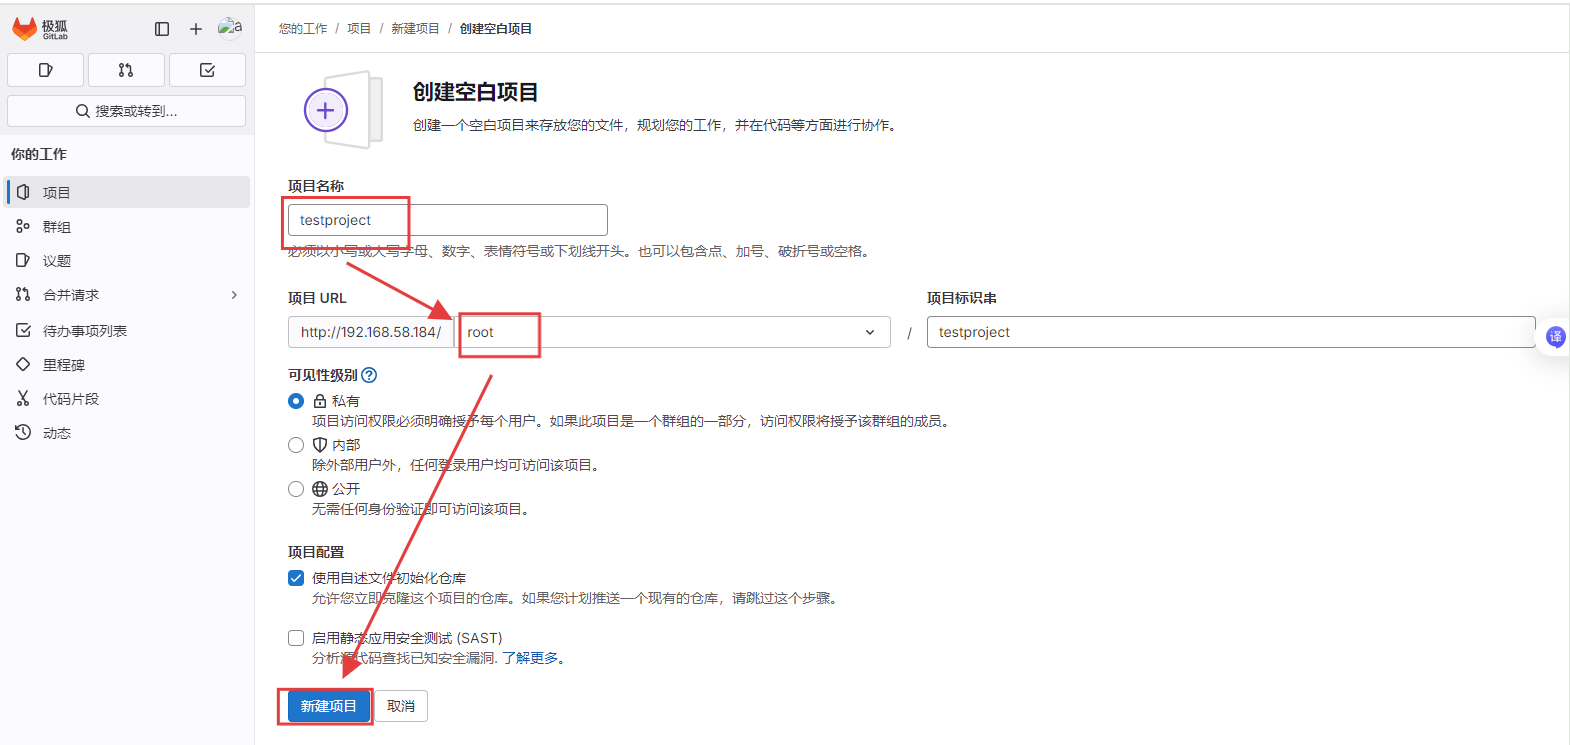
1、安装git
yum install -y git2、克隆项目
使用http克隆项目
git clone http://192.168.58.184:root/testproject.git
root
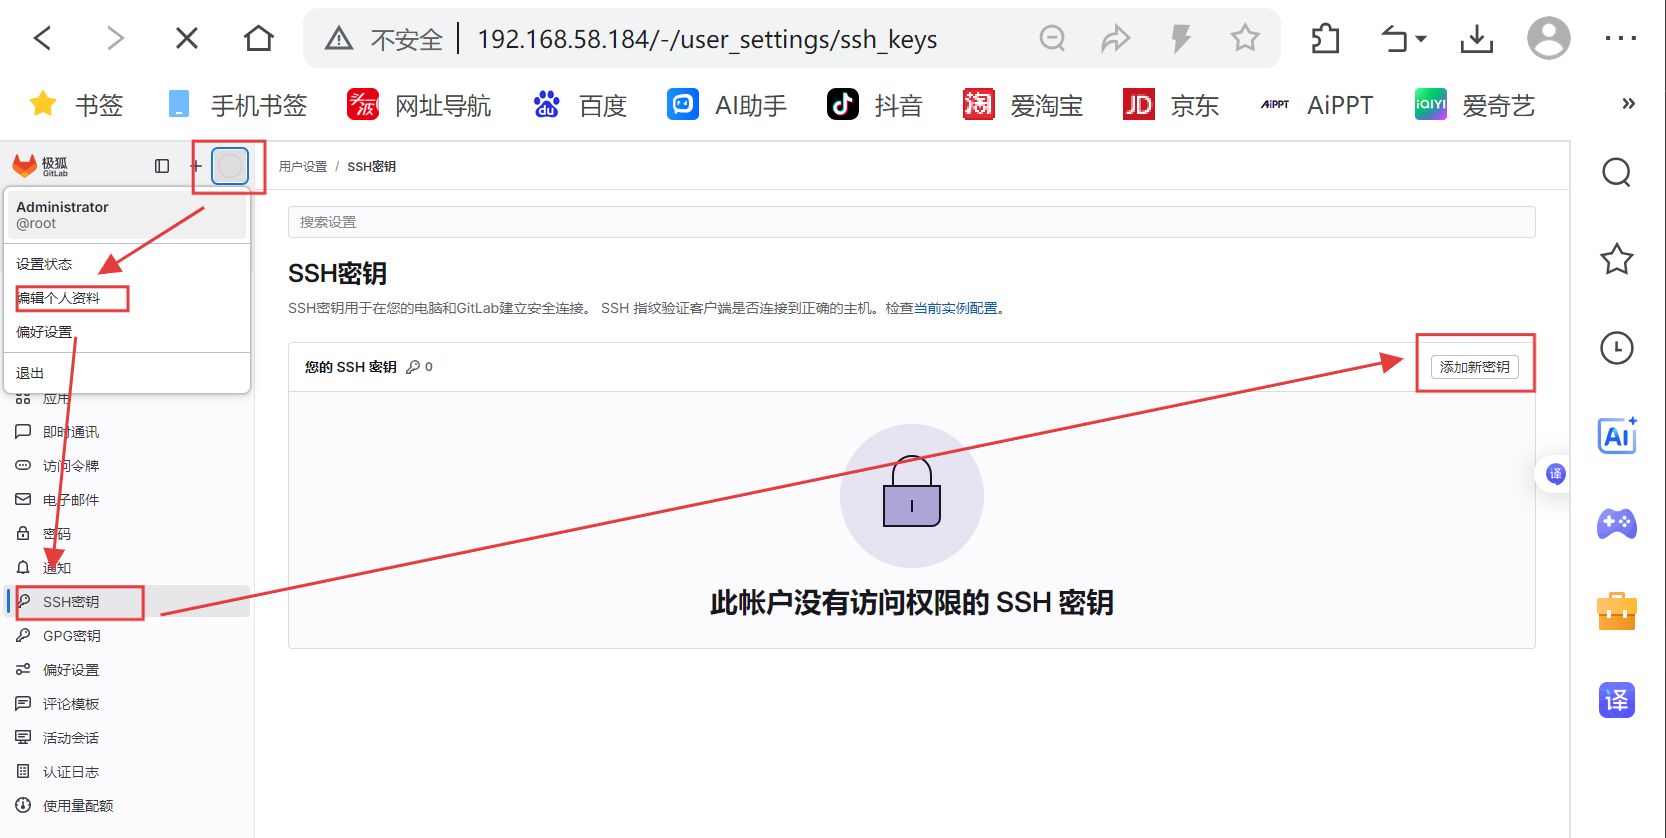
cyw+REBUuyStAXnL9BDkMrZ3LjZLjVa/L9FteYxp6EI=使用SSH克隆项目
passwd git
123
ssh-keygen
cd .ssh/
[root@workspace .ssh]# ls
id_ed25519 id_ed25519.pub known_hosts known_hosts.old
[root@workspace .ssh]# cat id_ed25519.pub
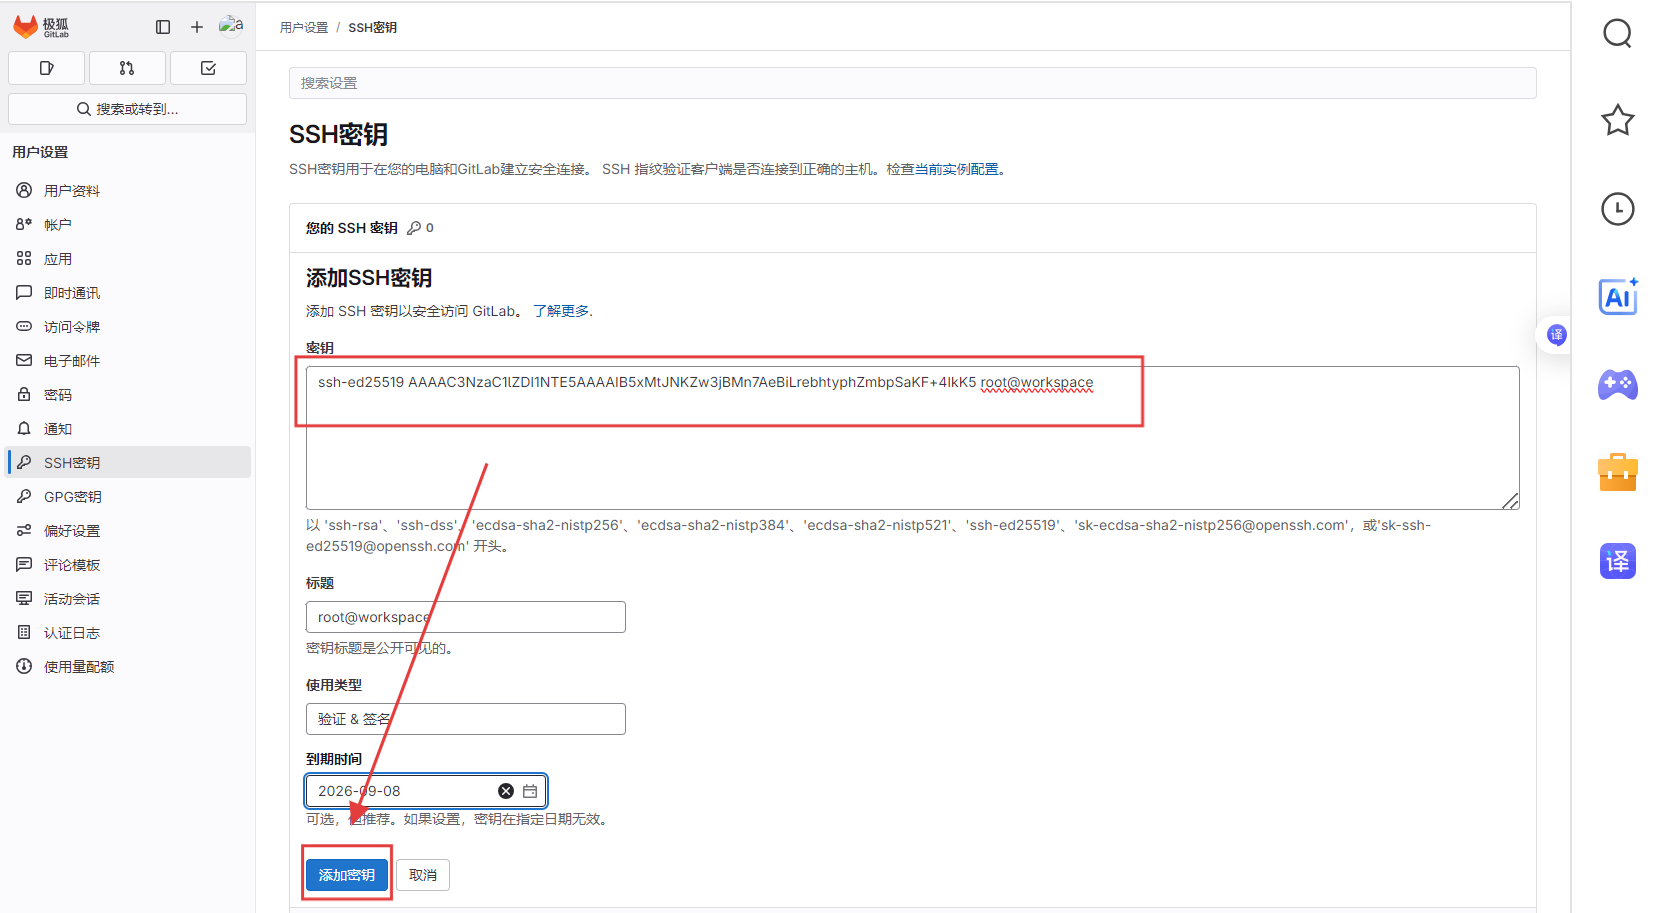
ssh-ed25519 AAAAC3NzaC1lZDI1NTE5AAAAIB5xMtJNKZw3jBMn7AeBiLrebhtyphZmbpSaKF+4IkK5 root@workspace
git clone git@192.168.58.184:root/testproject.git三、配置GitLab Runner
1、安装GitLab Runner
vim /etc/yum.repos.d/gitlab-runner.repo
[gitlab-runner]
name=gitlab-runner
baseurl=https://packages.gitlab.com/runner/gitlab-runner/el/8/$basearch
repo_gpgcheck=1
gpgcheck=0
enabled=1
gpgkey=https://packages.gitlab.com/runner/gitlab-runner/gpgkey
       https://packages.gitlab.com/runner/gitlab-runner/gpgkey-runner-io
sslverify=1
sslcacert=/etc/pki/tls/certs/ca-bundle.crt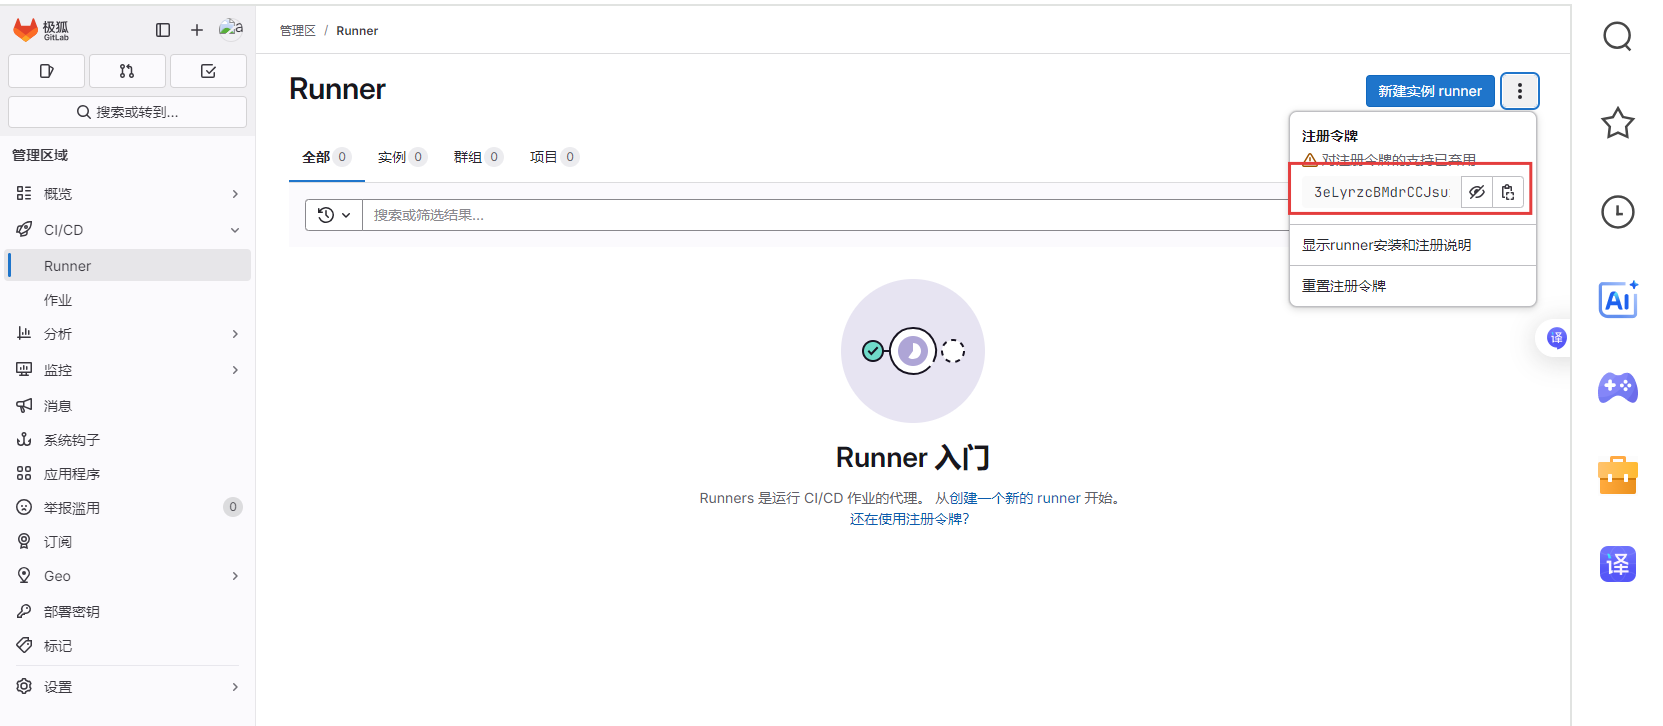
metadata_expire=300dnf install -y gitlab-runner查看令牌
#启动注册向导
[root@workspace ~]# gitlab-runner register
Runtime platform arch=amd64 os=linux pid=70294 revision=5a021a1c version=18.3.1
Running in system-mode.
Enter the GitLab instance URL (for example, https://gitlab.com/):
http://192.168.58.184 ##GitLab 实例 URL
Enter the registration token:
3eLyrzcBMdrCCJsuxrrn ##令牌
Enter a description for the runner:
[workspace]: test-runner ##Runner 描述
Enter tags for the runner (comma-separated):
webserver ##Runner 标签
Enter optional maintenance note for the runner:
test ##维护备注
WARNING: Support for registration tokens and runner parameters in the 'register' command has been deprecated in GitLab Runner 15.6 and will be replaced with support for authentication tokens. For more information, see https://docs.gitlab.com/ci/runners/new_creation_workflow/
Registering runner... succeeded correlation_id=01K4MZHEPT7Z2JAVSYDN8WW9HW runner=3eLyrzcBM
Enter an executor: virtualbox, docker, docker-windows, kubernetes, instance, custom, shell, ssh, parallels, docker+machine, docker-autoscaler:
docker
Enter the default Docker image (for example, ruby:3.3):
nginx:latest
Runner registered successfully. Feel free to start it, but if it's running already the config should be automatically reloaded!
Configuration (with the authentication token) was saved in "/etc/gitlab-runner/config.toml"
#启动 Runner 服务
systemctl start gitlab-runner2、安装docker
vim /etc/yum.repos.d/docker-ce.repo
[docker-ce-stable]
name=Docker CE Stable - $basearch
baseurl=https://mirrors.aliyun.com/docker-ce/linux/centos/8/$basearch/stable
enabled=1
gpgcheck=1
gpgkey=https://mirrors.aliyun.com/docker-ce/linux/centos/gpg
[docker-ce-stable-debuginfo]
name=Docker CE Stable - Debuginfo $basearch
baseurl=https://mirrors.aliyun.com/docker-ce/linux/centos/8/debug-$basearch/stable
enabled=0
gpgcheck=1
gpgkey=https://mirrors.aliyun.com/docker-ce/linux/centos/gpg
[docker-ce-stable-source]
name=Docker CE Stable - Sources
baseurl=https://mirrors.aliyun.com/docker-ce/linux/centos/8/source/stable
enabled=0
gpgcheck=1
gpgkey=https://mirrors.aliyun.com/docker-ce/linux/centos/gpg
yum clean all
yum install -y docker-ce配置加速
vim /etc/docker/daemon.json
{
    "registry-mirrors": [
        "https://0vmzj3q6.mirror.aliyuncs.com",
        "https://docker.m.daocloud.io",
        "https://mirror.baidubce.com",
        "https://dockerproxy.com",
        "https://mirror.iscas.ac.cn",
        "https://huecker.io",
        "https://dockerhub.timeweb.cloud",
        "https://noohub.ru",
        "https://vlgh0kqj.mirror.aliyuncs.com"
    ]
}systemctl daemon-reload
systemctl enable --now docker#将 gitlab-runner 用户加入 docker 用户组
usermod -aG docker gitlab-runner
#重启 Runner 服务以应用更改
systemctl restart gitlab-runner3、测试 Runner