目录
- 为什么需要提升代码的可扩展性?有什么问题?
- 比如我们写一个环境噪音分析逻辑。【对功能进行封装】
- 自定义view
- 分类管理
一、为什么需要提升代码的可扩展性?有什么问题?
比如我们要开发多个项目,那么很多项目,有很多内容都是相同的,所以我们需要复制过去,比如一些常用的自定义view,或者功能。
但往往我们复制过去的时候,就会发现有很多地方需要修改,甚至太多逻辑粘合在一起了,就导致我们复制要花很长的时间。
所以这篇文章就像来讲讲这个问题,以及解决方法。
1.1 比如我们写一个环境噪音分析逻辑。【对功能进行封装】
我们先来看看代码
kt
class MainActivity : AppCompatActivity() {

    private lateinit var dbValueTextView: TextView
    private lateinit var progressBar: ProgressBar
    private lateinit var statusTextView: TextView

    private var audioRecord: AudioRecord? = null
    private var recording = false
    private val bufferSize = 1024
    private val handler = Handler(Looper.getMainLooper())
    private val updateInterval = 500L // 更新间隔(毫秒)

    override fun onCreate(savedInstanceState: Bundle?) {
        super.onCreate(savedInstanceState)
        setContentView(R.layout.activity_main)

        dbValueTextView = findViewById(R.id.dbValueTextView)
        progressBar = findViewById(R.id.progressBar)
        statusTextView = findViewById(R.id.statusTextView)

        checkPermission()
    }

    private fun checkPermission() {
        if (ActivityCompat.checkSelfPermission(
                this,
                Manifest.permission.RECORD_AUDIO
            ) != PackageManager.PERMISSION_GRANTED
        ) {
            ActivityCompat.requestPermissions(
                this,
                arrayOf(Manifest.permission.RECORD_AUDIO),
                REQUEST_RECORD_AUDIO_PERMISSION
            )
        } else {
            startNoiseMeasurement()
        }
    }

    override fun onRequestPermissionsResult(
        requestCode: Int,
        permissions: Array<String>,
        grantResults: IntArray
    ) {
        super.onRequestPermissionsResult(requestCode, permissions, grantResults)
        if (requestCode == REQUEST_RECORD_AUDIO_PERMISSION && grantResults.isNotEmpty() &&
            grantResults[0] == PackageManager.PERMISSION_GRANTED
        ) {
            startNoiseMeasurement()
        }
    }

    //进行噪音分析
    private fun startNoiseMeasurement() {
        val minBufferSize = AudioRecord.getMinBufferSize(
            SAMPLE_RATE,
            AudioFormat.CHANNEL_IN_MONO,
            AudioFormat.ENCODING_PCM_16BIT
        )

        audioRecord = AudioRecord(
            MediaRecorder.AudioSource.MIC,
            SAMPLE_RATE,
            AudioFormat.CHANNEL_IN_MONO,
            AudioFormat.ENCODING_PCM_16BIT,
            minBufferSize
        )

        recording = true
        audioRecord?.startRecording()

        Thread {
            val buffer = ShortArray(bufferSize)
            while (recording) {
                val readResult = audioRecord?.read(buffer, 0, bufferSize) ?: 0
                if (readResult > 0) {
                    val amplitude = calculateAmplitude(buffer)
                    val db = amplitudeToDb(amplitude)

                    handler.post {
                        updateUI(db)
                    }
                }
                Thread.sleep(updateInterval)
            }
        }.start()
    }

    private fun calculateAmplitude(buffer: ShortArray): Double {
        var sum = 0.0
        for (i in buffer.indices) {
            sum += buffer[i].toDouble() * buffer[i].toDouble()
        }
        return sqrt(sum / buffer.size)
    }

    private fun amplitudeToDb(amplitude: Double): Double {
        // 参考值:16位PCM最大值为32767
        return 20 * log10(amplitude / 32767.0)
    }

    private fun updateUI(db: Double) {
        val absDb = abs(db)
        val displayValue = if (absDb.isNaN()) 0.0 else absDb

        dbValueTextView.text = "%.1f dB".format(displayValue)
        progressBar.progress = displayValue.toInt()

        when {
            displayValue < 30 -> statusTextView.text = "环境安静"
            displayValue < 60 -> statusTextView.text = "正常环境"
            displayValue < 80 -> statusTextView.text = "噪音较大"
            else -> statusTextView.text = "噪音超标!"
        }
    }

    override fun onDestroy() {
        super.onDestroy()
        recording = false
        audioRecord?.stop()
        audioRecord?.release()
    }

    companion object {
        private const val SAMPLE_RATE = 44100
        private const val REQUEST_RECORD_AUDIO_PERMISSION = 200
    }
}
让我解释一下这里面的功能:
- 动态请求麦克风权限
- 获取到以后,开始进行声音的数据分析,然后进行数据分析。
比如我们现在有一个需求,要在另外一个项目里面也增加一个噪音分析功能,现在项目小还好,如果后续我们想增加数据保存到数据库,增加统计表等等,那么很多代码的逻辑就会耦合在一起。我们复制起来就很麻烦。
那么我们如何做呢?就是将噪音分析功能,抽取出来,封装到一个类里面,然后提供方法给外面调用。比如:
kt
object NoiseMeter {
    private var mediaRecorder: MediaRecorder? = null
    private var isRecording = false
    private var scope: CoroutineScope? = null
    private var updateInterval: Long = 100L // 更新间隔(毫秒)

    // 噪音数据流
    private val _noiseLevelFlow = MutableStateFlow(NoiseData(0.0, NoiseStatus.QUIET))
    val noiseLevelFlow: StateFlow<NoiseData> = _noiseLevelFlow.asStateFlow()

    // 初始化
    fun initialize(context: Context, scope: CoroutineScope, updateInterval: Long = 100L) {
        if (this.scope != null) return // 避免重复初始化

        this.scope = scope
        this.updateInterval = updateInterval
    }

    // 开始测量
    fun start(context:Context) {
        val cacheDir: File = context.cacheDir
        if (isRecording || scope == null) return

        scope!!.launch {
            try {
                mediaRecorder = MediaRecorder().apply {
                    // 1. 设置音频源
                    setAudioSource(MediaRecorder.AudioSource.MIC)

                    // 2. 设置输出格式
                    setOutputFormat(MediaRecorder.OutputFormat.THREE_GPP)

                    // 3. 设置音频编码
                    setAudioEncoder(MediaRecorder.AudioEncoder.AMR_NB)

                    // 4. 设置输出文件(使用临时文件更安全)
                    val tempFile = File.createTempFile("temp_audio", ".3gp", cacheDir)
                    setOutputFile(tempFile.absolutePath)

                    prepare()
                    start()
                }

                isRecording = true

                // 开始更新噪音数据
                while (isRecording) {
                    val amplitude = mediaRecorder?.maxAmplitude?.toDouble() ?: 0.0
                    if (amplitude > 0) {
                        val db = 20 * log10(amplitude)
                        val status = when {
                            db < 40 -> NoiseStatus.QUIET
                            db < 70 -> NoiseStatus.NORMAL
                            else -> NoiseStatus.LOUD
                        }
                        _noiseLevelFlow.value = NoiseData(db, status)
                    }
                    delay(updateInterval)
                }
            } catch (e: Exception) {
                e.printStackTrace()
                Log.d("NoiseMeter", "start failed: ${e.message}")
                releaseMediaRecorder()
            }
        }
    }

    private fun releaseMediaRecorder() {
        try {
            mediaRecorder?.stop()
            mediaRecorder?.release()
        } catch (e: Exception) {
            Log.e("NoiseMeter", "Error releasing MediaRecorder: ${e.message}")
        } finally {
            mediaRecorder = null
            isRecording = false
        }
    }

    // 停止测量
    fun stop() {
        if (!isRecording) return

        isRecording = false
        mediaRecorder?.apply {
            try {
                stop()
                release()
            } catch (e: Exception) {
                e.printStackTrace()
            }
        }
        mediaRecorder = null
    }

    // 噪音数据类
    data class NoiseData(
        val decibels: Double,
        val status: NoiseStatus
    )

    // 噪音状态枚举
    enum class NoiseStatus {
        QUIET, NORMAL, LOUD
    }
}
然后我们在fragment里面就可以这样拿到数据
kt
class HomeFragment : BaseViewBindingFragment<FragmentHomeBinding>() {
    companion object {
        fun newInstance() = HomeFragment()
    }

    override fun createViewBinding(container: ViewGroup?): FragmentHomeBinding {
        return FragmentHomeBinding.inflate(layoutInflater)
    }

    override fun initUI() {
    }

    override fun initListener() {
        lifecycleScope.launch {
            NoiseMeter.noiseLevelFlow
                .flowWithLifecycle(lifecycle, Lifecycle.State.STARTED)
                .collect { noiseData ->
                    binding.noise.text = noiseData.toString()
                }

        }
    }

    override fun initData() {
    }
}
1.2 自定义view
我们写了一个自定义view,比如是一个自定义的TextView,可能每个项目都不一样,比如他们的字重,字体等等,如果你想修改,那么提供一些自定义属性给外面,不要代码里面修改,比如加什么背景色等等,而是要想下面一样,提供属性,比如字重属性,这样后续迁移也很方便。
kt
class MhtTextView : AppCompatTextView {
constructor(context: Context) : super(context) {
init(null)
}
constructor(context: Context, attrs: AttributeSet?) : super(context, attrs) {
init(attrs)
}
constructor(context: Context, attrs: AttributeSet?, defStyleAttr: Int) : super(
context,
attrs,
defStyleAttr
) {
init(attrs)
}
private fun init(attrs: AttributeSet?) {
if (attrs != null) {
val a = context.obtainStyledAttributes(attrs, R.styleable.MhtTextView)
val weight = a.getInt(R.styleable.MhtTextView_mhtTextWeight, NORMAL)
applyFontWeight(weight)
a.recycle()
}
}
private fun applyFontWeight(weight: Int) {
// 应用字重
when (weight) {
MEDIUM -> setTypeface(ResourcesCompat.getFont(context, R.font.mht_medium))
BOLD -> setTypeface(ResourcesCompat.getFont(context, R.font.mht_bold))
else -> setTypeface(ResourcesCompat.getFont(context, R.font.mht_regular))
}
}
companion object {
private const val NORMAL = 0
private const val MEDIUM = 1
private const val BOLD = 2
}
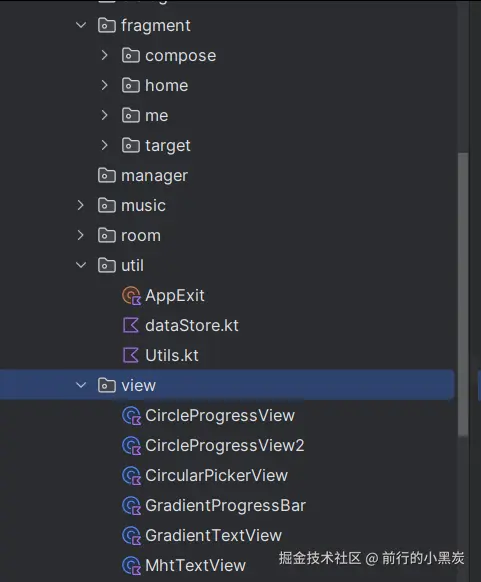
}1.3 分类管理
比如view,就统一放到view包里面 比如功能模块,home,那么repository,viewmodel,framgnet,如果你还有些compose,也可以放到里面。都是方便迁移。