Llama-Factory微调Qwen2.5-VL从数据集制作到部署记录
电脑环境配置:
1.ubuntu24
2.3090(24G)
3.Cuda==12.9
一、数据集制作
我的数据集主要是对图像内容进行描述
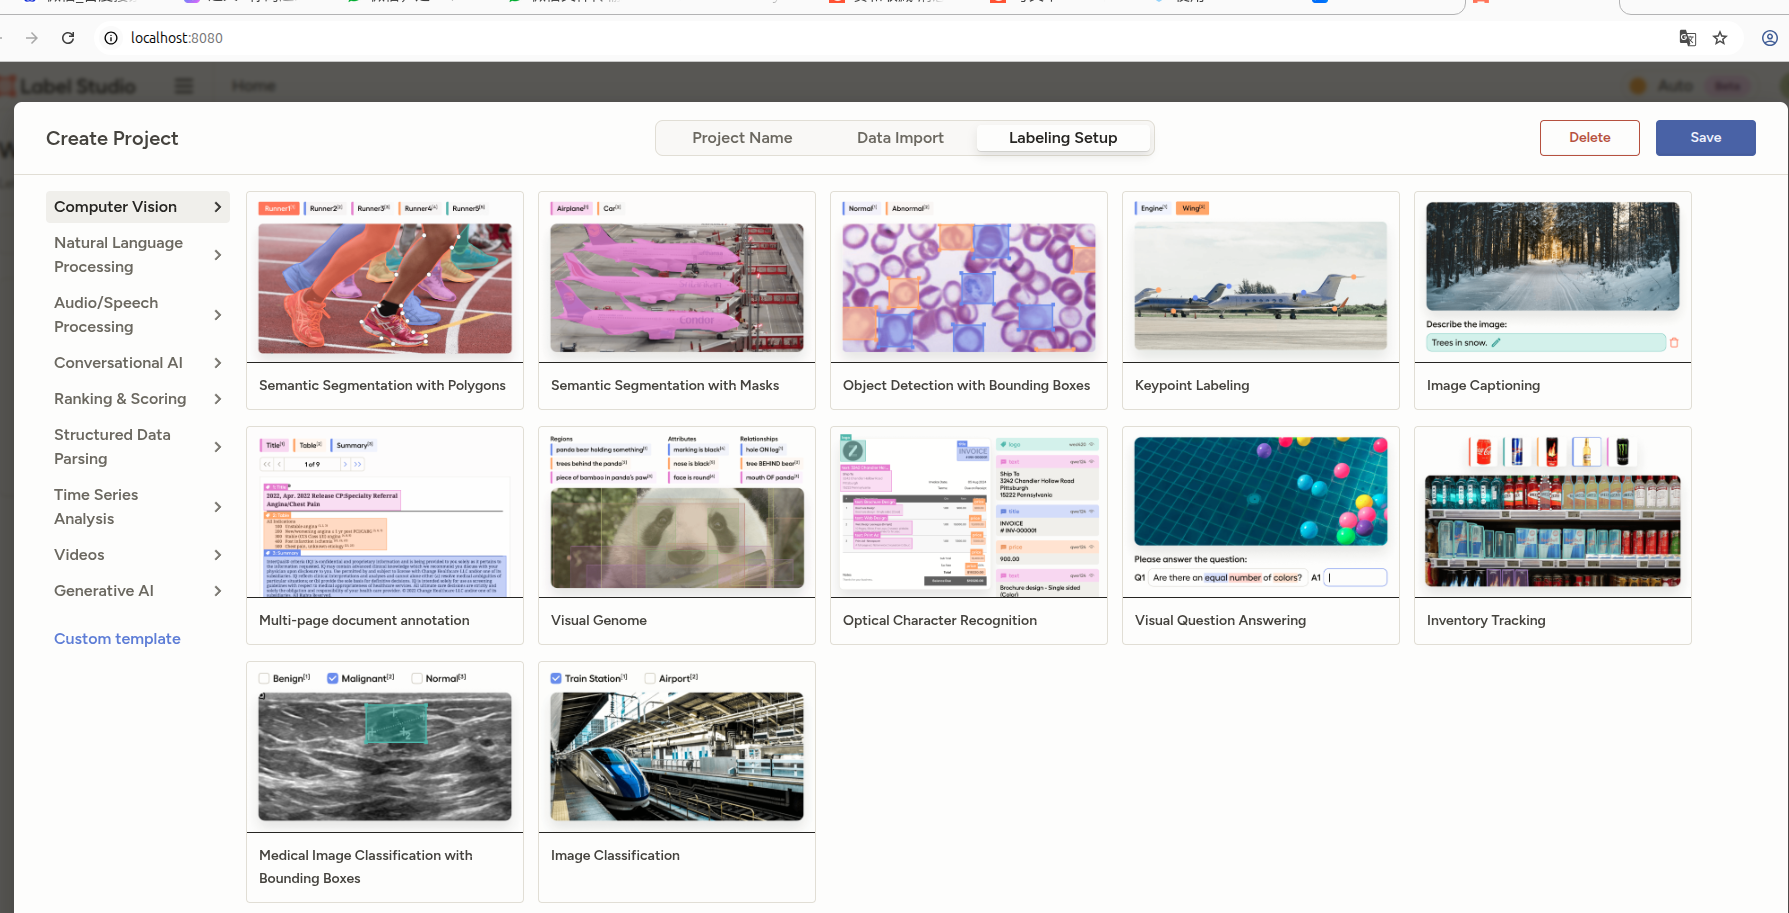
1.Label-studio制作数据集
这是最原始的从零开始制作数据集的方法,不建议这样做!
安装完label-studio后,输入指令启动
python
label-studio start进入浏览器界面

创建项目:Create Project,引入图片后,选择图像描述数据集制作(Image Captioning)
2.利用Qwen2.5-VL半自动制作数据集
既然qwen本身具有较好的图像描述能力,那我们可以先使用qwen进行图像描述,在此基础上进行复核修改,这样做可以减少人力成本。
我这编写的脚本如下:
python
import torch
from modelscope import Qwen2_5_VLForConditionalGeneration, AutoTokenizer, AutoProcessor
from qwen_vl_utils import process_vision_info
import time
import os
from pathlib import Path
import json

def process_single_image(model, processor, image_path, prompt):

    messages = [
        {
            "role": "user",
            "content": [
                {
                    "type": "image",
                    "image": image_path,
                },
                {"type": "text", "text": prompt},
            ],
        }
    ]

    # Preparation for inference
    text = processor.apply_chat_template(
        messages, tokenize=False, add_generation_prompt=True
    )
    image_inputs, video_inputs = process_vision_info(messages)
    inputs = processor(
        text=[text],
        images=image_inputs,
        videos=video_inputs,
        padding=True,
        return_tensors="pt",
    )
    inputs = inputs.to("cuda")

    time_start = time.time()
    # Inference: Generation of the output
    generated_ids = model.generate(**inputs, max_new_tokens=256, do_sample=False)
    time_end = time.time()

    print(f"Inference time for {Path(image_path).name}: {time_end - time_start:.2f}s")

    generated_ids_trimmed = [
        out_ids[len(in_ids) :] for in_ids, out_ids in zip(inputs.input_ids, generated_ids)
    ]
    output_text = processor.batch_decode(
        generated_ids_trimmed, skip_special_tokens=True, clean_up_tokenization_spaces=False
    )

    return output_text[0]

def process_images_in_folder(model, processor, image_folder, prompt, output_file=None):

    # 支持的图像格式
    image_extensions = {'.jpg', '.jpeg', '.png', '.bmp', '.tiff', '.tif'}

    # 获取文件夹中所有图像文件
    image_files = []
    for file in Path(image_folder).iterdir():
        if file.suffix.lower() in image_extensions:
            image_files.append(file)

    image_files.sort()
    if not image_files:
        print(f"No image files found in {image_folder}")
        return

    print(f"Found {len(image_files)} image files")

    # 存储结果
    results = []

    # 遍历处理每张图像
    for image_file in image_files:
        print(f"\nProcessing: {image_file.name}")
        try:
            result = process_single_image(model, processor, str(image_file), prompt)
            print(f"Result: {result}")

            # 保存结果
            results.append({
                'image': image_file.name,
                'path': str(image_file),
                'result': result
            })

        except Exception as e:
            print(f"Error processing {image_file.name}: {e}")
            results.append({
                'image': image_file.name,
                'path': str(image_file),
                'result': f"Error: {e}",
                'error': True
            })

    # 如果指定了输出文件,则保存为JSONL格式
    if output_file:
        with open(output_file, 'w', encoding='utf-8') as f:
            for item in results:
                # 构造JSONL格式的字典
                json_line = {
                    "image": item['path'],
                    "text": item['result']
                }
                # 写入一行JSON
                f.write(json.dumps(json_line, ensure_ascii=False) + '\n')
        print(f"\nResults saved to {output_file}")

    return results

if __name__ == '__main__':
    # default: Load the model on the available device(s)
    model = Qwen2_5_VLForConditionalGeneration.from_pretrained(
        "/home/ct/work/BigModel/Qwen2.5-VL/models/Qwen2.5-VL-7B-Instruct",
        torch_dtype="auto",
        device_map="auto"
    )

    # The default range for the number of visual tokens per image in the model is 4-16384.
    # You can set min_pixels and max_pixels according to your needs, such as a token range of 256-1280, to balance performance and cost.
    min_pixels = 256*28*28
    max_pixels = 1280*28*28
    processor = AutoProcessor.from_pretrained(
        "/home/ct/work/BigModel/Qwen2.5-VL/models/Qwen2.5-VL-7B-Instruct",
        min_pixels=min_pixels,
        max_pixels=max_pixels
    )

    # 设置图像文件夹路径和提示词
    image_folder = "/home/ct/work/Label_tools/PICS/Flame/"

    prompt = "查看图像中红色矩形框中是否存在烟火,判定存在烟火需要看到明显的烟雾和火焰,注意区分灯光、太阳光和一些其他的影响。"
    output_file = "inference_results.jsonl"  # 结果输出文件

    # 处理文件夹中的所有图像
    results = process_images_in_folder(model, processor, image_folder, prompt, output_file)

    # 打印汇总信息
    print(f"\nProcessing completed. Total images processed: {len(results)}")
配置运行后,将会生成推理结果的JSONL文件。主要包含图像路径和对应描述。其他任务主要修改以下提示词就可以。
接下来就是对这图像查看与qwen2.5-vl描述的是否一致就行。
二、LLama-Factory微调
1.配置LLama-Factory环境
因为我是一边测试一边记录,为了安全起见,建议使用anaconda建立LLama-Factory虚拟环境。
(1)克隆LLama-Factory项目
python
git clone https://github.com/hiyouga/LLaMA-Factory.git
cd LLaMA-Factory
(2)创建虚拟环境
python
# 使用 conda(推荐)
conda create -n llama-factory python=3.10
conda activate llama-factory

# 或使用 venv
python -m venv venv
source venv/bin/activate
(3)安装依赖
python
pip install -r requirements.txt
2.转化标签数据格式
目前我们的数据格式大概是:
python
{"image": "/path/to/image.jpg", "text": "图像描述语句"}而LLama-Factory对于多模态大模型的建议数据格式为:
python
{"images": ["/home/ct/work/Label_tools/PICS/Smoke/Smoke001.png"], "conversations": [{"content": "<image>\n请分析图像中红色矩形框内是否存在吸烟行为,并说明理由。", "from": "user"}, {"content": "红色矩形框中的人在吸烟。", "from": "assistant"}]}转换脚本如下:
python
import json

# 读取原始文件
input_file = "/home/ct/work/LLaMA-Factory/inference_results_Smoke.jsonl"
output_file = "/home/ct/work/LLaMA-Factory/smoke_dataset.jsonl"

with open(input_file, 'r', encoding='utf-8') as infile:
    lines = infile.readlines()

# 转换格式
converted_lines = []
for line in lines:
    data = json.loads(line.strip())

    # 构建新的数据结构
    new_data = {
        "images": [data["image"]],
        "conversations": [
            {
                "content": "<image>\n请分析图像中红色矩形框内是否存在吸烟行为,并说明理由。",
                "from": "user"
            },
            {
                "content": data["text"],
                "from": "assistant"
            }
        ]
    }

    converted_lines.append(json.dumps(new_data, ensure_ascii=False) + '\n')

# 写入新文件
with open(output_file, 'w', encoding='utf-8') as outfile:
    outfile.writelines(converted_lines)

print(f"转换完成!已保存到 {output_file}")
3.启动微调
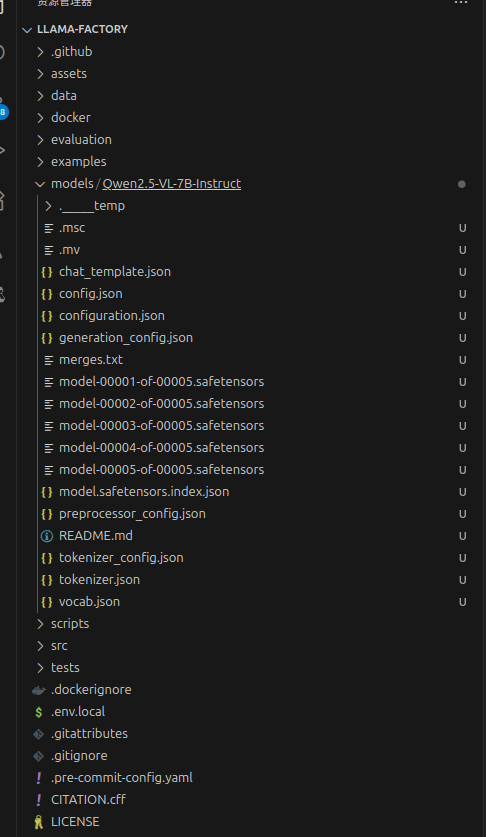
(1)下载模型
huggingface由于是外网,下载困难,建议去魔塔社区下载,下载后置于LLama-factory根目录下,新建models文件夹。
(2)构建dataset_info.json
在LLama-factory的根目录下新建该文件,并写入:
python
{
  "smoke_dataset": {
    "file_name": "smoke_dataset.jsonl",
    "formatting": "sharegpt",
    "columns": {
      "messages": "conversations",
      "images": "images"
    },
    "tags": {
      "role_tag": "from",
      "content_tag": "content",
      "user_tag": "user",
      "assistant_tag": "assistant"
    }
  }
}
注意smoke_dataset和smoke_dataset.jsonl两者需要对应。
(3)启动微调
python
cd /home/ct/work/LLaMA-Factory
python src/train.py \
    --stage sft \
    --do_train \
    --model_name_or_path /home/ct/work/LLaMA-Factory/models/Qwen2.5-VL-7B-Instruct \
    --dataset smoke_dataset \
    --dataset_dir . \
    --template qwen2_vl \
    --finetuning_type lora \
    --lora_target all \
    --output_dir saves/Qwen2.5-VL-7B-Instruct-lora \
    --per_device_train_batch_size 1 \
    --gradient_accumulation_steps 8 \
    --lr_scheduler_type cosine \
    --logging_steps 10 \
    --save_steps 100 \
    --learning_rate 5e-5 \
    --num_train_epochs 3.0 \
    --plot_loss \
    --fp16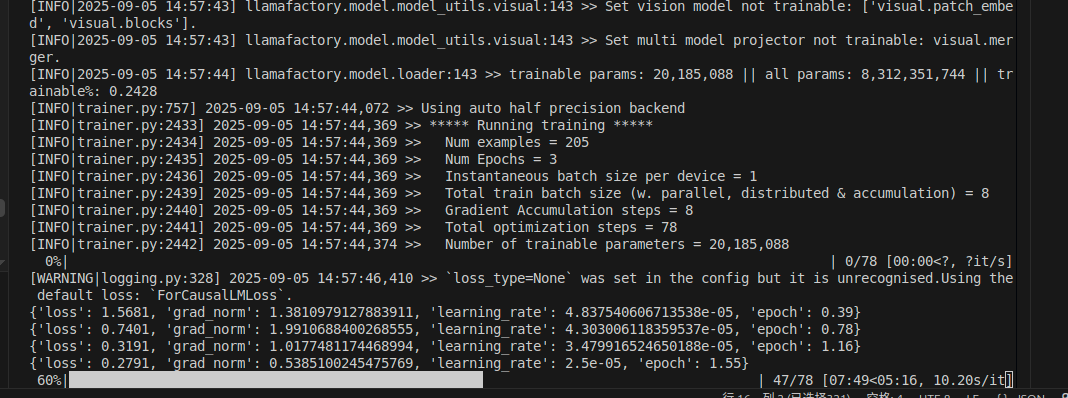
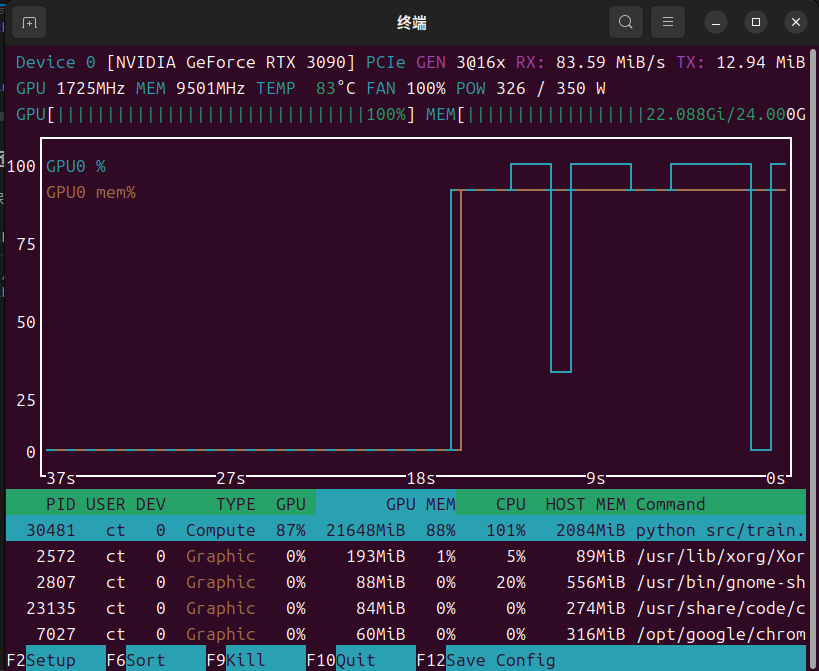
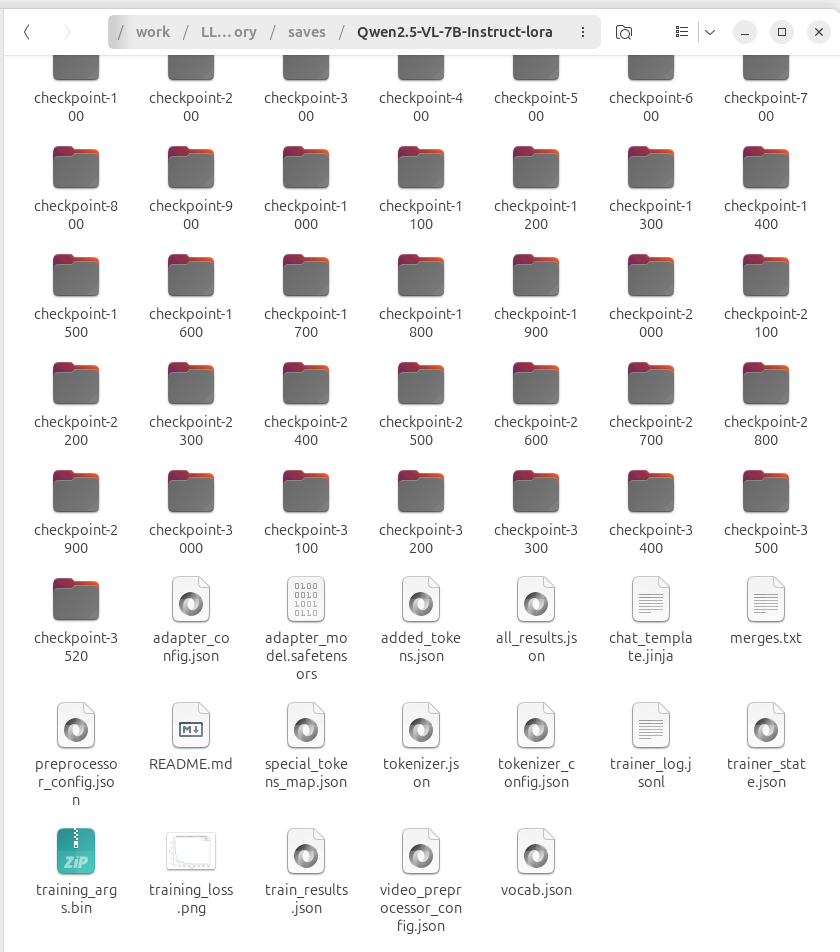
生成的权重文件在LLama-Factory根目录下的Saves文件夹下。
内存占用大概22G.
三、模型合并
在模型微调训练后,会在saves文件夹下生成一系列的微调权重文件,我使用的lora微调。大小在100~300m之间。需要与原始权重文件合并。
可以采用llama-factory和pytorch+transform等多种方法进行合并,我这的脚本如下:
python
# merge_lora_weights.py
import os
import torch
from transformers import AutoModelForVision2Seq, AutoTokenizer, AutoProcessor
from peft import PeftModel
def merge_lora_weights():
# 配置路径
base_model_path = "models/Qwen2.5-VL-7B-Instruct" # 原始模型路径
lora_weights_path = "saves/Qwen2.5-VL-7B-Instruct-lora/checkpoint-3520" # LoRA权重路径
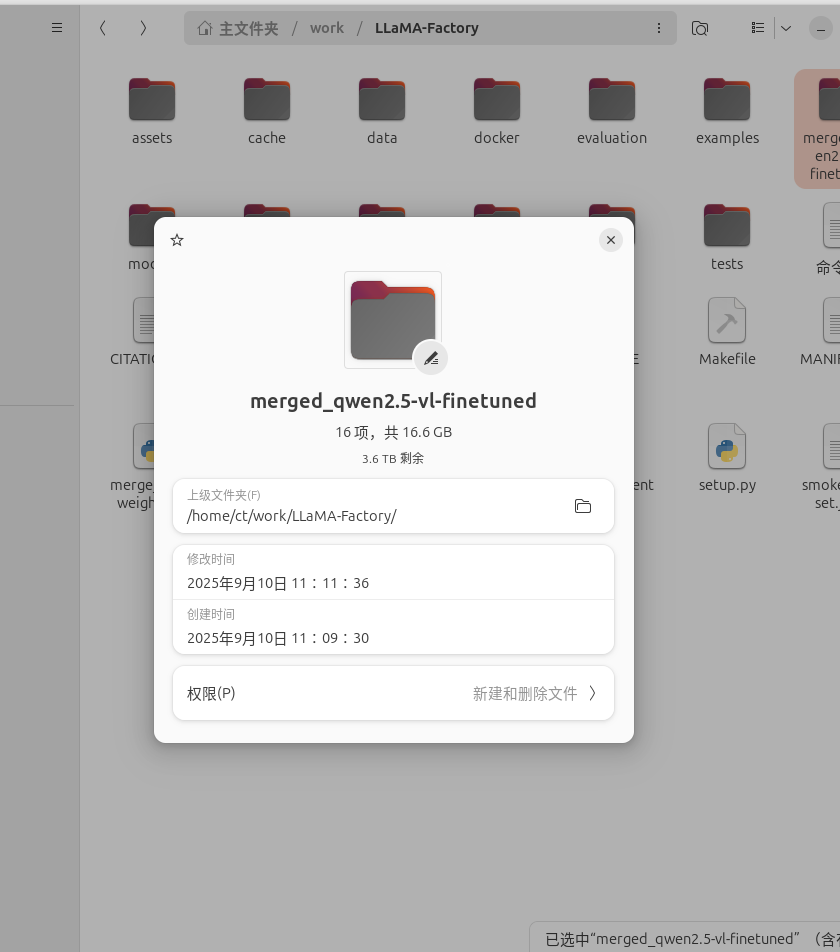
output_path = "./merged_qwen2.5-vl-finetuned" # 合并后模型保存路径
print("Loading base model...")
base_model = AutoModelForVision2Seq.from_pretrained(
base_model_path,
torch_dtype=torch.float16,
low_cpu_mem_usage=True,
trust_remote_code=True
)
print("Loading LoRA adapter...")
lora_model = PeftModel.from_pretrained(base_model, lora_weights_path)
print("Merging weights...")
merged_model = lora_model.merge_and_unload()
print("Saving merged model...")
# 创建输出目录
os.makedirs(output_path, exist_ok=True)
# 保存模型
merged_model.save_pretrained(output_path, safe_serialization=True, max_shard_size="5GB")
# 保存tokenizer和processor
tokenizer = AutoTokenizer.from_pretrained(base_model_path, trust_remote_code=True)
tokenizer.save_pretrained(output_path)
# 保存processor(对VL模型很重要)
processor = AutoProcessor.from_pretrained(base_model_path, trust_remote_code=True)
processor.save_pretrained(output_path)
print(f"Merged model saved to {output_path}")
if __name__ == "__main__":
merge_lora_weights()合并后模型权重大小:
接下来就是测试了。