前言
在Three.js的学习中过程中如果你已经对材质,几何体,灯光,动画,模型,场景,相机,渲染器等内容非常熟悉之后,那么作者非常推荐你去进阶学习一下ShaderMaterial (着色器材质)的使用,因为ShaderMaterial 不仅能实现很多炫酷的效果,而且也是很多数字孪生平台项目中必会出现的场景之一。
关于 ShaderMaterial 的介绍
官网文档:threejs.org/docs/#api/z...
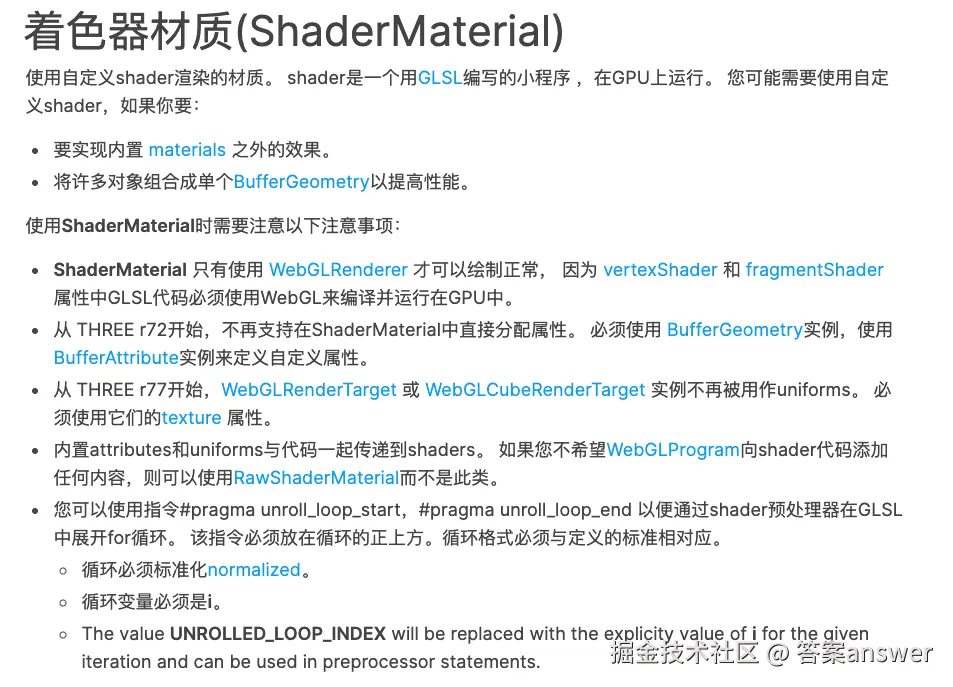
官网的介绍依旧很官方
当然这个不重要了,这里我们大概简单介绍一下最重要的几个 API
1.vertexShader(顶点着色器) :把模型空间的顶点坐标变换到裁剪空间(最终写入 gl_Position),并把需要在片元阶段使用的中间数据(如 uv、法线、颜色、光照系数等)通过 varying / out 传给片元着色器(会被插值)
2.fragmentShader(片元着色器) :根据传入的 varying(已插值)和 uniform(全局不变量)计算该像素的最终颜色(输出 gl_FragColor 或 GLSL3 的 out 变量)
3.uniforms:全局变量参数,通过修改uniforms中 的值来实现动态的 shader 效果
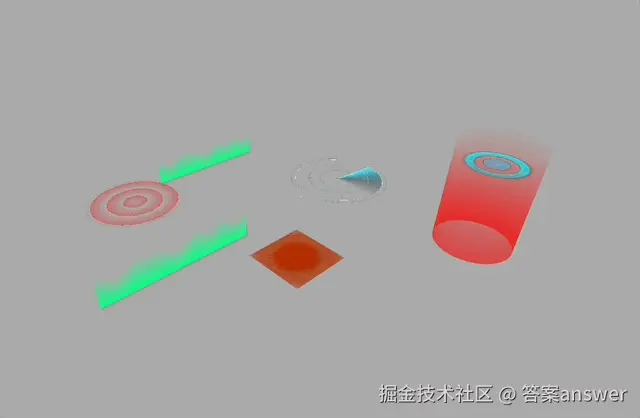
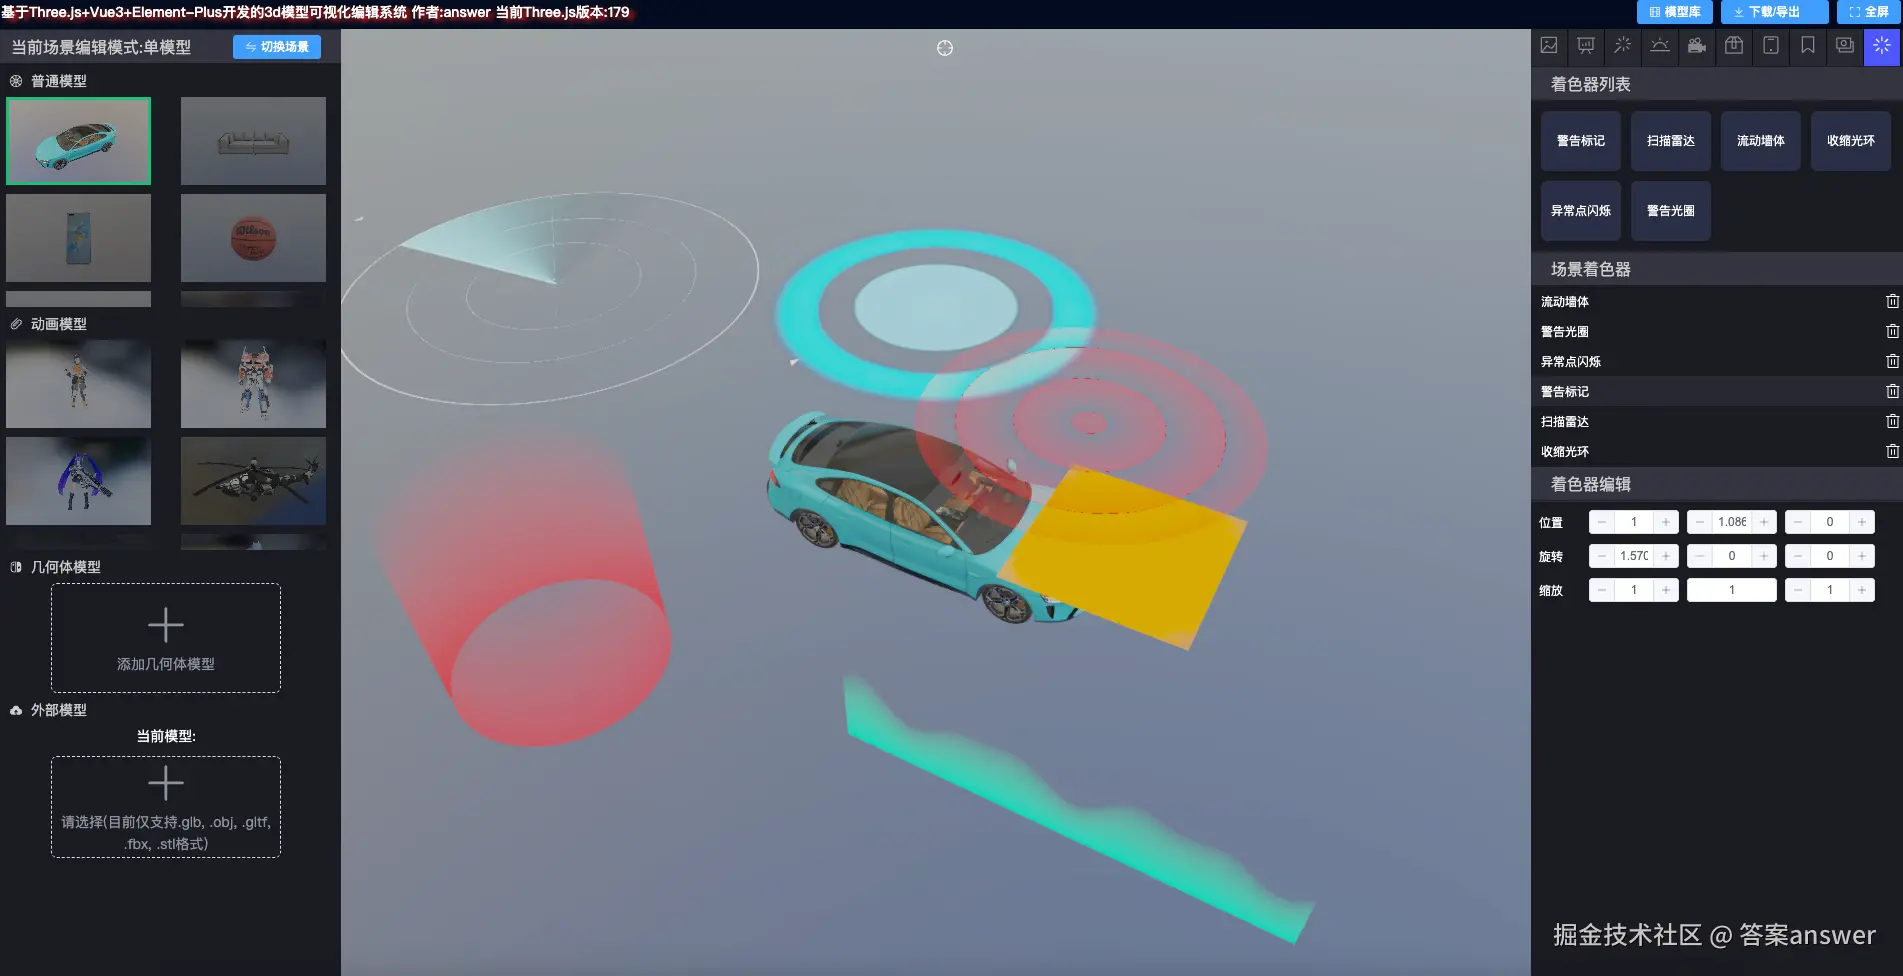
实现一个警告标记效果
在数字孪生和物联网项目中,经常会有类似于设备损坏需要一个警告标记的效果,这时候我就可以通过ShaderMaterial来实现了
这里使用了两个 Three.js 关键 API THREE.PlaneGeometry 和 THREE.ShaderMaterial
这里将其封装成一个函数方法
代码如下:
js
function createWarningShader() {
  const geometry = new THREE.PlaneGeometry(2, 2, 2, 2);
  const material = new THREE.ShaderMaterial({
    side: THREE.DoubleSide,
    transparent: true,
    uniforms: {
      uTime: { value: 0 },
      uColor: { value: new THREE.Color(1.0, 0.0, 0.0) },
      uIntensity: { value: 1.0 },
      uSpeed: { value: 1.0 },
      uRadius: { value: 0.5 }
    },
    vertexShader: `
      varying vec2 vUv;
      void main() {
        vUv = uv;
        gl_Position = projectionMatrix * modelViewMatrix * vec4(position, 1.0);
      }
    `,
    fragmentShader: `
      varying vec2 vUv;
      uniform float uTime;
      uniform vec3 uColor;
      uniform float uIntensity;
      uniform float uSpeed;
      uniform float uRadius;

      void main() {
        vec3 color = uColor;
        vec2 center = vec2(0.5, 0.5);
        float dis = distance(vUv, center);
        float p = 6.0;
        float r = fract(dis * p - uTime * uSpeed) / 3.0 + step(0.99, fract(dis * p - uTime * uSpeed));

        if (dis > uRadius) {
          r = 0.0;
        }

        gl_FragColor = vec4(color, r * uIntensity);
      }
    `
  });

  const mesh = new THREE.Mesh(geometry, material);
  mesh.rotation.x = Math.PI / 2;
  return mesh;
}
添加到场景中
js
const shader = createWarningShader()
scene.add(shader)
通过动画帧不断更新着色器参数,实现动态效果
js
  sceneAnimation() {
    this.renderAnimation = requestAnimationFrame(() => this.sceneAnimation());
    shader.material.uniforms.uTime.value = this.click.getElapsedTime();
  }
效果:

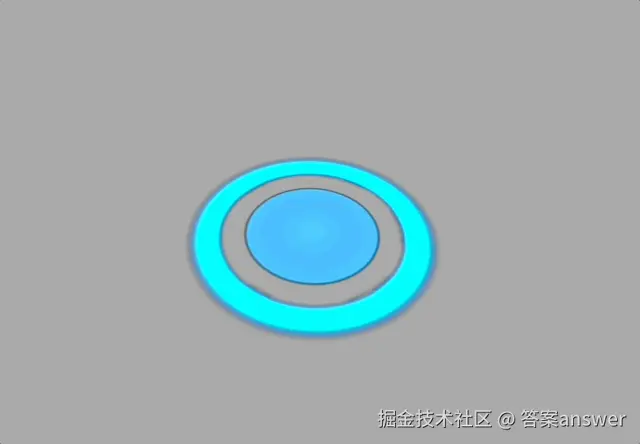
实现一个收缩光环效果
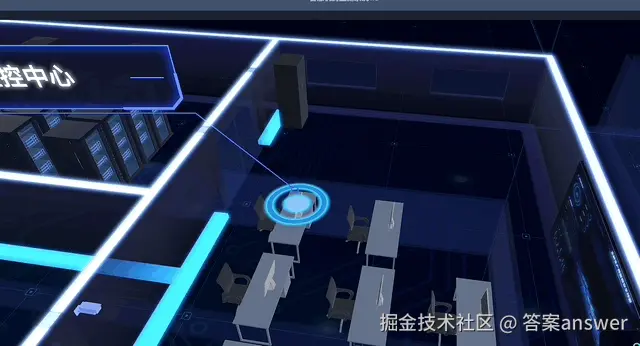
如图所示,这是一个智慧机房监测系统中常见的一个收缩光环效果,一般会和一个文本标签内容一起存在,这里我们参照这个效果实现一个类似的
和上面的警告光圈效果实现的逻辑一样,这里将其封装成一个函数方法
在uniforms中我们定义一下会用到的参数值
在fragmentShader中实现圆环的变换效果
js
function createApertureShader() {
  const geometry = new THREE.PlaneGeometry(3, 3, 500, 500);
  const material = new THREE.ShaderMaterial({
    side: THREE.DoubleSide,
    transparent: true,
    depthWrite: false,
    uniforms: {
      uTime: { value: 0 },
      uOuterColor: { value: new THREE.Color("#2b90e0") }, // 外圆圆环颜色 - 鲜艳的蓝色
      uOuterGlowColor: { value: new THREE.Color("#00bfff") }, // 外环发光颜色 - 亮蓝色发光
      uInnerColor: { value: new THREE.Color(0x87ceeb) }, // 内圆颜色 - 柔和的浅蓝色
      uInnerGlowColor: { value: new THREE.Color(0x87ceeb) }, // 内圆发光颜色 - 柔和的发光
      uIntensity: { value: 0.8 }, // 透明度
      uSpeed: { value: 2.5 }, // 加快收缩速度
      uOuterRadius: { value: 0.9 }, // 外圆半径
      uInnerRadius: { value: 0.4 }, // 增大内圆半径
      uRingDistance: { value: 0.18 }, // 内外圆固定距离
      uHexDensity: { value: 2.0 }, // 六边形密度
      uGlowIntensity: { value: 2 } // 辉光强度
    },
    vertexShader: `
      varying vec2 vUv;
      varying vec3 vPosition;
      void main() {
        vUv = uv;
        vPosition = position;
        gl_Position = projectionMatrix * modelViewMatrix * vec4(position, 1.0);
      }
    `,
    fragmentShader: `
      varying vec2 vUv;
      varying vec3 vPosition;
      uniform float uTime;
      uniform vec3 uOuterColor;
      uniform vec3 uOuterGlowColor;
      uniform vec3 uInnerColor;
      uniform vec3 uInnerGlowColor;
      uniform float uIntensity;
      uniform float uSpeed;
      uniform float uOuterRadius;
      uniform float uInnerRadius;
      uniform float uRingDistance;
      uniform float uHexDensity;
      uniform float uGlowIntensity;

      // 六边形距离场函数
      float hexDist(vec2 p) {
        p = abs(p);
        return max(p.x * 0.866025 + p.y * 0.5, p.y);
      }

      // 六边形网格函数
      vec2 hexGrid(vec2 p) {
        vec2 h = vec2(0.866025, 0.5);
        vec2 g1 = vec2(h.x, -h.y);
        vec2 g2 = vec2(0.0, 1.0);

        vec2 id1 = floor(vec2(dot(p, g1), dot(p, g2)));
        vec2 id2 = floor(vec2(dot(p, g1), dot(p, g2)) + 0.5);

        vec2 p1 = p - id1.x * g1 - id1.y * g2;
        vec2 p2 = p - id2.x * g1 - id2.y * g2;

        float d1 = hexDist(p1);
        float d2 = hexDist(p2);

        if (d1 < d2) {
          return vec2(d1, 0.0);
        } else {
          return vec2(d2, 1.0);
        }
      }

      // 噪声函数
      float noise(vec2 p) {
        return fract(sin(dot(p, vec2(12.9898, 78.233))) * 43758.5453);
      }

      // 平滑噪声
      float smoothNoise(vec2 p) {
        vec2 i = floor(p);
        vec2 f = fract(p);

        float a = noise(i);
        float b = noise(i + vec2(1.0, 0.0));
        float c = noise(i + vec2(0.0, 1.0));
        float d = noise(i + vec2(1.0, 1.0));

        vec2 u = f * f * (3.0 - 2.0 * f);

        return mix(a, b, u.x) + (c - a) * u.y * (1.0 - u.x) + (d - b) * u.x * u.y;
      }

      void main() {
        vec2 uv = (vUv - 0.5) * 2.0;
        vec2 center = vec2(0.0, 0.0);
        float dist = length(uv);

        // 时间动画 - 光圈收缩效果,统一频率
        float time = uTime * uSpeed;
        float shrinkFactor = 0.3 + 0.7 * (0.5 + 0.5 * sin(time)); // 更快的收缩速度

        // 计算当前半径,保持固定距离
        float currentInnerRadius = uInnerRadius * shrinkFactor;
        float currentOuterRadius = currentInnerRadius + uRingDistance;

        // 确保不重叠,外圆最小半径
        currentOuterRadius = max(currentOuterRadius, currentInnerRadius + 0.05);

        // 外环发光效果 - 更细的环
        float outerRing = smoothstep(currentOuterRadius - 0.08, currentOuterRadius, dist) *
                         (1.0 - smoothstep(currentOuterRadius, currentOuterRadius + 0.15, dist));

        // 内环 - 实心圆
        float innerRing = 1.0 - smoothstep(currentInnerRadius - 0.03, currentInnerRadius, dist);

        // 六边形图案 - 只在外环区域
        vec2 hexUV = uv * uHexDensity;
        vec2 hexData = hexGrid(hexUV);
        float hexPattern = 1.0 - smoothstep(0.2, 0.3, hexData.x);

        // 添加噪声变化
        float noiseValue = smoothNoise(hexUV * 1.5 + time * 0.3);
        hexPattern *= (0.6 + 0.4 * noiseValue);

        // 只在外环区域内显示六边形
        float ringMask = smoothstep(currentOuterRadius - 0.1, currentOuterRadius, dist) *
                        (1.0 - smoothstep(currentOuterRadius, currentOuterRadius + 0.1, dist));
        hexPattern *= ringMask;

        // 发光效果 - 增强外环发光
        float outerGlow = exp(-abs(dist - currentOuterRadius) * uGlowIntensity * 0.8) * outerRing;
        float outerGlow2 = exp(-abs(dist - currentOuterRadius) * uGlowIntensity * 0.4) * outerRing * 0.6;
        float innerGlow = exp(-abs(dist - currentInnerRadius) * uGlowIntensity * 1.5) * innerRing;

        // 组合颜色 - 内外圆使用不同颜色
        vec3 finalColor = vec3(0.0);

        // 外环颜色 - 圆环使用uOuterColor,发光使用uOuterGlowColor
        if (outerRing > 0.0) {
          finalColor += uOuterColor * outerRing;
          finalColor += uOuterGlowColor * (outerGlow + outerGlow2) * 2.5; // 增强亮蓝色发光
        }

        // 内圆颜色 - 圆环使用uInnerColor,发光使用uInnerGlowColor
        if (innerRing > 0.0) {
          finalColor += uInnerColor * innerRing;
          finalColor += uInnerGlowColor * innerGlow * 0.3; // 减弱内圆发光
        }

        // 六边形图案颜色 - 使用外环颜色
        if (hexPattern > 0.0) {
          finalColor += uOuterColor * hexPattern * 0.6;
        }

        // 添加中心区域的柔和发光 - 使用内圆发光颜色
        if (dist < currentInnerRadius) {
          float centerGradient = 1.0 - smoothstep(0.0, currentInnerRadius * 0.7, dist);
          finalColor += uInnerGlowColor * centerGradient * 0.2; // 减弱中心发光
        }

        // 透明度计算
        float alpha = (outerRing + innerRing + hexPattern + outerGlow + outerGlow2 + innerGlow) * uIntensity;
        alpha = clamp(alpha, 0.0, 1.0);

        // 如果颜色强度很低,设为完全透明
        if (alpha < 0.01) {
          alpha = 0.0;
        }

        gl_FragColor = vec4(finalColor, alpha);
      }
    `
  });

  const mesh = new THREE.Mesh(geometry, material);
  mesh.rotation.x = Math.PI / 2;
  return mesh;
}
效果:
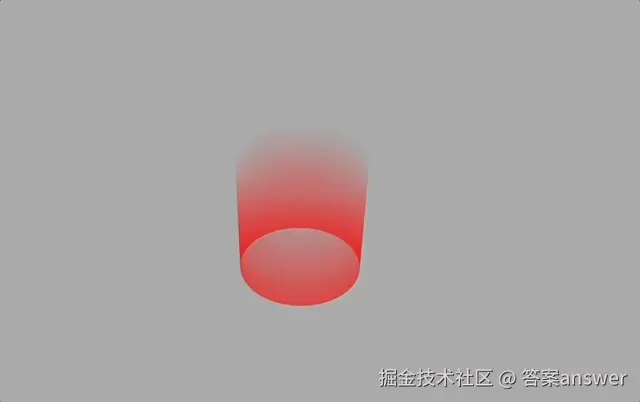
实现一个动态光圈效果

这里我们参照这个智慧石化工厂效果来实现一个类似的
js
function createWarningApertureShader(): THREE.Mesh {
  const curve = new THREE.LineCurve3(
    new THREE.Vector3(),
    new THREE.Vector3().setY(1.5)
  );
  const geometry = new THREE.TubeGeometry(curve, 200, 0.7, 200, false);

  geometry.computeBoundingBox();
  const { max, min } = geometry.boundingBox || new THREE.Vector3();

  // 创建材质
  const material = new THREE.ShaderMaterial({
    transparent: true,
    side: THREE.DoubleSide,
    uniforms: {
      uMax: { value: max },
      uMin: { value: min },
      uColor: { value: new THREE.Color(1.0, 0.0, 0.0) },
    },
    vertexShader: `
        varying vec4 vPosition;
        void main() {
          vPosition = modelMatrix * vec4(position,1.0);
          gl_Position = projectionMatrix * modelViewMatrix * vec4(position, 1.0);
        }
      `,
    fragmentShader: `
        uniform vec3 uColor; // 半径
        uniform vec3 uMax;
        uniform vec3 uMin;
        uniform mat4 modelMatrix; // 世界矩阵
        varying vec4 vPosition; // 接收顶点着色传递进来的位置数据
        void main() {
          vec4 uMax_world = modelMatrix * vec4(uMax,1.0);
          vec4 uMin_world = modelMatrix * vec4(uMin,1.0);
          // 计算从底部到顶部的渐变透明度,整体透明度更低
          float heightFactor = (vPosition.y - uMin_world.y) / (uMax_world.y - uMin_world.y);
          float opacity = (1.0 - heightFactor) * 0.6; // 最大透明度0.6,从底部到顶部逐渐降低
          gl_FragColor = vec4( uColor, opacity);
        }
      `,
  });

  const mesh = new THREE.Mesh(geometry, material);
  return mesh;
}
效果:
结语
剩余的几个效果,实现的逻辑和方式都大致一样,这里作者就不过多阐述了
完整的案例效果在作者的开源 和非开源项目中都有展示:
开源:
three3d-0gte3eg619c78ffd-1301256746.tcloudbaseapp.com/threejs-3dm...
非开源: three3d-0gte3eg619c78ffd-1301256746.tcloudbaseapp.com/threejs-mod...
开源项目地址:
github:github.com/zhangbo126/...
gitee:gitee.com/ZHANG_6666/...
部分效果实现参考网站:
z2586300277.github.io/three-cesiu...
如果你有更好的实现方式,欢迎留言沟通