目录
[(1)引入 websocket stater 起步依赖。](#(1)引入 websocket stater 起步依赖。)
[(2)编写 websocket 配置类。](#(2)编写 websocket 配置类。)
[(3)编写存储 HttpSession 配置类。](#(3)编写存储 HttpSession 配置类。)
[GetHttpSessionConfig 。](#GetHttpSessionConfig 。)
- 紧跟上篇博客理论知识。
- 博客链接:消息推送与 WebSocket 学习-CSDN博客
- 本篇博客就是代码实现。
- 博主实现比较潦草且简易。搁置半个月才更新,实习上班心累,属于不想动,,,
- 如果你喜欢,请点个赞hh。如果你更强,请继续完善它吧!
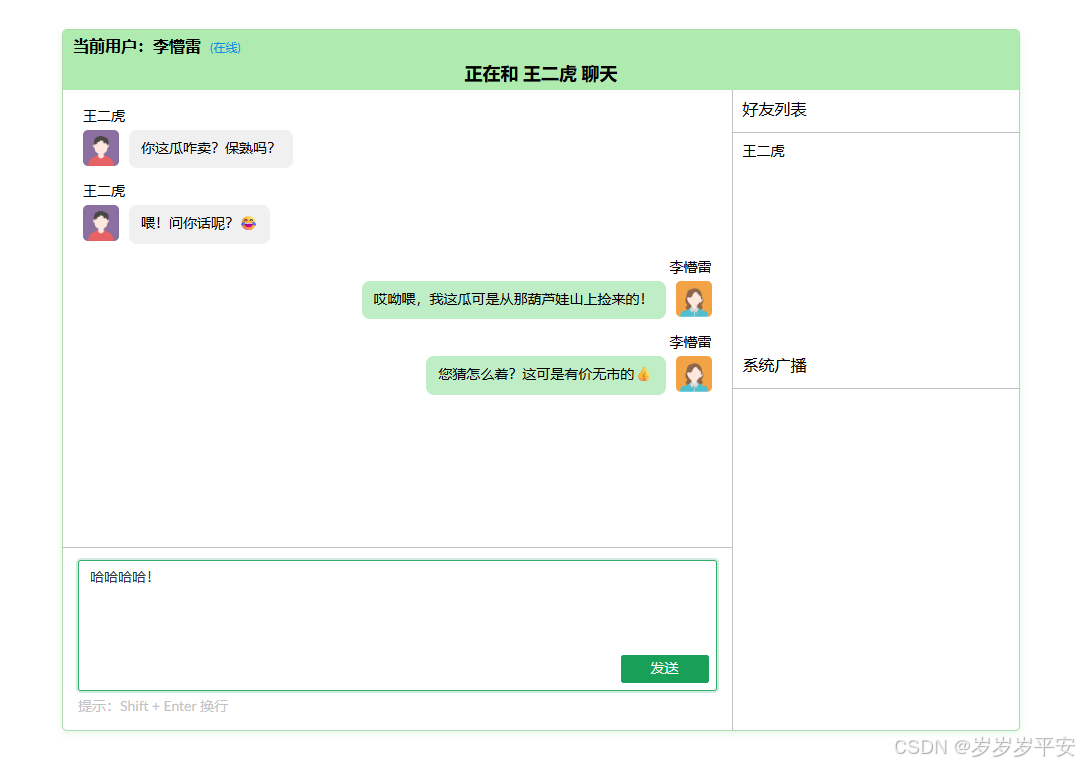
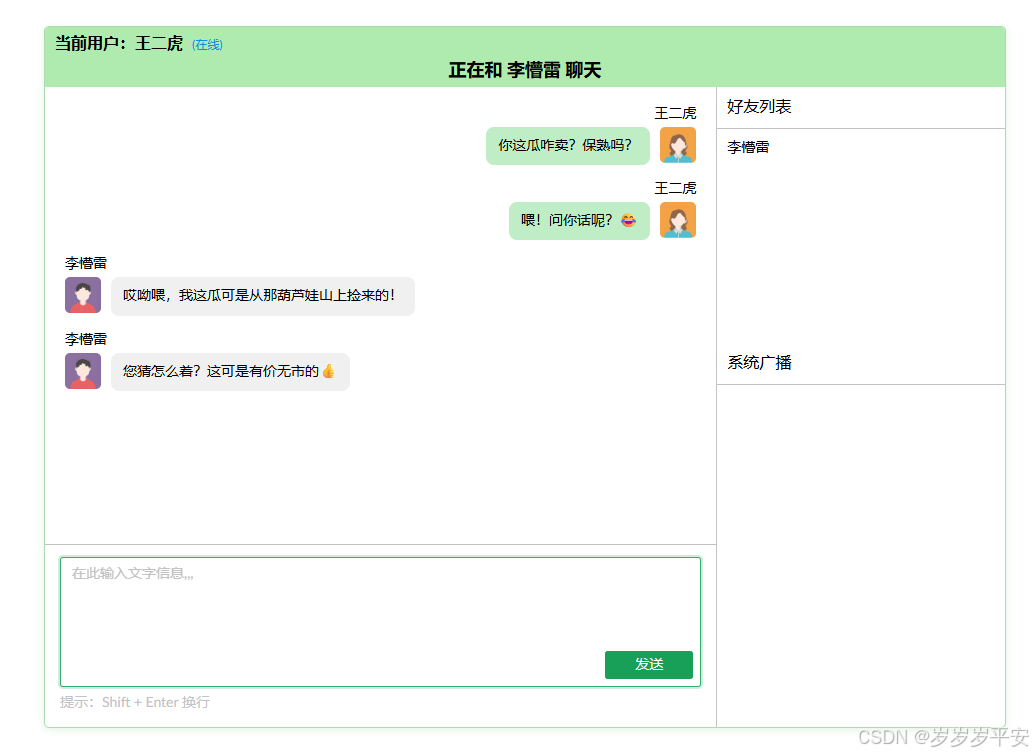
一、效果展示与消息格式。
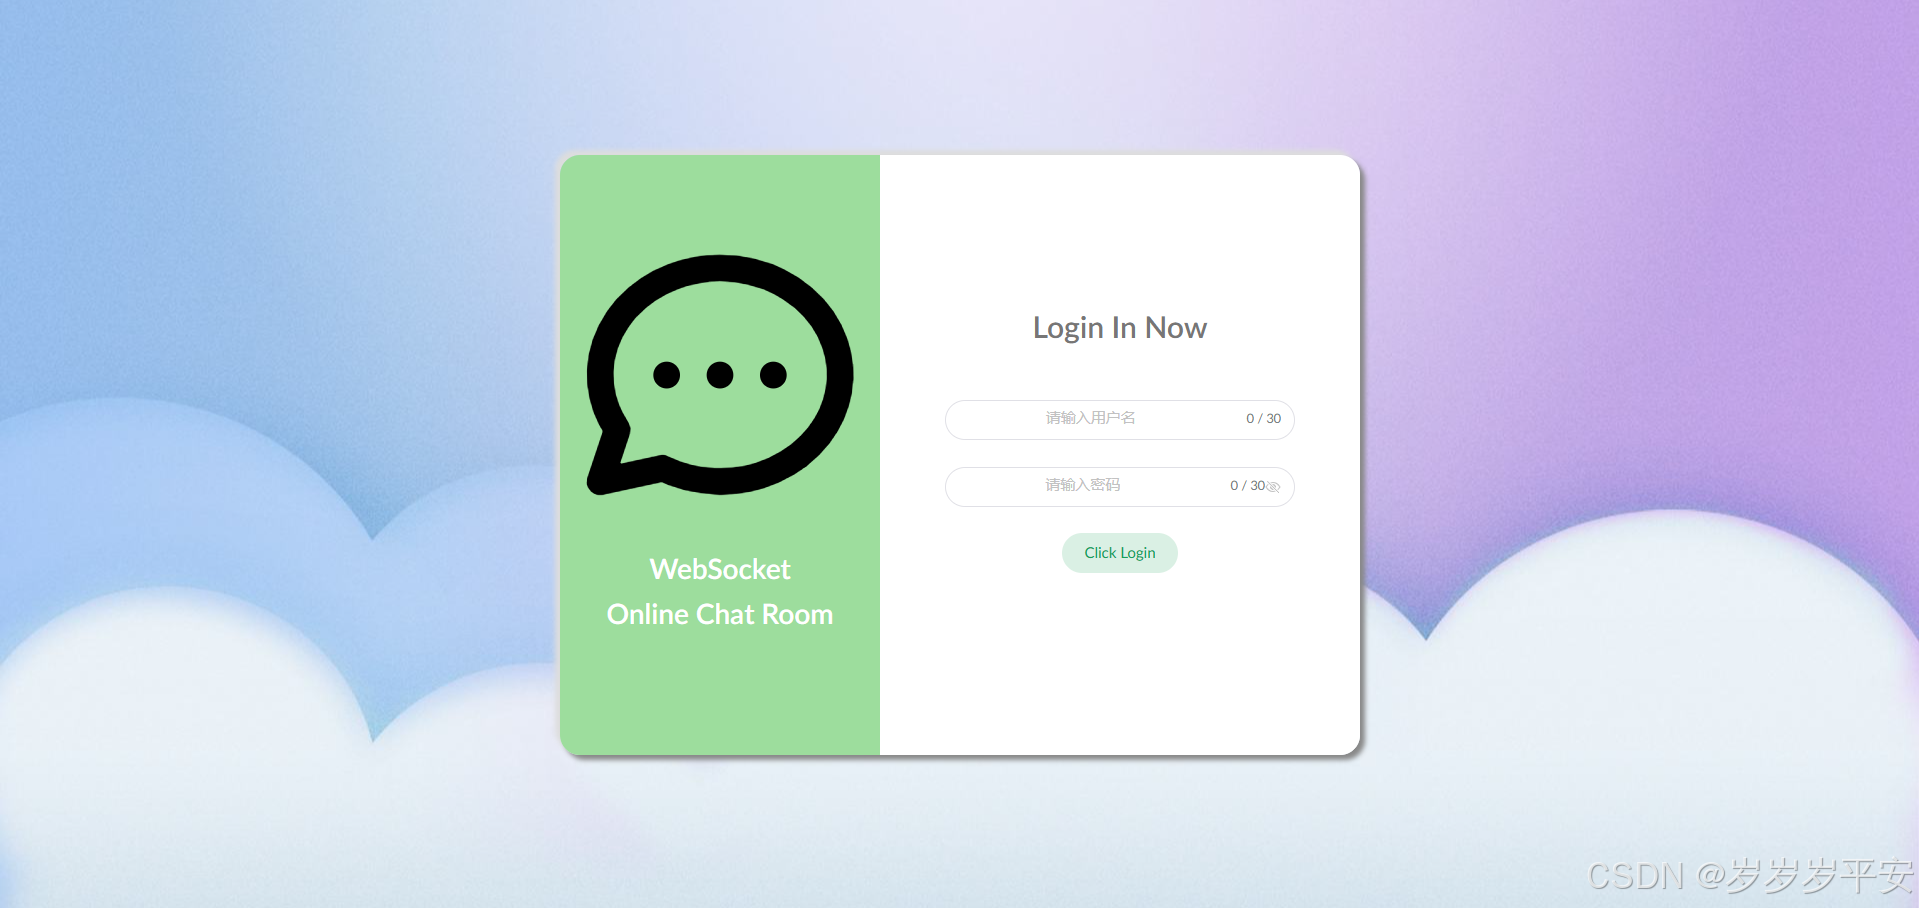
- 聊天登录。(未实现数据库登录,可以自己实现)
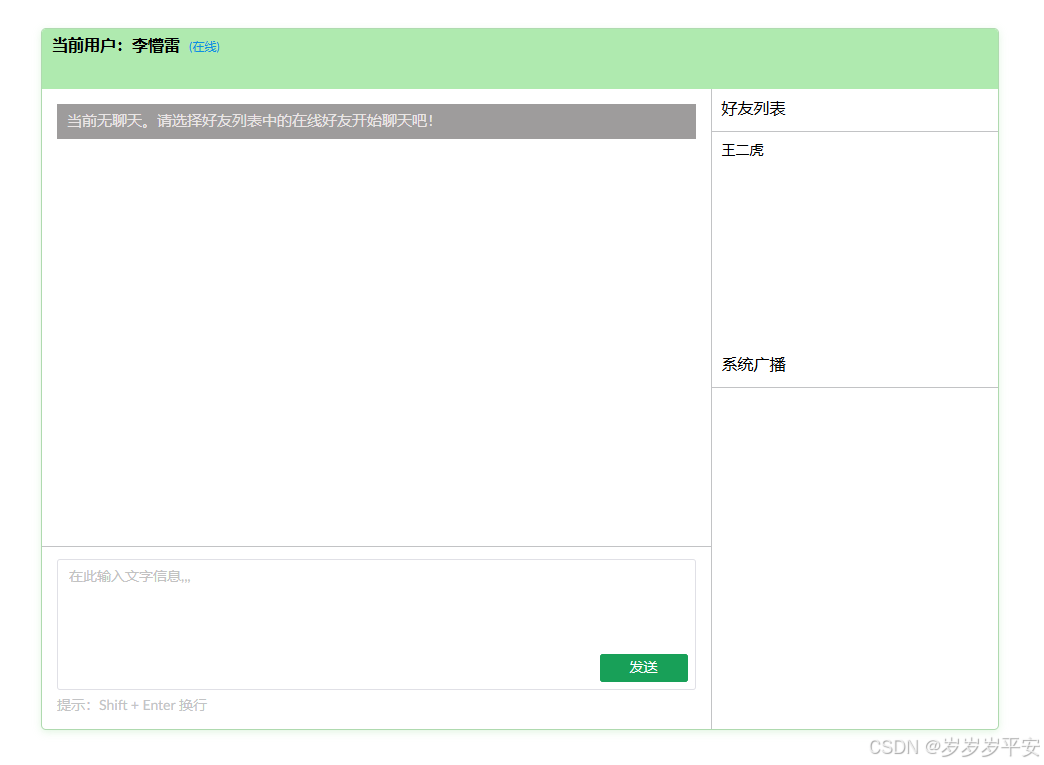
- 首次进入。
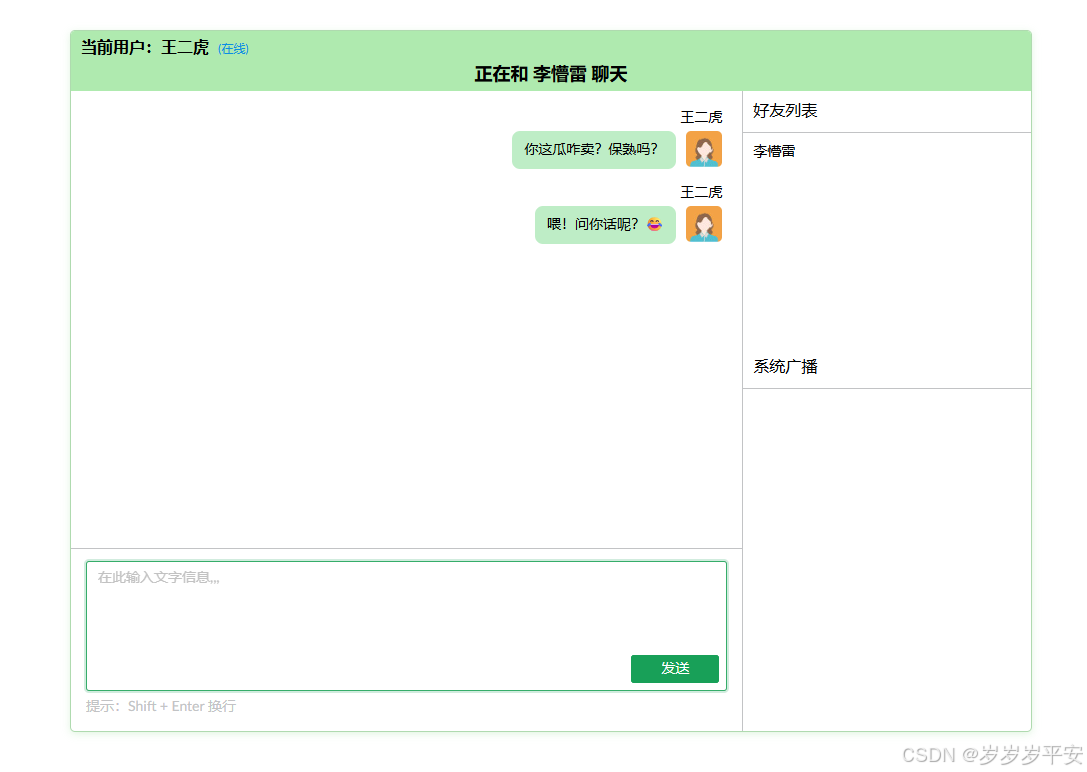
- 聊天1。
- 聊天2。
- 聊天3。
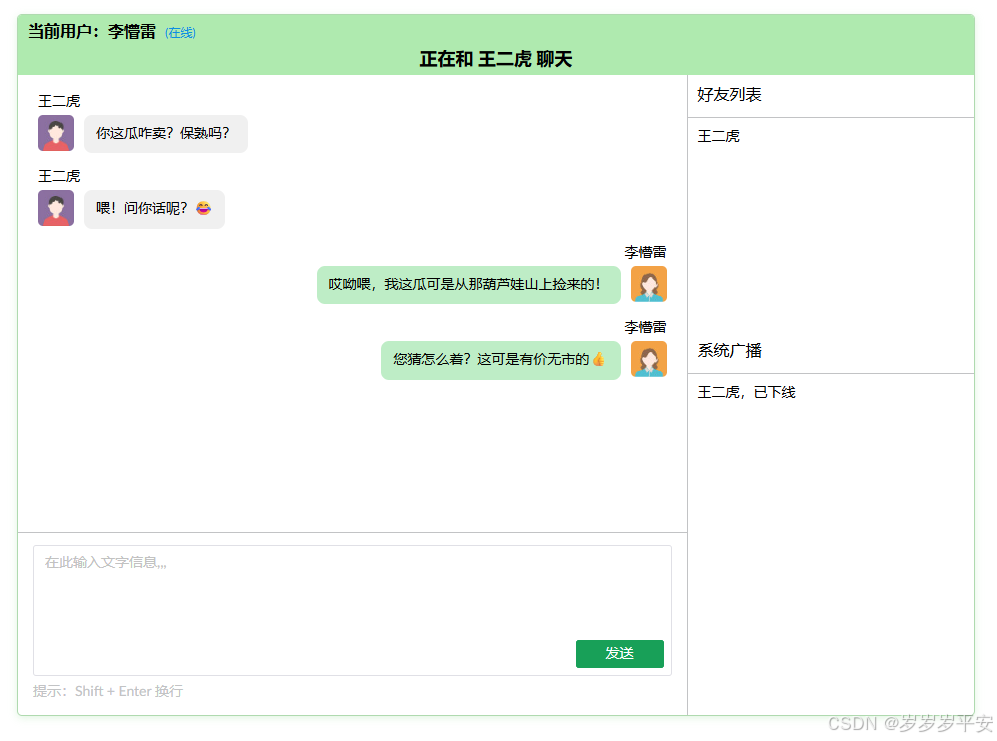
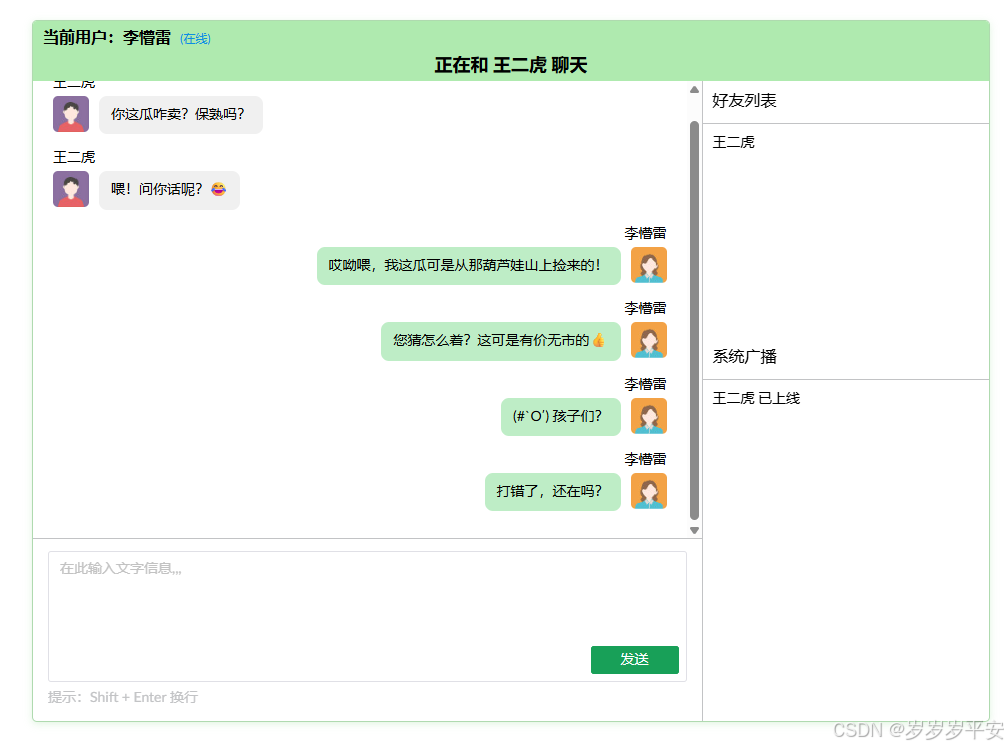
- 系统广播。
- 消息格式。
- 客户端 给 服务端:{"toName":"xxx","message":"hello"}。
- 服务端 给 客户端:(两种格式)
(1)系统消息格式:{"system":true,"fromName":null,"message":"xxxx","offline":true/false}。
(2)推送给某一个用户的消息格式:{"system":false,"fromName":"xxx","message":"xxxx","offline":true/false}。
- Message实体类。
javapackage com.hyl.websocket.bean; /** * 封装浏览器(客户端)给服务端发送的消息数据 */ public class Message { private String toName; private String message; public Message(){ } public Message(String toName, String message) { this.toName = toName; this.message = message; } public String getToName() { return toName; } public void setToName(String toName) { this.toName = toName; } public String getMessage() { return message; } public void setMessage(String message) { this.message = message; } }
- ResultMessage实体类。
javapackage com.hyl.websocket.bean; /** * 封装服务端给浏览器(客户端)发送的消息数据 */ public class ResultMessage { private boolean isSystem; private String fromName; private Object message; //系统消息可能是数组(用户名称数组) private boolean offline; //是否为下线消息 public ResultMessage() { } public ResultMessage(boolean isSystem, String fromName, Object message, boolean offline) { this.isSystem = isSystem; this.fromName = fromName; this.message = message; this.offline = offline; } public boolean isSystem() { return isSystem; } public void setSystem(boolean system) { isSystem = system; } public String getFromName() { return fromName; } public void setFromName(String fromName) { this.fromName = fromName; } public Object getMessage() { return message; } public void setMessage(Object message) { this.message = message; } public boolean isOffline() { return offline; } public void setOffline(boolean offline) { this.offline = offline; } @Override public String toString() { return "ResultMessage{" + "isSystem=" + isSystem + ", fromName='" + fromName + '\'' + ", message=" + message + ", offline=" + offline + '}'; } }

二、代码实现。
(1)引入 websocket stater 起步依赖。
XML<dependency> <groupId>org.springframework.boot</groupId> <artifactId>spring-boot-starter-web</artifactId> </dependency> <!--websocket--> <dependency> <groupId>org.springframework.boot</groupId> <artifactId>spring-boot-starter-websocket</artifactId> </dependency> <!-- https://mvnrepository.com/artifact/com.alibaba.fastjson2/fastjson2 --> <dependency> <groupId>com.alibaba.fastjson2</groupId> <artifactId>fastjson2</artifactId> <version>2.0.53</version> </dependency> <!--hutool工具类--> <dependency> <groupId>cn.hutool</groupId> <artifactId>hutool-all</artifactId> <version>5.8.16</version> </dependency>
(2)编写 websocket 配置类。
- 主要作用:扫描并添加含有注解@ServerEndponit的Bean。
- 代码。
javapackage com.hyl.config; import org.springframework.context.annotation.Bean; import org.springframework.context.annotation.Configuration; import org.springframework.web.socket.server.standard.ServerEndpointExporter; /** * 扫描@ServerEndpoint注解 */ @Configuration public class WebSocketConfig { @Bean public ServerEndpointExporter serverEndpointExporter(){ return new ServerEndpointExporter(); } }
(3)编写存储 HttpSession 配置类。
- 普通 Web 请求中,通过 HttpServletRequest.getSession() 即可简单获取HttpSession 。
- WebSocket 协议是独立于 HTTP 的全双工协议。HttpSession 是 HTTP 层的会话,WebSocket 的 Endpoint 中无法直接获取 HttpSession ,所以要在 WebSocket 中获取 HttpSession ,必须在 HTTP 握手阶段(还未升级为 WebSocket 时) 保存 HttpSession 的引用。
- 自定义 Configurator 继承 ServerEndpointConfig.Configurator。重写modifyHandshake()方法,获取 HttpSession 对象并存储到配置对象中。
- 在注解 @ServerEndpoint 中引入的自定义配置器(Configurator)。
GetHttpSessionConfig 。
javapackage com.hyl.config; import jakarta.servlet.http.HttpSession; import jakarta.websocket.HandshakeResponse; import jakarta.websocket.server.HandshakeRequest; import jakarta.websocket.server.ServerEndpointConfig; /** * HTTP握手阶段(还未升级为 WebSocket时)保存 HttpSession 的引用 * ChatEndpoint就通过这个配置类获取HttpSession对象进行操作(@ServerEndpoint中引入) */ public class GetHttpSessionConfig extends ServerEndpointConfig.Configurator{ @Override public void modifyHandshake(ServerEndpointConfig sec, HandshakeRequest request, HandshakeResponse response) { //获取HttpSession对象 HttpSession httpSession = (HttpSession) request.getHttpSession(); //保存HttpSession对象到ServerEndpointConfig对象中 //ChatEndpoint类中在onOpen方法中通过EndpointConfig对象获取 sec.getUserProperties().put(HttpSession.class.getName(), httpSession); } }
ChatEndPoint实体类。(服务端核心处理消息类)
- @ServerEndPoint注解(端点)引入配置类。
javapackage com.hyl.websocket; import cn.hutool.core.util.ObjectUtil; import com.alibaba.fastjson2.JSON; import com.hyl.config.GetHttpSessionConfig; import com.hyl.utils.MessageUtil; import com.hyl.websocket.bean.Message; import jakarta.servlet.http.HttpSession; import jakarta.websocket.*; import jakarta.websocket.server.ServerEndpoint; import org.slf4j.Logger; import org.slf4j.LoggerFactory; import org.springframework.stereotype.Component; import java.util.Map; import java.util.Set; import java.util.concurrent.ConcurrentHashMap; /** * 针对每一个客户端都会创建一个Endpoint(端点) */ //设置访问路径 //引入HttpSession配置类 @ServerEndpoint(value = "/chat",configurator = GetHttpSessionConfig.class) @Component public class ChatEndpoint { private static final Logger log = LoggerFactory.getLogger(ChatEndpoint.class); //保存当前所有在线用户,key为用户名,value为 Session 对象 //static 共享 final 防止重新赋值 ConcurrentHashMap 线程安全 private static final Map<String, Session> onlineUsers = new ConcurrentHashMap<>(); private HttpSession httpSession; //成员变量,方便当前用户继续使用 /** * 建立websocket连接后,被调用 * @param wsSession */ @OnOpen public void onOpen(Session wsSession, EndpointConfig endpointConfig){ //注意这个是websocket的session //用户登录时,已经保存用户名,从HttpSession中获取用户名 this.httpSession = (HttpSession) endpointConfig.getUserProperties().get(HttpSession.class.getName()); String username = (String) this.httpSession.getAttribute("currentUser"); if(ObjectUtil.isNotEmpty(username) && !onlineUsers.containsKey(username)){ //避免重复存储 //存储当前用户以及对应的session进行存储 onlineUsers.put(username, wsSession); //再将当前登录的所有用户以广播的方式进行推送 String message = MessageUtil.getMessage(true, null, getAllFriendUsernames(), false); broadcastAllUsers(message); } } public Set getAllFriendUsernames(){ Set<String> set = onlineUsers.keySet(); return set; } /** * 广播方法 * 系统消息格式:{"system":true,"fromName":null,"message":"xxx"} */ private void broadcastAllUsers(String message){ if(ObjectUtil.isEmpty(message)){ return; } try{ //遍历当前在线用户的map集合 Set<Map.Entry<String, Session>> entries = onlineUsers.entrySet(); for (Map.Entry<String, Session> entry : entries) { //获取所有用户的session对象 Session session = entry.getValue(); if(session.isOpen()){ //获取同步消息发送的实例,发送文本消息 session.getBasicRemote().sendText(message); }else { onlineUsers.remove(entry.getKey()); } } }catch (Exception e){ e.printStackTrace(); }finally { log.info("广播已发送,消息:{}", message); } } /** * 接收到浏览器(客户端)发送的数据时被调用,如:张三 -> 李四 * @param message 发送的数据是JSON字符串 ,格式为:{"toName":"xxx","message":"xxx"} */ @OnMessage public void onMessage(String message){ //当前登录的用户 String username = null; //当前用户发送的消息 String messageText = null; //接收人用户名 String toUsername = null; try { //将消息推送给指定用户 //操作JSON字符串消息需先转换为对应的Message对象 Message msg = JSON.parseObject(message, Message.class); //获取接收方用户名称 toUsername = msg.getToName(); //获取接收方需收到的消息 messageText = msg.getMessage(); //获取消息接收方用户对象的session对象发消息 Session toUserSession = onlineUsers.get(toUsername); //封装发送的消息 username = (String) this.httpSession.getAttribute("currentUser"); String toUserMsg = MessageUtil.getMessage(false, username, messageText, false); toUserSession.getBasicRemote().sendText(toUserMsg); }catch (Exception e){ e.printStackTrace(); }finally { log.info("发送人:{},接收人:{},消息内容:{}", username, toUsername, messageText); } } /** * 断开websocket连接被调用 * @param wsSession */ @OnClose public void onClose(Session wsSession){ //注意这个是websocket的session //从在线用户map中剔除当前退出登录的用户 String username = (String) this.httpSession.getAttribute("currentUser"); if(ObjectUtil.isNotNull(username)){ onlineUsers.remove(username); //通知其他用户,当前用户下线 String leaveMessage = MessageUtil.getMessage(true, null, username + ",已下线",true); broadcastAllUsers(leaveMessage); //就是重新发送广播,当前在线用户的map的key String message = MessageUtil.getMessage(true, null, getAllFriendUsernames(),false); broadcastAllUsers(message); } } }
(4)处理消息的自定义工具类。
- MessageUtil。
javapackage com.hyl.utils; import cn.hutool.core.util.ObjectUtil; import com.alibaba.fastjson2.JSON; import com.hyl.websocket.bean.ResultMessage; /** * 封装json格式的消息工具类 */ public class MessageUtil { /** * * @param isSystemMessage 是否是系统消息 广播是系统消息 私聊不是 * @param fromName 谁发送的 * @param message 具体消息内容 * @param offline 是否离线消息 * @return */ public static String getMessage(boolean isSystemMessage, String fromName, Object message , boolean offline){ try { ResultMessage resultMessage = new ResultMessage(); resultMessage.setSystem(isSystemMessage); resultMessage.setMessage(message); //校验fromName是否为空 系统消息默认为null if(ObjectUtil.isNotNull(fromName)){ resultMessage.setFromName(fromName); } if(offline){ resultMessage.setOffline(true); }else { resultMessage.setOffline(false); } return JSON.toJSONString(resultMessage); }catch (Exception e){ throw new RuntimeException("消息序列化失败", e); } } }
(5)响应结果封装类。
javapackage com.hyl.common; import java.io.Serializable; public class ResponseData<T> implements Serializable { private String code; private String message; private T result; public ResponseData(){ } public ResponseData(String code, String message) { this.code = code; this.message = message; } public ResponseData(String code, String message, T result) { this.code = code; this.message = message; this.result = result; } //泛型方法:第一个T的作用域只限于当前方法 public static <T> ResponseData<T> success() { ResponseData<T> resData = new ResponseData<>(); resData.setCode("200"); resData.setMessage("success"); return resData; } public static <T> ResponseData<T> success(T result){ ResponseData<T> resData = new ResponseData<>(); resData.setCode("200"); resData.setMessage("success"); resData.setResult(result); return resData; } public static <T> ResponseData<T> fail(String message){ ResponseData<T> resData = new ResponseData<>(); resData.setCode("500"); //后台服务器业务错误 resData.setMessage(message); return resData; } public String getCode() { return code; } public void setCode(String code) { this.code = code; } public String getMessage() { return message; } public void setMessage(String message) { this.message = message; } public T getResult() { return result; } public void setResult(T result) { this.result = result; } }
- 实体类User。
javapackage com.hyl.bean; /** * 用户实体类 */ public class User { private Long userId; private String username; private String password; public Long getUserId() { return userId; } public void setUserId(Long userId) { this.userId = userId; } public String getUsername() { return username; } public void setUsername(String username) { this.username = username; } public String getPassword() { return password; } public void setPassword(String password) { this.password = password; } @Override public String toString() { return "User{" + "userId=" + userId + ", username='" + username + '\'' + ", password='" + password + '\'' + '}'; } }
三、前端代码。(核心页代码)
- 这里只放了vue页面代码。前端的其他组件或重要文件可以去源码查看。
- 登录页。
html<template> <section class="login-container"> <div class="login-box"> <div class="login-box-left"> <div> <img style="margin-top: 60px" src="../../public/meta.svg" alt=""></img> </div> <div>WebSocket <br/> Online Chat Room</div> </div> <div class="login-div"> <div class="login-title">Login In Now</div> <div class="username"> <n-input ref="uinput" type="text" v-model:value="usernameValue" maxlength="30" show-count round clearable placeholder="请输入用户名" size="large"></n-input> </div> <div class="password"> <n-input ref="pinput" type="password" v-model:value="passwordValue" maxlength="30" show-count round clearable placeholder="请输入密码" show-password-on="mousedown" size="large"></n-input> </div> <div class="login-button"> <n-button :loading="loading" strong secondary round type="success" size="large" @click="handleLogin">Click Login</n-button> </div> </div> </div> </section> </template> <script setup lang="ts"> import {ref} from 'vue'; import {login} from '@/api/login/api' import router from "@/router"; import {useMessage,NInput } from 'naive-ui' const usernameValue = ref<string | null>(); const passwordValue = ref<string | null>(); const uinput = ref<InstanceType<typeof NInput> | null>(); const pinput = ref<InstanceType<typeof NInput> | null>(); const message = useMessage(); //新增加载显示 const loading = ref<boolean>(false); async function handleLogin() { loading.value = true; if(!usernameValue.value){ message.warning('用户名不能为空!'); uinput.value?.focus(); loading.value = false; return; } if(!passwordValue.value){ message.warning('密码不能为空!'); pinput.value?.focus(); loading.value = false; return; } try { const res = await login(usernameValue.value, passwordValue.value) if(res?.code === '200'){ message.success('登录成功'); router.replace('/home'); }else { message.error(res?.message); usernameValue.value = ''; passwordValue.value = ''; uinput.value?.focus(); } }catch (err) { console.log('登录请求异常:', err); message.error('网络异常,无法连接服务器'); }finally { loading.value = false; } } </script> <style scoped> .login-container { height: 100vh; width: 100vw; background-image: url('@/assets/img/login_bg.jpg'); /*背景图片*/ background-size: cover; /*填充*/ background-repeat: no-repeat; /*不重复*/ background-position: center; /*居中*/ background-attachment: fixed; /*固定*/ display: flex; justify-content: center; align-items: center; text-align: center; } .login-box { width: 800px; height: 600px; font-size: 28px; font-weight: 800; color: #ffffff; display: flex; justify-content: left; border-radius: 20px; box-shadow: 5px 5px 5px #888888, -5px -5px 5px #DDDDDD; overflow: hidden; } .login-box-left { height: 100%; width: 40%; background-color: #9ddd9d; } .login-div { height: 100%; width: 60%; background-color: white; display: flex; flex-direction: column; align-items: center; .login-title { margin-top: 150px; font-size: 30px; font-weight: 700; color: #777676; } .username { width: 350px; margin-top: 40px; } .password { width: 350px; margin-top: 20px; } .login-button { margin-top: 20px; } } </style>
- 聊天主页。
html<template> <section class="message"> <div class="message-box"> <!-- 头部 --> <div class="box-head"> <div class="head-user"> 当前用户:{{ username }} <span class="status" v-if="isOnline">(在线)</span> <span class="status" v-else>(离线)</span> </div> <div class="head-chat" v-show="chatNameShow">正在和 {{toName}} 聊天</div> </div> <!-- 主体内容 --> <div class="box-main"> <!-- 左部分 --> <div class="box-left"> <!-- 左上部分-未点击好友-空白聊天背景 --> <div class="left-nomessage" v-show="!isShowChat"> <div class="nomessage-title"> 当前无聊天。请选择好友列表中的在线好友开始聊天吧! </div> </div> <!-- 左上部分-消息聊天框 --> <div class="left-message" v-show="isShowChat"> <div v-for="item in historyMessage"> <!--左部分-对面消息--> <div class="msg-guest" v-if="item.fromName"> <div class="msg-name">{{item.fromName}}</div> <div class="msg-content"> <img class="msg-img" src="../assets/img/avatar1.jpg" alt=""> <div class="message-1">{{item.message}}</div> </div> </div> <!--右边部分-自己消息--> <div class="msg-host" v-else> <div class="msg-name">{{username}}</div> <div class="msg-content"> <img class="msg-img" src="../assets/img/avatar2.jpg" alt=""> <div class="message-2">{{item.message}}</div> </div> </div> </div> </div> <!-- 左下部分-消息发送框 --> <div class="left-input"> <div class="input-wrapper"> <n-input v-model:value="sendMessage.message" @keydown:enter="handleEnter" class="l-textarea" type="textarea" placeholder="在此输入文字信息,,," :autosize="{minRows: 3,maxRows: 5}"/> <n-button class="send-btn" type="success" size="small" @click="submit"> 发送 </n-button> </div> <div class="send-tip">提示:Shift + Enter 换行</div> </div> </div> <!-- 右部分 --> <div class="box-right"> <!-- 右上部分-好友列表 --> <div class="right-friend"> <div class="right-title"> <div>好友列表</div> </div> <div class="friend-list"> <ul> <li v-for="item in friendList"> <div style="cursor: pointer" @click="showChat(item)">{{ item }}<span class="status"></span></div> </li> </ul> </div> </div> <!-- 右下部分-广播列表(系统消息) --> <div class="right-sys"> <div class="right-title"> <div>系统广播</div> </div> <div class="sys-msg"> <ul> <li v-for="item in systemOfflineMessages"> {{item}} </li> <li v-for="item in systemMessages"> {{item}} 已上线 </li> </ul> </div> </div> </div> </div> </div> </section> </template> <script setup lang="ts"> import {ref,onMounted} from "vue"; import {getCurrentUsername} from "@/api/home/api"; import {ChatMessage, ResponseData, SendMessage} from "@/api/type"; import { useMessage } from 'naive-ui' const websocket = ref<WebSocket | null>(); const data = ref<ResponseData<string>>(); //初始化数据 const message = useMessage(); const username = ref<string | null>(''); // 当前用户 const isOnline = ref<boolean>(true); const toName = ref<string | null>(''); // 聊天对象 const chatNameShow = ref<boolean>(false); // 聊天对象是否显示 const friendList = ref<string[]>([]); //在线好友列表 const systemOfflineMessages = ref<string[]>([]); //离线消息 const systemMessages = ref<string[]>([]); //系统消息 const historyMessage = ref<ChatMessage[]>([]); //聊天历史消息 const isShowChat = ref<boolean>(false); //是否显示聊天框 /*message*/ const sendMessage = ref<SendMessage>({ toName: '', message: '', }) const handleEnter = (e: KeyboardEvent) =>{ if(!e.shiftKey){ e.preventDefault(); //阻止默认回车换行行为 submit(); } } function showChat (friend: string) { toName.value = friend; // 聊天对象赋值 //处理历史聊天信息 const history = sessionStorage.getItem(toName.value); if(!history){ historyMessage.value = []; } else { historyMessage.value = JSON.parse(history); //反序列化获取历史聊天记录 } isShowChat.value = true; //渲染聊天 chatNameShow.value = true; //渲染正在和谁聊天 } //发送信息 const submit = () =>{ sendMessage.value.message = sendMessage.value.message.trim(); if(!sendMessage.value.message){ message.warning('请输入聊天内容'); return; } //接收消息人 sendMessage.value.toName = toName.value; //添加自己的一条信息 historyMessage.value.push(JSON.parse(JSON.stringify(sendMessage.value))); //临时保存与该对象的聊天历史消息 sessionStorage.setItem(toName.value, JSON.stringify(historyMessage.value)) //存字符串类型,序列化stringify,反序列化parse //向服务端发送信息 websocket.value.send(JSON.stringify(sendMessage.value)); sendMessage.value.message = ''; } //onOpen function onOpen() { isOnline.value = true; } const onClose = () => { isOnline.value = false; } //接收服务端发送的信息 const onMessage = (event: MessageEvent) =>{ const dataString = event.data; //服务端推送的信息 console.log(dataString); const resJsonObj = JSON.parse(dataString); console.log(resJsonObj); //系统信息 if(resJsonObj && resJsonObj.system){ const names = resJsonObj.message; const offline = resJsonObj.offline; if(offline){ systemOfflineMessages.value.push(resJsonObj.message); }else { for(let i=0; i<names.length; i++){ if(names[i] !== username.value && !friendList.value.includes(names[i])){ friendList.value.push(names[i]); systemMessages.value.push(names[i]); } } } }else { //聊天信息 //获取聊天记录 const history = sessionStorage.getItem(resJsonObj.fromName); if(!history){ historyMessage.value = []; } historyMessage.value.push(resJsonObj); sessionStorage.setItem(resJsonObj.fromName, JSON.stringify(historyMessage.value)) } } //初始化 const init = async () => { await getCurrentUsername().then((res) =>{ if(res.code === '200'){ data.value = res; username.value = data.value.result; } }).catch((err)=>{ console.log(err); }); /*创建websocket对象*/ websocket.value = new WebSocket('ws://localhost:8081/chat'); websocket.value.onopen = onOpen; websocket.value.onmessage = onMessage; websocket.value.onclose = onClose; } onMounted(()=>{ init(); }) </script> <style scoped> .message { height: 100vh; display: flex; justify-content: center; align-items: center; } .message-box { width: 50%; height: 700px; border: 1px solid #afdaaf; border-radius: 5px; overflow: hidden; /* 防止内部元素溢出 */ box-shadow: 0 2px 8px rgba(157, 221, 157, 0.3); } .box-head { background-color: #afeaaf; height: 60px; padding: 0 10px; display: flex; flex-direction: column; justify-content: flex-start; /*子元素靠顶部对齐,防止拉伸挤压*/ .head-user { font-size: 16px; font-weight: 600; margin-top: 5px; .status { font-size: 12px; font-weight: 500; margin-left: 5px; color: #0c8fe1; } } .head-chat { text-align: center; font-size: 18px; font-weight: 600; } } /*主体内容*/ .box-main { height: calc(100% - 60px); display: flex; .box-left { height: 100%; width: 70%; border-right: 1px solid #c2c3c5; display: flex; flex-direction: column; /*左侧无消息*/ .left-nomessage { flex: 1; padding: 15px; overflow-y: auto; /*内容过多下滑*/ background-color: #fff; .nomessage-title { color: #eae5e5; font-size: 15px; font-weight: 500; line-height: 25px; background-color: #9e9c9c; padding: 5px 10px; } } /*左侧消息*/ .left-message { flex: 1; padding: 15px; overflow-y: auto; /*内容过多下滑*/ background-color: #fff; .msg-guest { margin-bottom: 12px; padding: 0 5px; text-align: left; .msg-name { font-size: 14px; color: #000000; font-weight: 400; line-height: 25px; } .msg-content { display: flex; align-items: flex-start; .msg-img { width: 36px; height: 36px; border-radius: 5px; } .message-1 { margin-left: 10px; background-color: #f0f0f0; padding: 8px 12px; border-radius: 8px; max-width: 70%; /* 限制气泡最大宽度 */ } } } .msg-host { margin-bottom: 12px; padding: 0 5px; text-align: right; .msg-name { font-size: 14px; color: #000000; font-weight: 400; line-height: 25px; } .msg-content { display: flex; align-items: flex-start; flex-direction: row-reverse; /*反转*/ .msg-img { width: 36px; height: 36px; border-radius: 5px; margin-left: 10px; } .message-2 { background-color: #beedc6; padding: 8px 12px; border-radius: 8px; max-width: 70%; } } } } /*左侧输入框*/ .left-input { display: flex; flex-direction: column; padding: 12px 15px; border-top: 1px solid #c2c3c5; .input-wrapper { position: relative; flex: 1; .l-textarea { width: 100% !important; /*确保输入框占满容器*/ padding-bottom: 50px !important; /*给下侧按钮预留空间*/ } .send-btn { position: absolute; bottom: 8px; right: 8px; padding: 10px 30px; } } .send-tip { margin-top: 5px; color: #c2c3c5; } } } .box-right { width: 30%; height: 100%; /*处理子容器分布*/ display: flex; flex-direction: column; .right-title { font-size: 16px; font-weight: 500; padding: 8px 10px; border-bottom: 1px solid #c2c3c5; } .right-friend { height: 40%; display: flex; flex-direction: column; overflow: hidden; .friend-list { flex: 1; overflow-y: auto; padding: 8px 10px; } } .right-sys { flex: 1; display: flex; flex-direction: column; overflow: hidden; .sys-msg { flex: 1; overflow-y: auto; padding: 8px 10px; } } .friend-list ul,.sys-msg ul { margin: 0; padding: 0; list-style: none; } } } </style>
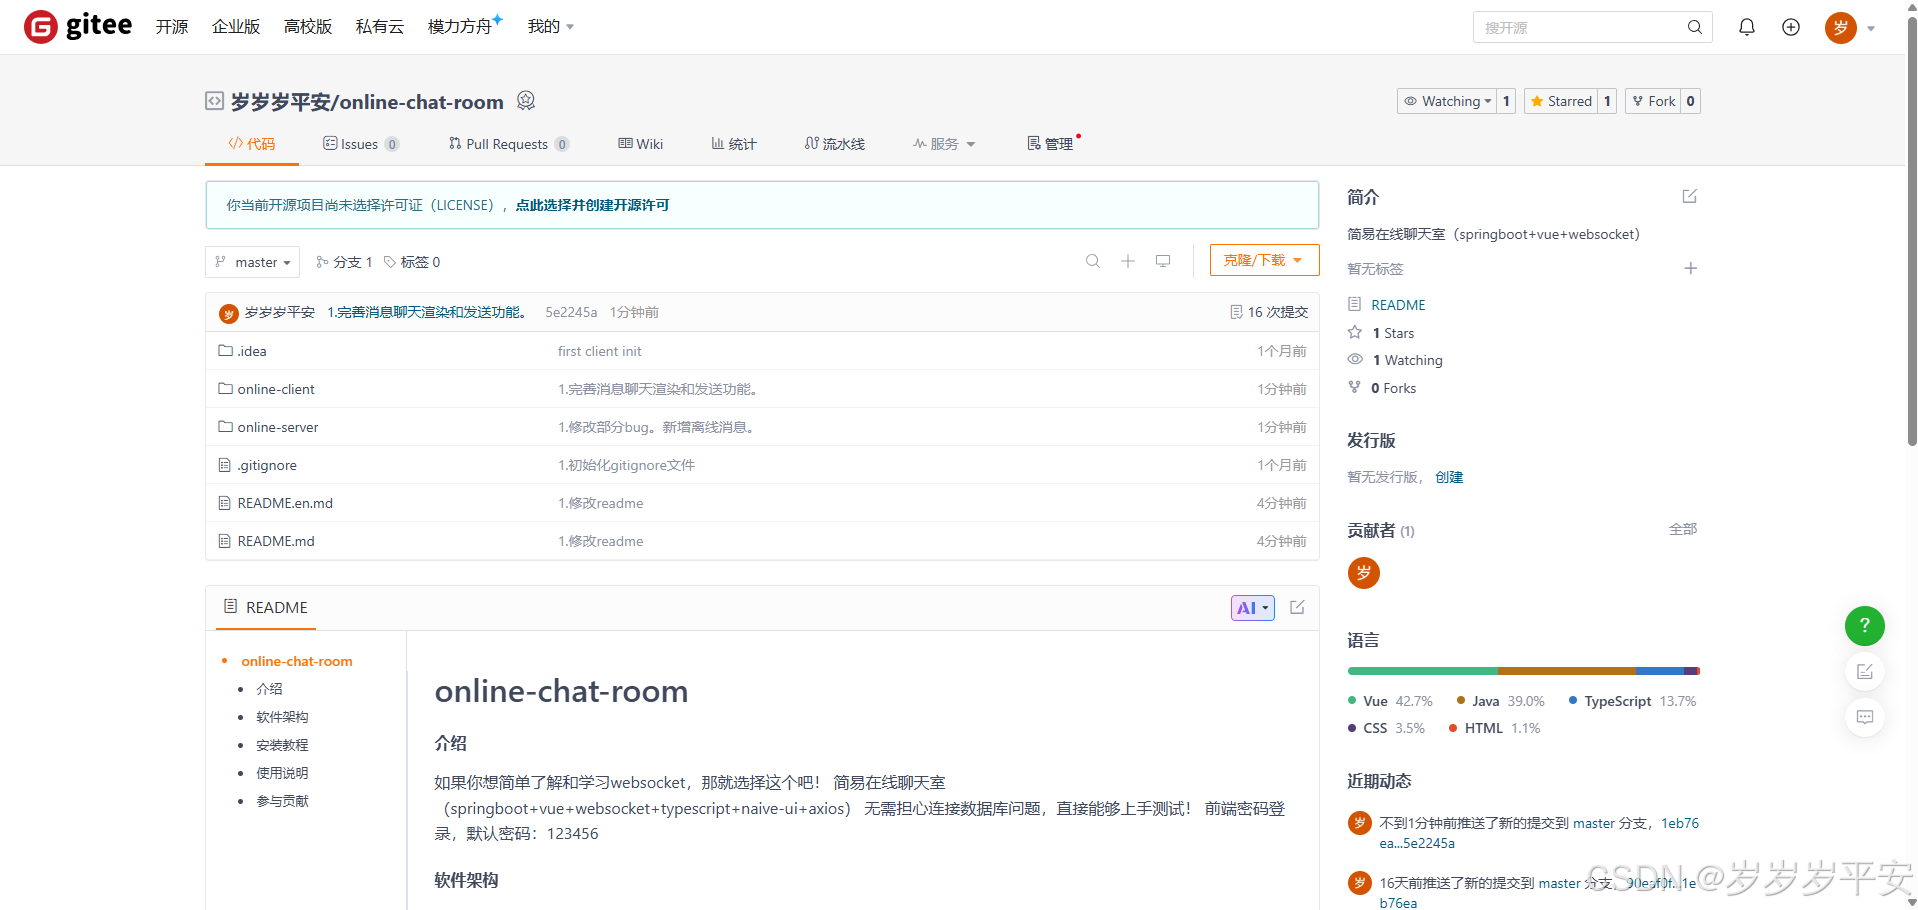
四、完整源代码。
(1)gitee仓库源码地址:https://gitee.com/suisuipingan-hyl/online-chat-room。