尝试使用vue生成一个界面,界面上条目都是同样的模板,效果如下:
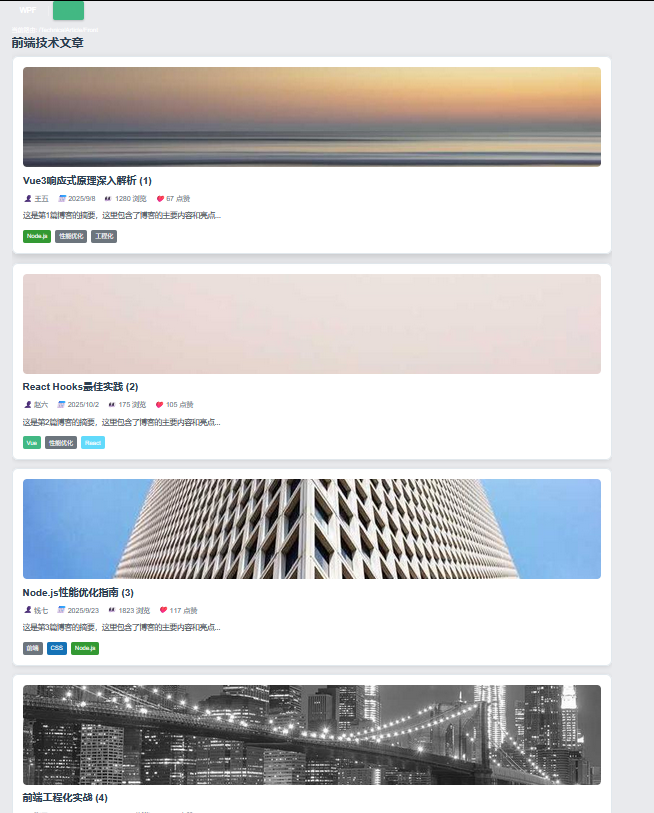
每个文章界面结构相同,js代码中提供了文章实体的链表,界面加载的时候根据这些实体自动生成对应UI;
1.编写数据提供类:blogData.js
javascript
// 博客数据模拟
export const generateBlogList = (count = 10) => {
  const titles = [
    'Vue3响应式原理深入解析',
    'React Hooks最佳实践',
    'Node.js性能优化指南',
    '前端工程化实战',
    '微前端架构设计',
    'Webpack5新特性解析',
    'TypeScript泛型应用',
    'CSS-in-JS方案比较',
    '前端测试策略',
    '浏览器渲染原理'
  ]

  const authors = ['张三', '李四', '王五', '赵六', '钱七']
  const tagsPool = ['Vue', 'React', 'JavaScript', 'TypeScript', 'CSS', 'Node.js', '前端', '工程化', '性能优化']

  return Array.from({ length: count }, (_, index) => {
    const tagCount = Math.floor(Math.random() * 3) + 2
    const selectedTags = []
    for (let i = 0; i < tagCount; i++) {
      const randomTag = tagsPool[Math.floor(Math.random() * tagsPool.length)]
      if (!selectedTags.includes(randomTag)) {
        selectedTags.push(randomTag)
      }
    }

    return {
      id: index + 1,
      title: titles[index % titles.length] + ` (${index + 1})`,
      author: authors[Math.floor(Math.random() * authors.length)],
      publishDate: new Date(Date.now() - Math.random() * 30 * 24 * 60 * 60 * 1000).toISOString().split('T')[0],
      summary: `这是第${index + 1}篇博客的摘要,这里包含了博客的主要内容和亮点...`,
      content: `这是第${index + 1}篇博客的完整内容...`,
      tags: selectedTags,
      views: Math.floor(Math.random() * 2000),
      likes: Math.floor(Math.random() * 150),
      coverImage: `https://picsum.photos/800/400?random=${index}`
    }
  })
}

// 导出固定数据
export const blogList = generateBlogList(8)
2.定义单个文章组件模板
BlogCard.vue
html
<template>
  <article class="blog-card" @click="$emit('view-detail', blog)">
    <div class="blog-header">
      <img v-if="blog.coverImage" :src="blog.coverImage" :alt="blog.title" class="cover-image">
      <h3 class="blog-title">{{ blog.title }}</h3>
    </div>

    <div class="blog-meta">
      <span class="author">
        <i class="icon-user"></i>{{ blog.author }}
      </span>
      <span class="date">
        <i class="icon-calendar"></i>{{ formatDate(blog.publishDate) }}
      </span>
      <span class="views">
        <i class="icon-eye"></i>{{ blog.views }} 浏览
      </span>
      <span class="likes">
        <i class="icon-heart"></i>{{ blog.likes }} 点赞
      </span>
    </div>

    <p class="blog-summary">{{ blog.summary }}</p>

    <div class="blog-tags">
      <span
        v-for="tag in blog.tags"
        :key="tag"
        class="tag"
        :style="{ backgroundColor: getTagColor(tag) }"
      >
        {{ tag }}
      </span>
    </div>
  </article>
</template>

<script>
export default {
  name: 'BlogCard',
  props: {
    blog: {
      type: Object,
      required: true
    }
  },
  methods: {
    formatDate(dateString) {
      return new Date(dateString).toLocaleDateString('zh-CN')
    },
    getTagColor(tag) {
      const colors = {
        'Vue': '#42b883',
        'React': '#61dafb',
        'JavaScript': '#f7df1e',
        'TypeScript': '#3178c6',
        'CSS': '#1572b6',
        'Node.js': '#339933'
      }
      return colors[tag] || '#6c757d'
    }
  }
}
</script>

<style scoped>
.blog-card {
  border: 1px solid #e1e8ed;
  border-radius: 12px;
  padding: 20px;
  margin-bottom: 16px;
  background: white;
  cursor: pointer;
  transition: all 0.3s ease;
  box-shadow: 0 2px 8px rgba(0,0,0,0.1);
}

.blog-card:hover {
  transform: translateY(-2px);
  box-shadow: 0 4px 16px rgba(0,0,0,0.15);
}

.cover-image {
  width: 100%;
  height: 200px;
  object-fit: cover;
  border-radius: 8px;
  margin-bottom: 12px;
}

.blog-title {
  color: #2c3e50;
  margin: 0 0 12px 0;
  font-size: 1.25rem;
  line-height: 1.4;
}

.blog-meta {
  display: flex;
  flex-wrap: wrap;
  gap: 16px;
  margin-bottom: 12px;
  font-size: 0.875rem;
  color: #6c757d;
}

.blog-meta span {
  display: flex;
  align-items: center;
  gap: 4px;
}

.blog-summary {
  color: #495057;
  line-height: 1.6;
  margin-bottom: 16px;
  display: -webkit-box;
  -webkit-line-clamp: 3;
  -webkit-box-orient: vertical;
  overflow: hidden;
}

.blog-tags {
  display: flex;
  flex-wrap: wrap;
  gap: 8px;
}

.tag {
  padding: 4px 8px;
  border-radius: 4px;
  color: white;
  font-size: 0.75rem;
  font-weight: 500;
}

/* 图标样式 */
.icon-user::before { content: '👤 '; }
.icon-calendar::before { content: '📅 '; }
.icon-eye::before { content: '👀 '; }
.icon-heart::before { content: '❤️ '; }
</style>
3.在父容器中使用v-for呈现
html
<template>
   <div class="front-container">
    <h2>前端技术文章</h2>
    <div class="blog-list">
      <BlogCard
        v-for="blog in blogs"
        :key="blog.id"
        :blog="blog"
        @view-detail="handleViewDetail"
      />
    </div>
  </div>
</template>

<script>
import { blogList } from '../../mock/blogData'
import BlogCard from '@/components/BlogCard.vue'

export default {
  name: 'BlogList',
  components: {
    BlogCard
  },
  data() {
    return {
      blogs: blogList
    }
  },
  methods: {
    handleViewDetail(blog) {
      console.log('查看博客详情:', blog)
    }
  }
}
</script>
分析:
数据流向:
blogData.js文件提供了blogList属性,在父容器中通过blogs引用了blogList,在父容器的v-for中把blogs中每一个实体又给到了BlogCard.vue的blog属性,完成数据填充。
其中包