目录
[三、安装 Isaac Gym](#三、安装 Isaac Gym)
[四、安装 rsl_rl](#四、安装 rsl_rl)
[五、安装Unitree 强化学习相关库](#五、安装Unitree 强化学习相关库)
[5.1 安装unitree_rl_gym](#5.1 安装unitree_rl_gym)
[5.2 unitree_sdk2py(可选)](#5.2 unitree_sdk2py(可选))
[6.1 训练命令](#6.1 训练命令)
[6.2 效果演示 Play](#6.2 效果演示 Play)
[6.3 Mujuco 仿真验证](#6.3 Mujuco 仿真验证)
参考链接:https://blog.csdn.net/qq_38429958/article/details/149634498?spm=1001.2014.3001.5501
在此记录整个复现过程
一、PBHC源码下载
首先下载源码:
git clone https://github.com/TeleHuman/PBHC.git
二、创建虚拟环境
创建 conda虚拟环境
conda create -n unitree-rl python=3.8
激活虚拟环境
conda activate unitree-rl
安装 PyTorch
conda install pytorch==2.3.1 torchvision==0.18.1 torchaudio==2.3.1 pytorch-cuda -c pytorch -c nvidia
或者使用
pip install torch==2.3.1 torchvision==0.18.1 torchaudio==2.3.1 --index-url https://download.pytorch.org/whl/cu118
三、安装 Isaac Gym
3.1下载
Isaac Gym 是 Nvidia 提供的刚体仿真和训练框架。首先,先在 Nvidia 官网![]() https://developer.nvidia.com/isaac-gym/download 下载Archive压缩包。
https://developer.nvidia.com/isaac-gym/download 下载Archive压缩包。
3.2解压
tar -zxvf IsaacGym_Preview_4_Package.tar.gz
cd isaacgym/python
pip install -e .
3.3验证安装
cd examples
python 1080_balls_of_solitude.py

四、安装 rsl_rl
1. 克隆仓库
git clone https://github.com/leggedrobotics/rsl_rl.git -b v1.0.2
2. 安装
cd rsl_rl
pip install -e .
五、安装Unitree 强化学习相关库
5.1 安装unitree_rl_gym
git clone https://github.com/unitreerobotics/unitree_rl_gym.git
cd unitree_rl_gym
pip install -e .
5.2 unitree_sdk2py(可选)
unitree_sdk2py 是用于与真实机器人通信的库。如果需要将训练的模型部署到物理机器人上运行,可以安装此库。
git clone https://github.com/unitreerobotics/unitree_sdk2_python.git
cd unitree_sdk2_python
pip install -e .
六、强化学习训练
6.1 训练命令
python legged_gym/scripts/train.py --task=g1 --headless
具体操作为在rsl_rl/utils/utils.py中增加和删除对应的代码:
python
trajectory_lengths_list = trajectory_lengths.tolist()
# Extract the individual trajectories
trajectories = torch.split(tensor.transpose(1, 0).flatten(0, 1),trajectory_lengths_list)
# add at least one full length trajectory
trajectories = trajectories + (torch.zeros(tensor.shape[0], tensor.shape[-1], device=tensor.device), )
# pad the trajectories to the length of the longest trajectory
padded_trajectories = torch.nn.utils.rnn.pad_sequence(trajectories)
# remove the added tensor
padded_trajectories = padded_trajectories[:, :-1]
trajectory_masks = trajectory_lengths > torch.arange(0, tensor.shape[0], device=tensor.device).unsqueeze(1)
trajectory_masks = trajectory_lengths > torch.arange(0, padded_trajectories.shape[0], device=tensor.device).unsqueeze(1)
return padded_trajectories, trajectory_masks
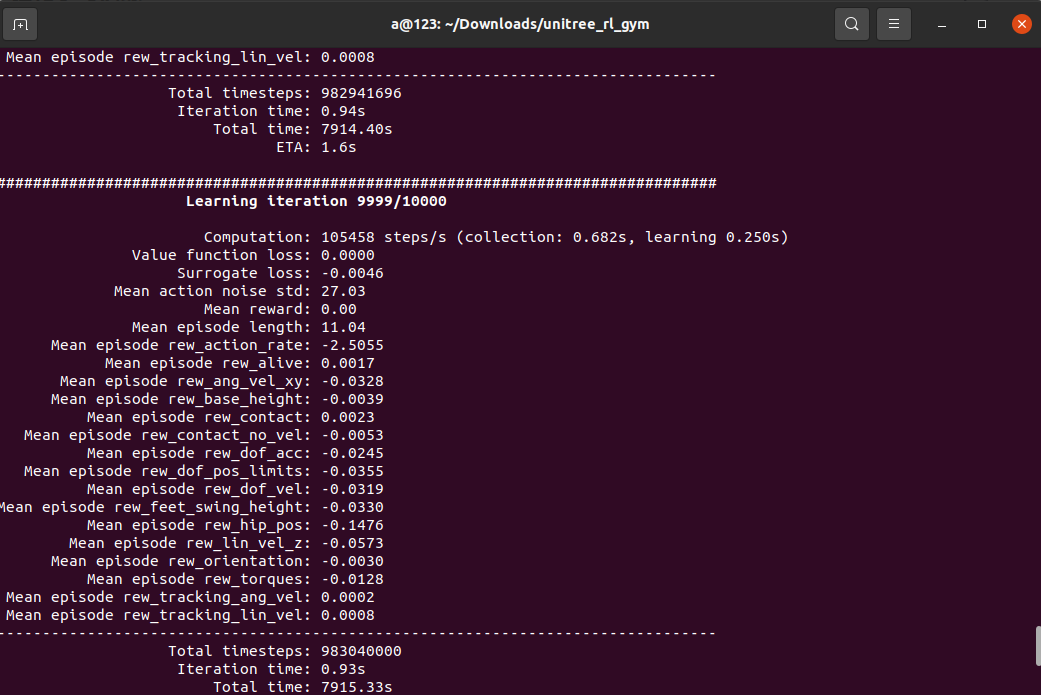
def unpad_trajectories(trajectories, masks):训练结果如下:
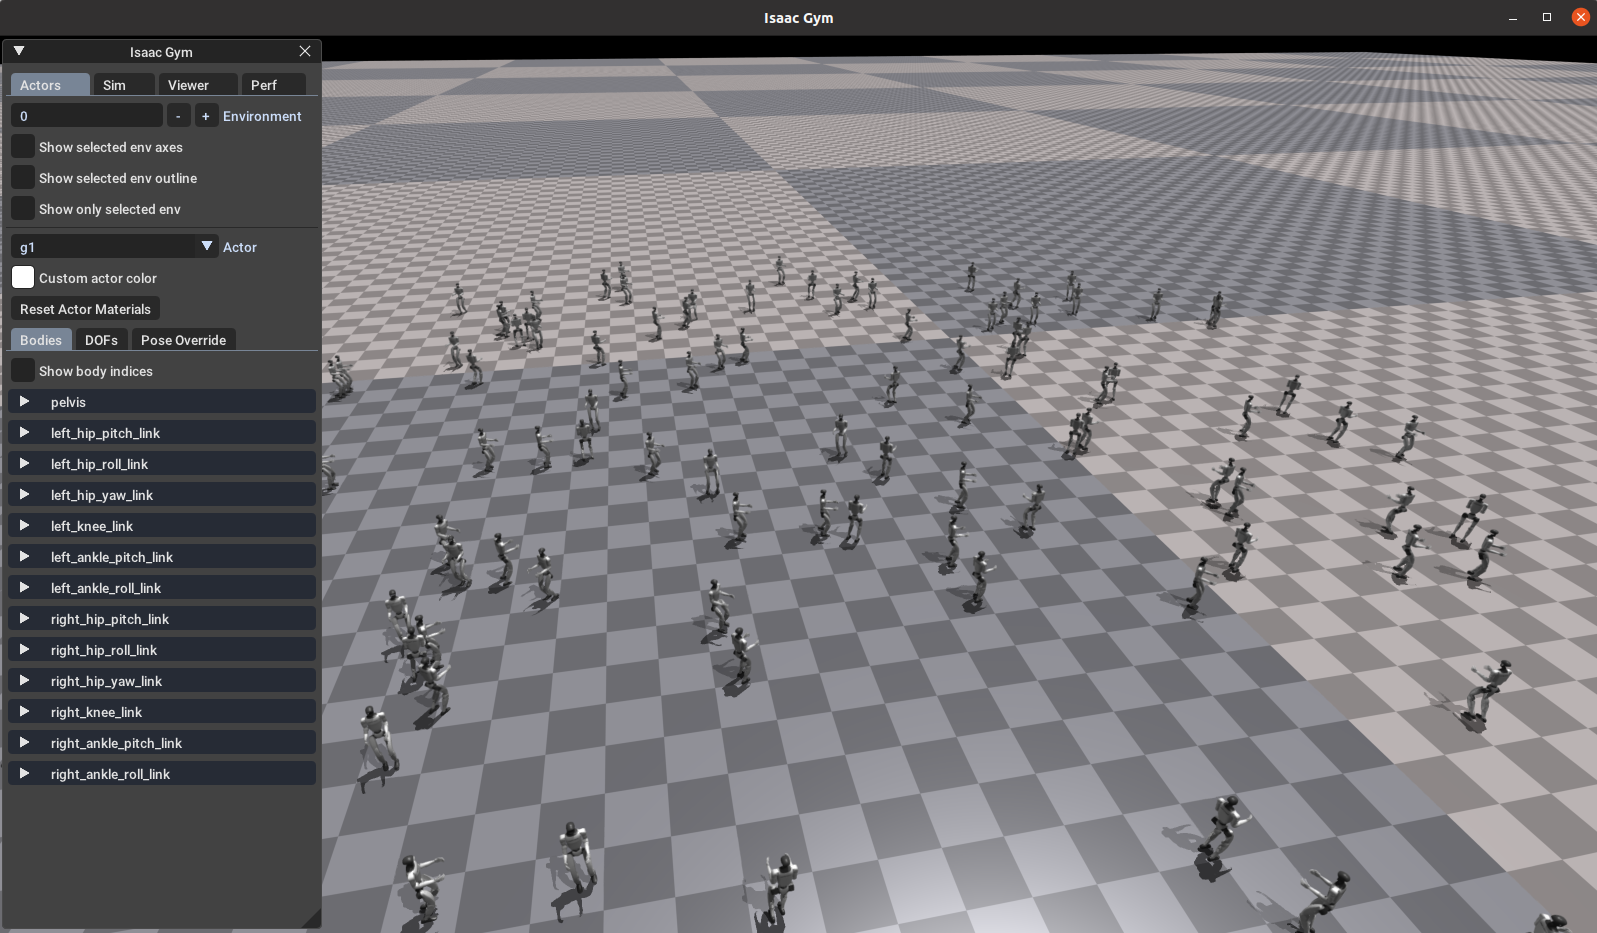
6.2 效果演示 Play
在 Gym 中查看训练效果,可以运行以下命令:
python legged_gym/scripts/play.py --task=g1
生成仅一个模型
python legged_gym/scripts/play.py --task=g1 --num_envs=1
#使用指定路径下模型进行测试(load_run不需要带logs地址)
python legged_gym/scripts/play.py --task=g1 --num_envs=1 --load_run=Oct10_03-50-19_
使用指定路径下 指定模型进行测试(load_run不需要带logs地址)
python legged_gym/scripts/play.py --task=g1 --num_envs=1 --load_run=Oct10_03-50-19_ --checkpoint=5000
结果如下:
!!!实际训练到7000次就可以了,7000次左右以后的结果开始不正常
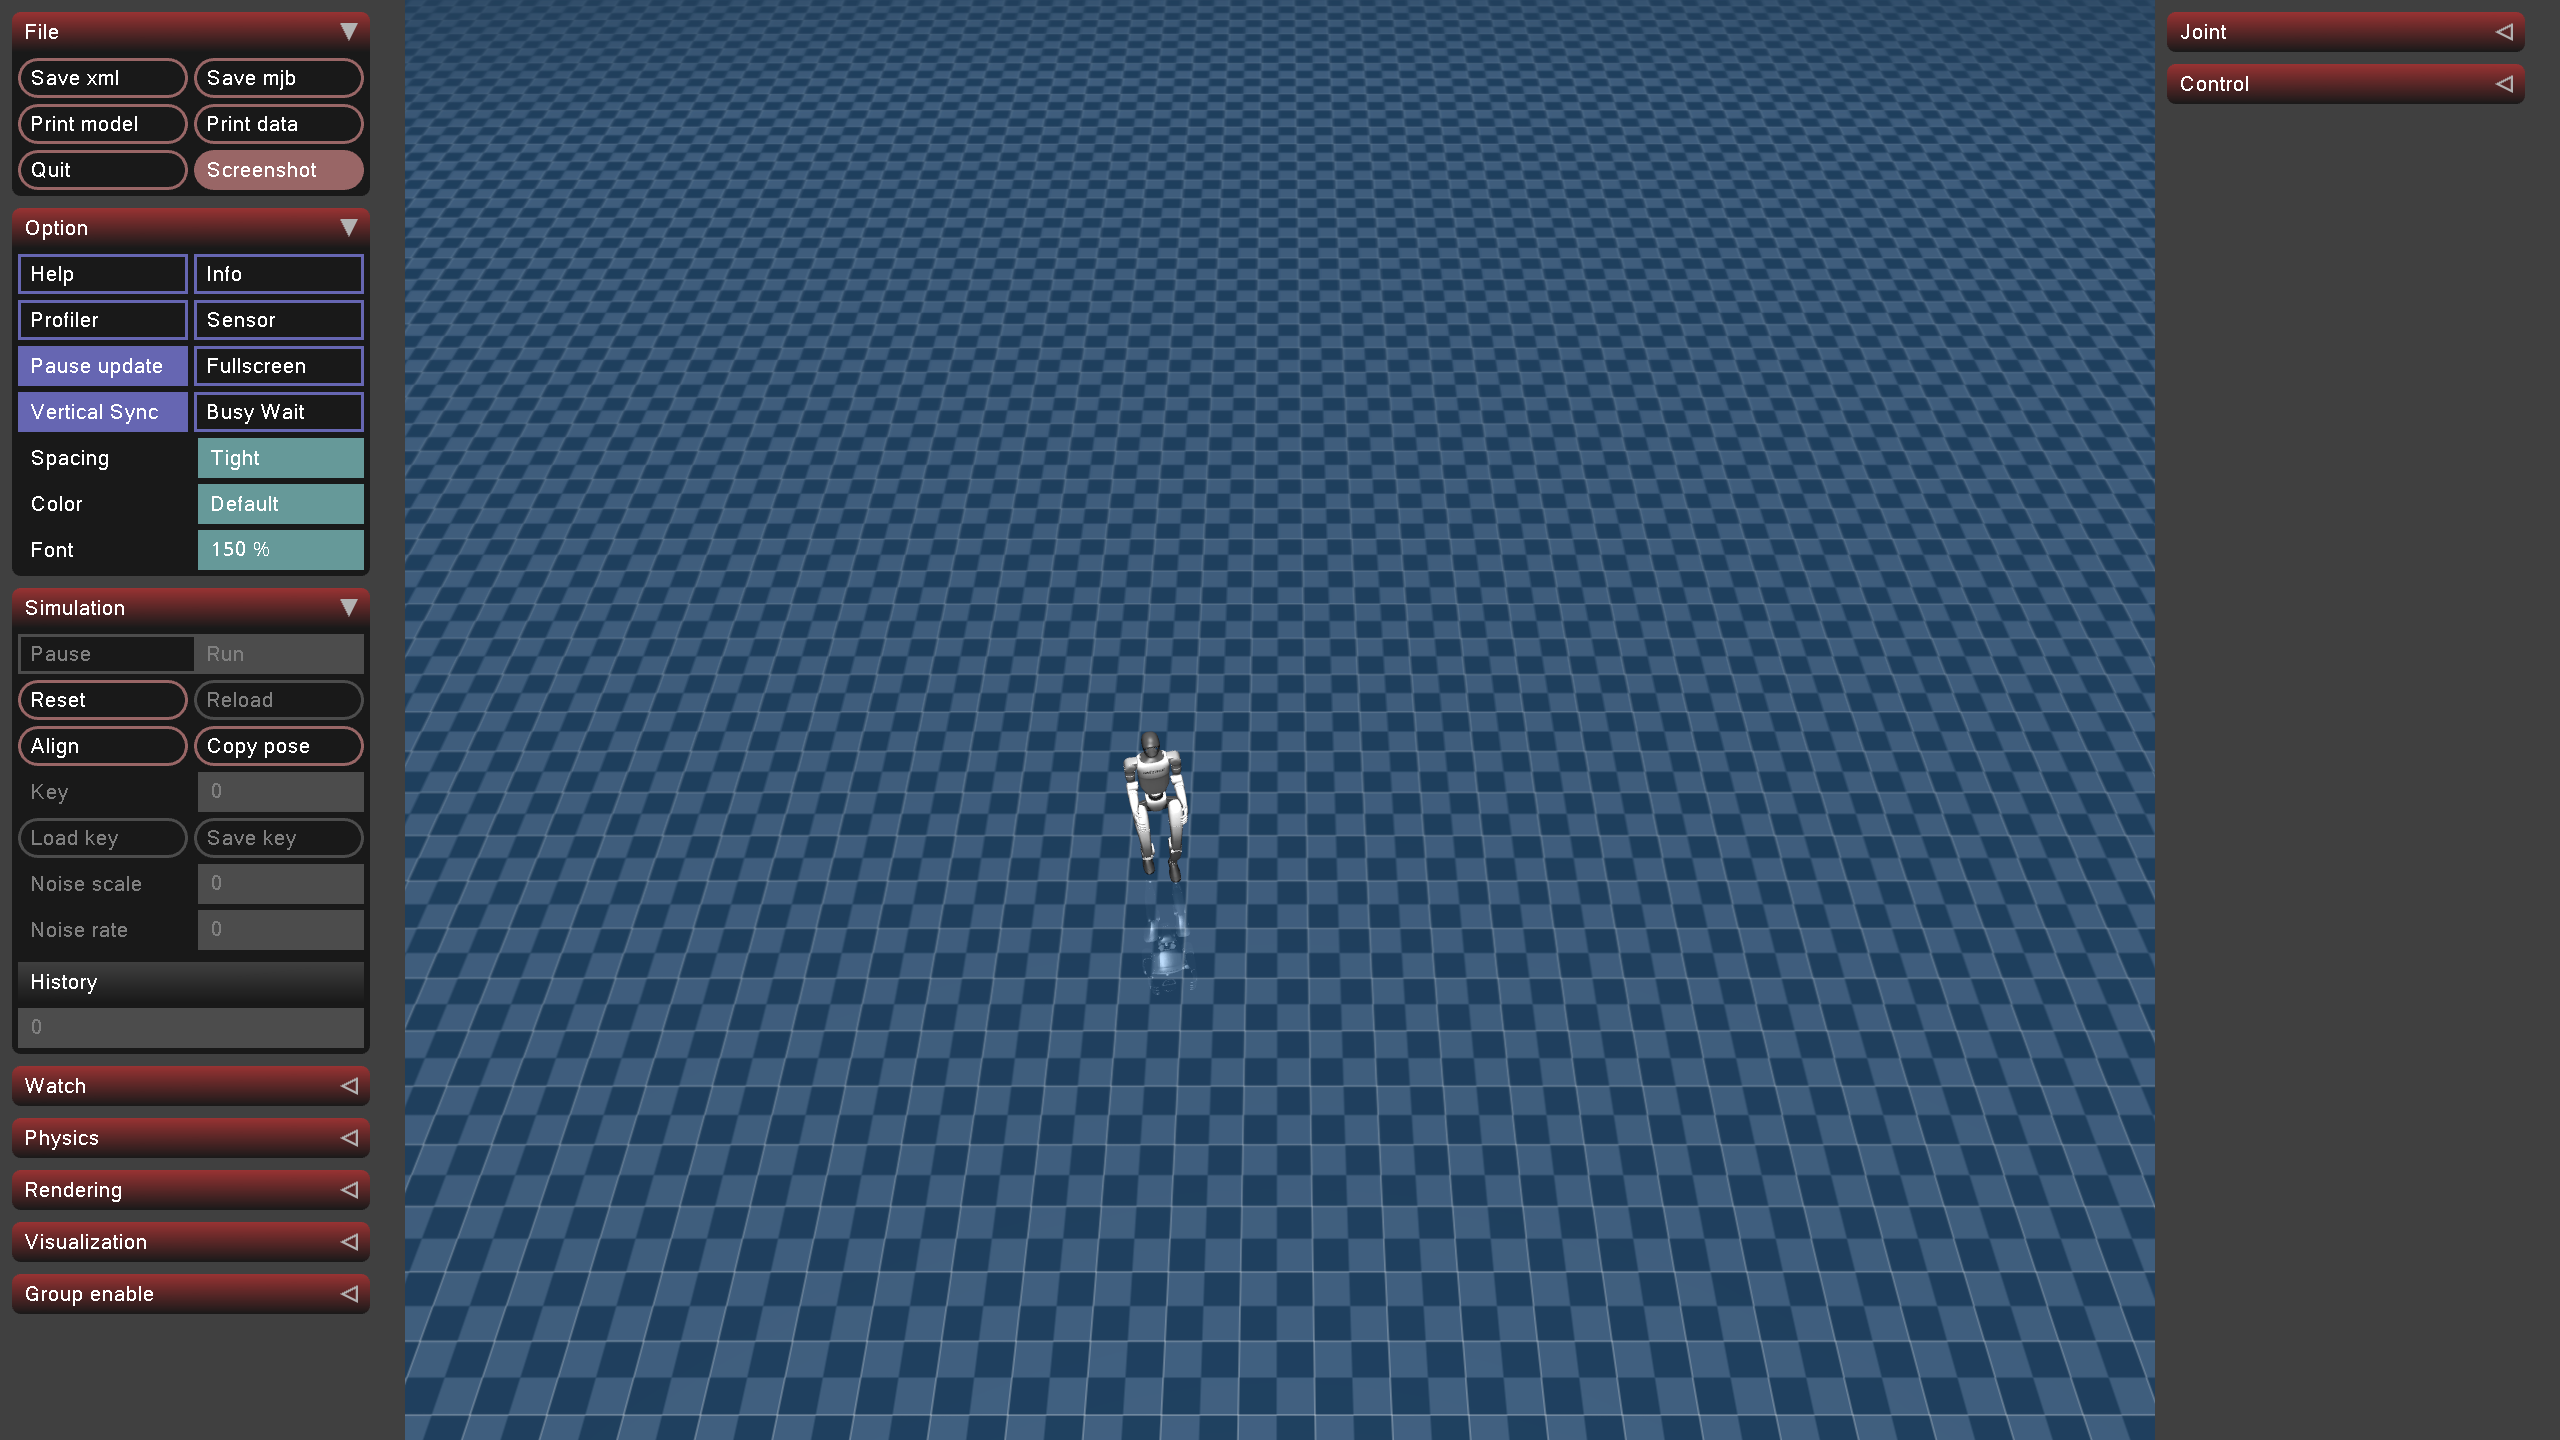
6.3 Mujuco 仿真验证
python deploy/deploy_mujoco/deploy_mujoco.py g1.yaml
修改g1.yaml文件中的(policy_path):
python
#policy_path: "{LEGGED_GYM_ROOT_DIR}/deploy/pre_train/g1/motion.pt"
policy_path: "{LEGGED_GYM_ROOT_DIR}/logs/g1/exported/policies/policy_lstm_1.pt"
xml_path: "{LEGGED_GYM_ROOT_DIR}/resources/robots/g1_description/scene.xml"

# Total simulation time
simulation_duration: 60.0
# Simulation time step
simulation_dt: 0.002
# Controller update frequency (meets the requirement of simulation_dt * controll_decimation=0.02; 50Hz)
control_decimation: 10

kps: [100, 100, 100, 150, 40, 40, 100, 100, 100, 150, 40, 40]
kds: [2, 2, 2, 4, 2, 2, 2, 2, 2, 4, 2, 2]

default_angles: [-0.1,  0.0,  0.0,  0.3, -0.2, 0.0,
                  -0.1,  0.0,  0.0,  0.3, -0.2, 0.0]

ang_vel_scale: 0.25
dof_pos_scale: 1.0
dof_vel_scale: 0.05
action_scale: 0.25
cmd_scale: [2.0, 2.0, 0.25]
num_actions: 12
num_obs: 47

cmd_init: [0.5, 0, 0]
结果还不错: