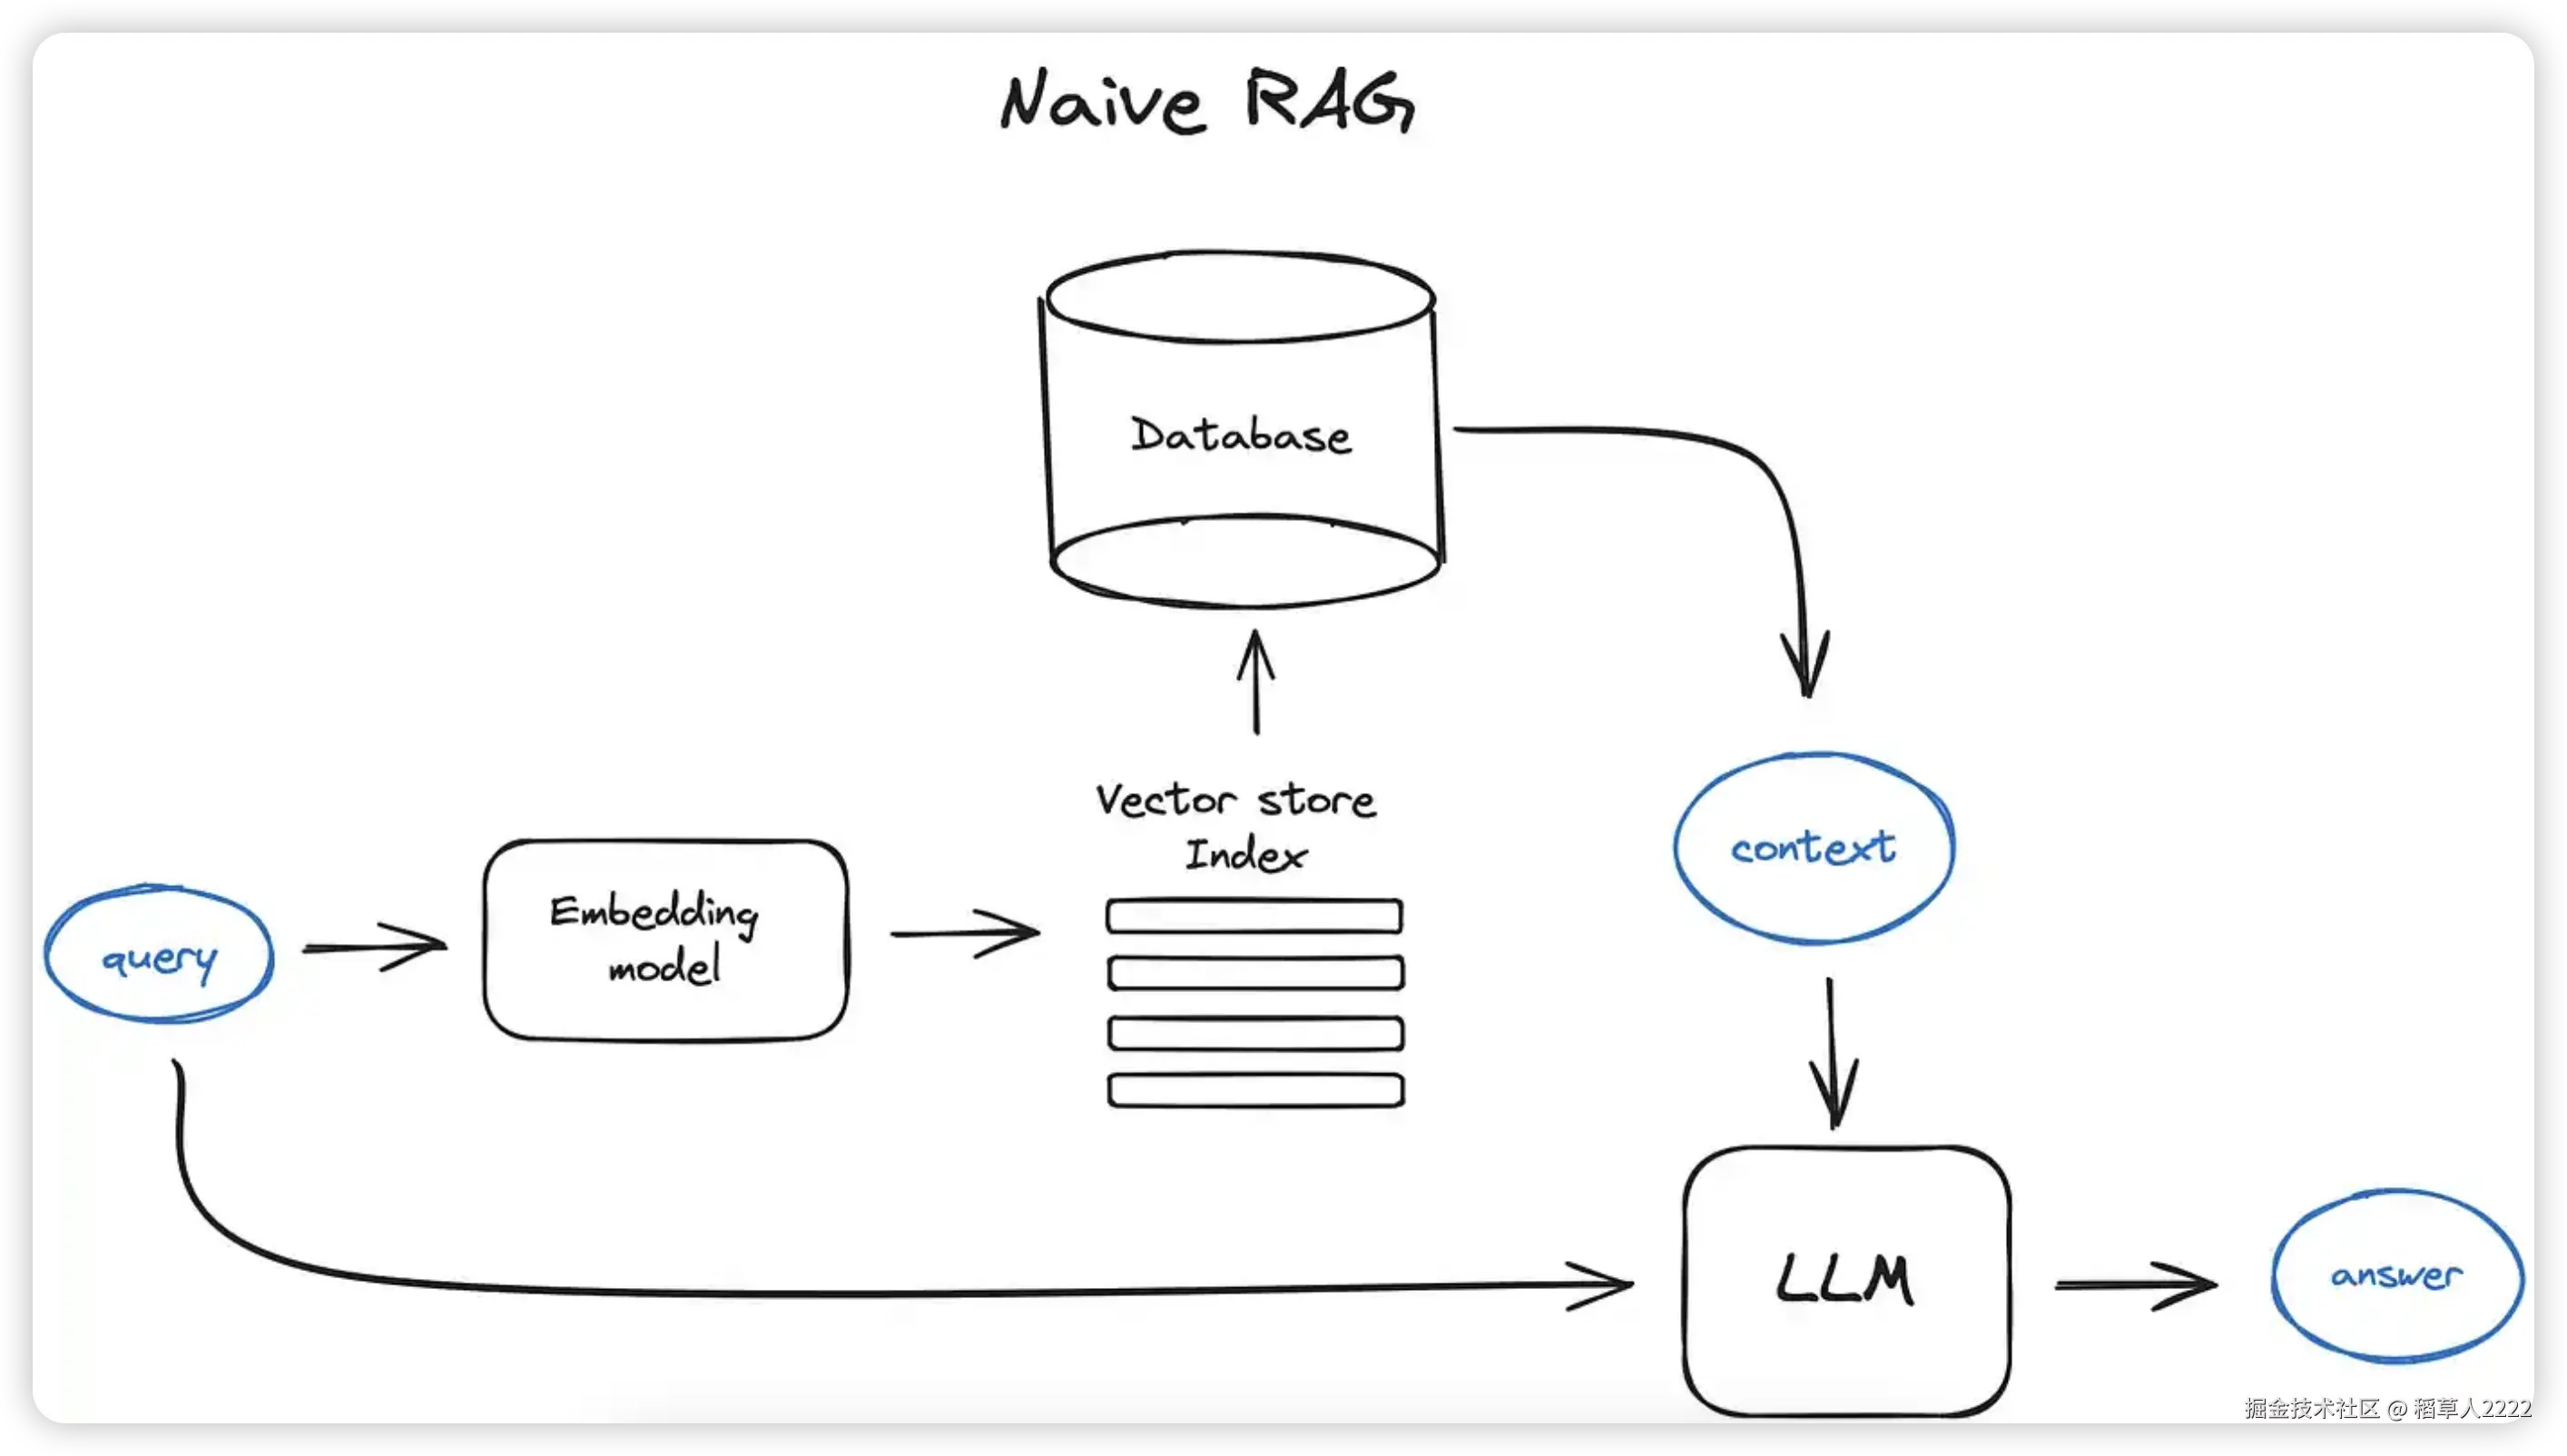
AI赋能企业应用已经遍地开花,在知识库的场景中AI的RAG(检索增强生成) 帮助用户从海量数据精准获取需要的内容。
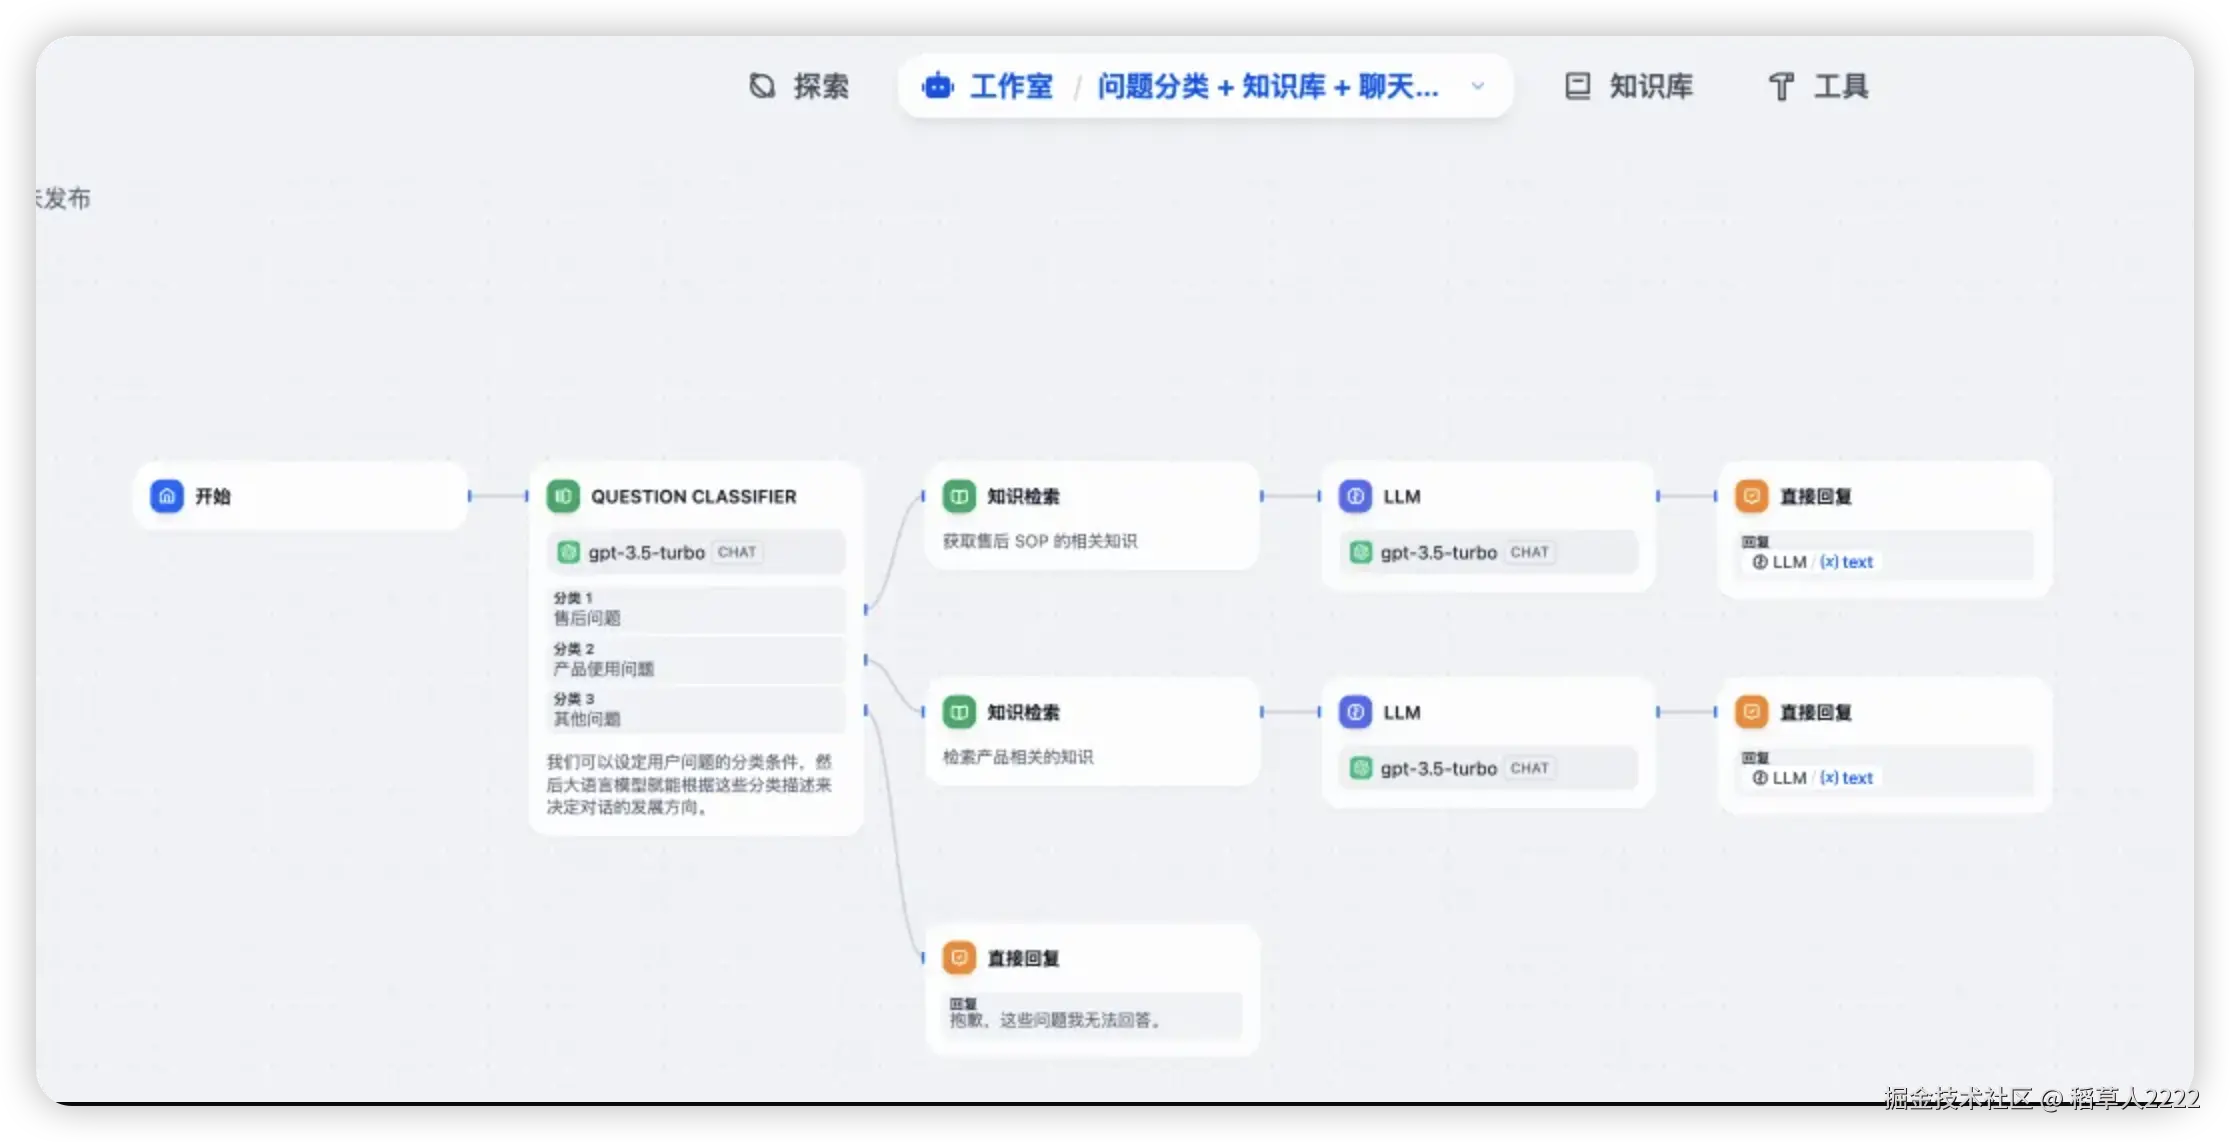
如果你想要构建一个超强的AI agent 那么市面上有Dify 这种超强的流程编排能力。
虽然已经有成熟的产品了,但是哪个程序员不想自己去造一个自己的工作流呢,我的场景需求是实现通过 AI 赋能一个系统后台能力,同时这个AI必须按照我的要求进行一系列规范化的流程完成用户的需求。
你可能对这个需求有下面问题
Q:这个不就是MCP的功能吗?
S:我的需求是一个AI工作流,其更加注重流程节点规则而不是简单的工具调用,而MCP其实本质是服务发现机制,目的是统一标准。
Q:这个是类似Dify这种 Agentic Flow (代理工作流)吗?
S:是的,但很明显自己的写的无法与Dify这种标杆项目相媲美,但我仍然能从中学习到如何构建类似工作流以及提高自己的设计能力和架构水平。
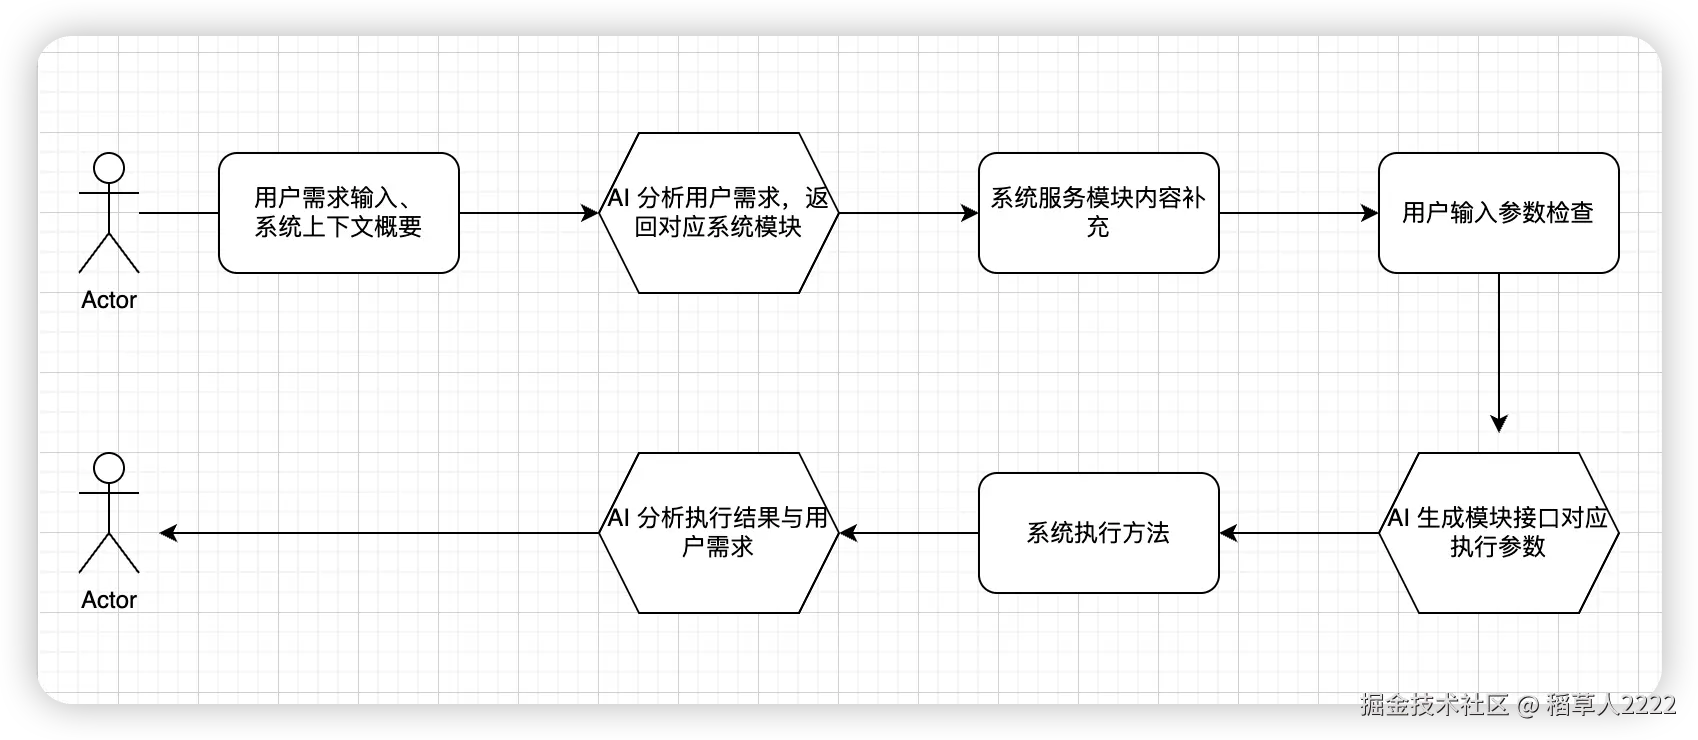
话不多说,确定了开始的思路,那么进入需求分析。一个基本的工作流需求如下
基本架构
看到节点结构大家应该都想到了一个数据结构- 链表!多个链表组成了一个完整的逻辑,同时从头进入,从尾输出。
但是每个节点都不一定能过正常处理逻辑并交给下一个节点处理,如果下一个节点还需要处理上一个节点的错误逻辑那么整个架构是非常不优雅的。尽可能保证节点是无状态的同时节点直接是相互节藕互不影响的。
这里我们可以直接搬运Netty的pipeline模型,将node 抽象为 inBound 与 outBound 这两个能力, 类似于上下文补充,交予AI分析并结构化输出,这种则是inBound的能力,如果出现了不符合预期的情况那么将进行outBound输出。outBound则是输出处理逻辑,比如头部节点 head 的outBound是通过SSE通知客户端处理结果。inBound 与 outBound能够很好的实现我们想要的逻辑。
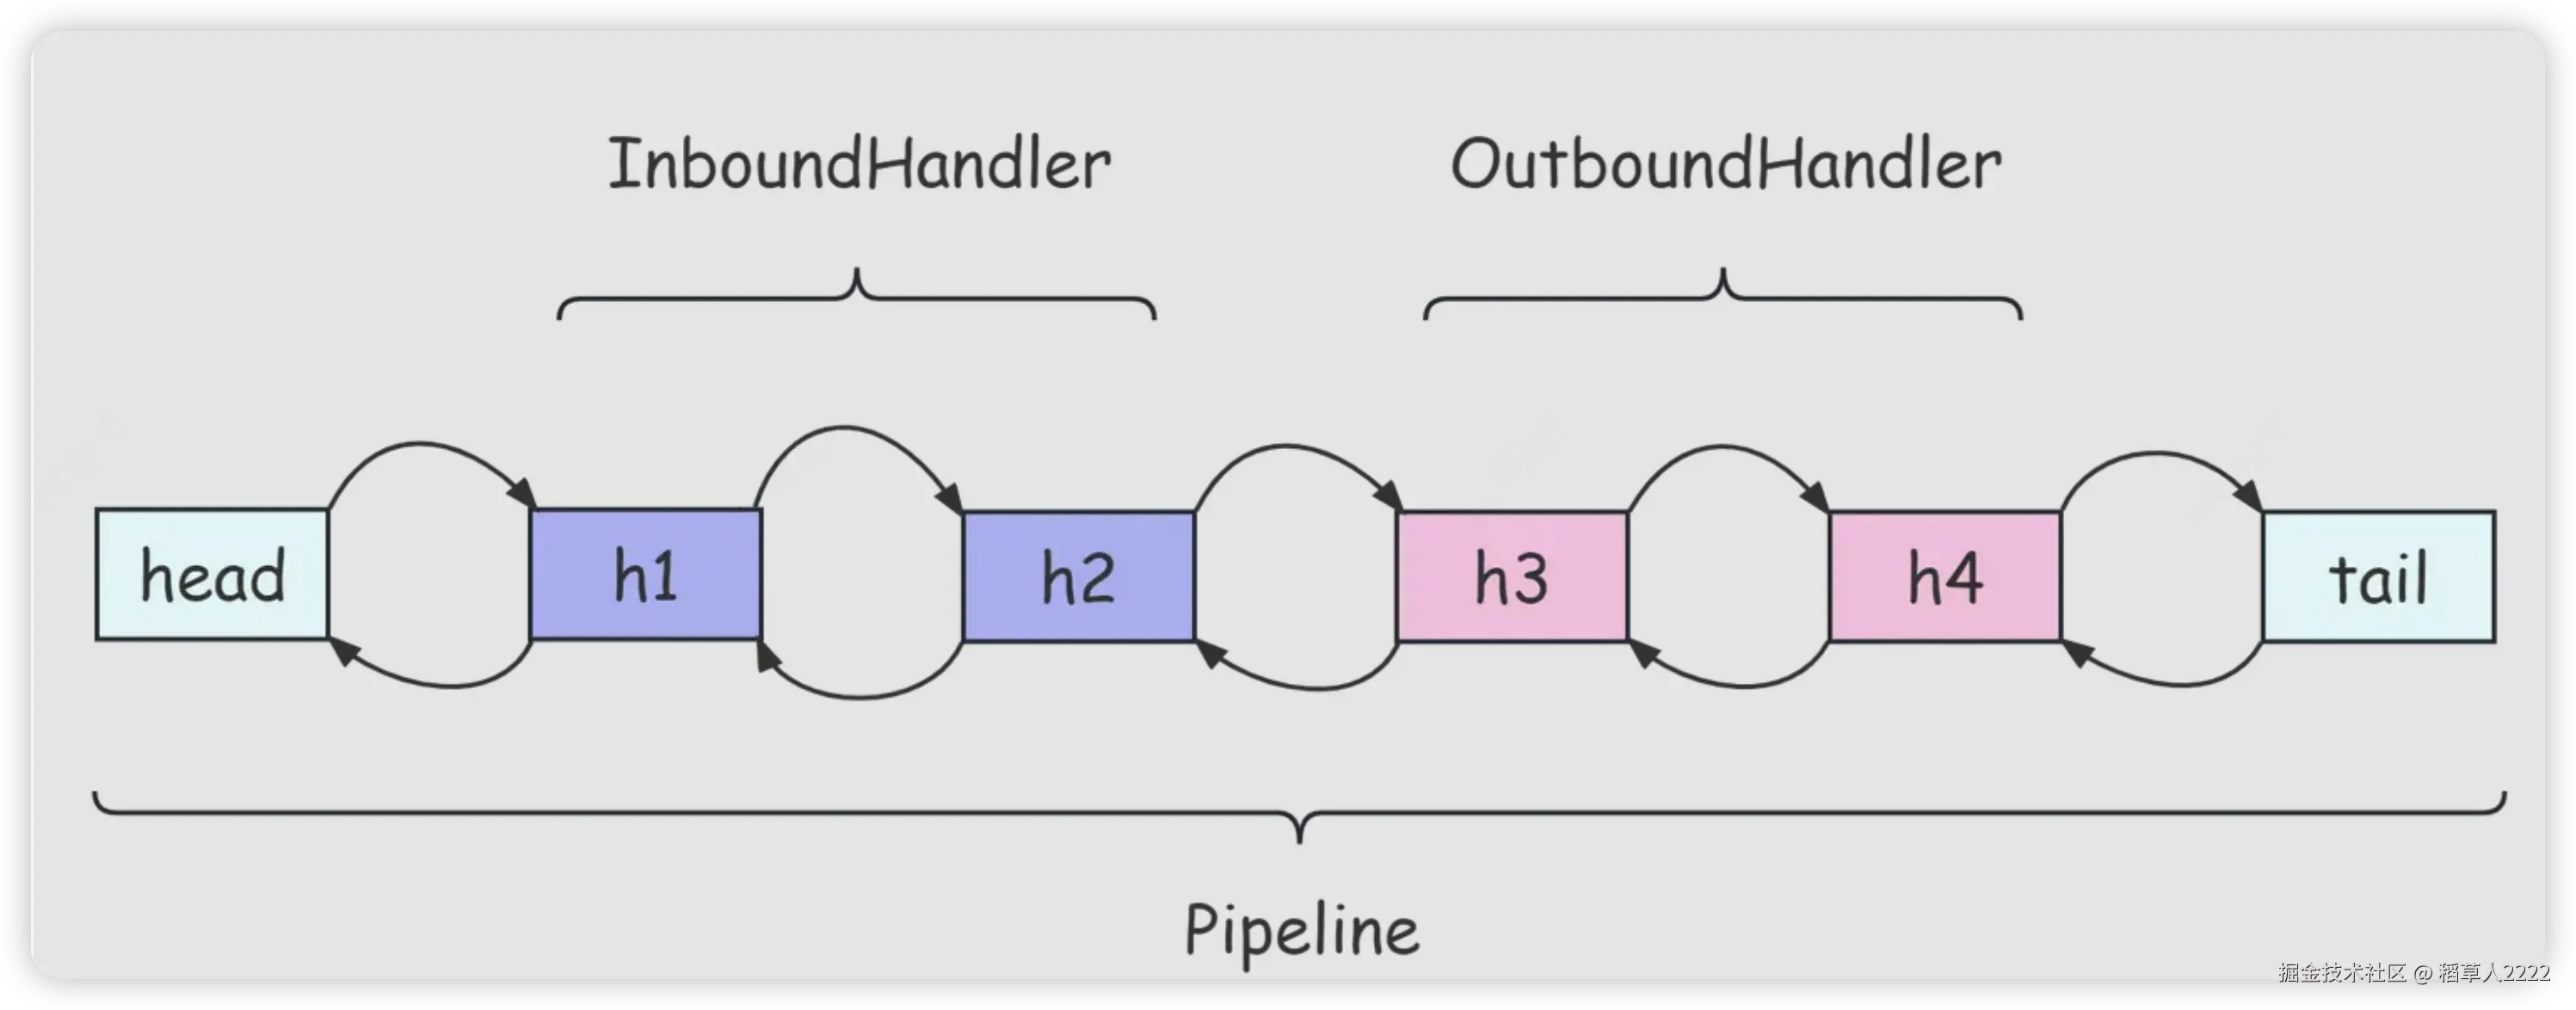
这个图只是展示了最基础的模型,outBoundHandler 并不一定严格在InBoundHandler之后,同时h1,h2,h3,h4 本质是同一个类型节点,只是其主要逻辑只实现一个接口,比如h1节点其实也实现了outBoundHandler接口,但只是简单传递response而不会进行逻辑处理
节点抽象接口
csharp
public interface INodeHandler {
    /**
     * 入站处理
     */
    void inboundHandler(ChatHandlerContext chc, ChatRequest request) throws Exception;

    /**
     * 出站处理
     */
    void outboundHandler(ChatHandlerContext chc, ChatRspDto response) throws Exception;
}
构建链表节点
有了业务实现接口那么还缺少了链表节点的能力,比如熟悉的prev与next 指针,那么我们需要一个链表的数据结构类对INodeHandler包装一下
java
@Slf4j
public class DefaultChatHandlerContext implements ChatHandlerContext {

    private final ChatPipeline pipeline;
    private final String name;
    private final INodeHandler handler;

    volatile DefaultChatHandlerContext next;
    volatile DefaultChatHandlerContext prev;

    public DefaultChatHandlerContext(ChatPipeline pipeline, String name, INodeHandler handler) {
        this.pipeline = pipeline;
        this.name = name;
        this.handler = handler;
    }

    @Override
    public String name() {
        return name;
    }

    @Override
    public INodeHandler handler() {
        return handler;
    }

    @Override
    public ChatPipeline pipeline() {
        return pipeline;
    }

    @Override
    public ChatHandlerContext fireRequest(ChatRequest request) {
        if (next != null) {
            try {
              next.handler.inboundHandler(next, request);
            } catch (Exception e) {
                fireException(e);
            }
        }
        return this;
    }

    @Override
    public ChatHandlerContext fireResponse(ChatRspDto response) {
        if (prev != null) {
            try {
                prev.handler.outboundHandler(prev, response);
            } catch (Exception e) {
                fireException(e);
            }
        }
        return this;
    }

    @Override
    public ChatHandlerContext fireException(Throwable cause) {
        // 异常处理逻辑
        cause.printStackTrace();
        return this;
    }

    @Override
    public void writeResponse(ChatRspDto response) {
        // 找到管道的底部(最后一个处理器)
        DefaultChatHandlerContext tail = this;
        while (tail.next != null) {
            tail = tail.next;
        }

        // 从尾部开始向前传递响应
        if (tail.prev != null) {
            try {
                tail.prev.handler.outboundHandler(tail.prev, response);
            } catch (Exception e) {
                fireException(e);
            }
        }
    }


    @Override
    public Object getAttrs(String key) {
        Map<String, Object> stringObjectMap = SessionContext.getAttributes();
        return stringObjectMap.get(key);
    }

    @Override
    public void setAttrs(String key, Object val) {
        if(val == null){
            log.error("val 不允许为null");
            return;
        }
        SessionContext.getAttributes().put(key,val);
    }

    @Override
    public String getUserSessionId(String userId) {
        return SessionContext.getAttributes().get(userId).toString();
    }

    @Override
    public void setUserSessionId(String userId, String userSessionId) {
        SessionContext.getAttributes().put(userId,userSessionId);
    }
    @Override
    public ChatStatus getChatStatus( ChatRequest request) {
        return (ChatStatus) SessionContext.getAttributes().getOrDefault("status", ChatStatus.REQUIREMENT_ANALYSIS);

    }
    @Override
    public void setChatStatus(ChatStatus chatStatus) {
        String userKey = LocalUserHandler.getLocalUserInfo().getUserKey();
        if (chatStatus == null) {
            log.error("ChatStatus 不允许为null");
            return;
        }
        SessionContext.getAttributes().put(userKey + ":status", chatStatus);
    }
}
构建链表-工作流
现在有了链表,那么就可以构建一个基础AI工作流类,这个基础的工作流 主要定义了守卫节点 也就是头节点 head 与 尾节点 tail ,并且提供了添加节点的能力,后续希望构建不同逻辑的工作流只要快速继承此类即可
java
@Slf4j
public class DefaultChatPipeline implements ChatPipeline {

    private final Map<String, DefaultChatHandlerContext> contextMap = new ConcurrentHashMap<>();
    private volatile DefaultChatHandlerContext head;
    private volatile DefaultChatHandlerContext tail;

    public DefaultChatPipeline() {
        // 创建头尾哨兵节点
        head = new DefaultChatHandlerContext(this, "head", HeadHandlerI.INSTANCE);
        tail = new DefaultChatHandlerContext(this, "tail", TailHandlerI.INSTANCE);
        head.next = tail;
        tail.prev = head;
    }

    @Override
    public void startPipeLine() {
        // 从头部开始处理
        processRequest(null);
    }

    /**
     * 在管道末尾添加处理器,如果添加响应处理器那么按照倒叙依次排序,如果添加请求处理器则正序依次添加
     * @param name
     * @param handler
     * @return
     */
    @Override
    public ChatPipeline addLast(String name, INodeHandler handler) {
        DefaultChatHandlerContext newCtx = new DefaultChatHandlerContext(this, name, handler);

        synchronized (this) {
            DefaultChatHandlerContext prev = tail.prev;
            newCtx.prev = prev;
            newCtx.next = tail;
            prev.next = newCtx;
            tail.prev = newCtx;

            contextMap.put(name, newCtx);
        }
        return this;
    }

    /**
     * 在管道开头添加处理器,如果添加响应处理器那么按照正序依次排序,如果添加请求处理器则倒叙依次添加
     * @param name
     * @param handler
     * @return
     */
    @Override
    public ChatPipeline addFirst(String name, INodeHandler handler) {
        DefaultChatHandlerContext newCtx = new DefaultChatHandlerContext(this, name, handler);

        synchronized (this) {
            DefaultChatHandlerContext next = head.next;
            newCtx.prev = head;
            newCtx.next = next;
            head.next = newCtx;
            next.prev = newCtx;

            contextMap.put(name, newCtx);
        }
        return this;
    }

    @Override
    public ChatPipeline addBefore(String baseName, String name, INodeHandler handler) {
        DefaultChatHandlerContext baseCtx = contextMap.get(baseName);
        if (baseCtx == null) {
            throw new IllegalArgumentException("Handler with name '" + baseName + "' not found");
        }

        DefaultChatHandlerContext newCtx = new DefaultChatHandlerContext(this, name, handler);

        synchronized (this) {
            DefaultChatHandlerContext prev = baseCtx.prev;
            newCtx.prev = prev;
            newCtx.next = baseCtx;
            prev.next = newCtx;
            baseCtx.prev = newCtx;

            contextMap.put(name, newCtx);
        }
        return this;
    }

    @Override
    public ChatPipeline addAfter(String baseName, String name, INodeHandler handler) {
        DefaultChatHandlerContext baseCtx = contextMap.get(baseName);
        if (baseCtx == null) {
            throw new IllegalArgumentException("Handler with name '" + baseName + "' not found");
        }

        DefaultChatHandlerContext newCtx = new DefaultChatHandlerContext(this, name, handler);

        synchronized (this) {
            DefaultChatHandlerContext next = baseCtx.next;
            newCtx.prev = baseCtx;
            newCtx.next = next;
            baseCtx.next = newCtx;
            next.prev = newCtx;

            contextMap.put(name, newCtx);
        }
        return this;
    }

    @Override
    public ChatPipeline remove(String name) {
        DefaultChatHandlerContext ctx = contextMap.remove(name);
        if (ctx != null) {
            synchronized (this) {
                ctx.prev.next = ctx.next;
                ctx.next.prev = ctx.prev;
            }
        }
        return this;
    }

    @Override
    public INodeHandler get(String name) {
        DefaultChatHandlerContext ctx = contextMap.get(name);
        return ctx != null ? ctx.handler() : null;
    }

    @Override
    public ChatHandlerContext context(String name) {
        return contextMap.get(name);
    }

    @Override
    public void processRequest(ChatRequest request) {
        head.fireRequest(request);
    }

    @Override
    public ChatHandlerContext firstContext() {
        return head.next;
    }

    @Override
    public ChatHandlerContext lastContext() {
        return tail.prev;
    }

    // 头部处理器(哨兵节点)
    private static class HeadHandlerI implements INodeHandler {
        static final HeadHandlerI INSTANCE = new HeadHandlerI();

        @Override
        public void inboundHandler(ChatHandlerContext chc, ChatRequest request) throws Exception {
            chc.fireRequest(request);
        }

        @Override
        public void outboundHandler(ChatHandlerContext chc, ChatRspDto chatRspDto) throws Exception {
            // 头部节点是响应链的终点,需要真正处理最终响应
            // 这里通过SSE推送给前端
            handleFinalResponseWithSse(chc, chatRspDto);
        }

        /**
         * 处理最终响应并通过SSE推送给前端
         */
        private void handleFinalResponseWithSse(ChatHandlerContext chc, ChatRspDto chatRspDto) {
            try {
                // 从Spring容器获取SseMessageService
                SseMessageService sseService = SpringContextUtil.getBean(SseMessageService.class);

                String sessionId = SessionContext.userSessionLocal.get();

                if (sessionId != null && sseService.hasActiveConnection(sessionId)) {
                    // 通过SSE推送响应给前端
                    ChatMessage chatMessage = ChatMessage.builder().messageType("chat")
                            .role("assistant").status("success")
                            .timestamp(System.currentTimeMillis())
                            .message(chatRspDto.getMsg())
                            .sessionId(sessionId).build();
                    sseService.sendMessage(sessionId, chatMessage);
                }else{
                    log.error("会话ID为空或没有活跃的SSE连接,无法发送消息");
                }
            } catch (Exception e) {
               log.error("SSE 发送消息给客户端失败", e);
            }
        }
    }

    // 尾部处理器(哨兵节点)
    private static class TailHandlerI implements INodeHandler {
        static final TailHandlerI INSTANCE = new TailHandlerI();

        @Override
        public void inboundHandler(ChatHandlerContext chc, ChatRequest request) throws Exception {
            // 尾部处理器 - 最终执行节点,调用LLM并返回结果
            ChatService chatService = SpringContextUtil.getBean(ChatService.class);
            String content = chatService.chatNonStream(request).getFirstMessage().getContent();
            SessionContext.addMessage(Message.assistant(content));
            chc.fireResponse(new ChatRspDto<>(true, content, null));
        }

        @Override
        public void outboundHandler(ChatHandlerContext chc, ChatRspDto chatRspDto) throws Exception {
            chc.fireResponse(chatRspDto);
        }

    }
}
尾声
本篇分析了当前的需求与待实现的目标,同时确定了基本框架 是基于pipeline,链表的实现方式。
虽然目前距离文章开始的AI 工作流实现还有一定距离,但下一篇我将详细具体分析节点的业务逻辑,对INodeHandler进行更加低维的实现与抽象。
最终构建以下流程的AI工作流
java
/**
* 初始化Pipeline节点
*/
private void initializePipeline() {
// 构建请求头
super.addFirst("requestHeader", new IRequestBuilder() {
@Override
public ChatRequest buildChatRequest() {
return ChatRequest.builder()
.userId(SessionContext.userSessionLocal.get())
.model("openai/gpt-oss-20b")
.maxTokens(1000)
.temperature(0.7)
.build();
}
});
// 系统上下文添加
super.addLast("informationCollection", informationCollectionHandler);
// 用户需求分析
super.addLast("informationAnalysis", informationAnalysisHandler);
// 系统上下文检索
super.addLast("informationSelectHandler", informationSelectHandler);
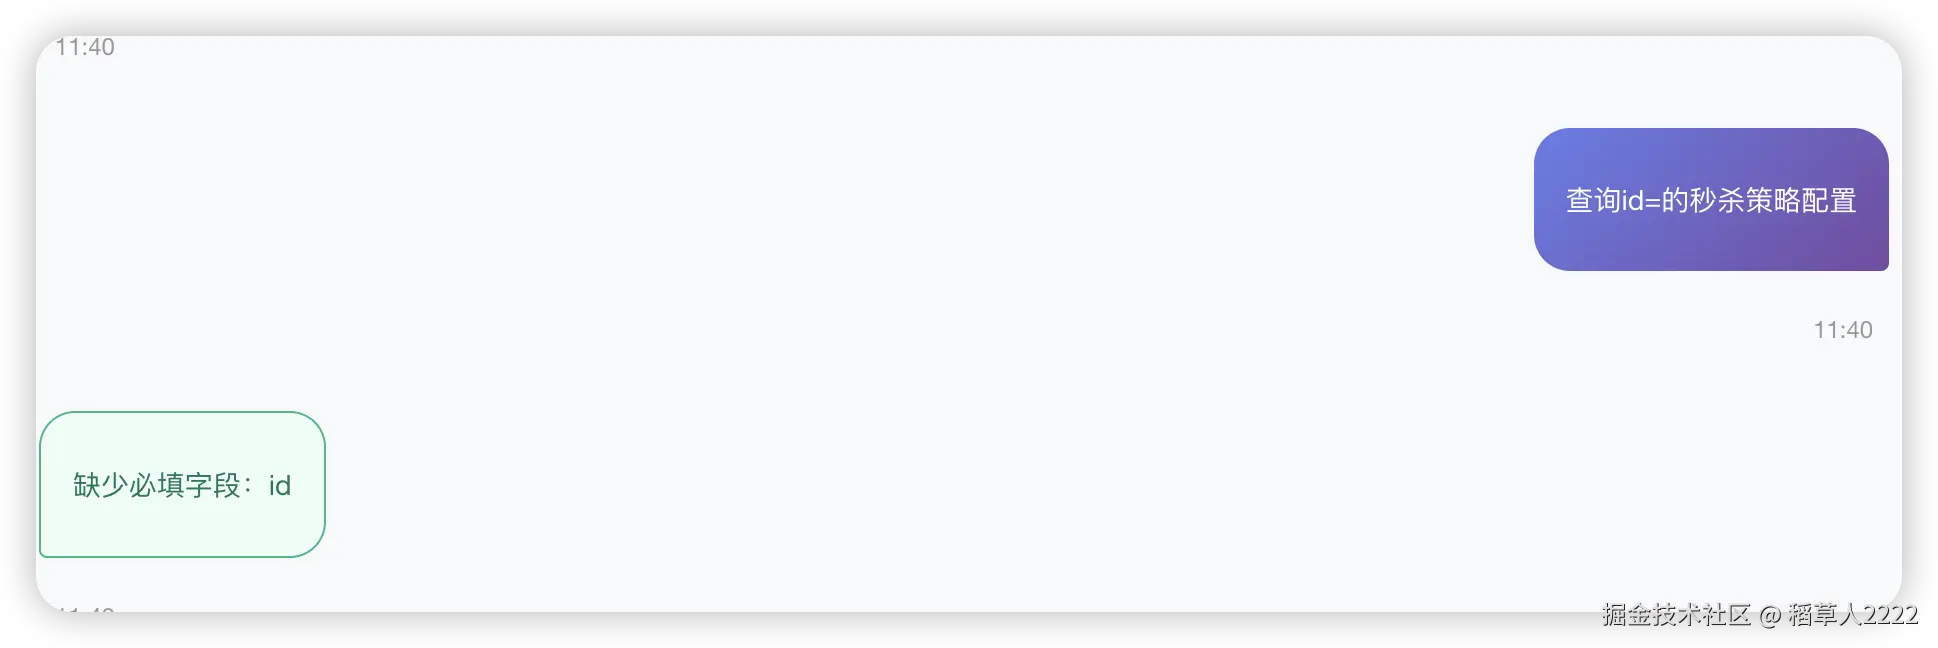
// 用户信息输入检查
super.addLast("inputParamsCheckHandler", inputParamsCheckHandler);
// 系统执行结果
super.addLast("functionCallExecuteHandler", functionCallExecuteHandler);
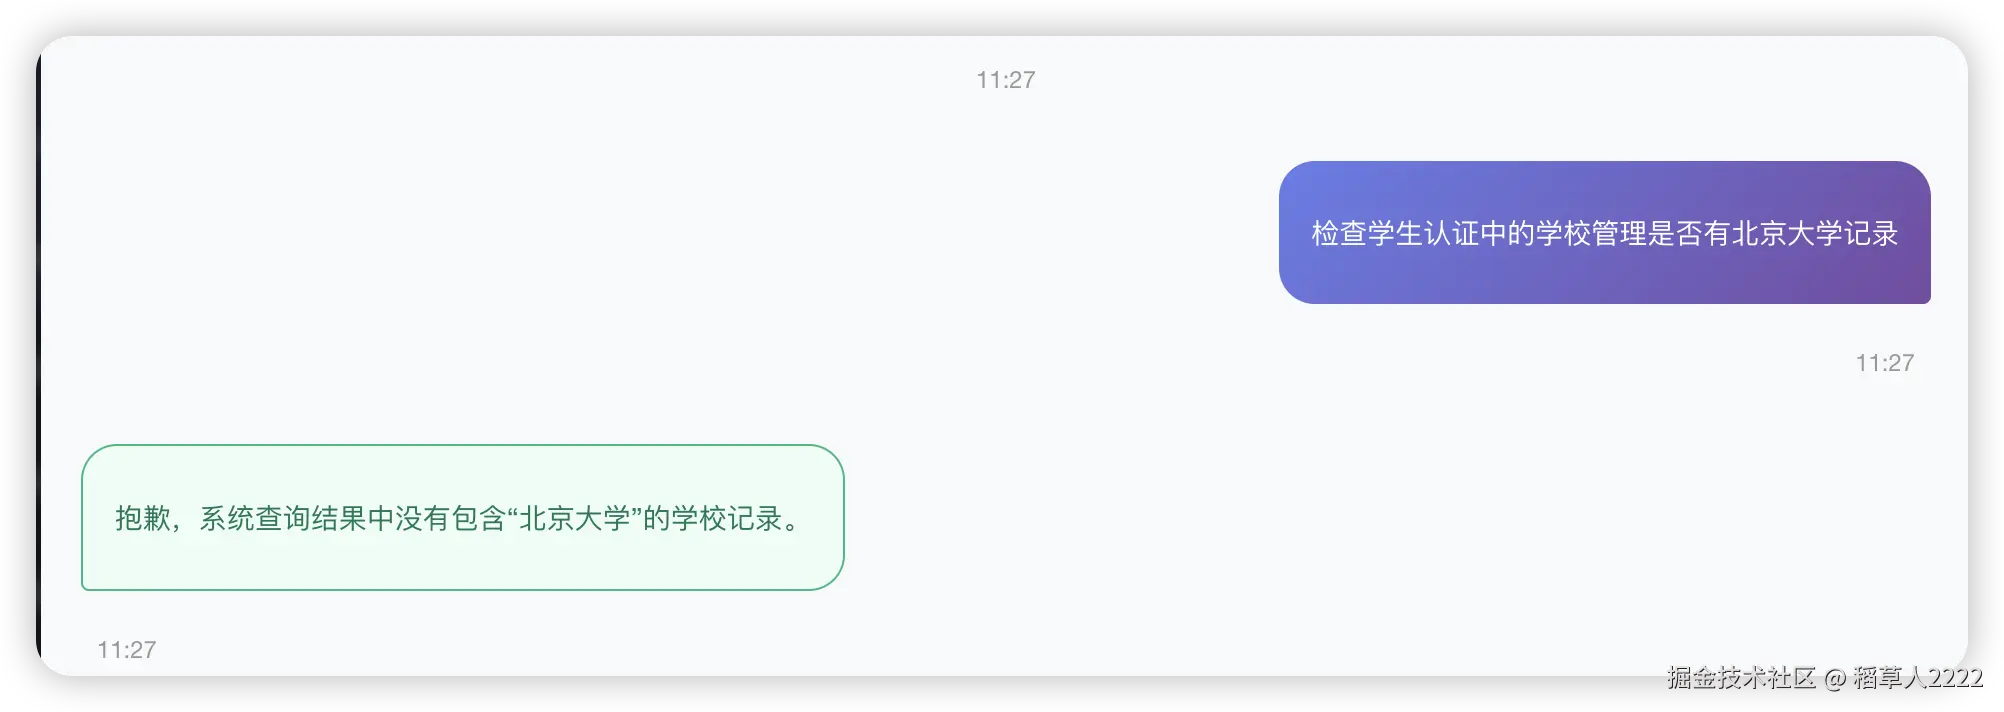
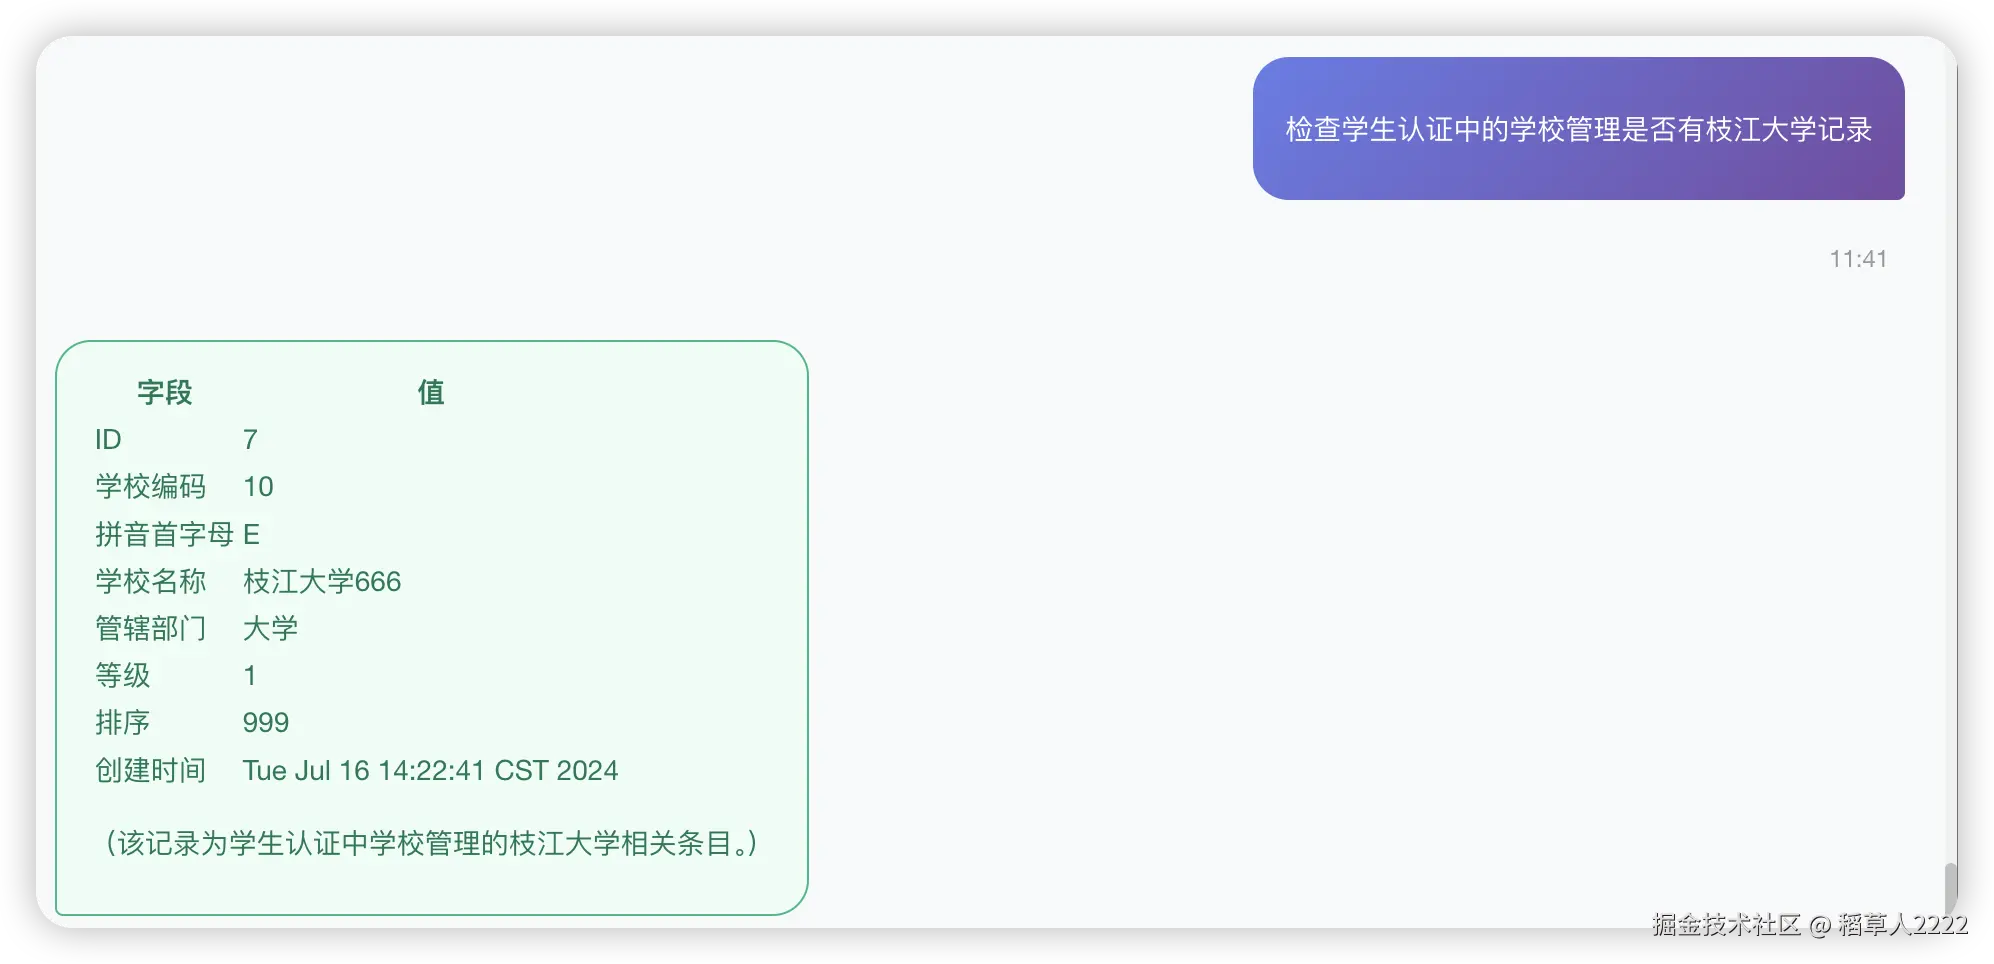
}效果如下