上一篇文章已经介绍了使用Apache Shiro权限认证框架实现动态授权功能。
Spring Boot整合Apache Shiro权限认证框架(应用篇)![]() https://blog.csdn.net/2501_92713943/article/details/152666246这篇文章介绍的是Apache Shiro的最佳实践,可直接用于项目。
https://blog.csdn.net/2501_92713943/article/details/152666246这篇文章介绍的是Apache Shiro的最佳实践,可直接用于项目。
目录
getAvailableAuthorizationCache()
对于刚接触Apache Shiro的同学来说,可以会觉得很好奇:
上一篇文章并没有涉及到密码比较,怎么就知道密码是对的还是错的呢?
登录认证流程
这就需要了解一下Apache Shiro的登录认证流程了:
1、对于普通的登录认证,用户会在登录页面输入账号(用户名、手机号、邮箱等)和密码;
2、在后端会得到用户输入的登录信息(账号+密码),调用Subject.login()方法登录;
Subject
org.apache.shiro.subject.Subject是一个接口,它有一个实现类DelegatingSubject
DelegatingSubject
在DelegatingSubject重写的login()方法中,调用了SecurityManager的login()方法。
login()
java
Subject subject = securityManager.login(this, token);SecurityManager
SecurityManager也是一个接口,其默认实现类是DefaultSecurityManager。
DefaultSecurityManager
然后让我们看看这个实现类里的login()方法的代码:
java
public Subject login(Subject subject, AuthenticationToken token) throws AuthenticationException {
    AuthenticationInfo info;

    try {
        info = authenticate(token);
    } catch (AuthenticationException ae) {
        try {
            onFailedLogin(token, ae, subject);
        } catch (Exception e) {
            if (log.isInfoEnabled()) {
                log.info("onFailedLogin method threw an " +
                         "exception.  Logging and propagating original AuthenticationException.", e);
            }
        }

        throw ae; // propagate
    }

    Subject loggedIn = createSubject(token, info, subject);

    onSuccessfulLogin(token, info, loggedIn);

    return loggedIn;
}
首先会通过调用authenticate()方法得到AuthenticationInfo对象。
Authenticator
在authenticate()方法中调用了Authenticator接口的authenticate()方法。
authenticate()
java
public AuthenticationInfo authenticate(AuthenticationToken token)
        throws AuthenticationException {
    return this.authenticator.authenticate(token);
}
AbstractAuthenticator
查看Authenticator接口的抽象实现类AbstractAuthenticator的authenticate()方法。
java
public final AuthenticationInfo authenticate(AuthenticationToken token) throws AuthenticationException {
    if (token == null) {
        throw new IllegalArgumentException("Method argument (authentication token) cannot be null.");
    }

    log.trace("Authentication attempt received for token [{}]", token);

    AuthenticationInfo info;

    try {
        info = doAuthenticate(token);

        if (info == null) {
            String msg = "No account information found for authentication token [" + token + "] by this " +
                "Authenticator instance.  Please check that it is configured correctly.";
            throw new AuthenticationException(msg);
        }
    } catch (Throwable t) {
        AuthenticationException ae = null;

        if (t instanceof AuthenticationException) {
            ae = (AuthenticationException) t;
        }

        if (ae == null) {
            //Exception thrown was not an expected AuthenticationException.  Therefore it is probably a little more
            //severe or unexpected.  So, wrap in an AuthenticationException, log to warn, and propagate:
            String msg = "Authentication failed for token submission [" + token + "].  Possible unexpected " +
                "error? (Typical or expected login exceptions should extend from AuthenticationException).";
            ae = new AuthenticationException(msg, t);
            if (log.isWarnEnabled())
                log.warn(msg, t);
        }

        try {
            notifyFailure(token, ae);
        } catch (Throwable t2) {
            if (log.isWarnEnabled()) {
                String msg = "Unable to send notification for failed authentication attempt - listener error?.  " +
                    "Please check your AuthenticationListener implementation(s).  Logging sending exception " +
                    "and propagating original AuthenticationException instead...";
                log.warn(msg, t2);
            }
        }


        throw ae;
    }

    log.debug("Authentication successful for token [{}].  Returned account [{}]", token, info);

    notifySuccess(token, info);

    return info;
}
doAuthenticate()
在这个方法里通过doAuthenticate()方法获取AuthenticationInfo对象。
java
protected abstract AuthenticationInfo doAuthenticate(AuthenticationToken token)
            throws AuthenticationException;
ModularRealmAuthenticator
由于AbstractAuthenticator的authenticate()方法是抽象方法,定位到其派生类ModularRealmAuthenticator。
获取所有Realm,如果只有一个Realm,调用doSingleRealmAuthentication()方法。
java
protected AuthenticationInfo doAuthenticate(AuthenticationToken authenticationToken)
    	throws AuthenticationException {
    assertRealmsConfigured();

    Collection<Realm> realms = getRealms();

    if (realms.size() == 1) {
        return doSingleRealmAuthentication(realms.iterator().next(), authenticationToken);
    } else {
        return doMultiRealmAuthentication(realms, authenticationToken);
    }
}
Realm
doSingleRealmAuthentication()
在doSingleRealmAuthentication()方法中最终调用了Realm的getAuthenticationInfo()方法。
java
AuthenticationInfo info = realm.getAuthenticationInfo(token);AuthenticatingRealm
Realm是一个接口,定位到其派生类AuthenticatingRealm重写的getAuthenticationInfo()方法。
getAuthenticationInfo()
java
public final AuthenticationInfo getAuthenticationInfo(AuthenticationToken token)
    	throws AuthenticationException {

    // 从缓存中获取AuthenticationInfo
    AuthenticationInfo info = getCachedAuthenticationInfo(token);

    if (info == null) {
        // otherwise not cached, perform the lookup:
        info = doGetAuthenticationInfo(token);

        log.debug("Looked up AuthenticationInfo [{}] from doGetAuthenticationInfo", info);

        if (token != null && info != null) {
            cacheAuthenticationInfoIfPossible(token, info);
        }
    } else {
        log.debug("Using cached authentication info [{}] to perform credentials matching.", info);
    }

    if (info != null) {
        assertCredentialsMatch(token, info);
    } else {
        log.debug("No AuthenticationInfo found for submitted AuthenticationToken [{}].  Returning null.", token);
    }

    return info;
}
先从缓存中获取AuthenticationInfo对象,如果缓存中没有,则通过doGetAuthenticationInfo()方法获取。
java
protected abstract AuthenticationInfo doGetAuthenticationInfo(AuthenticationToken token) throws AuthenticationException;其实就是调用了我们提供的UsernameRealm重写的getAuthenticationInfo()方法,这个方法返回的就是用于认证的信息。AuthorizingRealm是AuthenticatingRealm的一个派生类。
java
public class UsernameRealm extends AuthorizingRealm {assertCredentialsMatch()
在这里方法中完成了密码的匹配,通过调用CredentialsMatcher的doCredentialsMatch()方法。
java
protected void assertCredentialsMatch(AuthenticationToken token, AuthenticationInfo info)
    	throws AuthenticationException {
    CredentialsMatcher cm = getCredentialsMatcher();

    if (cm != null) {
        if (!cm.doCredentialsMatch(token, info)) {
            //not successful - throw an exception to indicate this:
            String msg = "Submitted credentials for token [" + token + "] did not match the expected credentials.";
            throw new IncorrectCredentialsException(msg);
        }
    } else {
        throw new AuthenticationException("A CredentialsMatcher must be configured in order to verify " +
                                          "credentials during authentication.  If you do not wish for credentials to be examined, you " +
                                          "can configure an " + AllowAllCredentialsMatcher.class.getName() + " instance.");
    }
}
CredentialsMatcher
CredentialsMatcher是一个接口,定位到其派生类重写的doCredentialsMatch()方法。
SimpleCredentialsMatcher
doCredentialsMatch()
在doCredentialsMatch()方法中调用了equals()方法。
java
public boolean doCredentialsMatch(AuthenticationToken token, AuthenticationInfo info) {
    Object tokenCredentials = getCredentials(token);
    Object accountCredentials = getCredentials(info);

    return equals(tokenCredentials, accountCredentials);
}
equals()
在这个方法中,首先判断比较的两个密码是不是字节,一般来说都是字符串,所以执行else分支的通过Object的equals()方法简单比较两个对象的值是否相等。
java
protected boolean equals(Object tokenCredentials, Object accountCredentials) {
    if (log.isDebugEnabled()) {
        log.debug("Performing credentials equality check for tokenCredentials of type [" +
                  tokenCredentials.getClass().getName() + " and accountCredentials of type [" +
                  accountCredentials.getClass().getName() + "]");
    }

    if (isByteSource(tokenCredentials) && isByteSource(accountCredentials)) {
        if (log.isDebugEnabled()) {
            log.debug("Both credentials arguments can be easily converted to byte arrays.  Performing " +
                      "array equals comparison");
        }
        byte[] tokenBytes = toBytes(tokenCredentials);
        byte[] accountBytes = toBytes(accountCredentials);

        return MessageDigest.isEqual(tokenBytes, accountBytes);
    } else {
        // 比较两个字符串的内容是否相等
        return accountCredentials.equals(tokenCredentials);
    }
}
DefaultSecurityManager
好了,获取AuthenticationInfo对象的方法已经看完了,回到刚开始的DefaultSecurityManager的login()方法。
java
Subject loggedIn = createSubject(token, info, subject);

onSuccessfulLogin(token, info, loggedIn);

return loggedIn;
createSubject()
第一行代码是创建Subject对象
java
protected Subject createSubject(AuthenticationToken token, AuthenticationInfo info, Subject existing) {
    SubjectContext context = createSubjectContext();

    context.setAuthenticated(true);
    context.setAuthenticationToken(token);
    context.setAuthenticationInfo(info);

    if (existing != null) {
        context.setSubject(existing);
    }

    return createSubject(context);
}
onSuccessfulLogin()
继续看onSuccessfulLogin()方法。
java
protected void onSuccessfulLogin(AuthenticationToken token, AuthenticationInfo info, Subject subject) {
    rememberMeSuccessfulLogin(token, info, subject);
}
继续调用rememberMeSuccessfulLogin()方法,在这里调用了RememberMeManager的onSuccessfulLogin()方法。
java
protected void rememberMeSuccessfulLogin(AuthenticationToken token, AuthenticationInfo info, Subject subject) {
    RememberMeManager rmm = getRememberMeManager();

    if (rmm != null) {
        try {
            rmm.onSuccessfulLogin(subject, token, info);
        } catch (Exception e) {
            if (log.isWarnEnabled()) {
                String msg = "Delegate RememberMeManager instance of type [" + rmm.getClass().getName() +
                    "] threw an exception during onSuccessfulLogin.  RememberMe services will not be " +
                    "performed for account [" + info + "].";
                log.warn(msg, e);
            }
        }
    } else {
        if (log.isTraceEnabled()) {
            log.trace("This " + getClass().getName() + " instance does not have a " +
                      "[" + RememberMeManager.class.getName() + "] instance configured.  RememberMe services " +
                      "will not be performed for account [" + info + "].");
        }
    }
}
RememberMeManager
RememberMeManager是一个接口,定位到其派生类AbstractRememberMeManager重写的onSuccessfulLogin()方法。
AbstractRememberMeManager
onSuccessfulLogin()
java
public void onSuccessfulLogin(Subject subject, AuthenticationToken token, AuthenticationInfo info) {
    // always clear any previous identity:
    forgetIdentity(subject);

    // now save the new identity:
    if (isRememberMe(token)) {
        rememberIdentity(subject, token, info);
    } else {
        if (log.isDebugEnabled()) {
            log.debug("AuthenticationToken did not indicate RememberMe is requested.  " +
                      "RememberMe functionality will not be executed for corresponding account.");
        }
    }
}
rememberIdentity()
方法名翻译过来是"记住身份",很显然应该是跟会话有关。
java
public void rememberIdentity(Subject subject, AuthenticationToken token, AuthenticationInfo authcInfo) {
    PrincipalCollection principals = getIdentityToRemember(subject, authcInfo);

    rememberIdentity(subject, principals);
}
传参继续调用重载的rememberIdentity()方法。
java
protected void rememberIdentity(Subject subject, PrincipalCollection accountPrincipals) {
    byte[] bytes = convertPrincipalsToBytes(accountPrincipals);

    rememberSerializedIdentity(subject, bytes);
}
rememberSerializedIdentity()
java
protected abstract void rememberSerializedIdentity(Subject subject, byte[] serialized);CookieRememberMeManager
由于AbsreactRememberMeManager的rememberSerializedIdentity()方法是抽象的,定位带其派生类重写的rememberSerializedIdentity()方法。
rememberSerializedIdentity()
很显然,就是设置返回给浏览器的Cooklie值。
java
protected void rememberSerializedIdentity(Subject subject, byte[] serialized) {
    if (!WebUtils.isHttp(subject)) {
        if (log.isDebugEnabled()) {
            String msg = "Subject argument is not an HTTP-aware instance.  This is required to obtain a servlet " +
                "request and response in order to set the rememberMe cookie. Returning immediately and " +
                "ignoring rememberMe operation.";
            log.debug(msg);
        }

        return;
    }


    HttpServletRequest request = WebUtils.getHttpRequest(subject);
    HttpServletResponse response = WebUtils.getHttpResponse(subject);

    //base 64 encode it and store as a cookie:
    String base64 = Base64.encodeToString(serialized);

    Cookie template = getCookie(); //the class attribute is really a template for the outgoing cookies

    Cookie cookie = new SimpleCookie(template);

    cookie.setValue(base64);
    cookie.saveTo(request, response);
}
权限缓存问题
上面章节已经详细地深入源码介绍了Apache Shiro的登录认证流程。
接下来,有一个比较大的问题需要处理一下,每次访问API接口的时候,发现都会去查询一次用户的权限(查询角色+查询权限),用户的角色和权限通常是不会变更的,可以对权限进行缓存。
可以在UsernameRealm的doGetAuthorizationInfo()方法中增加缓存的代码。
但是,查看源代码之后会发现,Apache Shiro提供了一个缓存机制。
权限缓存源码
AuthorizingRealm
getAuthorizationInfo()
在UsernameRealm的超类中调用了我们重写的doGetAuthorizationInfo()方法
java
protected AuthorizationInfo getAuthorizationInfo(PrincipalCollection principals) {
if (principals == null) {
return null;
}
AuthorizationInfo info = null;
if (log.isTraceEnabled()) {
log.trace("Retrieving AuthorizationInfo for principals [" + principals + "]");
}
// 获取可用的授权信息缓存缓存类
Cache<Object, AuthorizationInfo> cache = getAvailableAuthorizationCache();
if (cache != null) { // 缓存可用
if (log.isTraceEnabled()) {
log.trace("Attempting to retrieve the AuthorizationInfo from cache.");
}
// 获取缓存key
Object key = getAuthorizationCacheKey(principals);
// 通过key从缓存中获取值
info = cache.get(key);
if (log.isTraceEnabled()) {
if (info == null) {
log.trace("No AuthorizationInfo found in cache for principals [" + principals + "]");
} else {
log.trace("AuthorizationInfo found in cache for principals [" + principals + "]");
}
}
}
if (info == null) { // 没有命中缓存
// 调用doGetAuthorizationInfo()方法获取授权信息
info = doGetAuthorizationInfo(principals);
// 缓存可用,并且获取到了授权信息
if (info != null && cache != null) {
if (log.isTraceEnabled()) {
log.trace("Caching authorization info for principals: [" + principals + "].");
}
// 将授权信息存入缓存中
Object key = getAuthorizationCacheKey(principals);
cache.put(key, info);
}
}
return info;
}
/**
* 获取缓存key
*/
protected Object getAuthorizationCacheKey(PrincipalCollection principals) {
return principals;
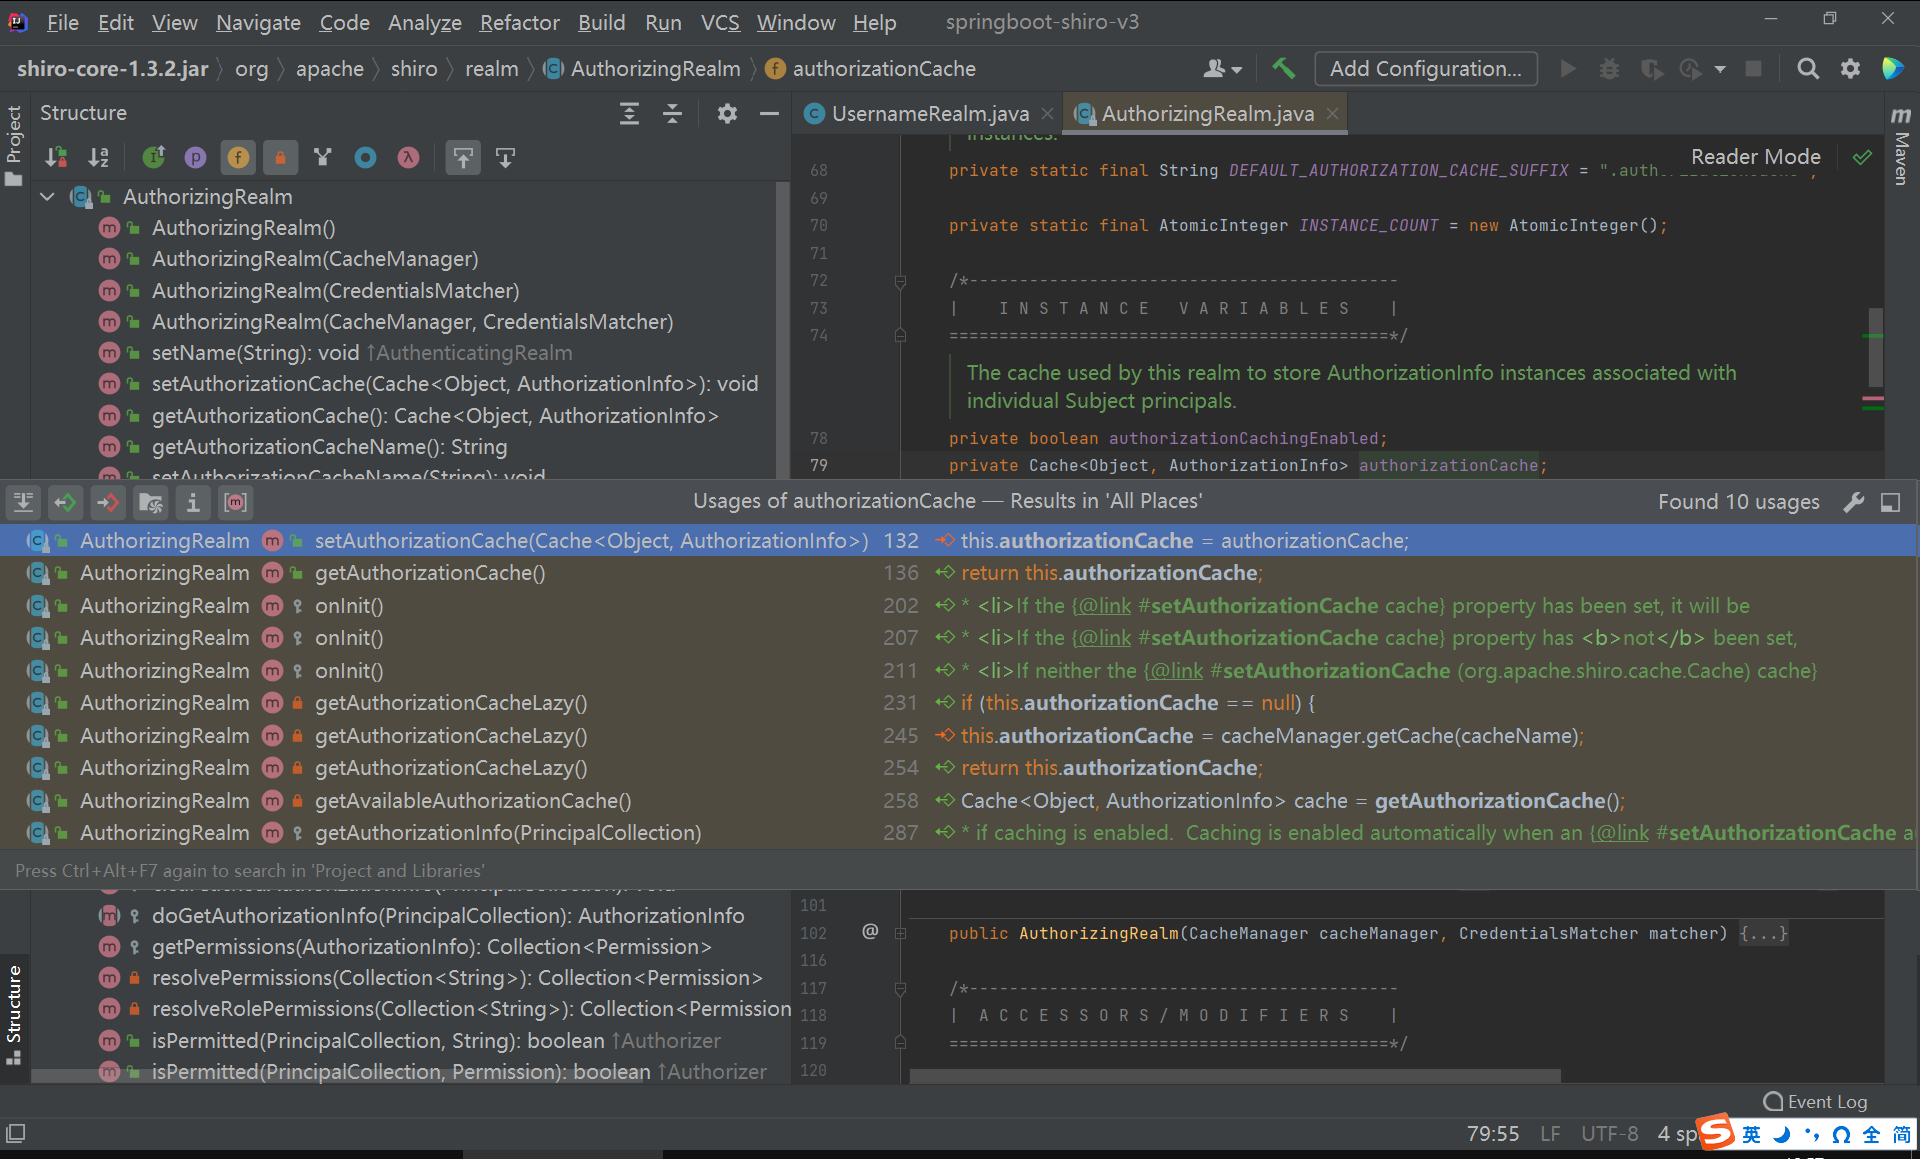
}getAvailableAuthorizationCache()
继续深入探究如何获取可用的授权缓存。
java
private Cache<Object, AuthorizationInfo> getAvailableAuthorizationCache() {
    Cache<Object, AuthorizationInfo> cache = getAuthorizationCache();

    if (cache == null && isAuthorizationCachingEnabled()) {
        cache = getAuthorizationCacheLazy();
    }

    return cache;
}
getAuthorizationCache()
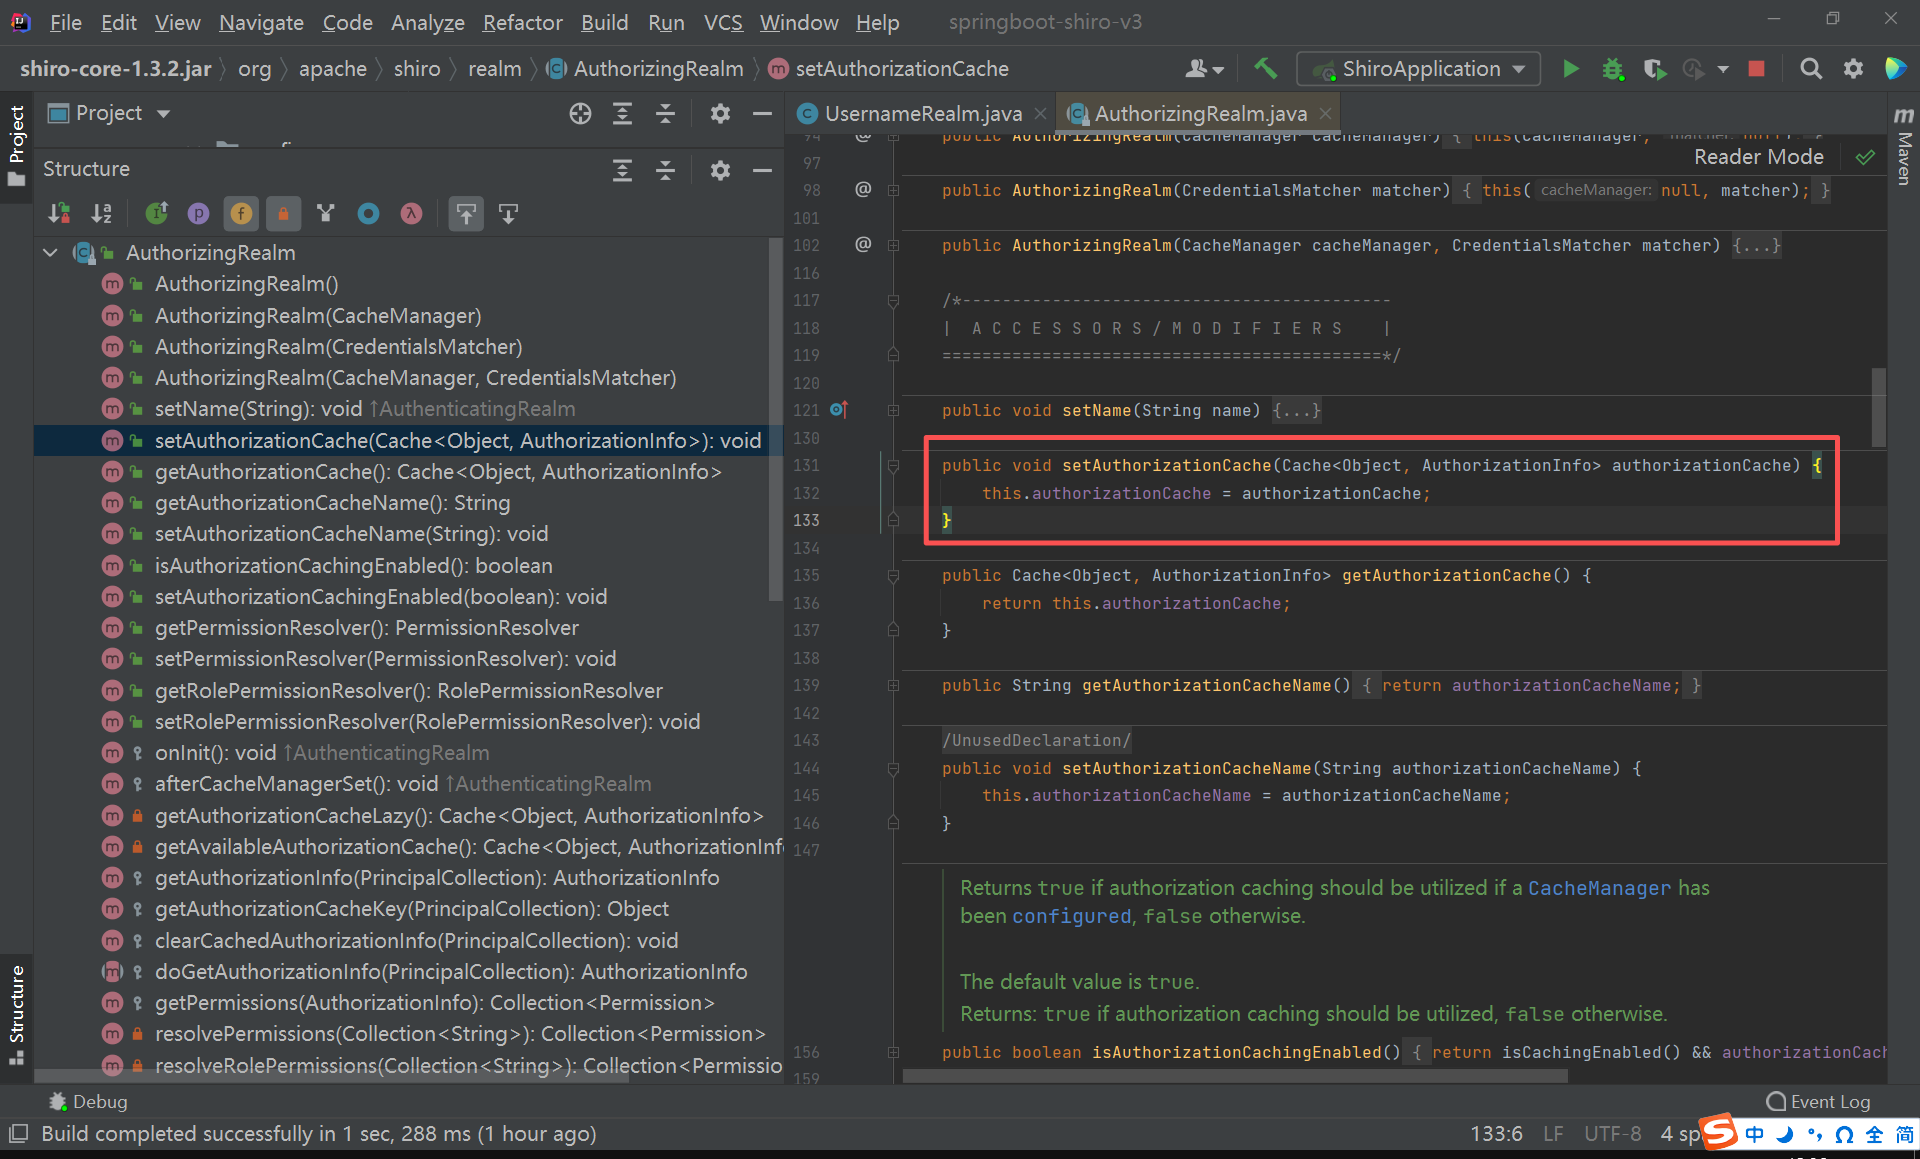
getAuthorizationCache()方法直接返回了当前类的成员变量。
java
public Cache<Object, AuthorizationInfo> getAuthorizationCache() {
    return this.authorizationCache;
}
发现只有一个set方法可以设置缓存类。
创建授权缓存类
根据上面的信息,我们可以创建一个自定义的授权缓存类。
可以将授权信息缓存到Map中,但是当登录的用户多了之后,Map中的数据会越来越大,甚至可能导致内存溢出。
因此,使用Redis作为缓存更合适,虽然没有内存中的Map快,也有每秒十万左右的并发。
pom.xml
添加Spring Boot整合Redis的依赖。
XML
<dependency>
    <groupId>org.springframework.boot</groupId>
    <artifactId>spring-boot-starter-data-redis</artifactId>
</dependency>
RedisUtils.java
创建redis包,在redis包下创建RedisUtils接口。
java
package cn.edu.sgu.www.shiro.redis;

import java.util.List;
import java.util.Set;
import java.util.concurrent.TimeUnit;

/**
 * @author 沐雨橙风ιε
 * @version 1.0
 */
public interface RedisUtils {

    /**
     * 获取key的值:get key
     * @param key redis的key
     * @return key的值
     */
    String get(String key);

    /**
     * 一次性根据多个key获取多个值
     * @param keys key列表
     * @return List<String>
     */
    List<String> multiGet(Set<String> keys);

    /**
     * 根据pattern批量获取key
     * @param pattern String
     * @return Set<String> 所有key的列表
     */
    Set<String> keys(String pattern);

    /**
     * 设置key:set key value
     * @param key redis的key
     * @param value key的值
     */
    void set(String key, String value);

    /**
     * 设置key:set key value ex timeout = set key value + expire key timeout
     * @param key redis的key
     * @param value key的值
     * @param timeout 过期时间
     * @param timeUnit 时间单位
     */
    void set(String key, String value, long timeout, TimeUnit timeUnit);

    /**
     * 删除key:del key
     * @param key redis的key
     */
    void delete(String key);

    /**
     * 根据pattern删除key:del keys pattern
     * @param pattern String
     */
    void deleteByPattern(String pattern);

    /**
     * 让key自增:incrby key
     * @param key redis的key
     * @return 自增后的值
     */
    Long incrBy(String key);

    /**
     * 判断key是否存在
     * @param key redis的key
     * @return key存在则返回true,否则返回false
     */
    Boolean hasKey(String key);

    /**
     * 设置key的过期时间:expire key seconds
     * @param key redis的key
     * @param timeout 过期时间
     * @param timeUnit 时间单位
     */
    void expire(String key, long timeout, TimeUnit timeUnit);
}
StringRedisUtils.java
创建RedisUtils接口的实现类。
java
package cn.edu.sgu.www.shiro.redis;

import org.springframework.beans.factory.annotation.Autowired;
import org.springframework.data.redis.core.StringRedisTemplate;
import org.springframework.data.redis.core.ValueOperations;
import org.springframework.stereotype.Component;

import java.util.List;
import java.util.Set;
import java.util.concurrent.TimeUnit;

/**
 * 封装了StringRedisTemplate的redis工具类
 * @author 沐雨橙风ιε
 * @version 1.0
 */
@Component
public class StringRedisUtils implements RedisUtils {

    private final StringRedisTemplate stringRedisTemplate;

    @Autowired
    public StringRedisUtils(StringRedisTemplate stringRedisTemplate) {
        this.stringRedisTemplate = stringRedisTemplate;
    }

    @Override
    public String get(String key) {
        return getValueOperations().get(key);
    }

    @Override
    public List<String> multiGet(Set<String> keys) {
        return getValueOperations().multiGet(keys);
    }

    @Override
    public Set<String> keys(String pattern) {
        return stringRedisTemplate.keys(pattern);
    }

    @Override
    public void set(String key, String value) {
        getValueOperations().set(key, value);
    }

    @Override
    public void set(String key, String value, long timeout, TimeUnit timeUnit) {
        getValueOperations().set(key, value, timeout, timeUnit);
    }

    @Override
    public void delete(String key) {
        stringRedisTemplate.delete(key);
    }

    @Override
    public void deleteByPattern(String pattern) {
        Set<String> keys = stringRedisTemplate.keys(pattern);

        if (keys != null && !keys.isEmpty()) {
            stringRedisTemplate.delete(keys);
        }
    }

    @Override
    public Long incrBy(String key) {
        return getValueOperations().increment(key);
    }

    @Override
    public Boolean hasKey(String key) {
        return stringRedisTemplate.hasKey(key);
    }

    @Override
    public void expire(String key, long timeout, TimeUnit timeUnit) {
        stringRedisTemplate.expire(key, timeout, timeUnit);
    }

    /**
     * 获取ValueOperations对象
     * @return ValueOperations<String, String>
     */
    private ValueOperations<String, String> getValueOperations() {
        return stringRedisTemplate.opsForValue();
    }

}
RedisCache.java
创建一个Cache<Object, AuthorizationInfo>的派生类。
至于为什么是Cache<Object, AuthorizationInfo>类型的,因为set方法需要这个类型。
java
package cn.edu.sgu.www.shiro.support;

import cn.edu.sgu.www.shiro.consts.RedisKeyPrefixes;
import cn.edu.sgu.www.shiro.redis.RedisUtils;
import com.alibaba.fastjson.JSON;
import org.apache.shiro.authz.AuthorizationInfo;
import org.apache.shiro.authz.SimpleAuthorizationInfo;
import org.apache.shiro.cache.Cache;
import org.springframework.beans.factory.annotation.Autowired;
import org.springframework.stereotype.Component;

import java.util.Collection;
import java.util.List;
import java.util.Set;
import java.util.function.Function;
import java.util.stream.Collectors;
import java.util.stream.Stream;

/**
 * @author 沐雨橙风ιε
 * @version 1.0
 */
@Component
public class RedisCache implements Cache<Object, AuthorizationInfo> {

    private final RedisUtils redisUtils;

    @Autowired
    public RedisCache(RedisUtils redisUtils) {
        this.redisUtils = redisUtils;
    }

    @Override
    public SimpleAuthorizationInfo get(Object key) {
        String value = redisUtils.get(key.toString());

        return JSON.parseObject(value, SimpleAuthorizationInfo.class);
    }

    @Override
    public AuthorizationInfo put(Object key, AuthorizationInfo value) {
        redisUtils.set(key.toString(), JSON.toJSONString(value));

        return value;
    }

    @Override
    public SimpleAuthorizationInfo remove(Object key) {
        redisUtils.delete(key.toString());

        return null;
    }

    @Override
    public void clear() {
        redisUtils.deleteByPattern(RedisKeyPrefixes.PREFIX_SHIRO_PERMISSIONS + "*");
    }

    @Override
    public int size() {
        return keys().size();
    }

    @Override
    public Set<Object> keys() {
        Set<String> keys = redisUtils.keys(RedisKeyPrefixes.PREFIX_SHIRO_PERMISSIONS + "*");

        Stream<String> stream = keys.stream();

        return stream.map(new Function<String, Object>() {
            @Override
            public Object apply(String key) {
                return key;
            }
        }).collect(Collectors.toSet());
    }

    @Override
    public Collection<AuthorizationInfo> values() {
        Set<Object> keys = keys();

        Stream<Object> stream = keys.stream();

        List<String> list = redisUtils.multiGet(stream.map(new Function<Object, String>() {
            @Override
            public String apply(Object key) {
                return key.toString();
            }
        }).collect(Collectors.toSet()));

        return list.stream().map(new Function<Object, SimpleAuthorizationInfo>() {
            @Override
            public SimpleAuthorizationInfo apply(Object value) {
                return JSON.parseObject(value.toString(), SimpleAuthorizationInfo.class);
            }
        }).collect(Collectors.toList());
    }

}
ShiroConfig
因为要设置授权缓存的管理器,需要修改UsernameRealm的Bean定义方式。
java
@Bean
public UsernameRealm usernameRealm(RedisCache redisCache) {
    UsernameRealm usernameRealm = new UsernameRealm();

    usernameRealm.setAuthorizationCache(redisCache);

    return usernameRealm;
}
RedisKeyPrefixes.java
java
package cn.edu.sgu.www.shiro.consts;

/**
 * Redis的key前缀的常量接口
 * @author 沐雨橙风ιε
 * @version 1.0
 */
public interface RedisKeyPrefixes {

    /**
     * 应用名,所有key的统一前缀
     * 在所有key之前加上应用名,方便Redis的数据管理
     * 不同应用的key会通过前缀区分,做到数据隔离的效果
     */
    String PREFIX_BASE = "springboot-shiro:";

    /**
     * Apache Shiro角色权限缓存的key前缀
     */
    String PREFIX_SHIRO_PERMISSIONS = PREFIX_BASE + "shiro:permissions:";
}
UsernameRealm.java
删除类上的@Component注解,重写getAuthorizationCacheKey()方法,使用前缀+用户ID作为key
java
package cn.edu.sgu.www.shiro.support;

import cn.edu.sgu.www.shiro.consts.ErrorMessages;
import cn.edu.sgu.www.shiro.consts.RedisKeyPrefixes;
import cn.edu.sgu.www.shiro.entity.User;
import cn.edu.sgu.www.shiro.mapper.RolePermissionMapper;
import cn.edu.sgu.www.shiro.mapper.UserMapper;
import cn.edu.sgu.www.shiro.mapper.UserRoleMapper;
import org.apache.shiro.authc.*;
import org.apache.shiro.authz.AuthorizationInfo;
import org.apache.shiro.authz.SimpleAuthorizationInfo;
import org.apache.shiro.realm.AuthorizingRealm;
import org.apache.shiro.subject.PrincipalCollection;
import org.springframework.beans.factory.annotation.Autowired;

import java.util.HashSet;
import java.util.List;
import java.util.Set;

/**
 * @author 沐雨橙风ιε
 * @version 1.0
 */
public class UsernameRealm extends AuthorizingRealm {

    @Autowired
    private UserMapper userMapper;

    @Autowired
    private UserRoleMapper userRoleMapper;

    @Autowired
    private RolePermissionMapper rolePermissionMapper;

    /**
     * 获取认证信息
     */
    @Override
    public AuthenticationInfo doGetAuthenticationInfo(AuthenticationToken authenticationToken) throws AuthenticationException {
        // 获取登录时提交的token
        UsernamePasswordToken token = (UsernamePasswordToken) authenticationToken;

        // 得到用户名
        String username = token.getUsername();

        // 根据用户名查询用户信息
        User user = userMapper.selectByUsername(username);

        // 查询结果为空,则说明用户不存在
        if (user == null) {
            throw new AuthenticationException(ErrorMessages.loginFail);
        } else if (user.isDisabled()) { // 账号被封禁,抛出异常
            throw new AuthenticationException("登录失败,账号状态异常!");
        }

        return new SimpleAuthenticationInfo(user, user.getPassword(), "usernameRealm");
    }

    /**
     * 获取授权信息
     */
    @Override
    public AuthorizationInfo doGetAuthorizationInfo(PrincipalCollection principals) {
        SimpleAuthorizationInfo authorizationInfo = new SimpleAuthorizationInfo();

        // 得到用户ID
        User user = (User) principals.getPrimaryPrincipal();
        String userId = user.getId();

        // 查询用户的角色列表
        List<String> roleList = userRoleMapper.selectUserRoles(userId);

        if (!roleList.isEmpty()) {
            authorizationInfo.setRoles(new HashSet<>(roleList));

            Set<String> stringPermissions = new HashSet<>();

            for (String roleId : roleList) {
                // 查询角色的权限列表
                List<String> permissions = rolePermissionMapper.selectRolePermissions(roleId);

                if (!permissions.isEmpty()) {
                    stringPermissions.addAll(permissions);
                }
            }

            if (!stringPermissions.isEmpty()) {
                authorizationInfo.setStringPermissions(stringPermissions);
            }
        }

        return authorizationInfo;
    }

    /**
     * 配置授权缓存的key
     * @param principals PrincipalCollection
     */
    @Override
    public String getAuthorizationCacheKey(PrincipalCollection principals) {
        User user = (User) principals.getPrimaryPrincipal();

        return RedisKeyPrefixes.PREFIX_SHIRO_PERMISSIONS + user.getId();
    }

}
至此,授权缓存的问题就解决了。
密码安全问题
现在另外一个不容忽视的隐患是密码的安全问题,登录密码是直接明文存储在数据库的,对于这类高度敏感的信息,一般会采取加密的方式保证数据的安全性。
像密码这类信息,使用不可逆的加密方式会更合理,否则,安全问题依然存在。
这也就是为什么大部分APP忘记密码之后要求重置密码,应用本身也不知道你当时设置的密码是多少。
为了解决这个问题,需要查看前面AuthenticatingRealm的assertCredentialsMatch()方法。
java
CredentialsMatcher cm = getCredentialsMatcher();getCredentialsMatcher()方法也是返回一个当前类的成员变量。
java
public CredentialsMatcher getCredentialsMatcher() {
    return credentialsMatcher;
}
很显然,这里也能通过set方法设置这个密码匹配器。

创建密码匹配器
既然可以直接通过set方法设置这个密码匹配器,那么,我们就可以自定义验证密码的逻辑。
也就可以实现对密码的加密处理了,而不是原来的简单比较字符串内容。
PasswordEncoder.java
创建自己的密码加密器,使用MD5加密算法。
java
package cn.edu.sgu.www.shiro.support;

import lombok.extern.slf4j.Slf4j;
import org.springframework.util.DigestUtils;

import java.util.UUID;

/**
 * 密码加密器
 * @author 沐雨橙风ιε
 * @version 1.0
 */
@Slf4j
public class PasswordEncoder {

    /**
     * 对用户提供的密码进行加密
     * @param password 用户提供的密码
     * @return 加密后的密码
     */
    public static String encode(String password) {
        // 生成随机盐
        String salt = UUID.randomUUID().toString().replace("-", "");

        String encodedPassword = password;

        encodedPassword = DigestUtils.md5DigestAsHex(
                (salt + encodedPassword + salt + salt + encodedPassword + salt + salt + salt).getBytes()
        );

        return salt + encodedPassword;
    }

    /**
     * 匹配密码
     * @param password 用户提供的密码
     * @param encodedPassword 加密后的密码
     * @return 密码匹配返回true,否则返回false
     */
    public static boolean matches(String password, String encodedPassword) {
        String salt = null;

        try {
            // 获取盐
            salt = encodedPassword.substring(0, 32);
        } catch (StringIndexOutOfBoundsException e) {
            log.debug("密码格式错误:password = {}", encodedPassword);

            e.printStackTrace();
        }

        String newPassword = password;

        newPassword = DigestUtils.md5DigestAsHex(
                (salt + newPassword + salt + salt + newPassword + salt + salt + salt).getBytes()
        );
        newPassword = salt + newPassword;

        return newPassword.equals(encodedPassword);
    }

    public static void main(String[] args) {
        String password = "mhxy1218";

        System.out.println(encode(password));
    }

}
PasswordMatcher.java
创建自定义的密码匹配器,通过调用密码加密器的matches()方法匹配密码。
java
package cn.edu.sgu.www.shiro.support;

import cn.edu.sgu.www.shiro.consts.ErrorMessages;
import cn.edu.sgu.www.shiro.entity.User;
import org.apache.shiro.authc.AuthenticationException;
import org.apache.shiro.authc.AuthenticationInfo;
import org.apache.shiro.authc.AuthenticationToken;
import org.apache.shiro.authc.UsernamePasswordToken;
import org.apache.shiro.authc.credential.CredentialsMatcher;
import org.apache.shiro.subject.PrincipalCollection;
import org.springframework.stereotype.Component;

/**
 * Apache Shiro密码匹配器
 * @author 沐雨橙风ιε
 * @version 1.0
 */
@Component
public class PasswordMatcher implements CredentialsMatcher {

    @Override
    public boolean doCredentialsMatch(AuthenticationToken authenticationToken, AuthenticationInfo authenticationInfo) {
        // 得到用户输入的密码
        UsernamePasswordToken token = (UsernamePasswordToken) authenticationToken;

        String password = new String(token.getPassword());

        // 得到数据库密码
        PrincipalCollection principals = authenticationInfo.getPrincipals();

        User user = (User) principals.getPrimaryPrincipal();

        String encodedPassword = user.getPassword();

        // 匹配密码
        if (!PasswordEncoder.matches(password, encodedPassword)) {
            throw new AuthenticationException(ErrorMessages.loginFail);
        }

        return true;
    }

}
ShiroConfig.java
设置密码匹配器到Realm中。
java
@Bean
public UsernameRealm usernameRealm(PasswordMatcher passwordMatcher, RedisCache redisCache) {
    UsernameRealm usernameRealm = new UsernameRealm();

    usernameRealm.setAuthorizationCache(redisCache);
    usernameRealm.setCredentialsMatcher(passwordMatcher);

    return usernameRealm;
}
修改用户登录密码
运行PasswordEncoder的main()方法,生成通过密码加密器加密得到的密码,然后替换数据库中的用户登录密码。

自定义未授权逻辑
当访问未授权的资源时,Apache Shiro的过滤器会拦截请求,并返回401状态码。
通常,我们需要定义自己的处理逻辑,比如返回一个比较个性化的提示。
指定处理路径
Apache Shiro支持未授权时重定向到指定的URL,可以在Controller接口中处理未授权,返回包装后的响应数据。
ShiroConfig.java
java
/**
 * 配置Shiro过滤器工厂
 */
@Bean
public ShiroFilterFactoryBean shiroFilter(DefaultWebSecurityManager securityManager) {
    ShiroFilterFactoryBean shiroFilterFactoryBean = new ShiroFilterFactoryBean();

    // 注册安全管理器
    shiroFilterFactoryBean.setSecurityManager(securityManager);

    /*
     * 设置登录页面的地址
     * 当用户访问认证资源的时候,如果用户没有登录,那么就会跳转到该属性指定的页面
     */
    shiroFilterFactoryBean.setLoginUrl("/login.html");
    /*
     * 设置访问未授权资源时重定向的地址
     * 当用户访问需要指定权限才能访问的资源时,如果用户没有此权限,那么就会重定向到指定的页面
     */
    shiroFilterFactoryBean.setUnauthorizedUrl("/user/unauthorized");

    // 定义资源访问规则
    Map<String, String> filterChainDefinitionMap = new LinkedHashMap<>();

    /*
     * 过滤器说明
     * anon:不需要认证就可以访问的资源
     * authc:需要登录认证才能访问的资源
     * perms:需要指定权限才能访问的资源
	 */
    // 需要登录认证才能访问的资源
    filterChainDefinitionMap.put("/", "authc");
    filterChainDefinitionMap.put("/index.html", "authc");

    // 查询所有权限
    List<Permission> permissions = permissionMapper.selectPermissions();

    // 需要指定权限才能访问的资源
    for (Permission permission : permissions) {
        if (permission.getAnonymity() == 0) {
            filterChainDefinitionMap.put(permission.getUrl(), "perms[" + permission.getValue() + "]");
        } else {
            filterChainDefinitionMap.put(permission.getUrl(), "anon");
        }
    }

    shiroFilterFactoryBean.setFilterChainDefinitionMap(filterChainDefinitionMap);

    return shiroFilterFactoryBean;
}
UserController.java
java
@RequestMapping(path = "/unauthorized", method = RequestMethod.GET)
public JsonResult<Void> unauthorized() {
    throw new GlobalException(ResponseCode.UNAUTHORIZED, "正在访问未授权的资源!");
}
取消修改用户的权限,删除Redis中的权限缓存。
点击修改按钮,可以看到响应内容确实是UserController.unauthorized()方法的返回值。

自定义过滤器
除了指定未授权的处理路径,还可以通过滤器处理未授权的访问。
Shiro是通过PermissionsAuthorizationFilter这个过滤器处理授权访问资源的请求的,可以重写这个过滤器,然后覆盖设置到perms过滤器链中。
PermsFilter.java
java
package cn.edu.sgu.www.shiro.support;

import cn.edu.sgu.www.shiro.restful.JsonResult;
import cn.edu.sgu.www.shiro.restful.ResponseCode;
import com.alibaba.fastjson.JSON;
import lombok.extern.slf4j.Slf4j;
import org.apache.shiro.web.filter.authz.PermissionsAuthorizationFilter;

import javax.servlet.ServletRequest;
import javax.servlet.ServletResponse;
import javax.servlet.http.HttpServletRequest;
import javax.servlet.http.HttpServletResponse;
import java.io.IOException;
import java.io.PrintWriter;

/**
 * 定义PermsFilter过滤器(覆盖shiro的perms过滤器)
 * @author 沐雨橙风ιε
 * @version 1.0
 */
@Slf4j
public class PermsFilter extends PermissionsAuthorizationFilter {

    @Override
    public boolean isAccessAllowed(ServletRequest req, ServletResponse resp, Object mappedValue) throws IOException {
        boolean accessAllowed = super.isAccessAllowed(req, resp, mappedValue);

        if (!accessAllowed) {
            // 获取request对象
            HttpServletRequest request = (HttpServletRequest) req;
            // 得到请求地址
            String requestURI = request.getRequestURI();

            String errorMessage = "正在访问未授权的资源:" + requestURI;

            log.debug(errorMessage);

            ResponseCode responseCode = ResponseCode.UNAUTHORIZED;
            // 获取response对象
            HttpServletResponse response = (HttpServletResponse) resp;

            response.setStatus(responseCode.getValue());
            response.setContentType("application/json;charset=UTF-8");

            // 构建返回对象
            JsonResult<Void> jsonResult = JsonResult.error(responseCode, errorMessage);

            try (PrintWriter writer = response.getWriter()) {
                writer.write(JSON.toJSONString(jsonResult));
            }
        }

        return true;
    }

}
ShiroConfig.java
将PermsFilter设置到Shiro的过滤器链中,覆盖原来名字为perms的过滤器。
java
// 添加自定义过滤器
Map<String, Filter> filters = shiroFilterFactoryBean.getFilters();

filters.put("perms", new PermsFilter());

shiroFilterFactoryBean.setFilters(filters);