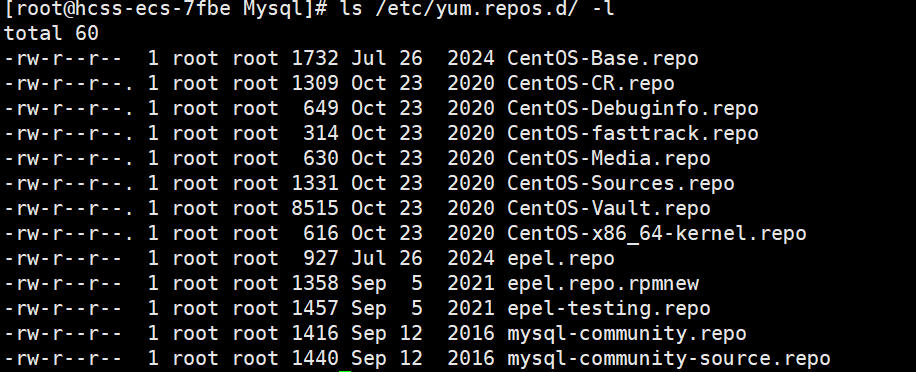
首先,我们的系统下是没有MYSQL的yum源的。
我们可以使用:ls /etc/yum.repos.d/ -l命令,查看当前系统中已经有的yum源。
1.那么我们如何添加MYSQL的yum源呢?
1.首先我们先到repo.mysql.com这个网址,下载对应的文件。

下载到Linux中是这样的文件
使用rpm -ivh mysql57-community-release-el7-9.noarch.rpm这条指令把我们刚刚的yum源添加到系统的yum源中。

上面的最后两行就有我们添加好的yum源了。
2.安装MYSQL的客户端和服务端
使用yum install -y mysql-community-server命令安装MYSQL服务
安装遇到秘钥过期的问题:
Failing package is: mysql-community-client-5.7.39-1.el7.x86_64
 GPG Keys are configured as: file:///etc/pki/rpm-gpg/RPM-GPG-KEY-mysql
解决⽅案:输入下面的命令
rpm --import https://repo.mysql.com/RPM-GPG-KEY-mysql-2022
3.启动服务
因为安装的其实是两个程序,一个客户端,一个服务端。所以我们需要启动服务端
[@VM-0-3-centos 9.9]$ systemctl start mysqld.service
==== AUTHENTICATING FOR org.freedesktop.systemd1.manage-units ===
Authentication is required to manage system services or units.
Authenticating as: root
Password:
==== AUTHENTICATION COMPLETE ===
4.登录客户端
接下来我们需要使用我们的客户端来登录
由于刚开始登录需要密码,但是默认的密码我们不知道,我们可以在配置文件中添加skip-grant-tables选项,这样我们可以不用密码就登录,后续可以修改登录密码
[root@bite-alicloud mysql]# vim /etc/my.cnf # 打开mysql配置⽂件
在[mysqld]最后⼀栏配置(不知道是什么,就放在配置⽂件最后) 加⼊: skip-grant-tables 选项,
并保存退出
[root@bite-alicloud mysql]# systemctl restart mysqld # 重启mysql服务
# 登陆成功
[root@bite-alicloud mysql]# mysql -uroot
Welcome to the MySQL monitor. Commands end with ; or \g.
Your MySQL connection id is 2
Server version: 5.7.41 MySQL Community Server (GPL)
Copyright (c) 2000, 2023, Oracle and/or its affiliates.
Oracle is a registered trademark of Oracle Corporation and/or its
affiliates. Other names may be trademarks of their respective
owners.
修改完别忘记重启服务,让配置文件生效。