文章的目的记录所使用的的Linux服务器和中间件的配置和使用,防止时间太长忘记,进行重复工作。
推荐链接:
linux C 语言开发 (一) Window下用gcc编译和gdb调试
linux C 语言开发 (二) VsCode远程开发 linux
linux C 语言开发 (六) 程序的编辑和编译(vim、gcc)
Linux C到Android App开发推荐链接(入门十二章):
开源 java android app 开发(一)开发环境的搭建_csdn 开源 java android app-CSDN博客
开源 java android app 开发(一)开发环境的搭建-CSDN博客
开源 java android app 开发(二)工程文件结构-CSDN博客
开源 java android app 开发(三)GUI界面布局和常用组件-CSDN博客
开源 java android app 开发(四)GUI界面重要组件-CSDN博客
开源 java android app 开发(五)文件和数据库存储-CSDN博客
开源 java android app 开发(六)多媒体使用-CSDN博客
开源 java android app 开发(七)通讯之Tcp和Http-CSDN博客
开源 java android app 开发(八)通讯之Mqtt和Ble-CSDN博客
开源 java android app 开发(九)后台之线程和服务-CSDN博客
开源 java android app 开发(十)广播机制-CSDN博客
开源 java android app 开发(十一)调试、发布-CSDN博客
开源 java android app 开发(十二)封库.aar-CSDN博客
linux C到.net mvc开发推荐链接:
开源C# .net mvc 开发(一)WEB搭建_c#部署web程序-CSDN博客
开源 C# .net mvc 开发(二)网站快速搭建_c#网站开发-CSDN博客
开源 C# .net mvc 开发(三)WEB内外网访问(VS发布、IIS配置网站、花生壳外网穿刺访问)_c# mvc 域名下不可訪問內網,內網下可以訪問域名-CSDN博客
开源 C# .net mvc 开发(四)工程结构、页面提交以及显示_c#工程结构-CSDN博客
开源 C# .net mvc 开发(五)常用代码快速开发_c# mvc开发-CSDN博客、
内容:Nginx服务器的安装,测试,以及页面修改。
Nginx是一个高性能的HTTP和反向代理服务器,具有负载均衡、动态代理、虚拟主机等功能,广泛应用于Web服务、邮件代理及负载均衡场景。
核心功能
1. 反向代理
接收外部网络请求后转发至内部服务器,并将响应返回给客户端。通过配置可实现动静分离(如静态资源由Nginx直接服务,动态请求转发至后端服务器),并支持SSL加密传输。
2. 负载均衡
将请求分发给多台服务器,支持轮询、最少连接数、IP哈希等策略。例如,通过配置可将用户请求根据IP地址哈希值固定分配到特定服务器,适用于需要保持会话状态的应用。
3. 邮件代理
支持IMAP/POP3/SMTP协议,可替代专业邮件服务器软件处理邮件收发请求。
4. 动态内容处理
通过rewrite模块实现URL重写、防盗链等功能,并优化动态内容加载速度。
扩展场景
5. 虚拟主机服务
支持基于域名的虚拟主机配置,可同时托管多个网站。
6. 高并发处理
在5万并发连接下仍能保持稳定运行,内存占用低,适合高流量网站。
7. 安全防护
通过配置可实现DDoS攻击防护、跨域请求处理等安全功能。
目录
1.Nginx服务器安装
2.Nginx服务器测试
3.Nginx修改
使用的vmvare虚拟机下的Ubunt进行安装和测试
一、Nginx服务器安装
-
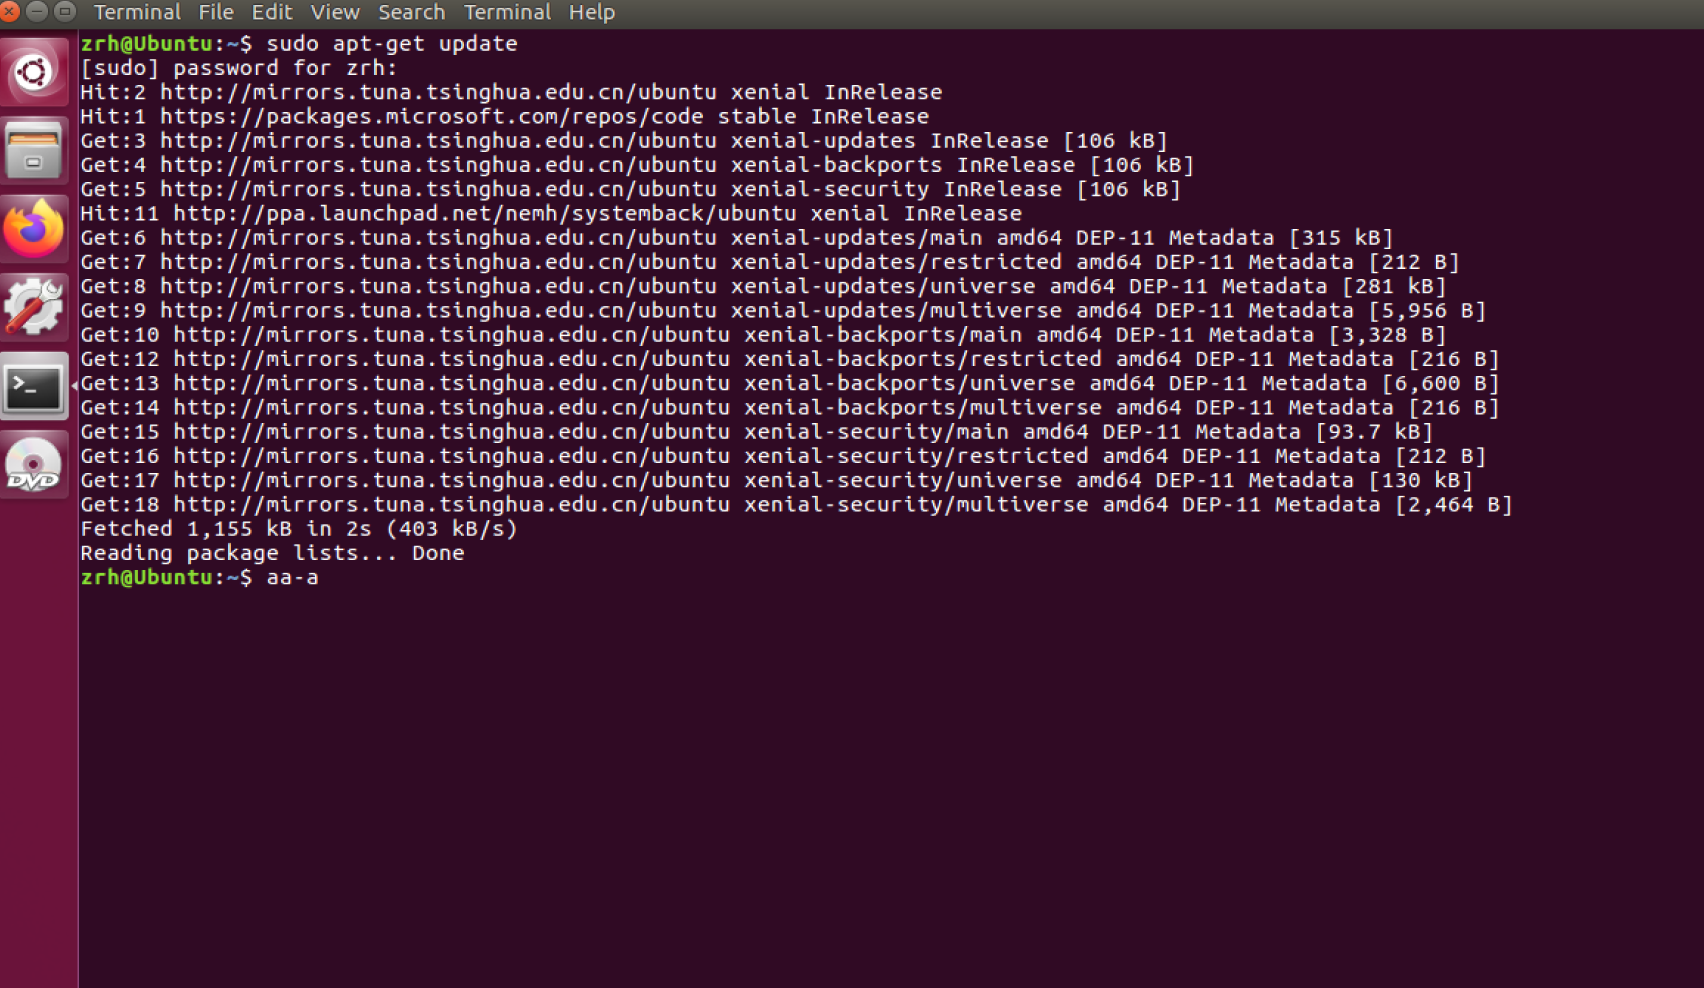
更新软件包列表
sudo apt update
-
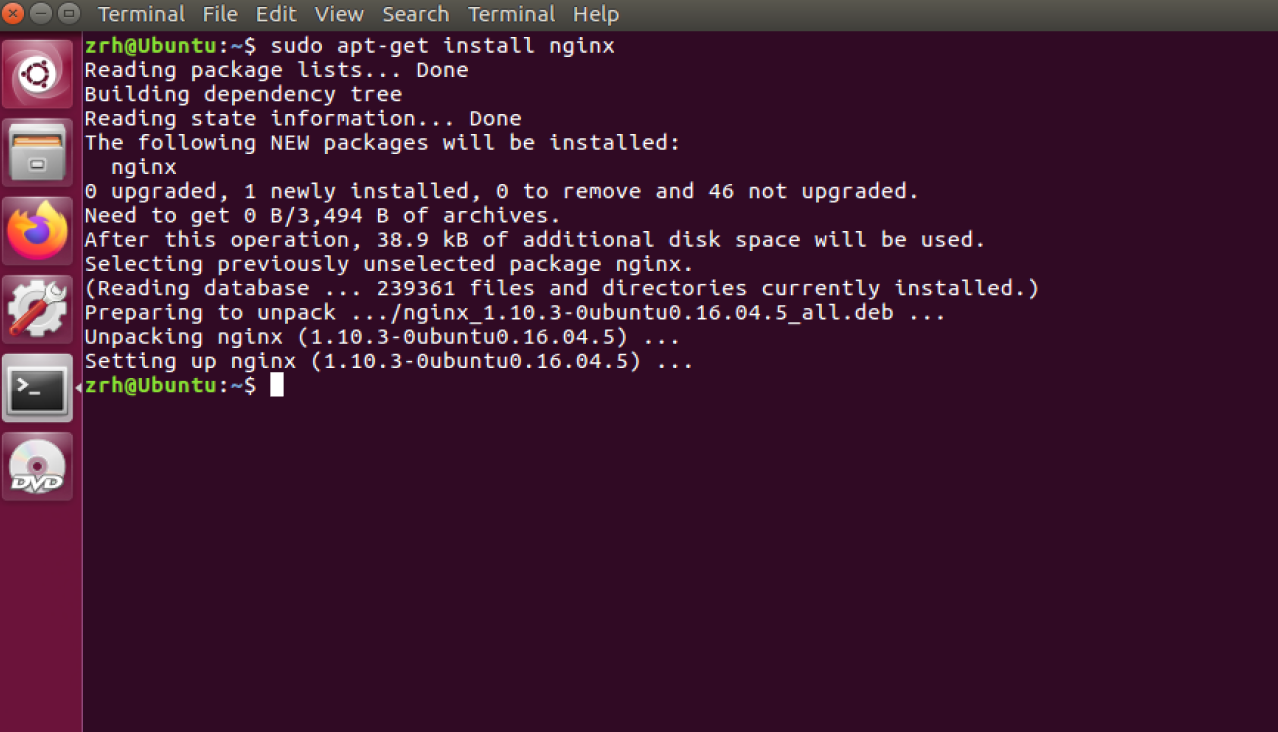
安装 Nginx
sudo apt install nginx
-
启动 Nginx 服务
启动 Nginx
sudo systemctl start nginx
设置开机自启
sudo systemctl enable nginx
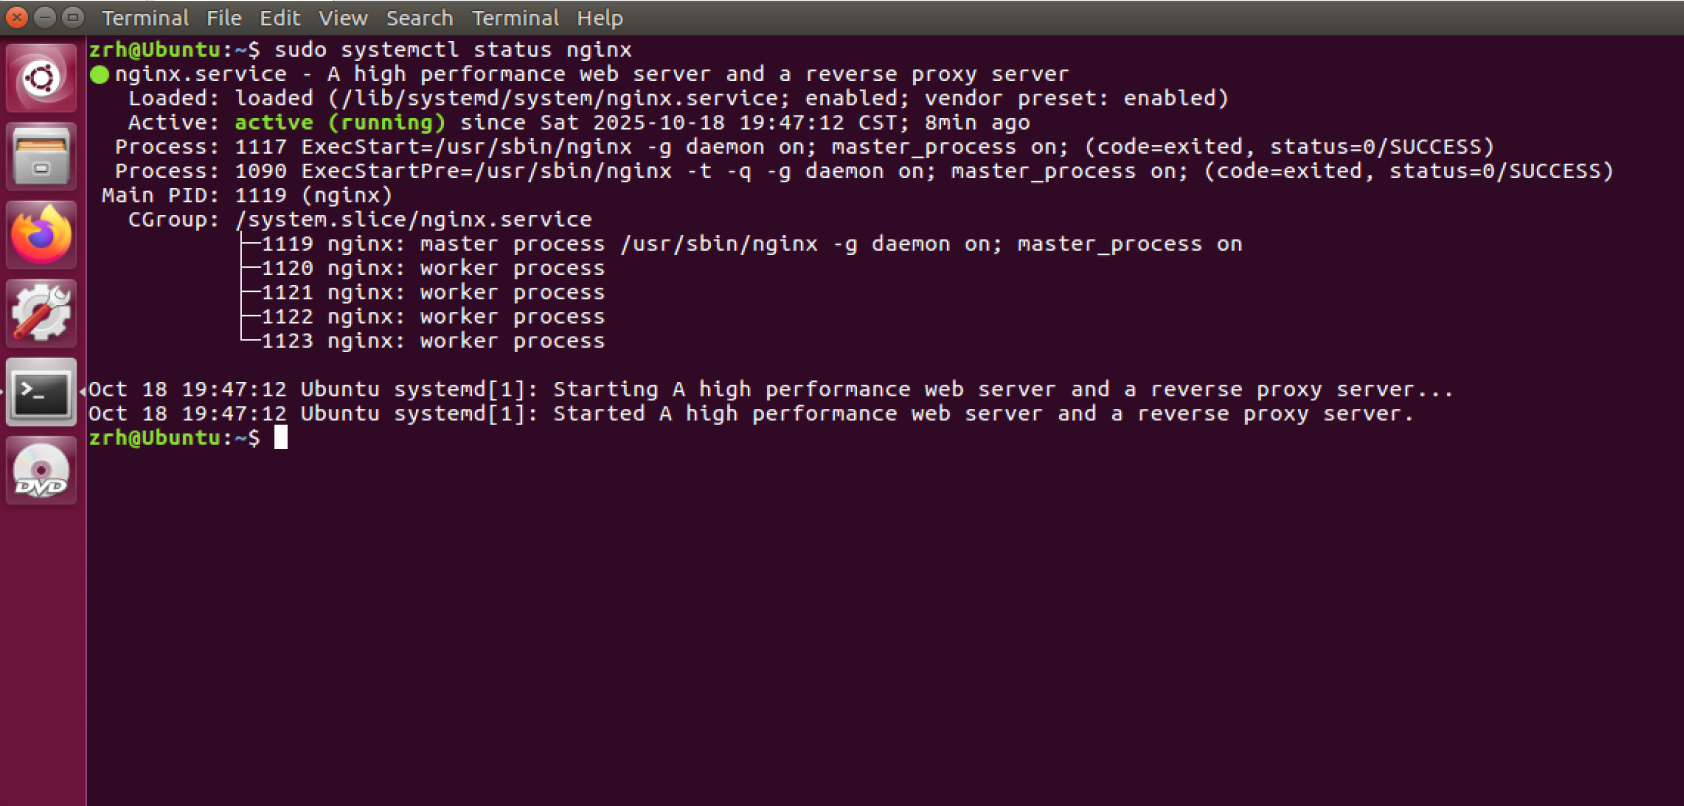
检查运行状态
sudo systemctl status nginx
安装完了一般是默认运行的。可以直接查看状态,active则是已经运行。如果没有,用start命令启动。
二、Nginx服务器测试
1.虚拟机上访问
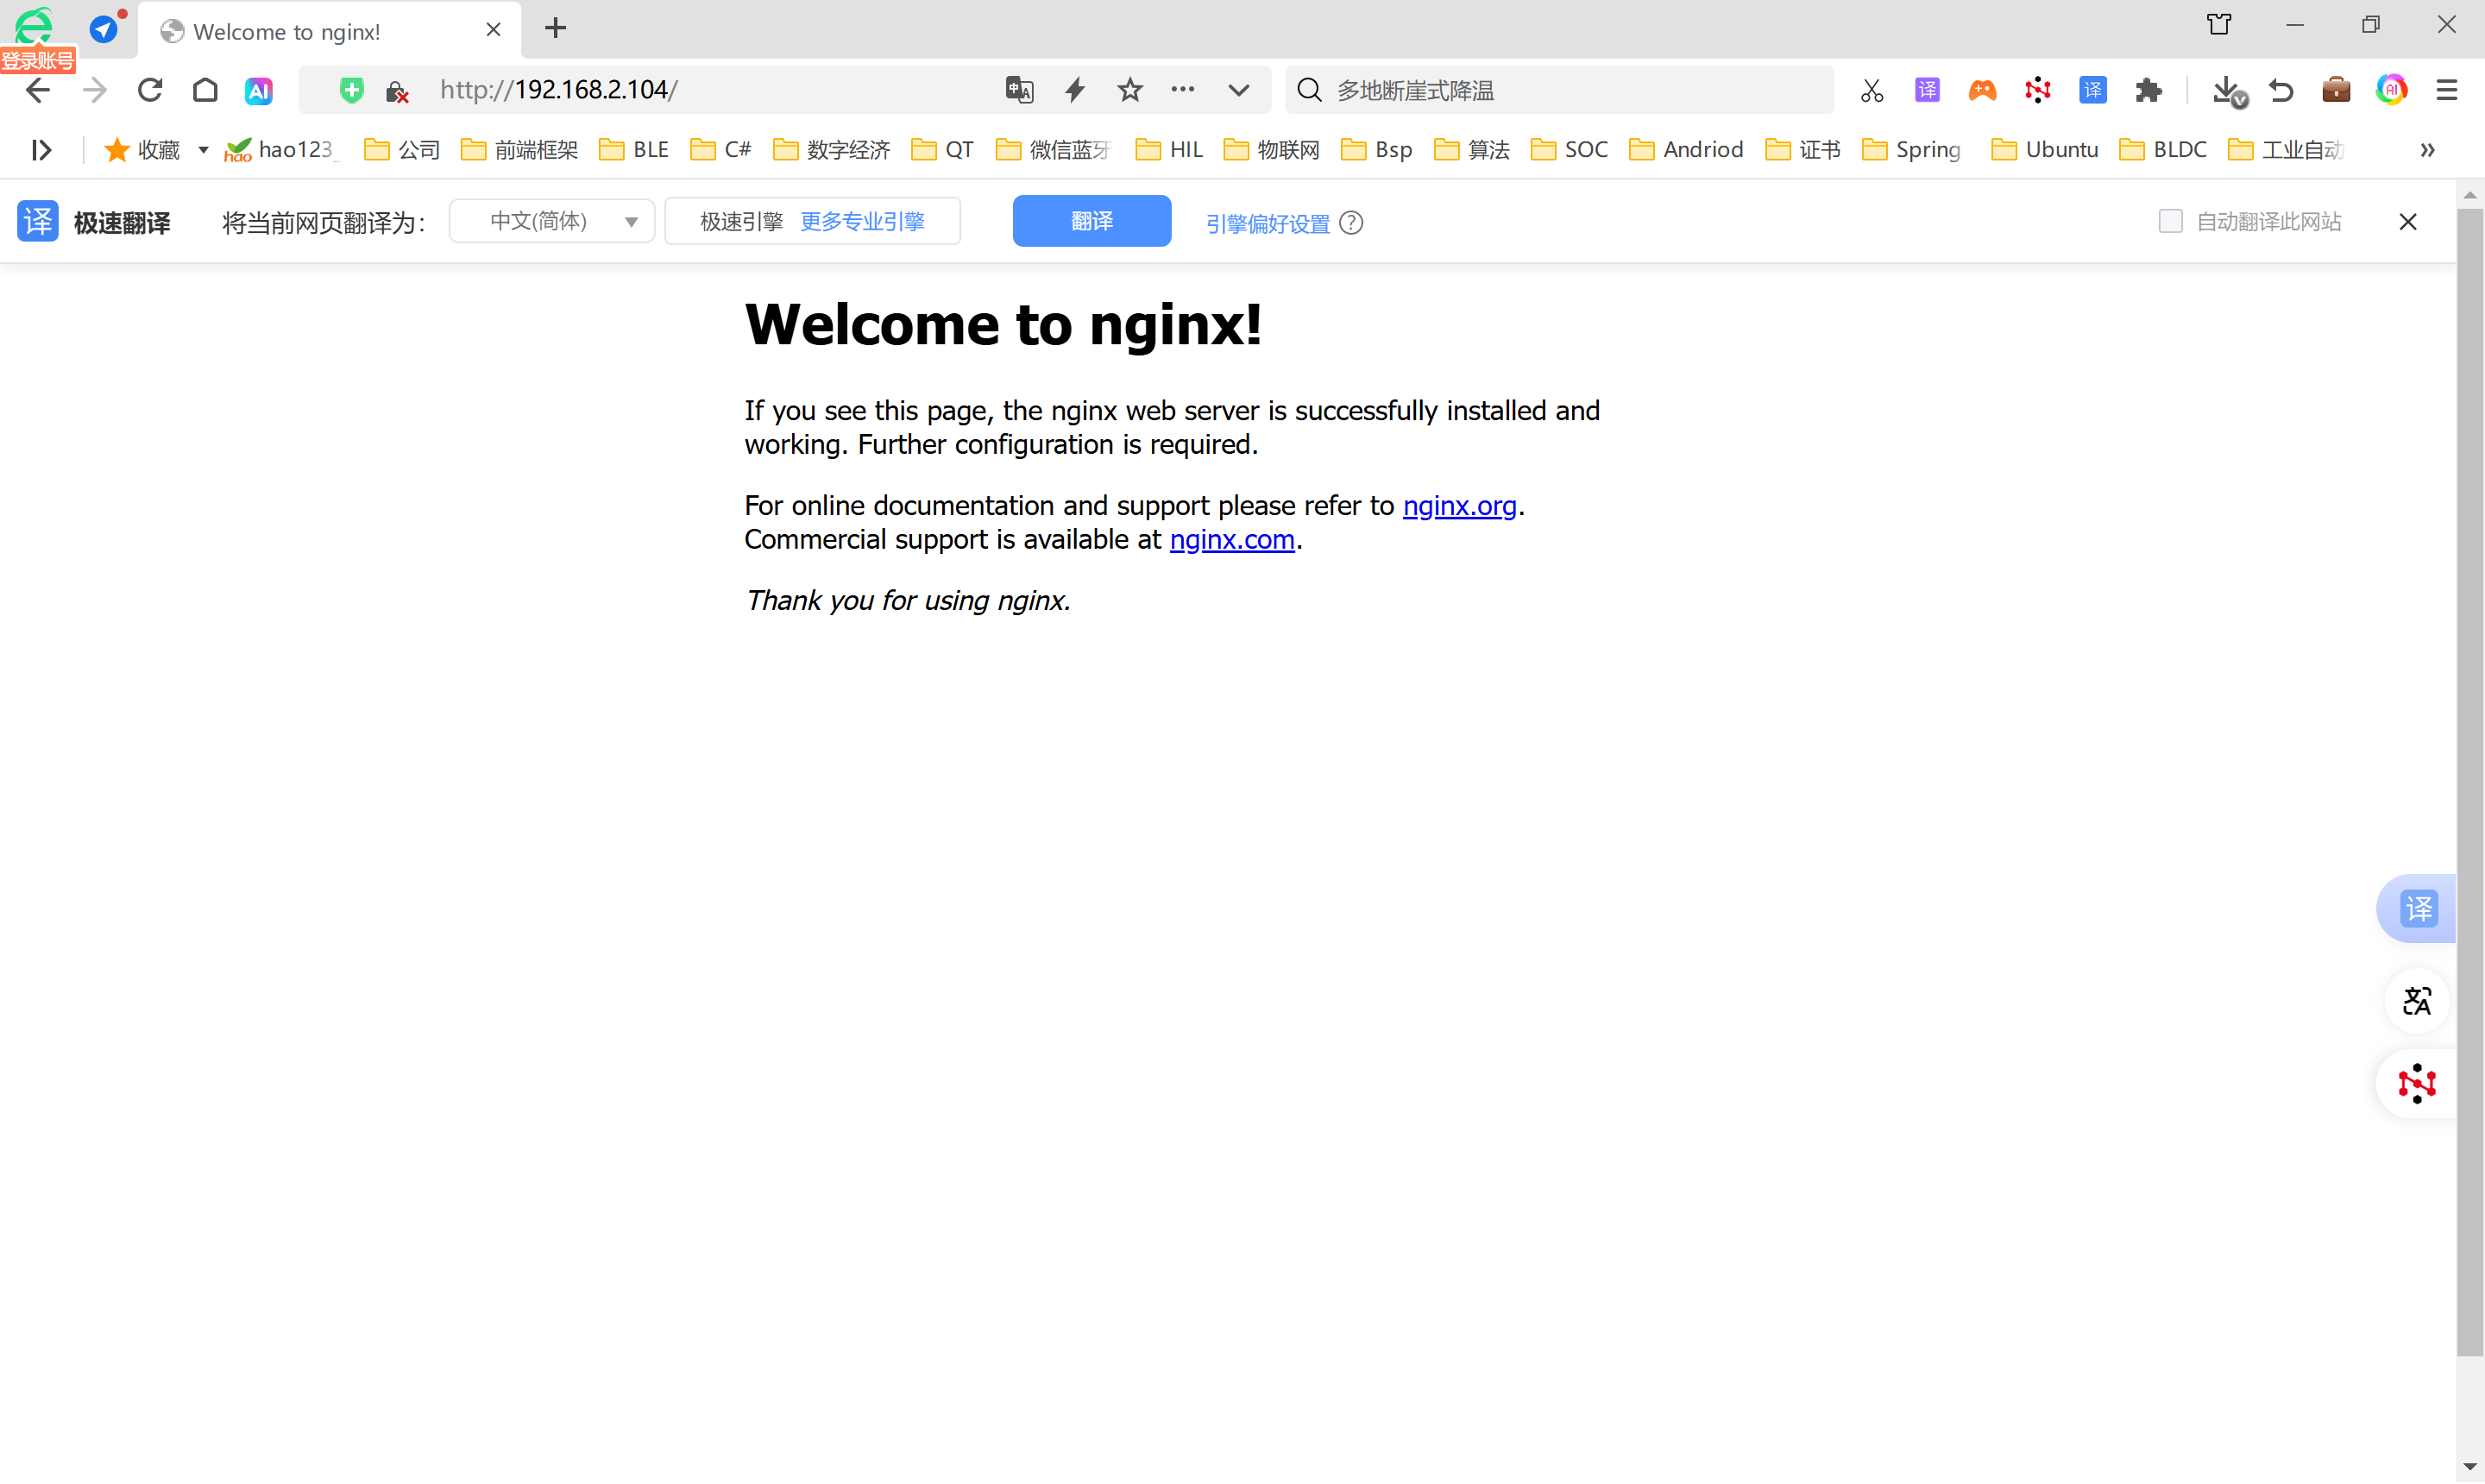
在浏览器地址栏输入:
http://localhost
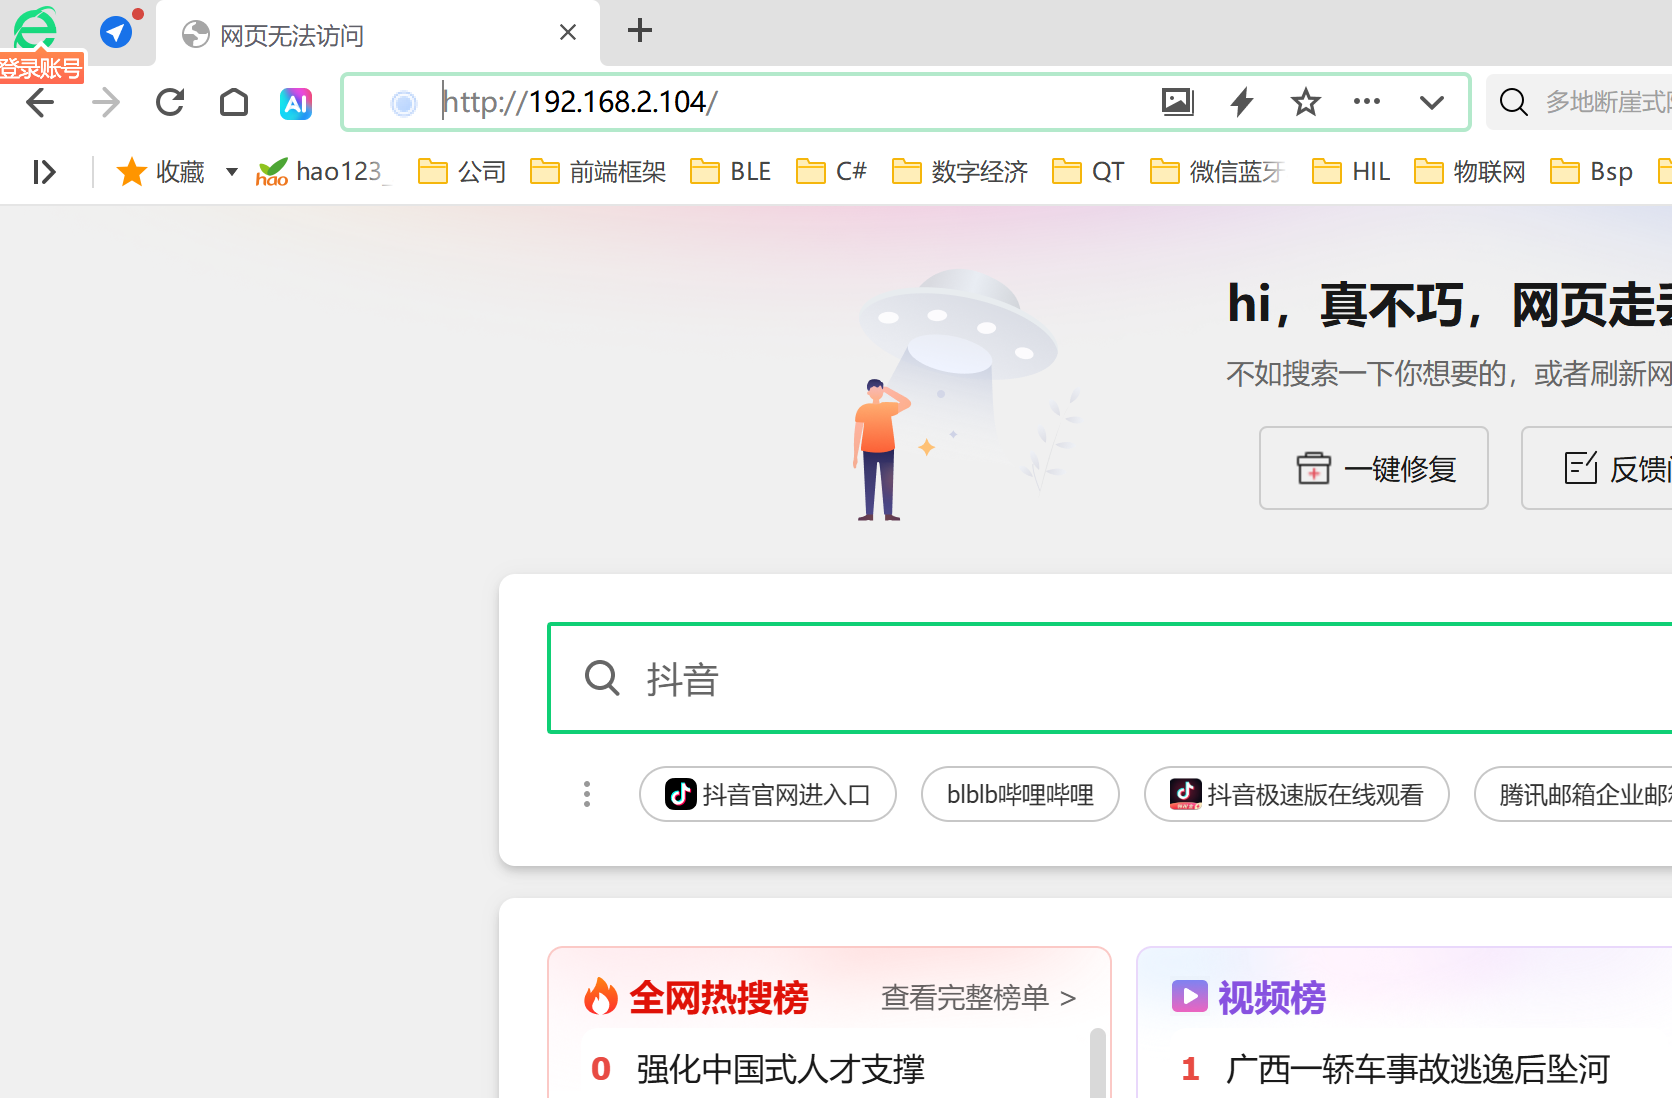
2.在网络中访问
测试的方法是访问默认页面,通常需要先配置防火墙。如果是本地的linux使用ufw进行配置就可以了,但如果是百度云或华为云之类的,外网访问需要配置云防火强。
查看网络ip
ifconfig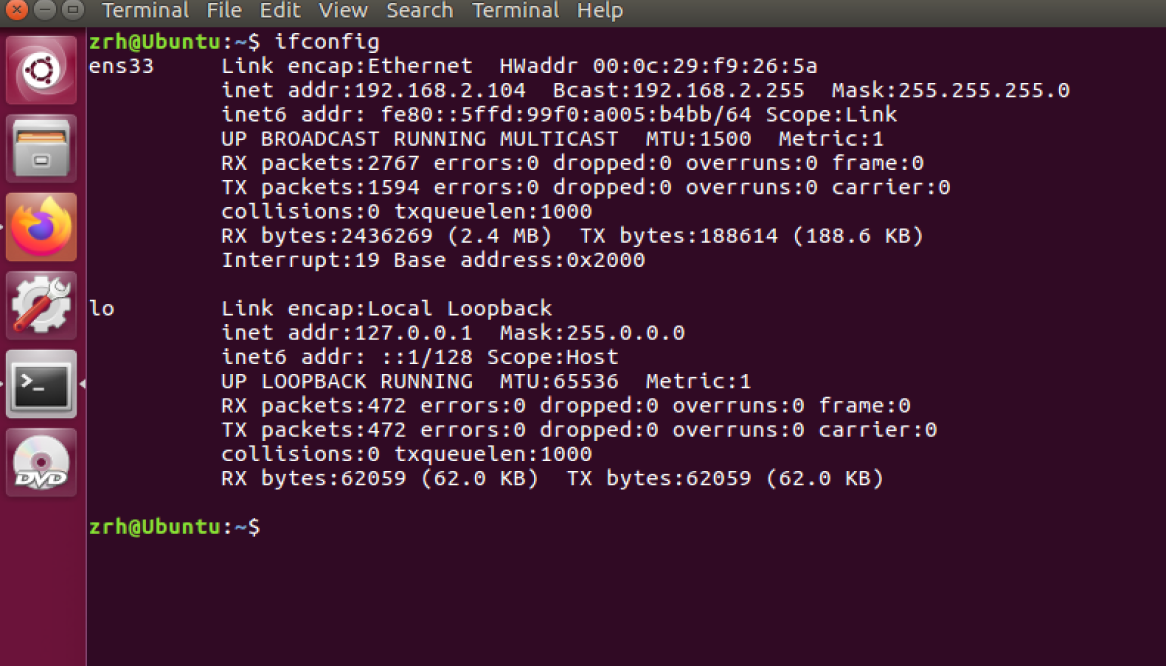
网络主机浏览器输入ip地址就可以访问,这里不能访问通常是防火墙没有设置。
配置防火墙(如果启用)
#查看防火墙规则
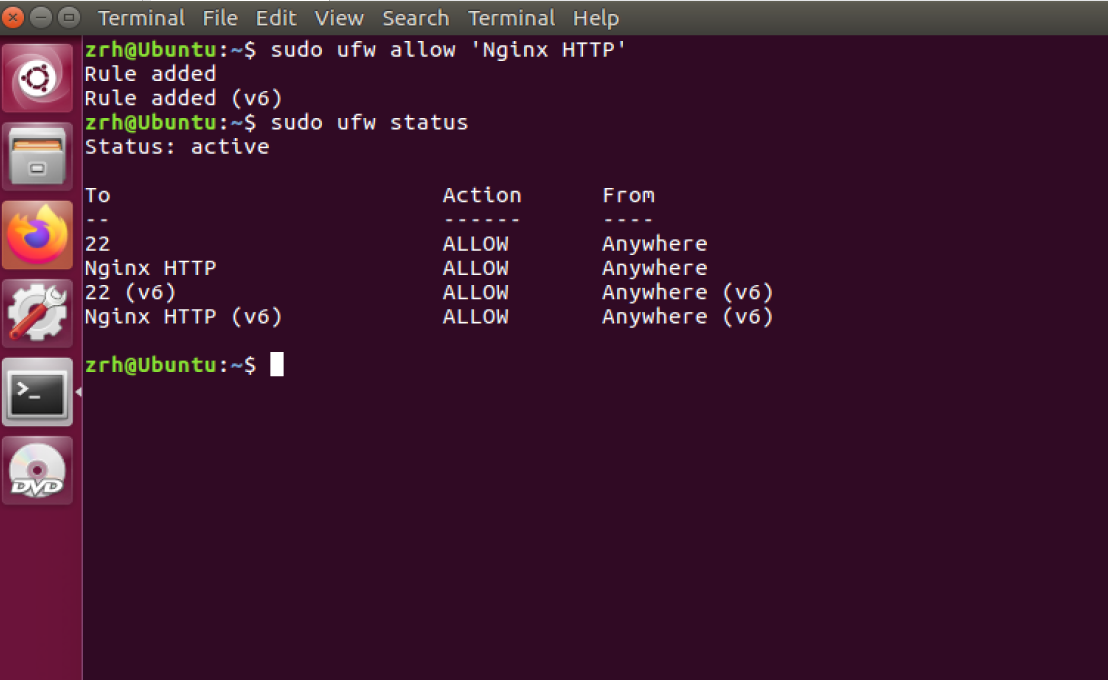
sudo ufw status
# 允许 HTTP 流量(端口 80)
sudo ufw allow 'Nginx HTTP'
# 或者允许 HTTPS 流量(端口 443)
sudo ufw allow 'Nginx HTTPS'
# 启用防火墙(如果尚未启用)
sudo ufw enable
# 删除规则
sudo ufw delete allow 'Nginx HTTP'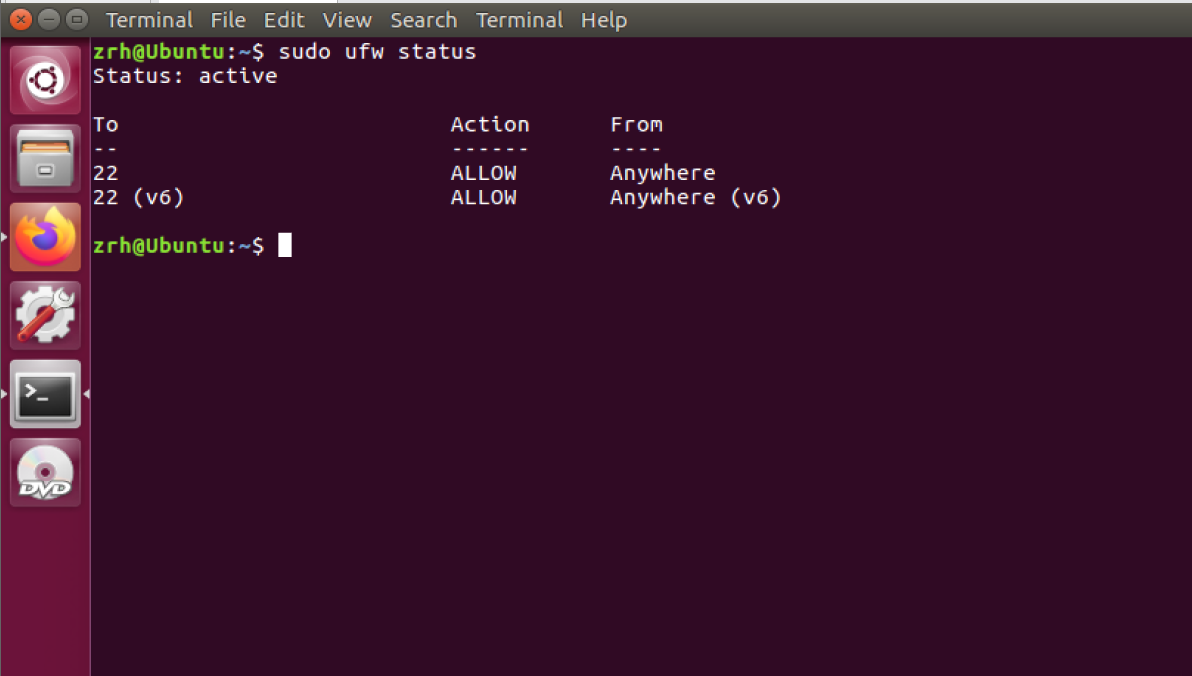
页面显示,安装访问成功
三、Nginx修改
1.重要文件和目录
默认网站根目录: /var/www/html/
主配置文件: /etc/nginx/nginx.conf
站点配置文件: /etc/nginx/sites-available/
启用的站点: /etc/nginx/sites-enabled/
日志文件: /var/log/nginx/
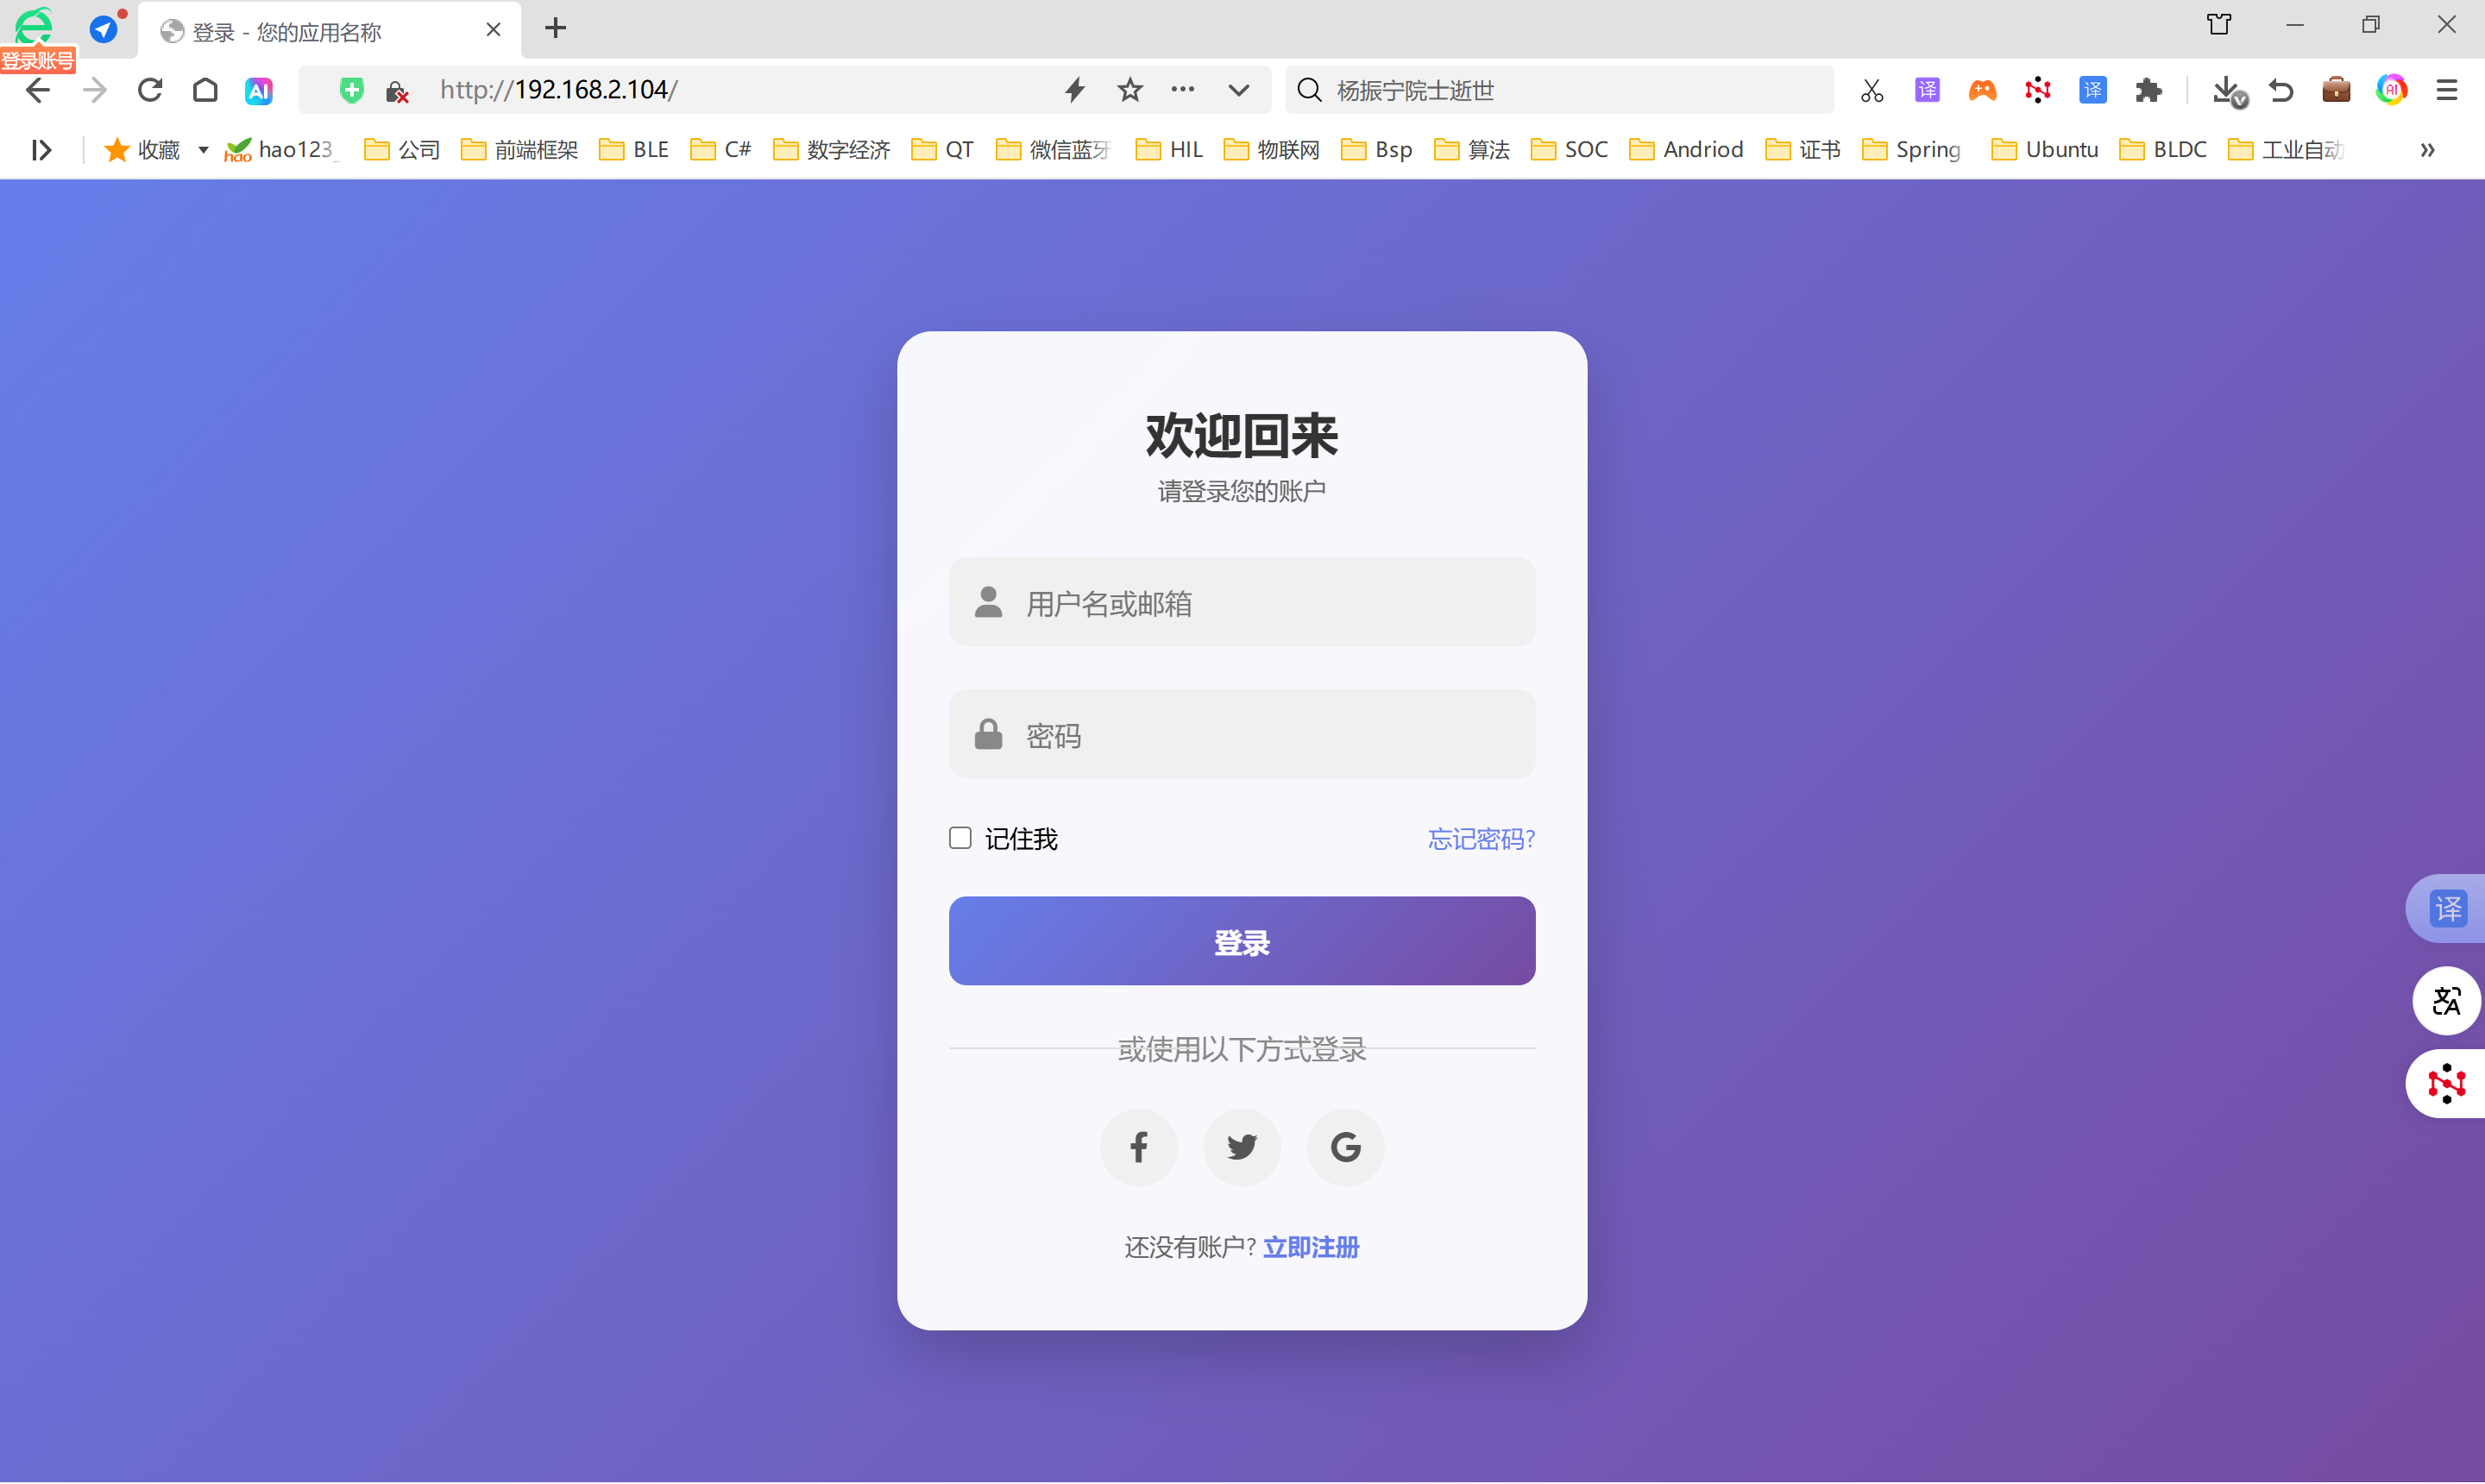
拷贝登录页面替换/var/www/html/的index.nginx-debian

然后重启nginx
sudo systemctl restart nginx再次访问页面,已经实现了修改
登录页面源码
<!DOCTYPE html>
<html lang="zh-CN">
<head>
    <meta charset="UTF-8">
    <meta name="viewport" content="width=device-width, initial-scale=1.0">
    <title>登录 - 您的应用名称</title>
    <style>
        * {
            margin: 0;
            padding: 0;
            box-sizing: border-box;
            font-family: 'Segoe UI', Tahoma, Geneva, Verdana, sans-serif;
        }

        body {
            display: flex;
            justify-content: center;
            align-items: center;
            min-height: 100vh;
            background: linear-gradient(135deg, #667eea 0%, #764ba2 100%);
            padding: 20px;
        }

        .container {
            width: 100%;
            max-width: 400px;
        }

        .login-card {
            background: rgba(255, 255, 255, 0.95);
            border-radius: 20px;
            box-shadow: 0 15px 35px rgba(0, 0, 0, 0.2);
            padding: 40px 30px;
            backdrop-filter: blur(10px);
            animation: fadeIn 0.8s ease-out;
        }

        @keyframes fadeIn {
            from { opacity: 0; transform: translateY(20px); }
            to { opacity: 1; transform: translateY(0); }
        }

        .logo {
            text-align: center;
            margin-bottom: 30px;
        }

        .logo h1 {
            color: #333;
            font-size: 28px;
            font-weight: 600;
            margin-bottom: 5px;
        }

        .logo p {
            color: #666;
            font-size: 14px;
        }

        .input-group {
            position: relative;
            margin-bottom: 25px;
        }

        .input-group input {
            width: 100%;
            padding: 15px 15px 15px 45px;
            border: none;
            background: #f0f0f0;
            border-radius: 10px;
            font-size: 16px;
            transition: all 0.3s ease;
            outline: none;
        }

        .input-group input:focus {
            background: #e8e8e8;
            box-shadow: 0 0 0 2px rgba(102, 126, 234, 0.3);
        }

        .input-group i {
            position: absolute;
            left: 15px;
            top: 50%;
            transform: translateY(-50%);
            color: #888;
            font-size: 18px;
        }

        .options {
            display: flex;
            justify-content: space-between;
            align-items: center;
            margin-bottom: 25px;
            font-size: 14px;
        }

        .remember {
            display: flex;
            align-items: center;
        }

        .remember input {
            margin-right: 8px;
        }

        .forgot-password {
            color: #667eea;
            text-decoration: none;
            transition: color 0.3s;
        }

        .forgot-password:hover {
            color: #764ba2;
            text-decoration: underline;
        }

        .login-btn {
            width: 100%;
            padding: 15px;
            border: none;
            background: linear-gradient(135deg, #667eea 0%, #764ba2 100%);
            color: white;
            border-radius: 10px;
            font-size: 16px;
            font-weight: 600;
            cursor: pointer;
            transition: transform 0.3s, box-shadow 0.3s;
        }

        .login-btn:hover {
            transform: translateY(-2px);
            box-shadow: 0 7px 15px rgba(102, 126, 234, 0.4);
        }

        .login-btn:active {
            transform: translateY(0);
        }

        .divider {
            text-align: center;
            margin: 25px 0;
            position: relative;
            color: #888;
        }

        .divider::before {
            content: "";
            position: absolute;
            left: 0;
            top: 50%;
            width: 42%;
            height: 1px;
            background: #ddd;
        }

        .divider::after {
            content: "";
            position: absolute;
            right: 0;
            top: 50%;
            width: 42%;
            height: 1px;
            background: #ddd;
        }

        .social-login {
            display: flex;
            justify-content: center;
            gap: 15px;
            margin-bottom: 25px;
        }

        .social-btn {
            width: 45px;
            height: 45px;
            border-radius: 50%;
            display: flex;
            justify-content: center;
            align-items: center;
            background: #f0f0f0;
            color: #555;
            font-size: 18px;
            text-decoration: none;
            transition: all 0.3s;
        }

        .social-btn:hover {
            transform: translateY(-3px);
            box-shadow: 0 5px 10px rgba(0, 0, 0, 0.1);
        }

        .facebook:hover {
            background: #3b5998;
            color: white;
        }

        .twitter:hover {
            background: #1da1f2;
            color: white;
        }

        .google:hover {
            background: #dd4b39;
            color: white;
        }

        .signup {
            text-align: center;
            font-size: 14px;
            color: #666;
        }

        .signup a {
            color: #667eea;
            text-decoration: none;
            font-weight: 600;
            transition: color 0.3s;
        }

        .signup a:hover {
            color: #764ba2;
            text-decoration: underline;
        }

        @media (max-width: 480px) {
            .login-card {
                padding: 30px 20px;
            }

            .logo h1 {
                font-size: 24px;
            }
        }
    </style>
    <link rel="stylesheet" href="https://cdnjs.cloudflare.com/ajax/libs/font-awesome/6.0.0-beta3/css/all.min.css">
</head>
<body>
    <div class="container">
        <div class="login-card">
            <div class="logo">
                <h1>欢迎回来</h1>
                <p>请登录您的账户</p>
            </div>

            <form id="loginForm">
                <div class="input-group">
                    <i class="fas fa-user"></i>
                    <input type="text" id="username" placeholder="用户名或邮箱" required>
                </div>

                <div class="input-group">
                    <i class="fas fa-lock"></i>
                    <input type="password" id="password" placeholder="密码" required>
                </div>

                <div class="options">
                    <div class="remember">
                        <input type="checkbox" id="remember">
                        <label for="remember">记住我</label>
                    </div>
                    <a href="#" class="forgot-password">忘记密码?</a>
                </div>

                <button type="submit" class="login-btn">登录</button>
            </form>

            <div class="divider">或使用以下方式登录</div>

            <div class="social-login">
                <a href="#" class="social-btn facebook">
                    <i class="fab fa-facebook-f"></i>
                </a>
                <a href="#" class="social-btn twitter">
                    <i class="fab fa-twitter"></i>
                </a>
                <a href="#" class="social-btn google">
                    <i class="fab fa-google"></i>
                </a>
            </div>

            <div class="signup">
                还没有账户? <a href="#">立即注册</a>
            </div>
        </div>
    </div>

    <script>
        document.getElementById('loginForm').addEventListener('submit', function(e) {
            e.preventDefault();

            const username = document.getElementById('username').value;
            const password = document.getElementById('password').value;

            // 这里可以添加实际的登录逻辑
            console.log('用户名:', username);
            console.log('密码:', password);

            // 模拟登录成功
            alert('登录成功!');

            // 在实际应用中,这里会进行表单验证和API调用
            // 例如:
            // fetch('/api/login', {
            //     method: 'POST',
            //     headers: { 'Content-Type': 'application/json' },
            //     body: JSON.stringify({ username, password })
            // })
            // .then(response => response.json())
            // .then(data => {
            //     if (data.success) {
            //         window.location.href = '/dashboard';
            //     } else {
            //         alert('登录失败: ' + data.message);
            //     }
            // });
        });
    </script>
</body>
</html>