目录
[2.1 coil](#2.1 coil)
[2.2 viewmodel](#2.2 viewmodel)
[2.3 LazyColumn使用](#2.3 LazyColumn使用)
[2.4 LazyRow使用](#2.4 LazyRow使用)
[2.5 LazyVerticalGrid使用](#2.5 LazyVerticalGrid使用)
[2.6 LazyHorizontalGrid](#2.6 LazyHorizontalGrid)
一,前言
在传统android中我们使用的列表组件是RecyclerView,但是在Compose中是没有RecyclerView组件的,它把列表组件分为了四个:LazyColumn,LazyRow,LazyVerticalGrid,LazyHorizontalGrid。从名称可以看出,LazyColumn 和 LazyRow 之间的区别就在于它们的列表项布局和滚动方向不同。LazyColumn 生成的是垂直滚动列表,而 LazyRow 生成的是水平滚动列表。LazyVerticalGrid 和 LazyHorizontalGrid 可组合项为在网格中显示列表项提供支持。延迟垂直网格会在可垂直滚动容器中跨多个列显示其列表项,而延迟水平网格则会在水平轴上有相同的行为。
二,LazyColumn和LazyRow的使用
2.1 coil
在compose中加载图片一般使用的是coil,下面我们介绍下coil是如何使用的:
首先在app的build.gradle中添加依赖:
bash
implementation 'io.coil-kt:coil-compose:2.0.0-rc03'在activity中加载网络图片:
Kotlin
class MainActivityNew : ComponentActivity() {

    override fun onCreate(savedInstanceState: Bundle?) {
        super.onCreate(savedInstanceState)
        setContent {

            AsyncImage(model = "https://img2.baidu.com/it/u=1025320646,221016220&fm=253&app=138&f=JPEG?w=800&h=1421",
                "",
                contentScale = ContentScale.Fit)

        }
    }
}
运行效果图:

2.2 viewmodel
viewmodel在compose中的使用与kotlin中有所不同,下面讲一下使用:
首先添加依赖:
bash
implementation "androidx.lifecycle:lifecycle-viewmodel-compose:2.4.0"然后创建viewmodel:
Kotlin
class MyViewModel :ViewModel() {

    var chats by mutableStateOf(
        listOf(
            Student("伽罗","20","https://img2.baidu.com/it/u=1025320646,221016220&fm=253&app=138&f=JPEG?w=800&h=1421"),
            Student("妲己","22","https://pic.rmb.bdstatic.com/bjh/240119/081fe6fa14028b1831aa89f81a8b81191308.jpeg"),
            Student("李白","25","https://img1.baidu.com/it/u=986348615,2122549478&fm=253&app=138&f=JPEG?w=800&h=1423")
        )
    )
在activity中使用:
Kotlin
class MainActivity : ComponentActivity() {

    override fun onCreate(savedInstanceState: Bundle?) {
        super.onCreate(savedInstanceState)
        setContent {
            MyComposeTheme {
               Column (){

                   var viewModel : MyViewModel =viewModel()
                   AsyncImage(model = viewModel.chats.get(1).image, contentDescription = "")

               }

            }
        }
    }
}
运行效果:

2.3 LazyColumn使用
1.创建viewmodel:
Kotlin
class ListViewModel :ViewModel() {

    var student by mutableStateOf(
        listOf(
            Student("伽罗","20","https://img2.baidu.com/it/u=1025320646,221016220&fm=253&app=138&f=JPEG?w=800&h=1421"),
            Student("妲己","22","https://pic.rmb.bdstatic.com/bjh/240119/081fe6fa14028b1831aa89f81a8b81191308.jpeg"),
            Student("李白","25","https://img1.baidu.com/it/u=986348615,2122549478&fm=253&app=138&f=JPEG?w=800&h=1423")
        )
    )
}
Kotlin
data class Student(var name:String,var age:String,var image:String)2.使用:
Kotlin
class ListDemoActivity: ComponentActivity()  {


    override fun onCreate(savedInstanceState: Bundle?) {
        super.onCreate(savedInstanceState)
        setContent {

            var viewModel : ListViewModel = viewModel()
            LazyColumn(){
              items(viewModel.student){
                  Column {
                      Text(text = it.name)
                      Text(text = it.age)
                      AsyncImage(model = it.image,"", modifier = Modifier
                          .width(100.dp)
                          .height(300.dp), contentScale = ContentScale.Fit)
                  }
              }
            }
        }
    }
}
3.运行如下:

2.4 LazyRow使用
在activity中使用:
Kotlin
class ListDemoActivity: ComponentActivity()  {


    override fun onCreate(savedInstanceState: Bundle?) {
        super.onCreate(savedInstanceState)
        setContent {

            var viewModel : ListViewModel = viewModel()
            LazyRow(){
              items(viewModel.student){
                  Column {
                      Text(text = it.name)
                      Text(text = it.age)
                      AsyncImage(model = it.image,"", modifier = Modifier
                          .width(100.dp)
                          .height(300.dp), contentScale = ContentScale.Fit)
                  }
              }
            }
        }
    }
}
运行效果如下:

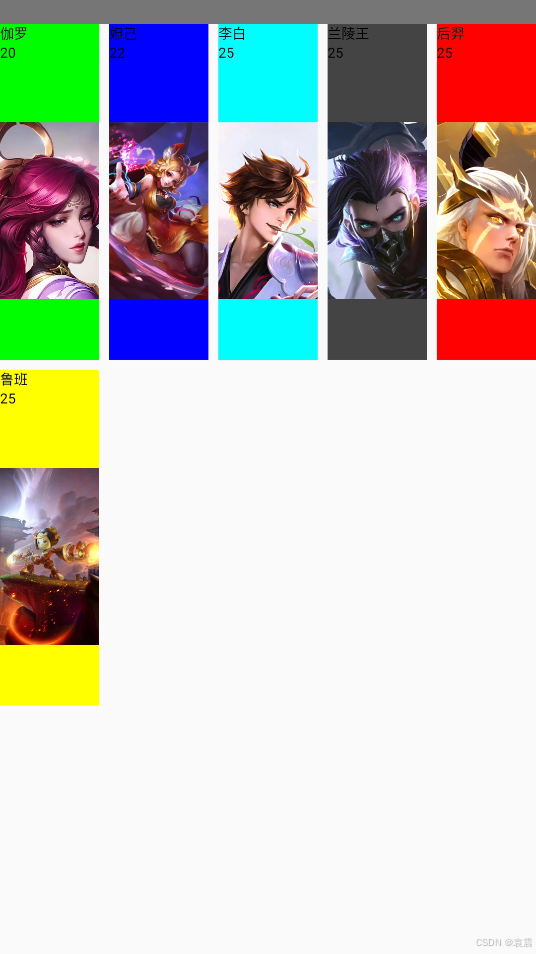
2.5 LazyVerticalGrid使用
在activity中使用:
Kotlin
class ListDemoActivity: ComponentActivity()  {


    override fun onCreate(savedInstanceState: Bundle?) {
        super.onCreate(savedInstanceState)
        setContent {

            var viewModel : ListViewModel = viewModel()

            LazyVerticalGrid(columns = GridCells.Fixed(2), //固定两列
                content = {
                    items(viewModel.student){
                        Column {
                            Text(text = it.name)
                            Text(text = it.age)
                            AsyncImage(model = it.image,"", modifier = Modifier
                                .width(100.dp)
                                .height(300.dp), contentScale = ContentScale.Fit)
                        }
                    }
                }
            )
        }
    }
}
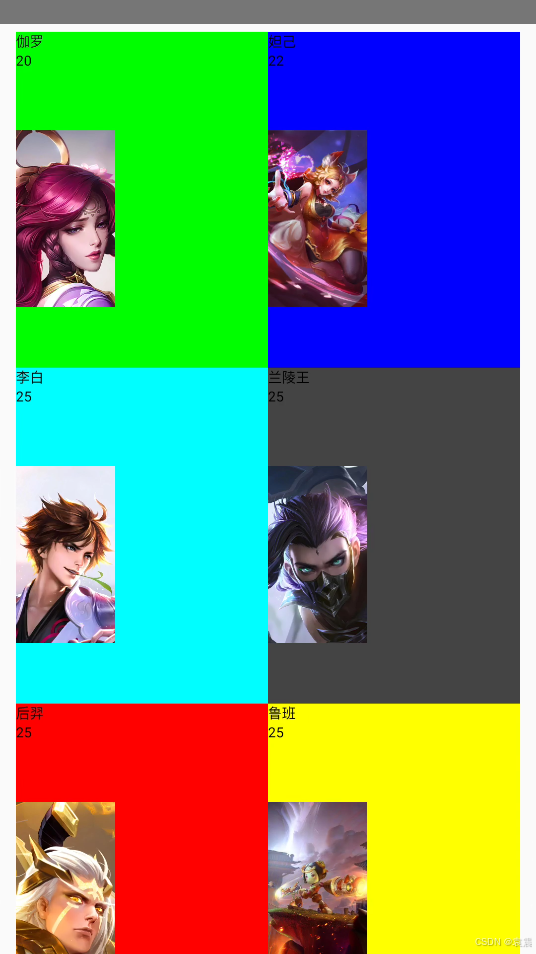
自适应大小宽度:
Kotlin
class ListDemoActivity: ComponentActivity()  {


    override fun onCreate(savedInstanceState: Bundle?) {
        super.onCreate(savedInstanceState)
        setContent {

            var viewModel : ListViewModel = viewModel()
            LazyVerticalGrid(columns = GridCells.Adaptive(100.dp),//自适应宽度
                         ){
              items(viewModel.student){
                  Column(Modifier.background(it.color)) {
                      Text(text = it.name)
                      Text(text = it.age)
                      AsyncImage(model = it.image,"", modifier = Modifier
                          .width(100.dp)
                          .height(300.dp), contentScale = ContentScale.Fit)
                  }
              }
            }
        }
    }
}
2.6 LazyHorizontalGrid
在activity中使用:
Kotlin
class ListDemoActivity: ComponentActivity()  {


    override fun onCreate(savedInstanceState: Bundle?) {
        super.onCreate(savedInstanceState)
        setContent {

            var viewModel : ListViewModel = viewModel()

            LazyHorizontalGrid(rows = GridCells.Fixed(2), //固定两行
                content = {
                    items(viewModel.student){
                        Column {
                            Text(text = it.name)
                            Text(text = it.age)
                            AsyncImage(model = it.image,"", modifier = Modifier
                                .width(100.dp)
                                .height(300.dp), contentScale = ContentScale.Fit)
                        }
                    }
                }
            )
        }
    }
}
三,添加外边距
可以使用**contentPadding = PaddingValues(horizontal = 16.dp, vertical = 8.dp)**给组件整体设置外边距:
Kotlin
class ListDemoActivity: ComponentActivity()  {


    override fun onCreate(savedInstanceState: Bundle?) {
        super.onCreate(savedInstanceState)
        setContent {

            var viewModel : ListViewModel = viewModel()
            LazyVerticalGrid(contentPadding = PaddingValues(horizontal = 16.dp, vertical = 8.dp), columns = GridCells.Fixed(2)){
              items(viewModel.student){
                  Column(Modifier.background(it.color)) {
                      Text(text = it.name)
                      Text(text = it.age)
                      AsyncImage(model = it.image,"", modifier = Modifier
                          .width(100.dp)
                          .height(300.dp), contentScale = ContentScale.Fit)
                  }
              }
            }
        }
    }
}
效果如下:
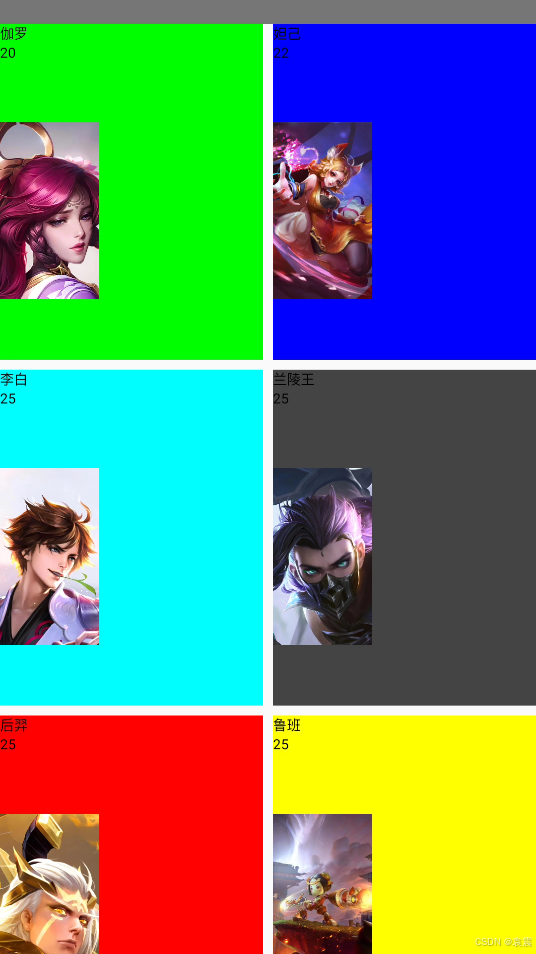
四,添加间隙
要为子元素之间添加空隙也很简单,指定一下arrangemnt为spacedBy即可
Kotlin
horizontalArrangement = Arrangement.spacedBy(12.dp),
verticalArrangement = Arrangement.spacedBy(8.dp)
Kotlin
class ListDemoActivity: ComponentActivity()  {


    override fun onCreate(savedInstanceState: Bundle?) {
        super.onCreate(savedInstanceState)
        setContent {

            var viewModel : ListViewModel = viewModel()
            LazyVerticalGrid(columns = GridCells.Fixed(2),//固定两列
                             verticalArrangement = Arrangement.spacedBy(10.dp),//垂直间隙
                             horizontalArrangement = Arrangement.spacedBy(10.dp) //水平间隙
                         ){
              items(viewModel.student){
                  Column(Modifier.background(it.color)) {
                      Text(text = it.name)
                      Text(text = it.age)
                      AsyncImage(model = it.image,"", modifier = Modifier
                          .width(100.dp)
                          .height(300.dp), contentScale = ContentScale.Fit)
                  }
              }
            }
        }
    }
}
显示效果如下:
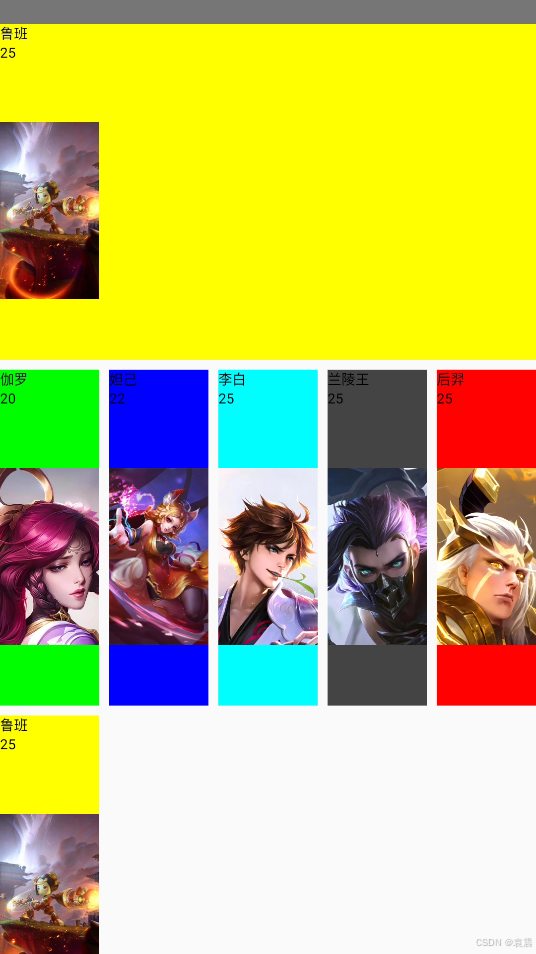
五,自定义宽度span
如果想让某一元素占满一行,可以使用span来实现,代码如下:
Kotlin
class ListDemoActivity: ComponentActivity()  {


    override fun onCreate(savedInstanceState: Bundle?) {
        super.onCreate(savedInstanceState)
        setContent {

            var viewModel : ListViewModel = viewModel()
            LazyVerticalGrid(columns = GridCells.Adaptive(100.dp),//自适应宽度
                             verticalArrangement = Arrangement.spacedBy(10.dp),//垂直间隙
                             horizontalArrangement = Arrangement.spacedBy(10.dp) //水平间隙
                         ){
                item(span = {
                    // 占据最大宽度
                    GridItemSpan(maxLineSpan)
                }){
                    Column(Modifier.background(viewModel.one.color)) {
                        Text(text = viewModel.one.name)
                        Text(text = viewModel.one.age)
                        AsyncImage(model = viewModel.one.image,"", modifier = Modifier
                            .width(100.dp)
                            .height(300.dp), contentScale = ContentScale.Fit)
                    }
                }
              items(viewModel.student){
                  Column(Modifier.background(it.color)) {
                      Text(text = it.name)
                      Text(text = it.age)
                      AsyncImage(model = it.image,"", modifier = Modifier
                          .width(100.dp)
                          .height(300.dp), contentScale = ContentScale.Fit)
                  }
              }
            }
        }
    }
}
效果如下:
六,粘性标题
使用stickyHeader可以实现粘性标题,实现代码如下:
Kotlin
class ListDemoActivity: ComponentActivity()  {


    @OptIn(ExperimentalFoundationApi::class)
    override fun onCreate(savedInstanceState: Bundle?) {
        super.onCreate(savedInstanceState)
        setContent {

            var viewModel : ListViewModel = viewModel()

            LazyColumn(){
                stickyHeader {
                    Row(Modifier.background(Color.Gray).width(100.dp).height(50.dp)){
                        Text(text = "标题1")
                    }
                }
                items(viewModel.student){
                    Column {
                        Text(text = it.name)
                        Text(text = it.age)
                        AsyncImage(model = it.image,"", modifier = Modifier
                            .width(100.dp)
                            .height(300.dp), contentScale = ContentScale.Fit)
                    }
                }
                stickyHeader {
                    Row(Modifier.background(Color.Gray).width(100.dp).height(50.dp)){
                        Text(text = "标题2")
                    }
                }
                items(viewModel.student){
                    Column {
                        Text(text = it.name)
                        Text(text = it.age)
                        AsyncImage(model = it.image,"", modifier = Modifier
                            .width(100.dp)
                            .height(300.dp), contentScale = ContentScale.Fit)
                    }
                }
            }
        }
    }
}
运行效果如下: