目录
[1.1. Singular(单一规则)](#1.1. Singular(单一规则))
[1.2. Repeated(重复规则)](#1.2. Repeated(重复规则))
[1.3.2.修改 和 删除 repeated 字段](#1.3.2.修改 和 删除 repeated 字段)
[2.2. 消息类型的使用](#2.2. 消息类型的使用)
[2.3.1.在同一个 .proto 文件中使用消息类型](#2.3.1.在同一个 .proto 文件中使用消息类型)
[2.3.2.导入其他 .proto 文件中的消息](#2.3.2.导入其他 .proto 文件中的消息)
[4.2.4.Any 内嵌 Any](#4.2.4.Any 内嵌 Any)
一.字段规则
1.1. Singular(单一规则)
这是 proto3 中默认的字段规则。
这意味着,如果你在定义消息时没有为字段指定任何规则,那它就是 singular。
-
含义 :在一个构造好的消息对象中,这个字段可以有 0 个或 1 个 值。
-
通俗理解:它就像一个普通的变量。它可以被设置一次值,或者完全不设置(留空)。
详细解释与示例
假设我们定义一个个人信息消息:
cpp
message Person {
  string name = 1;       // 默认就是 singular,所以不用写出来
  int32 age = 2;         // 同样是 singular
  string email = 3;      // singular
}
当你使用这个 Person 消息时:
-
你可以创建一个
Person对象,并设置它的name、age和email。 -
你也可以创建一个
Person对象,只设置name,而不设置age和email。在这种情况下,age和email就是"零次"出现。
关于"零值":
在 proto3 中,如果一个 singular 字段没有被显式设置值,它会被赋予一个默认的"零值":
-
对于字符串
string,零值是空字符串""。 -
对于数字类型(如
int32,float等),零值是0。 -
对于布尔类型
bool,零值是false。 -
对于枚举类型
enum,零值是第一个定义的枚举值(必须为0)。
所以,在上面的例子中,如果你没有设置 age,当你序列化并再反序列化这个消息时,age 字段的值会是 0。
1.2. Repeated(重复规则)
当你在一个字段前加上 repeated 关键字时,你就在告诉 Protobuf:这个字段可以包含多个值。
-
含义 :在一个构造好的消息对象中,这个字段可以包含 0 个、1 个或多个 值。
-
通俗理解 :它就像一个动态数组 、列表 或集合。你可以向里面添加任意数量的元素。
详细解释与示例
让我们扩展 Person 消息,添加一些可以重复的字段:
cpp
message Person {
  string name = 1;
  int32 age = 2;
  repeated string phone_numbers = 3; // 一个人可以有多个电话号码
}
当你使用这个新的 Person 消息时:
-
phone_numbers字段可以是一个空的列表(这个人没有登记电话号码)。 -
它可以包含一个电话号码。
-
它也可以包含多个电话号码,比如 ["123-4567", "987-6543"]。
保留顺序的强调:
"其中重复值的顺序会被保留"这一点非常关键。这意味着:
-
如果你先添加
"123-4567",再添加"987-6543"。 -
当消息被序列化、传输、再反序列化后,你得到的列表顺序依然是
["123-4567", "987-6543"]。 -
这个特性在很多场景下非常重要,例如记录日志、保持项目列表的顺序等。
1.3.简单示例
1.3.1.基本用法
我们现在编写一个person.proto文件
cpp
syntax = "proto3";

// 定义一个包(命名空间)
package tutorial;

// Person 消息定义
message Person {
  string name = 1;                   // singular(单值)
  int32 age = 2;                     // singular(单值)
  repeated string phone_numbers = 3; // repeated(可重复)
}
现在我们来编译一下
cpp
protoc --cpp_out=. person.proto
在生成的 C++ 代码中:
- Person 类型现在在命名空间 tutorial 里
- 你需要写成 tutorial::Person
现在我们就编码来使用一下main.cpp
cpp
#include <iostream>
#include "person.pb.h"

using namespace std;

int main() {
    GOOGLE_PROTOBUF_VERIFY_VERSION;

    // 使用包名限定符 tutorial::
    tutorial::Person p;

    // singular 字段
    p.set_name("Alice");
    p.set_age(25);

    // repeated 字段
    p.add_phone_numbers("123-4567");
    p.add_phone_numbers("987-6543");

    // 输出
    cout << "Name: " << p.name() << endl;
    cout << "Age: " << p.age() << endl;

    cout << "Phone numbers:" << endl;
    for (int i = 0; i < p.phone_numbers_size(); ++i) {
        cout << "  " << p.phone_numbers(i) << endl;
    }

    // 测试未赋值对象
    tutorial::Person empty;
    cout << "\n--- 未赋值对象 ---" << endl;
    cout << "Name: '" << empty.name() << "'" << endl;   // 空字符串
    cout << "Age: " << empty.age() << endl;             // 0
    cout << "Phone count: " << empty.phone_numbers_size() << endl; // 0

    google::protobuf::ShutdownProtobufLibrary();
    return 0;
}
我们在上述代码中使用了GOOGLE_PROTOBUF_VERIFY_VERSION宏
我们来详细、深入地讲解一下 GOOGLE_PROTOBUF_VERIFY_VERSION 这个宏的作用和重要性。
你可以把它想象成 Protocol Buffer 库的一个 "安全哨兵" 或 "版本一致性检查器"。
核心问题:它解决了什么?
在 C++ 项目中使用 Protocol Buffers 时,存在两个关键部分:
- 编译时使用的头文件:当你用 protoc 编译器生成 .pb.h 和 .pb.cc 文件时,这些代码的格式和功能依赖于你当时安装的 protobuf 库的头文件。
- 运行时链接的库文件:你的最终可执行程序在运行时,需要动态或静态地链接到 protobuf 的库文件。
这里就出现了一个潜在的风险:编译时的库版本和运行时的库版本可能不一致。
如果不一致,会发生什么?
Protocol Buffers 在不同版本之间,其内部数据结构和内存布局可能会发生变化。如果版本不匹配,轻则导致数据错乱、读取失败,重则直接引发程序崩溃,而且这种错误非常难以调试。
举个例子:
- 你用一个 v3.20.1 的 protoc 编译了你的 .proto 文件,生成了 message.pb.h 和 message.pb.cc。
- 但是,你的程序在运行时却链接到了一个旧的 v2.6.1 的 libprotobuf.so。
- 新版本生成的代码可能会调用一些旧版本库中根本不存在的函数,或者使用不同的内存管理方式。当程序运行时,就可能尝试访问一个不存在的内存地址,导致 Segment Fault。
GOOGLE_PROTOBUF_VERIFY_VERSION 如何工作?
这个宏就是用来在程序启动的最早期主动发现并阻止这种灾难性问题的发生。
它的工作原理非常简单:
- 定义版本号:在 protobuf 的头文件中,定义了一个表示头文件版本的常量。
- 检查链接库版本:protobuf 的链接库内部也有一个表示库版本的常量。
- 比较:GOOGLE_PROTOBUF_VERIFY_VERSION 宏的核心逻辑就是检查这两个版本号是否完全匹配。
你应该在哪里使用它?
- 自动调用:在每个自动生成的 .pb.cc 文件的顶部,编译器已经帮我们插入了这个宏。这意味着,只要你链接了 protobuf 库,这个检查在程序启动时就会自动发生。
- 手动调用(最佳实践):建议在你程序的 main 函数的最开始,显式地调用一次。
为什么手动调用是好的做法?
因为这样可以确保在你自己的代码开始使用任何 protobuf 功能之前,版本检查就已经完成。如果版本不匹配,程序会立即中止,并给出清晰的错误信息,让你能快速定位到问题根源,而不是在后续某个莫名其妙的地方崩溃。
我们现在就来编译一下
cpp
g++ main.cpp person.pb.cc -o Test -std=c++11 -lprotobuf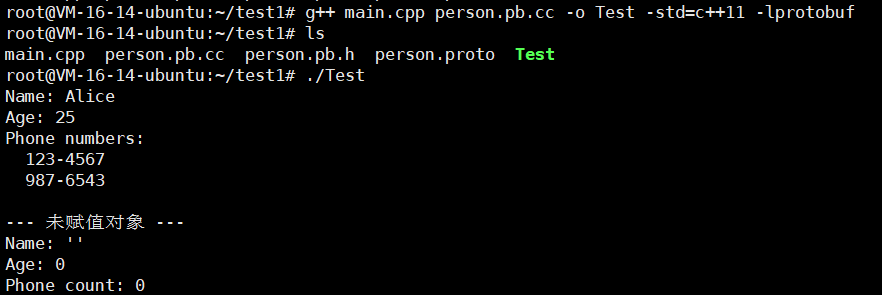
怎么样?还是很不错的吧!!
当然,都说protobuf是用来序列化和反序列化的,那么我们怎么可以不学习一下呢?
cpp
#include <iostream>     // 标准输入输出
#include <fstream>      // 文件读写
#include "person.pb.h"  // 由 protoc 生成的头文件

using namespace std;

int main() {
    // 初始化 protobuf 库(确保兼容性)
    GOOGLE_PROTOBUF_VERIFY_VERSION;

    // ====== 创建对象并赋值 ======
    tutorial::Person p;  // 创建 Person 消息对象
    p.set_name("Alice"); // 设置单值字段 name
    p.set_age(25);       // 设置单值字段 age

    // 添加 repeated 字段(可以多次调用)
    p.add_phone_numbers("123-4567");
    p.add_phone_numbers("987-6543");

    // ====== 序列化到二进制文件 ======
    {
        // 以二进制写模式打开文件,若存在则覆盖
        fstream output("person.bin", ios::out | ios::trunc | ios::binary);

        // 调用 protobuf 的序列化函数,将对象写入文件
        if (!p.SerializeToOstream(&output)) {
            cerr << "Failed to write person data." << endl;
            return -1;
        }

        cout << "✅ 已序列化到 person.bin 文件" << endl;
    }

    // ====== 从二进制文件反序列化(读取) ======
    tutorial::Person p2; // 用于接收反序列化后的对象
    {
        fstream input("person.bin", ios::in | ios::binary);

        // 调用 ParseFromIstream 解析文件内容
        if (!p2.ParseFromIstream(&input)) {
            cerr << "Failed to read person data." << endl;
            return -1;
        }

        cout << "✅ 已从 person.bin 文件反序列化" << endl;
    }

    // ====== 输出反序列化结果 ======
    cout << "\n--- 反序列化结果 ---" << endl;
    cout << "Name: " << p2.name() << endl;  // 访问 name 字段
    cout << "Age: " << p2.age() << endl;    // 访问 age 字段
    cout << "Phone numbers:" << endl;

    // 输出 repeated 字段内容
    for (int i = 0; i < p2.phone_numbers_size(); ++i) {
        cout << "  " << p2.phone_numbers(i) << endl;
    }

    // ====== 序列化为字符串(常用于网络传输) ======
    string data; // 存储序列化后的二进制字符串
    if (p.SerializeToString(&data)) {
        cout << "\n序列化为字符串成功,长度: " << data.size() << endl;
    }

    // ====== 从字符串反序列化 ======
    tutorial::Person p3;
    if (p3.ParseFromString(data)) {
        cout << "从字符串反序列化成功: "
             << p3.name() << ", age=" << p3.age() << endl;
    }

    // 释放 protobuf 使用的全局资源
    google::protobuf::ShutdownProtobufLibrary();
    return 0;
}
直接进行编译好吧!!
cpp
g++ main.cpp person.pb.cc -o Test -std=c++11 -lprotobuf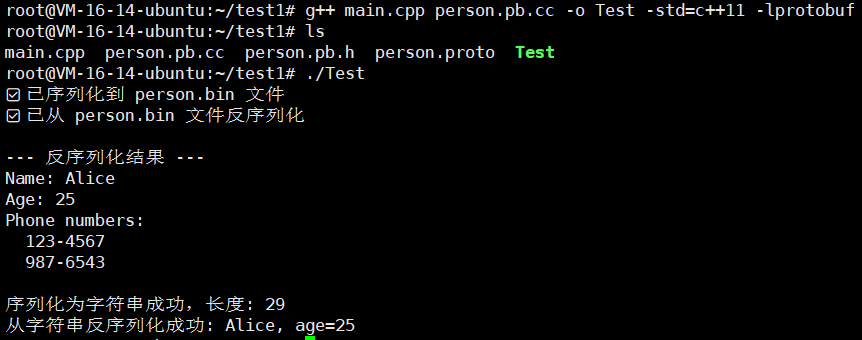
还是很不错的吗!!
1.3.2.修改 和 删除 repeated 字段
我们换一个main.cpp
cpp
#include <iostream>
#include "person.pb.h"

using namespace std;

int main() {
    GOOGLE_PROTOBUF_VERIFY_VERSION;

    tutorial::Person p;
    p.set_name("Alice");
    p.set_age(25);

    // 添加电话号码
    p.add_phone_numbers("123-4567");
    p.add_phone_numbers("987-6543");
    p.add_phone_numbers("555-0000");

    cout << "初始电话号码列表:" << endl;
    for (int i = 0; i < p.phone_numbers_size(); ++i) {
        cout << "  [" << i << "] " << p.phone_numbers(i) << endl;
    }

    // 修改第 2 个号码(下标从 0 开始)
    if (p.phone_numbers_size() > 1) {
        p.set_phone_numbers(1, "111-2222");
        cout << "\n修改第2个号码为 '111-2222' 后:" << endl;
        for (int i = 0; i < p.phone_numbers_size(); ++i) {
            cout << "  [" << i << "] " << p.phone_numbers(i) << endl;
        }
    }

    // 删除最后一个号码
    if (p.phone_numbers_size() > 0) {
        p.mutable_phone_numbers()->RemoveLast();
        cout << "\n删除最后一个号码后:" << endl;
        for (int i = 0; i < p.phone_numbers_size(); ++i) {
            cout << "  [" << i << "] " << p.phone_numbers(i) << endl;
        }
    }

    // 清空整个 repeated 字段
    p.clear_phone_numbers();
    cout << "\n清空后 phone_numbers_size() = " << p.phone_numbers_size() << endl;

    google::protobuf::ShutdownProtobufLibrary();
    return 0;
}
还是老样子,我们进行编译
cpp
g++ main.cpp person.pb.cc -o Test -std=c++11 -lprotobuf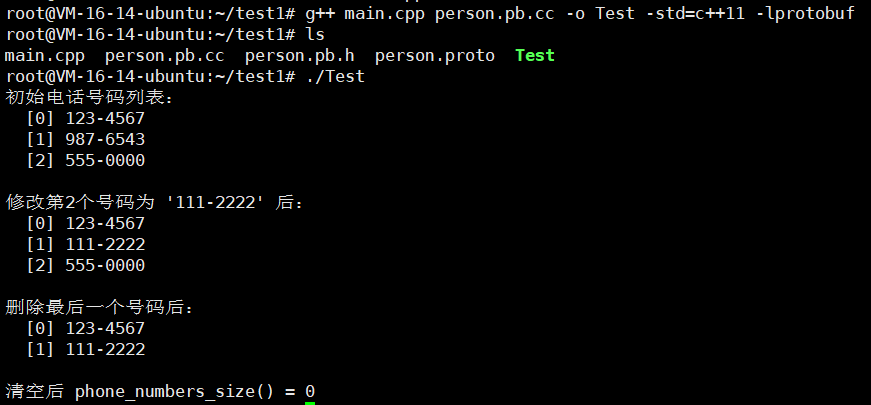
当然,我们还是需要学习一下序列化和反序列化的版本
cpp
#include <iostream>
#include <fstream>      // 用于文件读写
#include "person.pb.h"

using namespace std;

int main() {
    GOOGLE_PROTOBUF_VERIFY_VERSION;

    // ====== 创建对象并设置字段 ======
    tutorial::Person p;
    p.set_name("Alice");
    p.set_age(25);

    // 添加 repeated 字段(电话号码)
    p.add_phone_numbers("123-4567");
    p.add_phone_numbers("987-6543");
    p.add_phone_numbers("555-0000");

    cout << "初始电话号码列表:" << endl;
    for (int i = 0; i < p.phone_numbers_size(); ++i) {
        cout << "  [" << i << "] " << p.phone_numbers(i) << endl;
    }

    // ====== 修改 repeated 字段中第 2 个元素 ======
    if (p.phone_numbers_size() > 1) {
        p.set_phone_numbers(1, "111-2222");
        cout << "\n修改第2个号码为 '111-2222' 后:" << endl;
        for (int i = 0; i < p.phone_numbers_size(); ++i) {
            cout << "  [" << i << "] " << p.phone_numbers(i) << endl;
        }
    }

    // ====== 删除最后一个号码 ======
    if (p.phone_numbers_size() > 0) {
        p.mutable_phone_numbers()->RemoveLast();
        cout << "\n删除最后一个号码后:" << endl;
        for (int i = 0; i < p.phone_numbers_size(); ++i) {
            cout << "  [" << i << "] " << p.phone_numbers(i) << endl;
        }
    }

    // ====== 序列化到文件 ======
    {
        fstream output("person_repeated.bin", ios::out | ios::trunc | ios::binary);
        if (!p.SerializeToOstream(&output)) {
            cerr << "❌ 写入文件失败" << endl;
            return -1;
        }
        cout << "\n✅ 已序列化到文件 person_repeated.bin" << endl;
    }

    // ====== 从文件反序列化 ======
    tutorial::Person p2;
    {
        fstream input("person_repeated.bin", ios::in | ios::binary);
        if (!p2.ParseFromIstream(&input)) {
            cerr << "❌ 读取文件失败" << endl;
            return -1;
        }
        cout << "✅ 已从文件反序列化" << endl;
    }

    // ====== 输出反序列化结果 ======
    cout << "\n--- 反序列化结果 ---" << endl;
    cout << "Name: " << p2.name() << endl;
    cout << "Age: " << p2.age() << endl;
    cout << "Phone numbers:" << endl;
    for (int i = 0; i < p2.phone_numbers_size(); ++i) {
        cout << "  [" << i << "] " << p2.phone_numbers(i) << endl;
    }

    // ====== 序列化为字符串并再次解析 ======
    string data;
    if (p2.SerializeToString(&data)) {
        cout << "\n序列化为字符串成功,长度: " << data.size() << endl;
    }

    tutorial::Person p3;
    if (p3.ParseFromString(data)) {
        cout << "从字符串反序列化成功 -> 姓名: "
             << p3.name() << ", 电话数量: "
             << p3.phone_numbers_size() << endl;
    }

    // ====== 清理资源 ======
    google::protobuf::ShutdownProtobufLibrary();
    return 0;
}
我们进行编译一下
cpp
g++ main.cpp person.pb.cc -o Test -std=c++11 -lprotobuf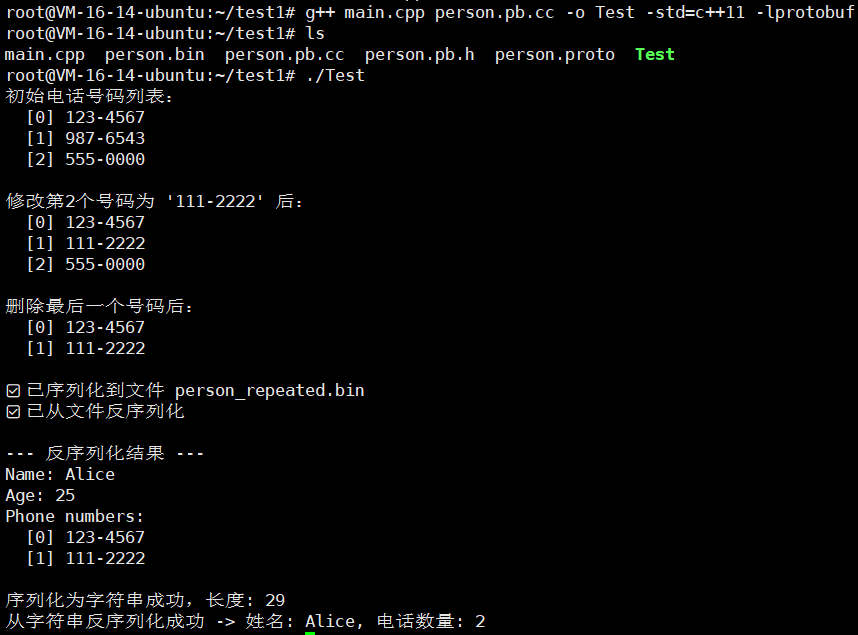
1.3.3.修改和删除
还是熟悉的配方,我们先写一个main.cpp
cpp
#include <iostream>
#include "person.pb.h"

using namespace std;

int main() {
    GOOGLE_PROTOBUF_VERIFY_VERSION;

    tutorial::Person p;

    // 初始设置
    p.set_name("Alice");
    p.set_age(25);
    p.add_phone_numbers("123-4567");
    p.add_phone_numbers("987-6543");

    cout << "==== 初始值 ====" << endl;
    cout << "Name: " << p.name() << endl;
    cout << "Age: " << p.age() << endl;
    for (int i = 0; i < p.phone_numbers_size(); ++i) {
        cout << "Phone[" << i << "]: " << p.phone_numbers(i) << endl;
    }

    // 修改 name 和 age
    p.set_name("Bob");
    p.set_age(30);

    // 修改 repeated 中的第1个元素
    if (p.phone_numbers_size() > 0)
        p.set_phone_numbers(0, "555-9999");

    cout << "\n==== 修改后 ====" << endl;
    cout << "Name: " << p.name() << endl;
    cout << "Age: " << p.age() << endl;
    for (int i = 0; i < p.phone_numbers_size(); ++i) {
        cout << "Phone[" << i << "]: " << p.phone_numbers(i) << endl;
    }

    // 删除(清空)singular 字段
    p.clear_name();  // 删除 name 字段,变为空字符串 ""
    p.clear_age();   // 删除 age 字段,变为 0

    // 删除(清空)repeated 字段
    p.clear_phone_numbers();

    cout << "\n==== 清空后 ====" << endl;
    cout << "Name: '" << p.name() << "'" << endl;  // 空字符串
    cout << "Age: " << p.age() << endl;            // 0
    cout << "Phone count: " << p.phone_numbers_size() << endl;

    google::protobuf::ShutdownProtobufLibrary();
    return 0;
}
我们还是编译运行一下

怎么样?还行不。
话不多说,我们直接讲讲序列化和反序列化版本
cpp
#include <iostream>
#include <fstream>
#include "person.pb.h"

using namespace std;

int main() {
    GOOGLE_PROTOBUF_VERIFY_VERSION;

    // ====== 创建并初始化对象 ======
    tutorial::Person p;
    p.set_name("Alice");
    p.set_age(25);
    p.add_phone_numbers("123-4567");
    p.add_phone_numbers("987-6543");

    cout << "==== 初始值 ====" << endl;
    cout << "Name: " << p.name() << endl;
    cout << "Age: " << p.age() << endl;
    for (int i = 0; i < p.phone_numbers_size(); ++i)
        cout << "Phone[" << i << "]: " << p.phone_numbers(i) << endl;

    // ====== 修改字段 ======
    p.set_name("Bob");
    p.set_age(30);
    if (p.phone_numbers_size() > 0)
        p.set_phone_numbers(0, "555-9999");

    cout << "\n==== 修改后 ====" << endl;
    cout << "Name: " << p.name() << endl;
    cout << "Age: " << p.age() << endl;
    for (int i = 0; i < p.phone_numbers_size(); ++i)
        cout << "Phone[" << i << "]: " << p.phone_numbers(i) << endl;

    // ====== 序列化到二进制文件 ======
    {
        fstream output("person_update.bin", ios::out | ios::trunc | ios::binary);
        if (!p.SerializeToOstream(&output)) {
            cerr << "❌ 写入文件失败" << endl;
            return -1;
        }
        cout << "\n✅ 已序列化到文件 person_update.bin" << endl;
    }

    // ====== 从文件反序列化 ======
    tutorial::Person p2;
    {
        fstream input("person_update.bin", ios::in | ios::binary);
        if (!p2.ParseFromIstream(&input)) {
            cerr << "❌ 读取文件失败" << endl;
            return -1;
        }
        cout << "✅ 已从文件反序列化" << endl;
    }

    cout << "\n==== 反序列化结果 ====" << endl;
    cout << "Name: " << p2.name() << endl;
    cout << "Age: " << p2.age() << endl;
    for (int i = 0; i < p2.phone_numbers_size(); ++i)
        cout << "Phone[" << i << "]: " << p2.phone_numbers(i) << endl;

    // ====== 清空字段 ======
    p2.clear_name();
    p2.clear_age();
    p2.clear_phone_numbers();

    cout << "\n==== 清空后 ====" << endl;
    cout << "Name: '" << p2.name() << "'" << endl;  // 空字符串
    cout << "Age: " << p2.age() << endl;            // 0
    cout << "Phone count: " << p2.phone_numbers_size() << endl;

    // ====== 再次序列化并验证 ======
    {
        fstream output("person_cleared.bin", ios::out | ios::trunc | ios::binary);
        if (!p2.SerializeToOstream(&output)) {
            cerr << "❌ 写入清空数据失败" << endl;
            return -1;
        }
        cout << "\n✅ 已将清空后的数据写入 person_cleared.bin" << endl;
    }

    // ====== 从清空后的文件再反序列化验证 ======
    tutorial::Person p3;
    {
        fstream input("person_cleared.bin", ios::in | ios::binary);
        if (!p3.ParseFromIstream(&input)) {
            cerr << "❌ 读取清空数据失败" << endl;
            return -1;
        }
        cout << "✅ 已从清空文件反序列化" << endl;
    }

    cout << "\n==== 再次反序列化结果 ====" << endl;
    cout << "Name: '" << p3.name() << "'" << endl;
    cout << "Age: " << p3.age() << endl;
    cout << "Phone count: " << p3.phone_numbers_size() << endl;

    // ====== 清理 protobuf 库 ======
    google::protobuf::ShutdownProtobufLibrary();
    return 0;
}
还是老样子,我们编译一下
cpp
g++ main.cpp person.pb.cc -o Test -std=c++11 -lprotobuf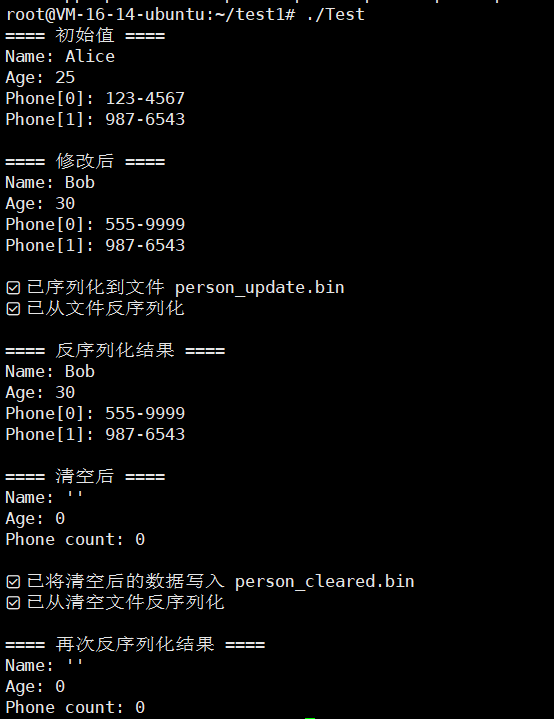
1.4.简单示例2
我们编写一下.proto文件
cpp
syntax = "proto3";
package contact2;

message Person {
  string name = 1;
  int32 age = 2;
  repeated string phone_numbers = 3; // 一个人可以有多个电话号码
}
我们保存退出,我们进行编译一下
cpp
protoc --cpp_out=. contacts2.proto
特别注意我们这里生成的文件的名字啊!!!
现在来编写一下.cpp代码
main.cpp
cpp
#include <iostream>
#include "contacts2.pb.h"  // 引入编译生成的头文件

using namespace std;

int main() {
    string person_str;

    // 序列化
    contact2::Person person_src;
    person_src.set_name("张三");
    person_src.set_age(20);

    // 重点:测试 repeated 字段 - 添加多个电话号码
    person_src.add_phone_numbers("138-1234-5678");
    person_src.add_phone_numbers("010-8765-4321");
    person_src.add_phone_numbers("155-5555-5555");

    // 调用序列化方法
    if (!person_src.SerializeToString(&person_str)) {
        cout << "序列化失败" << endl;
        return -1;
    }

    cout << "序列化成功,数据长度: " << person_str.length() << " 字节" << endl;

    // 反序列化
    contact2::Person person_dst;
    if (!person_dst.ParseFromString(person_str)) {
        cout << "反序列化失败" << endl;
        return -1;
    }

    // 打印基本信息
    cout << "\n=== 反序列化结果 ===" << endl;
    cout << "姓名: " << person_dst.name() << endl;
    cout << "年龄: " << person_dst.age() << endl;

    // 重点:打印 repeated 字段(电话号码)
    cout << "电话号码列表 (共" << person_dst.phone_numbers_size() << "个):" << endl;
    for (int i = 0; i < person_dst.phone_numbers_size(); i++) {
        cout << "  " << (i + 1) << ". " << person_dst.phone_numbers(i) << endl;
    }

    // 演示如何操作 repeated 字段
    cout << "\n=== repeated 字段操作演示 ===" << endl;

    // 1. 获取 repeated 字段数量
    cout << "电话号码数量: " << person_dst.phone_numbers_size() << endl;

    // 2. 遍历所有电话号码
    cout << "所有电话号码:" << endl;
    for (int i = 0; i < person_dst.phone_numbers_size(); i++) {
        cout << "  - " << person_dst.phone_numbers(i) << endl;
    }

    // 3. 获取第一个和最后一个电话号码
    if (person_dst.phone_numbers_size() > 0) {
        cout << "第一个号码: " << person_dst.phone_numbers(0) << endl;
        cout << "最后一个号码: " << person_dst.phone_numbers(person_dst.phone_numbers_size() - 1) << endl;
    }

    return 0;
}
接下来我们进行编译
cpp
g++ main.cpp contacts2.pb.cc -o TestProtoBuf -std=c++11 -lprotobuf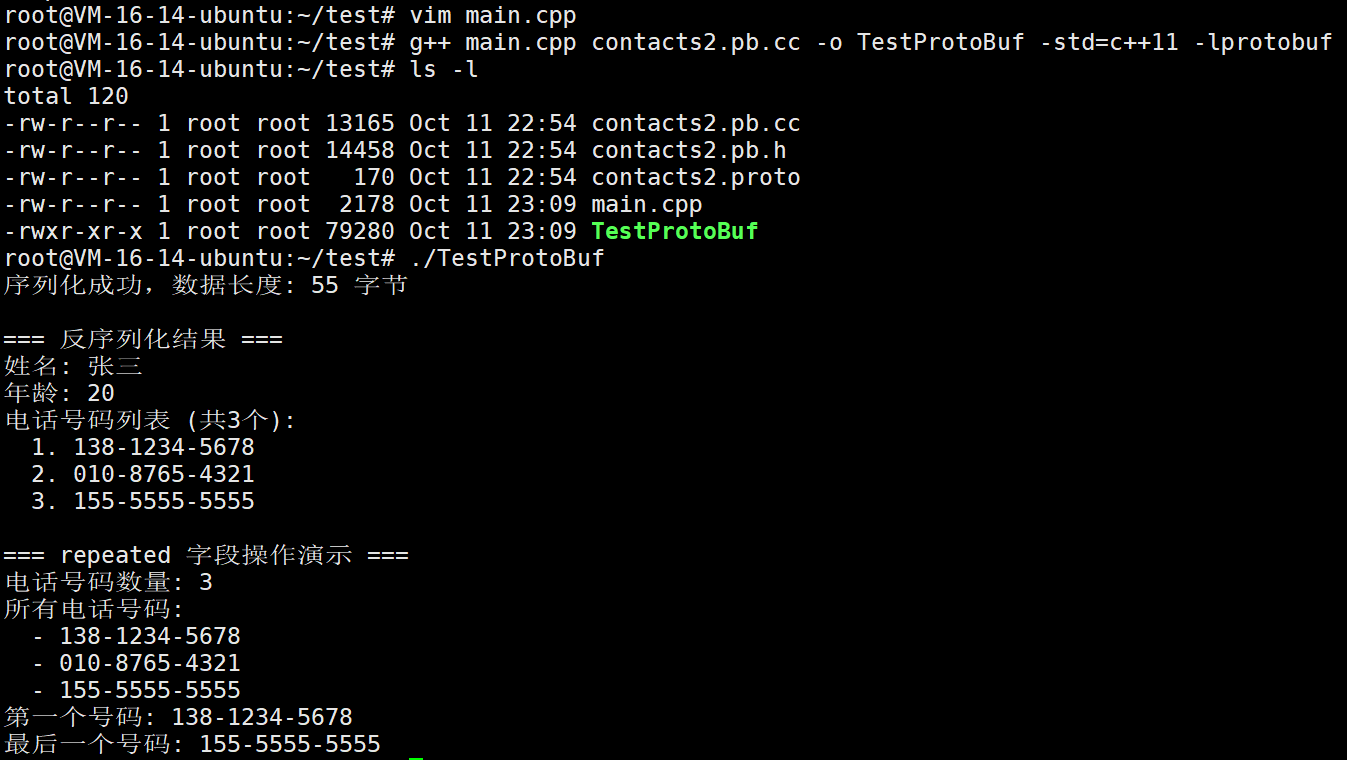
还是很简单的吧!!!
二.消息类型的定义和使用
2.1.消息类型的定义
嵌套定义方式
cpp
syntax = "proto3";
package contacts;

message PeopleInfo {
  string name = 1;
  int32 age = 2;

  // 在 PeopleInfo 内部定义 Phone 消息类型
  message Phone {
    string number = 1;
  }
}
特点:
- Phone 消息被嵌套定义在 PeopleInfo 内部
- 这种嵌套关系在逻辑上表示Phone 属于 PeopleInfo 的一部分
- 适用于只在父消息内部使用的类型
非嵌套定义方式
cpp
syntax = "proto3";
package contacts;

// Phone 作为独立的消息类型定义
message Phone {
  string number = 1;
}

message PeopleInfo {
  string name = 1;
  int32 age = 2;
}
特点:
- Phone 和 PeopleInfo 是平级的消息类型
- 适用于需要在多个地方重用的消息类型
2.2. 消息类型的使用
方式一:在同一个文件中使用消息类型
cpp
syntax = "proto3";
package contacts;

message PeopleInfo {
  string name = 1;
  int32 age = 2;

  message Phone {
    string number = 1;
  }

  // 使用 Phone 消息类型作为字段
  repeated Phone phone = 3;
}
关键点:
- repeated Phone phone = 3; 表示 phone 字段是一个 Phone 类型的数组
- 可以直接使用同一文件中定义的消息类型作为字段类型
- repeated 关键字表示该字段可以包含多个值(列表)
方式二:导入其他 .proto 文件中的消息
phone.proto 文件:
cpp
syntax = "proto3";
package phone;  // 声明包名

message Phone {
  string number = 1;
}
contacts.proto 文件:
cpp
syntax = "proto3";
package contacts;
import "phone.proto";  // 导入 phone.proto 文件

message PeopleInfo {
  string name = 1;
  int32 age = 2;

  // 使用导入的 Phone 消息类型
  repeated phone.Phone phone = 3;
}
重要规则:
- 使用 import 语句导入:import "phone.proto";
- 需要指定命名空间:由于导入的文件声明了 package phone;,使用时必须用 phone.Phone 格式
- 跨包引用:通过 包名.消息类型 的方式来引用
2.3.简单示例
2.3.1.在同一个 .proto 文件中使用消息类型
非嵌套版本
我们先编写一个contacts.proto
cpp
syntax = "proto3";
package tutorial;

// 定义一个子消息类型:电话号码信息
message PhoneNumber {
  string number = 1;
  string type = 2;  // 比如 "home", "work"
}

// 定义一个主消息类型:联系人
message Person {
  string name = 1;
  int32 age = 2;
  repeated PhoneNumber phones = 3; // 在同一个文件中使用另一个消息类型
}
✅ 注意:Person 中的 phones 字段使用了上面定义的 PhoneNumber 类型。
然后我们进行编译一下
cpp
protoc --cpp_out=. contacts.proto
接下来我们写一个main.cpp
cpp
#include <iostream>
#include "contacts.pb.h"

using namespace std;

int main() {
    GOOGLE_PROTOBUF_VERIFY_VERSION;

    tutorial::Person person;
    person.set_name("Alice");
    person.set_age(25);

    // 添加第一个电话
    tutorial::PhoneNumber* home = person.add_phones();
    home->set_number("123-4567");
    home->set_type("home");

    // 添加第二个电话
    tutorial::PhoneNumber* work = person.add_phones();
    work->set_number("987-6543");
    work->set_type("work");

    // 输出
    cout << "Name: " << person.name() << endl;
    cout << "Age: " << person.age() << endl;

    for (int i = 0; i < person.phones_size(); ++i) {
        const tutorial::PhoneNumber& ph = person.phones(i);
        cout << "Phone[" << i << "]: " << ph.number()
             << " (" << ph.type() << ")" << endl;
    }

    google::protobuf::ShutdownProtobufLibrary();
    return 0;
}
我们编译运行一下
cpp
g++ main.cpp contacts.pb.cc -o Test -std=c++11 -lprotobuf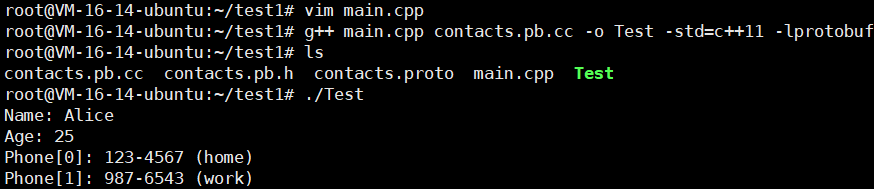
怎么样?还是很OK的吧!!
我还是想讲讲序列化和反序列化版本
cpp
#include <iostream>
#include <fstream>
#include "contacts.pb.h"

using namespace std;

int main() {
    GOOGLE_PROTOBUF_VERIFY_VERSION;

    // ===============================
    // 1. 创建并填充 Person 对象
    // ===============================
    tutorial::Person person;
    person.set_name("Alice");
    person.set_age(25);

    // 添加第一个电话
    tutorial::PhoneNumber* home = person.add_phones();
    home->set_number("123-4567");
    home->set_type("home");

    // 添加第二个电话
    tutorial::PhoneNumber* work = person.add_phones();
    work->set_number("987-6543");
    work->set_type("work");

    // ===============================
    // 2. 序列化到二进制文件
    // ===============================
    {
        fstream output("person.bin", ios::out | ios::trunc | ios::binary);
        if (!person.SerializeToOstream(&output)) {
            cerr << "Failed to write person.bin." << endl;
            return -1;
        }
        cout << "✅ 已序列化到 person.bin" << endl;
    }

    // ===============================
    // 3. 从文件反序列化
    // ===============================
    tutorial::Person person2;
    {
        fstream input("person.bin", ios::in | ios::binary);
        if (!input) {
            cerr << "person.bin 不存在" << endl;
            return -1;
        } else if (!person2.ParseFromIstream(&input)) {
            cerr << "反序列化失败" << endl;
            return -1;
        }
        cout << "✅ 已从 person.bin 反序列化" << endl;
    }

    // ===============================
    // 4. 打印反序列化后的内容
    // ===============================
    cout << "\n==== 反序列化结果 ====\n";
    cout << "Name: " << person2.name() << endl;
    cout << "Age: " << person2.age() << endl;

    for (int i = 0; i < person2.phones_size(); ++i) {
        const tutorial::PhoneNumber& ph = person2.phones(i);
        cout << "Phone[" << i << "]: " << ph.number()
             << " (" << ph.type() << ")" << endl;
    }

    google::protobuf::ShutdownProtobufLibrary();
    return 0;
}
编译一下
cpp
g++ main.cpp contacts.pb.cc -o Test -std=c++11 -lprotobuf
嵌套版本
我们重新编写这个contacts.proto
cpp
syntax = "proto3";
package tutorial;

message Person {
  string name = 1;
  int32 age = 2;

  //在 Person 内部定义一个嵌套消息类型
  message PhoneNumber {
    string number = 1;
    string type = 2;
  }

  // 在 Person 内使用内部定义的消息类型
  repeated PhoneNumber phones = 3;
}
💡 PhoneNumber 现在是 Person 的"内部类型",使用时要写成:tutorial::Person::PhoneNumber
话不多说,直接编译
cpp
protoc --cpp_out=. contacts.proto接下来我们来编写一下我们的main.cpp
cpp
#include <iostream>
#include "contacts.pb.h"

using namespace std;

int main() {
    GOOGLE_PROTOBUF_VERIFY_VERSION;

    tutorial::Person person;
    person.set_name("Alice");
    person.set_age(25);

    // 添加第一个电话
    tutorial::Person::PhoneNumber* home = person.add_phones();
    home->set_number("123-4567");
    home->set_type("home");

    // 添加第二个电话
    tutorial::Person::PhoneNumber* work = person.add_phones();
    work->set_number("987-6543");
    work->set_type("work");

    // 输出
    cout << "Name: " << person.name() << endl;
    cout << "Age: " << person.age() << endl;

    for (int i = 0; i < person.phones_size(); ++i) {
        const tutorial::Person::PhoneNumber& ph = person.phones(i);
        cout << "Phone[" << i << "]: " << ph.number()
             << " (" << ph.type() << ")" << endl;
    }

    google::protobuf::ShutdownProtobufLibrary();
    return 0;
}
我们直接进行编译好吧
cpp
g++ main.cpp contacts.pb.cc -o Test -std=c++11 -lprotobuf
怎么样?是不是已经搞得差不多懂了?
老样子,还是搞一下序列化和反序列化版本
cpp
#include <iostream>
#include <fstream>
#include "contacts.pb.h"

using namespace std;

int main() {
    GOOGLE_PROTOBUF_VERIFY_VERSION;

    // ===============================
    // 1. 创建并填充 Person 对象
    // ===============================
    tutorial::Person person;
    person.set_name("Alice");
    person.set_age(25);

    // 添加第一个电话
    tutorial::Person::PhoneNumber* home = person.add_phones();
    home->set_number("123-4567");
    home->set_type("home");

    // 添加第二个电话
    tutorial::Person::PhoneNumber* work = person.add_phones();
    work->set_number("987-6543");
    work->set_type("work");

    // ===============================
    // 2. 序列化到二进制文件
    // ===============================
    {
        fstream output("person_nested.bin", ios::out | ios::trunc | ios::binary);
        if (!person.SerializeToOstream(&output)) {
            cerr << "❌ 序列化失败 (无法写入 person_nested.bin)" << endl;
            return -1;
        }
        cout << "✅ 已序列化到 person_nested.bin" << endl;
    }

    // ===============================
    // 3. 从文件反序列化
    // ===============================
    tutorial::Person person2;
    {
        fstream input("person_nested.bin", ios::in | ios::binary);
        if (!input) {
            cerr << "❌ person_nested.bin 不存在" << endl;
            return -1;
        }
        if (!person2.ParseFromIstream(&input)) {
            cerr << "❌ 反序列化失败" << endl;
            return -1;
        }
        cout << "✅ 已从 person_nested.bin 反序列化" << endl;
    }

    // ===============================
    // 4. 打印反序列化后的内容
    // ===============================
    cout << "\n==== 反序列化结果 ====\n";
    cout << "Name: " << person2.name() << endl;
    cout << "Age: " << person2.age() << endl;

    for (int i = 0; i < person2.phones_size(); ++i) {
        const tutorial::Person::PhoneNumber& ph = person2.phones(i);
        cout << "Phone[" << i << "]: " << ph.number()
             << " (" << ph.type() << ")" << endl;
    }

    google::protobuf::ShutdownProtobufLibrary();
    return 0;
}
还是OK的吧!!
2.3.2.导入其他 .proto 文件中的消息
在同一个package里面
它在中大型项目里最常见,比如把通用结构定义在一个单独的文件中,让多个 .proto 文件都能共享。
文件一:common.proto
定义可复用的结构体,比如电话号码。
cpp
syntax = "proto3";
package tutorial;

// 公共类型:电话号码
message PhoneNumber {
  string number = 1;
  string type = 2;
}
文件二:person.proto
导入上面的 common.proto 并使用其中的 PhoneNumber。
cpp
syntax = "proto3";
package tutorial;

//  导入另一个 proto 文件
import "common.proto";

message Person {
  string name = 1;
  int32 age = 2;
  repeated PhoneNumber phones = 3;  // 使用来自 common.proto 的类型
}
💡 这里因为两个文件都在同一个 package tutorial 下,
所以可以直接写 PhoneNumber 而不用加包名。
如果包名不同,需要写成 包名.PhoneNumber。
我们编译一下
cpp
protoc --cpp_out=. person.proto common.proto
接下来我们就来编写main.cpp
cpp
#include <iostream>
#include "person.pb.h"

using namespace std;

int main() {
    GOOGLE_PROTOBUF_VERIFY_VERSION;

    tutorial::Person person;
    person.set_name("Alice");
    person.set_age(25);

    // 添加电话号码(类型定义在 common.proto)
    tutorial::PhoneNumber* home = person.add_phones();
    home->set_number("123-4567");
    home->set_type("home");

    tutorial::PhoneNumber* work = person.add_phones();
    work->set_number("987-6543");
    work->set_type("work");

    // 输出
    cout << "Name: " << person.name() << endl;
    cout << "Age: " << person.age() << endl;

    for (int i = 0; i < person.phones_size(); ++i) {
        const tutorial::PhoneNumber& ph = person.phones(i);
        cout << "Phone[" << i << "]: " << ph.number()
             << " (" << ph.type() << ")" << endl;
    }

    google::protobuf::ShutdownProtobufLibrary();
    return 0;
}
我们直接编译运行一下
cpp
g++ main.cpp person.pb.cc common.pb.cc -o TestProtoBuf -std=c++11 -lprotobuf
还行吧!!
跨 package import
在不同包之间引用消息类型。
这在大型项目中非常常见,比如多个模块共享"公共数据结构"。
文件一:common.proto
cpp
syntax = "proto3";
package common;

// 定义一个通用的电话号码结构
message PhoneNumber {
  string number = 1;
  string type = 2; // e.g. "home", "work"
}
文件二:person.proto
cpp
syntax = "proto3";
package people;

// 导入 common 包的定义
import "common.proto";

message Person {
  string name = 1;
  int32 age = 2;

  // 注意这里必须加上包名前缀 common.PhoneNumber
  repeated common.PhoneNumber phones = 3;
}
💡 因为 PhoneNumber 定义在 common 包中,
所以这里要写成 common.PhoneNumber。
现在我们就来编译
cpp
protoc --cpp_out=. person.proto common.proto我们写一下我们的main.cpp
cpp
#include <iostream>
#include "person.pb.h"
#include "common.pb.h"

using namespace std;

int main() {
    GOOGLE_PROTOBUF_VERIFY_VERSION;

    people::Person person;
    person.set_name("Alice");
    person.set_age(25);

    // 添加电话号码(类型来自 common 包)
    common::PhoneNumber* home = person.add_phones();
    home->set_number("123-4567");
    home->set_type("home");

    common::PhoneNumber* work = person.add_phones();
    work->set_number("987-6543");
    work->set_type("work");

    // 输出
    cout << "Name: " << person.name() << endl;
    cout << "Age: " << person.age() << endl;

    for (int i = 0; i < person.phones_size(); ++i) {
        const common::PhoneNumber& ph = person.phones(i);
        cout << "Phone[" << i << "]: " << ph.number()
             << " (" << ph.type() << ")" << endl;
    }

    google::protobuf::ShutdownProtobufLibrary();
    return 0;
}
现在我们来编译一下这个.cpp文件
cpp
g++ main.cpp person.pb.cc common.pb.cc -o TestProtoBuf -std=c++11 -lprotobuf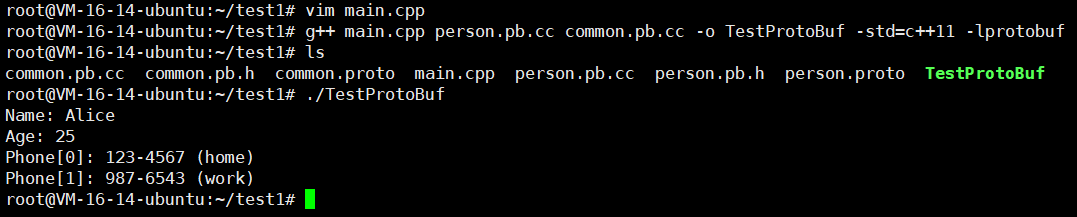
跨目录 + 跨 package
话不多说,我们先使用下面这个命令来一键搭建出我们的目录结构和文件内容
cpp
mkdir -p project/proto/common project/proto/people && \
echo 'syntax = "proto3";
package common;

// 公共结构:电话号码
message PhoneNumber {
  string number = 1;
  string type = 2;
}' > project/proto/common/common.proto && \
echo 'syntax = "proto3";
package people;

import "common/common.proto";

message Person {
  string name = 1;
  int32 age = 2;
  repeated common.PhoneNumber phones = 3;
}' > project/proto/people/person.proto && \
echo '#include <iostream>
#include "people/person.pb.h"
#include "common/common.pb.h"

using namespace std;

int main() {
    GOOGLE_PROTOBUF_VERIFY_VERSION;

    people::Person person;
    person.set_name("Bob");
    person.set_age(32);

    common::PhoneNumber* mobile = person.add_phones();
    mobile->set_number("139-0000-0000");
    mobile->set_type("mobile");

    common::PhoneNumber* office = person.add_phones();
    office->set_number("021-88888888");
    office->set_type("office");

    cout << "Name: " << person.name() << endl;
    cout << "Age: " << person.age() << endl;

    for (int i = 0; i < person.phones_size(); ++i) {
        const common::PhoneNumber& ph = person.phones(i);
        cout << "Phone[" << i << "]: " << ph.number()
             << " (" << ph.type() << ")" << endl;
    }

    google::protobuf::ShutdownProtobufLibrary();
    return 0;
}' > project/main.cpp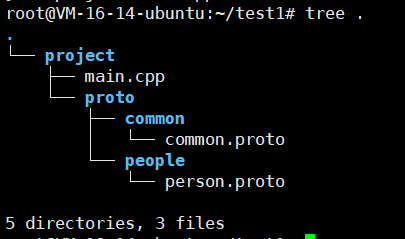
我们来仔细看看
proto/common/common.proto
cpp
syntax = "proto3";
package common;

// 公共结构:电话号码
message PhoneNumber {
  string number = 1;
  string type = 2;
}
proto/people/person.proto
cpp
syntax = "proto3";
package people;

// 导入上级目录下 common 包的定义
import "common/common.proto";

message Person {
  string name = 1;
  int32 age = 2;
  repeated common.PhoneNumber phones = 3;
}注意:这里的 import "common/common.proto"; 是相对路径导入(相对于 --proto_path 指定的目录)。
在**项目根目录(也就是project目录)**执行:
cpp
protoc -I=proto --cpp_out=. proto/people/person.proto proto/common/common.proto执行完后,我们看看project目录的情况
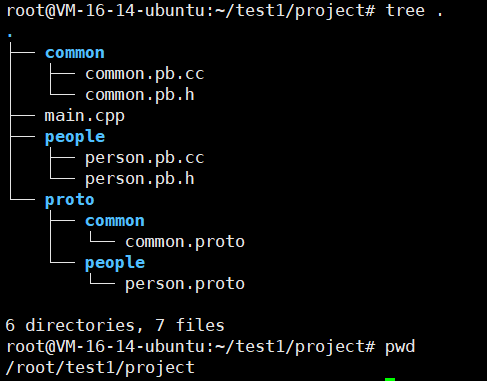
我们再看看我们的main.cpp
cpp
#include <iostream>
#include "people/person.pb.h"
#include "common/common.pb.h"

using namespace std;

int main() {
    GOOGLE_PROTOBUF_VERIFY_VERSION;

    people::Person person;
    person.set_name("Bob");
    person.set_age(32);

    common::PhoneNumber* mobile = person.add_phones();
    mobile->set_number("139-0000-0000");
    mobile->set_type("mobile");

    common::PhoneNumber* office = person.add_phones();
    office->set_number("021-88888888");
    office->set_type("office");

    cout << "Name: " << person.name() << endl;
    cout << "Age: " << person.age() << endl;

    for (int i = 0; i < person.phones_size(); ++i) {
        const common::PhoneNumber& ph = person.phones(i);
        cout << "Phone[" << i << "]: " << ph.number()
             << " (" << ph.type() << ")" << endl;
    }

    google::protobuf::ShutdownProtobufLibrary();
    return 0;
}
我们还是在我们的project目录里面进行编译啊
cpp
g++ main.cpp common/common.pb.cc people/person.pb.cc -o TestProtoBuf -std=c++11 -lprotobuf
还是很不错的!!
关于import 语句
protoc 在解析 import 语句时,最核心的思想是:**它需要一个或多个"根"目录作为查找的起点。**它不会在你的整个文件系统中漫无目的地搜索,而是基于你提供的这些根目录来定位文件。
详细的查找规则与顺序
1. 优先查找:通过 -I 或 --proto_path 指定的路径
这是最常用、最推荐的方式。你可以通过 -I(或 --proto_path,两者等价)参数来告诉 protoc:"请把这个目录作为我所有 .proto 文件的根目录"。
规则细节:
**可以指定多个 -I 路径。**protoc 会按照你在命令行中给出的顺序依次查找。
**查找过程是路径拼接。**当 protoc 遇到 import "common/common.proto"; 时,它会这样做:
- 取出 -I 指定的目录,例如 proto。
- 将 import 的路径 "common/common.proto" 拼接到这个目录后面,形成 proto/common/common.proto。
- 检查这个路径下的文件是否存在。如果存在,就使用它;如果不存在,就继续尝试下一个 -I 目录。
举个例子:
假设你的项目结构如下:
cpp
my_project/
├── proto/           <-- 我们指定的根目录
│   ├── common/
│   │   └── common.proto
│   └── main.proto   <-- 这里有一行:import "common/common.proto";
└── generated/
你执行的命令是:
cpp
protoc -I=proto main.proto common/common.proto --cpp_out=generated当 protoc 解析 main.proto 中的 import "common/common.proto"; 时:
- 它会将 -I=proto 和 "common/common.proto" 拼接。
- 最终找到 proto/common/common.proto 文件。
关键点: import 语句中的路径是相对于你提供的 -I 根目录的。
2. 备用查找:系统默认路径
如果在所有通过 -I 指定的路径中都找不到被 import 的文件,protoc 会尝试一个备用的系统默认路径。
这个路径通常是 protoc 编译器安装时自带的,或者指向系统的一些标准安装位置(例如 /usr/include 等)。
强烈不推荐依赖这种方式! 因为:
- 可移植性差:你的同事或构建服务器的这个路径可能完全不同。
- 版本混乱:你可能会意外地引入一个不兼容的旧版本 proto 文件。
- 意图不清晰:项目依赖关系不明确。
三.enum类型
3.1.基本语法
定义规则
基本语法
cpp
enum PhoneType {
  MP = 0;   // 移动电话
  TEL = 1;  // 固定电话
}
命名规范
枚举类型名称:驼峰命名法,首字母大写
- ✅ MyEnum, PhoneType, UserStatus
- ❌ myEnum, phone_type
常量值名称:全大写,下划线分隔
- ✅ ENUM_CONST = 0, MOBILE_PHONE = 1
- ❌ enumConst = 0, mobilePhone = 1
重要规则
- **0值常量必须存在,且要作为第⼀个元素。**这是为了与proto2的语义兼容:第⼀个元素作为默认值,且值为0。
- 枚举类型可以在消息外定义,也可以在消息体内定义(嵌套)。
- 枚举的常量值在32位整数的范围内。但因负值⽆效因⽽不建议使⽤(与编码规则有关)。
定义时的注意事项
- 情况1:同级枚举不能重名
cpp
// ❌ 错误:同级枚举包含相同常量名称
enum PhoneType {
  MP = 0;    // 移动电话
  TEL = 1;   // 固定电话
}

enum PhoneTypeCopy {
  MP = 0;    // 编译错误:MP 已经被定义
  TEL = 1;   // 编译错误:TEL 已经被定义
}
原因:在同一层级中,所有枚举常量必须在整个作用域内唯一。
- 情况2:嵌套枚举可以重名
cpp
// ✅ 正确:外层枚举
enum PhoneType {
  MP = 0;    // 移动电话
  TEL = 1;   // 固定电话
}

// ✅ 正确:消息内的嵌套枚举可以使用相同常量名
message Phone {
  string number = 1;

  enum PhoneType {
    MP = 0;    // 允许:在消息作用域内
    TEL = 1;   // 允许:与外层枚举不在同一级
  }
}
原因:嵌套枚举在不同的作用域中,不会产生命名冲突。
- 情况3:多文件未声明 package
cpp
// phone1.proto
enum PhoneType {
  MP = 0;
  TEL = 1;
}

// phone2.proto
import "phone1.proto";

enum PhoneTypeCopy {
  MP = 0;    // ❌ 编译错误:MP 已经被导入的文件定义
}
原因:没有 package 声明时,所有导入的文件都在全局作用域,枚举常量不能重名。
- 情况4:多文件声明了 package
cpp
// phone1.proto
package phone1;
enum PhoneType {
  MP = 0;    // ✅ 正确:在不同的包中
  TEL = 1;
}

// phone2.proto
package phone2;
import "phone1.proto";

enum PhoneTypeCopy {
  MP = 0;    // ✅ 正确:在不同的包命名空间中
}
原因:使用 package 后,每个枚举都在各自的命名空间中,不会冲突。
综合示例
cpp
// 指定使用 Protocol Buffers 第3版语法
syntax = "proto3";

// 定义包名,用于防止命名冲突,在生成的代码中会作为命名空间
package example;

// 外层枚举定义 - 用户状态
enum Status {
  // 默认值,表示状态未知或未设置
  UNKNOWN = 0;
  // 活跃状态,用户正在使用系统
  ACTIVE = 1;
  // 非活跃状态,用户暂时不使用系统
  INACTIVE = 2;
}

// 用户信息消息定义
message User {
  // 用户姓名字段,字段编号为1
  string name = 1;

  // 用户状态字段,使用外层定义的Status枚举类型,字段编号为2
  Status status = 2;

  // 嵌套枚举定义 - 用户性别
  // 注意:嵌套枚举与外部枚举不在同一作用域,可以重名
  enum Gender {
    // 默认值,表示未指定性别
    UNSPECIFIED = 0;
    // 男性
    MALE = 1;
    // 女性
    FEMALE = 2;
  }

  // 用户性别字段,使用嵌套的Gender枚举类型,字段编号为3
  Gender gender = 3;
}

// 另一个外层枚举定义 - 账户类型
// 注意:作为外层枚举,其常量名称不能与其他外层枚举重复
enum AccountType {
  // 默认值,表示账户类型未知
  ACCOUNT_UNKNOWN = 0;
  // 基础账户类型,具有基本功能
  BASIC = 1;
  // 高级账户类型,具有更多特权功能
  PREMIUM = 2;
}
3.2.简单示例
我们写一个简单的person.proto文件
cpp
syntax = "proto3";
package tutorial;

// 定义枚举类型
enum Status {
  UNKNOWN = 0;  // 默认值,必须是 0
  ACTIVE = 1;
  INACTIVE = 2;
  DELETED = 3;
}

// 使用枚举类型的消息
message User {
  string name = 1;
  Status status = 2;  // 枚举类型字段
}
我们编译一下

我们编写一下main.cpp
cpp
#include <iostream>
#include "person.pb.h"

using namespace std;

int main() {
    GOOGLE_PROTOBUF_VERIFY_VERSION;  // 确保链接的 Protobuf 版本与编译时一致

    // ==============================
    // 创建一个未设置 status 的用户
    // ==============================
    tutorial::User user_default;     // 声明 User 类型对象
    user_default.set_name("Bob");    // 设置 name 字段

    cout << "User name: " << user_default.name() << endl;

    // status 没有显式设置,proto3 默认值为 enum 中的 0(UNKNOWN)
    cout << "Default Status value: " << user_default.status() << endl;

    // 判断 status 是否为默认值 UNKNOWN
    if (user_default.status() == tutorial::Status::UNKNOWN) {
        cout << "Status is UNKNOWN by default" << endl;
    }

    // ==============================
    // 创建一个已设置 status 的用户
    // ==============================
    tutorial::User user;                 // 声明另一个 User 对象
    user.set_name("Alice");              // 设置 name 字段
    user.set_status(tutorial::Status::ACTIVE); // 显式设置 status 为 ACTIVE

    cout << "\nUser name: " << user.name() << endl;
    cout << "Status value: " << user.status() << endl; // 输出 ACTIVE 对应的整数值(1)

    // 判断 status 是否为 ACTIVE
    if (user.status() == tutorial::Status::ACTIVE) {
        cout << "User is active" << endl;
    }

    // 释放 Protobuf 库资源
    google::protobuf::ShutdownProtobufLibrary();
    return 0;
}
接下来我们编译一下
cpp
g++ main.cpp person.pb.cc -o Test -std=c++11 -lprotobuf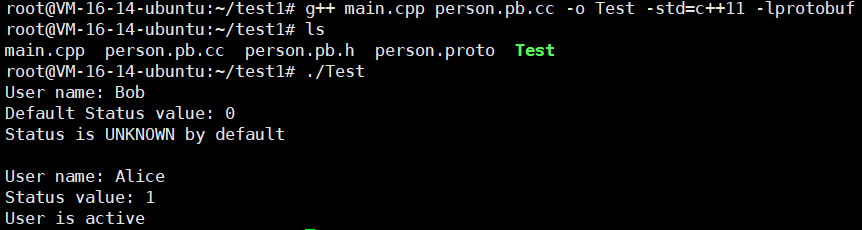
怎么样?我们不设置的话,默认就是枚举值的第一个。
老样子,我们还是写一下序列化和反序列化的版本
cpp
#include <iostream>
#include <fstream>
#include "user.pb.h"

using namespace std;

int main() {
    GOOGLE_PROTOBUF_VERIFY_VERSION;  // 确保运行时与编译时 protobuf 版本一致

    // ==============================
    // 1. 创建并初始化 User 对象
    // ==============================
    tutorial::User user;
    user.set_name("Alice");
    user.set_status(tutorial::Status::ACTIVE);

    cout << "==== 原始对象 ====" << endl;
    cout << "Name: " << user.name() << endl;
    cout << "Status(enum): " << user.status() << " (ACTIVE)" << endl;

    // ==============================
    // 2. 序列化到二进制文件
    // ==============================
    {
        fstream output("user.bin", ios::out | ios::trunc | ios::binary);
        if (!user.SerializeToOstream(&output)) {
            cerr << "❌ 写入 user.bin 失败" << endl;
            return -1;
        }
        cout << "✅ 已序列化到 user.bin" << endl;
    }

    // ==============================
    // 3. 从文件反序列化
    // ==============================
    tutorial::User user2;
    {
        fstream input("user.bin", ios::in | ios::binary);
        if (!input) {
            cerr << "❌ 无法打开 user.bin" << endl;
            return -1;
        }
        if (!user2.ParseFromIstream(&input)) {
            cerr << "❌ 反序列化失败" << endl;
            return -1;
        }
        cout << "✅ 已从 user.bin 反序列化" << endl;
    }

    // ==============================
    // 4. 打印反序列化结果
    // ==============================
    cout << "\n==== 反序列化结果 ====" << endl;
    cout << "Name: " << user2.name() << endl;

    cout << "Status(enum): " << user2.status() << " (";
    switch (user2.status()) {
        case tutorial::Status::UNKNOWN:  cout << "UNKNOWN"; break;
        case tutorial::Status::ACTIVE:   cout << "ACTIVE"; break;
        case tutorial::Status::INACTIVE: cout << "INACTIVE"; break;
        case tutorial::Status::DELETED:  cout << "DELETED"; break;
        default:                         cout << "Invalid"; break;
    }
    cout << ")" << endl;

    google::protobuf::ShutdownProtobufLibrary();
    return 0;
}
还是先进行编译
cpp
g++ main.cpp person.pb.cc -o Test -std=c++11 -lprotobuf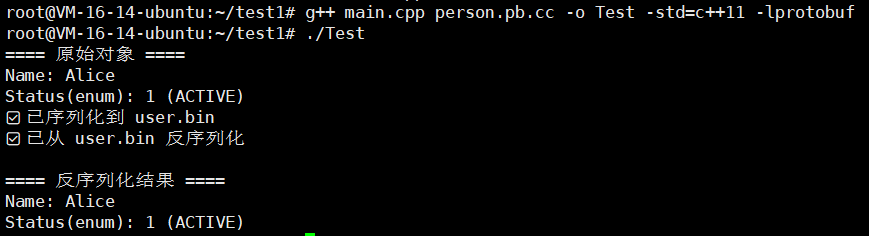
四.Any类型
4.1.简单介绍
字段还可以声明为Any类型,可以理解为泛型类型。使⽤时可以在Any中存储任意消息类型。Any类 型的字段也⽤repeated来修饰。
Any类型是google已经帮我们定义好的类型,在安装ProtoBuf时,其中的include⽬录下查找所有 google 已经定义好的.proto⽂件。
cpp
ls /usr/local/protobuf/include/google/protobuf/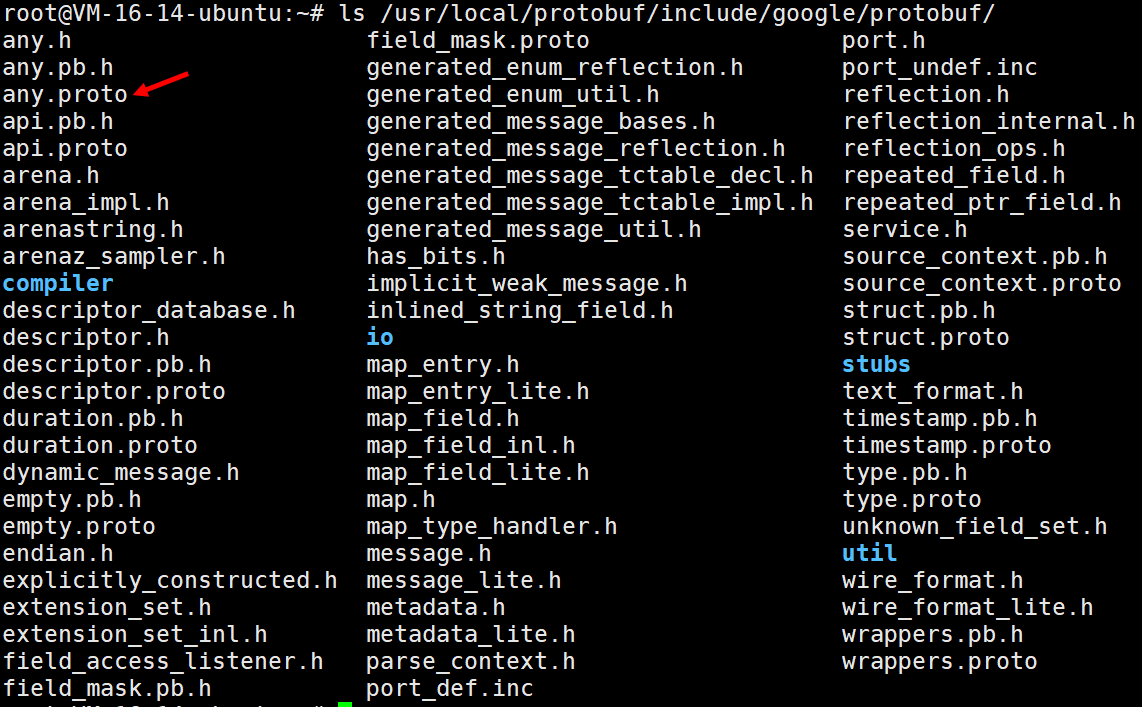
进去看看
......
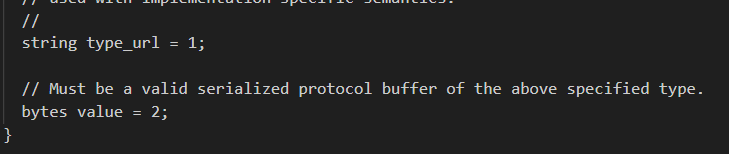
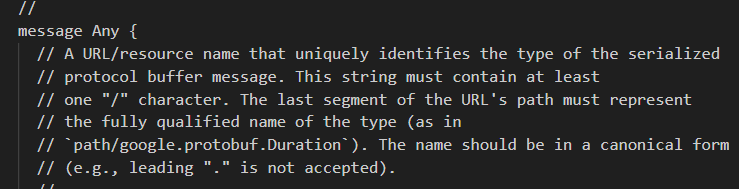
发现Any类型就是一个message类啊。它里面就2个字段
- Any 类型是什么?
你可以把 Any 类型理解为一个 "万能容器" 或 "类型安全的通用包装盒"。
在编程中,有时候你会遇到一种情况:你需要一个字段,但这个字段在设计时无法确定它未来会存放什么具体类型的数据。它可能是一个 Person 对象,也可能是一个 Dog 对象,或者任何其他你定义的消息类型。
Any 类型就是为了解决这个问题而生的。它允许你将 任意一种 定义好的 Protobuf 消息类型打包进去,并在需要的时候再将其解包还原成那个具体的类型。
- Any 类型的内在原理
这个"万能容器"并不是魔术,它的内部主要由两个部分组成:
- type_url(类型URL) :**这是一个字符串,它唯一地标识了你所打包的那个具体消息的类型。**你可以把它想象成盒子上的标签或条形码。它的标准格式通常是 type.googleapis.com/ 加上你消息的全限定名(即包名.消息名)。
- 例如,如果你有一个 MyPackage.Person 的消息,其 type_url 可能就是 type.googleapis.com/MyPackage.Person。这个标签告诉任何读取这个 Any 消息的人:"我里面装的是一个 Person 对象"。
- value(值):这是一段纯粹的二进制数据(字节序列)。它就是你打包的那个具体消息(比如 Person 对象)本身通过 Protobuf 序列化后的字节。你可以把它想象成盒子里的实物。
所以,Any 本质上就是一个 "类型标签" + "序列化后的数据" 的组合。
- 如何使用 Any 类型?
使用过程分为三个清晰的步骤:
- 第一步:在你的 .proto 文件中导入 Any 的定义
cpp
// 必须导入 any.proto 文件才能使用 Any 类型
import "google/protobuf/any.proto";

message MyMessage {
  string message_id = 1;
  // 定义一个 Any 类型的字段
  google.protobuf.Any details = 2;
}- 第二步:打包(Pack)------ 将具体消息放入 Any 容器
在编写代码时,当你想要把一个具体的消息(例如一个 Person 对象)赋值给 details 字段时,你不能直接赋值。你需要调用专门的打包函数(不同语言函数名可能略有不同,如 PackFrom, Pack 等),将这个 Person 对象"打包"进 Any 容器。
这个过程做了两件事:
自动将 Person 对象序列化成二进制数据,存入 Any 的 value 字段。
自动生成正确的 type_url(例如 type.googleapis.com/MyPackage.Person),存入 Any 的 type_url 字段。
- 第三步:解包(Unpack)------ 从 Any 容器中取出具体消息
当另一方收到你的 MyMessage 后,它看到了 details 字段是一个 Any 类型。它会:
读取 type_url,知道里面装的是一个 Person。
调用专门的解包函数(如 UnpackTo),并指定目标类型(Person)。
函数会根据 type_url 找到对应的类型解析器,然后将 value 字段的二进制数据反序列化,还原成一个 Person 对象。如果 type_url 指示的类型与你要求解包的目标类型不匹配,解包就会失败。
4.2.简单示例
4.2.1.基本用法
any_example.proto
cpp
syntax = "proto3";

package tutorial;

import "google/protobuf/any.proto";

// 普通消息类型(可以被嵌入到 Any 中)
message Person {
  string name = 1;
  int32 age = 2;
}

// 使用 Any 的消息
message Wrapper {
  string description = 1;
  google.protobuf.Any data = 2; // 可装入任意消息类型
}
我们先进行编译一下
cpp
protoc --cpp_out=. any_example.proto然后我们编写一下我们的main.cpp
cpp
#include <iostream>
#include <fstream>
#include "any_example.pb.h"
#include <google/protobuf/any.pb.h>

using namespace std;
using google::protobuf::Any;

int main() {
    GOOGLE_PROTOBUF_VERIFY_VERSION;

    // ===== 创建一个 Person 对象 =====
    tutorial::Person person;
    person.set_name("Alice");
    person.set_age(25);

    // ===== 创建一个 Wrapper,并用 Any 包装 Person =====
    tutorial::Wrapper wrapper;
    wrapper.set_description("This contains a Person message");

    Any* any_data = wrapper.mutable_data();
    any_data->->PackFrom(person); // 序列化 Person 到 Any 中

    cout << "✅ 已将 Person 打包进 Any" << endl;

    // ===== 序列化 Wrapper 到文件 =====
    {
        fstream output("wrapper.bin", ios::out | ios::trunc | ios::binary);
        if (!wrapper.SerializeToOstream(&output)) {
            cerr << "❌ Failed to write wrapper.bin" << endl;
            return -1;
        }
        cout << "✅ 已序列化到 wrapper.bin" << endl;
    }

    // ===== 从文件反序列化 =====
    tutorial::Wrapper wrapper2;
    {
        fstream input("wrapper.bin", ios::in | ios::binary);
        if (!wrapper2.ParseFromIstream(&input)) {
            cerr << "❌ Failed to read wrapper.bin" << endl;
            return -1;
        }
        cout << "✅ 已从 wrapper.bin 反序列化" << endl;
    }

    // ===== 解包 Any(取回原始 Person)=====
    tutorial::Person unpacked_person;
    if (wrapper2.data().UnpackTo(&unpacked_person)) {
        cout << "\n==== 解包成功 ====" << endl;
        cout << "Description: " << wrapper2.description() << endl;
        cout << "Name: " << unpacked_person.name() << endl;
        cout << "Age: " << unpacked_person.age() << endl;
    } else {
        cout << "❌ Any 不是 Person 类型" << endl;
    }

    google::protobuf::ShutdownProtobufLibrary();
    return 0;
}
还是老样子,我们进行编译一下
cpp
g++ main.cpp any_example.pb.cc -o Test -std=c++11 -lprotobuf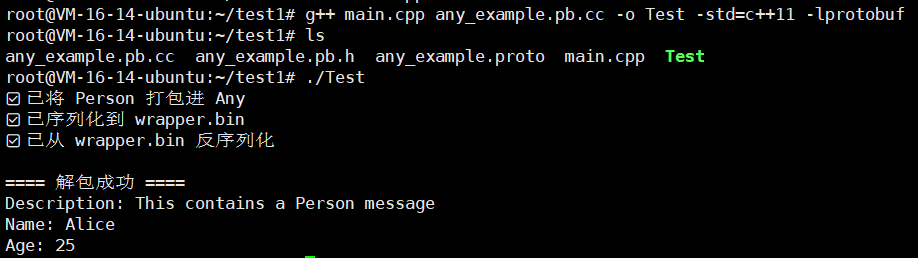
4.2.2.基本用法2
any_multi.proto
cpp
syntax = "proto3";

package tutorial;

import "google/protobuf/any.proto";

// 一个普通消息类型 Person
message Person {
  string name = 1;
  int32 age = 2;
}

// 另一个普通消息类型 Car
message Car {
  string model = 1;
  int32 year = 2;
}

// 包含 Any 的 Wrapper
message Wrapper {
  string description = 1;
  google.protobuf.Any data = 2;  // 可以存任意消息
}
我们进行编译一下
cpp
protoc --cpp_out=. any_multi.proto写一下我们的main.cpp
cpp
#include <iostream>
#include <fstream>
#include "any_multi.pb.h"
#include <google/protobuf/any.pb.h>

using namespace std;
using google::protobuf::Any;

int main() {
    GOOGLE_PROTOBUF_VERIFY_VERSION;

    // ==========================
    // 1️⃣ 创建 Person 对象
    // ==========================
    tutorial::Person person;
    person.set_name("Alice");
    person.set_age(25);

    // 创建 Car 对象
    tutorial::Car car;
    car.set_model("Tesla Model 3");
    car.set_year(2023);

    // ==========================
    // 2️⃣ 包装到 Wrapper 中
    // ==========================
    tutorial::Wrapper wrapper_person;
    wrapper_person.set_description("Wrapper containing a Person");
    wrapper_person.mutable_data()->PackFrom(person);

    tutorial::Wrapper wrapper_car;
    wrapper_car.set_description("Wrapper containing a Car");
    wrapper_car.mutable_data()->PackFrom(car);

    // ==========================
    // 3️⃣ 序列化到文件
    // ==========================
    {
        fstream out("wrapper_person.bin", ios::out | ios::trunc | ios::binary);
        wrapper_person.SerializeToOstream(&out);

        fstream out2("wrapper_car.bin", ios::out | ios::trunc | ios::binary);
        wrapper_car.SerializeToOstream(&out2);
    }
    cout << "✅ 已序列化两个 Wrapper" << endl;

    // ==========================
    // 4️⃣ 反序列化
    // ==========================
    tutorial::Wrapper w_person2;
    tutorial::Wrapper w_car2;

    {
        fstream in("wrapper_person.bin", ios::in | ios::binary);
        w_person2.ParseFromIstream(&in);

        fstream in2("wrapper_car.bin", ios::in | ios::binary);
        w_car2.ParseFromIstream(&in2);
    }
    cout << "✅ 已从文件反序列化" << endl;

    // ==========================
    // 5️⃣ 判断类型并解包
    // ==========================
    cout << "\n==== 处理 Wrapper containing Any ====" << endl;

    // Person
    // 判断 w_person2 中的 Any 是否为 Person 类型
    if (w_person2.data().Is<tutorial::Person>()) {
        tutorial::Person p;
        w_person2.data().UnpackTo(&p);
        cout << "Description: " << w_person2.description() << endl;
        cout << "It's a Person: " << p.name() << ", age=" << p.age() << endl;
    }

    // Car
    // 判断 w_car2 中的 Any 是否为 Car 类型
    if (w_car2.data().Is<tutorial::Car>()) {
        tutorial::Car c;
        w_car2.data().UnpackTo(&c);
        cout << "Description: " << w_car2.description() << endl;
        cout << "It's a Car: " << c.model() << ", year=" << c.year() << endl;
    }

    google::protobuf::ShutdownProtobufLibrary();
    return 0;
}
我们进行编译
cpp
g++ main.cpp any_multi.pb.cc -o Test -std=c++11 -lprotobuf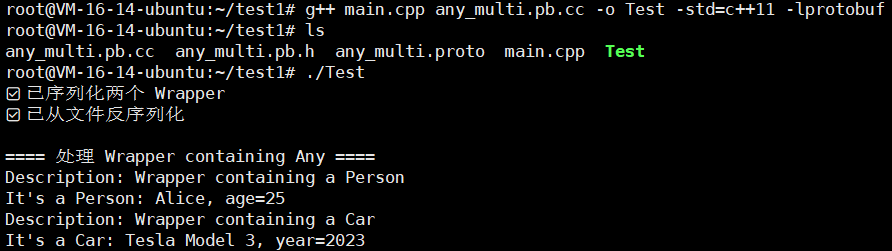
4.2.3.基本用法3
any_list.proto
cpp
syntax = "proto3";

package tutorial;

import "google/protobuf/any.proto";

// 普通消息类型 Person
message Person {
  string name = 1;
  int32 age = 2;
}

// 普通消息类型 Car
message Car {
  string model = 1;
  int32 year = 2;
}

// 包含 repeated Any 的 Wrapper
message Wrapper {
  string description = 1;
  repeated google.protobuf.Any data_list = 2; // 可以存多个不同类型
}
Wrapper 中有一个 repeated google.protobuf.Any 字段,可以存放多种不同类型消息(Person、Car 等)
我们先进行编译一下
cpp
protoc --cpp_out=. any_list.proto接下来就来编写main.cpp
cpp
#include <iostream>
#include <fstream>
#include "any_list.pb.h"
#include <google/protobuf/any.pb.h>

using namespace std;
using google::protobuf::Any;

int main() {
    GOOGLE_PROTOBUF_VERIFY_VERSION;

    // ==========================
    // 创建 Person 对象
    // ==========================
    tutorial::Person person1;
    person1.set_name("Alice");
    person1.set_age(25);

    tutorial::Person person2;
    person2.set_name("Bob");
    person2.set_age(30);

    // 创建 Car 对象
    tutorial::Car car1;
    car1.set_model("Tesla Model 3");
    car1.set_year(2023);

    tutorial::Car car2;
    car2.set_model("BMW i8");
    car2.set_year(2022);

    // ==========================
    // 包装到 Wrapper 的 repeated Any
    // ==========================
    tutorial::Wrapper wrapper;
    wrapper.set_description("Wrapper with multiple Any messages");

    // 打包消息
    wrapper.add_data_list()->PackFrom(person1);
    wrapper.add_data_list()->PackFrom(car1);
    wrapper.add_data_list()->PackFrom(person2);
    wrapper.add_data_list()->PackFrom(car2);

    // ==========================
    // 序列化到文件
    // ==========================
    {
        fstream out("wrapper_list.bin", ios::out | ios::trunc | ios::binary);
        wrapper.SerializeToOstream(&out);
    }
    cout << "✅ 已序列化 Wrapper(包含 repeated Any)" << endl;

    // ==========================
    // 反序列化
    // ==========================
    tutorial::Wrapper wrapper2;
    {
        fstream in("wrapper_list.bin", ios::in | ios::binary);
        wrapper2.ParseFromIstream(&in);
    }
    cout << "✅ 已从文件反序列化" << endl;

    // ==========================
    // 循环处理 repeated Any
    // ==========================
    cout << "\n==== 处理 repeated Any ====" << endl;
    for (int i = 0; i < wrapper2.data_list_size(); ++i) {
        const Any& any_msg = wrapper2.data_list(i);

        // 判断类型并解包
        if (any_msg.Is<tutorial::Person>()) {
            tutorial::Person p;
            any_msg.UnpackTo(&p);
            cout << "Index " << i << ": Person - Name: " << p.name()
                 << ", Age: " << p.age() << endl;
        } else if (any_msg.Is<tutorial::Car>()) {
            tutorial::Car c;
            any_msg.UnpackTo(&c);
            cout << "Index " << i << ": Car - Model: " << c.model()
                 << ", Year: " << c.year() << endl;
        } else {
            cout << "Index " << i << ": ❌ Unknown message type" << endl;
        }
    }

    google::protobuf::ShutdownProtobufLibrary();
    return 0;
}
还是老样子,我们进行编译一下
cpp
g++ main.cpp any_list.pb.cc -o Test -std=c++11 -lprotobuf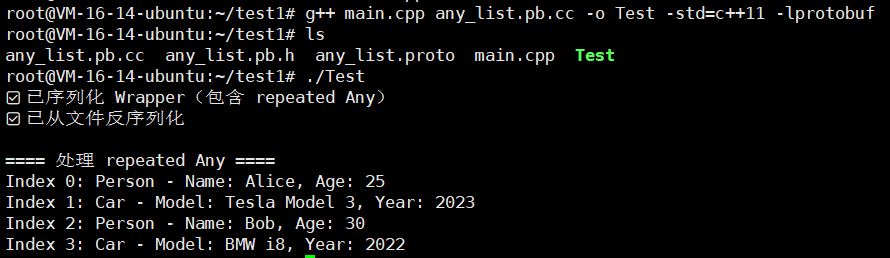
还是很不错的吧!!
4.2.4.Any 内嵌 Any
好,我们来写一个 递归 Any 的例子,也就是 Any 内嵌 Any,模拟多层消息结构,非常适合复杂业务场景。
any_nested.proto
cpp
syntax = "proto3";

package tutorial;

import "google/protobuf/any.proto";

// 普通消息类型 Person
message Person {
  string name = 1;
  int32 age = 2;
}

// 普通消息类型 Car
message Car {
  string model = 1;
  int32 year = 2;
}

// 可以存 Any 的 Wrapper(支持嵌套 Any)
message Wrapper {
  string description = 1;
  repeated google.protobuf.Any data_list = 2;
}
main.cpp
cpp
#include <iostream>
#include <fstream>
#include "any_nested.pb.h"
#include <google/protobuf/any.pb.h>

using namespace std;
using google::protobuf::Any;

int main() {
    // 初始化 Protocol Buffers 库,确保版本兼容性
    GOOGLE_PROTOBUF_VERIFY_VERSION;

    // ==========================
    // 1️⃣ 创建基本消息
    // ==========================

    // 创建一个 Person 消息并设置其字段
    tutorial::Person person;
    person.set_name("Alice");    // 设置姓名字段
    person.set_age(25);          // 设置年龄字段

    // 创建一个 Car 消息并设置其字段
    tutorial::Car car;
    car.set_model("Tesla Model 3");  // 设置车型字段
    car.set_year(2023);              // 设置年份字段

    // ==========================
    // 2️⃣ 创建子 Wrapper 并打包到 Any
    // ==========================

    // 创建一个子包装器,用于包含 Person 和 Car 消息
    tutorial::Wrapper sub_wrapper;
    sub_wrapper.set_description("Sub-wrapper containing Person and Car");  // 设置子包装器描述

    // 将 Person 消息打包成 Any 类型并添加到子包装器的 data_list 中
    sub_wrapper.add_data_list()->PackFrom(person);
    // 将 Car 消息打包成 Any 类型并添加到子包装器的 data_list 中
    sub_wrapper.add_data_list()->PackFrom(car);

    // 将整个子包装器本身打包成 Any 类型,实现嵌套
    Any nested_any;
    nested_any.PackFrom(sub_wrapper);

    // ==========================
    // 3️⃣ 创建顶层 Wrapper,存放嵌套 Any
    // ==========================

    // 创建顶层包装器
    tutorial::Wrapper top_wrapper;
    top_wrapper.set_description("Top-level wrapper with nested Any");  // 设置顶层包装器描述
    // 将嵌套的 Any(包含子包装器)添加到顶层包装器的 data_list 中
    top_wrapper.add_data_list()->CopyFrom(nested_any);

    // ==========================
    // 4️⃣ 序列化到文件
    // ==========================

    {
        // 以二进制方式打开文件用于输出,如果文件存在则清空内容
        fstream out("wrapper_nested.bin", ios::out | ios::trunc | ios::binary);
        // 将顶层包装器序列化到文件
        top_wrapper.SerializeToOstream(&out);
        // out 文件流在作用域结束时自动关闭
    }
    cout << "✅ 已序列化顶层 Wrapper(包含嵌套 Any)" << endl;

    // ==========================
    // 5️⃣ 反序列化
    // ==========================

    tutorial::Wrapper top_wrapper2;  // 创建新的包装器对象用于接收反序列化数据
    {
        // 以二进制方式打开文件用于输入
        fstream in("wrapper_nested.bin", ios::in | ios::binary);
        // 从文件反序列化数据到顶层包装器对象
        top_wrapper2.ParseFromIstream(&in);
        // in 文件流在作用域结束时自动关闭
    }
    cout << "✅ 已从文件反序列化" << endl;

    // ==========================
    // 6️⃣ 递归处理 Any
    // ==========================

    cout << "\n==== 递归处理嵌套 Any ====" << endl;

    // 遍历顶层包装器中的所有 Any 类型数据
    for (int i = 0; i < top_wrapper2.data_list_size(); ++i) {
        const Any& any_msg = top_wrapper2.data_list(i);  // 获取第 i 个 Any 数据

        // 检查 Any 数据是否为 Wrapper 类型
        if (any_msg.Is<tutorial::Wrapper>()) {
            tutorial::Wrapper sub_w;        // 创建子包装器对象用于解包
            any_msg.UnpackTo(&sub_w);       // 将 Any 数据解包到子包装器对象

            // 输出包装器描述信息
            cout << "Top-level description: " << top_wrapper2.description() << endl;
            cout << "Sub-wrapper description: " << sub_w.description() << endl;

            // 遍历子包装器中的所有 Any 类型数据
            for (int j = 0; j < sub_w.data_list_size(); ++j) {
                const Any& sub_any = sub_w.data_list(j);  // 获取子包装器中的第 j 个 Any 数据

                // 检查子 Any 数据是否为 Person 类型
                if (sub_any.Is<tutorial::Person>()) {
                    tutorial::Person p;           // 创建 Person 对象用于解包
                    sub_any.UnpackTo(&p);         // 将 Any 数据解包到 Person 对象
                    cout << "  Person: " << p.name() << ", Age: " << p.age() << endl;
                }
                // 检查子 Any 数据是否为 Car 类型
                else if (sub_any.Is<tutorial::Car>()) {
                    tutorial::Car c;              // 创建 Car 对象用于解包
                    sub_any.UnpackTo(&c);         // 将 Any 数据解包到 Car 对象
                    cout << "  Car: " << c.model() << ", Year: " << c.year() << endl;
                }
                // 处理未知的消息类型
                else {
                    cout << "  ❌ Unknown message type in sub-wrapper" << endl;
                }
            }

        } else {
            // 顶层 Any 数据不是 Wrapper 类型的处理
            cout << "❌ Top-level Any is not a Wrapper" << endl;
        }
    }

    // 清理 Protocol Buffers 库分配的资源
    google::protobuf::ShutdownProtobufLibrary();
    return 0;
}
我们来编译一下
cpp
protoc --cpp_out=. any_nested.proto && \
g++ main.cpp any_nested.pb.cc -o Test -std=c++11 -lprotobuf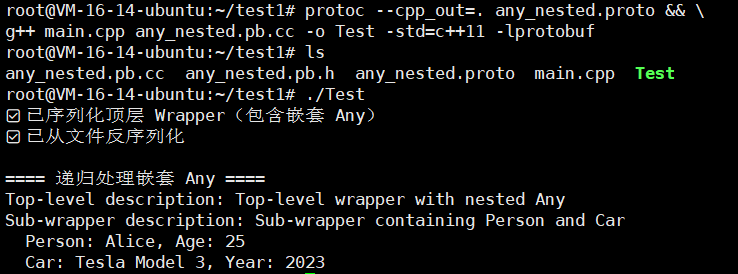
怎么样?Any有没有掌握?
五.oneof类型
oneof 的核心概念
想象一个场景,你需要定义一个"登录消息"。
用户可以通过"用户名密码"登录,也可以通过"手机号验证码"登录,或者通过"扫码"登录。
在一条具体的登录请求中,只会使用这三种方式中的一种。
如果没有 oneof,你可能会这样定义:
cpp
message LoginRequest {
  // 用户名密码登录方式 - 用户名
  string username = 1;

  // 用户名密码登录方式 - 密码
  string password = 2;

  // 手机号验证码登录方式 - 手机号码
  string phone_number = 3;

  // 手机号验证码登录方式 - 短信验证码
  string verification_code = 4;

  // 扫码登录方式 - 二维码令牌
  // 当使用扫码登录时,此字段包含从二维码中获取的令牌
  string qr_code_token = 5;
}
这条消息在逻辑上存在问题:
- 如果 username 和 password 被设置了,那么 phone_number 和 verification_code 就应该是空的,但它们依然会占用消息体的空间(即使是空字符串)。
- 解析这条消息的程序无法清晰地知道究竟应该使用哪一种凭证来进行验证,它需要写一堆 if-else 来判断哪个字段有值。
oneof 就是为了解决这个问题而生的。
- 它允许你定义一个字段集合,在这个集合中,最多只有一个字段可以被设置值。
- 如果你设置了 oneof 中的一个字段,那么所有其他字段都会被自动清空。最后被设置的字段会"胜出"。
oneof 的语法
在 .proto 文件中,你使用 oneof 关键字,后面跟上你给这个"一组字段"起的名字,然后在花括号 {} 内列出所有互斥的字段。
语法格式:
cpp
oneof 组名 {
  字段类型 字段名称 = 字段编号;
  // ... 其他字段
}
让我们用 oneof 来重构上面的登录请求:
cpp
message LoginRequest {
  oneof credential {
    UsernamePassword username_password = 1;
    PhoneVerification phone_verification = 2;
    string qr_code_token = 3;
  }
}

// 为了更好的结构,我们可以定义子消息
message UsernamePassword {
  string username = 1;
  string password = 2;
}

message PhoneVerification {
  string phone_number = 1;
  string verification_code = 2;
}
解释:
我们定义了一个名为 credential 的 oneof。
这个 oneof 包含了三个互斥的字段:
- username_password:一个包含用户名和密码的子消息。
- phone_verification:一个包含手机号和验证码的子消息。
- qr_code_token:一个直接的字符串,表示扫码令牌。
当你在代码中给 username_password 赋值时,phone_verification 和 qr_code_token 会自动被清空(变成未设置状态)。反之亦然。
oneof 的特点和规则
- 互斥性: 这是最核心的特点。同一时间,oneof 中只有一个字段能"存活"。
- 字段类型:**oneof 内的字段可以是任何除了 map 和 repeated 之外的类型。**这意味着可以是标量类型(如 string, int32)、枚举类型,或者其他消息类型。
- 字段编号:**oneof 内的字段编号必须在整个父消息中是唯一的。**你不能在 oneof 外面再用同样的编号定义另一个字段。
- 内存节约:**Protobuf 在编码时会确保 oneof 中的所有字段共享同一块内存。**因为同时只有一个字段有效,所以这种共享是安全的,这达到了节约内存的目的。
- 默认值陷阱:需要注意,如果你设置了一个 oneof 字段为其类型的默认值(例如,给一个 int32 字段设置为 0,或者给一个 string 字段设置为 ""),这个操作被认为是设置了这个字段。它会被序列化,并且会清除 oneof 里的其他字段。在解析端,你无法区分这个字段是被显式设置为默认值,还是根本没被设置(在某些语言生成的代码中,会有特殊的"字段存在"检查方法)。
- 向后兼容性:在向现有的 oneof 中添加新字段时,需要小心。老版本的代码在解析新版本代码发出的消息时,如果遇到未知的 oneof 字段,其行为取决于具体的编程语言和 Protobuf 版本。通常,老版本会知道自己无法识别这个字段,并会清空整个 oneof(将其设置为未设置任何字段的状态)。所以,在修改 oneof 时,要确保所有通信方都能及时更新,或者做好兼容性处理。
一个更综合的例子
假设我们有一个消息 SampleMessage,它包含一个 oneof:
cpp
message SampleMessage {
  oneof test_oneof {
    string name = 1;
    int32 id = 2;
    SubMessage sub_message = 3;
  }
}

message SubMessage {
  string value = 1;
}
如果你设置了 id 字段为 123,那么 name 和 sub_message 字段会被清空。
随后,如果你又设置了 name 字段为 "alice",那么 id 字段会被清空。
在生成的代码中,通常会有一个枚举或特殊的方法让你检查当前 test_oneof 中到底是哪个字段被设置了。
5.1.简单示例
示例1
话不多说,我们直接创建一个my_message.proto
cpp
syntax = "proto3";

package tutorial;

message MyMessage {
  string name = 1;

  // 定义一个 oneof,三个整数字段互斥
  oneof choice {
    int32 option1 = 2;
    int32 option2 = 3;
    int32 option3 = 4;
  }
}
现在先编译一下这个文件
cpp
protoc --cpp_out=. my_message.proto我们接下来写一下我们的main.cpp
cpp
#include "my_message.pb.h"
#include <iostream>

int main() {
    tutorial::MyMessage msg;
    msg.set_name("Alice");

    msg.set_option1(100);
    std::cout << "Option1: " << msg.option1() << std::endl;

    msg.set_option2(200); // 会自动清空 option1
    if (msg.has_option1()) {
        std::cout << "Option1 still set" << std::endl;
    } else {
        std::cout << "Option1 cleared" << std::endl;
    }

    std::cout << "Option2: " << msg.option2() << std::endl;

    // 你还可以用 oneof_case() 判断当前设置的是哪一个
    switch (msg.choice_case()) {
        case tutorial::MyMessage::kOption1:
            std::cout << "Currently set: Option1" << std::endl;
            break;
        case tutorial::MyMessage::kOption2:
            std::cout << "Currently set: Option2" << std::endl;
            break;
        case tutorial::MyMessage::kOption3:
            std::cout << "Currently set: Option3" << std::endl;
            break;
        case tutorial::MyMessage::CHOICE_NOT_SET:
            std::cout << "No option set" << std::endl;
            break;
    }

    return 0;
}
接下来我们编译一下
cpp
g++ main.cpp my_message.pb.cc -o Test -std=c++11 -lprotobuf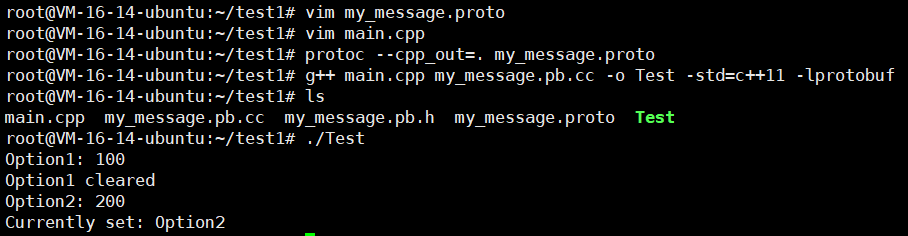
示例2
my_message.proto
cpp
syntax = "proto3";

package tutorial;

message SubMessage {
  string info = 1;
}

message MyMessage {
  string name = 1;

  oneof choice {
    int32 option1 = 2;
    int32 option2 = 3;
    SubMessage option3 = 4;
  }
}
我们编译一下
cpp
protoc --cpp_out=. my_message.proto现在来编写我们的main.cpp
cpp
#include "my_message.pb.h"
#include <iostream>

using namespace tutorial;

int main() {
    GOOGLE_PROTOBUF_VERIFY_VERSION;

    MyMessage msg;
    msg.set_name("Alice");

    std::cout << "=== 设置 option1 ===" << std::endl;
    msg.set_option1(100);

    // 1️⃣ 检测某个字段是否被设置
    std::cout << "has_option1: " << msg.has_option1() << std::endl;
    std::cout << "has_option2: " << msg.has_option2() << std::endl;

    // 2️⃣ 判断当前 oneof 设置的是哪个字段
    switch (msg.choice_case()) {
        case MyMessage::kOption1: std::cout << "Current: option1" << std::endl; break;
        case MyMessage::kOption2: std::cout << "Current: option2" << std::endl; break;
        case MyMessage::kOption3: std::cout << "Current: option3" << std::endl; break;
        case MyMessage::CHOICE_NOT_SET: std::cout << "Current: none" << std::endl; break;
    }

    std::cout << "\n=== 设置 option3 ===" << std::endl;
    msg.mutable_option3()->set_info("Hello protobuf");

    // 1️⃣ 再次检测字段
    std::cout << "has_option1: " << msg.has_option1() << std::endl;
    std::cout << "has_option3: " << msg.has_option3() << std::endl;

    // 2️⃣ 检测当前 oneof 设置
    switch (msg.choice_case()) {
        case MyMessage::kOption1: std::cout << "Current: option1" << std::endl; break;
        case MyMessage::kOption2: std::cout << "Current: option2" << std::endl; break;
        case MyMessage::kOption3: std::cout << "Current: option3" << std::endl; break;
        case MyMessage::CHOICE_NOT_SET: std::cout << "Current: none" << std::endl; break;
    }

    // 3️⃣ 获取值
    if (msg.has_option3()) {
        std::cout << "option3 info: " << msg.option3().info() << std::endl;
    }

    std::cout << "\n=== 清空 oneof ===" << std::endl;
    msg.clear_choice();
    std::cout << "choice_case after clear: " << msg.choice_case() << std::endl;

    google::protobuf::ShutdownProtobufLibrary();
    return 0;
}
我们直接编译
cpp
g++ main.cpp my_message.pb.cc -o Test -std=c++11 -lprotobuf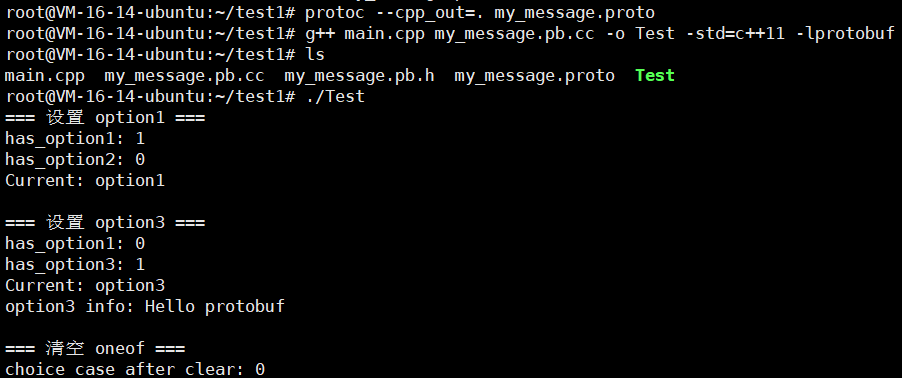
很OK啊!!!