工欲善其事,必先利其器。在开始AI安全研究之前,一个完善的环境是你的第一道防线。
一、环境规划:为什么需要独立的AI安全实验室
在开始搭建之前,我们先明确目标:构建一个隔离、可复现、功能完整的AI安全研究环境。
1.1 环境架构设计
1.2 硬件要求与推荐配置
最低配置:
- CPU: 4核以上
- 内存: 16GB
- 存储: 100GB可用空间
- GPU: 可选(但强烈推荐)
推荐配置:
- CPU: 8核以上(Intel i7/i9 或 AMD Ryzen 7/9)
- 内存: 32GB
- 存储: 512GB SSD + 1TB HDD
- GPU: NVIDIA RTX 3070/4080(支持CUDA)
二、基础环境搭建
2.1 安装Python与虚拟环境
步骤1:安装Miniconda(推荐)
# 下载并安装Miniconda
wget https://repo.anaconda.com/miniconda/Miniconda3-latest-Linux-x86_64.sh
bash Miniconda3-latest-Linux-x86_64.sh
# 初始化conda
conda init bash
source ~/.bashrc
步骤2:创建专用虚拟环境
# 创建名为ai-security的虚拟环境
conda create -n ai-security python=3.9 -y
# 激活环境
conda activate ai-security
# 验证安装
python --version
pip --version
2.2 配置Jupyter Lab
安装与配置:
# 安装Jupyter Lab
pip install jupyterlab
# 安装常用扩展
pip install jupyter_contrib_nbextensions
jupyter contrib nbextension install --user
# 生成配置文件
jupyter notebook --generate-config
# 设置密码
jupyter notebook password
优化配置(编辑 ~/.jupyter/jupyter_notebook_config.py):
# 允许外部访问
c.NotebookApp.allow_origin = '*'
c.NotebookApp.ip = '0.0.0.0'
# 禁用浏览器自动打开
c.NotebookApp.open_browser = False
# 设置端口
c.NotebookApp.port = 8888
# 设置工作目录
c.NotebookApp.notebook_dir = '/path/to/your/workspace'
# 允许远程访问
c.NotebookApp.allow_remote_access = True
启动Jupyter Lab:
# 后台启动
nohup jupyter lab --allow-root > jupyter.log 2>&1 &
# 查看日志
tail -f jupyter.log
三、机器学习与深度学习框架
3.1 基础科学计算库
# 安装核心科学计算库
pip install numpy scipy pandas matplotlib seaborn
# 安装进度条显示
pip install tqdm
# 安装可视化工具
pip install plotly bokeh
3.2 机器学习框架
Scikit-learn及扩展:
# 安装scikit-learn
pip install scikit-learn
# 安装扩展库
pip install imbalanced-learn # 处理不平衡数据
pip install scikit-optimize # 超参数优化
pip install category_encoders # 类别编码
验证安装:
import sklearn
print(f"Scikit-learn版本: {sklearn.version}")
from sklearn.ensemble import RandomForestClassifier
from sklearn.model_selection import train_test_split
from sklearn.metrics import accuracy_score
print(" ✓ Scikit-learn环境正常")
3.3 深度学习框架
TensorFlow安装:
# 对于有GPU的系统
pip install tensorflowand-cuda
# 对于只有CPU的系统
pip install tensorflow
# 安装TensorFlow扩展
pip install tensorflow-datasets tensorflow-hub
PyTorch安装:
# 使用conda安装(推荐)
conda install pytorch torchvision torchaudio pytorch-cuda=11.8 -c pytorch -c nvidia
# 或者使用pip
pip install torch torchvision torchaudio --index-url https://download.pytorch.org/whl/cu118
验证深度学习环境:
import tensorflow as tf
import torch
print(f"TensorFlow版本: {tf.version}")
print(f"PyTorch版本: {torch.version}")
# 检查GPU是否可用
print(f"TensorFlow GPU可用: {tf.config.list_physical_devices('GPU')}")
print(f"PyTorch GPU可用: {torch.cuda.is_available()}")
if torch.cuda.is_available():
print(f"PyTorch GPU数量: {torch.cuda.device_count()}")
print(f"当前GPU: {torch.cuda.get_device_name()}")
四、安全分析工具库
4.1 网络流量分析
Scapy安装与配置:
pip install scapy
基础使用示例:
from scapy.all import *
import matplotlib.pyplot as plt
# 简单的数据包分析
def analyze_pcap(file_path):
packets = rdpcap(file_path)
print(f"数据包总数: {len(packets)}")
# 统计协议分布
protocols = {}
for pkt in packets:
if IP in pkt:
proto = pktIP.proto
protocolsproto = protocols.get(proto, 0) + 1
print("协议分布:", protocols)
return packets
# 创建简单的流量生成器
def generate_malicious_traffic():
# 构造异常DNS查询(DGA域名特征)
ip = IP(dst="8.8.8.8")
udp = UDP(dport=53)
dns = DNS(rd=1, qd=DNSQR(qname="example.com"))
packet = ip/udp/dns
send(packet, verbose=0)
print("DNS数据包已发送")
其他网络分析工具:
# 网络分析库
pip install pyshark dpkt
# 流量可视化
pip install networkx
4.2 恶意软件分析
YARA安装:
# 安装YARA-Python
pip install yara-python
# 安装yara规则管理工具
pip install yara-rules
YARA使用示例:
import yara
import os
# 编译YARA规则
def compile_yara_rules(rules_dir):
rules = {}
for file in os.listdir(rules_dir):
if file.endswith('.yar'):
rule_path = os.path.join(rules_dir, file)
try:
rulesfile = yara.compile(rule_path)
print(f" ✓ 已加载规则: {file}")
except Exception as e:
print(f" ✗ 加载规则失败 {file}: {e}")
return rules
# 扫描文件
def scan_file(file_path, rules):
matches = {}
for name, rule in rules.items():
try:
match = rule.match(file_path)
if match:
matchesname = match
except Exception as e:
print(f"扫描错误 {name}: {e}")
return matches
# 示例:检测Mirai变种
mirai_rule = """
rule Mirai_Botnet {
meta:
description = "Detects Mirai botnet samples"
author = "AI-Security-Lab"
date = "2024-01-01"
strings:
$str1 = "busybox" nocase
$str2 = "/bin/sh"
$str3 = "telnet" nocase
$suspicious_function = "system"
condition:
3 of them and filesize < 2MB
}
"""
其他恶意软件分析工具:
# PE文件分析
pip install pefile
# 安卓应用分析
pip install androguard
# 通用文件分析
pip install file-magic
4.3 日志与事件分析
# 日志处理库
pip install logparser pandas
# 时间序列分析
pip install statsmodels
# 数据库连接
pip install sqlalchemy pymysql
五、数据集获取与处理
5.1 常用安全数据集
CIC-IDS2017数据集:
import pandas as pd
import numpy as np
from urllib.request import urlretrieve
import os
class SecurityDatasets:
def init(self, data_dir="./datasets"):
self.data_dir = data_dir
os.makedirs(data_dir, exist_ok=True)
def download_cic_ids2017(self):
"""下载CIC-IDS2017数据集"""
base_url = "https://www.unb.ca/cic/datasets/ids-2017.html"
# 实际使用时需要从官网下载
files = {
"Monday-WorkingHours.pcap_ISCX.csv": "url_to_file",
# ... 其他文件
}
print("请从以下地址手动下载CIC-IDS2017数据集:")
print("https://www.unb.ca/cic/datasets/ids-2017.html")
def load_sample_data(self):
"""加载示例数据(用于测试环境)"""
# 创建示例网络流量数据
sample_data = {
'duration': 0, 1, 5, 10, 30,
'protocol_type': 'tcp', 'udp', 'tcp', 'icmp', 'tcp',
'service': 'http', 'dns', 'ssh', 'ping', 'ftp',
'flag': 'SF', 'S0', 'SF', 'REJ', 'SF',
'src_bytes': 100, 50, 300, 0, 1500,
'dst_bytes': 200, 100, 500, 0, 0,
'land': 0, 0, 0, 0, 0,
'wrong_fragment': 0, 0, 0, 0, 0,
'urgent': 0, 0, 0, 0, 0,
'label': 'normal', 'attack', 'normal', 'attack', 'normal'
}
df = pd.DataFrame(sample_data)
return df
其他重要数据集:
# UNSW-NB15数据集
def download_unsw_nb15():
"""UNSW-NB15数据集"""
print("下载地址: https://research.unsw.edu.au/projects/unsw-nb15-dataset")
# CICMalDroid-2020 (Android恶意软件)
def download_cic_maldroid():
"""Android恶意软件数据集"""
print("下载地址: https://www.unb.ca/cic/datasets/maldroid-2020.html")
5.2 数据预处理工具
import pandas as pd
import numpy as np
from sklearn.preprocessing import StandardScaler, LabelEncoder
from sklearn.model_selection import train_test_split
class DataPreprocessor:
def init(self):
self.scalers = {}
self.encoders = {}
def preprocess_network_data(self, df):
"""预处理网络流量数据"""
df_clean = df.copy()
# 处理缺失值
df_clean = df_clean.fillna(0)
# 编码分类变量
categorical_columns = df_clean.select_dtypes(include='object').columns
categorical_columns = col for col in categorical_columns if col != 'label'
for col in categorical_columns:
if col not in self.encoders:
self.encoderscol = LabelEncoder()
df_cleancol = self.encoderscol.fit_transform(df_cleancol.astype(str))
# 标准化数值特征
numerical_columns = df_clean.select_dtypes(include=np.number).columns
numerical_columns = col for col in numerical_columns if col != 'label'
for col in numerical_columns:
if col not in self.scalers:
self.scalerscol = StandardScaler()
df_cleancol = self.scalerscol.fit_transform(df_clean\[col])
return df_clean
def split_data(self, df, target_column='label', test_size=0.2):
"""分割数据集"""
X = df.drop(columns=target_column)
y = dftarget_column
# 编码目标变量
if target_column not in self.encoders:
self.encoderstarget_column = LabelEncoder()
y_encoded = self.encoderstarget_column.fit_transform(y)
return train_test_split(X, y_encoded, test_size=test_size, random_state=42)
六、完整环境验证
6.1 环境验证脚本
def verify_environment():
"""验证AI安全环境是否正常"""
print(" 开始验证AI安全环境...")
checks = \[\]
# 检查Python版本
try:
import sys
version = sys.version_info
if version.major == 3 and version.minor >= 8:
checks.append((" ✓ Python版本", f"{version.major}.{version.minor}.{version.micro}"))
else:
checks.append((" ✗ Python版本", "需要Python 3.8+"))
except Exception as e:
checks.append((" ✗ Python版本", str(e)))
# 检查核心库
libraries = [
("numpy", "科学计算"),
("pandas", "数据处理"),
("scikit-learn", "机器学习"),
("tensorflow", "深度学习"),
("torch", "深度学习"),
("scapy", "网络分析"),
("yara", "恶意软件检测"),
("jupyter", "交互式环境")
]
for lib, description in libraries:
try:
module = import(lib)
version = getattr(module, 'version', '未知版本')
checks.append((f" ✓ {description}", f"{lib} {version}"))
except ImportError as e:
checks.append((f" ✗ {description}", f"{lib} 未安装"))
# 检查GPU支持
try:
import tensorflow as tf
gpu_devices = tf.config.list_physical_devices('GPU')
if gpu_devices:
checks.append((" ✓ GPU支持", f"检测到 {len(gpu_devices)} 个GPU"))
else:
checks.append((" ⚠ GPU支持", "未检测到GPU,将使用CPU"))
except Exception as e:
checks.append((" ✗ GPU检查", str(e)))
# 打印检查结果
print("\n" + "="*50)
print("环境验证结果:")
print("="*50)
for check, result in checks:
print(f"{check:20} {result}")
# 统计结果
total = len(checks)
passed = sum(1 for check, _ in checks if check.startswith(' ✓'))
warnings = sum(1 for check, _ in checks if check.startswith(' ⚠'))
failed = total - passed - warnings
print("="*50)
print(f"总结: {passed} 项通过, {warnings} 项警告, {failed} 项失败")
if failed == 0:
print(" 🎉 环境验证通过!可以开始AI安全研究了。")
return True
else:
print(" ❌ 环境验证失败,请检查上述问题。")
return False
# 运行验证
if name == "main":
verify_environment()
6.2 快速启动脚本
创建 start_ai_security_lab.sh:
#!/bin/bash
echo "启动AI安全研究环境..."
# 激活conda环境
conda activate ai-security
# 启动Jupyter Lab
echo "启动Jupyter Lab..."
nohup jupyter lab --allow-root --ip=0.0.0.0 --port=8888 --no-browser > jupyter.log 2>&1 &
# 显示访问信息
echo "Jupyter Lab 已启动"
echo "访问地址: http://localhost:8888"
echo "查看日志: tail -f jupyter.log"
# 运行环境验证
echo "运行环境验证..."
python -c "from verification import verify_environment; verify_environment()"
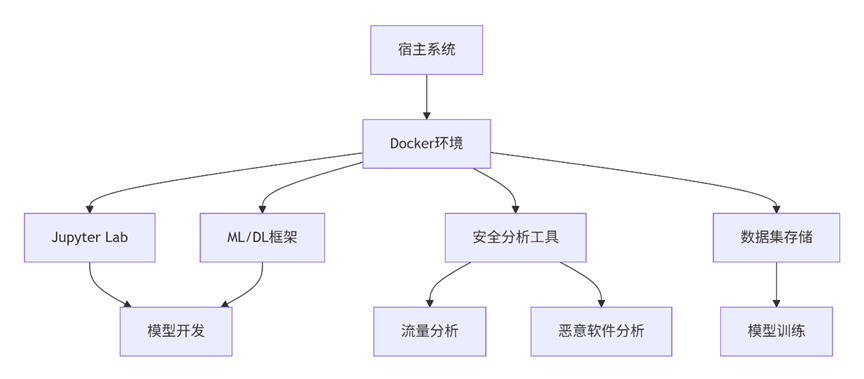
七、Docker容器化部署(可选)
对于需要环境隔离或快速部署的场景,可以使用Docker。
7.1 Dockerfile
dockerfile
FROM nvidia/cuda:11.8-devel-ubuntu20.04
# 设置环境变量
ENV PYTHONUNBUFFERED=1
ENV DEBIAN_FRONTEND=noninteractive
# 安装系统依赖
RUN apt-get update && apt-get install -y \
python3-pip \
python3-dev \
git \
wget \
curl \
vim \
&& rm -rf /var/lib/apt/lists/*
# 创建工作目录
WORKDIR /workspace
# 复制requirements文件
COPY requirements.txt .
# 安装Python依赖
RUN pip3 install --upgrade pip
RUN pip3 install -r requirements.txt
# 安装Jupyter扩展
RUN pip3 install jupyter_contrib_nbextensions && \
jupyter contrib nbextension install --user
# 暴露端口
EXPOSE 8888
# 启动脚本
CMD "jupyter", "lab", "--ip=0.0.0.0", "--port=8888", "--no-browser", "--allow-root", "--NotebookApp.token=''"
7.2 requirements.txt
# 核心数据科学库
numpy>=1.21.0
pandas>=1.3.0
scipy>=1.7.0
matplotlib>=3.4.0
seaborn>=0.11.0
# 机器学习框架
scikit-learn>=1.0.0
imbalanced-learn>=0.9.0
# 深度学习框架
tensorflow>=2.8.0
torch>=1.12.0
torchvision>=0.13.0
# 安全分析工具
scapy>=2.4.0
yara-python>=4.2.0
pefile>=2022.5.30
# Jupyter环境
jupyterlab>=3.4.0
ipywidgets>=7.7.0
# 其他工具
requests>=2.26.0
tqdm>=4.62.0
八、总结与下一步
至此,我们已经完成了一个功能完整的AI安全研究环境搭建。这个环境包含:
8.1 环境特性
- 完整的ML/DL框架:TensorFlow、PyTorch、Scikit-learn
- 专业安全工具:Scapy、YARA、PE分析工具
- 交互式开发环境:Jupyter Lab with 扩展
- 数据集支持:预配置常用安全数据集处理流程
- GPU加速支持:CUDA和cuDNN配置
- 容器化部署:Docker支持快速复制环境
8.2 下一步行动
- 验证环境运行:执行提供的验证脚本,确保所有组件正常工作
- 探索示例项目:在Jupyter中运行基础的安全分析示例
- 获取真实数据:下载CIC-IDS2017等数据集开始实际研究
- 开始第一个项目:尝试构建一个简单的恶意流量检测模型
8.3 学习资源
- 官方文档:各库的官方文档是最好的学习资源
- 示例代码:各库GitHub仓库中的examples目录
- 在线课程:Coursera、Udacity的机器学习与安全课程
- 研究论文:阅读最新的AI安全研究论文
在下一篇文章中,我们将使用这个环境来构建第一个AI安全项目------《智能入侵检测:基于机器学习的网络流量异常发现》。