嵌入式AI Arm_linux_第一个Demo_让IPU跑起来
使用Comake PI D1开发板需要使用星宸科技推出的适配Soc的sdk架构,在这里我们为了快速运行起来IPU,直接拉取整包的Comake PI D1的代码,在这个整包代码的基础上添加我们的第一个Demo程序,让IPU跑起来。
1. 配置环境
这里可以参考Comake PI D1环境搭建
如果没有服务器,可以在自己的windows电脑下安装虚拟机,可参考下面的虚拟机安装链接进行安装ubuntu
1.1 虚拟机安装
1.2 账号申请与git配置
在这里可直接参考git账号申请与配置
2. 拉取Comake PI D1 整包代码
2.1 拉取整包code
参考1.2的文章内容,下载整包code,记得将ipu资料也拉取下来
1.3 编译工具链配置
1.2顺利申请到git账号之后按照1.2配置好git,输入以下命令获取编译工具链
git clone "https://git03.sigmastar.com.cn:9083/sigmastar/release_tool"
然后参考Comake PI D1环境搭建
3. conda 安装配置
网上搜索miniconda的安装和配置即可
4. python环境搭建
conda create -n classification python==3.10
conda activate classification
##此处建议在你的工作目录下创建一个文件夹
mkdir pyclass
cd pyclass
git clone https://github.com/WZMIAOMIAO/deep-learning-for-image-processing.git
cd deep-learning-for-image-processing/pytorch_classification/Test6_mobilenet
pytorch 安装配置(建议去官网选择合适的版本安装)
pip3 install torch torchvision
onnx安装
pip install onnx -i https://pypi.tuna.tsinghua.edu.cn/simple
pip install onnx-simplifier -i https://pypi.tuna.tsinghua.edu.cn/simple
pip install onnxscript
5.以mobilenetv2为例实际操作
5.1 创建 mobilenetv2 文件夹
mkdir mobilenetv2
cd mobilenetv2
git clone https://github.com/WZMIAOMIAO/deep-learning-for-image-processing.git
cd deep-learning-for-image-processing/pytorch_classification/Test6_mobilenet
5.2 验证模型
在这个
deep-learning-for-image-processing/pytorch_classification/Test6_mobilenet
路径下创建infer.py文件,验证模型正确与否
vi infer.py输入以下内容
import os
import json

import torch
from PIL import Image
from torchvision import transforms
import matplotlib.pyplot as plt

from model_v2 import MobileNetV2

def main():
    device = torch.device("cuda:0" if torch.cuda.is_available() else "cpu")

    data_transform = transforms.Compose(
        [transforms.Resize(256),
        transforms.CenterCrop(224),
        transforms.ToTensor(),
        transforms.Normalize([0.485, 0.456, 0.406], [0.229, 0.224, 0.225])])

    # load image
    img_path = "./apple.jpg"
    assert os.path.exists(img_path), "file: '{}' dose not exist.".format(img_path)
    img = Image.open(img_path)
    plt.imshow(img)
    # [N, C, H, W]
    img = data_transform(img)
    # expand batch dimension
    img = torch.unsqueeze(img, dim=0)

    # create model
    model = MobileNetV2(num_classes=1000).to(device)
    # load model weights
    model_weight_path = "./opendla/mobilenet_v2-b0353104.pth"
    model.load_state_dict(torch.load(model_weight_path, map_location=device))
    model.eval()
    with torch.no_grad():
        # predict class
        output = torch.squeeze(model(img.to(device))).cpu()
        predict = torch.softmax(output, dim=0)
        predict_cla = torch.argmax(predict).numpy()
        print("class id", predict_cla)

if __name__ == '__main__':
    main()
然后在 conda 的 classification 环境下运行
python infer.py
5.3 转换模型为onnx模型
在这个
deep-learning-for-image-processing/pytorch_classification/Test6_mobilenet
路径下创建export.py文件,验证模型正确与否
vi export.py输入以下内容
import os
import json

import torch
from PIL import Image
from torchvision import transforms
import matplotlib.pyplot as plt

from model_v2 import MobileNetV2

def main():
    device = torch.device("cuda:0" if torch.cuda.is_available() else "cpu")

    data_transform = transforms.Compose(
        [transforms.Resize(256),
        transforms.CenterCrop(224),
        transforms.ToTensor(),
        transforms.Normalize([0.485, 0.456, 0.406], [0.229, 0.224, 0.225])])

    # load image
    img_path = "./apple.jpg"
    assert os.path.exists(img_path), "file: '{}' dose not exist.".format(img_path)
    img = Image.open(img_path)
    plt.imshow(img)
    # [N, C, H, W]
    img = data_transform(img)
    # expand batch dimension
    img = torch.unsqueeze(img, dim=0)

    # create model
    model = MobileNetV2(num_classes=1000).to(device)
    # load model weights
    model_weight_path = "./opendla/mobilenet_v2-b0353104.pth"
    model.load_state_dict(torch.load(model_weight_path, map_location=device))
    model.eval()
    torch.onnx.export(
        model,
        img.to(device),
        "./opendla/mobilenetv2.onnx",
        input_names=['images'],
        output_names=['output'],
        do_constant_folding=False
    )

if __name__ == '__main__':
    main()
优化图结构
python -m onnxsim opendla/mobilenetv2.onnx opendla/mobilenetv2_sim.onnx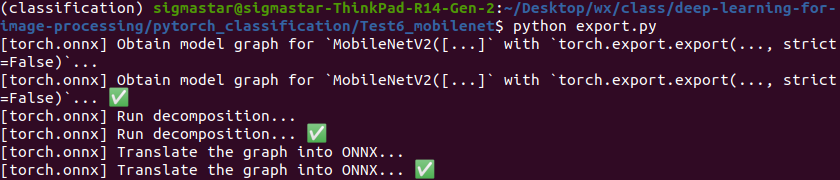
6.使用 comake 社区的端侧云ai仿真转换离线模型
详情可参考Comake 社区AI在线开发平台使用
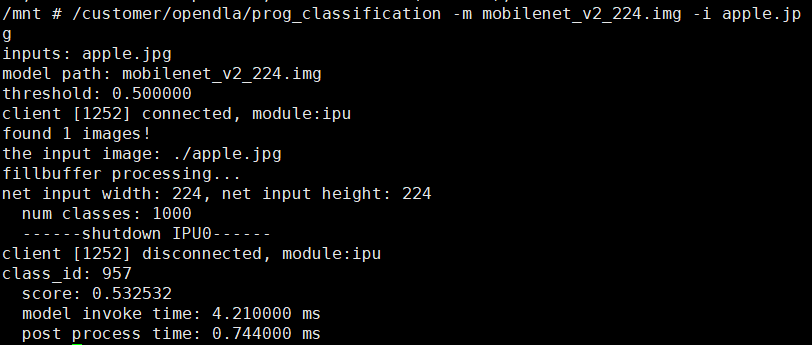
7.拷贝到板端,离线运行模型
将6中转换好的模型img文件,拷贝至板端
这里先用sdk/verify/opendla/classification的代码验证一下
在板端执行:
/customer/opendla/prog_classification -m mobilenet_v2_224.img -i apple.jpg