网站需求:
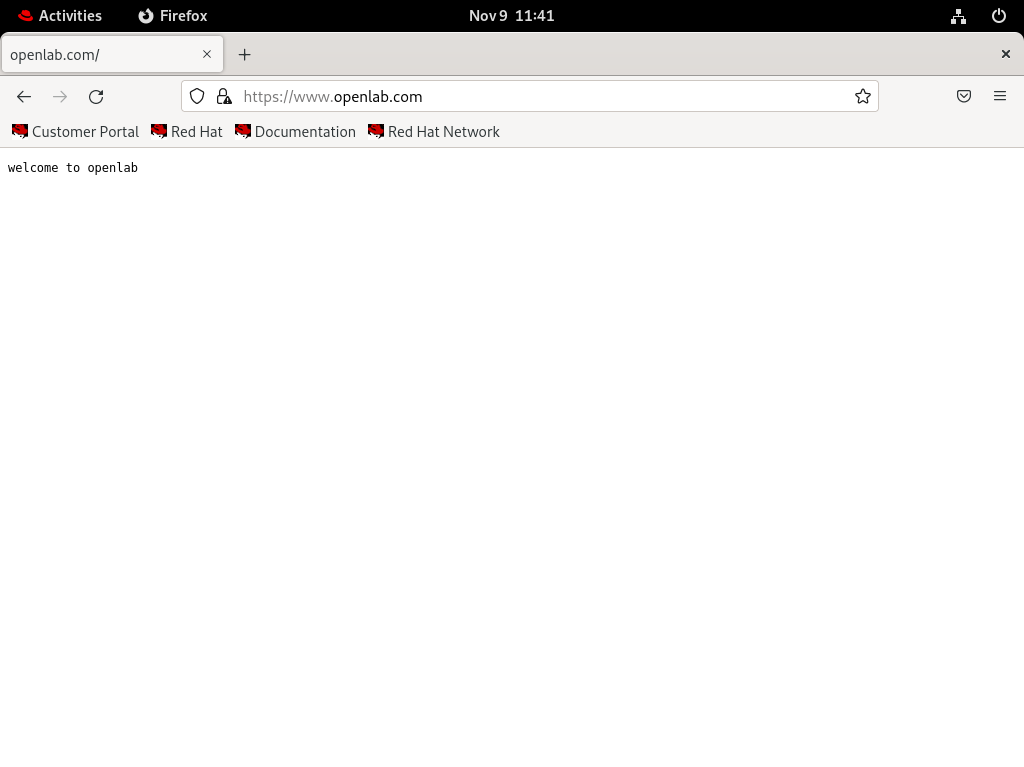
1.基于域名<www.openlab.com>可以访问网站内容为 welcome to openlab!!!
2.给该公司创建三个子界面分别显示学生信息,教学资料和缴费网站,基于<www.openlab.com/student> 网站访问学生信息,<www.openlab.com/data>网站访问教学资料 <www.openlab.com/money>网站访问缴费网站。
3.要求 (1)访问该网站http请求都通过https响应。
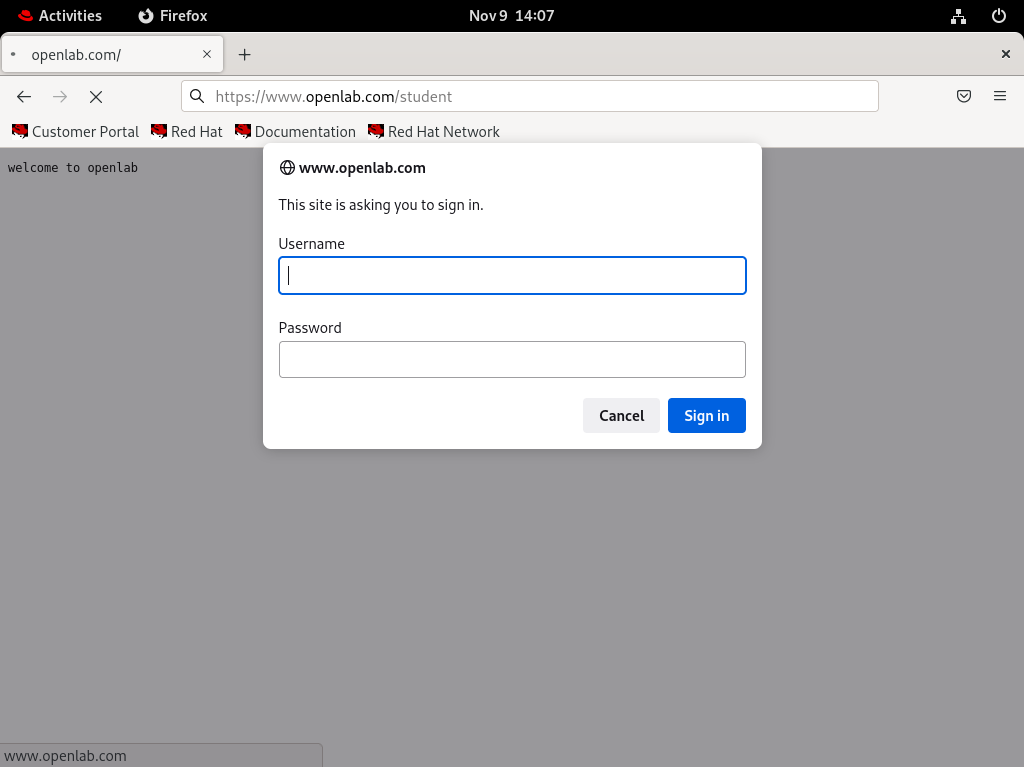
(2)学生信息网站只有song和tian两人可以访问,其他用户不能访问。
实现步骤:
一.准备工作
恢复快照
root@server \~# setenforce 0
root@server \~# systemctl stop firewalld
root@server \~# systemctl disable firewalld
root@server \~# dnf install nginx -y
root@localhost \~# dnf install nginx httpd-tools -y
root@server \~# systemctl start nginx # 启动nginx
root@server \~# systemctl enable nginx # 设置开机启动
二.生成密码文件(song和tian)
root@localhost \~# htpasswd -c /etc/nginx/passwd song New password: Re-type new password: Adding password for user song
root@localhost \~# htpasswd /etc/nginx/passwd tian New password: Re-type new password: Adding password for user tian
三.创建openlab主页内容
root@localhost \~# vim /etc/nginx/conf.d/openlab.conf
server { listen 80; server_name <www.openlab.com>; location /openlab{ alias /www/openlab/; index index.html } }
创建网页目录
root@localhost \~# mkdir -p /www/openlab
手动配置IP地址与域名的映射关系
root@localhost \~# vim /etc/hosts
192.168.88.129 <www.openlab.com>
建立https网站
制作私钥
root@localhost \~# openssl genrsa -aes128 2048 > /etc/nginx/openlab.key Enter PEM pass phrase: Verifying - Enter PEM pass phrase:
制作证书
root@localhost \~# openssl req -utf8 -new -key /etc/nginx/openlab.key -x509 -days 365 -out /etc/nginx/openlab.crt Enter pass phrase for /etc/nginx/openlab.key: You are about to be asked to enter information that will be incorporated into your certificate request. What you are about to enter is what is called a Distinguished Name or a DN. There are quite a few fields but you can leave some blank For some fields there will be a default value,
If you enter '.', the field will be left blank.
Country Name (2 letter code) XX:86 State or Province Name (full name) \[\]:nanjing Locality Name (eg, city) Default City:nanjing Organization Name (eg, company) Default Company Ltd:openlab Organizational Unit Name (eg, section) \[\]:RHCE Common Name (eg, your name or your server's hostname) \[\]:server Email Address \[\]:andy@qq.com
在加载SSL支持的Nginx并使用上述私钥时除去必须的口令
root@server \~# cd /etc/nginx root@server nginx# cp openlab.key openlab.key.org root@server nginx# openssl rsa -in openlab.key.org -out openlab.key Enter pass phrase for ftp.key.org: # 输入加密私钥的密码 writing RSA key
root@root \~# vim /etc/nginx/conf.d/openlab.conf # 编辑配置文件
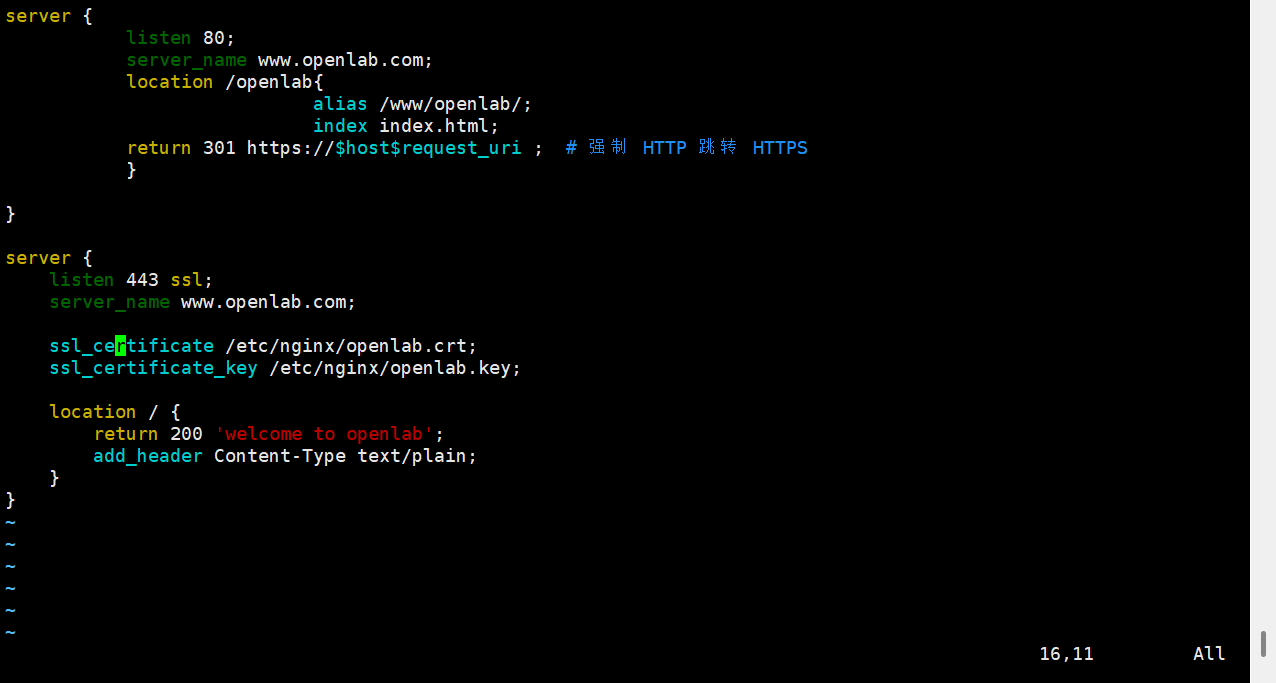
server { listen 443 ssl; server_name <www.openlab.com>;
ssl_certificate /etc/nginx/openlab.crt; ssl_certificate_key /etc/nginx/openlab.key;
}
根据要求写入网页内容
location / { return 200 'welcome to openlab'; add_header Content-Type text/plain; }
强制 HTTP 跳转 HTTPS
return 301 https://hostrequest_uri ;
整个配置内容如下
重启
root@localhost \~# systemctl restart nginx
测试
创建子界面
root@localhost \~# vim /etc/nginx/conf.d/openlab.conf
学生信息页面,仅允许 song、tian 访问
location /student { auth_basic "Student Area"; auth_basic_user_file /etc/nginx/passwd; alias /www/openlab/student; index index.html; }
教学资料界面和缴费界面,所有人都能访问
location /data { alias /www/openlab/data; index index.html; }
location /money { alias /www/openlab/money; index index.html; }
创建相关目录
root@localhost \~# mkdir -p /www/openlab/{student,data,money}
重启
root@localhost \~# systemctl restart nginx
完成后测试结果为:
综上,实验完成