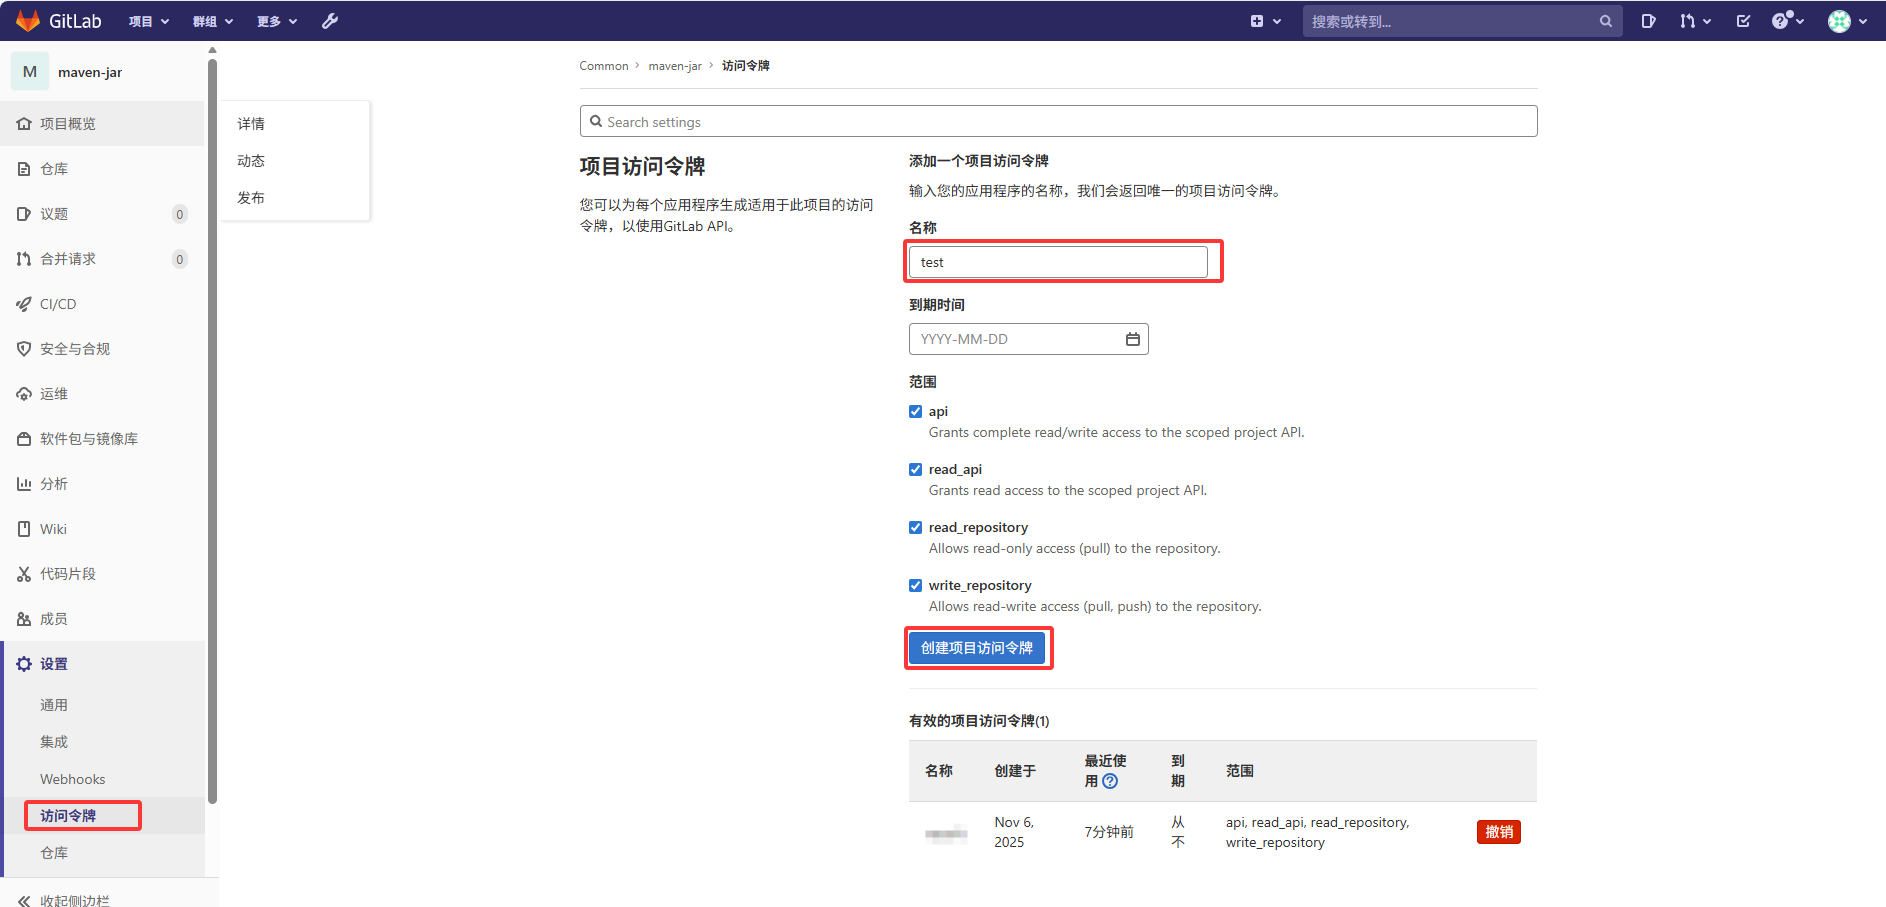
一、创建private-token
首先进入某个项目,在下面的菜单页面中创建一个private token,根据需要选择权限范围,创建完后记住token,之后就找不到了
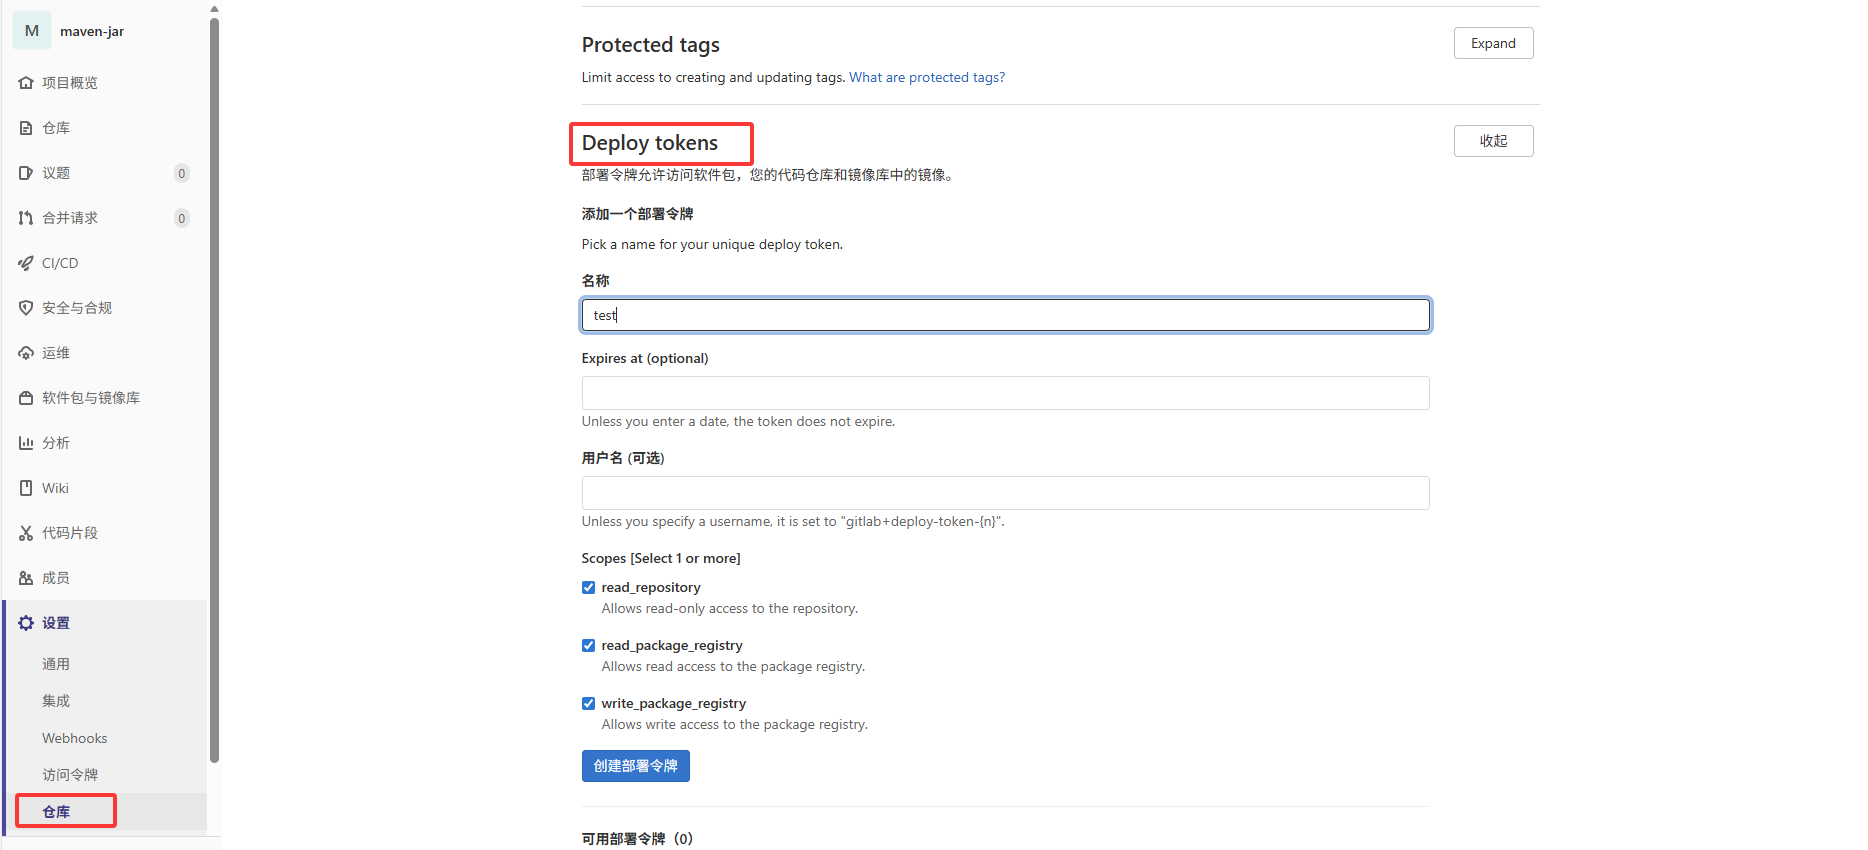
二、创建deploy-token
再创建一个deploy token,同样要记住token,不然后面就找不到了
三、上传本地jar包
bash
mvn deploy:deploy-file -Durl=http://192.168.1.102/api/v4/projects/60/packages/maven -DrepositoryId=gitlab-maven -Dfile=./lib/demo.jar -DpomFile=./lib/demo.pom -DgroupId=com.mysoft -DartifactId=my-demo -Dversion=1.0.0 -Dpackaging=jar -DgeneratePom=true说明:mvn deploy:deploy-file
-Durl=http://gitlab地址/api/v4/projects/gitlab项目id/packages/maven #你的gitlab地址
-DrepositoryId=gitlab-maven #资源库的id,与settings.xml里面一致
-Dfile=./lib/demo.jar #jar包路径
-DpomFile=./lib/demo.pom #jar包对应的pom文件路径
-DgroupId=com.mysoft #groupId
-DartifactId=my-demo #artifactId
-Dversion=1.0.0 #版本号
-Dpackaging=jar
-DgeneratePom=true #是否生成全局pom文件
四、配置settings.xml
我的完整settings.xml如下:
XML
<?xml version="1.0" encoding="UTF-8"?>
<settings xmlns="http://maven.apache.org/SETTINGS/1.2.0"
          xmlns:xsi="http://www.w3.org/2001/XMLSchema-instance"
          xsi:schemaLocation="http://maven.apache.org/SETTINGS/1.2.0 https://maven.apache.org/xsd/settings-1.2.0.xsd">

  <pluginGroups>
	<pluginGroup>org.apache.maven.plugins</pluginGroup>
  </pluginGroups>
  <proxies>
  </proxies>
  <servers>
	<server>
		<id>gitlab-maven</id>
		<username>gitlab+deploy-token-1</username>
		<password>cKhGrRUHeKqDwYd9dexN</password>
		<configuration>
			<httpHeaders>
			   <property>
				  <name>Private-Token</name>
				  <value>1Byi6DDa8ewyrdqxT_aE</value>
			   </property>
			</httpHeaders>
		</configuration>
    </server>
  </servers>
  <mirrors>
	<mirror>
		<id>nexus-aliyun</id>
		<mirrorOf>central</mirrorOf>
		<name>Nexus aliyun</name>
		<url>http://maven.aliyun.com/nexus/content/groups/public/</url>
	</mirror>
	<mirror>
		<id>net-cn</id>
		<mirrorOf>central</mirrorOf>
		<name>Nexus net</name>
		<url>http://maven.net.cn/content/groups/public/</url>
	</mirror>
	<mirror>
	  <id>aliyunmaven</id>
	  <mirrorOf>central</mirrorOf>
	  <name>阿里云公共仓库</name>
	  <url>https://maven.aliyun.com/repository/public</url>
	</mirror>
	<mirror>
		<id>gitlab-maven</id>
		<name>Allow GitLab HTTP Repository</name>
		<url>http://192.168.1.102/api/v4/projects/60/packages/maven/</url>
		<mirrorOf>external:http:*</mirrorOf>
		<blocked>false</blocked>
	</mirror>
	<mirror>
		<id>clojars</id>
		<name>Allow GitLab HTTP Repository</name>
		<url>http://clojars.org/repo/</url>
		<mirrorOf>external:http:*</mirrorOf>
		<blocked>false</blocked>
	</mirror>
  </mirrors>

  <profiles>
	<profile>
		<id>jdk-1.8</id>
		<activation>
			  <activeByDefault>true</activeByDefault>
			  <jdk>1.8</jdk>
		 </activation>
		 <properties>
			  <maven.compiler.source>1.8</maven.compiler.source>
			  <maven.compiler.target>1.8</maven.compiler.target>
			  <maven.compiler.compilerVersion>1.8</maven.compiler.compilerVersion>
		 </properties>
	</profile>
	<profile>
		<id>nexus</id>
		<repositories>
			<repository>
				<id>nexus</id>
				<name>local private nexus</name>
				<url>http://maven.aliyun.com/nexus/content/groups/public/</url>
				<releases>
					<enabled>true</enabled>
				</releases>
				<snapshots>
					<enabled>false</enabled>
				</snapshots>
			</repository>
		</repositories>
		<pluginRepositories>
			<pluginRepository>
				<id>nexus</id>
				<name>local private nexus</name>
				<url>http://maven.aliyun.com/nexus/content/groups/public/</url>
				<releases>
					<enabled>true</enabled>
				</releases>
				<snapshots>
					<enabled>false</enabled>
				</snapshots>
			</pluginRepository>
		</pluginRepositories>
	</profile>
	<profile>
	  <id>private-repo</id>
	  <repositories>
		<repository>
		  <id>gitlab-maven</id>
		  <url>http://192.168.1.102/api/v4/projects/60/packages/maven</url>
		</repository>
	  </repositories>
	</profile>
  </profiles>
  <activeProfiles>
     <activeProfile>private-repo</activeProfile>
  </activeProfiles>
</settings>
其中主要是要配置以下几段:
1、配置权限
XML
<servers>
	<server>
		<id>gitlab-maven</id>
		<username>deploy的账号</username>
		<password>deploy的token</password>
		<configuration>
			<httpHeaders>
			   <property>
				  <name>Private-Token</name>
				  <value>private的Token</value>
			   </property>
			</httpHeaders>
		</configuration>
    </server>
</servers>
2、配置资源地址
由于我的gitlab没有配置https,所以需要在settings里设置允许http访问:external:http:*
XML
<mirror>
	<id>gitlab-maven</id>
	<name>Allow GitLab HTTP Repository</name>
	<url>http://192.168.1.102/api/v4/projects/60/packages/maven/</url>
	<mirrorOf>external:http:*</mirrorOf>
	<blocked>false</blocked>
</mirror>
3、还有这段
XML
<profile>
	<id>private-repo</id>
	<repositories>
		<repository>
		  <id>gitlab-maven</id>
		  <url>http://192.168.1.102/api/v4/projects/60/packages/maven</url>
		</repository>
	</repositories>
</profile>
4、这段也加上吧
XML
  <activeProfiles>
     <activeProfile>private-repo</activeProfile>
  </activeProfiles>
settings.xml基本就这些了,另外有几点要注意下,如果是用idea开发的,好像直接在这里设置settings.xml不起效
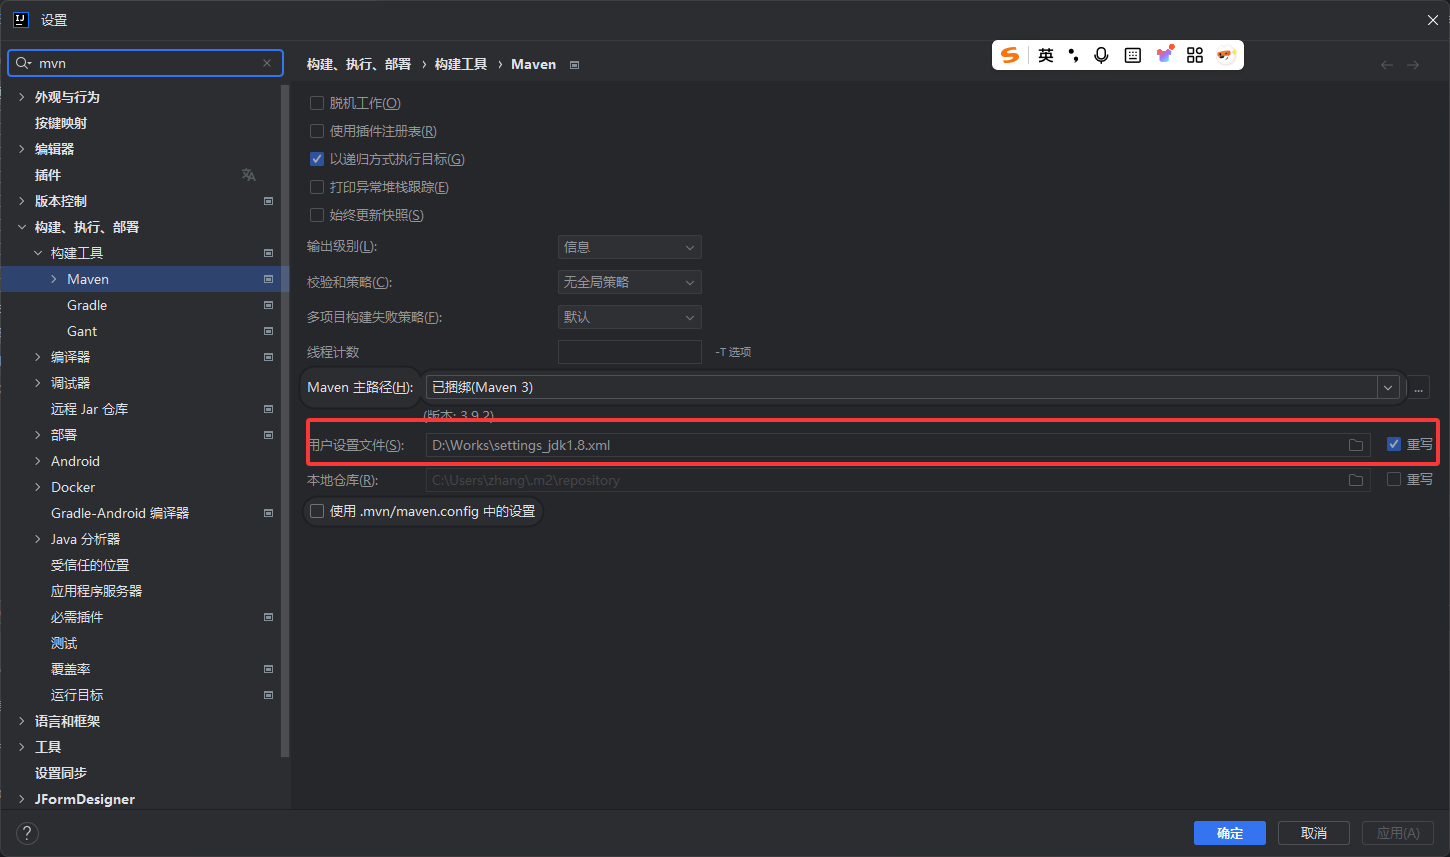
实际读取的还是maven安装目录下conf文件夹中的settings.xml,网上搜了下,说是maven优先读取安装目录conf下的settings.xml,其次是.m2文件夹下资源库中的settings.xml,如果这2个地方都有没找到settings.xml,idea里设置的settings.xml才会起效。
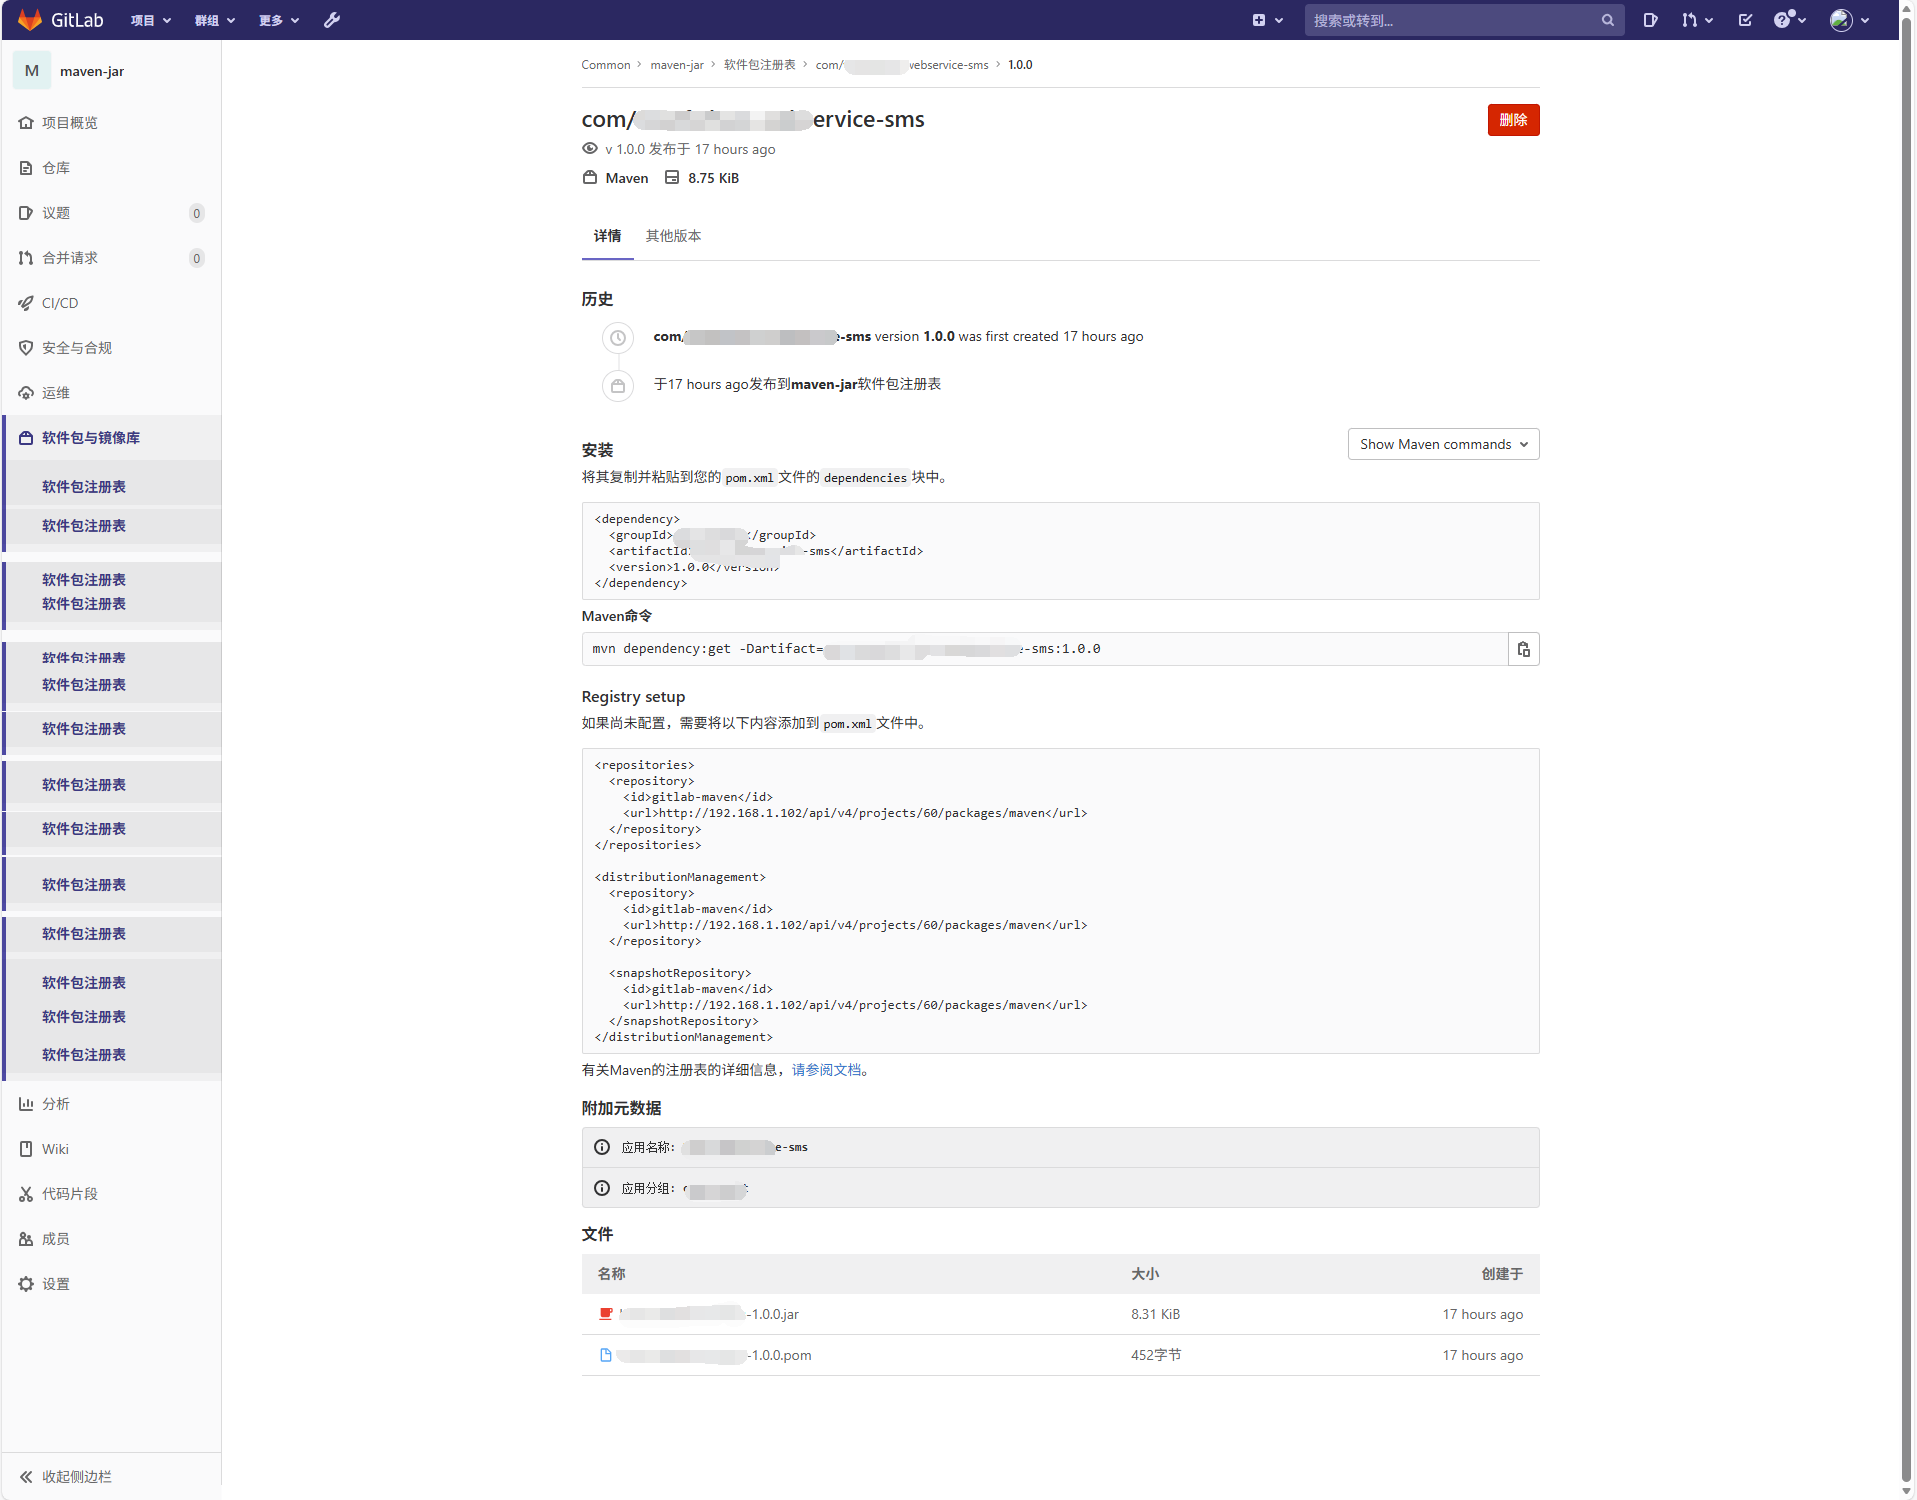
五、配置pom.xml
进入gitlab项目的"软件包与镜像库"
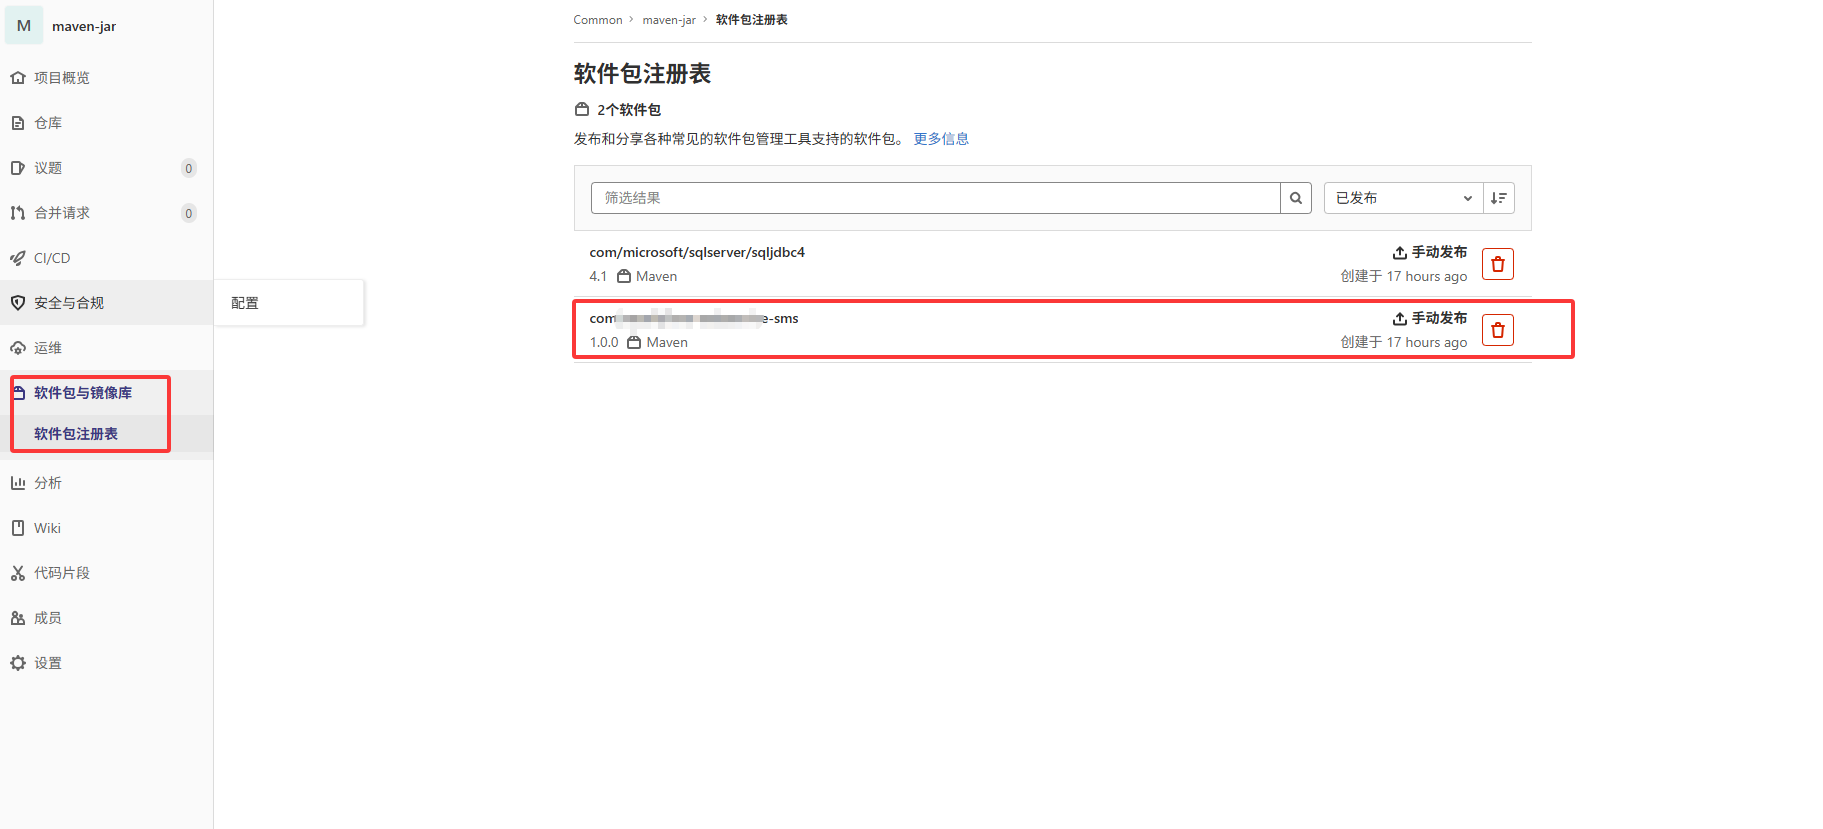
进入jar包的详情页面,可以看到包的pom配置信息,可以使用mvn dependency:get -Dartifact=com.xxxx:xxxxxxx:1.0.0测试包是否可以正常拉取