Spring Cloud Config
分布式配置管理系统
作用:配置管理
主要包括:
- Config Server :配置管理服务器,负责从后端存储中拉取配置信息(如 git,svn,本地文件系统等),并提供 REST API 供客户端使用。
- Config Client:配置客户端,使程序通过 它 连接 Config Server 并动态获取配置信息。
- 版本控制集成:SCC 默认使用 Git 作为配置存储的后端,使用 Git 的版本控制功能来管理配置文件。每个环境对应一个特定的版本,通过切换版本号自动获取对应环境的配置。
Config Server
这是一个程序(要自己搭),步骤:
- 创建项目
- 添加依赖
- 项目启用Config Server (启动类上加注解)
- 进行配置-git 仓库地址,分支选用,配置所在文件夹
- 初始化 Git 仓库。
Spring Cloud Config 有它的⼀套访问规则,通过这套规则在浏览器上直接访问就可以。
• /{application}/{profile}/{label}
• /{application}-{profile}.yml
• /{label}/{application}-{profile}.yml
• /{application}-{profile}.properties
• /{label}/{application}-{profile}.properties
• {application}: 微服务的名称, 对应于配置中的 spring.application.name 属性。
• {profile}: 当前环境的配置⽂件, 如dev, test, prod等, 对应于 spring.profiles.active
属性.
• {label}: Git仓库中的分支, 标签或提交ID,默认会使用 master分支, {label} 对于回滚到以前的配置版本非常有用。
Config Client
1. 引入依赖
xml
<dependency>
	<groupId>org.springframework.cloud</groupId>
	<artifactId>spring-cloud-starter-config</artifactId>
</dependency>
<dependency>
	<groupId>org.springframework.cloud</groupId>
	<artifactId>spring-cloud-starter-bootstrap</artifactId>
</dependency>
一个是 Config 依赖,一个是 bootstrap 依赖。
Spring Cloud 会创建⼀个 Bootstrap Context , 作为Spring 应用"Application Context" 的父上下文。 在Spring应用启动的初始化阶段, Bootstrap Context 负责从外部源(如Consul)加载配置属性并解析配置。
Bootstrap 属性具有高优先级, 也就是说在 bootstrap.yml 或 bootstrap.properties 中定义
的配置会优先于 application.yml 或 application.properties 中的配置。
bootstrap.yml 主要用于配置应用启动时所需的外部依赖和环境, 而 application.yml 用于业
务逻辑相关的配置(如数据库连接等)
2. 配置 bootstrap 文件
yml
spring:
	profiles:
		active: dev
	application:
		name: product-service
	cloud:
		config:
			uri: http://127.0.0.1:7071 # 指定配置服务端的地址
配置 config server 的地址。
3. 测试------从配置文件中读取配置
java
@RequestMapping("/config")
@RestController
public class ConfigController {
	@Value("${data.env}")
	private String env;

	@RequestMapping("/getEnv")
	public String getEnv(){ return "env:"+ env; } }
此处从 server 中读配置,遵循前面的访问规则。
4. 多平台配置
yml
spring:
	profiles:
		active: prod

#配置两个版本的配置,并通过 spring.profiles.active 设置当前使⽤的版本

---
spring:
	config:
		activate:
			on-profile: prod
	application:
		name: product-service
	cloud:
		config:
			uri: http://localhost:7071
---
spring:
	config:
		activate:
			on-profile: dev
	application:
			name: product-service
	cloud:
		config:
			uri: http://localhost:7071
因为开发环境和生产环境,server 的地址是可能不同的。
刷新
只这样是不够的,会发现修改 git 中的配置后,读的配置不会改变。需要重启,服务才可以。
为了解决反复重启这个问题,需要借助 Actuator提供的功能。
1. 依赖引入:
xml
<dependency>
	<groupId>org.springframework.boot</groupId>
	<artifactId>spring-boot-starter-actuator</artifactId>
</dependency>
2. 端点开启:
spring-boot-starter-actuator是 Spring Boot 提供的⼀个强大的监控和管理工具,它允许开发者查看和管理 Spring Boot 应用的各种运行时指标和状态。核心功能有健康检查, 收集和展示应用程序的运行指标, 以及端口配置
想要使用,就要开发对应的端点。
yml
#需要开启的端点, 这⾥主要⽤到的是refresh端点, 只开启这⼀个就可以, 为了⽅便, 可以开启所有端点, 除了shutdown端点
management:
	endpoint:
		shutdown:
			enabled: false
	endpoints:
		web:
			exposure:
				include: "*"
/actuator/refresh端点是 Spring Cloud Actuator 提供的一个功能, 它允许在运行时动态刷新 Spring Cloud Config 客户端的配置
3. 注解添加:
添加 @RefreshScope 注解。
java
@RefreshScope
@RequestMapping("/config")
@RestController
public class ConfigController {
	@Value("${data.env}")
	private String env;

	@RequestMapping("/getEnv")
	public String getEnv(){ return "env:"+ env; } }
之后,每当修改后,手动动调一下接口 http://127.0.0.1:9090/actuator/refresh(POST请求)动态刷新 Spring Cloud Config 客户端的配置 (客户端服务接口)
Webhook 使用
当然,之前还是太麻烦了。每次都要手动,太不人性了。所以,引入 webhook 的使用。
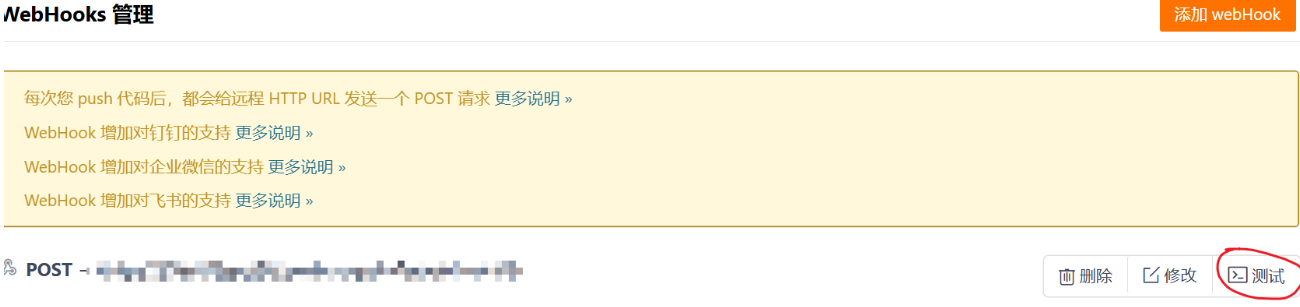
webhook 是gitee 提供的,使用后。每次 push 后,gitee 会向远程 HTTP URL 发送 一个 POST 请求。这就不用手动了。
操作:进入仓库-管理-webhook-添加 webhook
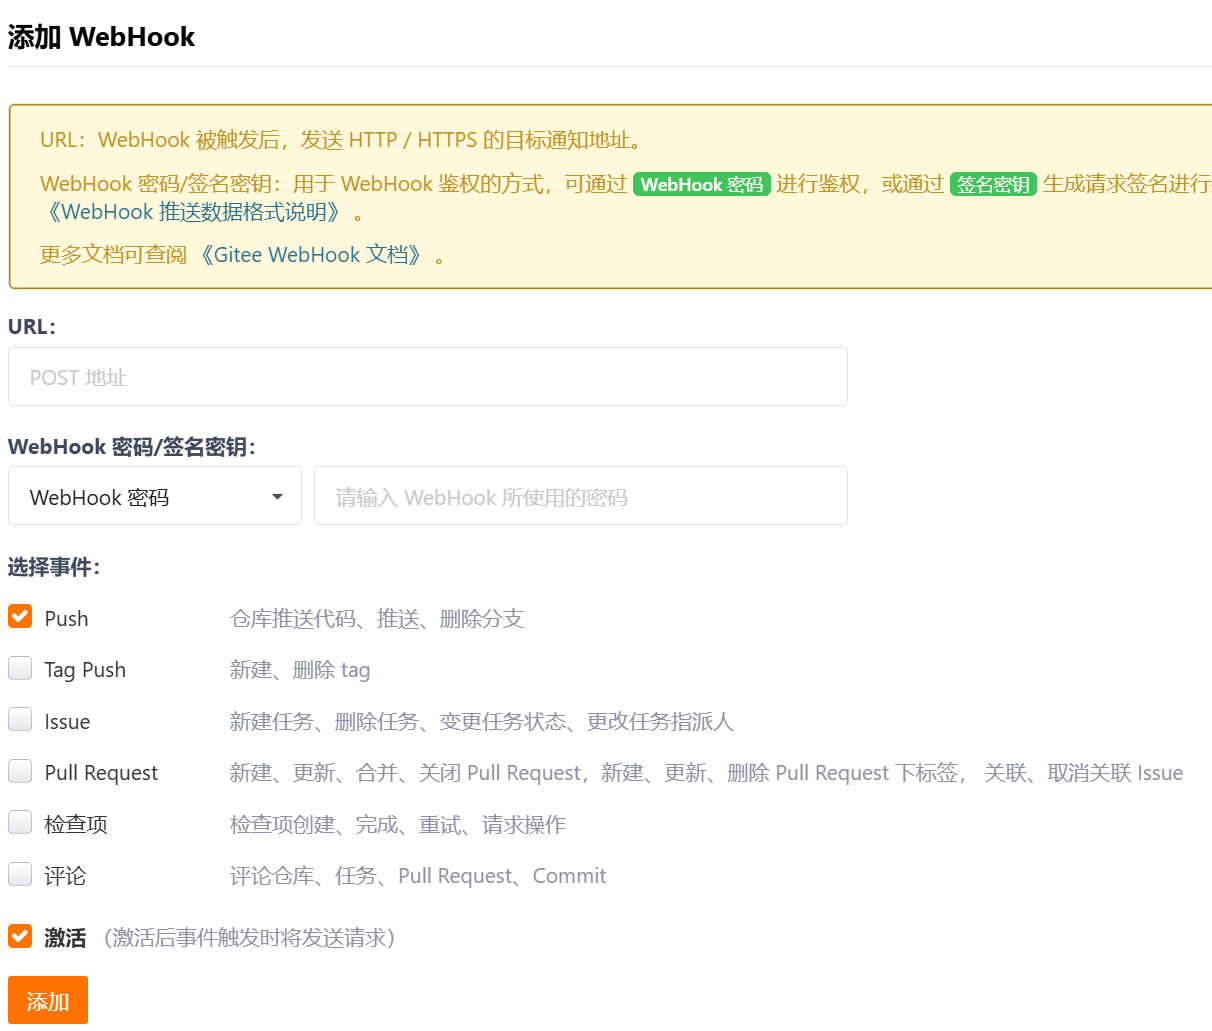
直接把 http://127.0.0.1:9090/actuator/refresh 填进去是不行的,因为这是 内网的url,gitee 在外网访问不到,可以填域名 或 外网 url。
这两种比较麻烦,此处介绍一个简单的------ 内网穿透 。
cpolar 使用它完成。页面有提示,根据提示操作即可。
直接使用生成的 url,并测试后,会失败。
原因:webhook发送post的时候会携带其他的信息, 可以通过过滤器把对应的多余信息去掉。
Filter 、Interceptor区别
直接复制使用:
java
package com.bite.product.filter;
import jakarta.servlet.*;
import jakarta.servlet.http.HttpServletRequest;
import jakarta.servlet.http.HttpServletRequestWrapper;
import org.springframework.stereotype.Component;
import java.io.ByteArrayInputStream;
import java.io.IOException;
@Component
public class WebHooksFilter implements Filter {

    @Override

    public void init(FilterConfig filterConfig) throws ServletException {

    }

    @Override

    public void destroy() {

    }

    @Override

    public void doFilter(ServletRequest servletRequest, ServletResponse

            servletResponse, FilterChain filterChain) throws IOException,

            ServletException {

        HttpServletRequest httpServletRequest = (HttpServletRequest)

                servletRequest;

        String url = new String(httpServletRequest.getRequestURI());

//检查url是否以/refresh结尾, 如果不是, 直接把请求传递给下⼀个过滤器或者⽬标资源

        if (!url.endsWith("/refresh")) {

            filterChain.doFilter(servletRequest, servletResponse);

            return;

        }

        RequestWrapper requestWrapper = new

                RequestWrapper(httpServletRequest);

        filterChain.doFilter(requestWrapper, servletResponse);

    }

    private class RequestWrapper extends HttpServletRequestWrapper {

        public RequestWrapper(HttpServletRequest request) {

            super(request);

        }

        //重写了HttpServletRequestWrapper的getInputStream⽅法, 返回了⼀个空的字节数组的ByteArrayInputStream

        @Override

        public ServletInputStream getInputStream() throws IOException {

            byte[] bytes = new byte[0];

            ByteArrayInputStream byteArrayInputStream = new

                    ByteArrayInputStream(bytes);

            ServletInputStream servletInputStream = new ServletInputStream() {

                @Override

                public int read() throws IOException {

                    return byteArrayInputStream.read();

                }

                @

                        Override

                public boolean isFinished() {

                    return byteArrayInputStream.read() == -1 ? true : false;

                }

                @

                        Override

                public boolean isReady() {

                    return false;

                }

                @

                        Override

                public void setReadListener(ReadListener listener) {

                }

            };

            return servletInputStream;

        }

    }

}
Spring Cloud Bus
使用 webhook 是方便了不少,但是一次提交只会刷新一个实例,而实际生产中一般会有多个实例。此时,想要更新每个实例,就要访问每个实例的 \actuator\refresh 端点,这就很麻烦。
为此引入 Spring Cloud Bus 的使用,只要用其中一个,其余也会跟着更新。
Spring Cloud Bus 核心是基于消息队列进行广播。主要用于集群环境中传播分布式系统的配置变更,以及提供事件驱动的通信机制。
目前 Spring Cloud Bus 支持的消息队列 有 RabbitMQ 和 Kafka。
依赖引入
xml
<dependency>
	<groupId>org.springframework.cloud</groupId>
	<artifactId>spring-cloud-starter-bus-amqp</artifactId> </dependency>
这里使用 rabbitmq,如果是 kafka 则将上面的 amqp 换成 kafak。
配置添加
yml
rabbitmq:
  host: 49.235.103.138
  port: 5672
  username: admin
  password: admin
  virtual-host: /
使用 kafka ,则换成对应配置。
测试
启动多个实例,修改配置中心中的配置,接着访问任意实例的 /actuator/busrefresh (post 方法),可以观察到所有实例,都更新了。
加密
配置文件中有时会放一些密码之类的敏感信息,明文存储风险很大,而且还是放在git仓库里。
因此,就要对这些信息加密。
对称加密
java 中默认提供的有 一套用于加密,密钥生成的包 JCE,支持对称,非对称等加密。
但是这个默认的长度有限制。如果想要不受限制就到 https://www.oracle.com/java/technologies/javase-jce8-downloads.html 这里下载不受限的。下好后,将
local_policy.jar和US_export_policy.jar两个文件复制到$JAVA_HOME/jre/lib/security目录下, 如果之前目录存在同名jar包, 则覆盖。
依赖引入
在 config server 服务中添加
xml
<dependency>
	<groupId>org.springframework.cloud</groupId>
	<artifactId>spring-cloud-starter-bootstrap</artifactId> </dependency>
配置
config server 服务中配置密钥
yml
encrypt:
  key: 123456
测试
访问 config server 下 \encrypt\status
如果显示 OK ,就说明成功了。
出现"The encryption algorithm is not strong enough",说明没有配密钥
出现 "java.lang.UnsupportedOperationException: No encryption for FailsafeTextEncryptor."
说明没有添加 bootstrap 依赖。
加密解密
启动 server 后,在命令行中 curl http://127.0.0.1:7071/encrypt -d root 执行此命令,即对 root 进行加密。
结果如下:9c95492304ac3a92e9d8ac2ff530b9bf1a968db65dbd14119c7f755204bba683
执行 `curl http://127.0.0.1:7071/decrypt -d 9c95492304ac3a92e9d8ac2ff530b9bf1a968db65dbd14119c7f755204bba683
就是对 root 加密的结果进行解密,结果为 root。
此处,也可使用postman, 加密对象要放在 body中,选用 raw 下的 text,且使用 POST 方法。
将加密结果放在 配置中心的配置文件中:
yml
data:
    env: product-service-prod3
    password: '{cipher}9c95492304ac3a92e9d8ac2ff530b9bf1a968db65dbd14119c7f755204bba683'
单引号 ' ' 不可省略,且要加上 {cipher}, {cipher} 就是告诉程序这是个加密后的,获取时要用密钥解密,之后在发给 client 端。
非对称加密:
生成密钥
使用 JDK 中自带的 keytool。
命令行执行:keytool -genkeypair -keystore D:/config-server.keystore -alias config-server-keyalg RSA -keypass config -storepass config
!\[Pasted image 20251109160009.png]
接着将生成的 .keystore 文件,放在 config server 服务的 resource 文件夹下。
配置
yml
encrypt:
	key-store:
		location: config-server.keystore #keystore⽂件存储路径
		alias: config-server
		password: config #密钥别名#storepass密钥仓库
		secret: config #keypass ⽤来保护所⽣成密钥对中的密钥
测试
同对称加密
加密解密
同对称加密