Fastadmin中使用rabbitmq实现延迟队列
目录
[扩展 RabbitMQ 工具类](#扩展 RabbitMQ 工具类)
延迟队列
修改配置
在Fastadmin 使用RabbitMQ队列基础上实现,
在application/config.php中在基础配置上,添加死信交换机和队列配置。
如下:
php
// +----------------------------------------------------------------------
// | Rabbitmq设置
// +----------------------------------------------------------------------
'rabbitmq'               => [
    // 基础配置
    // RabbitMQ主机
    'host'      => '127.0.0.1',
    // 端口
    'port'      => 5672,
    // 用户名(默认guest,仅本地访问)
    'user'      => 'guest',
    // 密码
    'password'  => 'guest',
    // 虚拟主机
    'vhost'     => '/',
    // 心跳检测时间(秒)
    'heartbeat' => 60,
    // 默认队列名称
    'queue'     => [
        'default' => 'fastadmin_default_queue',
    ],
    // 延迟队列相关配置
    'delay' => [
        // 临时队列(消息在此过期)
        'temp_queue' => 'fastadmin_temp_queue',
        // 死信交换机
        'dlx_exchange' => 'fastadmin_dlx_exchange',
        // 死信队列(最终消费队列)
        'dlx_queue' => 'fastadmin_dlx_queue',
        // 死信路由键
        'dlx_routing_key' => 'dlx_key'
    ]
],
扩展 RabbitMQ 工具类
修改 application/common/library/RabbitMQ.php,添加声明死信交换机、队列的方法:
php
<?php
namespace app\common\library;

use PhpAmqpLib\Connection\AMQPStreamConnection;
use PhpAmqpLib\Exchange\AMQPExchangeType;
use PhpAmqpLib\Message\AMQPMessage;
use PhpAmqpLib\Wire\AMQPTable;
use think\Config;

class RabbitMQ
{
    protected $connection;  // 连接对象

    protected $channel;     // 通道对象

    protected $config;      // 配置参数

    protected $delayConfig; // 延迟队列配置 -- 新增

    public function __construct()
    {
        $this->config = Config::get('rabbitmq');
        $this->delayConfig = $this->config['delay']; // -- 新增
        $this->connect();
    }

    // 建立连接
    protected function connect()
    {
        try {
            $this->connection = new AMQPStreamConnection(
                $this->config['host'],
                $this->config['port'],
                $this->config['user'],
                $this->config['password'],
                $this->config['vhost'],
                false,
                'AMQPLAIN',
                null,
                'en_US',
                $this->config['heartbeat'],
                null
            );
            $this->channel = $this->connection->channel();
        } catch (\Exception $e) {
            throw new \Exception("RabbitMQ连接失败:" . $e->getMessage());
        }
    }

    // 声明死信交换机和死信队列(最终消费的队列) --新增
    public function declareDlx()
    {
        $dlxExchange = $this->delayConfig['dlx_exchange'];
        $dlxQueue = $this->delayConfig['dlx_queue'];
        $dlxRoutingKey = $this->delayConfig['dlx_routing_key'];

        // 1. 声明死信交换机(类型 direct)
        $this->channel->exchange_declare(
            $dlxExchange,
            AMQPExchangeType::DIRECT, // 直连交换机
            false,
            true, // 持久化
            false
        );

        // 2. 声明死信队列(消费者监听此队列)
        $this->channel->queue_declare(
            $dlxQueue,
            false,
            true, // 持久化
            false,
            false
        );

        // 3. 绑定死信队列到死信交换机(通过路由键)
        $this->channel->queue_bind(
            $dlxQueue,
            $dlxExchange,
            $dlxRoutingKey
        );
    }

    // 声明临时队列(消息在此过期,过期后进入死信队列) --新增
    public function declareTempQueue()
    {
        $tempQueue = $this->delayConfig['temp_queue'];
        $dlxExchange = $this->delayConfig['dlx_exchange'];
        $dlxRoutingKey = $this->delayConfig['dlx_routing_key'];

        // 1. 强制转换为字符串
        $dlxExchange = (string)$dlxExchange;
        $dlxRoutingKey = (string)$dlxRoutingKey;

        // 2. 用 AMQPTable 显式包装 arguments
        $arguments = new AMQPTable([
            'x-dead-letter-exchange' => $dlxExchange,
            'x-dead-letter-routing-key' => $dlxRoutingKey
        ]);

        // 3. 声明临时队列(使用包装后的 arguments)
        $this->channel->queue_declare(
            $tempQueue,
            false, // passive
            true,  // durable
            false, // exclusive
            false, // auto_delete
            false, // nowait
            $arguments // 传入 AMQPTable 对象
        );
    }

    // 发送延迟消息(单位:秒) --新增
    public function sendDelayMessage($data, $delaySeconds, $tempQueue = null)
    {
        $this->declareDlx(); // 确保死信交换机和队列存在
        $this->declareTempQueue(); // 确保临时队列存在

        $queue = $tempQueue ?: $this->delayConfig['temp_queue'];
        $message = new AMQPMessage(
            json_encode($data, JSON_UNESCAPED_UNICODE), [
                'delivery_mode' => AMQPMessage::DELIVERY_MODE_PERSISTENT,
                'expiration' => (string)($delaySeconds * 1000) // TTL:毫秒(必须是字符串)
            ]
        );

        // 发送消息到临时队列(消息过期后进入死信队列)
        $this->channel->basic_publish($message, '', $queue);
    }

    // 消费死信队列(处理延迟消息) --新增
    public function consumeDlx($callback)
    {
        $this->declareDlx();
        $dlxQueue = $this->delayConfig['dlx_queue'];

        $this->channel->basic_consume(
            $dlxQueue,
            '',
            false,
            false,
            false,
            false,
            $callback
        );

        // 3.x 版本循环监听
        while ($this->channel->is_consuming()) {
            $this->channel->wait();
        }
    }

    // 声明队列(确保队列存在)
    public function declareQueue($queueName = null)
    {
        $queue = $queueName ?: $this->config['queue']['default'];
        // 参数:队列名、是否持久化、是否排他、是否自动删除、其他参数
        $this->channel->queue_declare($queue, false, true, false, false);
        return $queue;
    }

    // 发送消息到队列
    public function send($data, $queueName = null)
    {
        $queue = $this->declareQueue($queueName);
        $message = new AMQPMessage(
            json_encode($data, JSON_UNESCAPED_UNICODE),
            ['delivery_mode' => AMQPMessage::DELIVERY_MODE_PERSISTENT]  // 消息持久化
        );
        $this->channel->basic_publish($message, '', $queue);
    }

    // 消费消息(回调处理)
    public function consume($callback, $queueName = null)
    {
        $queue = $this->declareQueue($queueName);
        // 参数:队列名、消费者标签、是否自动确认、是否排他、是否本地、是否阻塞、回调函数
        $this->channel->basic_consume($queue, '', false, false, false, false, $callback);

        // 循环监听消息
        while ($this->channel->has_consumers()) {
            $this->channel->wait();
        }
    }

    // 关闭连接
    public function close()
    {
        if ($this->channel) {
            $this->channel->close();
        }
        if ($this->connection) {
            $this->connection->close();
        }
    }

    // 析构函数自动关闭连接
    public function __destruct()
    {
        $this->close();
    }
}
发送延迟消息(生产者)
在application/api/Demo控制器中调用 sendDelay 发送延迟消息:
php
// 示例:延迟 10 秒处理消息
public function sendDelay()
{
    try {
        $rabbitMQ = new RabbitMQ();
        $data = [
            'id'        => 456,
            'content'   => '这条消息将在10秒后被处理',
            'send_time' => date('Y-m-d H:i:s')
        ];
        $rabbitMQ->sendDelayMessage($data, 10); // 延迟10秒
        return '延迟消息发送成功';
    } catch (\Exception $e) {
        return '发送失败:' . $e->getMessage();
    }
}
消费延迟消息(消费者)
修改命令行消费者 application/common/command/RabbitMQConsumer.php,添加延迟消息处理逻辑:
php
<?php
namespace app\common\command;

use app\common\library\RabbitMQ;
use think\console\Command;
use think\console\Input;
use think\console\Output;
use think\Log;

class RabbitMQConsumer extends Command
{
    // 配置命令
    protected function configure()
    {
        $this->setName('rabbitmq:consumer')  // 命令名:php think rabbitmq:consumer
        ->setDescription('RabbitMQ消费者,处理队列消息');
    }

    // 执行命令
    protected function execute(Input $input, Output $output)
    {
        $output->writeln('延迟消息消费者启动,等待延迟消息...');
        try {
            $rabbitMQ = new RabbitMQ();
            $callback = function ($msg) use ($output) {
                $output->writeln('收到延迟消息:' . $msg->body);
                $data = json_decode($msg->body, true);
                // 处理逻辑(如:10秒后发送邮件、更新状态等)
                $output->writeln('处理延迟消息:' . $data['id'] . ',当前时间:' . date('Y-m-d H:i:s'));
                $msg->ack(); // 确认处理
            };
            // 消费死信队列(延迟消息)
            $rabbitMQ->consumeDlx($callback);
        } catch (\Exception $e) {
            $output->writeln('消费者异常:' . $e->getMessage());
        }
    }
}
has_consumers()
执行队列后报错:
think\\exception\\ThrowableError
Fatal error: Call to undefined method PhpAmqpLib\Channel\AMQPChannel::has_consumers()
查找源码:
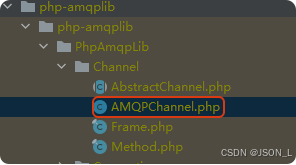
在AMQPChannel.php中未找到has_consumers方法,
考虑使用is_consuming方法替代如下:
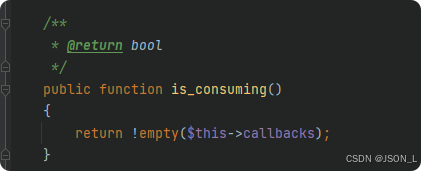
修改RabbitMQ.php中消费死信队列中循环监听方法has_consumers为is_consuming。
如下:
php
// 消费死信队列(处理延迟消息) --新增
public function consumeDlx($callback)
{
    $this->declareDlx();
    $dlxQueue = $this->delayConfig['dlx_queue'];

    $this->channel->basic_consume(
        $dlxQueue,
        '',
        false,
        false,
        false,
        false,
        $callback
    );

    // 3.x 版本循环监听
    while ($this->channel->is_consuming()) {
        $this->channel->wait();
    }
}
重新执行队列

开始发送测试延迟消息

效果如下:

注意:
如果中间出现错误还可以登录RabbitMq后台把之前创建的队列(queue)删除了重新试试。
总结
Fastadmin中使用rabbitmq实现延迟队列,中间遇到一点问题也解决了。