前言:
上一篇文章中介绍了Spring-cloud前奏------集群与分布式的区别,以及微服务与它们的关系,接下来就需要深入理解SpringCloud框架的作用,以及背后相关的知识。
上次提到了Spring-boot,那么此时SpringCloud可以暂时理解为多个SpringBoot服务,服务与服务之间虽然没有直接的关系,但是存在一些调用关系。
因此,一个SpringCloud框架中就存在一些核心组件:
1.服务注册发现: 负责管理微服务实例的地址、状态,让服务之间能动态感知彼此,是微服务通信的基础
2.配置管理:解决微服务集群中配置分散、修改需重启的问题,实现配置集中管理、动态刷新。
3.服务通信:实现服务之间的远程调用,分为 "同步调用" 和 "异步消息" 两类。
4.熔断降级:防止单个服务故障导致雪崩效应,保障系统稳定性。
5.网关:作为微服务的 "门面",负责路由转发、鉴权、限流、日志、跨域等,隔离内外网。
6.链路追踪:追踪微服务调用链路,定位性能瓶颈或故障点。
...
Spring-Cloud背后的原理:
首先以上的组件就是支撑微服务能够顺利启动的前提。
当然SpringCloud一开始的想法是容纳好组件!!!!!!
因此以上的组件大多数其实是其他大佬写的,之后Spring-Cloud发现好用就会将其收入麾下。
因此Spring Cloud有自己的一套规范,包括哪些组件应该收纳进来,那些组件不应该被收纳进来。
现在的Spring-Cloud的规范下有两个门派:
Spring Cloud Netflix
Spring Cloud Alibaba
Spring Cloud Netflix:
该门派是Spring-Cloud早期门派,Spring Cloud Netflix是 Netflix OSS(Netflix Open Source Software)在Spring Cloud规范下的实现.
包含的组件及其主要功能⼤致如下:
Eureka: 服务注册和发现 (官方也使用该组件)
Zuul: 服务⽹关
Ribbon: 负载均衡
Feign: 服务调⽤组件
Hystrix: 断路器, 提供服务熔断和限流
Hystrix Dashboard: 监控⾯板
...
在很⻓的⼀段时间⾥, Spring Cloud ⼀度被泛指 Spring Cloud Netflix. Spring Cloud⼀直以来把
Netflix OSS 套件作为其官⽅默认的⼀站式解决⽅案. 然⽽, Netflix公司在2018年前后宣布其核⼼组
件Hystrix、Ribbon、Zuul等均进⼊维护状态, Spring Cloud 也被迫宣布删除这些维护模块.
因此国内的大佬坐不住了,站出来说要研制自己的Spring-Cloud框架供大家使用。
Spring Cloud Alibaba:
Spring Cloud Alibaba 是阿⾥巴巴集团下的开源组件和云产品在Spring Cloud规范下的实现.
虽然Spring Cloud Alibaba⽬前并不是Spring Cloud官⽅推荐的默认⽅案, 但是Spring Cloud Alibaba
是阿⾥中间件团队主导的⼀个新⽣项⽬,正处于⾼速迭代中. 甚⾄在Alibaba的开源组件还没有织⼊
SpringCloud⽣态之前, 就已经在各⼤公司⼴泛使⽤了

上图是Spring Cloud Alibababa相关的核心组件,非常丰富!!!!
环境搭建:
此时要以SpringCloudAlibaba为例,之后结合使用SpringBoot构建微服务,对相关组件进行学习与使用。
就以电商平台为例,之后将电商服务拆分为两个服务,一个是商品服务,一个是订单服务。只做简单的本地演示,线上演示需要自己学习。
数据准备:
首先使用MySQL构建商品列表,与订单数据表:
sql
-- 建库
create database if not exists cloud_order charset utf8mb4;
-- 订单表
DROP TABLE IF EXISTS order_detail;
CREATE TABLE order_detail (
 `id` INT NOT NULL AUTO_INCREMENT COMMENT '订单id',
 `user_id` BIGINT ( 20 ) NOT NULL COMMENT '⽤⼾ID',
 `product_id` BIGINT ( 20 ) NULL COMMENT '产品id',
 `num` INT ( 10 ) NULL DEFAULT 0 COMMENT '下单数量',
 `price` BIGINT ( 20 ) NOT NULL COMMENT '实付款',
 `delete_flag` TINYINT ( 4 ) NULL DEFAULT 0,
 `create_time` DATETIME DEFAULT now(),
 `update_time` DATETIME DEFAULT now(),
PRIMARY KEY ( id )) ENGINE = INNODB DEFAULT CHARACTER
SET = utf8mb4 COMMENT = '订单表';
-- 数据初始化
insert into order_detail (user_id,product_id,num,price)
values
(2001, 1001,1,99), (2002, 1002,1,30), (2001, 1003,1,40),
(2003, 1004,3,58), (2004, 1005,7,85), (2005, 1006,7,94);
create database if not exists cloud_product charset utf8mb4;

-- 产品表
DROP TABLE IF EXISTS product_detail;
CREATE TABLE product_detail (
 `id` INT NOT NULL AUTO_INCREMENT COMMENT '产品id',
 `product_name` varchar ( 128 ) NULL COMMENT '产品名称',
 `product_price` BIGINT ( 20 ) NOT NULL COMMENT '产品价格',
 `state` TINYINT ( 4 ) NULL DEFAULT 0 COMMENT '产品状态 0-有效 1-下架',
 `create_time` DATETIME DEFAULT now(),
 `update_time` DATETIME DEFAULT now(),
PRIMARY KEY ( id )) ENGINE = INNODB DEFAULT CHARACTER
SET = utf8mb4 COMMENT = '产品表';
-- 数据初始化
insert into product_detail (id, product_name,product_price,state)
values
(1001,"T恤", 101, 0), (1002, "短袖",30, 0), (1003, "短裤",44, 0),
(1004, "卫⾐",58, 0), (1005, "⻢甲",98, 0),(1006,"⽻绒服", 101, 0),
(1007, "冲锋⾐",30, 0), (1008, "袜⼦",44, 0), (1009, "鞋⼦",58, 0),
(10010, "⽑⾐",98, 0)
工程搭建:
本次采用JDK17、IDEA作为演示:
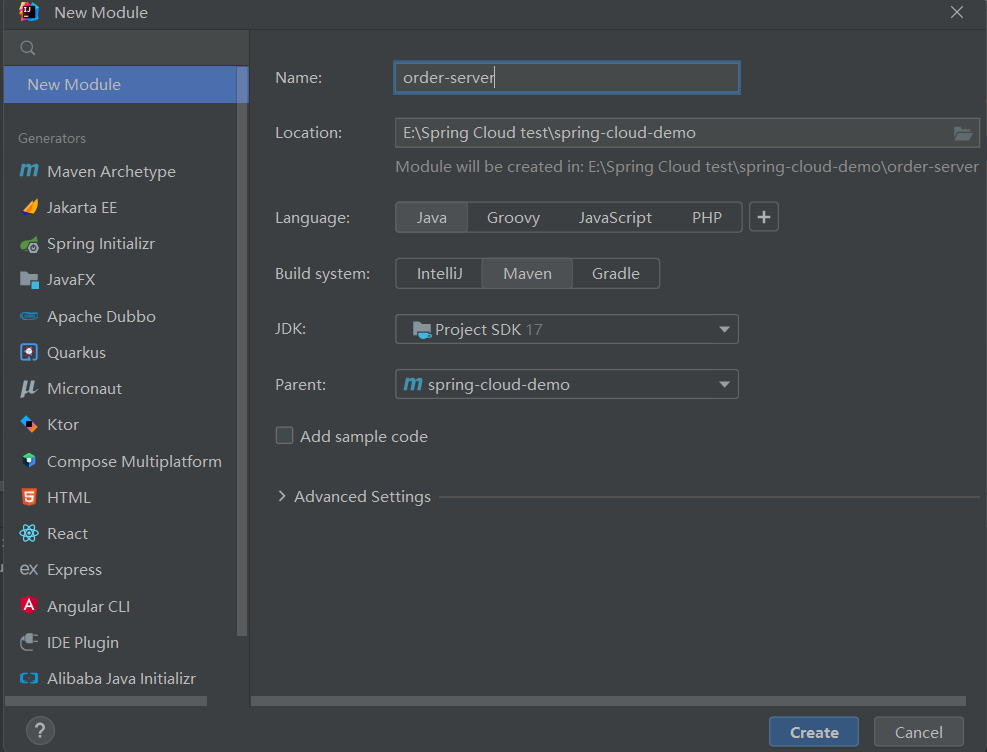
首先创建一个Maven项目,目录结构如下:
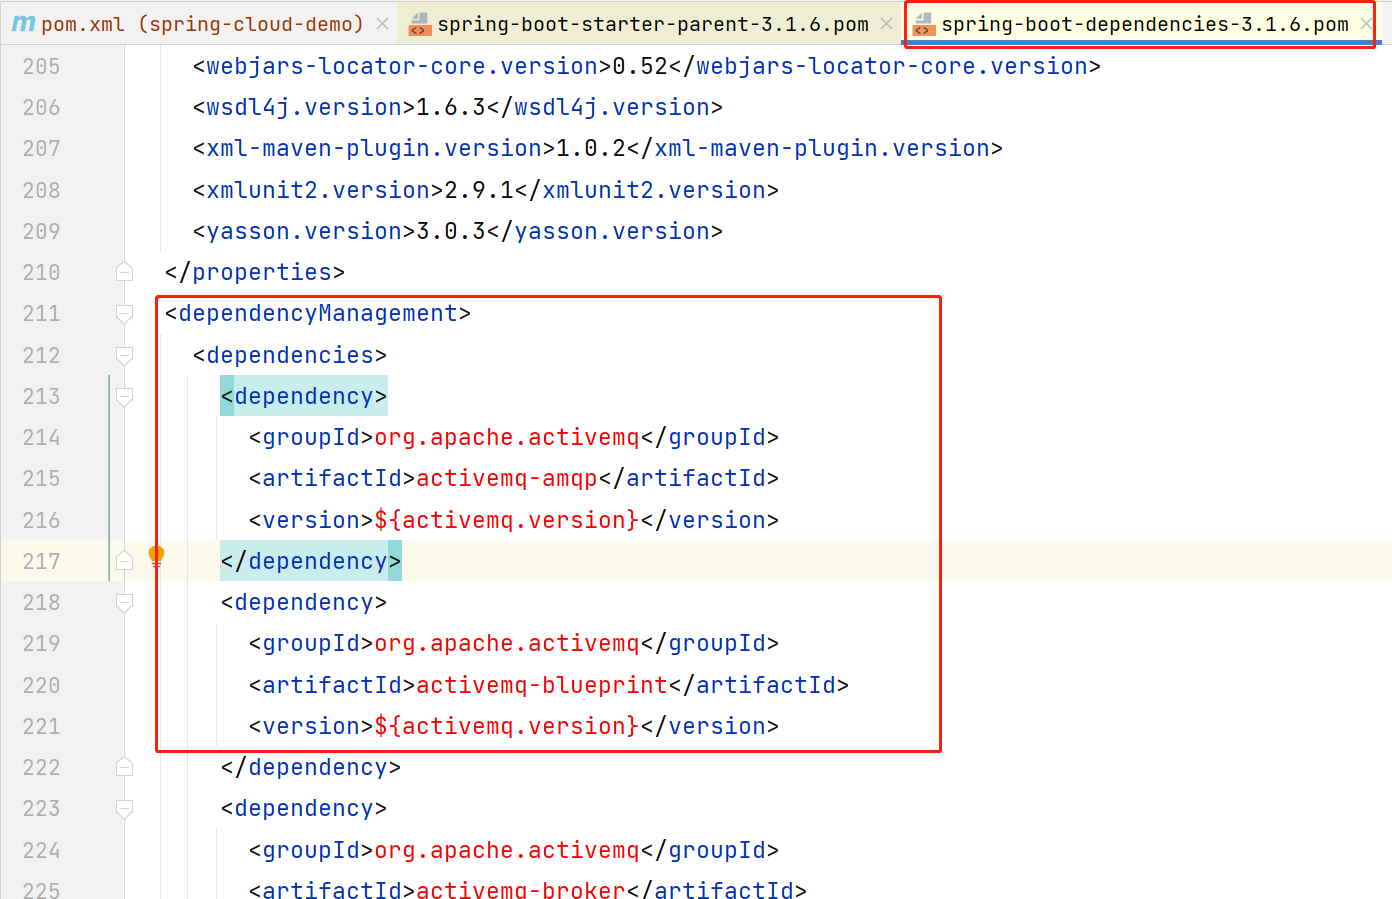
使⽤properties来进⾏版本号的统⼀管理, 使⽤dependencyManagement来管理依赖, 声明⽗⼯程的打
包⽅式为pom
<?xml version="1.0" encoding="UTF-8"?>
<project xmlns="http://maven.apache.org/POM/4.0.0"
         xmlns:xsi="http://www.w3.org/2001/XMLSchema-instance"
         xsi:schemaLocation="http://maven.apache.org/POM/4.0.0 http://maven.apache.org/xsd/maven-4.0.0.xsd">
    <modelVersion>4.0.0</modelVersion>

    <groupId>org.example</groupId>
    <artifactId>spring-cloud-demo</artifactId>
    <version>1.0-SNAPSHOT</version>

    <parent>
        <groupId>org.springframework.boot</groupId>
        <artifactId>spring-boot-starter-parent</artifactId>
        <version>3.1.6</version>
    </parent>
    <properties>
        <maven.compiler.source>17</maven.compiler.source>
        <maven.compiler.target>17</maven.compiler.target>
        <java.version>17</java.version>
        <mybatis.version>3.0.3</mybatis.version>
        <mysql.version>8.0.33</mysql.version>
        <spring-cloud.version>2022.0.3</spring-cloud.version>
    </properties>
    <dependencies>
        <dependency>
            <groupId>org.projectlombok</groupId>
            <artifactId>lombok</artifactId>
            <optional>true</optional>
        </dependency>
    </dependencies>
    <dependencyManagement>
        <dependencies>
            <dependency>
                <groupId>org.springframework.cloud</groupId>
                <artifactId>spring-cloud-dependencies</artifactId>
                <version>${spring-cloud.version}</version>
                <type>pom</type>
                <scope>import</scope>
            </dependency>
            <dependency>
                <groupId>org.mybatis.spring.boot</groupId>
                <artifactId>mybatis-spring-boot-starter</artifactId>
                <version>${mybatis.version}</version>
            </dependency>
            <dependency>
                <groupId>com.mysql</groupId>
                <artifactId>mysql-connector-j</artifactId>
                <version>${mysql.version}</version>
            </dependency>
            <dependency>
                <groupId>org.mybatis.spring.boot</groupId>
                <artifactId>mybatis-spring-boot-starter-test</artifactId>
                <version>${mybatis.version}</version>
            </dependency>
        </dependencies>
    </dependencyManagement>
</project>
DependencyManagement 和 Dependencies:
1.dependencies :将所依赖的jar直接加到项⽬中. ⼦项⽬也会继承该依赖.
2.dependencyManagement :只是声明依赖, 并不实现Jar包引⼊. 如果⼦项⽬需要⽤到相关依赖, 需要显式声明. 如果⼦项⽬没有指定具体版本, 会从⽗项⽬中读取version. 如果⼦项⽬中指定了版本号,就会使⽤⼦项⽬中指定的jar版本. 此外⽗⼯程的打包⽅式应该是pom,不是jar, 这⾥需要⼿动 使⽤ packaging 来声明.
版本管理:
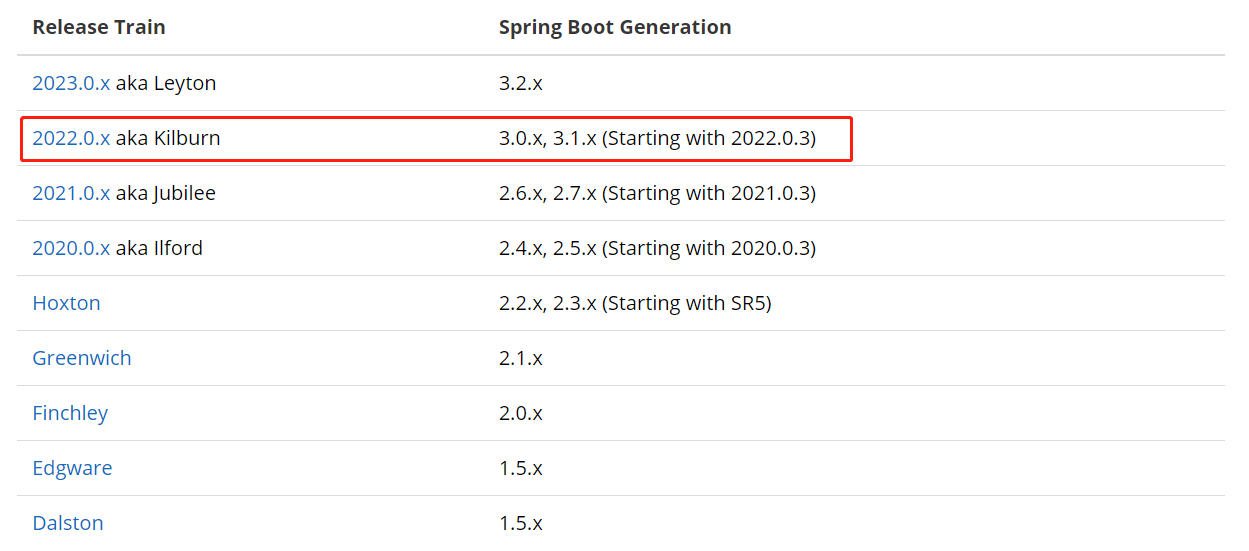
Spring Cloud 是基于SpringBoot搭建的, 所以Spring Cloud 版本与SpringBoot版本有关:
创建子项目-订单服务:
声明项⽬依赖 和 项⽬构建插件:
<?xml version="1.0" encoding="UTF-8"?>
<project xmlns="http://maven.apache.org/POM/4.0.0"
         xmlns:xsi="http://www.w3.org/2001/XMLSchema-instance"
         xsi:schemaLocation="http://maven.apache.org/POM/4.0.0 http://maven.apache.org/xsd/maven-4.0.0.xsd">
    <parent>
        <artifactId>spring-cloud-demo</artifactId>
        <groupId>org.example</groupId>
        <version>1.0-SNAPSHOT</version>
    </parent>
    <modelVersion>4.0.0</modelVersion>

    <artifactId>product-server</artifactId>

    <properties>
        <maven.compiler.source>17</maven.compiler.source>
        <maven.compiler.target>17</maven.compiler.target>
        <project.build.sourceEncoding>UTF-8</project.build.sourceEncoding>
    </properties>

    <dependencies>
        <dependency>
            <groupId>org.springframework.boot</groupId>
            <artifactId>spring-boot-starter-web</artifactId>
        </dependency>
        <dependency>
            <groupId>com.mysql</groupId>
            <artifactId>mysql-connector-j</artifactId>
        </dependency>
        <dependency>
            <groupId>org.mybatis.spring.boot</groupId>
            <artifactId>mybatis-spring-boot-starter</artifactId>
        </dependency>
    </dependencies>

    <build>
        <plugins>
            <plugin>
                <groupId>org.springframework.boot</groupId>
                <artifactId>spring-boot-maven-plugin</artifactId>
            </plugin>
        </plugins>
    </build>

</project>
实体类:
java
import lombok.Data;
import java.util.Date;
@Data
public class OrderInfo {
 private Integer id;
 private Integer userId;
 private Integer productId;
 private Integer num;
 private Integer price;
 private Integer deleteFlag;
 private Date createTime;
 private Date updateTime;
}
Controller:
java
@RequestMapping("/order")
@RestController
public class OrderController {
 @Autowired
 private OrderService orderService;
 @RequestMapping("/{orderId}")
 public OrderInfo getOrderById(@PathVariable("orderId") Integer orderId){
 return orderService.selectOrderById(orderId);
 }
}
Service:
java
import com.demo.ubs.info.OrderInfo;
import com.demo.ubs.mapper.OrderMapper;
import org.springframework.beans.factory.annotation.Autowired;
import org.springframework.stereotype.Service;

@Service
public class OrderService {

    @Autowired
    private OrderMapper orderMapper;
    public OrderInfo selectOrderById(Integer orderId) {
        OrderInfo orderInfo = orderMapper.selectOrderById(orderId);
        return orderInfo;
    }
}
Mapper:
java
import com.bite.order.model.OrderInfo;
import org.apache.ibatis.annotations.Mapper;
import org.apache.ibatis.annotations.Select;
@Mapper
public interface OrderMapper {
 @Select("select * from order_detail where id=#{orderId}")
 OrderInfo selectOrderById(Integer orderId);
}
启动服务并进行测试:

创建子项目-商品服务:

声明项⽬依赖 和 项⽬构建插件:
<?xml version="1.0" encoding="UTF-8"?>
<project xmlns="http://maven.apache.org/POM/4.0.0"
         xmlns:xsi="http://www.w3.org/2001/XMLSchema-instance"
         xsi:schemaLocation="http://maven.apache.org/POM/4.0.0 http://maven.apache.org/xsd/maven-4.0.0.xsd">
    <parent>
        <artifactId>spring-cloud-demo</artifactId>
        <groupId>org.example</groupId>
        <version>1.0-SNAPSHOT</version>
    </parent>
    <modelVersion>4.0.0</modelVersion>

    <artifactId>order-server</artifactId>

    <properties>
        <maven.compiler.source>17</maven.compiler.source>
        <maven.compiler.target>17</maven.compiler.target>
        <project.build.sourceEncoding>UTF-8</project.build.sourceEncoding>
    </properties>

    <dependencies>
        <dependency>
            <groupId>org.springframework.boot</groupId>
            <artifactId>spring-boot-starter-web</artifactId>
        </dependency>
        <dependency>
            <groupId>com.mysql</groupId>
            <artifactId>mysql-connector-j</artifactId>
        </dependency>
        <dependency>
            <groupId>org.mybatis.spring.boot</groupId>
            <artifactId>mybatis-spring-boot-starter</artifactId>
        </dependency>
    </dependencies>

    <build>
        <plugins>
            <plugin>
                <groupId>org.springframework.boot</groupId>
                <artifactId>spring-boot-maven-plugin</artifactId>
            </plugin>
        </plugins>
    </build>
</project>
配置application.yml:
server:
  port: 8080
spring:
  datasource:
    url: jdbc:mysql://127.0.0.1:3306/cloud_order?characterEncoding=utf8&useSSL=false
    username: root
    password: 123456
    driver-class-name: com.mysql.cj.jdbc.Driver
mybatis:
  configuration: # 配置打印 MyBatis⽇志
    log-impl: org.apache.ibatis.logging.stdout.StdOutImpl
    map-underscore-to-camel-case: true #配置驼峰⾃动转换
商品服务也是如此,同上:
controller:
sql
import com.demo.ubs.info.ProductInfo;
import com.demo.ubs.service.ProductService;
import org.springframework.beans.factory.annotation.Autowired;
import org.springframework.web.bind.annotation.PathVariable;
import org.springframework.web.bind.annotation.RequestMapping;
import org.springframework.web.bind.annotation.RestController;

@RestController
@RequestMapping("/product")
public class ProductController {
    @Autowired
    private ProductService productService;
    @RequestMapping("/{productId}")
    public ProductInfo getProductById(@PathVariable("productId") Integer productId){
        System.out.println("收到请求,Id:"+productId);
        return productService.selectProductById(productId);
    }
}
service:
sql
import com.demo.ubs.info.ProductInfo;
import com.demo.ubs.mapper.ProductMapper;
import org.springframework.beans.factory.annotation.Autowired;
import org.springframework.stereotype.Service;

@Service
public class ProductService {
    @Autowired
    private ProductMapper productMapper;
    public ProductInfo selectProductById(Integer id){
        return productMapper.selectProductById(id);
    }
}
实体类:
sql
import lombok.Data;
import java.util.Date;
@Data
public class ProductInfo {
    private Integer id;
    private String productName;
    private Integer productPrice;
    private Integer state;
    private Date createTime;
    private Date updateTime;
}
mapper:
sql
import com.demo.ubs.info.ProductInfo;
import org.apache.ibatis.annotations.Mapper;
import org.apache.ibatis.annotations.Select;

@Mapper
public interface ProductMapper {
    @Select("select * from product_detail where id=#{id}")
    ProductInfo selectProductById(Integer id);
}
启动并测试:

远程调用:
在学习SpringAlibaba之前,首先思考一个问题,那么服务与服务之间的通信时如何通的呢?当然在大多数情况下还是通过HTTP请求进行通信,因此,此处引入RestTemplate,发送HTTP请求的模板。
代码如下:
java
@Service
public class OrderService {

    @Autowired
    private OrderMapper orderMapper;

    @Autowired
    private RestTemplate restTemplate;
    public OrderInfo selectOrderById(Integer orderId) {
        OrderInfo orderInfo = orderMapper.selectOrderById(orderId);
        String url = "http://127.0.0.1:9090/product/"+orderInfo.getProductId();
        ProductInfo productInfo = restTemplate.getForObject(url, ProductInfo.class);
        orderInfo.setProductInfo(productInfo);
        return orderInfo;
    }
}
RestTemplate 是从 Spring3.0 开始⽀持的⼀个 HTTP 请求工具, 它是⼀个同步的 REST API 客⼾端, 提供了常见的REST请求⽅案的模版
什么是REST?
REST(Representational State Transfer), 表现层资源状态转移.
REST是由HTTP的主要设计者Roy Fielding博⼠在2000年他的博⼠论⽂中提出来的⼀种软件架构⻛格
1.资源: ⽹络上的所有事物都可以抽象为资源, 每个资源都有⼀个唯⼀的资源标识符(URI)
2.表现层: 资源的表现形式, ⽐如⽂本作为资源, 可以⽤txt格式表现, 也可以通过HTML, XML, JSON等格式来表现, 甚⾄以⼆进制的格式表现.
3.状态转移: 访问URI, 也就是客⼾端和服务器的交互过程. 客⼾端⽤到的⼿段,只能是HTTP协议. 这个过程中, 可能会涉及到数据状态的变化. ⽐如对数据的增删改查, 都是状态的转移