文章目录
- 写在前面
- [一、基础方案:SpringDoc + OpenAPI 3(原生 Swagger UI)](#一、基础方案:SpringDoc + OpenAPI 3(原生 Swagger UI))
-
- [1. SpringDoc 依赖](#1. SpringDoc 依赖)
- [2. 配置文件 application.yml](#2. 配置文件 application.yml)
- [3. Api 文档配置类 SwaggerConfig.class](#3. Api 文档配置类 SwaggerConfig.class)
- [4. 安全配置类 SecurityConfig.class 中放行 Api 接口](#4. 安全配置类 SecurityConfig.class 中放行 Api 接口)
- [5. 在控制器中使用](#5. 在控制器中使用)
- [6. Api 文档访问效果](#6. Api 文档访问效果)
- [二、增强方案:集成 Knife4j 美化与功能扩展](#二、增强方案:集成 Knife4j 美化与功能扩展)
-
- [1. Knife4j 依赖](#1. Knife4j 依赖)
- [2. 配置文件 application.yml](#2. 配置文件 application.yml)
- [3. Api 文档配置类 SwaggerConfig.class](#3. Api 文档配置类 SwaggerConfig.class)
- [4. 安全配置类 SecurityConfig.class 中放行 Api 接口](#4. 安全配置类 SecurityConfig.class 中放行 Api 接口)
- [5. 在控制器中使用](#5. 在控制器中使用)
- [6. Api 文档访问效果](#6. Api 文档访问效果)
- [7. 其他](#7. 其他)
写在前面
API 文档的一种现代配置方案是:
- OpenAPI:设计规范,明确规定 GET 请求不得携带 RequestBody 参数。
- SpringDoc :Spring Boot 下基于 OpenAPI 3 的实现框架,使用
@Tag、@Operation等注解描述接口。(而基于 Swagger 2 的 SpringFox 框架及其@Api、@ApiOperation注解已过时) - Swagger UI:官方提供的可视化文档前端界面。
- Knife4j:对 Swagger UI 的增强与美化,仅替换前端展示层,不改变后端逻辑。
本文使用的依赖版本:
- Spring Boot:2.6.13
- SpringDoc:1.6.14
- Knife4j:4.5.0
一、基础方案:SpringDoc + OpenAPI 3(原生 Swagger UI)
1. SpringDoc 依赖
xml
		<dependency>
			<groupId>org.springframework.boot</groupId>
			<artifactId>spring-boot-starter-web</artifactId>
			<version>2.6.13</version>
		</dependency>
xml
		<!-- SpringDoc OpenAPI 替换为 SB2 兼容版本 -->
		<dependency>
			<groupId>org.springdoc</groupId>
			<artifactId>springdoc-openapi-ui</artifactId>
			<version>1.6.14</version>
		</dependency>
2. 配置文件 application.yml
SpringDoc 从 1.6.4 起已原生支持 Spring Boot 2.6+ 默认的 PathPatternParser 路径匹配策略,故无需手动指定 Ant 路径匹配器。
yml
server:
  port: 8080
  servlet:
    context-path: /api

springdoc:
	api-docs:
		path: /v3/api-docs  # 这里配置的是相对于context-path的路径,不是绝对路径
	swagger-ui:
		path: /swagger-ui.html
		url: /v3/api-docs  # 相对路径。Swagger UI 会基于当前路径(/api/)去拼接 url
3. Api 文档配置类 SwaggerConfig.class
java
package org.example.framework.config;

import io.swagger.v3.oas.models.Components;
import io.swagger.v3.oas.models.OpenAPI;
import io.swagger.v3.oas.models.info.Contact;
import io.swagger.v3.oas.models.info.Info;
import io.swagger.v3.oas.models.security.SecurityRequirement;
import io.swagger.v3.oas.models.security.SecurityScheme;
import org.springframework.context.annotation.Bean;
import org.springframework.context.annotation.Configuration;

/**
 * Swagger / OpenAPI 文档配置(供 Knife4j 使用)
 */
@Configuration
public class SwaggerConfig {

    @Bean
    public OpenAPI swaggerOpenAPI() {
        return new OpenAPI()
                .info(new Info()
                        // API 文档的主标题,会显示在文档顶部(例如:用户中心服务 API)
                        .title("XXX 项目接口文档 API") // 项目名称
                        // API 文档的版本号,建议与项目版本保持一致(例如:v1.2.0)
                        .version("1.0")
                        // API 文档的整体描述,可说明用途、注意事项、认证方式等
                        .description("这是本系统的 RESTful API 接口文档,所有接口均需通过 JWT 认证。" +
                                "请勿在生产环境随意调用写操作接口。")
                        // 联系人信息(作者/团队)
                        .contact(new Contact()
                                // 开发者或团队名称
                                .name("XXX")
                                // 联系邮箱(会显示为可点击的 mailto 链接)
                                .email("-")
                                // 个人主页、项目地址或公司官网(可选)
                                .url("-")
                        )
                )
                // 全局的JWT认证配置
                .components(new Components()
                        .addSecuritySchemes("JWT", new SecurityScheme()
                                .type(SecurityScheme.Type.HTTP)
                                .scheme("bearer")   // 必须是小写 "bearer"
                                .bearerFormat("JWT")
                                .in(SecurityScheme.In.HEADER)
                                .name("Authorization")
                        )
                )
                // 所有接口默认需要 JWT 认证,否则 swagger ui 请求头不会携带 Authorization: Bearer xxx
                .addSecurityItem(new SecurityRequirement().addList("JWT"));
    }
}
4. 安全配置类 SecurityConfig.class 中放行 Api 接口
java
package org.example.framework.security.config;


import lombok.extern.slf4j.Slf4j;
import org.example.framework.security.filter.JwtAuthenticationFilter;
import org.example.framework.security.handler.AccessDeniedHandlerImpl;
import org.example.framework.security.handler.AuthenticationEntryPointImpl;
import org.springframework.beans.factory.annotation.Autowired;
import org.springframework.context.annotation.Bean;
import org.springframework.context.annotation.Lazy;
import org.springframework.security.authentication.AuthenticationManager;
import org.springframework.security.config.annotation.method.configuration.EnableGlobalMethodSecurity;
import org.springframework.security.config.annotation.web.builders.HttpSecurity;
import org.springframework.security.config.annotation.web.configuration.EnableWebSecurity;
import org.springframework.security.config.annotation.web.configuration.WebSecurityConfigurerAdapter;
import org.springframework.security.config.http.SessionCreationPolicy;
import org.springframework.security.crypto.bcrypt.BCryptPasswordEncoder;
import org.springframework.security.crypto.password.PasswordEncoder;
import org.springframework.security.web.authentication.UsernamePasswordAuthenticationFilter;

/**
 * Spring Security配置
 */
@Slf4j
@EnableWebSecurity
@EnableGlobalMethodSecurity(
        prePostEnabled = true,  // 启用@PreAuthorize
        securedEnabled = true,  // 启用@Secured
        jsr250Enabled = true    // 启用@RolesAllowed(JSR-250标准注解)
)
public class SecurityConfig extends WebSecurityConfigurerAdapter {

    @Autowired
    @Lazy  // 延迟加载,防止循环依赖
    private JwtAuthenticationFilter jwtAuthenticationFilter;
    @Autowired
    private AuthenticationEntryPointImpl authenticationEntryPoint;
    @Autowired
    private AccessDeniedHandlerImpl accessDeniedHandler;

    @Override
    protected void configure(HttpSecurity http) throws Exception {
        log.debug("SecurityConfig configuring HttpSecurity");   // 检查Spring Security配置的加载顺序
        http
                .csrf().disable() // 关闭CSRF(RESTful API无需)
                .sessionManagement().sessionCreationPolicy(SessionCreationPolicy.STATELESS) // 无状态会话
                .and()
                .authorizeRequests()
                // --- 放行SpringDoc的路径(相对context-path) ---
                .antMatchers(
                        "/v3/api-docs",
                        "/v3/api-docs/**",    // API描述文档的JSON数据
                        "/swagger-ui/**",     // Swagger UI的所有资源(HTML, JS, CSS)
                        "/swagger-ui.html",    // Swagger UI主页面,
                        "/webjars/**",           // Swagger 可能需要的静态资源
                        "/swagger-resources/**" // Swagger 资源
                ).permitAll()
                // --- 放行自己的接口,例如登录 ---
                .antMatchers("/auth/login", "/auth/wechat/login").permitAll()
                // --- 指定路径鉴权 ---
                .antMatchers("/system/**").hasRole("ADMIN") // 角色前缀会自动添加"ROLE_"
                // --- 其他安全规则 ---
                .anyRequest().authenticated()
                .and()
                .addFilterBefore(jwtAuthenticationFilter, UsernamePasswordAuthenticationFilter.class)   // 添加JWT过滤器
                .exceptionHandling()
                .authenticationEntryPoint(authenticationEntryPoint)    // 添加401异常处理器
                .accessDeniedHandler(accessDeniedHandler);         // 添加403异常处理器
    }

    @Bean
    public PasswordEncoder passwordEncoder() {
        return new BCryptPasswordEncoder(); // 密码加密器
    }

    @Bean
    @Override
    public AuthenticationManager authenticationManagerBean() throws Exception {
        return super.authenticationManagerBean(); // 暴露AuthenticationManager供登录接口使用
    }
}
5. 在控制器中使用
java
package org.example.app.controller;
import io.swagger.v3.oas.annotations.Operation;
import io.swagger.v3.oas.annotations.tags.Tag;
import org.springframework.web.bind.annotation.GetMapping;
import org.springframework.web.bind.annotation.RestController;
@Tag(name = "认证接口")
@RestController
public class TestController {
@Operation(summary = "B端账号密码登录")
@PostMapping("/auth/login")
public String test() {
return "Hello World";
}
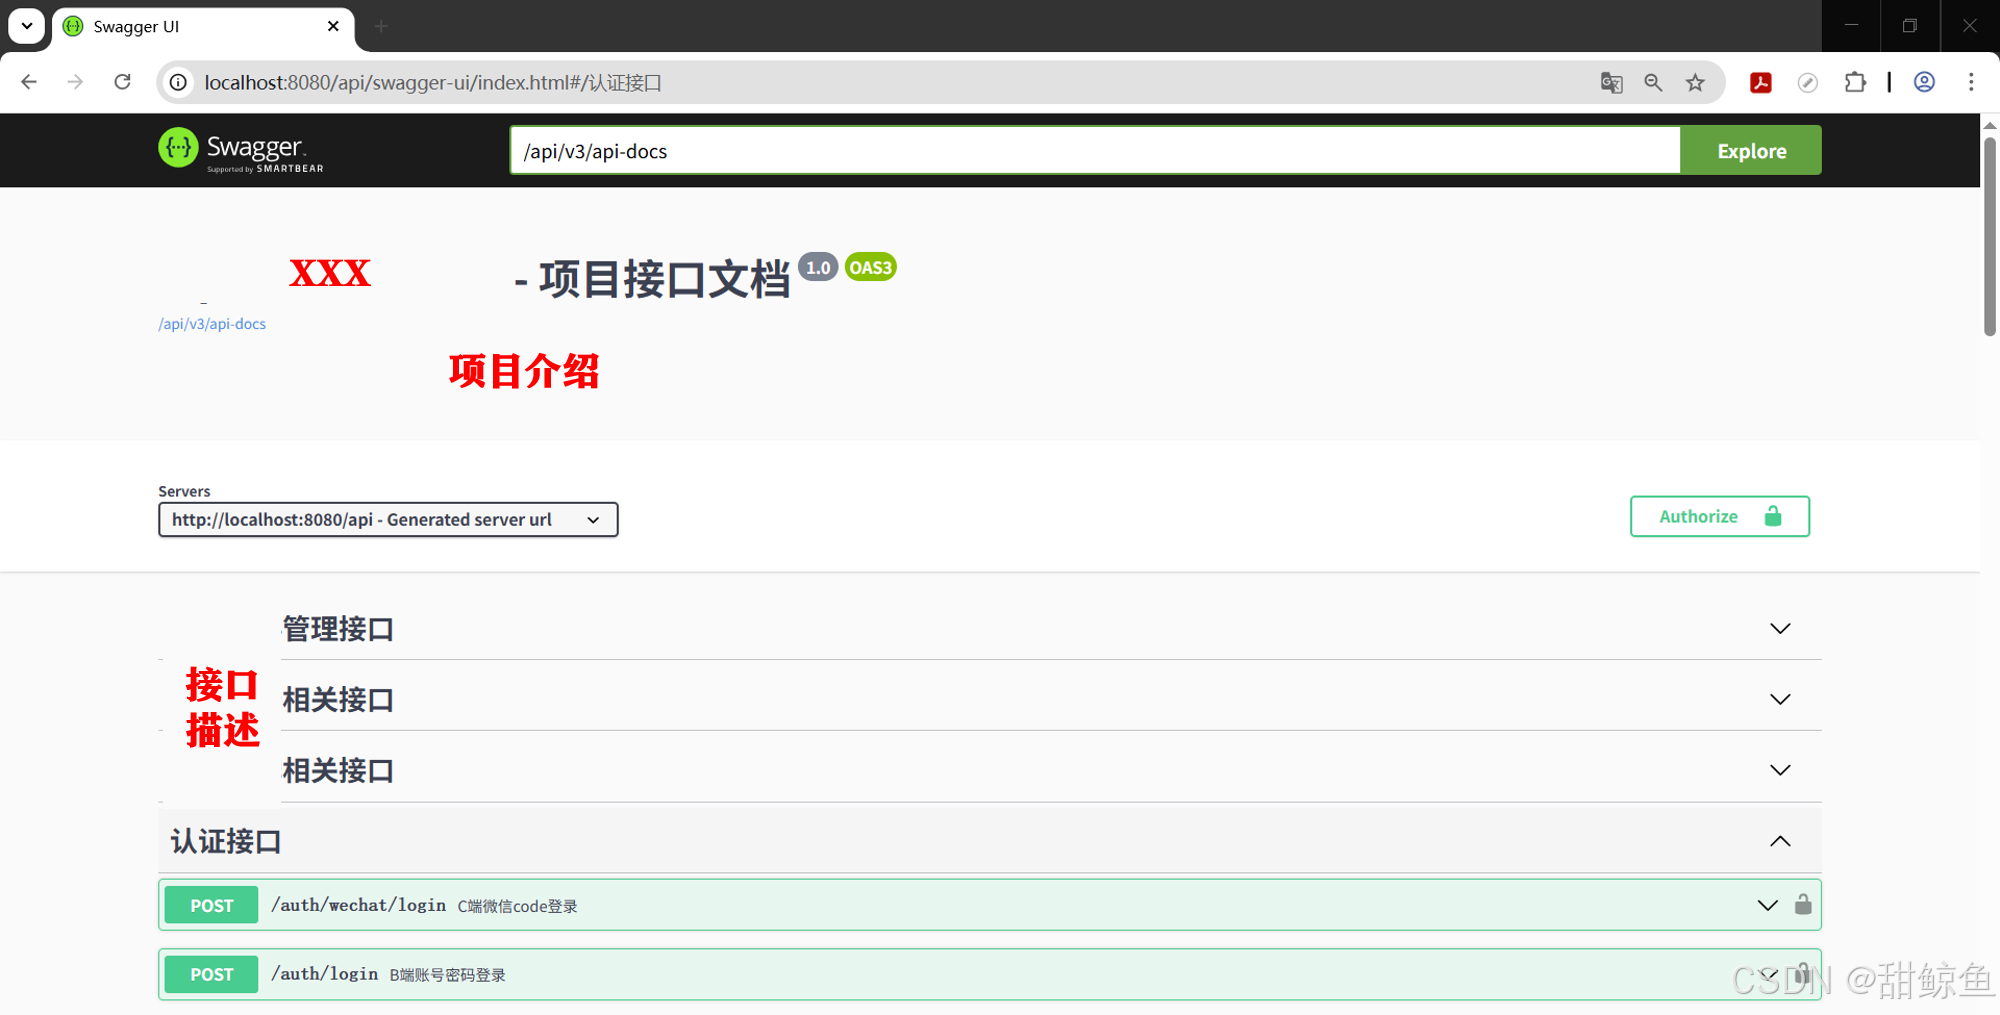
}6. Api 文档访问效果
访问 http://localhost:8080/api/swagger-ui.html :
二、增强方案:集成 Knife4j 美化与功能扩展
在上述方案的基础上稍作改动,即可无缝切换。
1. Knife4j 依赖
xml
		<!-- SpringDoc OpenAPI 替换为 SB2 兼容版本 -->
		<!-- <dependency>
			<groupId>org.springdoc</groupId>
			<artifactId>springdoc-openapi-ui</artifactId>
			<version>1.6.14</version>
		</dependency> -->
		<!-- Knife4j -->
        <dependency>
            <groupId>com.github.xiaoymin</groupId>
            <artifactId>knife4j-openapi3-spring-boot-starter</artifactId>
            <version>4.5.0</version>
        </dependency>
2. 配置文件 application.yml
Knife4j 4.5.0 底层是 SpringDoc 1.6.14。
SpringDoc 从 1.6.4 起已原生支持 Spring Boot 2.6+ 默认的 PathPatternParser 路径匹配策略,故无需手动指定 Ant 路径匹配器。
在上述方案的基础上需要启用 Knife4j 增强,以便访问 /doc.html,其他无需改动。
yml
knife4j:
	enable: true  # 启用 knife4j 增强,访问 /doc.html
	basic:        # 是否启用登录认证
		enable: false
		# username: admin
		# password: 123456
	production: false   # 生产环境屏蔽
3. Api 文档配置类 SwaggerConfig.class
同上述方案,无需改动。
4. 安全配置类 SecurityConfig.class 中放行 Api 接口
较上述方案中的配置,新增放行 Knife4j 主页接口 /doc.html,其他无需改动。
java
package org.example.framework.security.config;

...

/**
 * Spring Security配置
 */
@Slf4j
@EnableWebSecurity
@EnableGlobalMethodSecurity(
        prePostEnabled = true,  // 启用@PreAuthorize
        securedEnabled = true,  // 启用@Secured
        jsr250Enabled = true    // 启用@RolesAllowed(JSR-250标准注解)
)
public class SecurityConfig extends WebSecurityConfigurerAdapter {

    ...

    @Override
    protected void configure(HttpSecurity http) throws Exception {
        ...
                // --- 放行SpringDoc的路径(相对context-path) ---
                .antMatchers(
                        "/v3/api-docs",
                        "/v3/api-docs/**",    // API描述文档的JSON数据
                        "/swagger-ui/**",     // Swagger UI的所有资源(HTML, JS, CSS)
                        "/swagger-ui.html",    // Swagger UI主页面,
                        "/webjars/**",           // Swagger 可能需要的静态资源
                        "/swagger-resources/**",    // Swagger 资源
                        "/doc.html"     // Knife4j 主页
                ).permitAll()
                ...
    }

    ...
}
5. 在控制器中使用
同上述方案,无需改动。
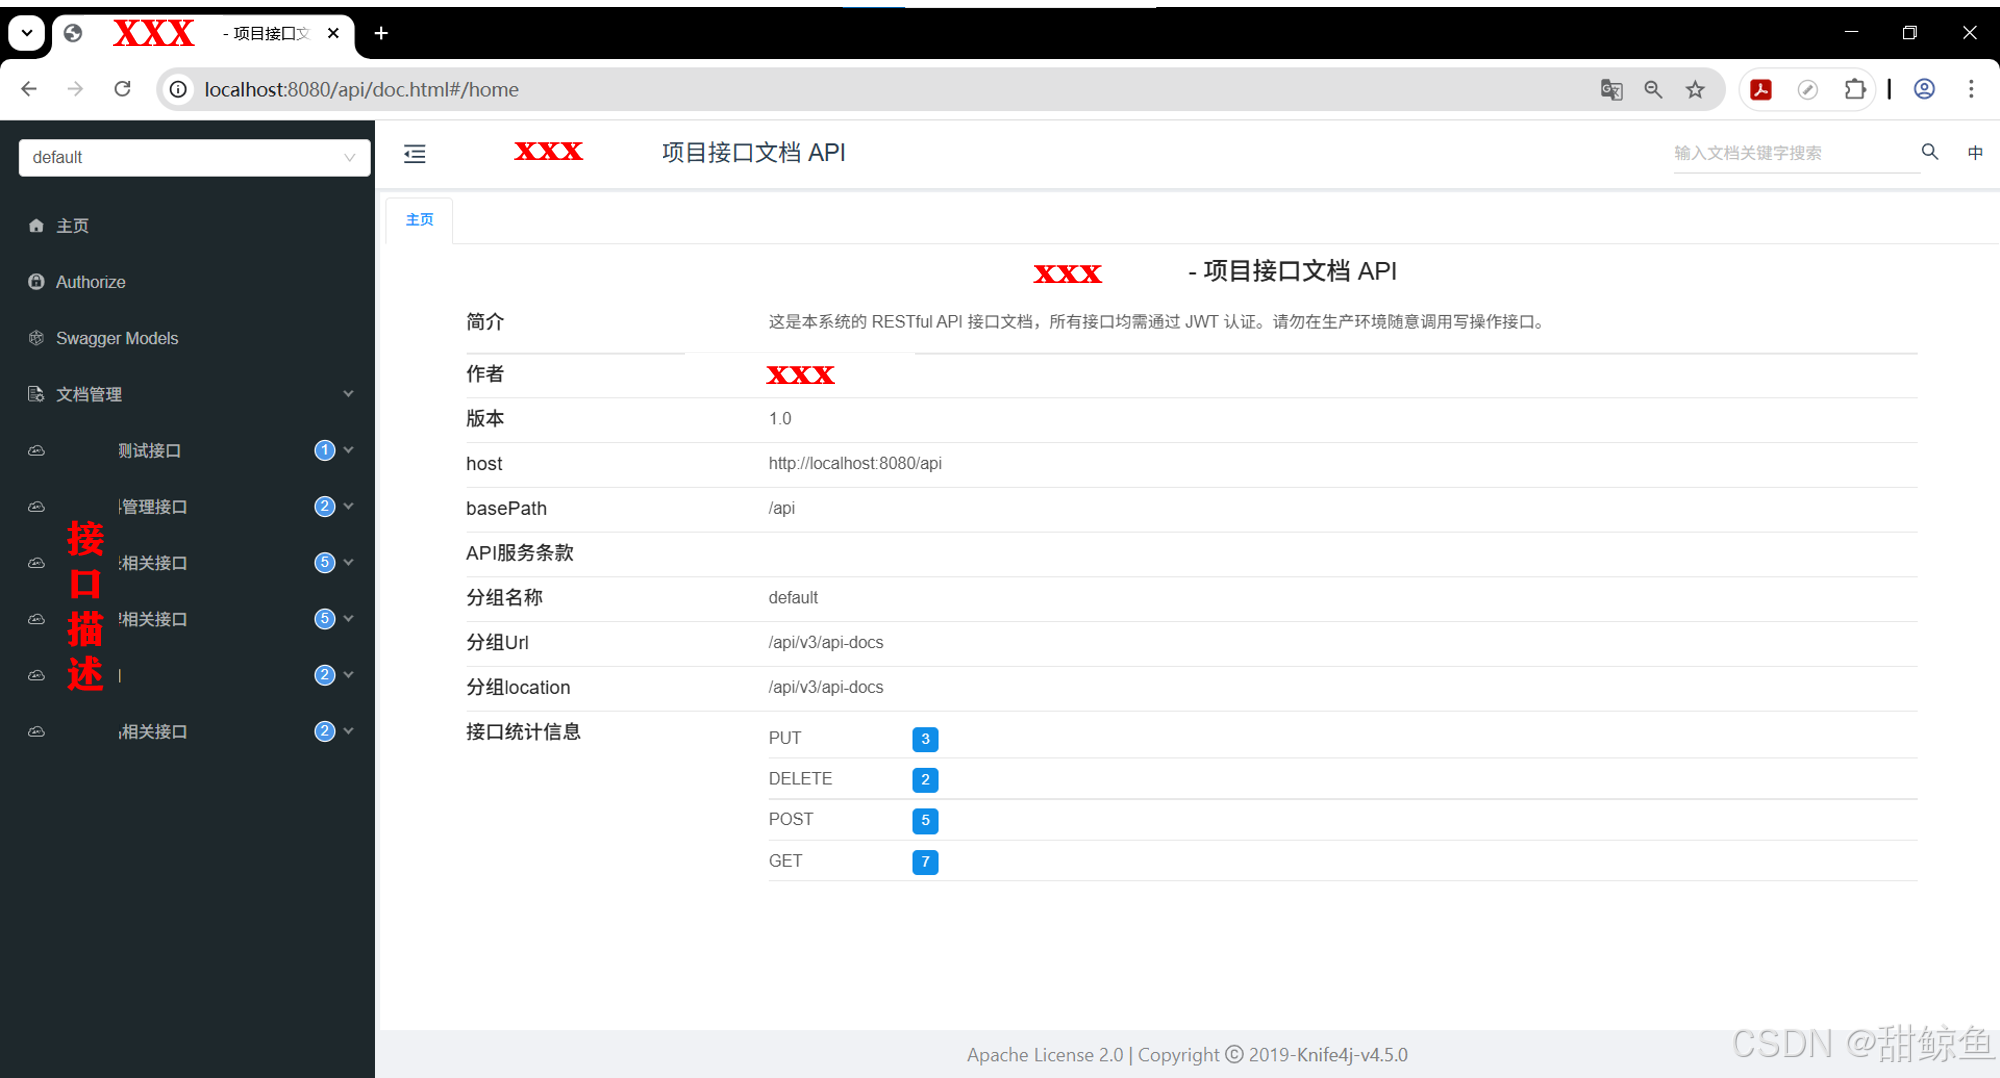
6. Api 文档访问效果
访问 http://localhost:8080/api/swagger-ui.html 效果同上。
访问 http://localhost:8080/api/doc.html#/home 效果如下。
7. 其他
配置启动链接接口地址,以便从启动日志中快速访问 API 文档。
- 这里懒得做了。
之前接口文档的菜单重复,后来发现是 Knife4j 的版本和起步依赖有问题,之前的 SpringDoc 依赖也没删干净。
- 把启动模块和框架模块中有关 API 接口文档的依赖都删掉。
- 在根目录的 POM 文件中添加
knife4j-openapi3-spring-boot-starter 4.5.0依赖。不要用基于 openapi2 的 4.4.0 版本。