1.下载 anaconda 推荐轻量版
清华镜像下载地址(选择对应版本):
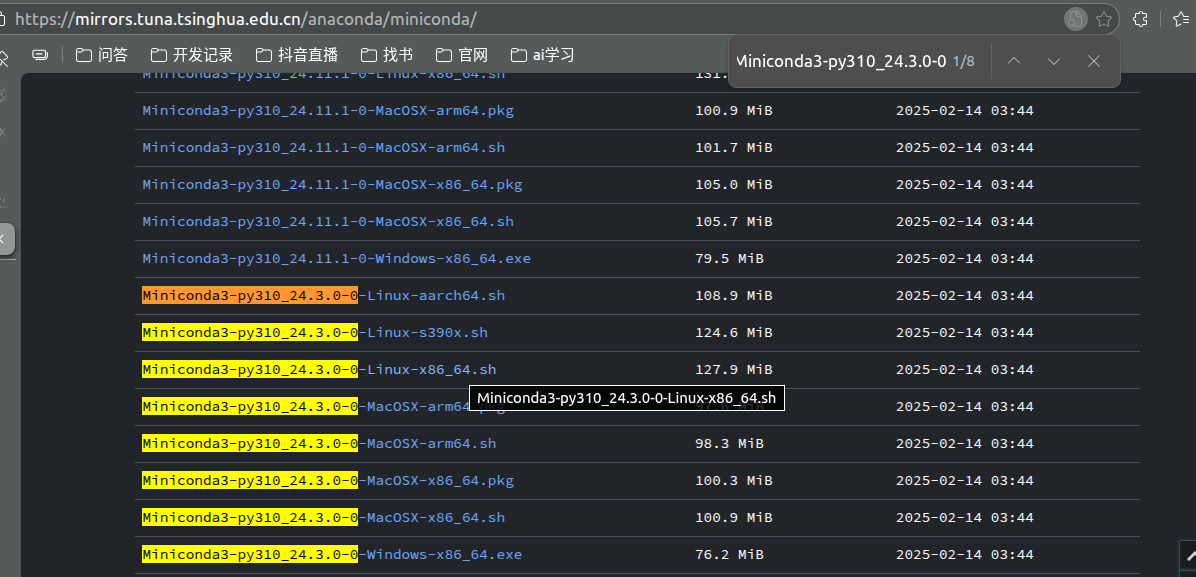
https://mirrors.tuna.tsinghua.edu.cn/anaconda/miniconda/
推荐:Miniconda3-py310_24.3.0-0
进入下载目录,安装和配置环境变量
- bash Miniconda3-latest-MacOSX-x86_64.sh
安装时一路回车,最后输入yes
- ls ~/miniconda3/bin/conda || ls ~/anaconda3/bin/conda || ls /opt/conda/bin/conda
可以查看conda路径 : /home/douzi/miniconda3/bin/conda
- 配置环境变量:
nano ~/.bashrc
source ~/.bashrc
最后一行加上这句,路径用上面查出的路径:
export PATH="HOME/miniconda3/bin:PATH"
保存后退出,cat ~/.bashrc 可查看文件所有内容,检查是否正确保存
4.检查是否成功:
conda --version
conda 24.3.0
5.替换为国内源
配置conda镜像
conda config --add channels https://mirrors.tuna.tsinghua.edu.cn/anaconda/pkgs/free/
conda config --add channels https://mirrors.tuna.tsinghua.edu.cn/anaconda/pkgs/main/
conda config --set show_channel_urls yes
配置pip镜像
pip config set global.index-url https://pypi.tuna.tsinghua.edu.cn/simple
pip config set global.trusted-host pypi.tuna.tsinghua.edu.cn
2.安装开发python环境和基础库
2.1 python
创建Python3.10环境
conda create -n ai-dev python=3.10
激活环境
conda activate ai-dev
验证安装
python --version
2.2 相关库
激活环境
conda activate ai-dev
基础科学计算库
pip install numpy pandas matplotlib seaborn jupyter
机器学习库
pip install scikit-learn scipy
验证安装
python -c "import numpy as np; print(f'NumPy版本: {np.version}')"
python -c "import pandas as pd; print(f'Pandas版本: {pd.version}')"
验证:
创建测试脚本
mkdir 1_python_basics
cd 1_python_basics/
touch data_analysis_test.py
gedit data_analysis_test.py
把这段内容粘贴进去:
import numpy as np
import pandas as pd
import matplotlib.pyplot as plt
import seaborn as sns

# 测试NumPy
print("NumPy测试:")
arr = np.array([[1, 2, 3], [4, 5, 6]])
print(f"数组形状: {arr.shape}")
print(f"数组求和: {arr.sum()}")

# 测试Pandas
print("\nPandas测试:")
data = {
    '姓名': ['张三', '李四', '王五'],
    '年龄': [25, 30, 35],
    '城市': ['北京', '上海', '深圳']
}
df = pd.DataFrame(data)
print("数据表:")
print(df)
print(f"\n描述统计:\n{df.describe()}")

# 测试Matplotlib
plt.figure(figsize=(8, 4))
plt.subplot(1, 2, 1)
x = np.linspace(0, 10, 100)
y = np.sin(x)
plt.plot(x, y)
plt.title('正弦函数')

plt.subplot(1, 2, 2)
categories = ['A', 'B', 'C', 'D']
values = [10, 25, 15, 30]
plt.bar(categories, values)
plt.title('柱状图')

plt.tight_layout()
plt.savefig('test_plot.png')
print("\n图表已保存为 test_plot.png")
plt.show()
运行:python data_analysis_test.py
有一张图弹出来,就验证正常了。
3.安装深度学习相关库
激活环境
conda activate ai-dev
查看CUDA版本(如果使用NVIDIA GPU)
nvidia-smi
查看右上角的CUDA Version,比如12.1
安装PyTorch(国内镜像)
pip install torch torchvision torchaudio --index-url https://mirrors.tuna.tsinghua.edu.cn/pytorch/wheels/cu118/
如果CUDA版本是11.8,上面的命令即可
如果没有GPU,安装CPU版本:
pip install torch torchvision torchaudio --index-url https://mirrors.tuna.tsinghua.edu.cn/pytorch/
安装额外工具
pip install torchinfo # 查看模型结构
pip install torchviz # 可视化计算图
验证:
创建测试脚本
mkdir 2_deep_learning
cd 2_deep_learning/
touch pytorch_test.py
gedit pytorch_test.py
粘贴:
import torch
import torch.nn as nn
import torchvision

print("="*50)
print("PyTorch快速测试")
print("="*50)

# 基本测试
print(f"1. PyTorch版本: {torch.__version__}")
print(f"2. torchvision版本: {torchvision.__version__}")
print(f"3. CUDA可用: {torch.cuda.is_available()}")

# 简单模型测试
model = nn.Sequential(
    nn.Linear(10, 20),
    nn.ReLU(),
    nn.Linear(20, 5)
)

x = torch.randn(1, 10)
y = model(x)
print(f"4. 模型测试: 输入{x.shape}, 输出{y.shape}")

# 自动求导测试
w = torch.tensor([2.0], requires_grad=True)
y = w**2
y.backward()
print(f"5. 自动求导: w=2, w²={y.item()}, dw/dy={w.grad.item()}")

print("\n✅ 所有测试通过!")
print("="*50)
EOF
ai-dev环境下运行:python pytorch_test.py
测试通过即可;
4.Hugging Face生态工具
激活环境
conda activate ai-dev
安装transformers和相关库
pip install transformers datasets accelerate evaluate
安装gradio(快速构建演示界面)
pip install gradio
安装wandb(实验追踪)
pip install wandb
安装mlflow(生命周期管理)
pip install mlflow
镜像修改(选一个即可):
1.# 将镜像设置写入bashrc
echo 'export HF_ENDPOINT="https://hf-mirror.com"' >> ~/.bashrc
source ~/.bashrc
验证
echo $HF_ENDPOINT # 应该显示 https://hf-mirror.com
2.# 安装modelscope
pip install modelscope
修改脚本中的模型加载方式
from modelscope import snapshot_download
model_path = snapshot_download('uer/roberta-base-finetuned-jd-binary-chinese')
测试:
mkdir 3_huggingface_demo
cd 3_huggingface_demo
touch huggingface_demo.py
gedit huggingface_demo.py
import os
os.environ['HF_ENDPOINT'] = 'https://hf-mirror.com'  # 设置镜像

from transformers import pipeline
import gradio as gr

# 使用国内更易访问的小模型
model_name = "bert-base-chinese"  # 替换为更小的中文模型

try:
    # 尝试加载模型
    nlp = pipeline("sentiment-analysis", model=model_name)

    def analyze(text):
        result = nlp(text)
        return {"text": text, "sentiment": result[0]['label'], "score": result[0]['score']}

    # 创建界面
    interface = gr.Interface(
        fn=analyze,
        inputs="text",
        outputs="json",
        title="中文情感分析"
    )

    interface.launch()
except Exception as e:
    print(f"加载模型失败: {e}")
    print("请尝试:")
    print("1. 检查网络连接")
    print("2. 运行: export HF_ENDPOINT=https://hf-mirror.com")
    print("3. 使用更小的模型")
ai-dev环境下运行:python huggingface_demo.py
出现地址即可。
tokenizer.json: 269kB 00:00, 1.33MB/s
Device set to use cpu
* Running on local URL: http://127.0.0.1:7860
* To create a public link, set `share=True` in `launch()`.
5.MLOps安装
激活环境
conda activate ai-dev
安装MLflow
pip install mlflow
安装wandb(Weights & Biases)
pip install wandb
注册wandb账号(免费)
访问:https://wandb.ai
注册后获取API Key
测试:暂时不测带api key的
touch mlops_demo.py
gedit mlops_demo.py
# mlops_demo.py
import mlflow
import mlflow.pytorch
import wandb
import torch
import torch.nn as nn
import torch.optim as optim
from torch.utils.data import DataLoader, TensorDataset
import numpy as np
from sklearn.model_selection import train_test_split
import matplotlib.pyplot as plt

print("MLOps工具演示")
print("=" * 50)

# 1. 准备数据
np.random.seed(42)
torch.manual_seed(42)

n_samples = 1000
X = np.random.randn(n_samples, 10)
y = (X[:, 0] + X[:, 1] * 2 + np.random.randn(n_samples) * 0.1 > 0).astype(float)

X_train, X_test, y_train, y_test = train_test_split(
    X, y, test_size=0.2, random_state=42
)

# 转换为PyTorch张量
X_train_tensor = torch.FloatTensor(X_train)
y_train_tensor = torch.FloatTensor(y_train).unsqueeze(1)
X_test_tensor = torch.FloatTensor(X_test)
y_test_tensor = torch.FloatTensor(y_test).unsqueeze(1)

train_dataset = TensorDataset(X_train_tensor, y_train_tensor)
test_dataset = TensorDataset(X_test_tensor, y_test_tensor)

train_loader = DataLoader(train_dataset, batch_size=32, shuffle=True)
test_loader = DataLoader(test_dataset, batch_size=32)

# 2. 定义模型
class SimpleModel(nn.Module):
    def __init__(self, input_size=10, hidden_size=20):
        super().__init__()
        self.network = nn.Sequential(
            nn.Linear(input_size, hidden_size),
            nn.ReLU(),
            nn.Dropout(0.2),
            nn.Linear(hidden_size, 1),
            nn.Sigmoid()
        )

    def forward(self, x):
        return self.network(x)

# 3. 使用MLflow进行实验追踪
print("\n1. MLflow实验追踪")
print("-" * 30)

# 设置MLflow
mlflow.set_tracking_uri("file:./mlruns")  # 本地存储
mlflow.set_experiment("demo_experiment")

# 初始化W&B
print("\n2. Weights & Biases实验追踪")
print("-" * 30)

# 先注释掉wandb,需要先注册账号
# wandb.init(project="pytorch-demo", name="mlflow-demo")
# config = wandb.config
# config.learning_rate = 0.01
# config.epochs = 5
# config.hidden_size = 20

# 训练函数
def train_model(lr=0.01, hidden_size=20, epochs=5, use_mlflow=True):
    model = SimpleModel(hidden_size=hidden_size)
    criterion = nn.BCELoss()
    optimizer = optim.Adam(model.parameters(), lr=lr)

    if use_mlflow:
        # MLflow记录参数
        mlflow.log_param("learning_rate", lr)
        mlflow.log_param("hidden_size", hidden_size)
        mlflow.log_param("epochs", epochs)

    train_losses = []

    for epoch in range(epochs):
        model.train()
        epoch_loss = 0

        for batch_X, batch_y in train_loader:
            optimizer.zero_grad()
            outputs = model(batch_X)
            loss = criterion(outputs, batch_y)
            loss.backward()
            optimizer.step()

            epoch_loss += loss.item()

        avg_loss = epoch_loss / len(train_loader)
        train_losses.append(avg_loss)

        print(f"Epoch {epoch+1}/{epochs}, Loss: {avg_loss:.4f}")

        if use_mlflow:
            mlflow.log_metric("train_loss", avg_loss, step=epoch)

        # W&B记录
        # if wandb.run is not None:
        #     wandb.log({"train_loss": avg_loss})

    # 测试
    model.eval()
    with torch.no_grad():
        test_outputs = model(X_test_tensor)
        test_loss = criterion(test_outputs, y_test_tensor).item()

        # 计算准确率
        predictions = (test_outputs > 0.5).float()
        accuracy = (predictions == y_test_tensor).float().mean().item()

    print(f"测试损失: {test_loss:.4f}, 准确率: {accuracy:.2%}")

    if use_mlflow:
        mlflow.log_metric("test_loss", test_loss)
        mlflow.log_metric("test_accuracy", accuracy)

        # 保存模型
        mlflow.pytorch.log_model(model, "model")

    return model, train_losses, accuracy

# 运行多个实验
print("\n3. 运行多个实验对比")
print("-" * 30)

learning_rates = [0.1, 0.01, 0.001]
results = []

for lr in learning_rates:
    print(f"\n实验: 学习率 = {lr}")

    with mlflow.start_run(run_name=f"lr_{lr}"):
        # 记录参数
        mlflow.log_param("learning_rate", lr)
        mlflow.log_param("hidden_size", 20)

        # 训练模型
        model, losses, accuracy = train_model(
            lr=lr,
            hidden_size=20,
            epochs=5,
            use_mlflow=False  # 这里避免嵌套记录
        )

        # 记录指标
        mlflow.log_metric("final_accuracy", accuracy)

        results.append({
            "learning_rate": lr,
            "accuracy": accuracy,
            "losses": losses
        })

# 4. 可视化结果
print("\n4. 实验结果可视化")
print("-" * 30)

plt.figure(figsize=(12, 4))

# 训练损失曲线
plt.subplot(1, 2, 1)
for i, res in enumerate(results):
    plt.plot(res['losses'], label=f"LR={res['learning_rate']}")
plt.xlabel('Epoch')
plt.ylabel('Loss')
plt.title('不同学习率的训练损失')
plt.legend()
plt.grid(True, alpha=0.3)

# 准确率比较
plt.subplot(1, 2, 2)
lrs = [res['learning_rate'] for res in results]
accs = [res['accuracy'] for res in results]
plt.bar(range(len(lrs)), accs)
plt.xticks(range(len(lrs)), [f"{lr}" for lr in lrs])
plt.xlabel('Learning Rate')
plt.ylabel('Accuracy')
plt.title('不同学习率的测试准确率')
plt.ylim([0, 1])

for i, acc in enumerate(accs):
    plt.text(i, acc + 0.02, f'{acc:.2%}', ha='center')

plt.tight_layout()
plt.savefig('experiment_results.png')
print("实验结果图已保存为 experiment_results.png")

# 5. 使用MLflow UI查看结果
print("\n5. 启动MLflow UI查看结果")
print("-" * 30)
print("在终端中运行以下命令查看MLflow实验结果:")
print("mlflow ui --port 5000")
print("然后在浏览器中访问: http://localhost:5000")

# 6. 模型服务化示例
print("\n6. 模型服务化准备")
print("-" * 30)

# 保存最终模型
best_lr = learning_rates[np.argmax(accs)]
print(f"最佳学习率: {best_lr} (准确率: {max(accs):.2%})")

# 用最佳参数重新训练
final_model, _, final_accuracy = train_model(
    lr=best_lr,
    hidden_size=20,
    epochs=10,
    use_mlflow=True
)

print(f"最终模型准确率: {final_accuracy:.2%}")

# 保存为TorchScript
traced_model = torch.jit.trace(final_model, torch.randn(1, 10))
traced_model.save("final_model.pt")
print("模型已保存为 final_model.pt (TorchScript格式)")

# 7. 创建推理API示例
print("\n7. 创建FastAPI推理服务示例")
print("-" * 30)

fastapi_code = '''
from fastapi import FastAPI
import torch
import numpy as np
from pydantic import BaseModel

app = FastAPI(title="模型推理API")

# 加载模型
model = torch.jit.load("final_model.pt")
model.eval()

class PredictionRequest(BaseModel):
    features: list

@app.post("/predict")
async def predict(request: PredictionRequest):
    """模型预测接口"""
    try:
        # 转换为tensor
        features = np.array(request.features, dtype=np.float32)
        if len(features.shape) == 1:
            features = features.reshape(1, -1)

        input_tensor = torch.FloatTensor(features)

        # 推理
        with torch.no_grad():
            prediction = model(input_tensor)

        result = {
            "prediction": prediction.numpy().tolist(),
            "binary_prediction": (prediction > 0.5).numpy().astype(int).tolist()
        }

        return {
            "status": "success",
            "result": result
        }
    except Exception as e:
        return {
            "status": "error",
            "message": str(e)
        }

@app.get("/health")
async def health_check():
    """健康检查"""
    return {"status": "healthy"}
'''

with open("fastapi_demo.py", "w", encoding="utf-8") as f:
    f.write(fastapi_code)

print("FastAPI代码已保存为 fastapi_demo.py")
print("运行命令: uvicorn fastapi_demo:app --reload --port 8000")
ai-dev环境运行:python mlops_demo.py
出现类似:
最佳学习率: 0.1 (准确率: 98.00%)
Epoch 1/10, Loss: 0.2812
Epoch 2/10, Loss: 0.1603
Epoch 3/10, Loss: 0.1234
Epoch 4/10, Loss: 0.0737
Epoch 5/10, Loss: 0.0612
Epoch 6/10, Loss: 0.0544
Epoch 7/10, Loss: 0.0760
Epoch 8/10, Loss: 0.0646
Epoch 9/10, Loss: 0.0561
Epoch 10/10, Loss: 0.0638
测试损失: 0.0730, 准确率: 97.00%
2025/12/08 00:29:12 WARNING mlflow.models.model: `artifact_path` is deprecated. Please use `name` instead.
最终模型准确率: 97.00%
模型已保存为 final_model.pt (TorchScript格式)
- 创建FastAPI推理服务示例
FastAPI代码已保存为 fastapi_demo.py
运行命令: uvicorn fastapi_demo:app --reload --port 8000