此前,我已经尝试了使用单目和RGBD模式,但我在项目里需要用到的是双目模式,所以此篇仅作为学习记录,不作为教程。
一、红外双目参数了解
(1)首先,我需要了解红外双目相关的话题,分辨率,fps
默认参数启动相机:
roslaunch realsense2_camera rs_camera.launch和双目相关的话题:
camera/extrinsics/depth_to_infra1
/camera/extrinsics/depth_to_infra2
/camera/infra1/camera_info
/camera/infra1/image_rect_raw #这个话题会在slam中被订阅
/camera/infra1/image_rect_raw/compressed
/camera/infra1/image_rect_raw/compressed/parameter_descriptions
/camera/infra1/image_rect_raw/compressed/parameter_updates
/camera/infra1/image_rect_raw/compressedDepth
/camera/infra1/image_rect_raw/compressedDepth/parameter_descriptions
/camera/infra1/image_rect_raw/compressedDepth/parameter_updates
/camera/infra1/image_rect_raw/theora
/camera/infra1/image_rect_raw/theora/parameter_descriptions
/camera/infra1/image_rect_raw/theora/parameter_updates
/camera/infra1/metadata
/camera/infra2/camera_info
/camera/infra2/image_rect_raw #这个话题会在slam中被订阅
/camera/infra2/image_rect_raw/compressed
/camera/infra2/image_rect_raw/compressed/parameter_descriptions
/camera/infra2/image_rect_raw/compressed/parameter_updates
/camera/infra2/image_rect_raw/compressedDepth
/camera/infra2/image_rect_raw/compressedDepth/parameter_descriptions
/camera/infra2/image_rect_raw/compressedDepth/parameter_updates
/camera/infra2/image_rect_raw/theora
/camera/infra2/image_rect_raw/theora/parameter_descriptions
/camera/infra2/image_rect_raw/theora/parameter_updates
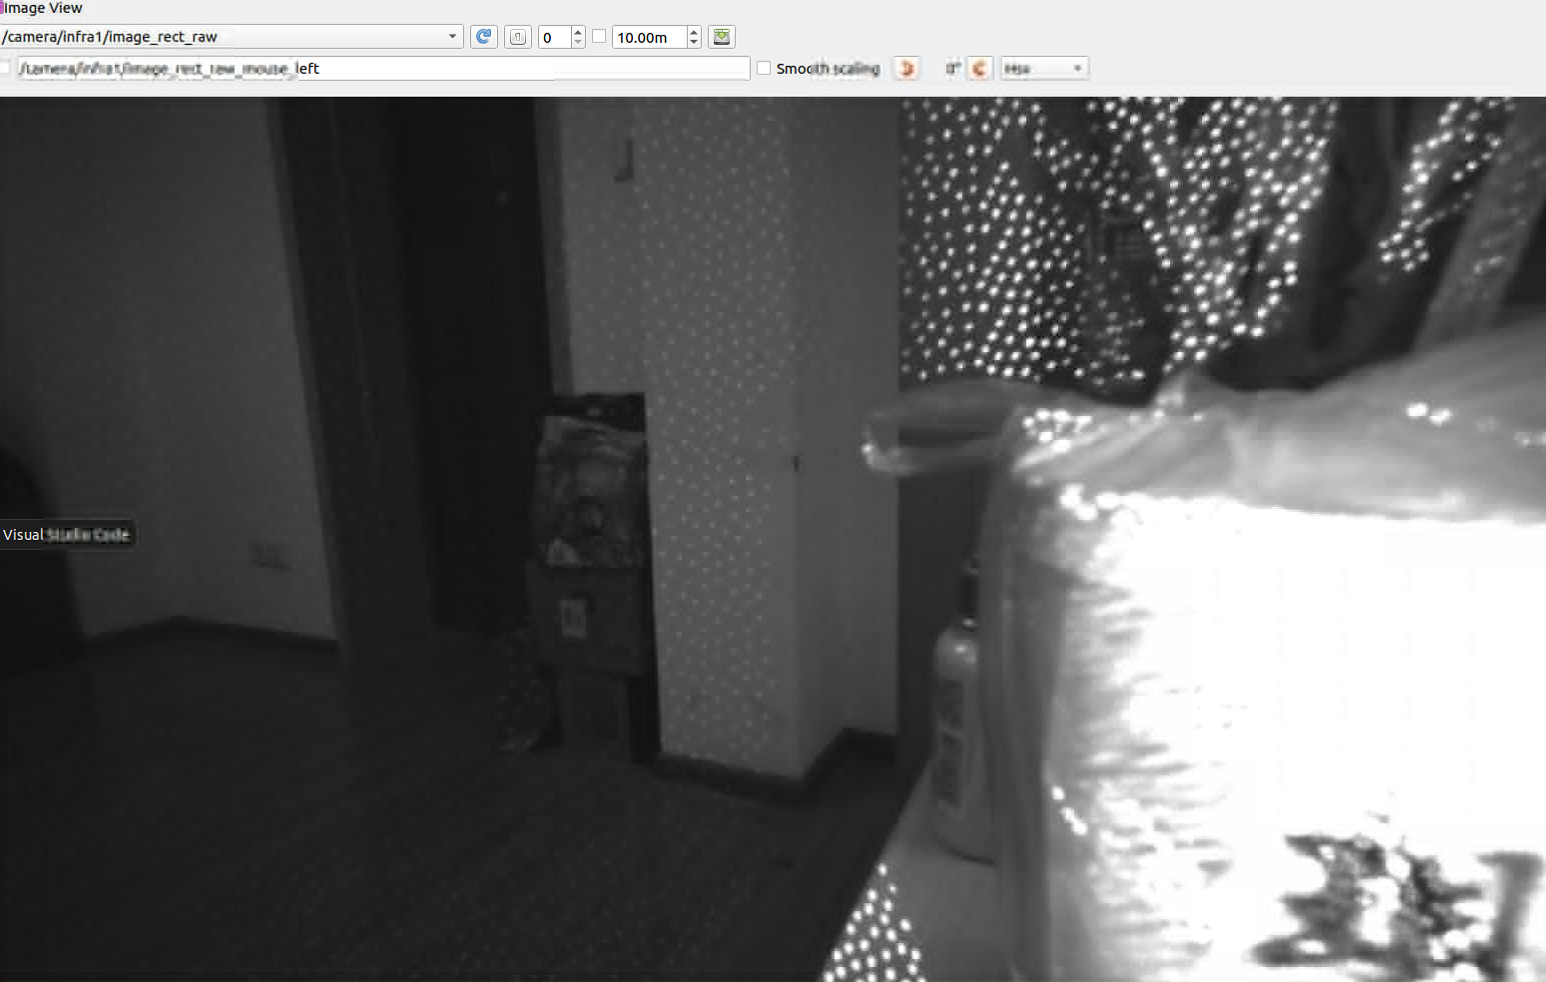
/camera/infra2/metadata图像:可以看到目前还有光斑,在实际使用中需要关掉红外发射器
接着去查看一下左右相机的话题信息:
infra1:
指令:rostopic echo -n 1 /camera/infra1/camera_info
header:
  seq: 1827
  stamp:
    secs: 1765423702
    nsecs: 445745230
  frame_id: "camera_infra1_optical_frame"
height: 480
width: 848
distortion_model: "plumb_bob"
D: [0.0, 0.0, 0.0, 0.0, 0.0]
K: [422.4416198730469, 0.0, 428.0201721191406, 0.0, 422.4416198730469, 243.25135803222656, 0.0, 0.0, 1.0]
R: [1.0, 0.0, 0.0, 0.0, 1.0, 0.0, 0.0, 0.0, 1.0]
P: [422.4416198730469, 0.0, 428.0201721191406, 0.0, 0.0, 422.4416198730469, 243.25135803222656, 0.0, 0.0, 0.0, 1.0, 0.0]
binning_x: 0
binning_y: 0
roi:
  x_offset: 0
  y_offset: 0
  height: 0
  width: 0
  do_rectify: False
目前分辨率是848*480
infra2:
 rostopic echo -n 1 /camera/infra2/camera_info
header:
  seq: 0
  stamp:
    secs: 1765423771
    nsecs: 258948326
  frame_id: "camera_infra1_optical_frame"
height: 480
width: 848
distortion_model: "plumb_bob"
D: [0.0, 0.0, 0.0, 0.0, 0.0]
K: [422.4416198730469, 0.0, 428.0201721191406, 0.0, 422.4416198730469, 243.25135803222656, 0.0, 0.0, 1.0]
R: [1.0, 0.0, 0.0, 0.0, 1.0, 0.0, 0.0, 0.0, 1.0]
P: [422.4416198730469, 0.0, 428.0201721191406, -21.109111785888672, 0.0, 422.4416198730469, 243.25135803222656, 0.0, 0.0, 0.0, 1.0, 0.0]
binning_x: 0
binning_y: 0
roi:
  x_offset: 0
  y_offset: 0
  height: 0
  width: 0
  do_rectify: False
再查看infra1和2的外参:
Extrinsic from "Infrared 1"	  To	  "Infrared 2" :
 Rotation Matrix:
   1   0   0
   0   1   0
   0   0   1

 Translation Vector: -0.0499693006277084  0  0
------------------------------------------------
版权声明:本文为CSDN博主「努力的BigJiang」的原创文章,遵循CC 4.0 BY-SA版权协议,转载请附上原文出处链接及本声明。
原文链接:https://blog.csdn.net/m0_62948300/article/details/155751398
只有平移,从相机的说明书里也得知两个相机的距离为50mm,与这个结果相符。
查看完毕后,我需要的应该是640*360的分辨率,30fps,所以修改启动命令(也可以改launch的参数):
roslaunch realsense2_camera rs_camera.launch infra_width:=640 infra_height:=360 infra_fps:=30再次查看话题信息:
 rostopic echo -n 1 /camera/infra2/camera_info
header:
  seq: 0
  stamp:
    secs: 1765424268
    nsecs: 830939293
  frame_id: "camera_infra1_optical_frame"
height: 360
width: 640
distortion_model: "plumb_bob"
D: [0.0, 0.0, 0.0, 0.0, 0.0]
K: [318.8238525390625, 0.0, 323.0340881347656, 0.0, 318.8238525390625, 182.453857421875, 0.0, 0.0, 1.0]
R: [1.0, 0.0, 0.0, 0.0, 1.0, 0.0, 0.0, 0.0, 1.0]
P: [318.8238525390625, 0.0, 323.0340881347656, -15.931405067443848, 0.0, 318.8238525390625, 182.453857421875, 0.0, 0.0, 0.0, 1.0, 0.0]
binning_x: 0
binning_y: 0
roi:
  x_offset: 0
  y_offset: 0
  height: 0
  width: 0
  do_rectify: False
---

#查看发布频率
指令:rostopic hz /camera/infra2/camera_info
subscribed to [/camera/infra2/camera_info]
average rate: 29.971
	min: 0.015s max: 0.059s std dev: 0.00605s window: 30
average rate: 29.964
	min: 0.015s max: 0.060s std dev: 0.00644s window: 60
average rate: 29.862
	min: 0.015s max: 0.060s std dev: 0.00537s window: 90
修改后,分辨率改变,k矩阵也改变了,查看频率发现hz一致。(这里还要记得在launch文件里修改参数确保时间同步):

时间戳对比:
rostopic echo -n1 /camera/infra1/image_rect_raw/header/stamp
rostopic echo -n1 /camera/infra2/image_rect_raw/header/stamp
二、红外双目的标定
暂时先不标,使用默认参数,先把代码跑通
三、红外双目模式运行ORBSLAM2
这里需要关掉红外发射器,不然效果很差
https://github.com/appliedAI-Initiative/orb_slam_2_ros?tab=readme-ov-file
官方没给适配d435i双目模式的启动文件,我仿照着别的写了一个,并加入了静态TF的发布
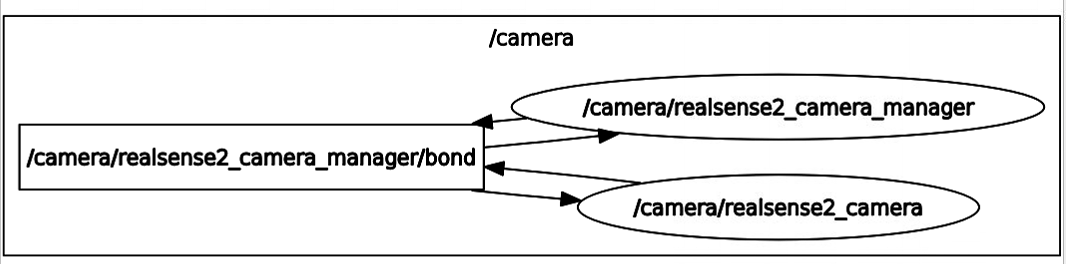
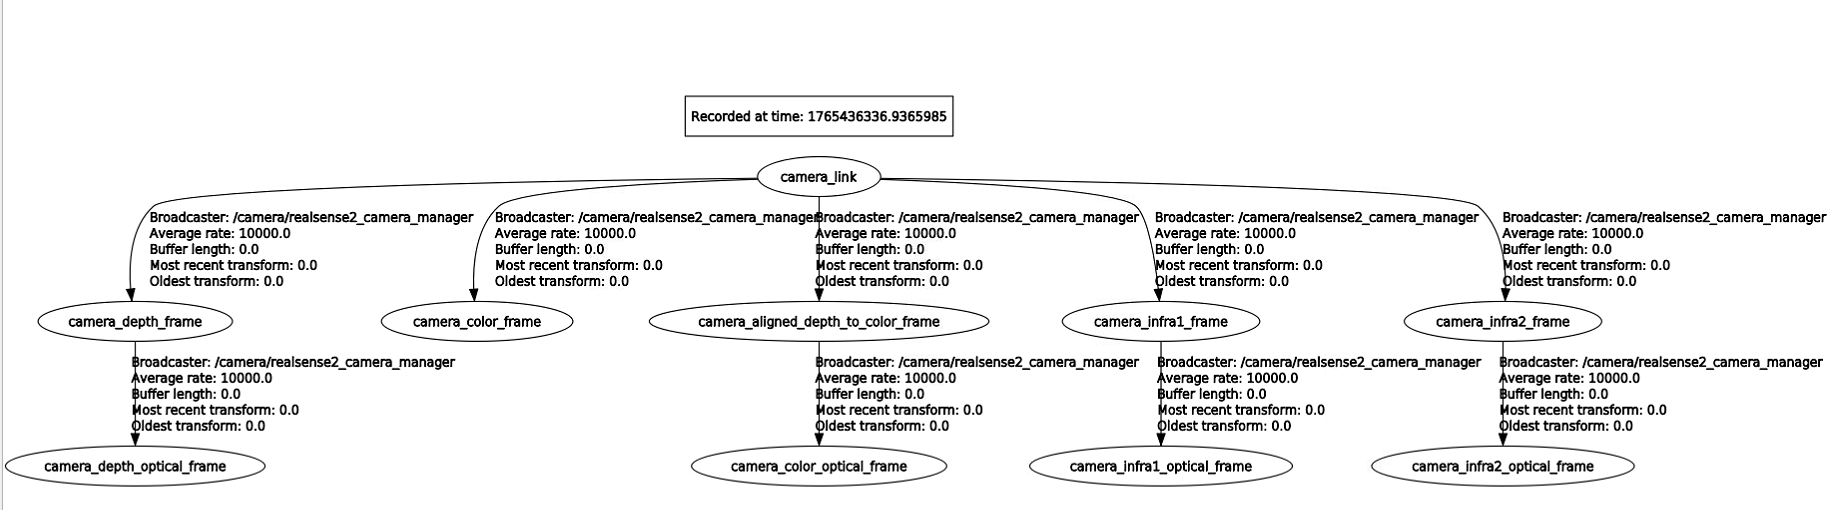
1. 单独运行相机:
查看一下节点图:
TF树:
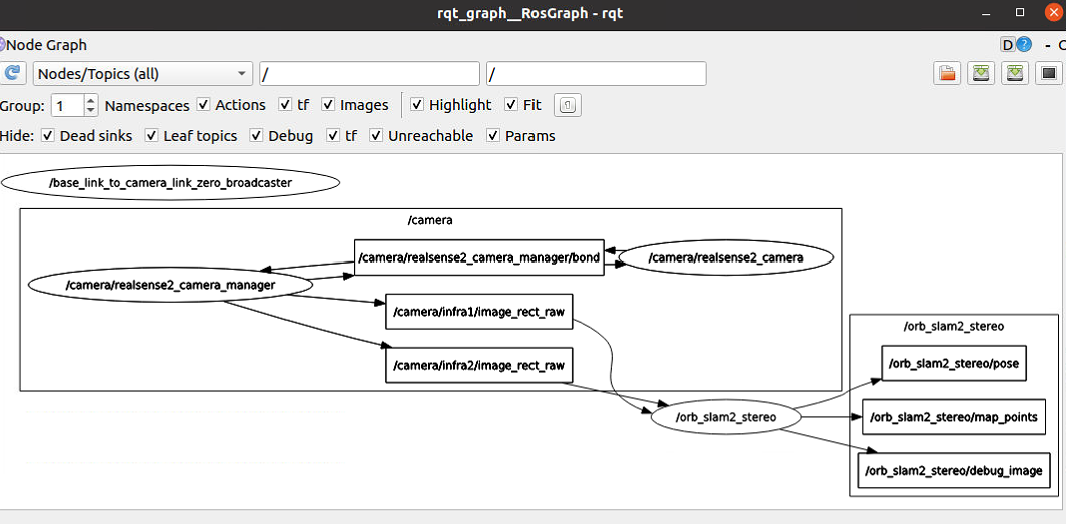
2. 启动相机,运行slam
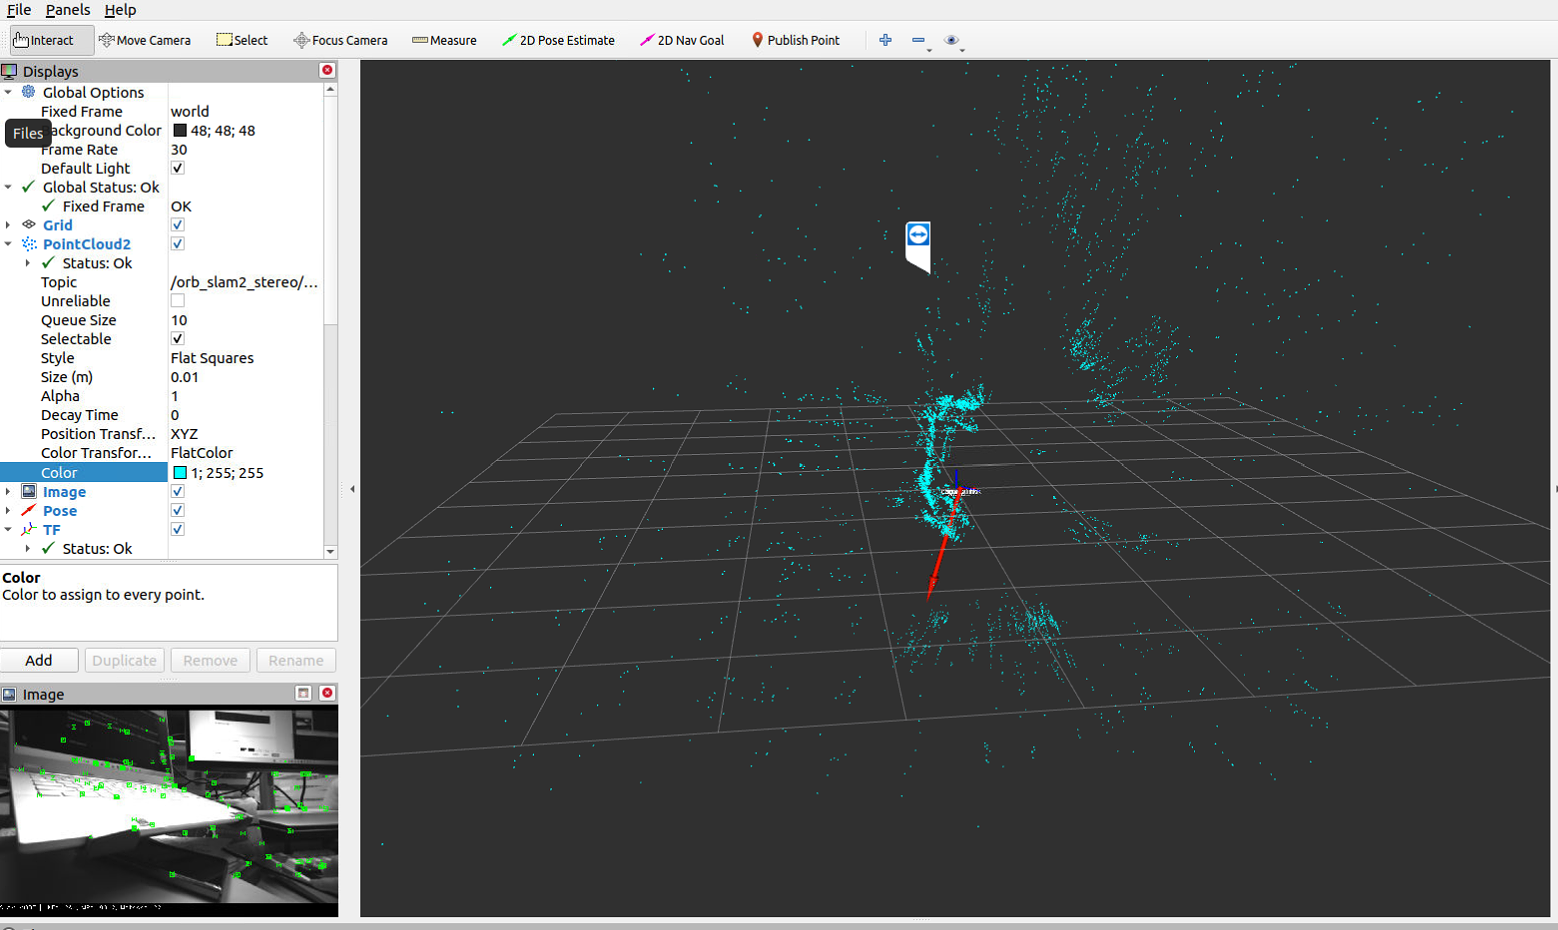
节点图:

这个节点图不对,没有输出的点云和位姿,移动一下相机,这个才对嘛:
TF:

打开rviz:
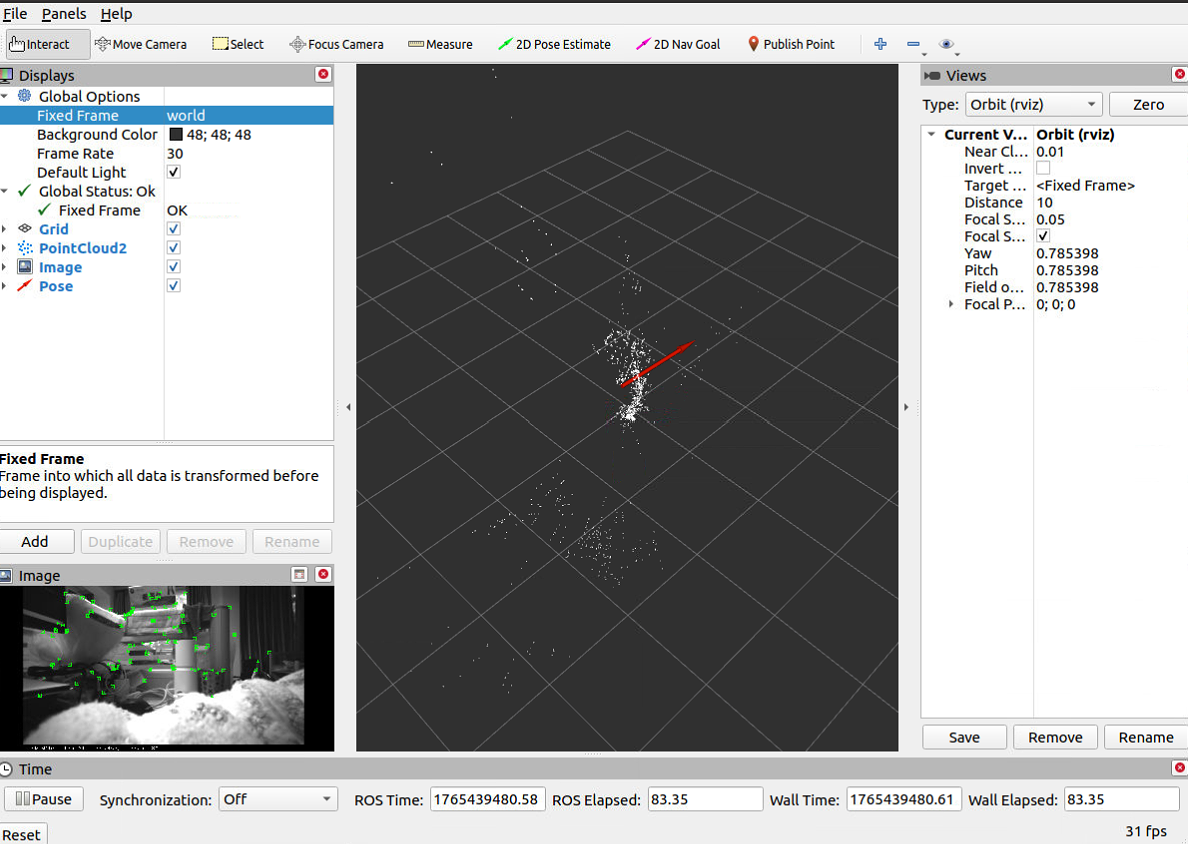
调下颜色:
比单目效果好,但是怎么还是这么容易跟丢呢。唉ε=(´ο`*)))唉
但此时出现警告:

唉 还是绕不过这个问题,不过问了师兄,说是影响不大,相信前人的智慧吧,或者有大佬解决的可以说一下。
到这里就基本完成了使用d435i双目模式运行orbslam2