Qt 实现炫酷锁屏源码分享
- 一、源码分享
- 二、实现原理
-
- 1、QPainter详解
- 2、QPropertyAnimation详解
-
- [1、 核心概念](#1、 核心概念)
- [2、 工作原理](#2、 工作原理)
- [3、 基本用法](#3、 基本用法)
- [4、 关键成员函数](#4、 关键成员函数)
- [5、 高级用法与技巧](#5、 高级用法与技巧)
- [6、 注意事项](#6、 注意事项)
- [7、 总结](#7、 总结)
一、源码分享
1、效果展示


2、源码分享
2.1、工程结构

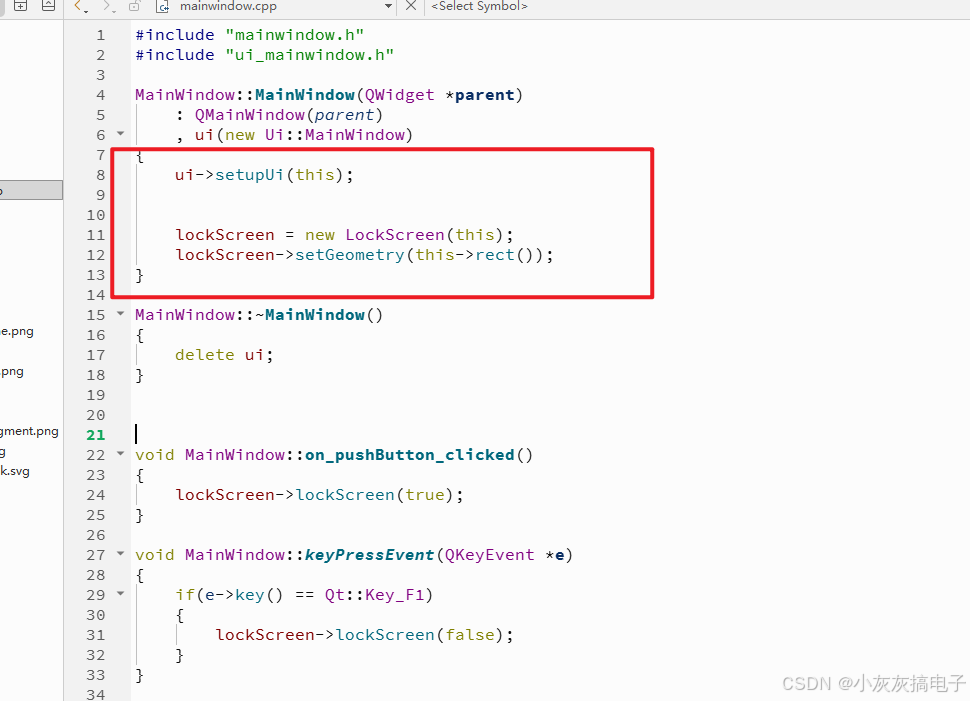
2.2、mainwindow.cpp
cpp
#include "mainwindow.h"
#include "ui_mainwindow.h"

MainWindow::MainWindow(QWidget *parent)
    : QMainWindow(parent)
    , ui(new Ui::MainWindow)
{
    ui->setupUi(this);


    lockScreen = new LockScreen(this);
    lockScreen->setGeometry(this->rect());
}

MainWindow::~MainWindow()
{
    delete ui;
}


void MainWindow::on_pushButton_clicked()
{
    lockScreen->lockScreen(true);
}

void MainWindow::keyPressEvent(QKeyEvent *e)
{
    if(e->key() == Qt::Key_F1)
    {
        lockScreen->lockScreen(false);
    }
}

void MainWindow::resizeEvent(QResizeEvent *event)
{
    lockScreen->setGeometry(this->rect());
}
2.3、lockScreen.h
cpp
#ifndef LOCKSCREEN_H
#define LOCKSCREEN_H

#include <QWidget>
#include <QPaintEvent>
#include <QPainter>
#include <QPropertyAnimation>
#include <QPainterPath>

class LockScreen : public QWidget
{
    Q_OBJECT
    Q_PROPERTY(int doorLeftX READ getDoorLeftX WRITE setDoorLeftX NOTIFY doorLeftXChanged FINAL)
    Q_PROPERTY(int doorRightX READ getDoorRightX WRITE setDoorRightX NOTIFY doorRightXChanged FINAL)
    Q_PROPERTY(float ledOpacity READ getLedOpacity WRITE setLedOpacity NOTIFY ledOpacityChanged FINAL)
signals:
    void doorLeftXChanged();

    void doorRightXChanged();

    void ledOpacityChanged();

public:
    explicit LockScreen(QWidget *parent = nullptr);
    void lockScreen(bool isLock);

    int getDoorLeftX() const
    {
        return doorLeftX;
    }

    void setDoorLeftX(int newDoorLeftX)
    {
        if (doorLeftX == newDoorLeftX)
            return;
        doorLeftX = newDoorLeftX;
        emit doorLeftXChanged();
    }

    int getDoorRightX() const
    {
        return doorRightX;
    }

    void setDoorRightX(int newDoorRightX)
    {
        if (doorRightX == newDoorRightX)
            return;
        doorRightX = newDoorRightX;
        emit doorRightXChanged();
    }

    float getLedOpacity() const
    {
        return ledOpacity;
    }

    void setLedOpacity(float newLedOpacity)
    {
        if (qFuzzyCompare(ledOpacity, newLedOpacity))
            return;
        ledOpacity = newLedOpacity;
        emit ledOpacityChanged();
    }

protected:
    void paintEvent(QPaintEvent *e) override;
    bool eventFilter(QObject *obj, QEvent *e) override;
private:
    float normalizeAngle(float angle) {
        return fmod(angle + 360.0f, 360.0f);
    }
    float clamp(float val,float min,float max){
        if(val < min)
            return min;
        else if(val > max)
            return max;
        else
            return val;
    }

private:
    int doorLeftX = 0,doorRightX = 0;
    const int dialSize = 250;
    const int indictorSize = dialSize + 50;
    float currentAngle = 95;
    QRect rectDial;
    float deltaDegrees;
    float recordAngle;
    const int startAngle = 95;
    const int endAngle = 265;
    float ledOpacity = 1.0f;

    QPropertyAnimation *animDoorLeftX = nullptr,*animDoorRightX = nullptr;

    QPropertyAnimation *animLedOpacity = nullptr;
    QImage *imageDial,*imageLines,*imageNotch,*imgageLed;

};

#endif // LOCKSCREEN_H
2.4、lockScreen.cpp
cpp
#include "lockScreen.h"

LockScreen::LockScreen(QWidget *parent)
    : QWidget{parent},
    imageDial(new QImage(":/image/images/dial-frame.png")),
    imageLines(new QImage(":/image/images/lines.png")),
    imageNotch(new QImage(":/image/images/notch.png")),
    imgageLed(new QImage(":/image/images/led-dark.png"))
{

    this->animDoorLeftX = new QPropertyAnimation(this,"doorLeftX",this);
    this->animDoorLeftX->setDuration(800);
    this->animDoorLeftX->setEasingCurve(QEasingCurve::InExpo);

    connect(this->animDoorLeftX,&QPropertyAnimation::valueChanged,this,
            [=](const QVariant &value)
            {
                Q_UNUSED(value);
                this->update();
                //qDebug()<<value;
            });
    connect(this->animDoorLeftX,&QPropertyAnimation::finished,this,
            [=]()
            {
                if(this->doorLeftX <= -this->width())
                {
                    this->setVisible(false);
                    this->currentAngle = this->startAngle;
                }
            });

    this->animDoorRightX = new QPropertyAnimation(this,"doorRightX",this);
    this->animDoorRightX->setDuration(800);
    this->animDoorRightX->setEasingCurve(QEasingCurve::InExpo);


    this->animLedOpacity = new QPropertyAnimation(this,"ledOpacity",this);
    this->animLedOpacity->setDuration(800);
    this->animLedOpacity->setEasingCurve(QEasingCurve::InExpo);
    this->animLedOpacity->setStartValue(1.0);
    this->animLedOpacity->setEndValue(0.0);
    this->animLedOpacity->setEasingCurve(QEasingCurve::InOutQuad);
    this->animLedOpacity->start();
    connect(this->animLedOpacity,&QPropertyAnimation::valueChanged,this,
                [=](const QVariant &value)
                {
                    Q_UNUSED(value);
                    this->update();
                });
    connect(this->animLedOpacity,&QPropertyAnimation::finished,this,
            [=]()
            {
                if(ledOpacity == 1.0f)
                {
                    this->animLedOpacity->setDirection(QAbstractAnimation::Forward);
                    this->animLedOpacity->start();
                }
                else
                {
                    this->animLedOpacity->setDirection(QAbstractAnimation::Backward);
                    this->animLedOpacity->start();
                }
            });
    this->setVisible(false);

    this->installEventFilter(this);
}

void LockScreen::lockScreen(bool isLock)
{
    if(isLock)
        this->setVisible(true);
    this->animDoorLeftX->setStartValue(isLock?-this->width()-10:-this->width()/2 + 30);
    this->animDoorLeftX->setEndValue(isLock?-this->width()/2 + 30:-this->width()-10);
    this->animDoorLeftX->start();

    this->animDoorRightX->setStartValue(isLock?this->width():this->width()/2 - indictorSize/2);
    this->animDoorRightX->setEndValue(isLock?this->width()/2 - indictorSize/2:this->width());
    this->animDoorRightX->start();
}

void LockScreen::paintEvent(QPaintEvent *e)
{
    Q_UNUSED(e);
    QPainter painter(this);
    painter.setRenderHints(QPainter::Antialiasing|QPainter::SmoothPixmapTransform, true); // 开启抗锯齿

    const int borderWidth = 6;

    if(doorLeftX==0)
        doorLeftX = -this->width()-10;
    if(this->doorRightX == 0)
        this->doorRightX = this->width();


    //绘制左边门
    painter.setPen(QPen(QColor("#000000"), 6, Qt::SolidLine, Qt::RoundCap, Qt::MiterJoin));
    QLinearGradient gradient(this->width()/2, 0, this->width()/2,this->height());
    gradient.setColorAt(0, QColor("#34373F"));
    gradient.setColorAt(1, QColor("#1D2026")); // 尾部
    painter.setBrush(gradient);

    QRect rectDoorLeft(doorLeftX,borderWidth/2,this->width(),this->height() - borderWidth);
    rectDoorLeft.setX(doorLeftX);
    painter.drawRoundedRect(rectDoorLeft,40,40);


    //绘制右边门
    QRect rectDoorRight(doorRightX,borderWidth/2,this->width(),this->height() - borderWidth);
    rectDoorRight.setX(doorRightX + indictorSize/2);

    QLinearGradient gradient2(this->width()/2, 0, this->width()/2,this->height());
    gradient2.setColorAt(0, QColor("#2e3037"));
    gradient2.setColorAt(1, QColor("#1D2026")); // 尾部
    painter.setBrush(gradient2);
    QRect rectRoundBorder(doorRightX +15,(this->height() - (dialSize +20))/2,dialSize + 20,dialSize + 20);
    painter.drawEllipse(rectRoundBorder);

    painter.setBrush(gradient);
    painter.drawRoundedRect(rectDoorRight,40,40);

    QRectF rectIndictor(this->doorRightX,(this->height() - indictorSize)/2,indictorSize,indictorSize);//绘制蓝线

    painter.setPen(QPen(QColor("#76AAF5"), 4, Qt::SolidLine, Qt::RoundCap, Qt::MiterJoin));
    painter.drawArc(rectIndictor,-this->startAngle*16,-(this->currentAngle - this->startAngle)*16);

    //绘制遮罩
    painter.save();
    painter.setPen(Qt::NoPen);
    painter.setBrush(gradient2);
    painter.drawRoundedRect(QRect(rectRoundBorder.center().x() - 10,rectRoundBorder.y()+3,20,rectRoundBorder.height()-6),5,5);
    painter.restore();

    //绘制dial
    QRectF rectDial(this->doorRightX + 25,(this->height() - dialSize)/2,dialSize,dialSize);//绘制转盘
    this->rectDial.setX(rectDial.x());
    this->rectDial.setY(rectDial.y());
    this->rectDial.setWidth(rectDial.width());
    this->rectDial.setHeight(rectDial.height());
    painter.drawImage(rectDial,*this->imageDial);

    //绘制指示线
    painter.save();
    int size = dialSize*1.1;
    painter.setOpacity(0.3);
    QRect rectLine(doorRightX+(indictorSize - size)/2,(this->height() - size)/2,size,size);

    int lineWidth = this->imageLines->width();
    int lineHeight = this->imageLines->height();
    float width = sqrt(lineWidth*lineWidth+lineHeight*lineHeight);
    QImage imageRoute((int)width,(int)width,QImage::Format_ARGB8565_Premultiplied);
    imageRoute.fill(Qt::transparent);
    QPainter p(&imageRoute);
    p.translate(imageRoute.width()/2,imageRoute.height()/2);
    p.rotate(this->currentAngle - this->startAngle);
    p.setBrush(Qt::red);
    // p.drawRect(QRect(-this->imageLines->width()/2,-this->imageLines->height()/2,
    //     this->imageLines->width(),this->imageLines->height()));
    p.drawImage(QRect(- this->imageLines->width()/2,- this->imageLines->height()/2,
        this->imageLines->width(),this->imageLines->height()),*this->imageLines);
    p.end();

    painter.drawImage(rectLine,imageRoute);
    painter.setOpacity(1);
    painter.restore();
    //绘制缺口
    int centerX = rectDial.x() + rectDial.width()/2;
    int centerY = rectDial.y() + rectDial.height()/2;
    int circleRadius = rectDial.width()/2 - 50;
    QRectF rectNotch(this->doorRightX + 15,(this->height() - dialSize)/2,64,64);//绘制转盘
    rectNotch.setX(centerX + circleRadius * cos(currentAngle * M_PI/180) - rectNotch.width()/2);
    rectNotch.setY(centerY + circleRadius * sin(currentAngle * M_PI/180) - rectNotch.height()/2);
    rectNotch.setWidth(64);
    rectNotch.setHeight(64);
    painter.drawImage(rectNotch,*this->imageNotch);


     if(this->currentAngle == this->startAngle)
     {
        QRect rectLed(rectIndictor.x() + rectIndictor.width()/2 - 30,rectIndictor.y() + rectIndictor.height()-20,this->imgageLed->width(),this->imgageLed->height());
        painter.setOpacity(ledOpacity);
        painter.drawImage(rectLed,*this->imgageLed);
     }

}

bool LockScreen::eventFilter(QObject *obj, QEvent *e)
{
    static bool isPressed = false,isfirstTouch = false;
    if(e->type() == QEvent::MouseButtonPress)
    {
        QMouseEvent *evt = static_cast<QMouseEvent *>(e);
        if(evt->button() == Qt::LeftButton && this->rectDial.contains(evt->pos()))
        {
            isPressed = true;
        }

    }
    else if(e->type() == QEvent::MouseButtonRelease)
    {
        QMouseEvent *evt = static_cast<QMouseEvent *>(e);
        if(evt->button() == Qt::LeftButton)
        {
            isPressed = false;
            isfirstTouch = false;
        }

    }
    else if(e->type() == QEvent::MouseMove)
    {
        QMouseEvent *evt = static_cast<QMouseEvent *>(e);
        if(isPressed)
        {
            int dx = evt->pos().x() - this->rectDial.center().x();
            int dy = evt->pos().y() - this->rectDial.center().y();

            // 计算角度(弧度)
            float angleRad = atan2(dy, dx);
            float newAngle = angleRad * (180 / M_PI);
            qDebug()<<angleRad<<" "<<newAngle;

            newAngle = normalizeAngle(newAngle);
            if(!isfirstTouch){
                isfirstTouch = true;
                deltaDegrees = newAngle;
                recordAngle = currentAngle;
            }
            else
            {
                currentAngle = clamp(recordAngle + (newAngle - deltaDegrees),this->startAngle,this->endAngle);
            }
            this->update();
            if(currentAngle >= this->endAngle)
                this->lockScreen(false);
            //     root.isClose = false
        }

    }
    return QWidget::eventFilter(obj,e);
}
2.5、使用方法
直接在需要锁屏的界面new一个就可以。
2.6、完整工程下载
文章顶部下载。
二、实现原理
主要是通过QPainter和QPropertyAnimation来实现
1、QPainter详解
1、 QPainter 概述
QPainter 是 Qt 框架中用于执行低级别绘制的核心类。它提供了丰富的功能,允许你在各种绘图设备(如 QPixmap, QImage, QWidget, QPrinter 等)上绘制图形、文本和图像。其设计遵循"画家模式"(Painter's Model),即在一个"画布"上使用不同的"工具"(画笔、画刷等)进行绘制。
2、核心概念
- 绘图设备 (
QPaintDevice): 这是绘制的目标表面,可以是窗口部件、像素图、图像或打印机页面。 - 画笔 (
QPen) : 控制绘制线条(如形状的轮廓线)的属性,包括颜色、宽度、线型(实线、虚线、点线等)、端点样式和连接样式。- 示例:
pen.setColor(Qt::blue); pen.setWidth(2); pen.setStyle(Qt::DotLine);
- 示例:
- 画刷 (
QBrush) : 控制填充形状内部的属性,包括颜色、样式(实心、渐变、纹理等)。- 示例:
brush.setColor(Qt::green); brush.setStyle(Qt::SolidPattern);
- 示例:
- 字体 (
QFont) : 控制绘制文本时使用的字体属性,如字体族、大小、粗细、斜体等。- 示例:
font.setFamily("Arial"); font.setPointSize(12); font.setBold(true);
- 示例:
- 变换 (
QTransform) : 提供坐标系变换功能,包括平移、缩放、旋转和剪切。这允许你在不同的坐标系下绘制相同的图形。- 示例:
painter.translate(100, 50); painter.rotate(45); painter.scale(2.0, 1.5);
- 示例:
- 视口 (
Viewport) 和 窗口 (Window) : 用于逻辑坐标到物理设备坐标的映射。视口定义物理设备上的矩形区域,窗口定义逻辑坐标空间中的矩形区域。QPainter负责将窗口坐标映射到视口坐标。
3、核心功能
-
绘制基本图形 :
drawPoint,drawPoints: 绘制点。drawLine,drawLines: 绘制直线。drawRect,drawRects: 绘制矩形。drawEllipse: 绘制椭圆(包括圆)。drawArc,drawChord,drawPie: 绘制弧线、弦形、扇形。drawPolyline,drawPolygon: 绘制折线、多边形。drawConvexPolygon: 绘制凸多边形(优化性能)。
-
绘制文本 :
drawText: 绘制文本字符串。有多种重载形式,可以在指定点、矩形或路径上绘制文本。- 示例:
painter.drawText(rect, Qt::AlignCenter, "Hello Qt!");
-
绘制图像 :
drawImage: 在指定位置绘制QImage。drawPixmap: 在指定位置绘制QPixmap。- 示例:
painter.drawImage(QPoint(10, 10), myImage);
-
路径 (
QPainterPath) : 提供一种创建复杂形状(由直线、曲线和其他路径元素组成)并进行绘制或填充的方式。路径可以复用,并支持布尔运算(并集、交集等)。cppQPainterPath path; path.moveTo(20, 80); path.lineTo(20, 30); path.cubicTo(80, 0, 50, 50, 80, 80); // 绘制贝塞尔曲线 painter.drawPath(path); -
渐变填充 (
QGradient) : 使用线性渐变 (QLinearGradient)、径向渐变 (QRadialGradient) 或锥形渐变 (QConicalGradient) 来填充形状,创建平滑的颜色过渡效果。cppQLinearGradient gradient(0, 0, 100, 100); gradient.setColorAt(0.0, Qt::white); gradient.setColorAt(1.0, Qt::green); QBrush brush(gradient); painter.setBrush(brush); painter.drawRect(0, 0, 100, 100); -
合成模式 (
CompositionMode) : 控制新绘制的像素如何与目标设备上已有的像素进行混合。例如,SourceOver(默认,源覆盖目标)、Source(直接替换)、DestinationIn(目标在源内)等。通过setCompositionMode()设置。 -
反走样 (
Antialiasing) : 通过setRenderHint(QPainter::Antialiasing, true)启用,可以平滑图形的边缘,减少锯齿感,提升视觉质量(但可能略微增加性能开销)。 -
裁剪区域 (
Clipping) : 使用setClipRect(),setClipRegion(),setClipPath()限制绘制只发生在特定的区域内。通过setClipping(true/false)启用或禁用裁剪。
4、 使用模式
-
在
QWidget::paintEvent中使用 : 这是最常见的用法。在QWidget子类的paintEvent(QPaintEvent *event)方法中创建QPainter对象,并传入this(指向该部件的指针)作为绘图设备。cppvoid MyWidget::paintEvent(QPaintEvent *event) { QPainter painter(this); // 创建QPainter,目标设备是这个部件 painter.setPen(...); painter.setBrush(...); // ... 绘制操作 ... } // 析构函数自动调用end(),确保资源释放 -
在图像或像素图上绘制 : 创建
QImage或QPixmap,然后创建QPainter指向它们。绘制完成后,可以保存图像或显示在界面上。cppQImage image(800, 600, QImage::Format_ARGB32); image.fill(Qt::white); // 初始填充白色背景 QPainter painter(&image); painter.drawText(...); // ... 绘制操作 ... painter.end(); // 或者让QPainter析构自动结束 image.save("output.png"); -
打印 : 创建
QPrinter对象,在打印作业开始后创建QPainter指向QPrinter,绘制内容将被发送到打印机。
5、 重要注意事项
-
生命周期管理 :
QPainter的构造函数 (QPainter(QPaintDevice *)) 会隐式调用begin()。必须确保在绘图设备有效且准备好绘制时创建QPainter。QPainter的析构函数会自动调用end()。如果在同一个设备上需要多次绘制,最好在每次绘制之间显式调用begin()和end()(或让局部QPainter对象析构)。 -
状态保存 :
save()和restore()方法用于保存和恢复当前的状态(画笔、画刷、字体、变换、视口窗口等)。这在嵌套绘制或需要临时改变状态时非常有用。cpppainter.save(); // 保存当前状态 painter.setPen(Qt::red); painter.drawLine(...); painter.restore(); // 恢复到保存的状态(原来的画笔) -
性能 : 避免在
paintEvent外创建QPainter。尽量减少在paintEvent中的计算量。重用预先生成的图像、路径或渐变对象。谨慎使用复杂的变换和反走样。 -
坐标系统 : 默认原点 (0, 0) 在设备的左上角,x轴向右增加,y轴向下增加。使用
translate,scale,rotate,shear可以改变坐标系。setViewport和setWindow提供了另一种坐标映射方式。 -
设备独立性 :
QPainter旨在提供设备无关的绘制。相同的绘制代码可以在屏幕、图像或打印机上工作,尽管不同设备的物理特性(如分辨率)可能不同。
6、 示例代码片段 (绘制一个简单的自定义部件)
cpp
#include <QWidget>
#include <QPainter>
#include <QPainterPath>

class MyCustomWidget : public QWidget {
    Q_OBJECT
public:
    using QWidget::QWidget;

protected:
    void paintEvent(QPaintEvent *event) override {
        QPainter painter(this); // 针对此部件创建QPainter
        painter.setRenderHint(QPainter::Antialiasing); // 开启反走样

        // 设置画笔和画刷
        QPen pen(Qt::darkBlue, 2);
        painter.setPen(pen);
        QBrush brush(Qt::lightGray);
        painter.setBrush(brush);

        // 绘制一个矩形
        painter.drawRect(10, 10, 100, 50);

        // 改变画笔颜色,绘制一条线
        pen.setColor(Qt::red);
        painter.setPen(pen);
        painter.drawLine(10, 70, 110, 70);

        // 创建一个路径并绘制(一个简单的箭头)
        QPainterPath path;
        path.moveTo(150, 30);
        path.lineTo(180, 30);
        path.lineTo(170, 20);
        path.lineTo(180, 30);
        path.lineTo(170, 40);
        painter.drawPath(path);

        // 绘制文本
        QFont font("Arial", 12);
        painter.setFont(font);
        painter.drawText(50, 100, "Qt 6 QPainter Demo");
    }
};
7、调试技巧
- 确保
paintEvent被正确调用(例如,在需要重绘时调用update())。 - 检查画笔颜色是否设置正确(忘记设置画笔可能导致图形不可见)。
- 注意坐标范围是否超出设备边界。
- 使用
save()和restore()避免状态设置错误的影响范围过大。
QPainter 是 Qt 图形编程的基石。掌握其核心概念、功能和使用模式,能够帮助你创建各种自定义的、高性能的图形界面元素和应用程序。
2、QPropertyAnimation详解
QPropertyAnimation 是 Qt 框架中 QVariantAnimation 类的一个子类。它是 Qt 动画框架的核心组成部分,专门用于对 QObject 或其子类对象的特定属性进行动画插值。简单来说,它能让一个对象的属性(比如位置、大小、颜色、透明度等)在一段时间内平滑地从起始值变化到结束值。
1、 核心概念
- 目标对象 (
targetObject) : 你想要施加动画效果的那个 QObject (或其子类) 实例。例如,一个QWidget, 一个QGraphicsItem等。 - 目标属性 (
propertyName) : 目标对象中你想要动态改变的属性的名称 。这个属性必须是:- 通过
Q_PROPERTY宏声明过的。 - 拥有读 (
READ) 和写 (WRITE) 函数。 - 其类型能够被
QVariant表示(大多数 Qt 的基本类型和自定义类型只要注册过都可以)。
- 通过
- 起始值 (
startValue): 动画开始时属性的值。类型必须与属性类型兼容。 - 结束值 (
endValue): 动画结束时属性的值。类型必须与属性类型兼容。 - 持续时间 (
duration): 动画从开始到结束所持续的时间长度,单位是毫秒 (ms)。 - 插值器 (
easingCurve) : 定义动画过程中值变化的速率模式(匀速、加速、减速、弹跳等)。QEasingCurve类提供了多种预定义的曲线。
2、 工作原理
- 时间驱动 :
QPropertyAnimation内部使用一个计时器。 - 插值计算 : 在动画运行的每一帧(由 Qt 的主事件循环驱动),根据当前动画已进行的时间占总持续时间的比例(一个介于 0.0 到 1.0 的值),结合设置的
easingCurve,计算出当前应该达到的插值值。 - 属性更新 : 将计算出的插值值通过目标对象的属性写函数 (
WRITE) 设置回去,从而改变属性的当前值。 - 信号通知 : 在动画开始、结束、状态改变以及每一帧属性值更新时,
QPropertyAnimation会发出相应的信号(如valueChanged,finished),便于应用程序进行响应。
3、 基本用法
以下是一个使用 QPropertyAnimation 移动一个 QPushButton 的简单示例:
cpp
#include <QApplication>
#include <QPushButton>
#include <QPropertyAnimation>

int main(int argc, char *argv[]) {
    QApplication app(argc, argv);

    QPushButton button("Animate Me!");
    button.resize(100, 50);
    button.show();

    // 1. 创建动画对象,指定目标对象和属性名
    QPropertyAnimation *animation = new QPropertyAnimation(&button, "geometry");
    // 设置父对象为按钮,方便内存管理 (Qt 的对象树机制)
    animation->setParent(&button);

    // 2. 设置持续时间 (2 秒)
    animation->setDuration(2000);

    // 3. 设置起始值 (按钮的初始位置和大小)
    animation->setStartValue(QRect(0, 0, 100, 50));

    // 4. 设置结束值 (移动到 (200, 150) 位置,大小不变)
    animation->setEndValue(QRect(200, 150, 100, 50));

    // 5. (可选) 设置缓动曲线 (例如,OutBounce 弹跳效果)
    animation->setEasingCurve(QEasingCurve::OutBounce);

    // 6. 启动动画
    animation->start();

    return app.exec();
}
4、 关键成员函数
setTargetObject(QObject *object): 设置要动画的目标对象。setPropertyName(const QByteArray &propertyName): 设置要动画的属性名称。setDuration(int msecs): 设置动画持续时间。setStartValue(const QVariant &value): 显式设置动画的起始值。setEndValue(const QVariant &value): 显式设置动画的结束值。setEasingCurve(const QEasingCurve &curve): 设置动画的缓动曲线。start(QAbstractAnimation::DeletionPolicy policy = KeepWhenStopped): 启动动画。stop(): 停止动画。pause(): 暂停动画。resume(): 从暂停状态恢复动画。currentValue() const: 获取当前动画的插值值。state() const: 获取动画的当前状态 (Stopped,Paused,Running)。
5、 高级用法与技巧
- 自动起始/结束值 : 如果不显式调用
setStartValue(),动画启动时会自动使用目标属性的当前值作为起始值。类似地,也可以不调用setEndValue()而在运行时通过槽函数动态改变结束值。 - 关键帧动画 : 虽然
QPropertyAnimation本身只支持两点间的线性插值(加上缓动曲线),但你可以通过QSequentialAnimationGroup或QParallelAnimationGroup组合多个QPropertyAnimation来实现更复杂的序列或并行动画效果。对于更精细的控制,可以使用QVariantAnimation并重写virtual void updateCurrentValue(const QVariant &value)函数,或者使用QAnimationDriver(更底层)。 - 动画组 : 使用
QSequentialAnimationGroup(顺序执行) 或QParallelAnimationGroup(并行执行) 来管理多个动画。 - 状态改变信号 : 连接
stateChanged()信号可以知道动画何时开始、暂停或停止。连接finished()信号知道动画何时正常结束。连接valueChanged()信号可以实时获取属性变化的值(注意频率可能很高)。 - 循环动画 : 使用
setLoopCount(int count)可以设置动画的循环次数。设置为-1表示无限循环。 - 方向 : 使用
setDirection(QAbstractAnimation::Direction direction)可以设置动画是正向 (Forward) 播放还是反向 (Backward) 播放。
6、 注意事项
- 属性支持 : 确保目标属性是用
Q_PROPERTY声明过的,并且有可用的读写函数。尝试动画一个没有WRITE函数或类型不兼容的属性会导致运行时警告或错误。 - 线程安全 :
QPropertyAnimation以及整个 Qt 动画框架都不是线程安全的。动画操作必须在主线程(GUI线程)中进行。 - 对象生命周期: 确保目标对象在动画执行期间一直有效。通常将动画对象设置为目标对象的子对象(利用 Qt 对象树机制)是一种安全的做法,这样当目标对象被删除时,动画对象也会被自动删除。
- 性能 : 对于非常高频的属性更新(比如每帧更新位置),确保操作本身是高效的,避免在
valueChanged()的槽函数中进行复杂计算。对于 UI 动画,Qt 通常能很好地处理。 - 与 QML 的对比 : Qt Quick (QML) 有自己更声明式的动画系统 (
PropertyAnimation,NumberAnimation等)。QPropertyAnimation主要用于 Qt Widgets 模块的 C++ 开发。
7、 总结
QPropertyAnimation 是 Qt Widgets 应用程序中为对象属性添加平滑动画效果的有力工具。通过设置目标对象、属性名、持续时间、起始值、结束值和缓动曲线,你可以轻松创建出各种视觉效果。结合动画组和信号槽机制,可以实现非常复杂的动画交互逻辑。理解其核心概念和正确使用方式是关键。
