文章目录
- 04-管理变量和事实
-
- 实验环境
- [管理 VARIABLES](#管理 VARIABLES)
- [管理 SECRETS](#管理 SECRETS)
-
- [Ansible Vault 简介](#Ansible Vault 简介)
- [ansible-vault 命令](#ansible-vault 命令)
- 变量管理推荐做法
- [管理 FACTS](#管理 FACTS)
-
- [FACTS 介绍](#FACTS 介绍)
- [查看 FACTS 内容](#查看 FACTS 内容)
- [部分 FACTS](#部分 FACTS)
- [setup 和 gather_facts 模块](#setup 和 gather_facts 模块)
- [ANSIBLE FACTS 变量注入](#ANSIBLE FACTS 变量注入)
- [关闭 FACTS 收集](#关闭 FACTS 收集)
- [关闭 FACTS 收集](#关闭 FACTS 收集)
04-管理变量和事实
实验环境
bash
[dyx@controller ~]$ mkdir web
[dyx@controller ~]$ cd web/

[dyx@controller web]$ vim ansible.cfg
[dyx@controller web]$ cat ansible.cfg
[defaults]
remote_user=dyx
inventory=./inventory

[privilege_escalation]
become=true
become_user=root
become_method=sudo
become_ask_pass=false

[dyx@controller web]$ vim inventory
[dyx@controller web]$ cat inventory
node[1:4]
管理 VARIABLES
变量简介
ansible 利用变量来存储数据,以便在Ansible项目文件中重复引用,有利于简化项目的创建和维护,降低出错率。我们在playbook中可以针对如用户、软件包、服务、文件等进行变量定义。
变量命名规则
-
只能包含字母、数字和下划线(如包含空格、点、$符号都为非法变量名)
-
只能以字母开头
变量范围和优先级
ansible项目文件中多个位置支持定义变量,主要包含三个基本范围:
-
Global scope:从命令行或 Ansible 配置设置的变量。
-
Play scope:在play和相关结构中设置的变量。
-
Host scope:由清单、事实(fact)收集或注册的任务,在主机组和个别主机上设置的变量。
优先级从高到低顺序:Global -> Play -> Host。
在多个级别上定义了相同名称的变量,则采用优先级别最高的变量。
Global scope
通过选项-e传递给ansible或者ansible-playbook命令。
bash
[dyx@controller web]$ ansible node1 -e "package=httpd" -m debug -a "msg={{ package }}"
node1 | SUCCESS => {
    "msg": "httpd"
}

[dyx@controller web]$ ansible node1 -e "package=httpd" -m yum -a "name={{ package }} state=present"
node1 | SUCCESS => {
    "ansible_facts": {
        "discovered_interpreter_python": "/usr/bin/python"
    },
    "changed": false,
    "msg": "",
    "rc": 0,
    "results": [
        "httpd-2.4.6-99.el7.centos.1.x86_64 providing httpd is already installed"
    ]
}
Play scope
vars 声明
格式1:
bash
[dyx@controller web]$ vim playbook.yaml
yaml
---
- name: test vars statement in play
  hosts: node1
  vars:
    user: joe
    home: /home/joe
  tasks:
    - name: add user {{ user }}
      user:
        name: "{{ user }}"
        home: "{{ home }}"
        state: present

    - name: debug user
      debug:
        msg: |
          username is {{ user }}
          home is {{ home }}
验证:
bash
[dyx@controller web]$ ansible-playbook playbook.yaml

PLAY [test vars statement in play] ******************************************************

TASK [Gathering Facts] ******************************************************************
ok: [node1]

TASK [add user joe] *********************************************************************
changed: [node1]

TASK [debug user] ***********************************************************************
ok: [node1] => {
    "msg": "username is joe\nhome is /home/joe\n"
}

PLAY RECAP ******************************************************************************
node1                      : ok=3    changed=1    unreachable=0    failed=0    skipped=0    rescued=0    ignored=0
格式2:
ansible 2.18 版本中移除 列表格式变量。
yaml
---
- name: test vars statement in play
  hosts: node1
  vars:
    - user: joe
    - home: /home/joe
  tasks:
    - name: add user {{ user }}
      user:
        name: "{{ user }}"
        home: "{{ home }}"
        state: present

    - name: debug user
      debug:
        msg: |
          username is {{ user }}
          home is {{ home }}
vars_files 声明
如果变量比较多,我么可以使用变量文件进行分类,然后分列别应用到playbook中。
示例:
bash
[dyx@controller web]$ vim playbook.yaml
yaml
---
- name: test vars statement in play
  hosts: node1
  vars_files:
    - vars/user1.yaml
  tasks:
    - name: add user {{ user }}
      user:
        name: "{{ user }}"
        home: "{{ home }}"
        state: present

    - name: debug user
      debug:
        msg: |
          username is {{ user }}
          home is {{ home }}
bash
# 创建变量文件
[dyx@controller web]$ mkdir vars
[dyx@controller web]$ vim vars/user1.yaml

# yaml 格式
# 输入变量
[dyx@controller web]$ cat vars/user1.yaml
user: user1
home: /home/user1
bash
# 测试
[dyx@controller web]$ ansible-playbook playbook.yaml

PLAY [test vars statement in play] ******************************************************

TASK [Gathering Facts] ******************************************************************
ok: [node1]

TASK [add user user1] *******************************************************************
ok: [node1]

TASK [debug user] ***********************************************************************
ok: [node1] => {
    "msg": "username is user1\nhome is /home/user1\n"
}

PLAY RECAP ******************************************************************************
node1                      : ok=3    changed=0    unreachable=0    failed=0    skipped=0    rescued=0    ignored=0
变量引用
可将变量名称放在双花括号**{{ }}**内引用变量。在任务执行时, Ansible会将变量替换为其值。
当变量用作值的第一元素时,变量引用必须使用引号(单引号或者双引号),否则会报错。
错误的示例:
bash
[dyx@controller web]$ vim playbook.yaml
yaml
---
- name: test vars statement in play
  hosts: node1
  vars_files:
    - vars/user1.yaml
  tasks:
    - name: add user {{ user }}
      user:
        name: {{ user }}
        home: "{{ home }}"
        state: present

    - name: debug user
      debug:
        msg: |
          username is {{ user }}
          home is {{ home }}
验证:
bash
[dyx@controller web]$ ansible-playbook playbook.yaml
ERROR! We were unable to read either as JSON nor YAML, these are the errors we got from each:
JSON: No JSON object could be decoded

Syntax Error while loading YAML.
  found unacceptable key (unhashable type: 'AnsibleMapping')

The error appears to be in '/home/dyx/web/playbook.yaml': line 9, column 16, but may
be elsewhere in the file depending on the exact syntax problem.

The offending line appears to be:

      user:
        name: {{ user }}
               ^ here
We could be wrong, but this one looks like it might be an issue with
missing quotes. Always quote template expression brackets when they
start a value. For instance:

    with_items:
      - {{ foo }}

Should be written as:

    with_items:
      - "{{ foo }}"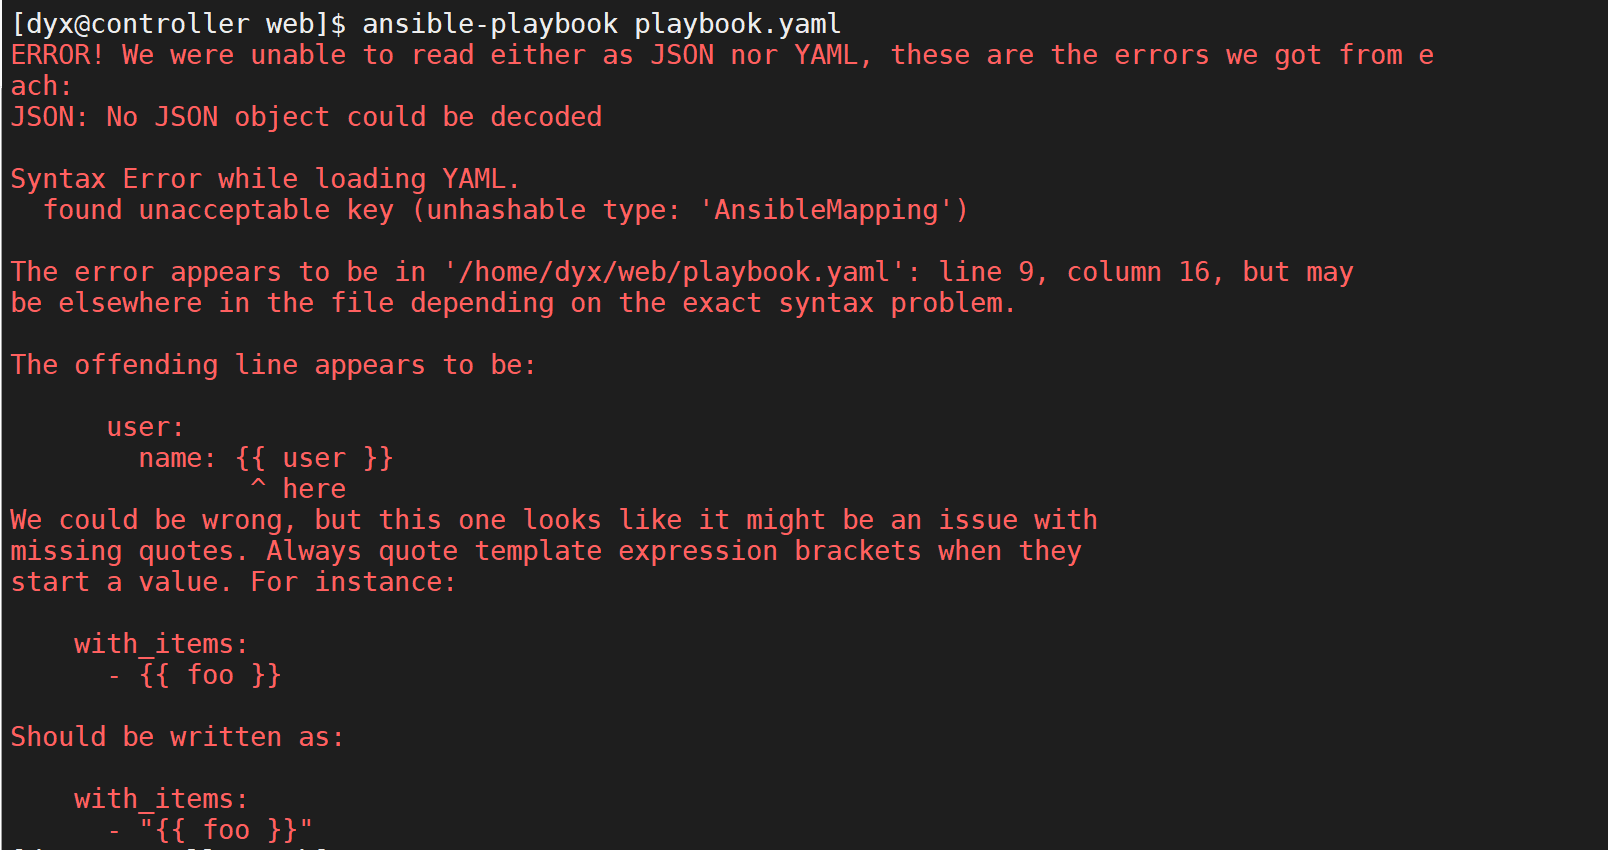
Host scope
主机变量应用于主机和主机组。主机变量优先级高于主机组变量。
主机清单中定义
较旧的做法是直接在清单文件中定义。不建议采用,但仍可能会遇到。
语法:
bash
servers]
node1 user=laogao
node2
[servers:vars]
user=laowang
示例:
bash
[dyx@controller web]$ vim inventory
[dyx@controller web]$ cat inventory
controller
node1 user=dyx
node2
node3
node4

#验证:
[dyx@controller web]$ ansible all -m debug -a 'var=user'
controller | SUCCESS => {
    "user": "VARIABLE IS NOT DEFINED!"
}
node1 | SUCCESS => {
    "user": `"dyx"`
}
node2 | SUCCESS => {
    "user": "VARIABLE IS NOT DEFINED!"
}
node4 | SUCCESS => {
    "user": "VARIABLE IS NOT DEFINED!"
}
node3 | SUCCESS => {
    "user": "VARIABLE IS NOT DEFINED!"
}
示例:
bash
[dyx@controller web]$ vim inventory
[dyx@controller web]$ cat inventory
[servers]
node1 user=dyx
node2

[servers:vars]
user=deng

#验证
[dyx@controller web]$ ansible servers -m debug -a 'var=user'
node1 | SUCCESS => {
    "user":` "dyx"`
}
node2 | SUCCESS => {
    "user": `"deng"`
}缺点:使得清单文件更复杂,在同一文件中混合提供了主机和变量信息。
目录分层结构定义
在项目目录中创建如下目录:
-
group_vars,定义主机组变量。目录中文件名可以直接使用 主机组名 或者 主机组名.yaml 。
-
host_vars,定义主机变量。目录中文件名可以直接使用 主机名 或者 主机名.yaml 。
示例1:
bash
[dyx@controller web]$ vim inventory
[dyx@controller web]$ cat inventory
[servers]
node1
node2

[dyx@controller web]$ mkdir group_vars
[dyx@controller web]$ vim group_vars/servers.yaml
[dyx@controller web]$ cat group_vars/servers.yaml
user: deng

[dyx@controller web]$ mkdir host_vars
[dyx@controller web]$ vim host_vars/node1.yaml
[dyx@controller web]$ cat host_vars/node1.yaml
user: syx
验证:
bash
[dyx@controller web]$ ansible servers -m debug -a 'var=user'
node1 | SUCCESS => {
    "user": `"syx"`
}
node2 | SUCCESS => {
    "user": `"deng"`
}目录结构定义主机和主机组的变量是首选做法。
示例2:
bash
[dyx@controller web]$ sudo yum install -y tree


[dyx@controller web]$ touch group_vars/dc
[dyx@controller web]$ touch group_vars/dc1
[dyx@controller web]$ touch group_vars/dc2
[dyx@controller web]$ tree
.
├── ansible.cfg
├── group_vars
│   ├── dc
│   ├── dc1
│   └── dc2
├── host_vars
│   └── node1.yaml
├── inventory
├── newuser.yaml
└── playbook.yaml

5 directories, 5 files

[dyx@controller web]$ vim inventory
[dyx@controller web]$ cat inventory
[dc1]
node1
node2

[dc2]
node3
node4

[dc:children]
dc1
dc2

[dyx@controller group_vars]$ vim dc
package: httpd
[dyx@controller group_vars]$ vim dc1
package: httpd
[dyx@controller group_vars]$ vim dc2
package: apache

[dyx@controller web]$ vim host_vars/node1.yaml
package: mariabd-server

[dyx@controller web]$ grep . group_vars/* host_vars/*
group_vars/dc:package: httpd
group_vars/dc1:package: httpd
group_vars/dc2:package: apache
host_vars/node1.yaml:package: mariabd-server


#结果
[dyx@controller web]$ ansible all -m debug -a 'var=package'
node1 | SUCCESS => {
    "package": `"mariabd-server"`
}
node3 | SUCCESS => {
    "package": `"apache"`
}
node2 | SUCCESS => {
    "package": `"httpd"`
}
node4 | SUCCESS => {
    "package": `"apache"`
}
主机连接特殊变量
详情参考:主机连接特殊变量。
-
ansible_connection,与主机的连接类型,可以是 smart、ssh 或 paramiko。默认为smart。
-
ansible_host,要连接的主机的名称,默认值就是主机清单名称。
-
ansible_port,ssh 端口号,如果不是 22。
-
ansible_user,ssh 用户名。
-
ansible_ssh_pass,要使用的 ssh 密码。切勿以纯文本形式存储此变量,始终使用保管库。
-
ansible_ssh_private_key_file,ssh 使用的私钥文件。如果使用多个密钥并且您不想使用 SSH 代理,这很有用。
-
ansible_ssh_common_args,此设置始终附加到 sftp、scp 和 ssh 的默认命令行。
-
ansible_sftp_extra_args,此设置始终附加到默认的 sftp 命令行。
-
ansible_scp_extra_args,此设置始终附加到默认的 scp 命令行。
-
ansible_ssh_extra_args,此设置始终附加到默认的 ssh 命令行。
-
ansible_become,等效于 ansible_sudo 或 ansible_su,允许强制提权。
-
ansible_become_method,允许设置权限提升方法。
-
ansible_become_user,等效于 ansible_sudo_user 或 ansible_su_user,允许设置您通过权限升级成为的用户。
-
ansible_become_pass,等效于 ansible_sudo_pass 或 ansible_su_pass,允许您设置权限提升密码(切勿以纯文本形式存储此变量;始终使用保管库。请参阅变量和保管库)。
数组变量
除了将与同一元素相关的配置数据(软件包列表、服务列表和用户列表等)分配到多个变量外,管理员
也可以使用数组变量,将多个值存储在同一变量中。
示例:
bash
user1_first_name: Bob
user1_last_name: Jones
user1_home_dir: /users/bjones
user2_first_name: Anne
user2_last_name: Cook
user2_home_dir: /users/acook
改写如下:
yaml
users:
  bjones:
    first_name: Bob
    last_name: Jones
    home_dir: /users/bjones
  acook:
    first_name: Anne
    last_name: Cook
    home_dir: /users/acook
数组变量引用方式一:
bash
# Returns 'Bob'
users.bjones.first_name
# Returns '/users/acook'
users.acook.home_dir
数组变量引用方式二:
bash
# Returns 'Bob'
users['bjones']['first_name']
# Returns '/users/acook'
users['acook']['home_dir']
引用方式总结:
-
如果使用方法一**.** 分隔符引用的关键字与python的功能函数同名,例如discard、copy、add,那么就会出现问题。方法二''引用方式可以避免这种错误。
-
尽管两种方法都可以使用,为了减少排故难度,Ansible中统一使用其中一种方法。
示例1:
bash
[dyx@controller web]$ vim playbook.yaml
yaml
---
- name: test vars statement in play
  hosts: node1
  vars:
    users:
      dyx:
        user_name: dyx
        home_path: /home/dyx
      deng:
        user_name: deng
        home_path: /home/deng
  tasks:
    - name: add user {{ users.dyx.user_name }}
      user:
        name: '{{ users.dyx.user_name }}'
        home: "{{ users.dyx.home_path }}"

    - name: debug deng
      debug:
        msg: >
          username is {{ users['deng']['user_name'] }}
          home_path is {{ users['deng']['home_path'] }}
验证:
bash
[dyx@controller web]$ ansible-playbook playbook.yaml

PLAY [test vars statement in play] ******************************************************

TASK [Gathering Facts] ******************************************************************
ok: [node1]

TASK [add user dyx] *********************************************************************
ok: [node1]

TASK [debug deng] ***********************************************************************
ok: [node1] => {
    "msg": "username is deng home_path is /home/deng\n"
}

PLAY RECAP ******************************************************************************
node1                      : ok=3    changed=0    unreachable=0    failed=0    skipped=0    rescued=0    ignored=0

[dyx@controller web]$ ansible node1 -a "id dyx"
node1 | CHANGED | rc=0 >>
uid=1001(dyx) gid=1001(dyx) groups=1001(dyx)
示例2:
bash
[dyx@controller web]$ vim playbook.yaml
yaml
---
- name: test vars statement in play
  hosts: node1
  vars:
    users:
      - user_name: dyx1
        home_path: /home/dyx1
      - user_name: dyx2
        home_path: /home/dyx2
  tasks:
    - name: add user {{ users.0.user_name }}
      user:
        name: '{{ users.0.user_name }}'
        home: "{{ users.0.home_path }}"

    - name: debug {{ users[1].user_name }}
      debug:
        msg: " {{ users[1].user_name }}"
bash
[dyx@controller web]$ ansible-playbook playbook.yaml

PLAY [test vars statement in play] ******************************************************

TASK [Gathering Facts] ******************************************************************
ok: [node1]

TASK [add user dyx1] ********************************************************************
ok: [node1]

TASK [debug dyx2] ***********************************************************************
ok: [node1] => {
    "msg": " dyx2"
}

PLAY RECAP ******************************************************************************
node1                      : ok=3    changed=0    unreachable=0    failed=0    skipped=0    rescued=0    ignored=0

[dyx@controller web]$ ansible node1 -a 'id dyx1'
node1 | CHANGED | rc=0 >>
uid=4002(dyx1) gid=4002(dyx1) groups=4002(dyx1)
register 语句
register **语句捕获任务输出。**输出保存在一个临时变量中,稍后在playbook中可用于调试用途或者达成其他目的。
示例:
bash
[dyx@controller web]$ vim playbook.yaml
yaml
---
- name: installs a package and prints the result
  hosts: node1
  tasks:
    - name: install the package
      yum:
        name: httpd
        state: installed
      register: install_result
    - debug:
        var: install_result
bash
[dyx@controller web]$ ansible-playbook playbook.yaml

PLAY [installs a package and prints the result] *****************************************

TASK [Gathering Facts] ******************************************************************
ok: [node1]

TASK [install the package] **************************************************************
ok: [node1]

TASK [debug] ****************************************************************************
ok: [node1] => {
    "install_result": {
        "changed": false,
        "failed": false,
        "msg": "",
        "rc": 0,
        "results": [
            "httpd-2.4.6-99.el7.centos.1.x86_64 providing httpd is already installed"
        ]
    }
}

PLAY RECAP ******************************************************************************
node1                      : ok=3    changed=0    unreachable=0    failed=0    skipped=0    rescued=0    ignored=0
MAGIC 变量
magic 变量由 Ansible 自动设置,可用于获取与特定受管主机相关的信息。
假设当前清单内容为:
bash
[dyx@controller web]$ vim inventory
controller

[webs]
node1
node2

[dbs]
node3
node4
最常用四个 Magic 变量:
-
inventory_hostname,包含清单中配置的当前受管主机的主机名称。这可能因为各种原因而与FACTS报告的主机名称不同。
bash[dyx@controller web]$ ansible node1 -m debug -a 'var=inventory_hostname' node1 | SUCCESS => { "inventory_hostname": "node1" } -
group_names,列出当前受管主机所属的所有主机组。
bash[dyx@controller web]$ ansible node1 -m debug -a 'var=group_names' node1 | SUCCESS => { "group_names": [ "webs" ] } -
groups,列出清单中的所有组,以及组中含有的主机。
bash[dyx@controller web]$ ansible node1 -m debug -a 'var=groups' node1 | SUCCESS => { "groups": { "all": [ "controller", "node1", "node2", "node3", "node4" ], "dbs": [ "node3", "node4" ], "ungrouped": [ "controller" ], "webs": [ "node1", "node2" ] } } -
hostvars,包含所有受管主机的变量,可用于获取另一台受管主机的变量的值。如果还没有为受管主机收集FACTS,则它不会包含该主机的 FACTS。
例如: hostvars.controller.group_names
管理 SECRETS
Ansible Vault 简介
Ansible可能需要访问密码或API密钥等敏感数据,此信息可能以纯文本形式存储在清单变量或其他
Ansible文件中。任何有权访问Ansible文件的用户或存储这些Ansible文件的版本控制系统都能够访问此
敏感数据。
这显然存在安全风险。Ansible随附的 Ansible Vault 可以加密任何由Ansible使用的结构化数据文件,包
括清单变量、playbook中含有的变量文件、在执行playbook时作为参数传递的变量文件,以及Ansible
角色中定义的变量。
ansible-vault 命令
bash
[dyx@controller web]$ ansible-vault -h
usage: ansible-vault [-h] [--version] [-v]
                     {create,decrypt,edit,view,encrypt,encrypt_string,rekey}
                     ...

encryption/decryption utility for Ansible data files

positional arguments:
  {create,decrypt,edit,view,encrypt,encrypt_string,rekey}
    create              Create new vault encrypted file
    decrypt             Decrypt vault encrypted file
    edit                Edit vault encrypted file
    view                View vault encrypted file
    encrypt             Encrypt YAML file
    encrypt_string      Encrypt a string
    rekey               Re-key a vault encrypted file

optional arguments:
  --version             show program's version number, config file location,
                        configured module search path, module location,
                        executable location and exit
  -h, --help            show this help message and exit
  -v, --verbose         verbose mode (-vvv for more, -vvvv to enable
                        connection debugging)

See 'ansible-vault <command> --help' for more information on a specific
command.
ansible-vault create和edit命令使用默认编辑器vi打开文件。您可以设置和导出EDITOR环境变量指定其他默认编辑器。
例如,若要将默认编辑器设为vim, 可设置为export EDITOR=vim
bash
[laogao@controller web]$ export EDITOR=vim
# 或者添加到bash配置文件中
[laogao@controller web]$ echo 'export EDITOR=vim' >> ~/.bashrc
[laogao@controller web]$ source ~/.bashrc

# 创建加密文件,内容是yaml格式,例如 password: 123
[dyx@controller web]$ ansible-vault create secret.yaml
New Vault password:`123`
Confirm New Vault password:`123`
password:123

[dyx@controller web]$ cat secret.yaml
$ANSIBLE_VAULT;1.1;AES256
35333761643231303666353965393035616230313563363265323664336135666539386635616338
3339616331353165613033663061643062313232646565340a626534626238316338623537633835
34313635313230356463373436613462326434633237616137626638646133343831303936396638
6136313536326538620a303838626535303835343365323062666437663431363533623834393831
3739

# 查看加密文件
[dyx@controller web]$ ansible-vault view secret.yaml
Vault password:`123`
password: 123

# 使用 --vault-password-file 选项从文件中读取加密和解密密码
[dyx@controller web]$ ansible-vault view secret.yaml --vault-password-file=pass
password: 123


[laogao@controller web]$ vim ansible.cfg
vault_password_file = ./pass

# 编辑加密文件
[dyx@controller web]$ ansible-vault edit secret.yaml --vault-password-file=pass

# 解密文件
[dyx@controller web]$ ansible-vault decrypt secret.yaml --vault-password-file=pass
Decryption successful

[dyx@controller web]$ cat secret.yaml
password: 123456

# 加密文件
[dyx@controller web]$ ansible-vault encrypt secret.yaml --vault-password-file=pass
Encryption successful

# 更改加密文件密码
[dyx@controller web]$ ansible-vault rekey secret.yaml --vault-password-file=pass
New Vault password:`123456`
Confirm New Vault password:`123456`
Rekey successful
综合案例
playbook.yaml 内容如下:
bash
[dyx@controller web]$ vim playbook.yaml

---
 - name: config mariadb server
   hosts: node1
   vars_files:
     vault/mysql.yml
   tasks:
     - name: isntall mariadb-server
       yum:
         name:
           - mariadb-server
           - python2-PyMySQL
         state: present
     - name: enable and start mariadb
       service:
         name: mariadb
         enabled: yes
         state: started
     - name: config user {{ user }}
       mysql_user:
         name: "{{ user }}"
         password: "{{ password }}"
         host: "{{ host }}"
         priv: "{{ priv }}"
         state: present
bash
[dyx@controller web]$ mkdir vault
[dyx@controller web]$ ansible-vault create vault/mysql.yml
New Vault password:`123`
Confirm New Vault password:`123`
user: dyx
password: 123
host: 'localhost'
priv: '*.*:ALL'

# 如果 ansible.cfg 中未配置vault_password_file
# 可使用--ask-vault-pass选项以交互方式提供vault密码
[dyx@controller web]$ ansible-playbook playbook.yaml --ask-vault-pass
Vault password:

PLAY [config mariadb server] ************************************************************

TASK [Gathering Facts] ******************************************************************
ok: [node1]

TASK [isntall mariadb-server] ***********************************************************
changed: [node1]

TASK [enable and start mariadb] *********************************************************
changed: [node1]

TASK [config user dyx] ******************************************************************
[WARNING]: The value ******** (type int) in a string field was converted to u'********'
(type string). If this does not look like what you expect, quote the entire value to
ensure it does not change.
[WARNING]: Module did not set no_log for update_password
changed: [node1]

PLAY RECAP ******************************************************************************
node1                      : ok=4    changed=3    unreachable=0    failed=0    skipped=0    rescued=0    ignored=0

[dyx@controller web]$

# 从node1本地验证
[root@node1 ~]# mysql -udyx -p123
Welcome to the MariaDB monitor.  Commands end with ; or \g.
Your MariaDB connection id is 3
Server version: 5.5.68-MariaDB MariaDB Server

Copyright (c) 2000, 2018, Oracle, MariaDB Corporation Ab and others.

Type 'help;' or '\h' for help. Type '\c' to clear the current input statement.

MariaDB [(none)]>
变量管理推荐做法
-
包含敏感变量的文件可通过 ansible-vault 命令进行保护。
-
敏感变量和所有其他变量保存在相互独立的文件中。
-
管理组变量和主机变量的首选方式是在项目目录中创建子目录。
可为每个主机组或受管主机使用独立的目录。这些目录可包含多个变量文件,它们都由该主机组或受管主机使用。
示例:
bash
[dyx@controller web]$ tree
.
├── ansible.cfg
├── group_vars
│   ├── dc
│   ├── dc1
│   └── dc2
├── host_vars
│   └── node1.yaml
├── inventory
├── newuser.yaml
├── pass
├── playbook.yaml
├── secret.yaml
└── vault
    └── mysql.yml

3 directories, 11 files
node1 的大部分变量可以放在vars.yaml文件中,敏感变量则可单独放在vaults.yaml文件中,并使用ansible-vault加密vault文件,而将vars文件保留为纯文本。
管理 FACTS
FACTS 介绍
FACTS 是 Ansible 在受管主机上自动检测到的变量,默认保存在内容中,只存在于本次playbook执行期间。
FACTS含有主机相关的信息,可以像play中的常规变量一样使用。
受管主机的 facts 包括:
-
主机名称 • 内核版本 • 网络接口 • IP地址 • 操作系统版本 • 各种环境变量
-
CPU数量 • 提供的或可用的内存 • 可用磁盘空间
借助 facts,可以方便地检索受管主机的状态,并根据该状态确定要执行的操作。
例如:
-
可以根据当前内核版本的FACTS运行条件任务,以此来重新启动服务器。
-
可以根据通过FACTS报告的可用内存来自定义 MySQL 配置文件。
-
可以根据FACTS的值设置配置文件中使用的 IPv4 地址。
通常,每个play在执行第一个任务之前会先自动收集FACTS。
查看 FACTS 内容
示例1:查看所有变量
yaml
[dyx@controller web]$ vim playbook.yaml
[dyx@controller web]$ cat playbook.yaml
---
- name: dump facts
  hosts: node1
  tasks:
    - name: print all facts
      debug:
        var: ansible_facts
bash
[dyx@controller web]$ ansible-playbook playbook.yaml示例2:查看单个变量
bash
[dyx@controller web]$ vim playbook.yaml

[dyx@controller web]$ cat playbook.yaml
---
- name: dump facts
  hosts: node1
  tasks:
    - name: print ansible facts
      debug:
        msg: >
          The default IPv4 address of {{ ansible_fqdn }} is {{ ansible_default_ipv4.address }}
bash
[dyx@controller web]$ ansible-playbook playbook.yaml

PLAY [dump facts] ***********************************************************************

TASK [Gathering Facts] ******************************************************************
ok: [node1]

TASK [print ansible facts] **************************************************************
ok: [node1] => {
    "msg": "The default IPv4 address of node1.dyx.cloud is 192.168.108.11\n"
}

PLAY RECAP ******************************************************************************
node1                      : ok=2    changed=0    unreachable=0    failed=0    skipped=0    rescued=0    ignored=0
部分 FACTS
| FACT | VARIABLE |
|---|---|
| 短主机名 | ansible_facts'hostname' |
| 完全限定的域名 | ansible_facts'fqdn' |
| 主要IPv4地址(基于路由) | ansible_facts'default_ipv4' 'address' |
| 所有网络接口的名称列表 | ansible_facts'interfaces' |
| /dev/vdal磁盘分区的大小 | ansible_facts'devices' 'vda' 'partitions' 'vda1 'size' |
| DNS服务器列表 | ansible_facts'dns' 'nameservers' |
| 当前运行的内核的版本 | ansible_facts'kernel' |
setup 和 gather_facts 模块
setup 和 gather_facts 模块都可以用来收集facts:
-
gather_facts 模块,只能用来收集facts。
-
setup 模块,除了用来收集facts,还提供额外选项:
- filter 选项,用于查看特定facts值。
- gather_subset 选项,用于控制收集facts范围。
bash
[dyx@controller web]$ ansible node1 -m setup -a 'filter=ansible_default_ipv4'
node1 | SUCCESS => {
    "ansible_facts": {
        "ansible_default_ipv4": {
            "address": "192.168.108.11",
            "alias": "ens33",
            "broadcast": "192.168.108.255",
            "gateway": "192.168.108.2",
            "interface": "ens33",
            "macaddress": "00:0c:29:38:a4:87",
            "mtu": 1500,
            "netmask": "255.255.255.0",
            "network": "192.168.108.0",
            "type": "ether"
        },
        "discovered_interpreter_python": "/usr/bin/python"
    },
    "changed": false
}
ANSIBLE FACTS 变量注入
在 Ansible2.5之前,FACTS是使用前缀为ansible_字符串的单个变量注入,而不是作为ansible_facts变量
的一部分注入。
例如,ansible_facts'distribution' 等同于 ansible_distribution。
许多较旧的playbook仍然使用ansible_前缀的变量,而不是通过ansible_ facts变量引用。
部分facts变量对比:
| ANSIBLE_FACTS 格式 | 旧变量格式 |
|---|---|
| ansible_facts'hostname' | ansible_hostname |
| ansible_facts'fqdn' | ansible_fqdn |
| ansible_facts'default_ipv4' 'address' | ansible_default_ipv4'address' |
| ansible_facts'interfaces' | ansible_interfaces |
| ansible_facts'devices' 'vda' 'partitions' 'vda1' 'size' | ansible_devices'vda' 'partitions' 'vda1' |
| ansible_facts'dns' 'nameservers' | ansible_dns'nameservers' |
| ansible_facts'kernel' | ansible_kernel |
目前,Ansible同时识别新的FACTS命名系统(使用ansible_facts)和旧的2.5前 "作为单独变量注入的FACTS"命名系统。
Ansible配置置文件default 块中inject_facts_as_vars参数设置为false, 可关闭旧命名系统。默认设置目前为true。
如果设置为false,则只能使用新的ansible_facts.* 命名规则。在这种情况下,尝试通过旧命名空间引用FACTS将导致变量未定义错误。
inject_facts_as_vars的默认值在Ansible的未来版本中可能会更改为false。
关闭 FACTS 收集
关闭 FACTS 收集部分原因:
-
不使用任何FACTS
-
希望加快play速度或减小play在受管主机上造成的负载
-
受管主机因为某种原因而无法运行setup模块
-
需要安装一些必备软件后再收集FACTS
Ansible配置文件设置
bash
[defaults]
gathering = explicit
play中设置
bash
---
- name: Fact dump
  hosts: node1
  gather_facts: no
即使关闭以后,也可以随时使用setup模块收集facts。
|
| ansible_facts'default_ipv4' 'address' | ansible_default_ipv4'address' |
| ansible_facts'interfaces' | ansible_interfaces |
| ansible_facts'devices' 'vda' 'partitions' 'vda1' 'size' | ansible_devices'vda' 'partitions' 'vda1' |
| ansible_facts'dns' 'nameservers' | ansible_dns'nameservers' |
| ansible_facts'kernel' | ansible_kernel |
目前,Ansible同时识别新的FACTS命名系统(使用ansible_facts)和旧的2.5前 "作为单独变量注入的FACTS"命名系统。
Ansible配置置文件default 块中inject_facts_as_vars参数设置为false, 可关闭旧命名系统。默认设置目前为true。
如果设置为false,则只能使用新的ansible_facts.* 命名规则。在这种情况下,尝试通过旧命名空间引用FACTS将导致变量未定义错误。
inject_facts_as_vars的默认值在Ansible的未来版本中可能会更改为false。
关闭 FACTS 收集
关闭 FACTS 收集部分原因:
-
不使用任何FACTS
-
希望加快play速度或减小play在受管主机上造成的负载
-
受管主机因为某种原因而无法运行setup模块
-
需要安装一些必备软件后再收集FACTS
Ansible配置文件设置
bash
[defaults]
gathering = explicit
play中设置
bash
---
- name: Fact dump
  hosts: node1
  gather_facts: no
即使关闭以后,也可以随时使用setup模块收集facts。