测试学习记录,仅供参考!
文件上传
掌握Selenium4.0文件上传功能的处理方式;
上传文件的 API "input 控件",这里使用的是 input 元素的文件上传,可以通过 Selenium 当中的 send_keys 方式进行传递,这种使用方式比较简单,一般只需要有 input 标签就可以通过这种方式来实现,原理就是首先定位到需要上传的按钮上面,然后再通过 selenium 的 send_keys 把文件上传路径当作值给传递过去即可;但是,这样的方式有比较大的局限性,如果是遇到某种通过 Js 调用的组件会出现某些问题,这时就需要通过一系列与系统交互的方式去完成文件上传操作,例如:AutoIt 插件,Pywinauto(跨平台 GUI 自动化库)、 PyAutoGUI 等第三方库来进行操作实现。
示例
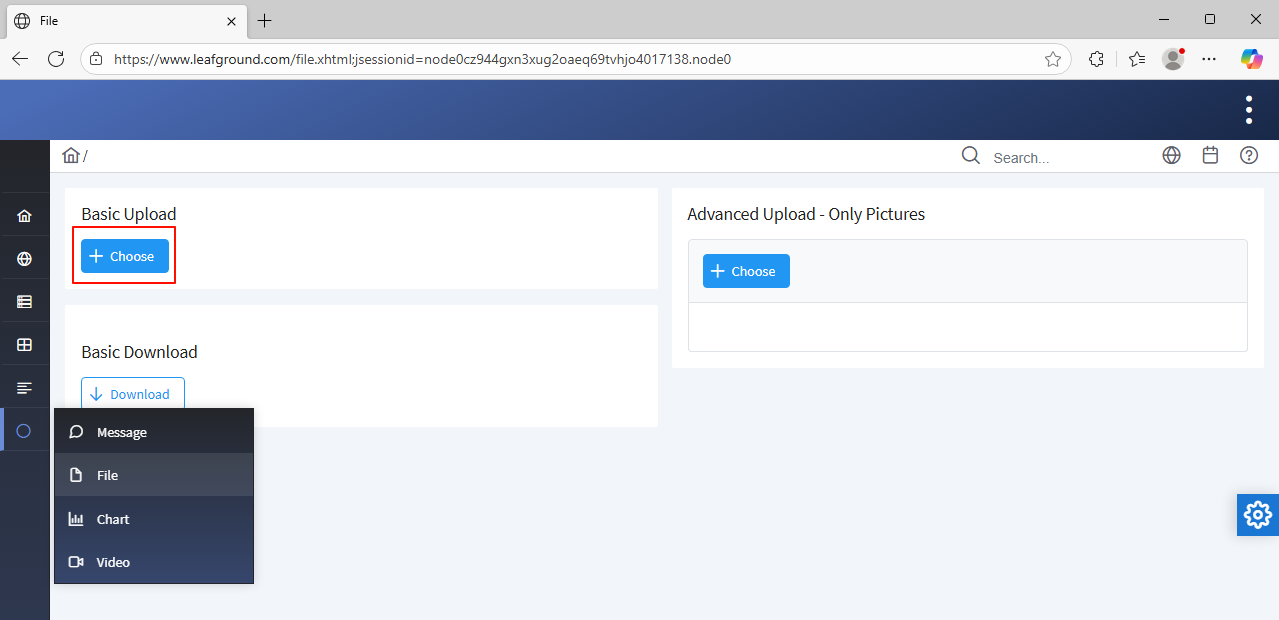
1、以 测试网站 页面 文件上传 为例;
(1)、首先点击按钮;打开一个文件选择对话框;
(2)、然后选中一个文件;
(3)、确定之后文件选择对话框关闭;文件上传成功;
注意点:文件选择对话框一般此弹窗是正常定位不到的,所以换一种思路,找到选择文件之后,定位把文件上传成功的地方,再把文件上传即可;

元素定位解析;
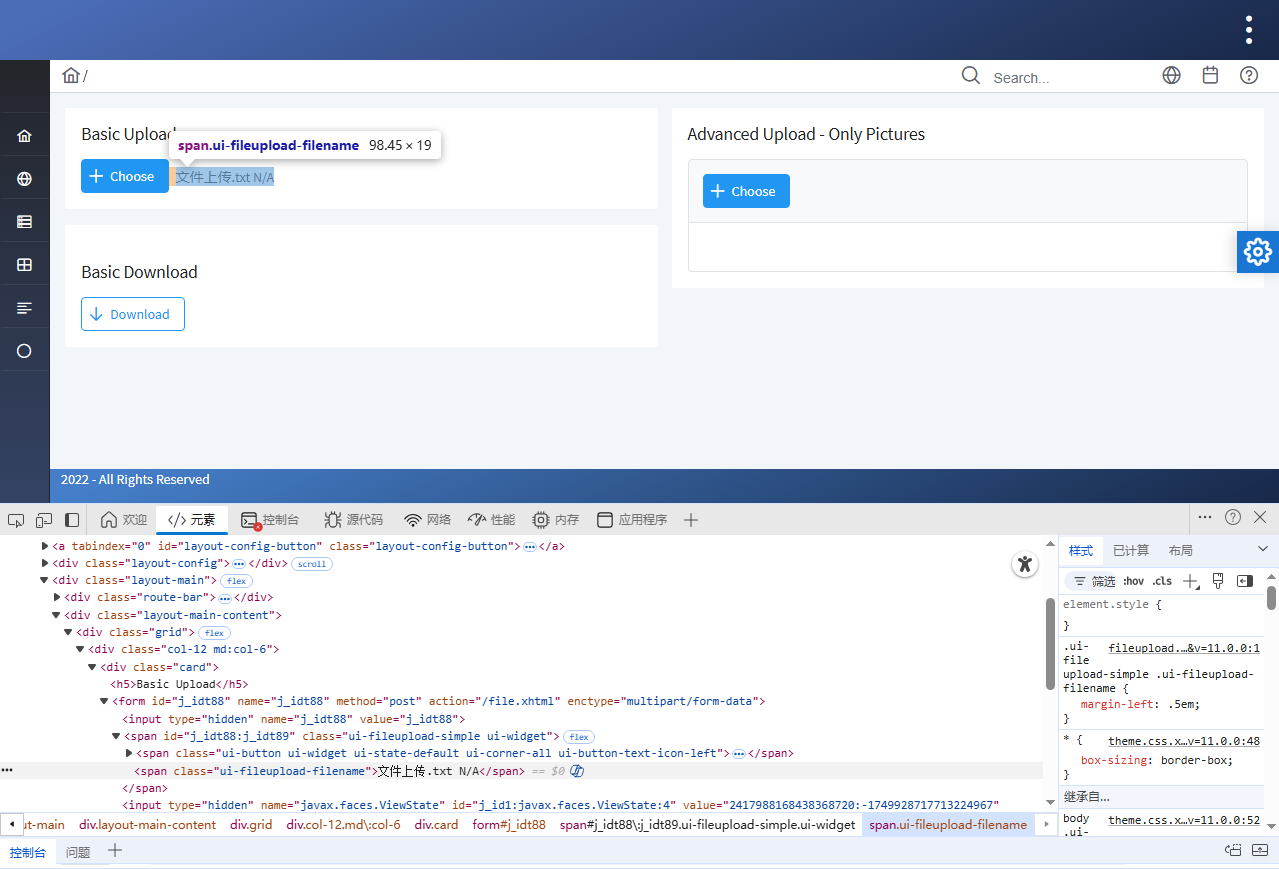
可以看到这个 input type="file" (类型是个文件),元素定位到这一级就行了,然后把需要上传文件的路径传过来就可以了;

代码实现
页面类
2、在项目根目录 pageObject 软件包 other 目录文件下新建名称一个为 file_upload_page.py 的 Python 文件;
# 导包
from selenium.webdriver.common.by import By
from util_tools.basePage import BasePage
from time import sleep

class FilesUploadPage(BasePage):
    """文件上传"""
    # 外网地址--网络不稳定(建议隔一段时间再访问测试)
    url = 'https://www.leafground.com/file.xhtml;jsessionid=node0cz944gxn3xug2oaeq69tvhjo4017138.node0'
    # 文件选择
    files_input = (By.XPATH, '//*[@id="j_idt88:j_idt89_input"]')

    # 操作方法
    def files_upload(self):
        self.open_url(self.url)
        # 设置要上传的文件路径(自行设置,若写到项目文件中可使用相对路径)--例如:固定的绝对路径(桌面文件)--前面加 r 防止被转义
        file_path = r'C:\Users\Administrator\Desktop\文件上传.txt'
        # 上传文件
        self.send_keys(self.files_input, file_path)
        sleep(3)
测试类
测试文件
3、在项目根目录 testcase 软件包 other 目录文件下新建名称一个为 test_file_upload.py 的 Python 文件;
from pageObject.other.file_upload_page import FilesUploadPage

class TestFilesUpload:

    # 文件上传成功
    def test_file_upload_success(self, not_login_driver):
        fu = FilesUploadPage(not_login_driver)
        fu.files_upload()
断言文件上传只需断言这个标签文本内容不为空,怎么获取标签文本内容呢?
封装方法
在基类公共方法模块中添加;
4、 优化项目根目录 util_tools 软件包下 basePage.py 文件,封装 获取文本标签内容 方法;
    def get_tag_text(self, locator: tuple):
        """获取页面标签文本内容"""
        try:
            element = self.location_element(*locator)
            element_text = element.text
            logs.info(f'获取标签文本内容:{element_text}')
            return element_text
        except Exception as e:
            logs.error(f'获取标签文本内容出现异常,原因为:{str(e)}')
5、完整 basePage.py 文件;
# 导包
from selenium import webdriver
from selenium.common import NoSuchElementException, TimeoutException
from selenium.webdriver.common.by import By
from time import sleep
from selenium.webdriver.support import expected_conditions as ec
from selenium.webdriver.support.wait import WebDriverWait
from config import setting
from util_tools.logs_util.recordlog import logs
from selenium.webdriver.common.action_chains import ActionChains
from selenium.webdriver.common.keys import Keys
from datetime import datetime
import pytesseract
from PIL import Image
from selenium.webdriver.support.ui import Select
from util_tools.handle_data.configParse import ConfigParse


class BasePage(object):


    def __init__(self, driver):
        self.__driver = driver
        self.__wait = WebDriverWait(self.__driver, setting.WAIT_TIME)
        self.conf = ConfigParse()

    def window_max(self):
        self.__driver.maximize_window()

    def window_full(self):
        self.__driver.fullscreen_window()

    def screenshot(self):
        self.__driver.get_screenshot_as_png()

    def open_url(self, url):
        if url.startswith('http') or url.startswith('https'):
            self.__driver.get(url)
            logs.info(f'打开页面:{url}')
        else:
            new_url = self.conf.get_host('host') + url
            self.__driver.get(new_url)
            logs.info(f'打开页面:{new_url}')

    def get_tag_text(self, locator: tuple):
        try:
            element = self.location_element(*locator)
            element_text = element.text
            logs.info(f'获取标签文本内容:{element_text}')
            return element_text
        except Exception as e:
            logs.error(f'获取标签文本内容出现异常,原因为:{str(e)}')

    @property
    def current_url(self):
        return self.__driver.current_url

    @property
    def title(self):
        return self.__driver.title

    def refresh(self):
        self.__driver.refresh()

    @property
    def switch_to(self):
        return self.__driver.switch_to

    def iframe(self, frame):
        try:
            self.switch_to.frame(frame)
            logs.info(f'切换到{frame}--iframe内部框架中')
        except:
            logs.error('切换到iframe框架失败!')

    def switch_to_new_tab(self):
        try:
            original_window = self.__driver.window_handles[0]
            all_window = self.__driver.window_handles
            new_window = None
            for window in all_window:
                if window != original_window:
                    new_window = window
                    break
            if new_window:
                self.switch_to.window(new_window)
                logs.info('成功切换到新标签页')
        except TimeoutException:
            logs.error('等待新标签页打开超时。')
        except NoSuchElementException:
            logs.error('未找到新标签页句柄。')
        except Exception as e:
            logs.error(f'切换窗口时发生异常:{str(e)}')

    def exit_iframe(self):
        self.switch_to.default_content()

    @property
    def alert(self):
        return self.__wait.until(ec.alert_is_present())

    def alert_confirm(self):
        self.alert.accept()

    def alert_cancel(self):
        self.alert.dismiss()

    def location_element(self, by, value):
        try:
            element = self.__wait.until(ec.presence_of_element_located((by, value)))
            logs.info(f"找到元素:{by}={value}")
            return element
        except Exception as e:
            logs.error(f"未找到元素:{by}={value}")
            raise e

    def location_elements(self, by, value):
        try:
            self.__wait.until(ec.presence_of_all_elements_located((by, value)))
            elements = self.__driver.find_elements(by, value)
            logs.info(f"找到元素列表:{by}={value}")
            return elements
        except Exception as e:
            logs.error(f"未找到元素列表:{by}={value}")
            raise e

    def click(self, locator: tuple, force=False):
        try:
            element = self.location_element(*locator)
            if not force:
                self.__driver.execute_script("arguments[0].click()", element)
            else:
                self.__driver.execute_script("arguments[0].click({force:true})", element)
            logs.info(f"元素被点击:{locator}")
        except NoSuchElementException as e:
            logs.error(f"元素无法定位:{e}")
            raise e

    def send_keys(self, locator: tuple, data):
        try:
            element = self.location_element(*locator)
            element.send_keys(data)
            logs.info(f"元素被输入内容:{locator},输入的内容为:{data}")
        except NoSuchElementException as e:
            logs.error(f"元素无法定位:{e}")
            raise e

    def selects(self, locator: tuple, index):
        try:
            select = Select(self.location_element(*locator))
            select.select_by_index(index)
            logs.info(f'选择第{index}个数据')
        except NoSuchElementException as e:
            logs.error(f'元素无法定位:{e}')
            raise e

    def enter(self):
        try:
            ActionChains(self.__driver).send_keys(Keys.ENTER).perform()
            logs.info("按下回车键")
        except NoSuchElementException as e:
            logs.error(f"元素无法定位:{e}")
            raise e

    def right_click(self, locator: tuple):
        try:
            element = self.location_element(*locator)
            ActionChains(driver).context_click(element).perform()
            logs.info("执行鼠标右键点击操作")
        except NoSuchElementException as e:
            logs.error(f"元素无法定位:{e}")
            raise e

    def double_click(self, locator: tuple):
        try:
            element = self.location_element(*locator)
            ActionChains(driver).double_click(element).perform()
            logs.info("执行鼠标双击操作")
        except NoSuchElementException as e:
            logs.error(f"元素无法定位:{e}")
            raise e

    def screenshots(self, image_name):
        import os
        current_time = datetime.now().strftime("%Y%m%d%H%M%S")
        file_name = f"{image_name}-{current_time}.png"
        file_path = os.path.join(setting.FILE_PATH.get('screenshot'), file_name)
        self.__driver.get_screenshot_as_file(file_path)

    def clear(self, locator: tuple):
        try:
            element = self.location_element(*locator)
            element.clear()
            logs.info("清空文本")
        except NoSuchElementException as e:
            logs.error(f"元素无法定位:{e}")
            raise e

    def ocr_captcha(self, locator: tuple):
        captcha_element = self.location_element(*locator)
        captcha_path = setting.FILE_PATH['screenshot'] + '/captcha.png'
        captcha_element.screenshot(captcha_path)
        captcha_image = Image.open(captcha_path)
        try:
            captcha_text = pytesseract.image_to_string(captcha_image)
            logs.info(f"识别到的验证码为:{captcha_text}")
            return captcha_text
        except pytesseract.pytesseract.TesseractNotFoundError:
            logs.error("找不到tesseract,这是因为pytesseract模块依赖于TesseractOCR引擎来进行图像识别!")

    def is_element_present(self, locator: tuple):
        try:
            self.__wait.until(ec.presence_of_element_located(*locator))
            return True
        except:
            return False

    def assert_is_element_present(self, locator: tuple):
        try:
            element = self.__driver.find_element(*locator)
            assert element.is_displayed(), '元素不存在'
        except NoSuchElementException as e:
            logs.error(f'元素未找到:{e}')
            raise AssertionError('元素不存在')

    def assert_element_not_visible(self, locator: tuple):
        try:
            self.__wait.until(ec.invisibility_of_element_located(locator))
        except TimeoutException:
            logs.error('元素可见')

    def assert_title(self, expect_title):
        assert expect_title in self.title
使用
6、优化 file_upload_page.py 文件;添加断言结果元素;
# 导包
from selenium.webdriver.common.by import By
from util_tools.basePage import BasePage
from time import sleep

class FilesUploadPage(BasePage):
    """文件上传"""
    # 外网地址--网络不稳定(建议隔一段时间再访问测试)
    url = 'https://www.leafground.com/file.xhtml'
    # 文件选择
    files_input = (By.XPATH, '//*[@id="j_idt88:j_idt89_input"]')
    # 断言结果
    assert_result = (By.XPATH, '//*[@id="j_idt88:j_idt89"]/span[2]')

    # 操作方法
    def files_upload(self):
        self.open_url(self.url)
        # 设置要上传的文件路径(自行设置,若写到项目文件中可使用相对路径)--例如:固定的绝对路径(桌面文件)--前面加 r 防止被转义
        file_path = r'C:\Users\Administrator\Desktop\文件上传.txt'
        # 上传文件
        self.send_keys(self.files_input, file_path)
        sleep(3)
7、优化 test_file_upload.py 文件;添加断言;
from pageObject.other.file_upload_page import FilesUploadPage

class TestFilesUpload:

    # 文件上传成功
    def test_file_upload_success(self, not_login_driver):
        fu = FilesUploadPage(not_login_driver)
        fu.files_upload()
        # 断言结果--断言文本内容不为空即代表上传成功
        assert fu.get_tag_text(fu.assert_result) != ''
拓展其他
在使用 Selenium 做自动化测试 Web 应用时,当弹出一个选择文件的弹框,由于这个弹框是属于操作系统的而非浏览器,Selenium 程序就无法进行后续的操作了,这时可以借用其他方式来继续( AutoIt、Pywinauto、PyAutoGUI等)编写完成自动化测试脚本,来执行后续的自动选择文件等一系列操作。
AutoIt
8、AutoIt 是一款类似 BASIC 脚本语言,且完全免费用于自动化 Windows 操作系统的脚本语言和工具集;AutoIt 的语法简单易懂,适合新手入门,可以用于自动化测试,模拟用户操作来测试应用程序的界面和功能,利用模拟键盘按键,鼠标移动和窗口/控件的组合来实现各类自动化任务,包括自动化软件安装、登录、数据自动录入、界面自动化测试、数据抓取等,以及可以和其他自动化工具结合起来使用;
AutoIt 官网地址:https://www.autoitscript.com/site/autoit/
AutoIt 下载地址:https://www.autoitscript.com/site/autoit/downloads/
AutoIt 帮助文档地址:https://www.autoitx.com/Doc/
在使用 AutoIt 编写自动化测试脚本之前,需要下载安装 AutoIt 软件。
Pywinauto
9、pywinauto 是一组用于自动化 Microsoft Windows GUI 的 python 模块;允许将鼠标和键盘操作发送到窗口对话框和控件;pywinauto 是一款基于 Python 的开源库,用于自动化测试 Windows 平台的 GUI 应用程序;它能够模拟用户的键盘和鼠标操作,以及获取和修改应用程序的控件属性;pywinauto 提供了简单而强大的 API,使得开发人员可以轻松地编写自动化测试脚本。
pywinauto 官网地址:https://pywinauto.readthedocs.io/en/latest/index.html
pywinauto 下载地址:https://github.com/pywinauto/pywinauto/releases
pywinauto 中文文档地址:https://www.kancloud.cn/gnefnuy/pywinauto_doc/1193035
pip install pywinautopywinauto 是为本地 Windows 应用程序设计的,不能直接与基于浏览器的 web 应用程序交互;pywinauto 目前仅支持 Windows 系统平台,暂不支持 Linux 和 MAC 系统平台。
PyAutoGUI
10、PyAutoGUI 是 Python 生态中功能最全面的图形界面自动化库,是一个纯 Python 的 GUI 自动化工具,通过模拟鼠标、键盘操作和屏幕图像识别,可以让程序自动控制鼠标和键盘的一系列操作来达到自动化测试的目的;PyAutoGUI 设计简洁,全部被封装在 pyautogui 单个模块中,因此 Python 程序中只要 import pyautogui 引用之后便可访问 pyautogui 中的函数、变量;
PyAutoGUI 支持跨平台(Windows/macOS/Linux)。
PyAutoGUI官网地址:https://pyautogui.readthedocs.io/en/latest/
# 核心库
pip install pyautogui
# 图像处理依赖(截图功能必需)
pip install Pillow

# 导包
import pyautogui
# 输出版本号
print(pyautogui.__version__)

# 导包
import pyautogui

# 启用自动放故障功能,左上角的坐标为(0,0),将鼠标移到屏幕的左上角,来抛出failSafeException异常
# 鼠标移至左上角时自动终止程序
pyautogui.FAILSAFE = True
# 关闭自动放故障保护
pyautogui.FAILSAFE = False

# pyautogui.PAUSE 变量默认值是0.1秒,每条指令之间的时间间隔
# pyautogui.PAUSE 是为所有的pyautogui自带api函数增加延迟;若不设置,则默认延迟时间是0.1秒
# 每次操作后暂停 0.5 秒
pyautogui.PAUSE = 0.5
pyautogui 大致分为通用功能、鼠标控制、键盘控制、屏幕窗口、消息窗 5 大类。
烦请自行学习了解。
未完待续。。。