30.登录时用户名密码 RSA 加密传输-后端为java
使用 Spring Initializr 创建项目,实现前端登录时用户名密码的 RSA 加密传输。
1. 创建后端项目(Spring Boot)
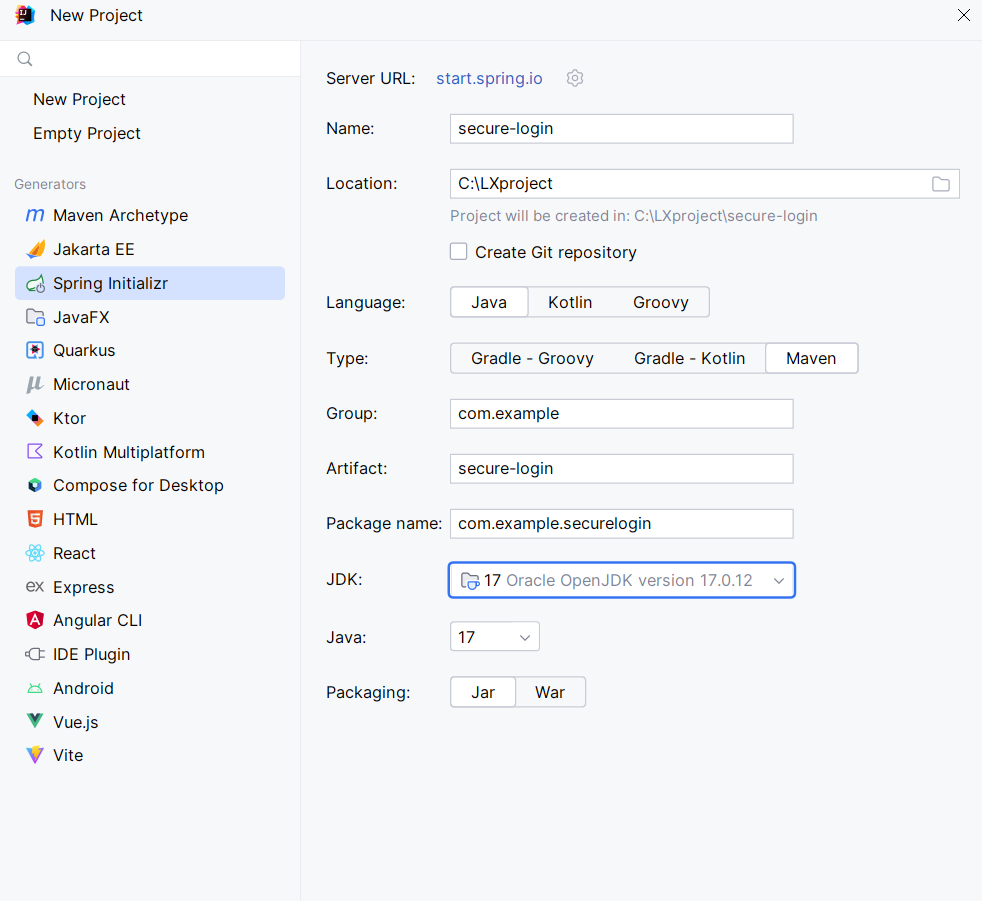
(1)用 Spring Initializr 生成项目
- 访问 https://start.spring.io/
- 填写:
- Project: Maven
- Language: Java
- Spring Boot:
- Group :
com.example - Artifact :
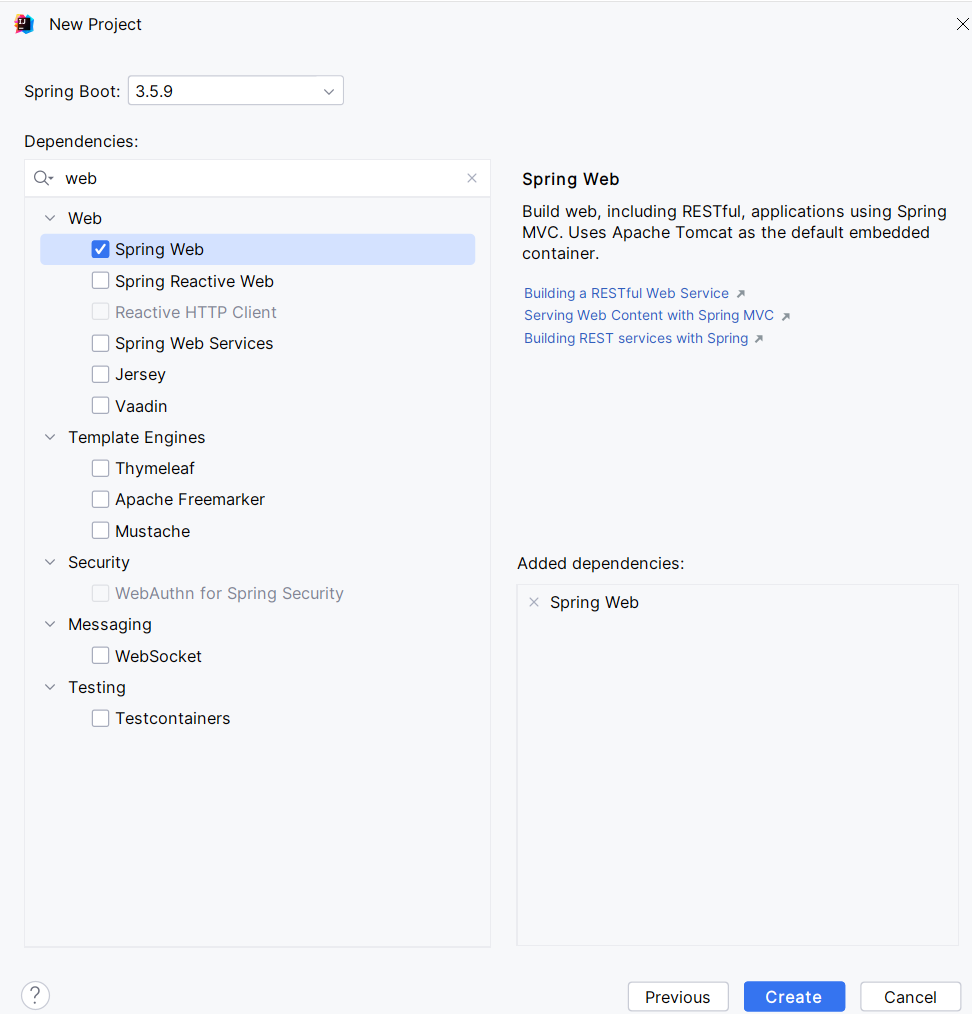
secure-login - Dependencies : 选
Spring Web(提供 API 支持)
- 点击 Generate 下载项目,解压后用 IDE(如 IntelliJ IDEA)打开。
(2)后端核心代码
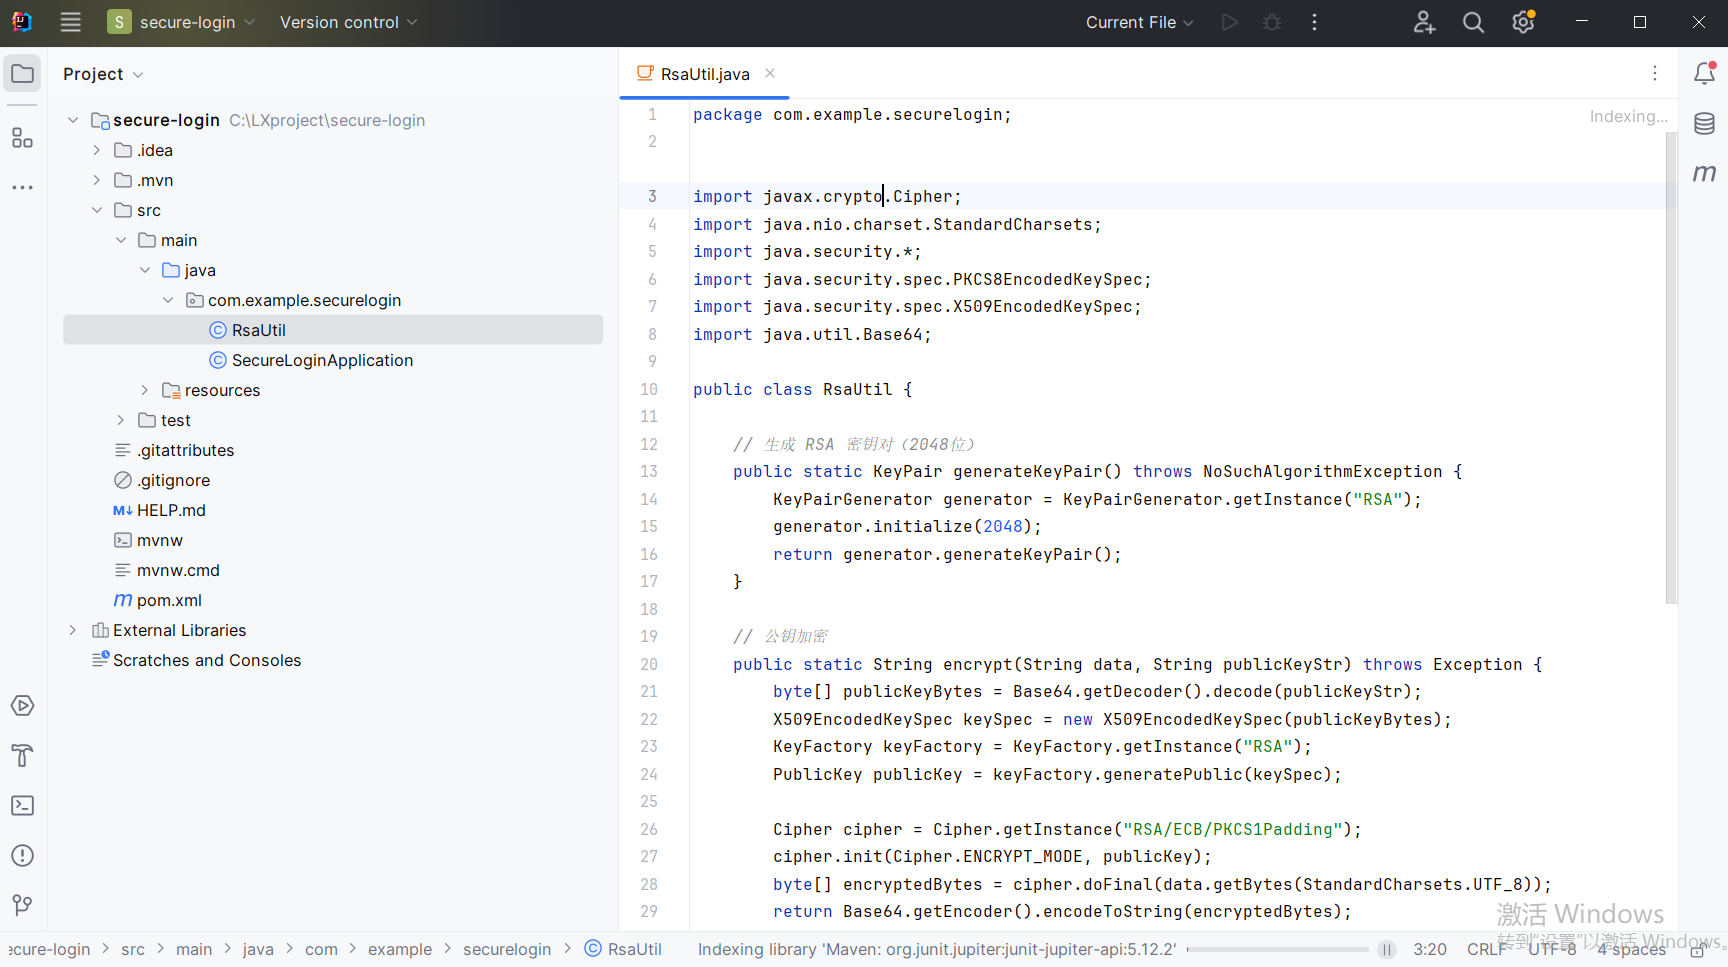
① 生成 RSA 密钥对
在 src/main/java/com/example/securelogin/ 下创建 RsaUtil.java:
java
package com.example.securelogin;

import javax.crypto.Cipher;
import java.nio.charset.StandardCharsets;
import java.security.*;
import java.security.spec.PKCS8EncodedKeySpec;
import java.security.spec.X509EncodedKeySpec;
import java.util.Base64;

public class RsaUtil {

    // 生成 RSA 密钥对(2048位)
    public static KeyPair generateKeyPair() throws NoSuchAlgorithmException {
        KeyPairGenerator generator = KeyPairGenerator.getInstance("RSA");
        generator.initialize(2048);
        return generator.generateKeyPair();
    }

    // 公钥加密
    public static String encrypt(String data, String publicKeyStr) throws Exception {
        byte[] publicKeyBytes = Base64.getDecoder().decode(publicKeyStr);
        X509EncodedKeySpec keySpec = new X509EncodedKeySpec(publicKeyBytes);
        KeyFactory keyFactory = KeyFactory.getInstance("RSA");
        PublicKey publicKey = keyFactory.generatePublic(keySpec);

        Cipher cipher = Cipher.getInstance("RSA/ECB/PKCS1Padding");
        cipher.init(Cipher.ENCRYPT_MODE, publicKey);
        byte[] encryptedBytes = cipher.doFinal(data.getBytes(StandardCharsets.UTF_8));
        return Base64.getEncoder().encodeToString(encryptedBytes);
    }

    // 私钥解密
    public static String decrypt(String encryptedData, String privateKeyStr) throws Exception {
        byte[] privateKeyBytes = Base64.getDecoder().decode(privateKeyStr);
        PKCS8EncodedKeySpec keySpec = new PKCS8EncodedKeySpec(privateKeyBytes);
        KeyFactory keyFactory = KeyFactory.getInstance("RSA");
        PrivateKey privateKey = keyFactory.generatePrivate(keySpec);

        Cipher cipher = Cipher.getInstance("RSA/ECB/PKCS1Padding");
        cipher.init(Cipher.DECRYPT_MODE, privateKey);
        byte[] encryptedBytes = Base64.getDecoder().decode(encryptedData);
        byte[] decryptedBytes = cipher.doFinal(encryptedBytes);
        return new String(decryptedBytes, StandardCharsets.UTF_8);
    }
}
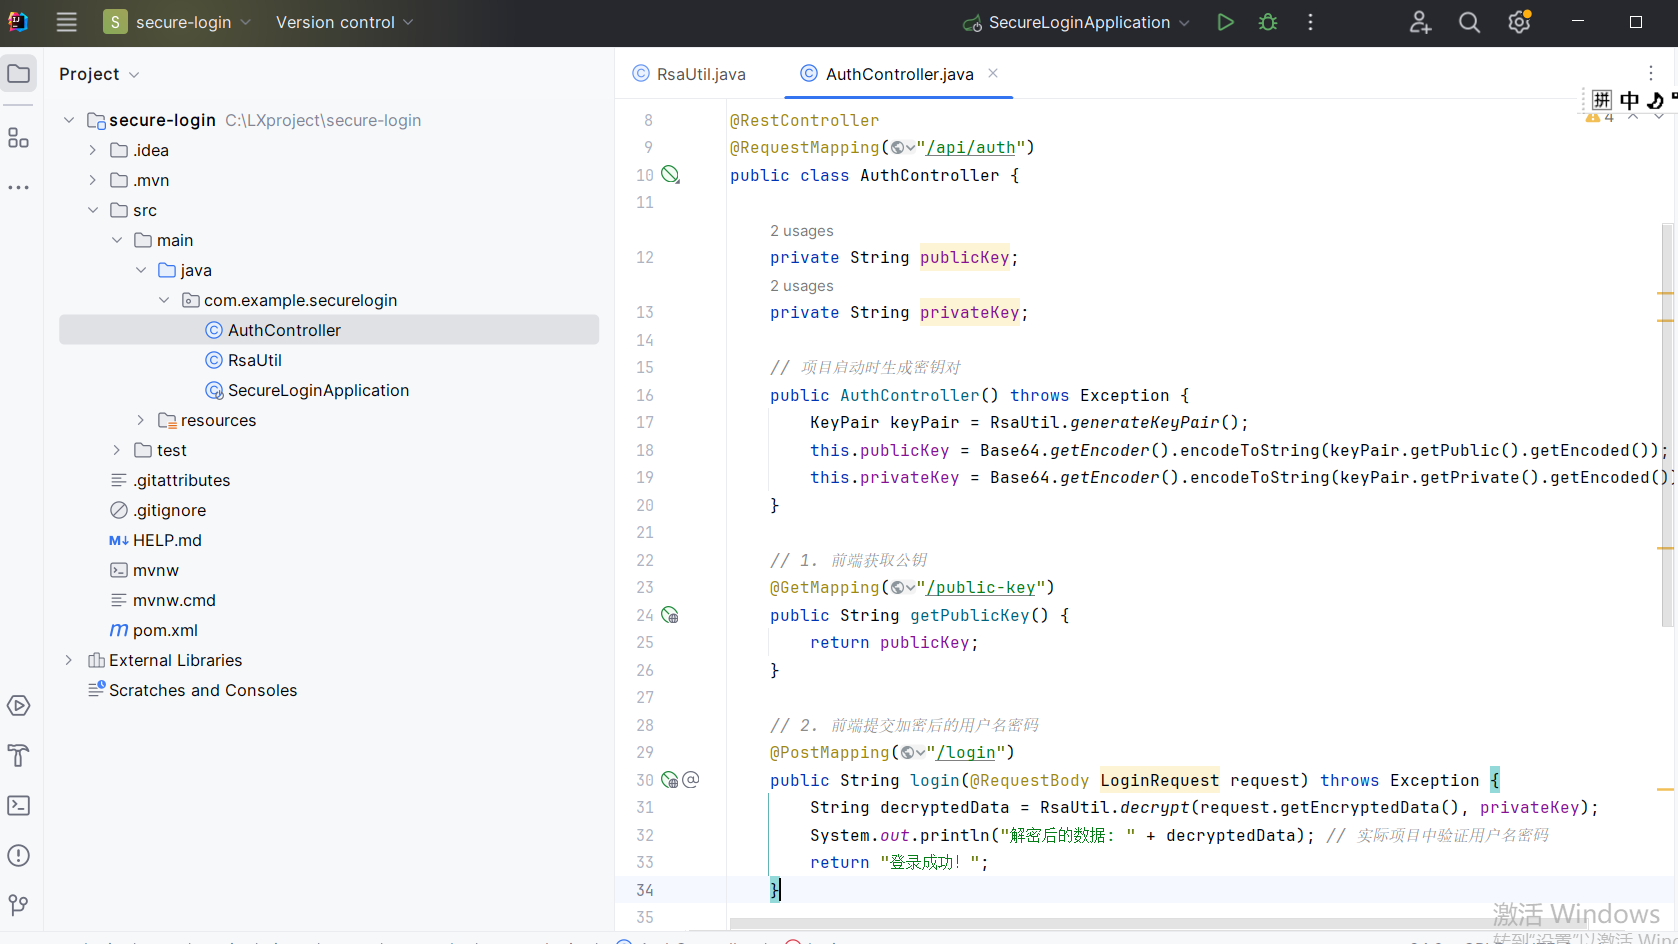
② 创建 Controller 提供公钥和接收加密数据
在 src/main/java/com/example/securelogin/ 下创建 AuthController.java:
java
package com.example.securelogin;
import org.springframework.web.bind.annotation.*;
import java.security.KeyPair;
import java.util.Base64;
@RestController
@RequestMapping("/api/auth")
public class AuthController {
private String publicKey;
private String privateKey;
// 项目启动时生成密钥对
public AuthController() throws Exception {
KeyPair keyPair = RsaUtil.generateKeyPair();
this.publicKey = Base64.getEncoder().encodeToString(keyPair.getPublic().getEncoded());
this.privateKey = Base64.getEncoder().encodeToString(keyPair.getPrivate().getEncoded());
}
// 1. 前端获取公钥
@GetMapping("/public-key")
public String getPublicKey() {
return publicKey;
}
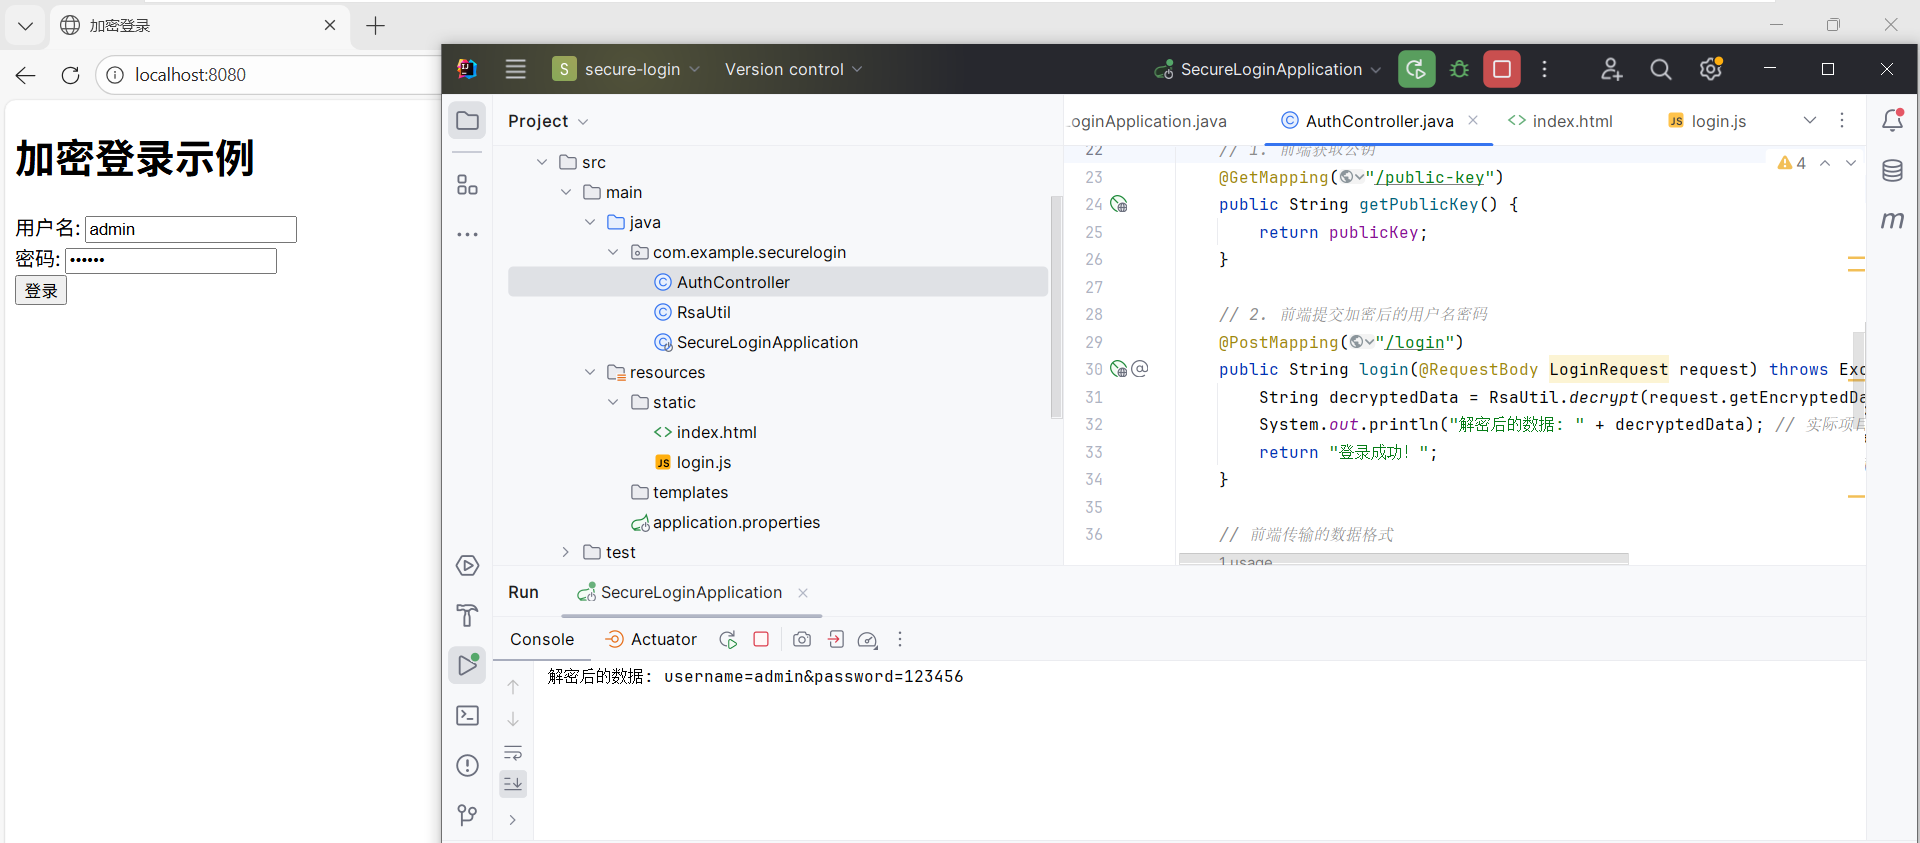
// 2. 前端提交加密后的用户名密码
@PostMapping("/login")
public String login(@RequestBody LoginRequest request) throws Exception {
String decryptedData = RsaUtil.decrypt(request.getEncryptedData(), privateKey);
System.out.println("解密后的数据: " + decryptedData); // 实际项目中验证用户名密码
return "登录成功!";
}
// 前端传输的数据格式
static class LoginRequest {
private String encryptedData; // 加密后的数据(Base64)
public String getEncryptedData() {
return encryptedData;
}
public void setEncryptedData(String encryptedData) {
this.encryptedData = encryptedData;
}
}
}
2. 创建前端项目(HTML + JavaScript)
(1)HTML 页面
在 src/main/resources/static/ 下创建 index.html:
html
<!DOCTYPE html>
<html>
<head>
    <meta charset="UTF-8">
    <title>加密登录</title>
    <script src="https://cdnjs.cloudflare.com/ajax/libs/jsencrypt/3.3.2/jsencrypt.min.js"></script>
</head>
<body>
<h1>加密登录示例</h1>
<form id="loginForm">
    <div>
        <label>用户名:</label>
        <input type="text" id="username" required>
    </div>
    <div>
        <label>密码:</label>
        <input type="password" id="password" required>
    </div>
    <button type="button" onclick="login()">登录</button>
</form>

<script src="login.js"></script>
</body>
</html>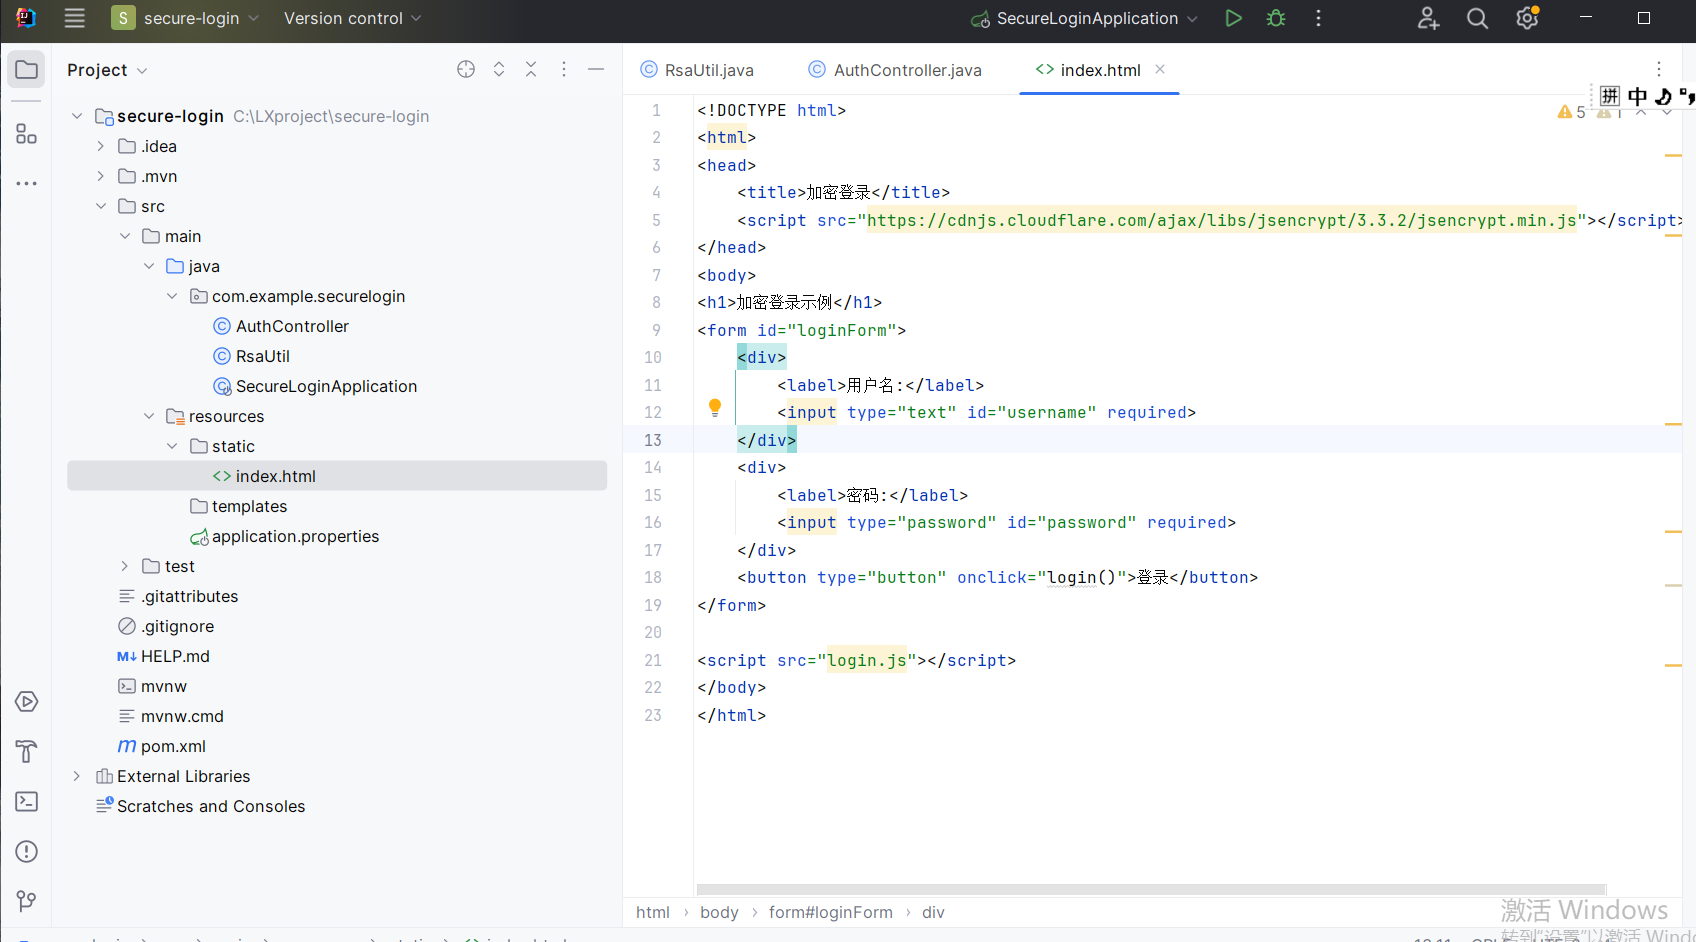
(2)JavaScript 加密逻辑
在 src/main/resources/static/ 下创建 login.js:
javascript
let publicKey = null;

// 1. 获取后端公钥
async function fetchPublicKey() {
    const response = await fetch('http://localhost:8080/api/auth/public-key');
    publicKey = await response.text();
    console.log("公钥:", publicKey);
}

// 2. 使用 RSA 公钥加密数据
function encryptData(data) {
    const encrypt = new JSEncrypt();
    encrypt.setPublicKey(publicKey);
    return encrypt.encrypt(data);
}

// 3. 提交登录请求
async function login() {
    await fetchPublicKey(); // 先获取公钥

    const username = document.getElementById('username').value;
    const password = document.getElementById('password').value;
    const rawData = `username=${username}&password=${password}`;

    // 加密数据
    const encryptedData = encryptData(rawData);

    // 发送到后端
    const response = await fetch('http://localhost:8080/api/auth/login', {
        method: 'POST',
        headers: { 'Content-Type': 'application/json' },
        body: JSON.stringify({ encryptedData: encryptedData })
    });

    const result = await response.text();
    alert(result);
}

// 页面加载时自动获取公钥
window.onload = fetchPublicKey;
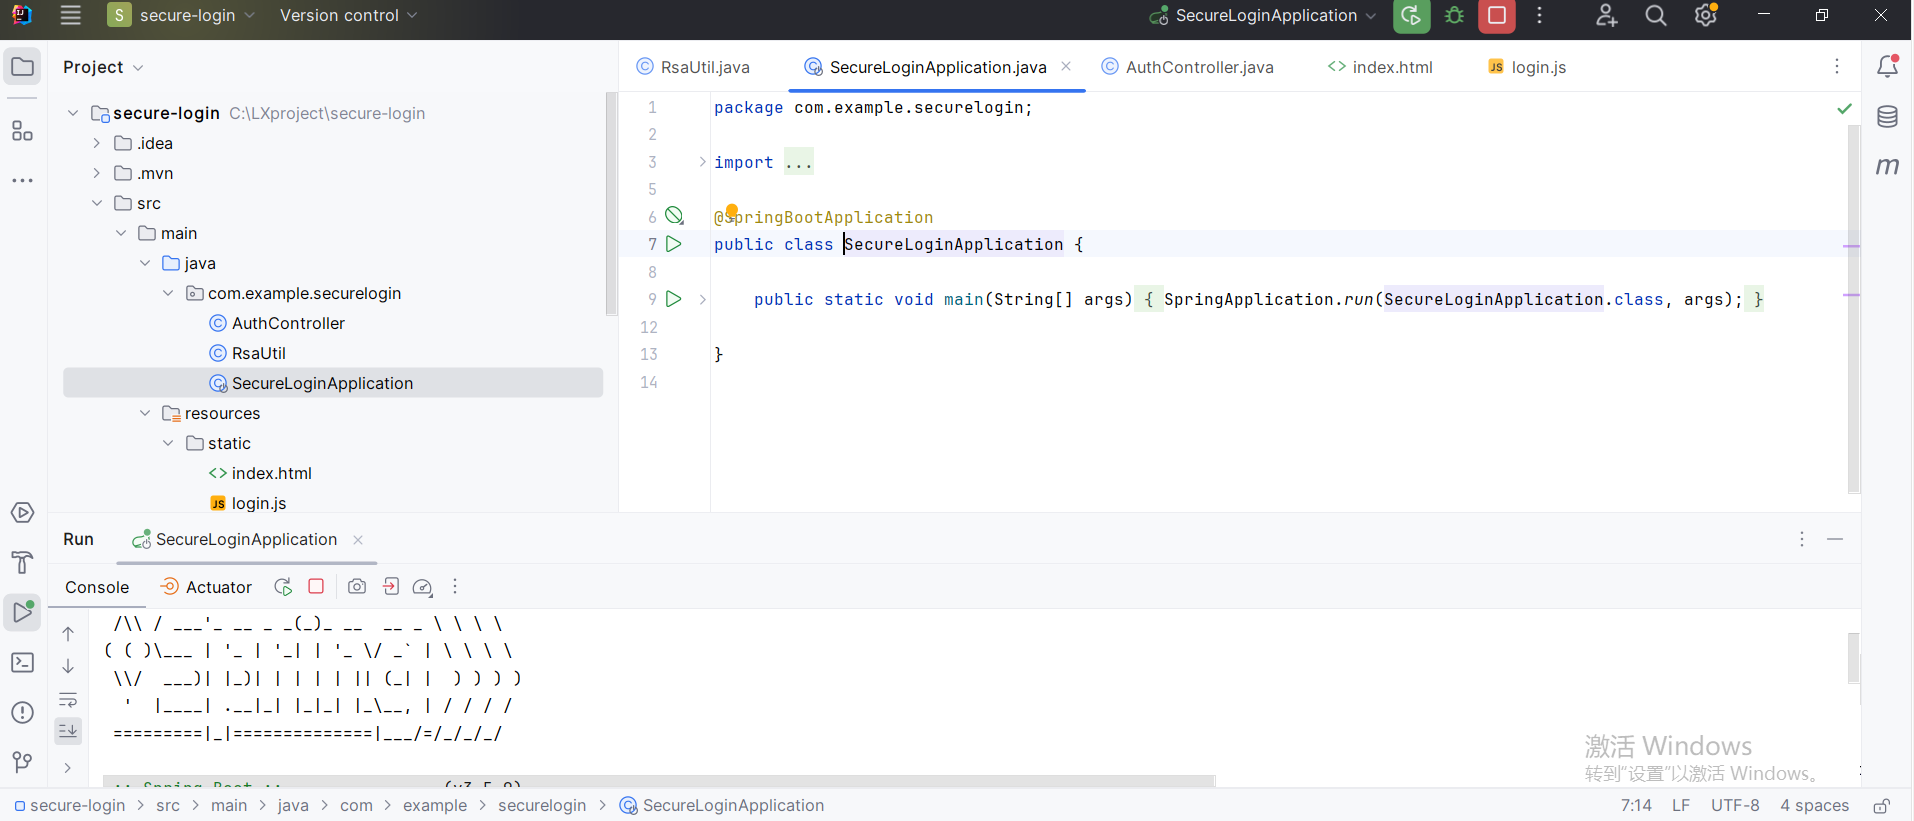
3. 测试流程
-
启动后端 :运行
SecureLoginApplication主类(项目启动时会自动生成 RSA 密钥对)。
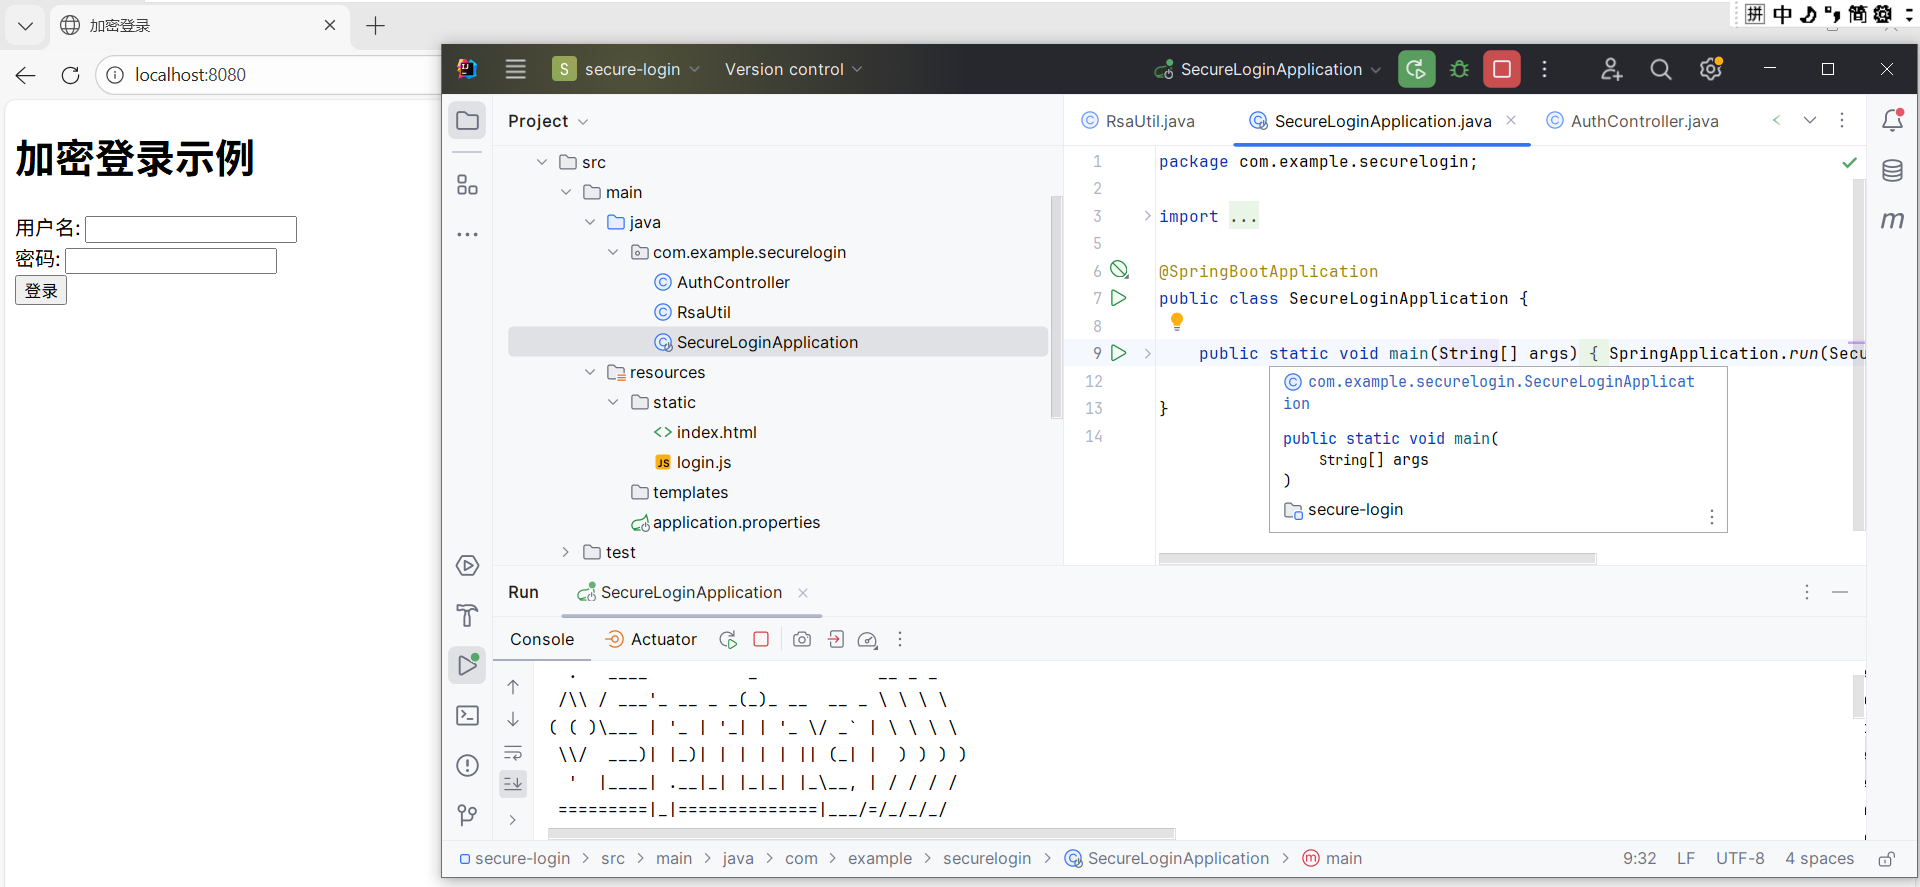
-
打开前端页面 :访问
http://localhost:8080/index.html。
-
输入用户名密码 (如
admin/123456),点击登录。
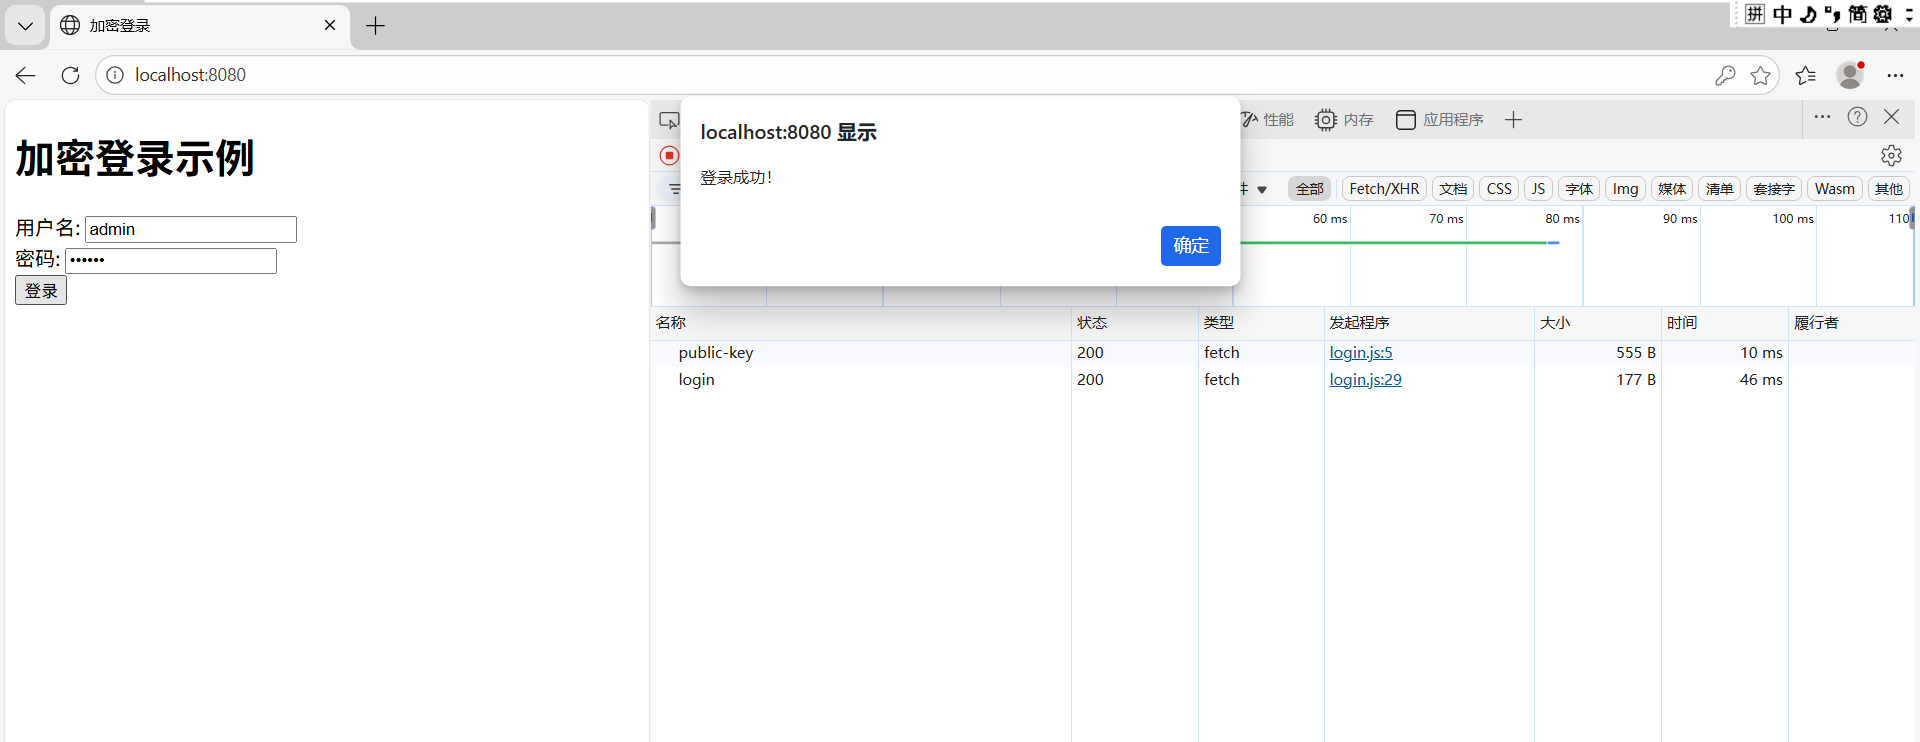
查看网络请求情况
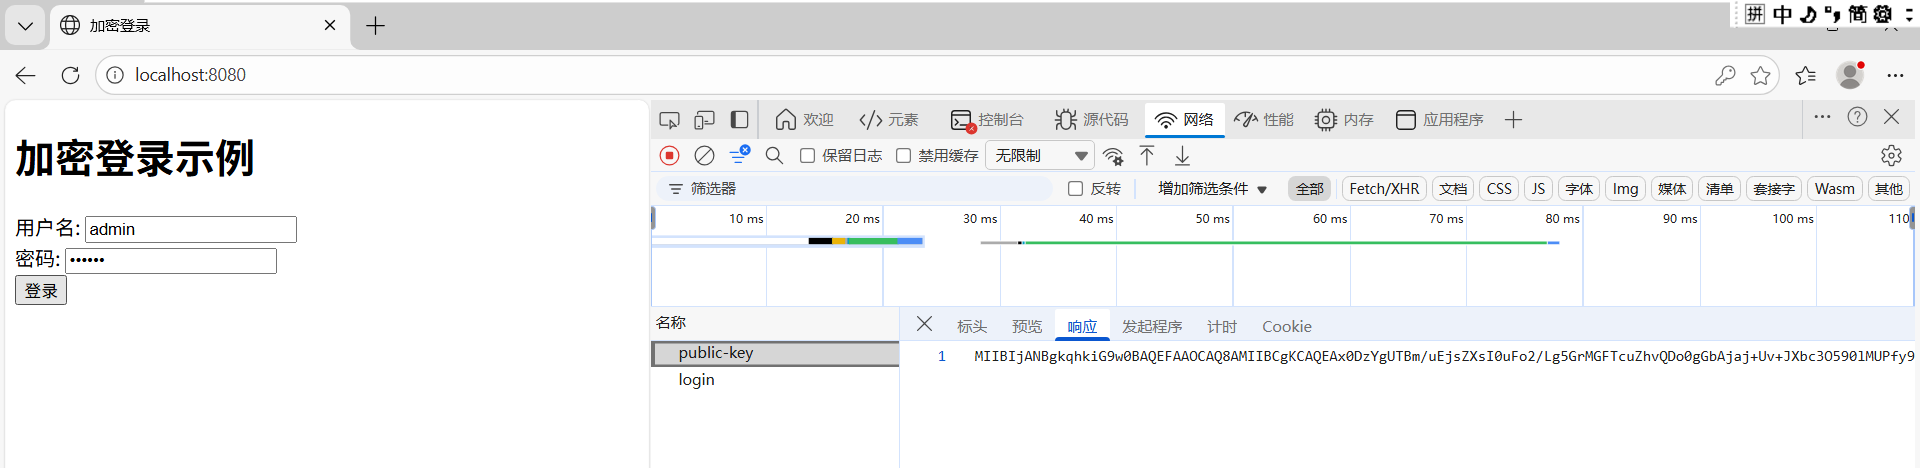
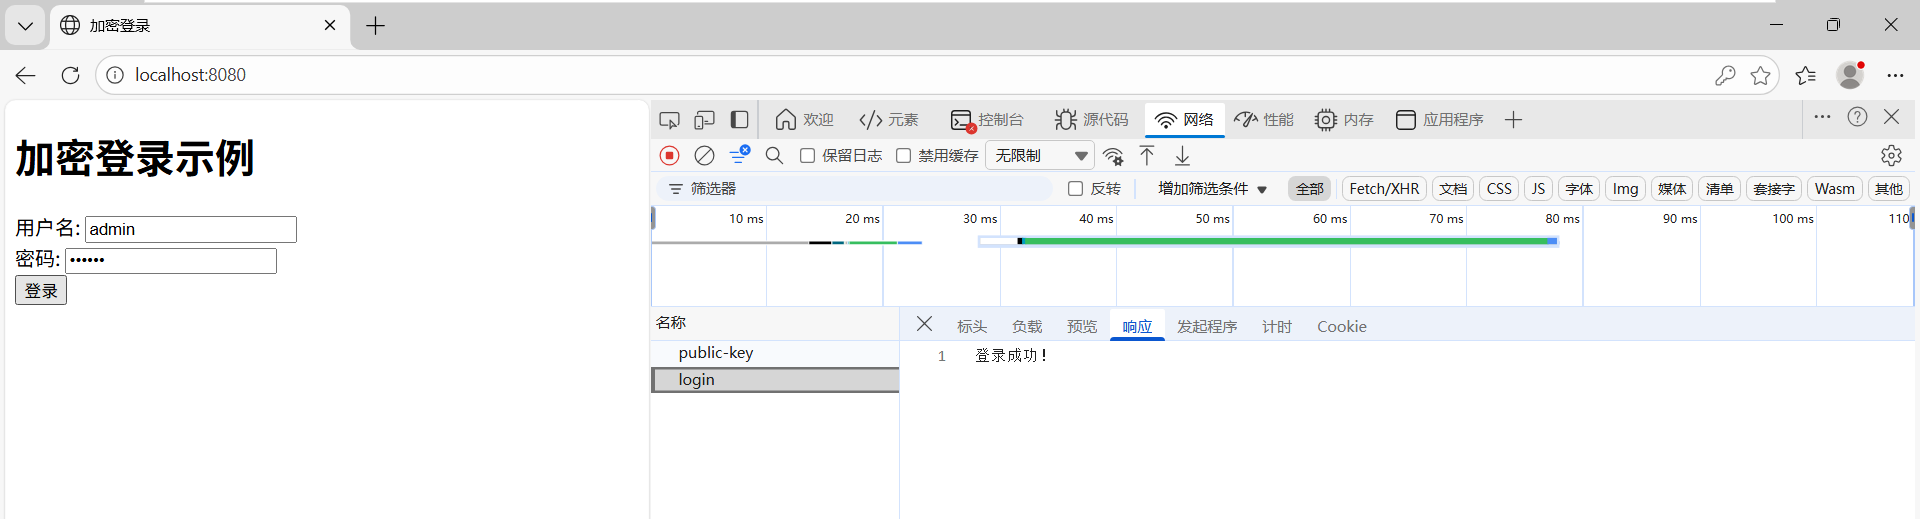
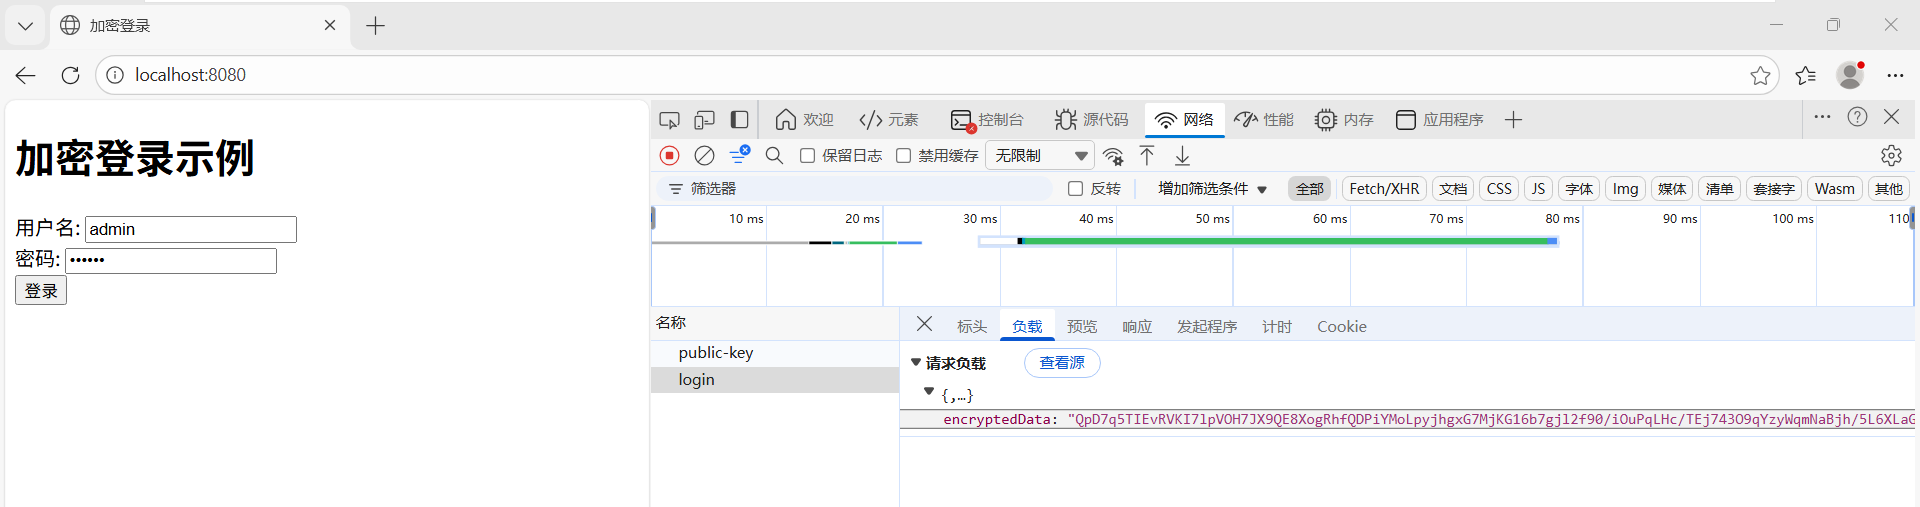
-
查看后端控制台 :输出解密后的数据(如
username=admin&password=123456)。
4. 关键点总结
-
后端做什么?
- 生成 RSA 密钥对(启动时生成,无需手动管理)。
- 提供公钥 API(
/api/auth/public-key)。 - 解密前端传来的加密数据(
/api/auth/login)。
-
前端做什么?
- 获取后端公钥。
- 用公钥加密用户名密码(使用
jsencrypt库)。 - 提交加密数据到后端。
-
安全建议
- 必须启用 HTTPS:防止公钥在传输中被窃取。
- 密钥轮换:定期更换密钥对(可扩展为动态获取公钥)。
5. 最终效果
- 前端:用户输入用户名密码 → 加密后发送。
- 后端:解密数据 → 验证用户 → 返回结果。
- 传输过程:即使被拦截,攻击者也无法直接获取原始密码。