我们在14.三维重建colmap环境安装与使用-CSDN博客写了colmap的三维重构的环境搭建与使用,该算法可以重构任意的物体,但对拍照要求比较高,本文介绍的PRNet算法专门用来三维重构人脸,并且单张图片就可以重构。
1.环境搭建
系统要求
- 操作系统:Linux(推荐 Ubuntu 16.04/18.04/20.04)或 Windows 10/11
- Python 版本:3.6 或 3.7(官方代码对高版本兼容性较差)
- GPU(可选但推荐):NVIDIA 显卡 + CUDA 支持
安装依赖
使用 Anaconda 创建虚拟环境(推荐)
# 创建并激活虚拟环境
conda create -n prnet python=3.6
conda activate prnet
安装基础依赖
# 安装 TensorFlow(必须是 1.x 版本)
pip install tensorflow==1.15   # CPU 版
# 或
pip install tensorflow-gpu==1.15  # GPU 版(需提前安装 CUDA 10.0 + cuDNN 7.6)

# 其他依赖
pip install opencv-python
pip install scipy
pip install scikit-image
pip install matplotlib
pip install Pillow
下载PRNet代码:
通过网盘分享的文件:PRNet
链接: https://pan.baidu.com/s/1q2BmO7i7l9BfxFivbiHtWQ?pwd=2kyk 提取码: 2kyk
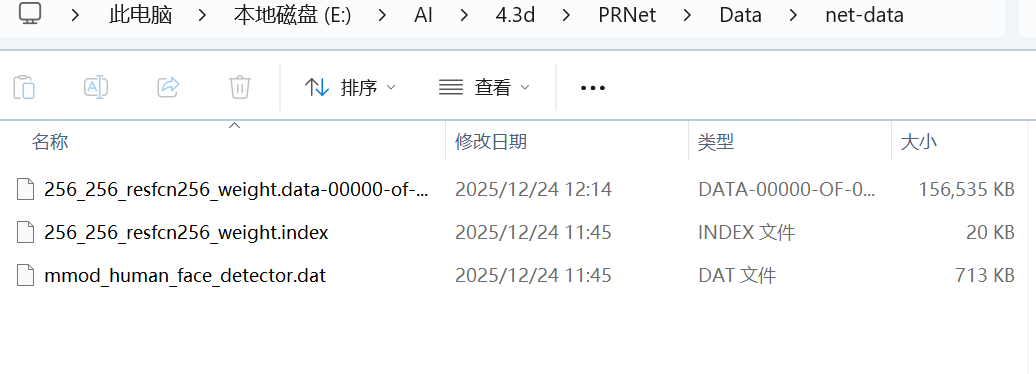
下载模型:
通过网盘分享的文件:256_256_resfcn256_weight.data-00000-of-00001
链接: https://pan.baidu.com/s/17yQJSg3J7KbUYf-hgYMezw 提取码: rtic
下载后,将模型放入下图的文件夹(PRNet\Data\net-data):
2.使用
修改下载后的demo.py代码(因为源代码运行时路径报错)
import numpy as np
import os
from glob import glob
import scipy.io as sio
from skimage.io import imread, imsave
from skimage.transform import rescale, resize
from time import time
import argparse
import ast
# -------------------------- TensorFlow 兼容性修改 --------------------------
import tensorflow.compat.v1 as tf

tf.disable_eager_execution()  # 禁用 TF2.x  eager 模式,适配 TF1.x 逻辑
# --------------------------------------------------------------------------
from api import PRN
from utils.estimate_pose import estimate_pose
from utils.rotate_vertices import frontalize
from utils.render_app import get_visibility, get_uv_mask, get_depth_image
from utils.write import write_obj_with_colors, write_obj_with_texture


def main(args):
    if args.isShow or args.isTexture:
        import cv2
        from utils.cv_plot import plot_kpt, plot_vertices, plot_pose_box

    # ---- init PRN
    os.environ['CUDA_VISIBLE_DEVICES'] = args.gpu  # GPU number, -1 for CPU
    prn = PRN(is_dlib=args.isDlib)

    # ------------- load data
    image_folder = args.inputDir
    save_folder = args.outputDir

    # 确保输出目录存在(修复:若目录多级嵌套,用 makedirs 递归创建)
    if not os.path.exists(save_folder):
        os.makedirs(save_folder, exist_ok=True)  # exist_ok=True 避免重复创建报错

    types = ('*.jpg', '*.png')
    image_path_list = []
    for files in types:
        image_path_list.extend(glob(os.path.join(image_folder, files)))

    total_num = len(image_path_list)
    for i, image_path in enumerate(image_path_list):
        # -------------------------- 路径提取逻辑修复 --------------------------
        # 问题:Windows 用 \ 分割路径,原代码用 / 导致 name 含目录名
        # 修复:用 os.path.splitext + os.path.basename 提取纯文件名(无路径、无后缀)
        file_basename = os.path.basename(image_path)  # 提取 "xxx.jpg" 格式
        name = os.path.splitext(file_basename)[0]  # 提取 "xxx"(无后缀)
        # ----------------------------------------------------------------------

        # read image
        image = imread(image_path)
        [h, w, c] = image.shape
        if c > 3:
            image = image[:, :, :3]

        # the core: regress position map
        if args.isDlib:
            max_size = max(image.shape[0], image.shape[1])
            if max_size > 1000:
                image = rescale(image, 1000. / max_size)
                image = (image * 255).astype(np.uint8)
            pos = prn.process(image)  # use dlib to detect face
        else:
            if image.shape[0] == image.shape[1]:
                image = resize(image, (256, 256))
                pos = prn.net_forward(image / 255.)  # input cropped to 256x256
            else:
                # cropped with bounding box (x1, x2, y1, y2)
                box = np.array([0, image.shape[1] - 1, 0, image.shape[0] - 1])
                pos = prn.process(image, box)

        image = image / 255.
        if pos is None:
            continue

        if args.is3d or args.isMat or args.isPose or args.isShow:
            # 3D vertices
            vertices = prn.get_vertices(pos)
            if args.isFront:
                save_vertices = frontalize(vertices)
            else:
                save_vertices = vertices.copy()
            save_vertices[:, 1] = h - 1 - save_vertices[:, 1]  # 垂直翻转(适配图像坐标系)

        if args.isImage:
            imsave(os.path.join(save_folder, f"{name}.jpg"), image)

        if args.is3d:
            # corresponding colors
            colors = prn.get_colors(image, vertices)
            if args.isTexture:
                if args.texture_size != 256:
                    pos_interpolated = resize(pos, (args.texture_size, args.texture_size), preserve_range=True)
                else:
                    pos_interpolated = pos.copy()
                # 修复:cv2.remap 输入需为 uint8 类型(避免浮点值报错)
                texture = cv2.remap(
                    (image * 255).astype(np.uint8),  # 转为 0-255 uint8
                    pos_interpolated[:, :, :2].astype(np.float32),
                    None,
                    interpolation=cv2.INTER_LINEAR,
                    borderMode=cv2.BORDER_CONSTANT,
                    borderValue=(0)
                )
                if args.isMask:
                    vertices_vis = get_visibility(vertices, prn.triangles, h, w)
                    uv_mask = get_uv_mask(vertices_vis, prn.triangles, prn.uv_coords, h, w, prn.resolution_op)
                    uv_mask = resize(uv_mask, (args.texture_size, args.texture_size), preserve_range=True)
                    texture = texture * uv_mask[:, :, np.newaxis]
                # 保存带纹理的 obj 文件
                write_obj_with_texture(
                    os.path.join(save_folder, f"{name}.obj"),
                    save_vertices,
                    prn.triangles,
                    texture,
                    prn.uv_coords / prn.resolution_op
                )
            else:
                # 保存带颜色的 obj 文件(修复后路径:save_folder/xxx.obj)
                write_obj_with_colors(
                    os.path.join(save_folder, f"{name}.obj"),
                    save_vertices,
                    prn.triangles,
                    colors
                )

        if args.isDepth:
            depth_image = get_depth_image(vertices, prn.triangles, h, w, True)
            depth = get_depth_image(vertices, prn.triangles, h, w)
            imsave(os.path.join(save_folder, f"{name}_depth.jpg"), depth_image)
            sio.savemat(os.path.join(save_folder, f"{name}_depth.mat"), {'depth': depth})

        if args.isMat:
            sio.savemat(
                os.path.join(save_folder, f"{name}_mesh.mat"),
                {'vertices': vertices, 'colors': colors, 'triangles': prn.triangles}
            )

        if args.isKpt or args.isShow:
            # get landmarks
            kpt = prn.get_landmarks(pos)
            np.savetxt(os.path.join(save_folder, f"{name}_kpt.txt"), kpt)

        if args.isPose or args.isShow:
            # estimate pose
            camera_matrix, pose = estimate_pose(vertices)
            np.savetxt(os.path.join(save_folder, f"{name}_camera_matrix.txt"), camera_matrix)
            np.savetxt(os.path.join(save_folder, f"{name}_pose.txt"), pose)

        if args.isShow:
            # ---------- Plot
            image_pose = plot_pose_box(image, camera_matrix, kpt)
            cv2.imshow('sparse alignment', plot_kpt(image, kpt))
            cv2.imshow('dense alignment', plot_vertices(image, vertices))
            cv2.imshow('pose', image_pose)
            cv2.waitKey(0)


if __name__ == '__main__':
    parser = argparse.ArgumentParser(description='Joint 3D Face Reconstruction with PRNet')
    # 输入输出目录参数(默认值适配 Windows 路径)
    parser.add_argument('-i', '--inputDir', default='TestImages', type=str,
                        help='Path to input images (e.g., TestImages)')
    parser.add_argument('-o', '--outputDir', default='TestImages/results', type=str,
                        help='Path to save results (e.g., TestImages/results)')
    parser.add_argument('--gpu', default='0', type=str,
                        help='GPU ID (0 for first GPU, -1 for CPU)')
    parser.add_argument('--isDlib', default=True, type=ast.literal_eval,
                        help='Use dlib for face detection (True/False)')
    parser.add_argument('--is3d', default=True, type=ast.literal_eval,
                        help='Output 3D face (.obj) with colors')
    parser.add_argument('--isMat', default=False, type=ast.literal_eval,
                        help='Save vertices/colors/triangles as .mat')
    parser.add_argument('--isKpt', default=False, type=ast.literal_eval,
                        help='Output facial landmarks (.txt)')
    parser.add_argument('--isPose', default=False, type=ast.literal_eval,
                        help='Output estimated pose (.txt)')
    parser.add_argument('--isShow', default=False, type=ast.literal_eval,
                        help='Show results with OpenCV (need OpenCV installed)')
    parser.add_argument('--isImage', default=False, type=ast.literal_eval,
                        help='Save input image to output dir')
    parser.add_argument('--isFront', default=False, type=ast.literal_eval,
                        help='Frontalize 3D vertices (remove pose bias)')
    parser.add_argument('--isDepth', default=False, type=ast.literal_eval,
                        help='Output depth image (.jpg) and depth data (.mat)')
    parser.add_argument('--isTexture', default=False, type=ast.literal_eval,
                        help='Save 3D face with texture map in .obj')
    parser.add_argument('--isMask', default=False, type=ast.literal_eval,
                        help='Mask invisible pixels (self-occlusion) in texture')
    parser.add_argument('--texture_size', default=256, type=int,
                        help='Size of texture map (only if isTexture=True)')

    main(parser.parse_args())
然后在demo.py同文件夹下的终端运行:
python demo.py -i TestImages -o TestImages/results重构的图片如下:
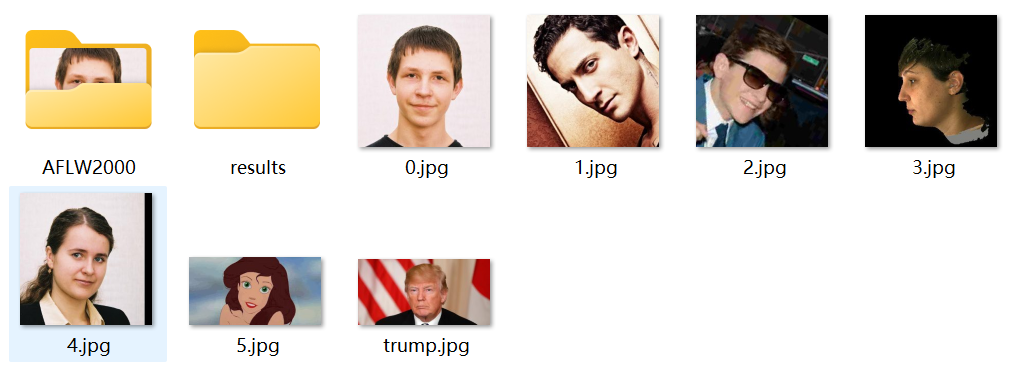
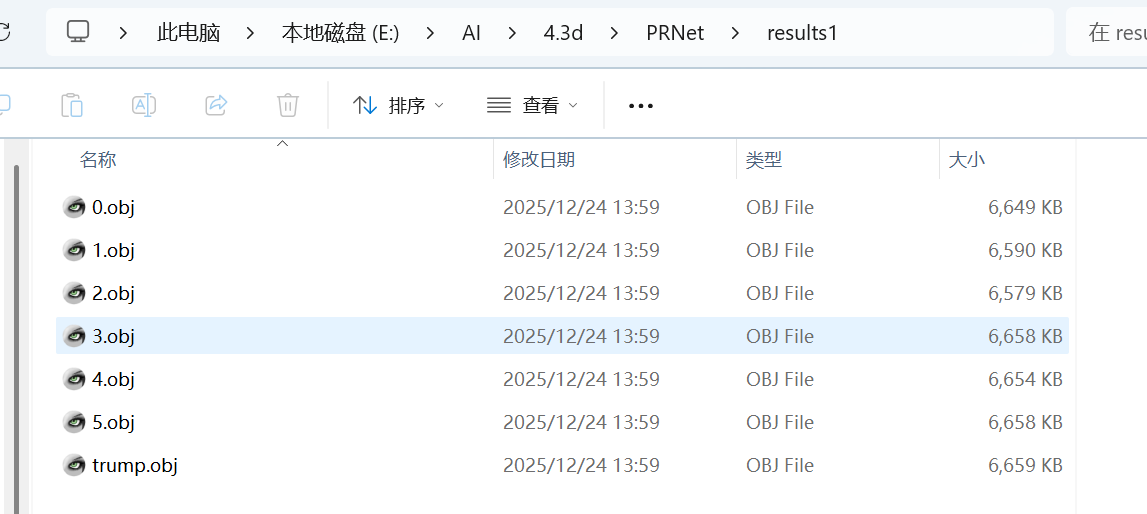
重构的每张图片的结果如下:
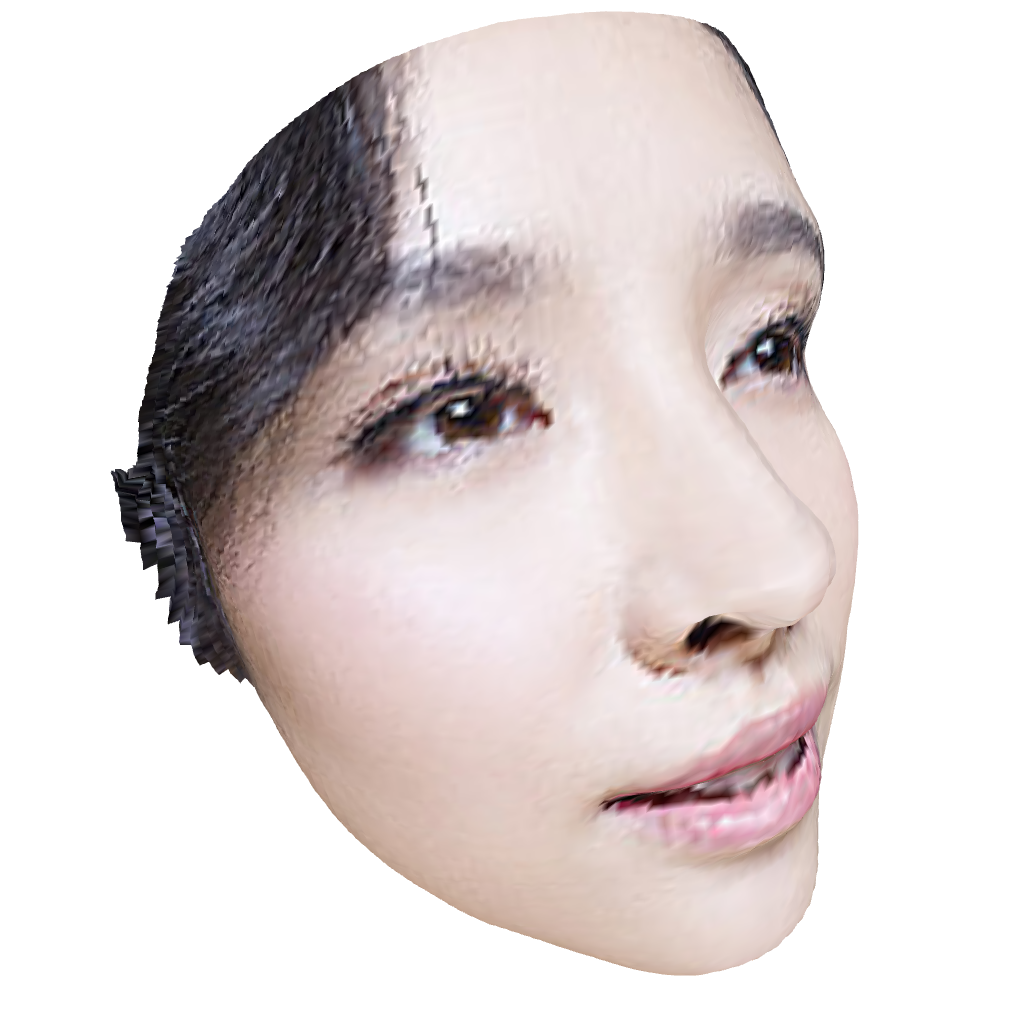
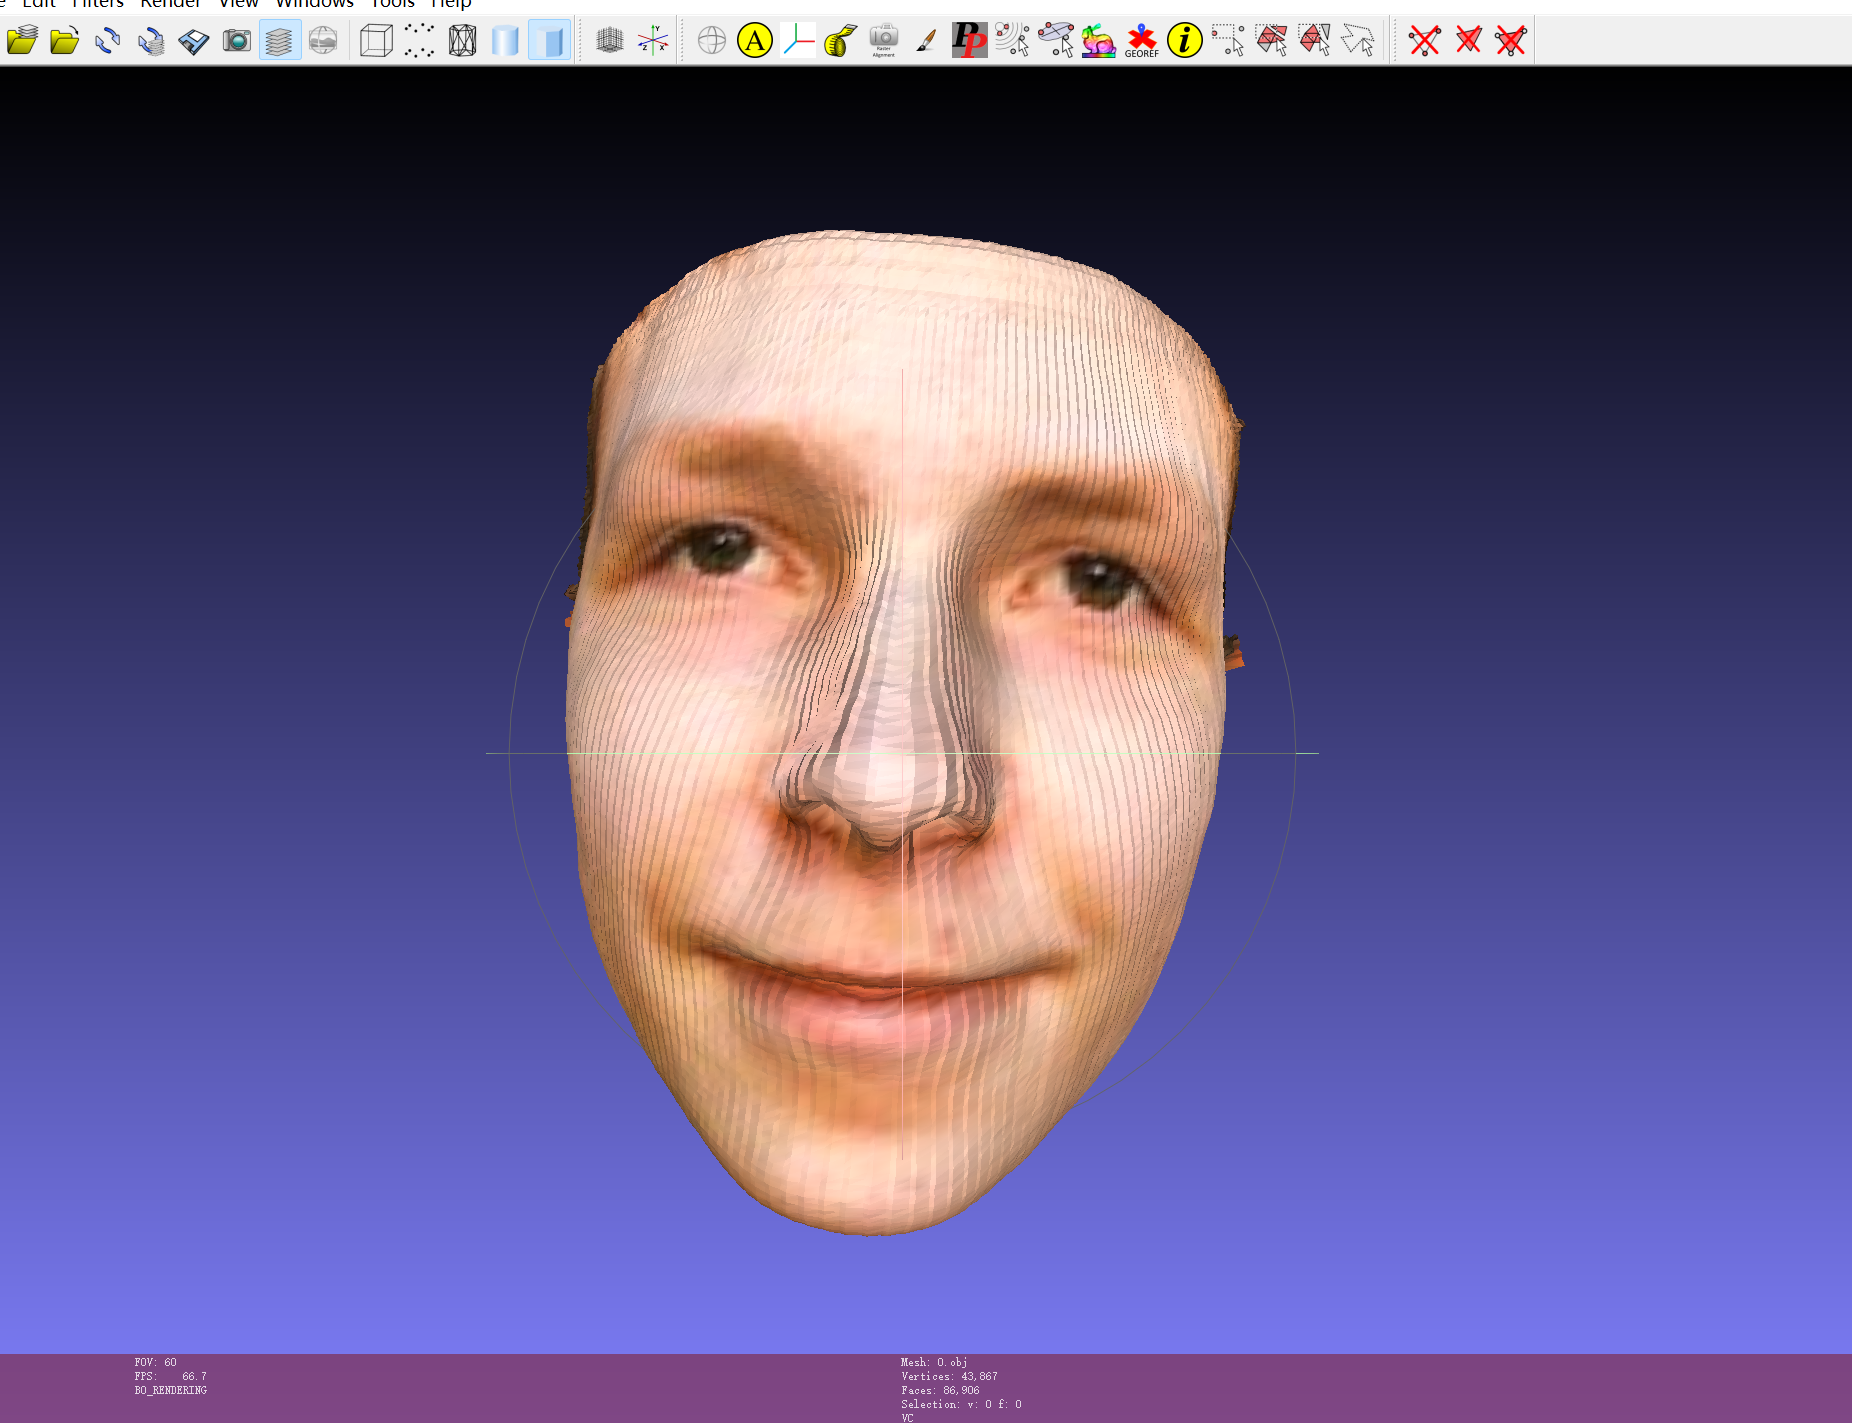
用MeshLab打开每个文件即可得到每张图片的三维图,如第一张图片打开如下:
3.人脸三维重构的融合
由于该算法是对单张图片的重构,那么如果是侧脸和正脸分别重构后,需要融合在一起呢,下面是融合代码:
import open3d as o3d
import numpy as np
import os
from scipy.spatial import procrustes


# -------------------------- 1. 加载PRNet 3D关键点 --------------------------
def load_prnet_3d_kpt(kpt_path):
    try:
        kpt_3d = np.loadtxt(kpt_path, dtype=np.float32)
        return kpt_3d if kpt_3d.shape == (68, 3) else np.zeros((68, 3))
    except:
        return np.zeros((68, 3))


# -------------------------- 2. 强制刚性对齐(确保五官重合) --------------------------
def force_rigid_align(meshes, kpt_paths):
    if len(meshes) != len(kpt_paths):
        raise ValueError("模型与关键点数量不匹配")

    # 取第一个模型为基准
    target_mesh = meshes[0]
    target_kpt = load_prnet_3d_kpt(kpt_paths[0])
    if np.all(target_kpt == 0):
        target_kpt = np.mean(np.asarray(target_mesh.vertices), axis=0, keepdims=True)  # 用中心替代

    aligned_meshes = [target_mesh]
    for mesh, kpt_path in zip(meshes[1:], kpt_paths[1:]):
        source_kpt = load_prnet_3d_kpt(kpt_path)
        if np.all(source_kpt == 0):
            source_kpt = np.mean(np.asarray(mesh.vertices), axis=0, keepdims=True)

        # 计算刚性变换(强制对齐关键点)
        source_center = np.mean(source_kpt, axis=0)
        target_center = np.mean(target_kpt, axis=0)
        source_kpt_centered = source_kpt - source_center
        target_kpt_centered = target_kpt - target_center

        H = source_kpt_centered.T @ target_kpt_centered
        U, S, Vt = np.linalg.svd(H)
        R = Vt.T @ U.T
        if np.linalg.det(R) < 0:
            Vt[-1, :] *= -1
            R = Vt.T @ U.T
        s = np.trace(np.diag(S) @ Vt.T @ U.T) / np.trace(source_kpt_centered.T @ source_kpt_centered)

        # 构建变换矩阵(强制对齐)
        trans = np.eye(4)
        trans[:3, :3] = s * R
        trans[:3, 3] = target_center - s * R @ source_center
        aligned_meshes.append(mesh.transform(trans))

    return aligned_meshes


# -------------------------- 3. 人脸区域过滤(仅保留面部点云) --------------------------
def filter_face_region(pcd):
    # 基于PRNet人脸区域的坐标范围(手动适配,可根据你的模型调整)
    # 假设人脸中心在原点,x/y/z范围限制在[-0.05, 0.05]内
    vertices = np.asarray(pcd.points)
    mask = (np.abs(vertices[:, 0]) < 0.05) & (np.abs(vertices[:, 1]) < 0.05) & (np.abs(vertices[:, 2]) < 0.05)
    filtered_pcd = o3d.geometry.PointCloud()
    filtered_pcd.points = o3d.utility.Vector3dVector(vertices[mask])
    if pcd.has_colors():
        filtered_pcd.colors = o3d.utility.Vector3dVector(np.asarray(pcd.colors)[mask])
    return filtered_pcd


# -------------------------- 4. 简化融合(点云拼接+全局平滑) --------------------------
def simple_face_fusion(aligned_meshes):
    # 1. 合并点云(保留所有顶点,仅轻量去重)
    combined_pcd = o3d.geometry.PointCloud()
    for mesh in aligned_meshes:
        pcd = o3d.geometry.PointCloud(points=mesh.vertices)
        if mesh.has_vertex_colors():
            pcd.colors = mesh.vertex_colors
        combined_pcd += pcd
    print(f"合并后点云数:{len(combined_pcd.points)}")

    # 2. 轻量去重(保留细节)
    combined_pcd = combined_pcd.voxel_down_sample(voxel_size=0.0005)  # 缩小体素尺寸
    # 取消全局平滑(保留细节)

    # 3. 复用原模型的顶点+面片(避免索引冲突)
    # 取第一个模型的面片,同时保留其顶点(保证索引匹配)
    base_mesh = aligned_meshes[0]
    final_mesh = o3d.geometry.TriangleMesh()
    final_mesh.vertices = base_mesh.vertices
    final_mesh.triangles = base_mesh.triangles
    final_mesh.vertex_colors = base_mesh.vertex_colors

    # 4. 融合其他模型的顶点(仅替换重合区域,保留基础面片)
    kdtree = o3d.geometry.KDTreeFlann(final_mesh)
    base_vertices = np.asarray(final_mesh.vertices)
    for mesh in aligned_meshes[1:]:
        other_vertices = np.asarray(mesh.vertices)
        other_colors = np.asarray(mesh.vertex_colors) if mesh.has_vertex_colors() else None
        # 逐顶点匹配,替换重合区域(保留细节)
        for i in range(len(other_vertices)):
            [_, idx, _] = kdtree.search_radius_vector_3d(other_vertices[i], 0.001)
            if len(idx) > 0:
                base_vertices[idx[0]] = (base_vertices[idx[0]] + other_vertices[i]) / 2  # 平均融合
                if other_colors is not None:
                    final_mesh.vertex_colors[idx[0]] = (final_mesh.vertex_colors[idx[0]] + other_colors[i]) / 2

    final_mesh.vertices = o3d.utility.Vector3dVector(base_vertices)
    return final_mesh


# -------------------------- 5. 辅助函数 --------------------------
def load_meshes(mesh_paths):
    meshes = []
    for path in mesh_paths:
        try:
            mesh = o3d.io.read_triangle_mesh(path)
            if len(mesh.vertices) > 0:
                meshes.append(mesh)
        except:
            pass
    return meshes


# -------------------------- 6. 主流程 --------------------------
if __name__ == "__main__":
    mesh_paths = [
        "E:/AI/4.3d/PRNet/results/1.obj",
        "E:/AI/4.3d/PRNet/results/2.obj",
        "E:/AI/4.3d/PRNet/results/3.obj"
    ]
    kpt_paths = [
        "E:/AI/4.3d/PRNet/results/1_kpt.txt",
        "E:/AI/4.3d/PRNet/results/2_kpt.txt",
        "E:/AI/4.3d/PRNet/results/3_kpt.txt"
    ]
    output_path = "E:/AI/4.3d/PRNet/results/fused_face_final.obj"

    # 加载模型
    meshes = load_meshes(mesh_paths)
    if len(meshes) < 2:
        raise ValueError("至少需要2个模型")

    # 强制刚性对齐
    aligned_meshes = force_rigid_align(meshes, kpt_paths)

    # 简化融合
    fused_mesh = simple_face_fusion(aligned_meshes)

    # 保存+可视化
    o3d.io.write_triangle_mesh(output_path, fused_mesh)
    o3d.visualization.draw_geometries([fused_mesh])
两张图片融合后的结果如下: