文章目录
-
-
-
- 前言
- 导入WSL镜像
- WSL编译环境配置
- 导出备份
- WSL系统设置
- [WSL 网络问题](#WSL 网络问题)
- Android13源码下载
- 解码和编译
- 编译完成
- [wsL 中直接运行](#wsL 中直接运行)
- [AVD环境配置 快速启动虚拟机](#AVD环境配置 快速启动虚拟机)
- 镜像生成目录
- 复制到windows目录
- 对比官方镜像目录
- MyAosp13.ini
- config.ini
- Windows启动模拟器
- 效果图
- 其他
-
-
前言
本文耗时一个月,前期遇到阻塞问题暂停了,现在有空尝试成功,共两大发现
- wsl可以直接运行模拟器,
- wsl编译产物在windows直接运行成功,Windows+WSL的开发模式,这将大大降低FW开发者的时间成本。
- 学习从来不是一蹴而就,时间不会辜负每一个始终求索的人。
导入WSL镜像
bash
C:\Users\HiMaq>wsl --import Ubuntu-22.04 D:\Ubuntu-22.04 D:\ubuntu-22.04.tar --version 2WSL编译环境配置
bash
#!/bin/bash
set -e

echo ">>> 更新系统..."
sudo apt update -y
sudo apt upgrade -y

echo ">>> 安装常用编译依赖..."
sudo apt install -y git-core gnupg flex bison gperf build-essential zip curl zlib1g-dev \
gcc-multilib g++-multilib libc6-dev-i386 lib32ncurses5-dev x11proto-core-dev libx11-dev \
lib32z1-dev ccache libgl1-mesa-dev libxml2-utils xsltproc unzip fontconfig python-is-python3 \
libncurses5 libncurses5-dev bc rsync lzop schedtool libssl-dev clang cmake ninja-build

echo ">>> 安装 OpenJDK 11(Android 13 推荐)..."
sudo apt install -y openjdk-11-jdk
sudo update-alternatives --config java

echo ">>> 配置 Java 环境变量..."
JAVA_HOME=$(dirname $(dirname $(readlink -f $(which javac))))
echo "export JAVA_HOME=${JAVA_HOME}" | sudo tee /etc/profile.d/java_home.sh
echo "export PATH=\$JAVA_HOME/bin:\$PATH" | sudo tee -a /etc/profile.d/java_home.sh
source /etc/profile.d/java_home.sh

echo ">>> 检查 ncurses5 兼容性库..."
sudo ln -sf /lib/x86_64-linux-gnu/libncurses.so.6 /lib/x86_64-linux-gnu/libncurses.so.5 || true
sudo ln -sf /lib/x86_64-linux-gnu/libtinfo.so.6 /lib/x86_64-linux-gnu/libtinfo.so.5 || true

echo ">>> 配置 git 和 ccache..."
git config --global user.name "Qm"
git config --global user.email "383930056@qq.com"
export USE_CCACHE=1

echo ">>> 全部完成 ✅"
java -version
导出备份
环境搭建后记得导出
bash
C:\Users\HiMaq>wsl -l -v
  NAME                 STATE           VERSION
* Ubuntu-22.04         Running         2
  Ubuntu-22.04-Core    Stopped         2

C:\Users\HiMaq>环境搭建后记得

C:\Users\HiMaq>wsl --export Ubuntu-22.04 Ubuntu-22.04.tar
WSL系统设置
bash
# Settings apply across all Linux distros running on WSL 2
[wsl2]

# Limits VM memory to use no more than 4 GB, this can be set as whole numbers using GB or MB
memory=24GB

# Sets the VM to use two virtual processors
processors=12

swap=8GB
swapFile=D:\\Ubuntu-22.04\\wsl-swap.vhdx

[experimental]
autoMemoryReclaim=gradual
networkingMode=mirrored
dnsTunneling=true
firewall=true
autoProxy=true
hostAddressLoopback=true
WSL 网络问题
bash
https://blog.csdn.net/qq_41765795/article/details/145034745
# 检测方法
curl https://www.google.com
curl https://github.com
Android13源码下载
推荐百度网盘下载 为什么推荐呢,因为最近清华和中科 大都禁用repo ,所以国内下载推荐百度网盘,性价比相对vnp高不少。如果你流量多那当我没说,下载连接下面。
源码版本为:android-13.0.0_r44下载完成后可用于编译 android 系统镜像 压缩包采用7z打包压缩,由于文件过大,为了方便上传百度网盘,采用了分包 解压缩命令:
7z x android13-r44.7z.001 -o.. -snl -y如果没有7z命令需要自行安装, ubuntu 安装 7z 命令:sudo apt-get install p7zip-full源码解压后大小大概75G,注意预留磁盘空间 解压过程中出现提示:
bash
Would you like to replace the existing file:
  Path:     ./android13-r44/build/blueprint/pathtools/testdata/escapes/.
  Size:     0 bytes
  Modified: 2024-01-04 18:41:19
with the file from archive:
  Path:     android13-r44/build/blueprint/pathtools/testdata/escapes/*
  Size:     0 bytes
  Modified: 2024-01-04 13:10:06
? (Y)es / (N)o / (A)lways / (S)kip all / A(u)to rename all / (Q)uit?
输入 A 回车即可
解码和编译
cp 到WSL中,7z 解压非常快
bash
cp -r /mnt/d/android13 ./
7z x android13-r44.7z.001 -o../

<!-- 解压不全问题 -->
export SOONG_DO_NOT_RUN_GOTESTS=true
echo $SOONG_DO_NOT_RUN_GOTESTS
cd ../android13-r44/build/blueprint/pathtools/testdata/escapes
touch '*'
touch '?'
mkdir '**'
touch '**/*'

# 修改配置
diff --git a/device/generic/x86_64/BoardConfig.mk b/device/generic/x86_64/BoardConfig.mk
index 67cfc67..c29dca0 100644
--- a/device/generic/x86_64/BoardConfig.mk
+++ b/device/generic/x86_64/BoardConfig.mk
@@ -35,4 +35,7 @@ BOARD_USERDATAIMAGE_PARTITION_SIZE := 576716800
 BOARD_CACHEIMAGE_PARTITION_SIZE := 69206016
 BOARD_CACHEIMAGE_FILE_SYSTEM_TYPE := ext4
 BOARD_FLASH_BLOCK_SIZE := 512
-TARGET_USERIMAGES_SPARSE_EXT_DISABLED := true
\ No newline at end of file
+TARGET_USERIMAGES_SPARSE_EXT_DISABLED := true
+# 也可以直接编辑该文件,确保以下配置存在
+BOARD_USES_DYNAMIC_PARTITIONS := false
+BOARD_BUILD_SYSTEM_ROOT_IMAGE := true

# 编译avd镜像
source build/envsetup.sh
lunch sdk_phone_x86_64-userdebug
m dist -j12
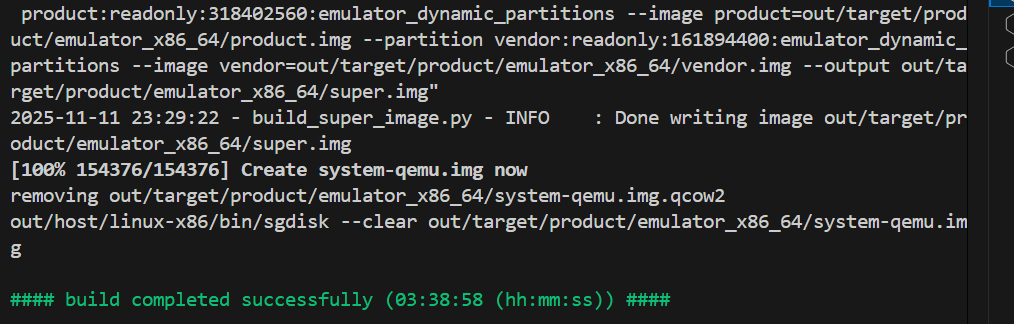
编译完成
wsL 中直接运行
bash
root@QiMa:/home/maqi/android13-r44# emulator   -gpu swiftshader_indirect
INFO    | Android emulator version 31.3.9.0 (build_id 8748233) (CL:N/A)
INFO    | Storing crashdata in: /tmp/android-root/emu-crash.db, detection is enabled
INFO    | Duplicate loglines will be removed, if you wish to see each indiviudal line launch with the -log-nofilter flag.
WARNING | cannot add library /home/maqi/android13-r44/prebuilts/android-emulator/linux-x86_64/qemu/linux-x86_64/lib64/vulkan/libvulkan.so: failed
INFO    | added library /home/maqi/android13-r44/prebuilts/android-emulator/linux-x86_64/lib64/vulkan/libvulkan.so
WARNING | No adb private key exists
WARNING | *** No gRPC protection active, consider launching with the -grpc-use-jwt flag.***
INFO    | Started GRPC server at 127.0.0.1:8554, security: Local, auth: none
INFO    | Advertising in: /run/user/0/avd/running/pid_1380036.ini
INFO    | Setting display: 0 configuration to: 1440x2960, dpi: 560x560
INFO    | Boot completed in 21763 ms
INFO    | Increasing screen off timeout, logcat buffer size to 2M.
INFO    | Revoking microphone permissions for Google App.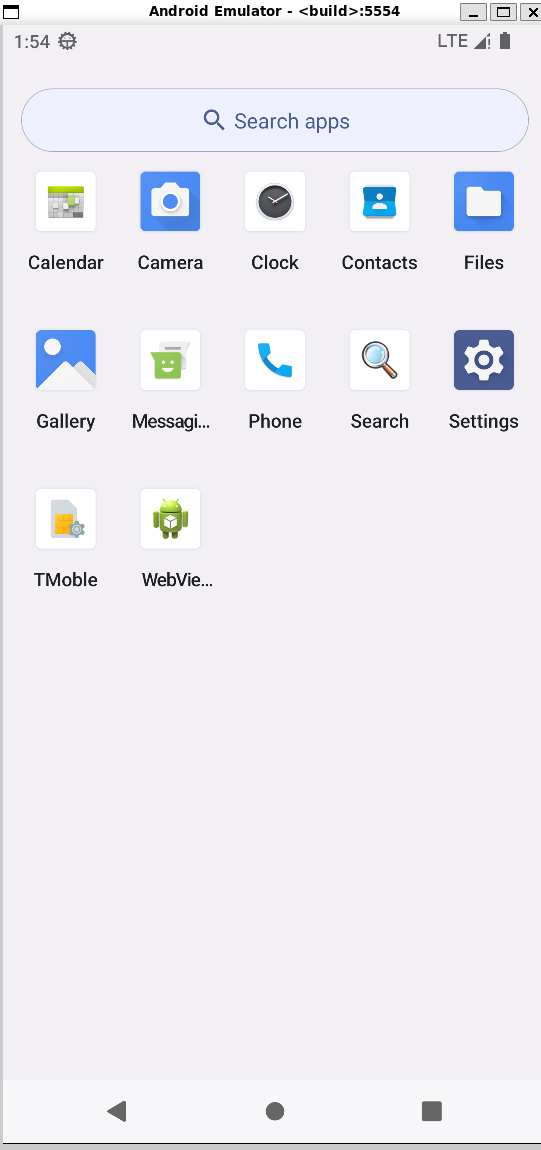
AVD环境配置 快速启动虚拟机
Windows环境变量设置

bash
# java临时设置,sdkmananger报错
set JAVA_HOME=D:\Program Files\Android\Android Studio\jbr
java --version
openjdk 17.0.9 2023-10-17
OpenJDK Runtime Environment (build 17.0.9+0--11185874)
OpenJDK 64-Bit Server VM (build 17.0.9+0--11185874, mixed mode)
# 无法下载请配置全局代理
set JAVA_HOME=D:\Program Files\Android\Android Studio\jbr
# 下载X86镜像
sdkmanager "system-images;android-33;aosp_atd;x86_64"
# 创建虚拟机
avdmanager create avd -n QmX86Api33 -k "system-images;android-33;default;x86_64" --device "pixel_6" --abi x86_64 --sdcard 2048M --force
# 运行虚拟机
emulator -avd QmX86Api33 -no-snapshot -gpu swiftshader_indirect
# 列举虚拟机
emulator -list-avds
Available Android Virtual Devices:
Name: QmArm64Api33
Name: QmX86Api33
# 删除虚拟机
avdmanager delete avd -n QmArm64Api33
# 生成镜像目录
D:\Android\Sdk\system-images\android-33
# adv虚拟机目录
C:\Users\HiMaq\.android\avd
# 镜像目录
cp /home/maqi/android13-r44/out/target/product/emulator_x86_64/emulator/x86_64 \
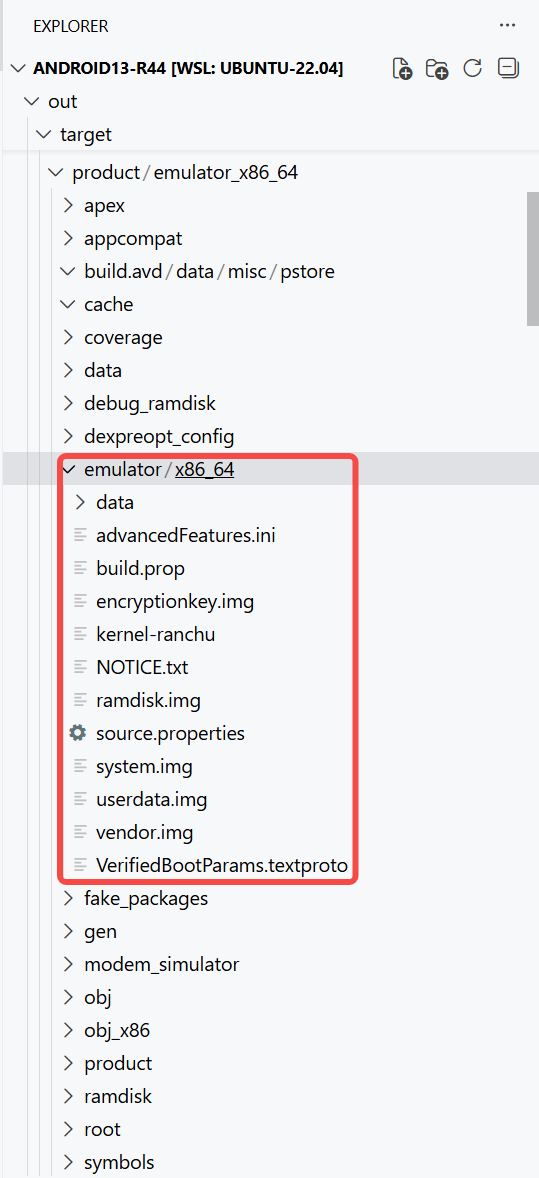
/mnt/d/Android/Sdk/system-images/android-33/my_aosp_img/镜像生成目录
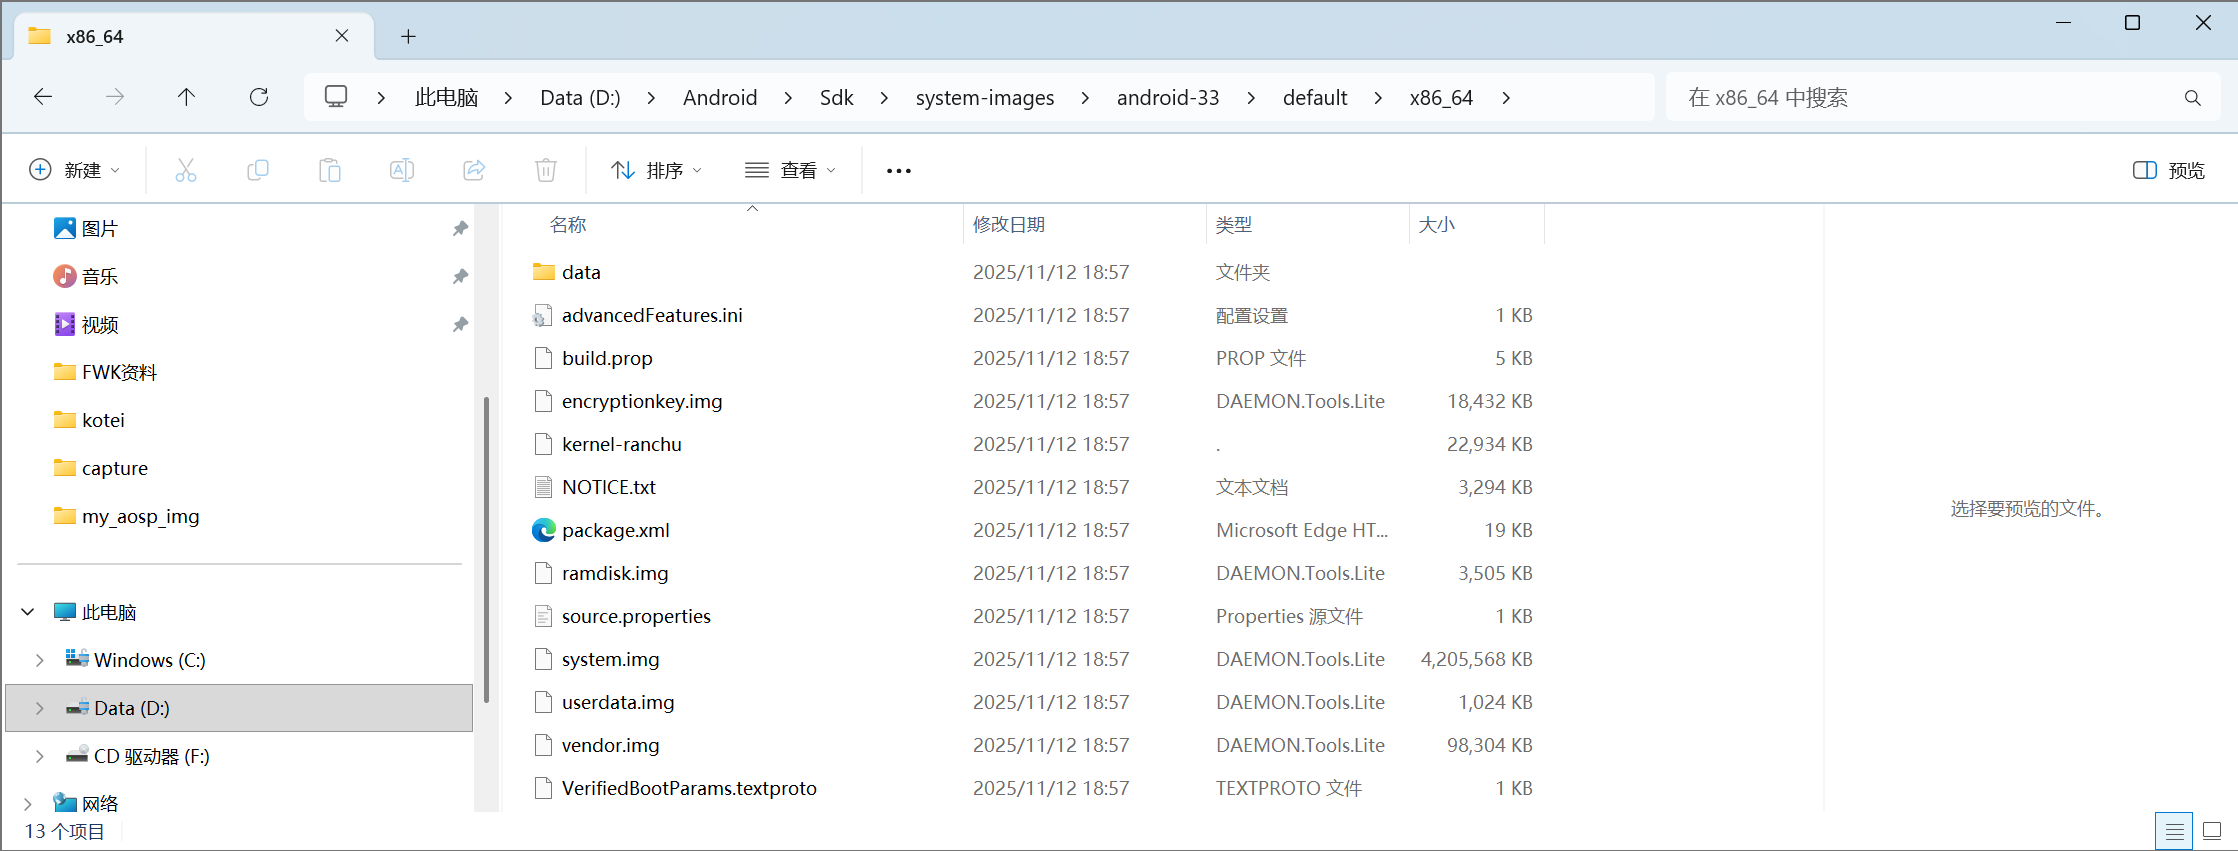
复制到windows目录

对比官方镜像目录
不能说像,只能说是一摸一样 **,所以AI上的回答也不是万能的,大道至简,有时候实现的方式很简单,只是方法不对。
只需要新建下面两个文件 且只需要关注 path ** 和image.sysdir.1,其他均CV即可
MyAosp13.ini
bash
avd.ini.encoding=UTF-8
path=C:\Users\HiMaq\.android\avd\MyAosp13.avd
config.ini
bash
AvdId=MyAosp13
PlayStore.enabled=no
abi.type=x86_64
avd.id=<build>
avd.ini.encoding=UTF-8
avd.name=<build>
disk.cachePartition=yes
disk.cachePartition.size=66MB
disk.dataPartition.path=<temp>
disk.dataPartition.size=6442450944
disk.systemPartition.size=0
disk.vendorPartition.size=0
fastboot.forceChosenSnapshotBoot=no
fastboot.forceColdBoot=no
fastboot.forceFastBoot=yes
firstboot.bootFromDownloadableSnapshot=yes
firstboot.bootFromLocalSnapshot=yes
firstboot.saveToLocalSnapshot=yes
hw.accelerometer=yes
hw.accelerometer_uncalibrated=yes
hw.arc=no
hw.arc.autologin=no
hw.audioInput=yes
hw.audioOutput=yes
hw.battery=yes
hw.camera.back=emulated
hw.camera.front=none
hw.cpu.arch=x86_64
hw.cpu.ncore=4
hw.dPad=no
hw.device.hash2=MD5:3db3250dab5d0d93b29353040181c7e9
hw.device.manufacturer=Google
hw.device.name=pixel_6
hw.display1.density=0
hw.display1.flag=0
hw.display1.height=0
hw.display1.width=0
hw.display1.xOffset=-1
hw.display1.yOffset=-1
hw.display2.density=0
hw.display2.flag=0
hw.display2.height=0
hw.display2.width=0
hw.display2.xOffset=-1
hw.display2.yOffset=-1
hw.display3.density=0
hw.display3.flag=0
hw.display3.height=0
hw.display3.width=0
hw.display3.xOffset=-1
hw.display3.yOffset=-1
hw.displayRegion.0.1.height=0
hw.displayRegion.0.1.width=0
hw.displayRegion.0.1.xOffset=-1
hw.displayRegion.0.1.yOffset=-1
hw.displayRegion.0.2.height=0
hw.displayRegion.0.2.width=0
hw.displayRegion.0.2.xOffset=-1
hw.displayRegion.0.2.yOffset=-1
hw.displayRegion.0.3.height=0
hw.displayRegion.0.3.width=0
hw.displayRegion.0.3.xOffset=-1
hw.displayRegion.0.3.yOffset=-1
hw.gltransport=pipe
hw.gltransport.asg.dataRingSize=32768
hw.gltransport.asg.writeBufferSize=1048576
hw.gltransport.asg.writeStepSize=4096
hw.gltransport.drawFlushInterval=800
hw.gps=yes
hw.gpu.enabled=no
hw.gpu.mode=auto
hw.gsmModem=yes
hw.gyroscope=yes
hw.hotplug_multi_display=no
hw.initialOrientation=portrait
hw.keyboard=no
hw.keyboard.charmap=qwerty2
hw.keyboard.lid=yes
hw.lcd.backlight=yes
hw.lcd.circular=false
hw.lcd.density=420
hw.lcd.depth=16
hw.lcd.height=2400
hw.lcd.vsync=60
hw.lcd.width=1080
hw.mainKeys=no
hw.multi_display_window=no
hw.ramSize=2G
hw.rotaryInput=no
hw.screen=multi-touch
hw.sdCard=yes
hw.sensor.hinge=no
hw.sensor.hinge.count=0
hw.sensor.hinge.fold_to_displayRegion.0.1_at_posture=1
hw.sensor.hinge.resizable.config=1
hw.sensor.hinge.sub_type=0
hw.sensor.hinge.type=0
hw.sensor.roll=no
hw.sensor.roll.count=0
hw.sensor.roll.resize_to_displayRegion.0.1_at_posture=6
hw.sensor.roll.resize_to_displayRegion.0.2_at_posture=6
hw.sensor.roll.resize_to_displayRegion.0.3_at_posture=6
hw.sensors.gyroscope_uncalibrated=yes
hw.sensors.heart_rate=no
hw.sensors.humidity=yes
hw.sensors.light=yes
hw.sensors.magnetic_field=yes
hw.sensors.magnetic_field_uncalibrated=yes
hw.sensors.orientation=yes
hw.sensors.pressure=yes
hw.sensors.proximity=yes
hw.sensors.rgbclight=no
hw.sensors.temperature=yes
hw.sensors.wrist_tilt=no
hw.trackBall=no
hw.useext4=yes
image.sysdir.1=system-images\android-33\default\x86_64\
kernel.newDeviceNaming=autodetect
kernel.supportsYaffs2=autodetect
runtime.network.latency=none
runtime.network.speed=full
sdcard.size=2G
showDeviceFrame=yes
tag.display=Default Android System Image
tag.displaynames=Default Android System Image
tag.id=default
tag.ids=default
test.delayAdbTillBootComplete=0
test.monitorAdb=0
test.quitAfterBootTimeOut=-1
userdata.useQcow2=no
vm.heapSize=228M
Windows启动模拟器
bash
# 启动模拟器
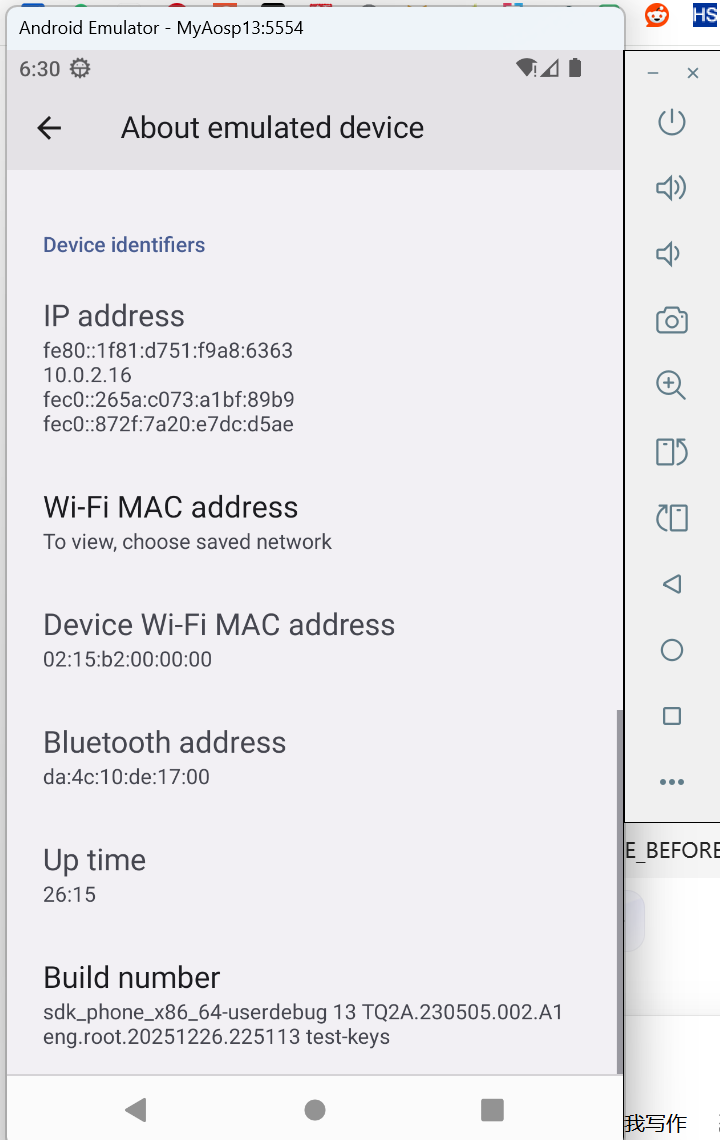
emulator -avd MyAosp13 -gpu swiftshader_indirect -no-snapshot -wipe-data >emulator.log 2>&1 &效果图
其他
内核编译
bash
# 1️⃣ 克隆微软官方 WSL2 内核源码 或者直接下载
git clone https://ghfast.top/https://github.com/microsoft/WSL2-Linux-Kerne
l.git
unzip WSL2-Linux-Kernel-linux-msft-wsl-6.6.84.1.zip

cd WSL2-Linux-Kernel

# 2️⃣ 启用 Android binder/ashmem 支持
# 打开内核配置菜单
make menuconfig

# 微内核配置Android相关参数
CONFIG_ANDROID=y
CONFIG_ANDROID_BINDER_IPC=y
CONFIG_ANDROID_BINDER_DEVICES="binder,hwbinder,vndbinder"
CONFIG_ANDROID_BINDERFS=y
CONFIG_ASHMEM=y

# 检查配置
grep -E "ANDROID|ASHMEM|BINDER" .config

# make环境配置
sudo apt install libelf-dev libelf1 build-essential flex bison dwarves libssl-dev

# 编译
make -j$(nproc)

# 内核编译成功
Kernel: arch/x86/boot/bzImage is ready  (#1)

# 关闭wsl
wsl --shutdowm
# 复制到C盘
cp arch/x86/boot/bzImage /mnt/d/Ubuntu-22.04/

# 修改.wslconfig
[wsl2]
kernel=D:\\Ubuntu-22.04\\bzImage

# 检查内核
ls /dev | grep binder
ls /dev | grep ashmem
VNC尝试
c
sudo apt update && sudo apt upgrade -y
sudo apt install xfce4 xfce4-goodies -y
sudo apt install tigervnc-standalone-server tigervnc-common -y

cat > ~/.vnc/xstartup << EOF
#!/bin/sh
unset SESSION_MANAGER
unset DBUS_SESSION_BUS_ADDRESS
exec startxfce4
EOF

chmod +x ~/.vnc/xstartup

vncserver :1 -localhost no -geometry 1920x1080 -depth 24
vncserver -list
定时清除内存
bash
#!/bin/bash

# 每 10 秒执行一次
while true; do
    # 清理页缓存、目录项和 inode 缓存
    sudo sh -c 'sync; echo 3 > /proc/sys/vm/drop_caches'

    # 打印剩余内存(单位 GB)
    free_gb=$(free -g | awk '/Mem:/ {print $4}')
    echo "$(date '+%F %T')  剩余内存: ${free_gb}G"

    sleep 10
done
https://pan.baidu.com/s/1Umlc39zKUTcQ9Lvk5MW-2g?pwd=k1ee
--来自百度网盘超级会员v1的分享