低代码平台项目实战(下)
- [10. 搭建编辑器](#10. 搭建编辑器)
-
- [10.1 绘制编辑器基本结构](#10.1 绘制编辑器基本结构)
- [10.2 完成题型和大纲切换](#10.2 完成题型和大纲切换)
- [10.3 完成题型面板绘制](#10.3 完成题型面板绘制)
- [11. 往画布添加组件](#11. 往画布添加组件)
-
- [11.1 创建编辑器数据仓库](#11.1 创建编辑器数据仓库)
- [11.2 画布中添加组件](#11.2 画布中添加组件)
- [11.3 使用事件总线实现丝滑滚动](#11.3 使用事件总线实现丝滑滚动)
- [12. 编辑画布组件](#12. 编辑画布组件)
-
- [12.1 选中画布组件,展示编辑面板](#12.1 选中画布组件,展示编辑面板)
- [12.2 完成编辑功能](#12.2 完成编辑功能)
- [12.3 解决警告](#12.3 解决警告)
- [13. vuedraggable 拖拽组件库](#13. vuedraggable 拖拽组件库)
-
- [13.1 vuedraggable 简介](#13.1 vuedraggable 简介)
- [13.2 使用方式](#13.2 使用方式)
- [13.3 使用示例](#13.3 使用示例)
- [14. 拖动组件](#14. 拖动组件)
-
- [14.1 拖动画布中组件](#14.1 拖动画布中组件)
- [14.2 绘制大纲组件,并实现拖拽](#14.2 绘制大纲组件,并实现拖拽)
- [14.3 解决计算序号问题](#14.3 解决计算序号问题)
- [14.4 点击提纲,画布对应组件滚动居中](#14.4 点击提纲,画布对应组件滚动居中)
- [14.5 添加删除功能](#14.5 添加删除功能)
- [14.6 修复警告](#14.6 修复警告)
- [15. 存储问卷](#15. 存储问卷)
-
- [15.1 dexie 简介(IndexedDB API 的轻量级 JS 库)](#15.1 dexie 简介(IndexedDB API 的轻量级 JS 库))
- [15.2 使用 dexie 定义和操作 IndexedDB](#15.2 使用 dexie 定义和操作 IndexedDB)
- [15.3 重置问卷](#15.3 重置问卷)
- [15.4 保存问卷](#15.4 保存问卷)
- [15.5 显示问卷列表](#15.5 显示问卷列表)
- [16. 预览问卷](#16. 预览问卷)
-
- [16.1 创建预览问卷页面](#16.1 创建预览问卷页面)
- [16.2 还原问卷数据](#16.2 还原问卷数据)
- [16.3 绘制预览页面](#16.3 绘制预览页面)
- [17. 编辑和删除问卷](#17. 编辑和删除问卷)
-
- [17.1 编辑问卷](#17.1 编辑问卷)
- [17.2 删除问卷](#17.2 删除问卷)
- [18. 生成PDF和在线问卷](#18. 生成PDF和在线问卷)
-
- [18.1 生成PDF](#18.1 生成PDF)
- [18.2 生成在线问卷](#18.2 生成在线问卷)
- [19. 课程收官](#19. 课程收官)
-
- [19.1 代码优化方向](#19.1 代码优化方向)
- [19.2 完整代码项目](#19.2 完整代码项目)
- [19.3 完整的低代码项目涉及技术](#19.3 完整的低代码项目涉及技术)
10. 搭建编辑器
上面我们已经初步完成了组件市场的功能,其他业务组件,同学们根据需要进行创建和完善即可。
接下来,我们就要投入编辑器的搭建工作了。

10.1 绘制编辑器基本结构
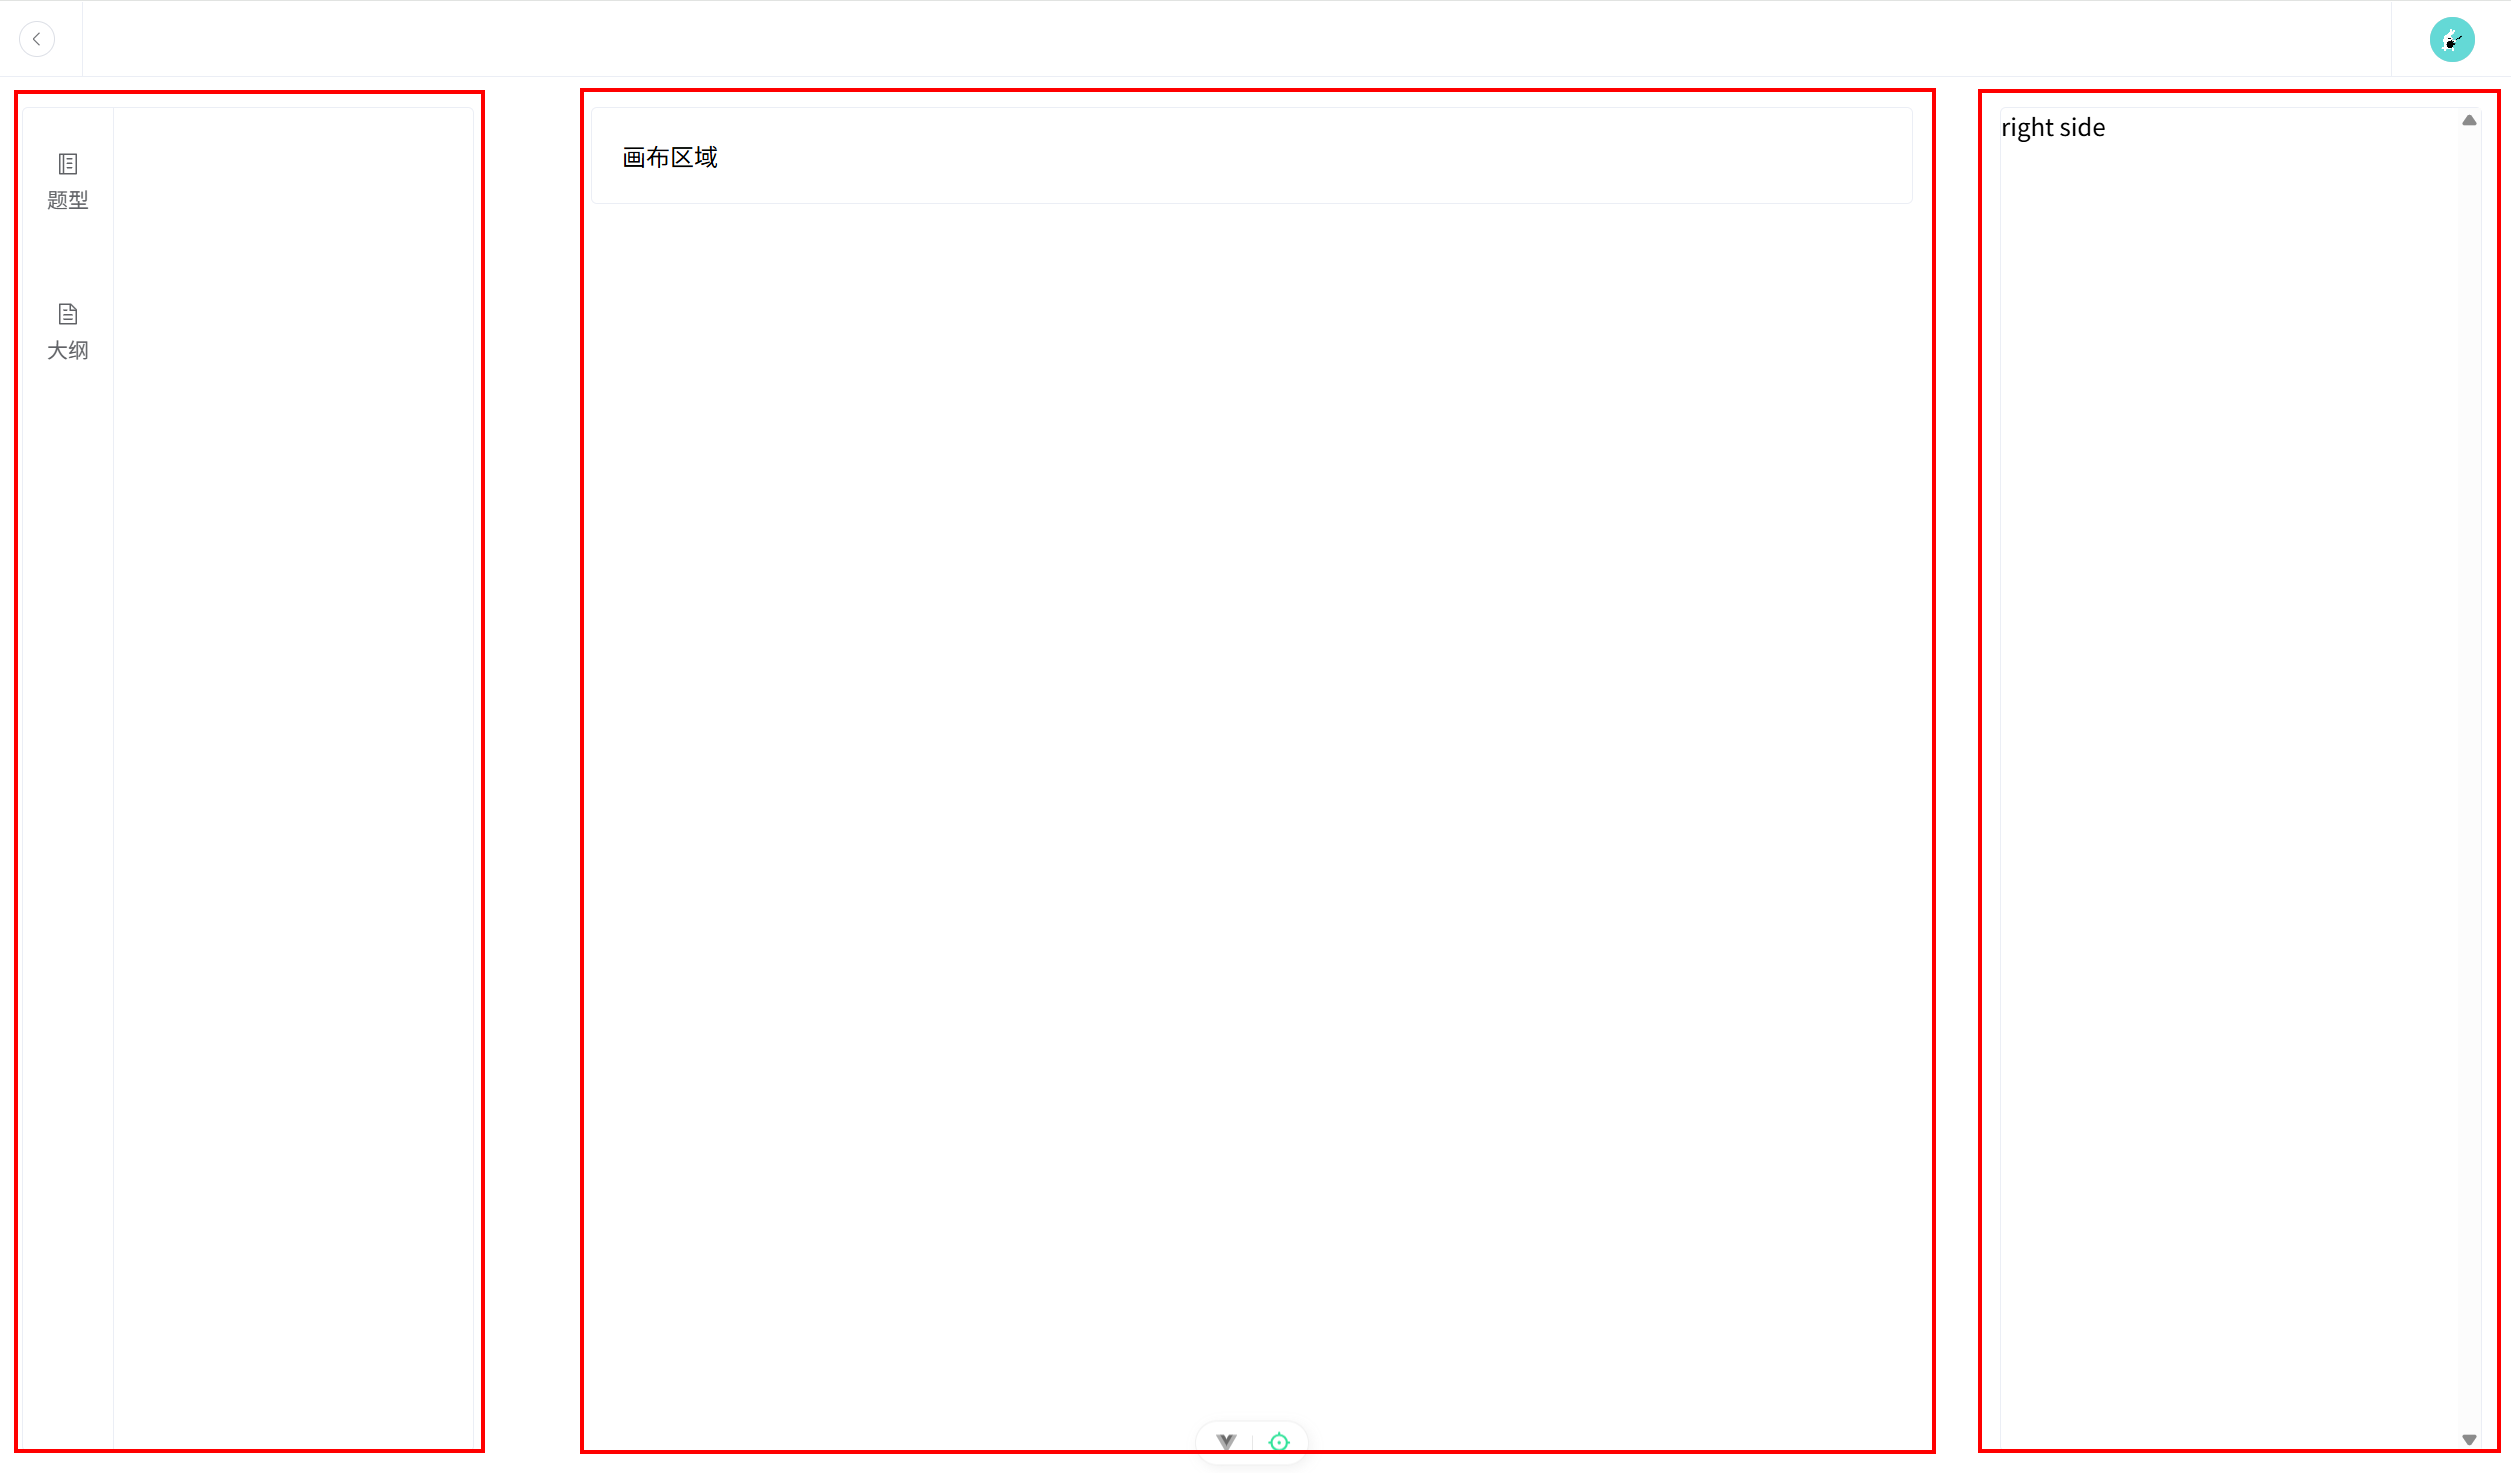
编辑器除了头部外,下面基本分为左中右结构,但是左右两个区域区别于中间画布,需要根据浏览器进行定位,所以需要切分出一个容器。另外左侧相对复杂,需要单独一个文件夹进行处理。
(1)修改 views/EditorView/Index.vue:
javascript
<template>
  <div>
    <div class="header">
      <Header />
    </div>
    <!-- 编辑器主体区域 -->
    <div class="container">
      <LeftSide />
      <RightSide />
    </div>
    <div>
      <Center />
    </div>
  </div>
</template>

<script setup lang="ts">
import Header from '@/components/Common/Header.vue';
import LeftSide from '@/views/EditorView/LeftSide/Index.vue';
import Center from '@/views/EditorView/Center.vue';
import RightSide from '@/views/EditorView/RightSide.vue';
</script>

<style scoped lang="scss">
.header {
  width: 100%;
  background-color: var(--white);
  position: fixed;
  top: 0;
  z-index: 10;
}
.container {
  width: calc(100vw - 40px);
  padding: 20px;
  // Header的高度50px,上下padding 20px
  height: calc(100vh - 50px - 40px);
  background: url('@/assets/imgs/editor_background.png');
  position: fixed;
  top: 50px;
}
</style>
(2)创建左侧组件 views/EditorView/LeftSide/Index.vue:
javascript
<template>
  <div class="left-side-container flex">
    <div class="tabs">
      <!-- 题型 -->
      <div class="tab-item">
        <el-icon>
          <Memo />
        </el-icon>
        <span class="tab-item-title mt-5">题型</span>
      </div>
      <!-- 大纲 -->
      <div class="tab-item">
        <el-icon>
          <Document />
        </el-icon>
        <span class="tab-item-title mt-5">大纲</span>
      </div>
    </div>
  </div>
</template>

<script setup lang="ts">
import { Document, Memo } from '@element-plus/icons-vue';
</script>

<style scoped lang="scss">
.left-side-container {
  width: 300px;
  height: calc(100vh - 50px - 40px);
  position: fixed;
  left: 20px;
  top: 70px;
  background: var(--white);
  border: 1px solid var(--border-color);
  border-radius: var(--border-radius-md);

  >.tabs {
    width: 20%;
    height: 100%;
    border-right: 1px solid var(--border-color);

    >.tab-item {
      width: 100%;
      height: 100px;
      display: flex;
      align-items: center;
      justify-content: center;
      flex-direction: column;
      color: var(--font-color-light);
      text-decoration: none;
      cursor: pointer;

      >.tab-item-title {
        font-size: var(--font-size-base);
      }
    }

    >.tab-show {
      color: var(--primary-color);
    }
  }

  >.tab-pane {
    width: 80%;
    // 高度需要减去padding部分,否则会溢出
    height: calc(100% - 50px);
    padding: 25px;
    overflow-y: scroll;
  }
}
</style>
(3)创建右侧组件 views/EditorView/RightSide.vue:
javascript
<template>
  <div class="right-side-container">right side</div>
</template>

<script setup lang="ts"></script>

<style scoped lang="scss">
.right-side-container {
  width: 320px;
  height: calc(100vh - 50px - 40px);
  position: fixed;
  right: 20px;
  top: 70px;
  background-color: var(--white);
  border: 1px solid var(--border-color);
  border-radius: var(--border-radius-md);
  overflow-y: scroll;
}
.content {
  height: 100%;
}
</style>
(4)创建中间画布组件 views/EditorView/Center.vue:
javascript
<template>
  <div class="center-container">画布区域</div>
</template>

<script setup lang="ts"></script>

<style scoped>
.center-container {
  width: 50%;
  border: 1px solid var(--border-color);
  border-radius: var(--border-radius-md);
  margin: 70px auto;
  padding: 20px;
  background: var(--white);
  position: relative;
  .content {
    cursor: pointer;
    padding: 10px;
    background-color: var(--white);
    border-radius: var(--border-radius-sm);
    &:hover {
      transform: scale(1.01);
      transition: 0.5s;
      box-shadow: 0 0 10px rgba(0, 0, 0, 0.1);
    }
  }
}
.active {
  transform: scale(1.01);
  transition: 0.5s;
  box-shadow: 0 0 10px rgba(0, 0, 0, 0.1);
}
.delete-btn {
  right: -5px;
  top: -10px;
}
</style>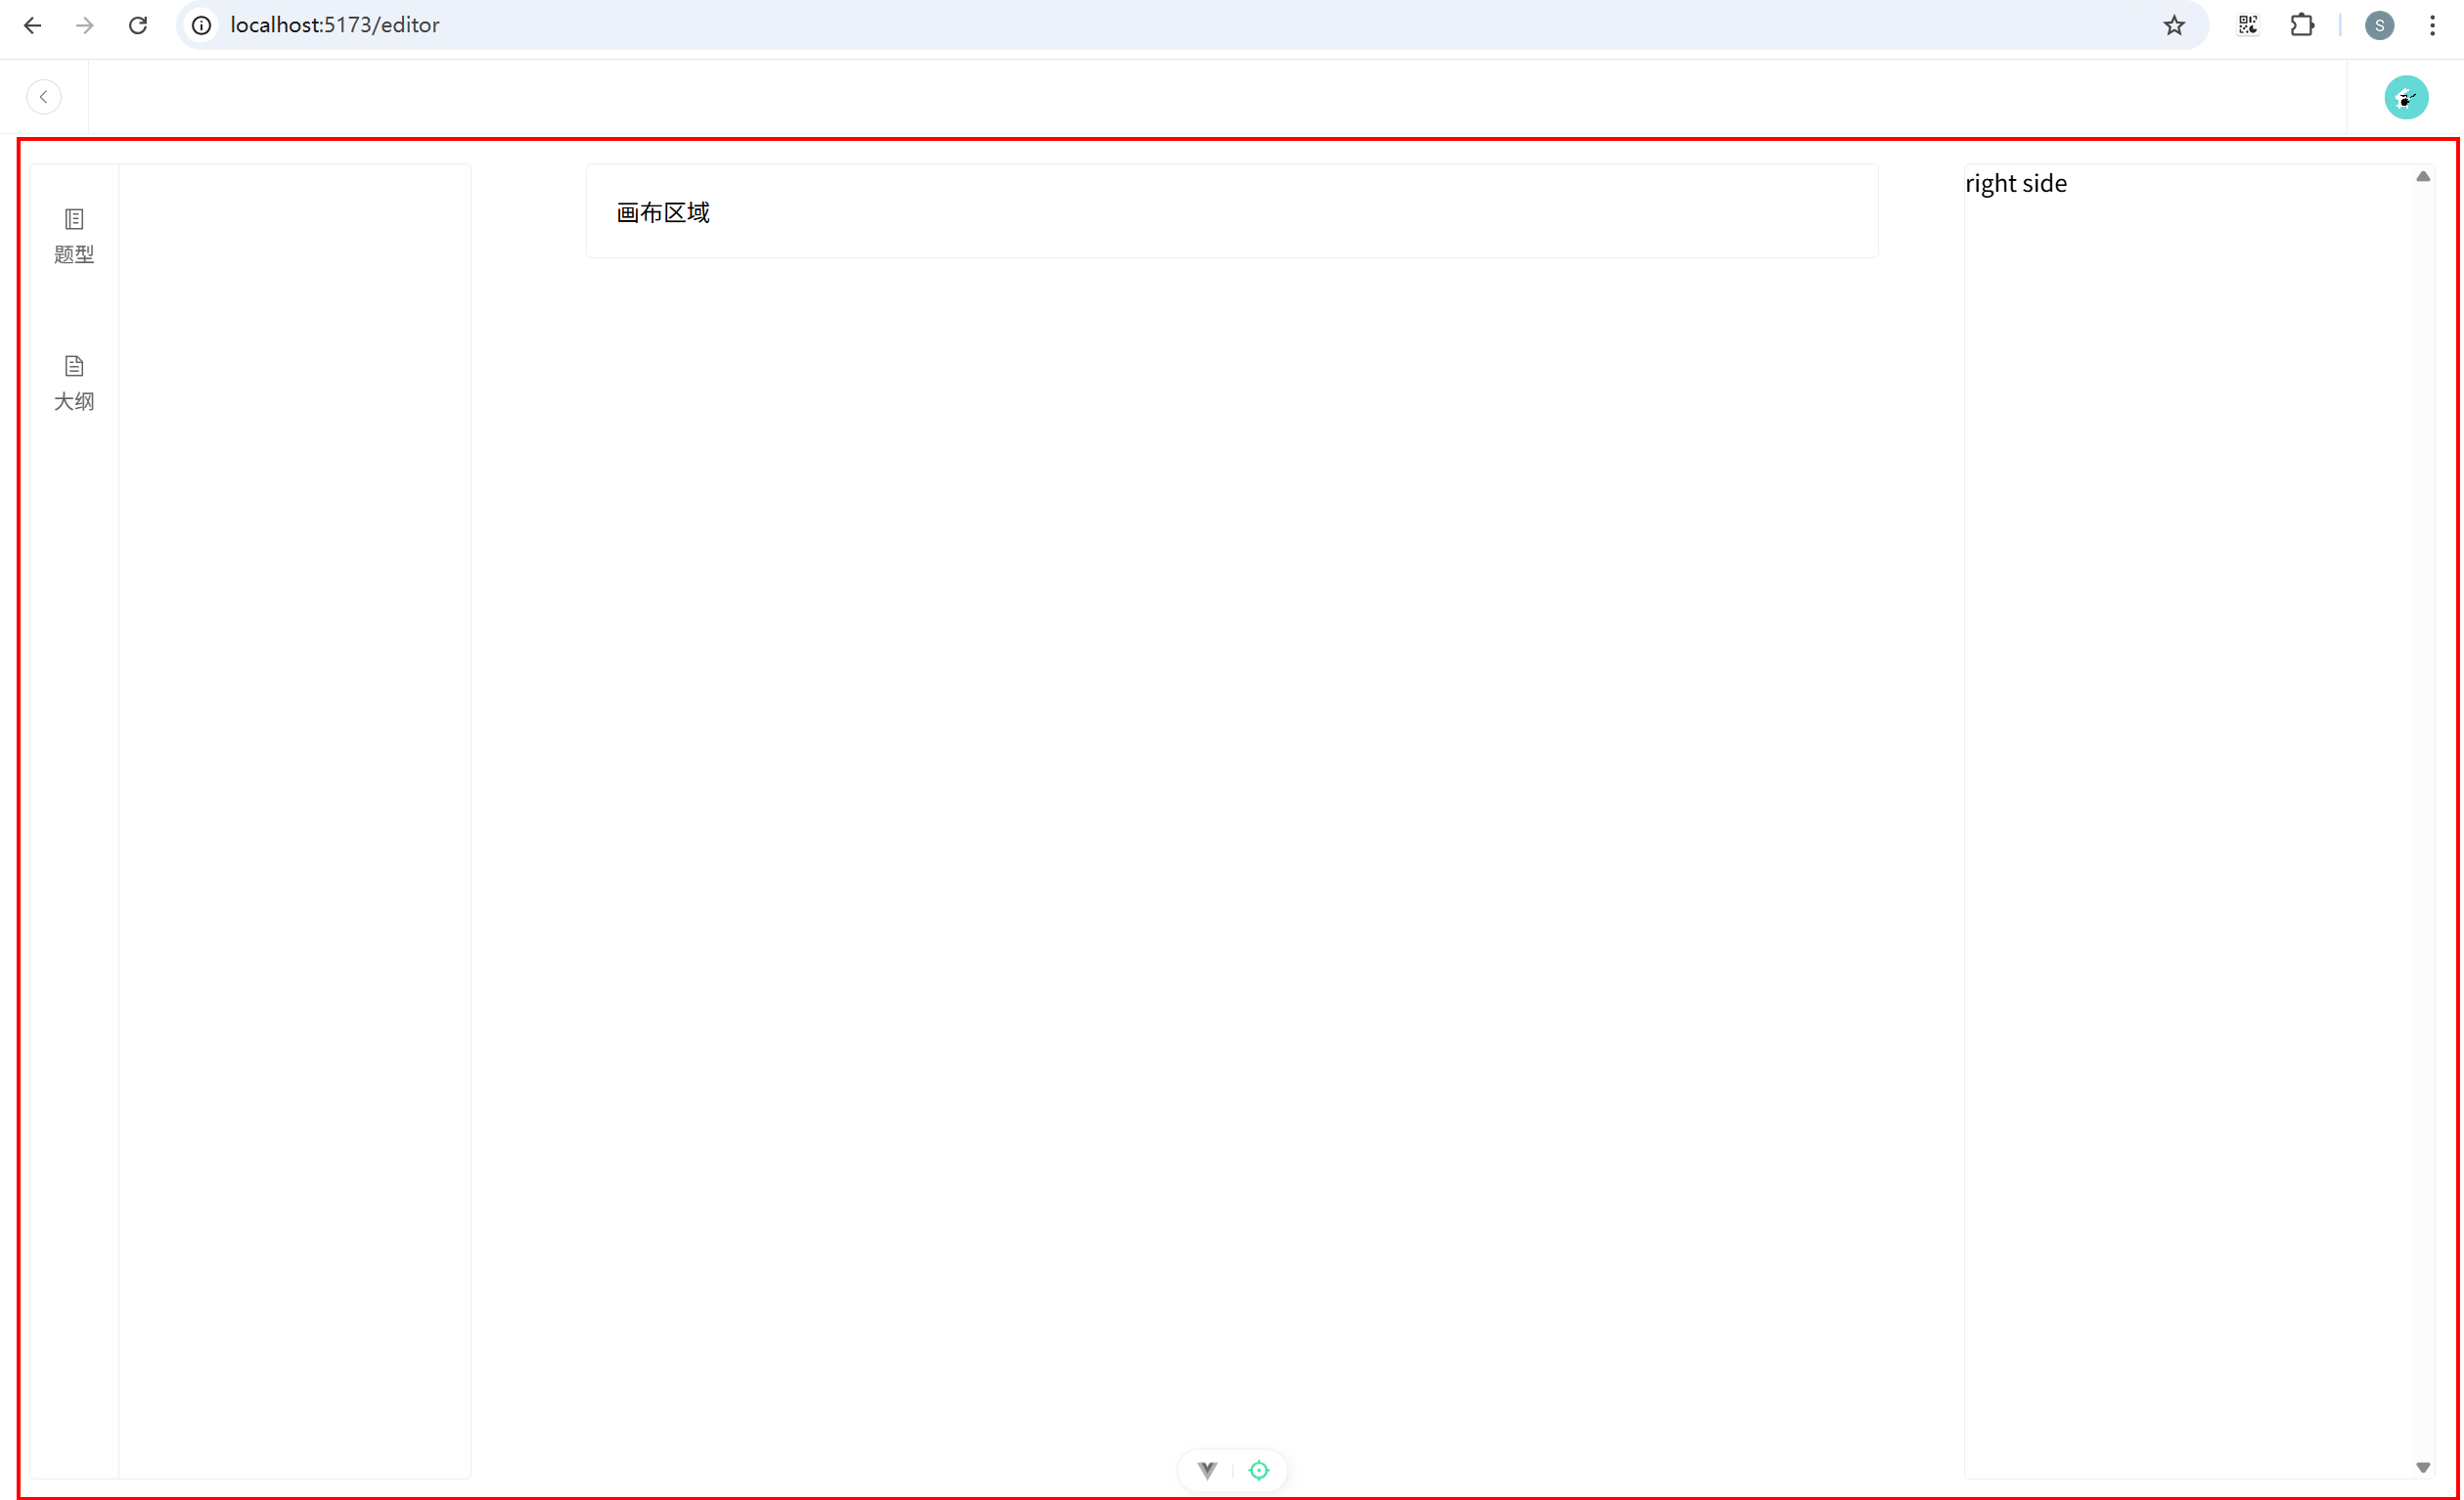
此时页面已经初具雏形。
10.2 完成题型和大纲切换
(1)配置路由 router/index.ts 关键代码:
javascript
{
      path: '/editor',
      name: 'editor',
      component: () => import('@/views/EditorView/Index.vue'),
      children: [
        {
          path: 'survey-type',
          name: 'survey-type',
          component: () => import('@/views/EditorView/LeftSide/SurveyType.vue'),
        },
        {
          path: 'outline',
          name: 'outline',
          component: () => import('@/views/EditorView/LeftSide/Outline.vue'),
        },
      ],
    },
(2)创建题型面板组件 views/EditorView/LeftSide/SurveyType.vue:
javascript
<template>
<div>题型面板</div>
</template>
<script setup lang="ts"></script>
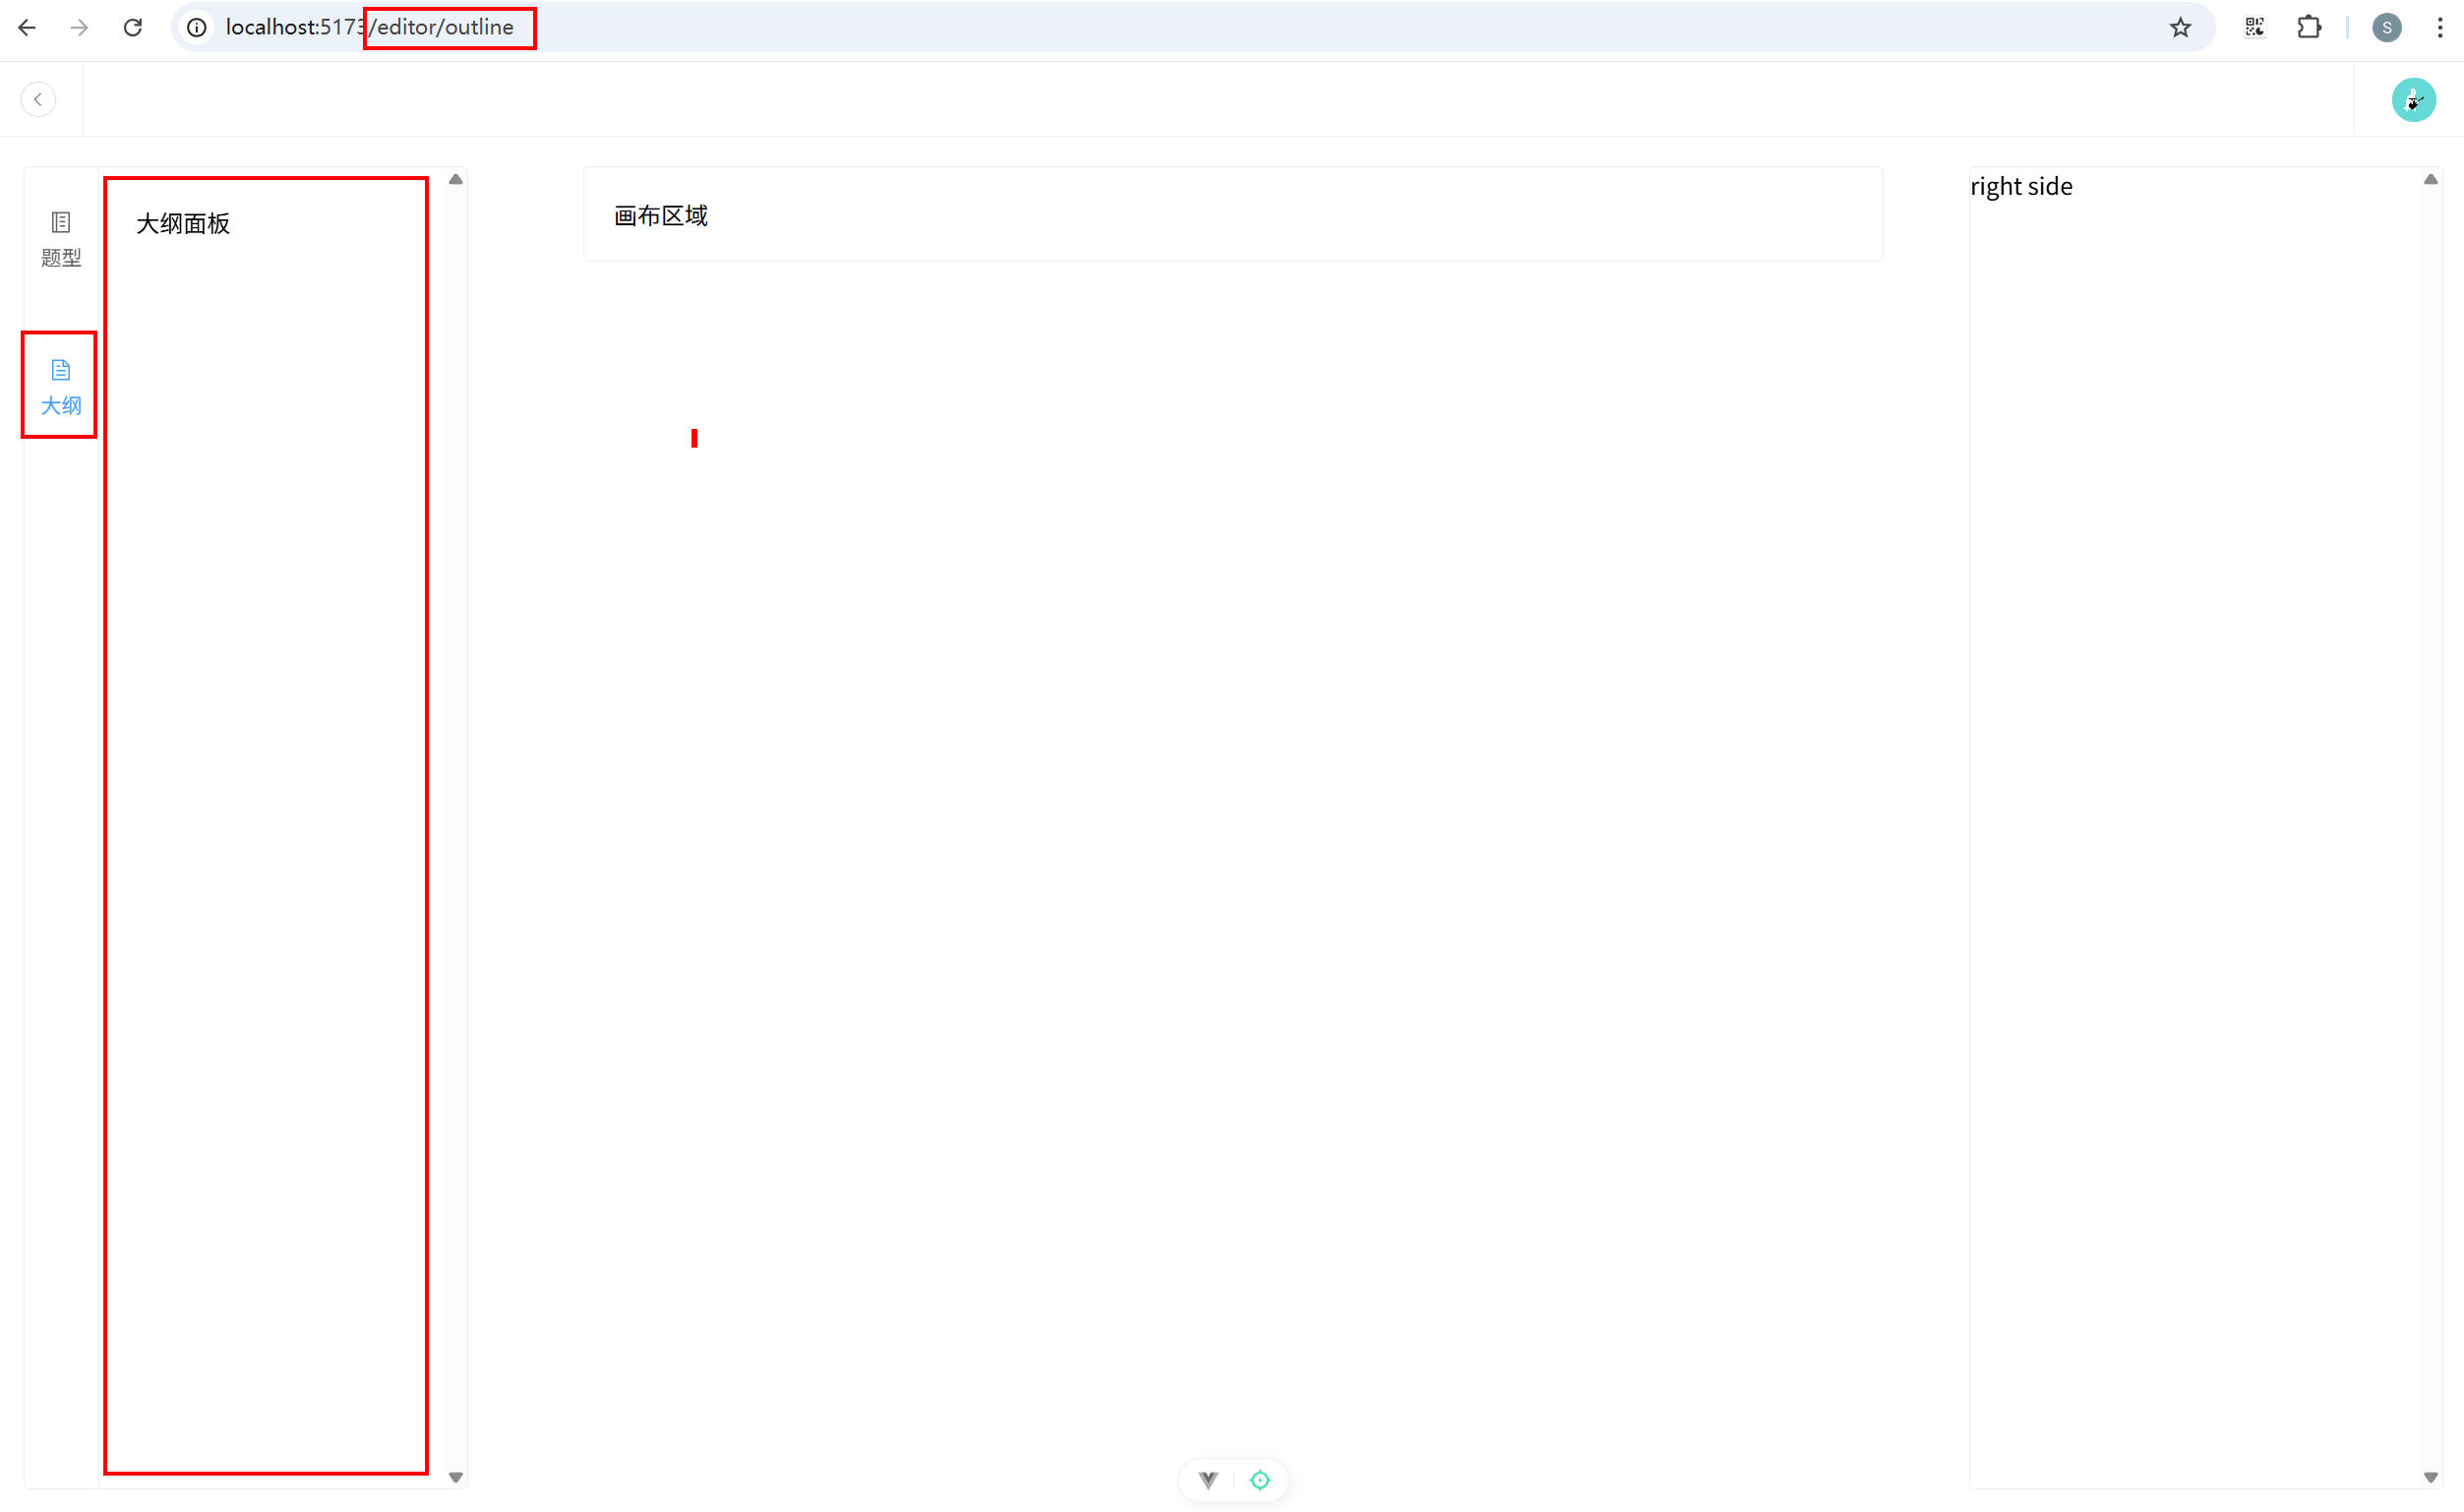
<style scoped></style>(3)创建大纲面板组件 views/EditorView/LeftSide/Outline.vue:
javascript
<template>
  <div>大纲面板</div>
</template>

<script setup lang="ts"></script>

<style scoped></style>
(4)左侧组件添加路由切换功能 views/EditorView/LeftSide\Index.vue:
javascript
<template>
  <div class="left-side-container flex">
    <div class="tabs">
      <!-- 题型 -->
      <div
        class="tab-item"
        :class="{
          'tab-show': routeName === 'survey-type',
        }"
        @click="switchEditor"
      >
        <el-icon><Memo /></el-icon>
        <span class="tab-item-title mt-5">题型</span>
      </div>
      <!-- 大纲 -->
      <div
        class="tab-item"
        :class="{
          'tab-show': routeName === 'outline',
        }"
        @click="switchOutline"
      >
        <el-icon><Document /></el-icon>
        <span class="tab-item-title mt-5">大纲</span>
      </div>
    </div>
    <RouterView class="tab-pane" />
  </div>
</template>

<script setup lang="ts">
import { computed } from 'vue';
import { Document, Memo } from '@element-plus/icons-vue';
import { useRoute, useRouter } from 'vue-router';
const route = useRoute();
const routeName = computed(() => route.name);
const router = useRouter();

const switchEditor = () => {
  router.push({ name: 'survey-type' });
};

const switchOutline = () => {
  router.push({ name: 'outline' });
};
</script>

<style scoped lang="scss">
.left-side-container {
  width: 300px;
  height: calc(100vh - 50px - 40px);
  position: fixed;
  left: 20px;
  top: 70px;
  background: var(--white);
  border: 1px solid var(--border-color);
  border-radius: var(--border-radius-md);
  > .tabs {
    width: 20%;
    height: 100%;
    border-right: 1px solid var(--border-color);
    > .tab-item {
      width: 100%;
      height: 100px;
      display: flex;
      align-items: center;
      justify-content: center;
      flex-direction: column;
      color: var(--font-color-light);
      text-decoration: none;
      cursor: pointer;
      > .tab-item-title {
        font-size: var(--font-size-base);
      }
    }
    > .tab-show {
      color: var(--primary-color);
    }
  }
  > .tab-pane {
    width: 80%;
    // 高度需要减去padding部分,否则会溢出
    height: calc(100% - 50px);
    padding: 25px;
    overflow-y: scroll;
  }
}
</style>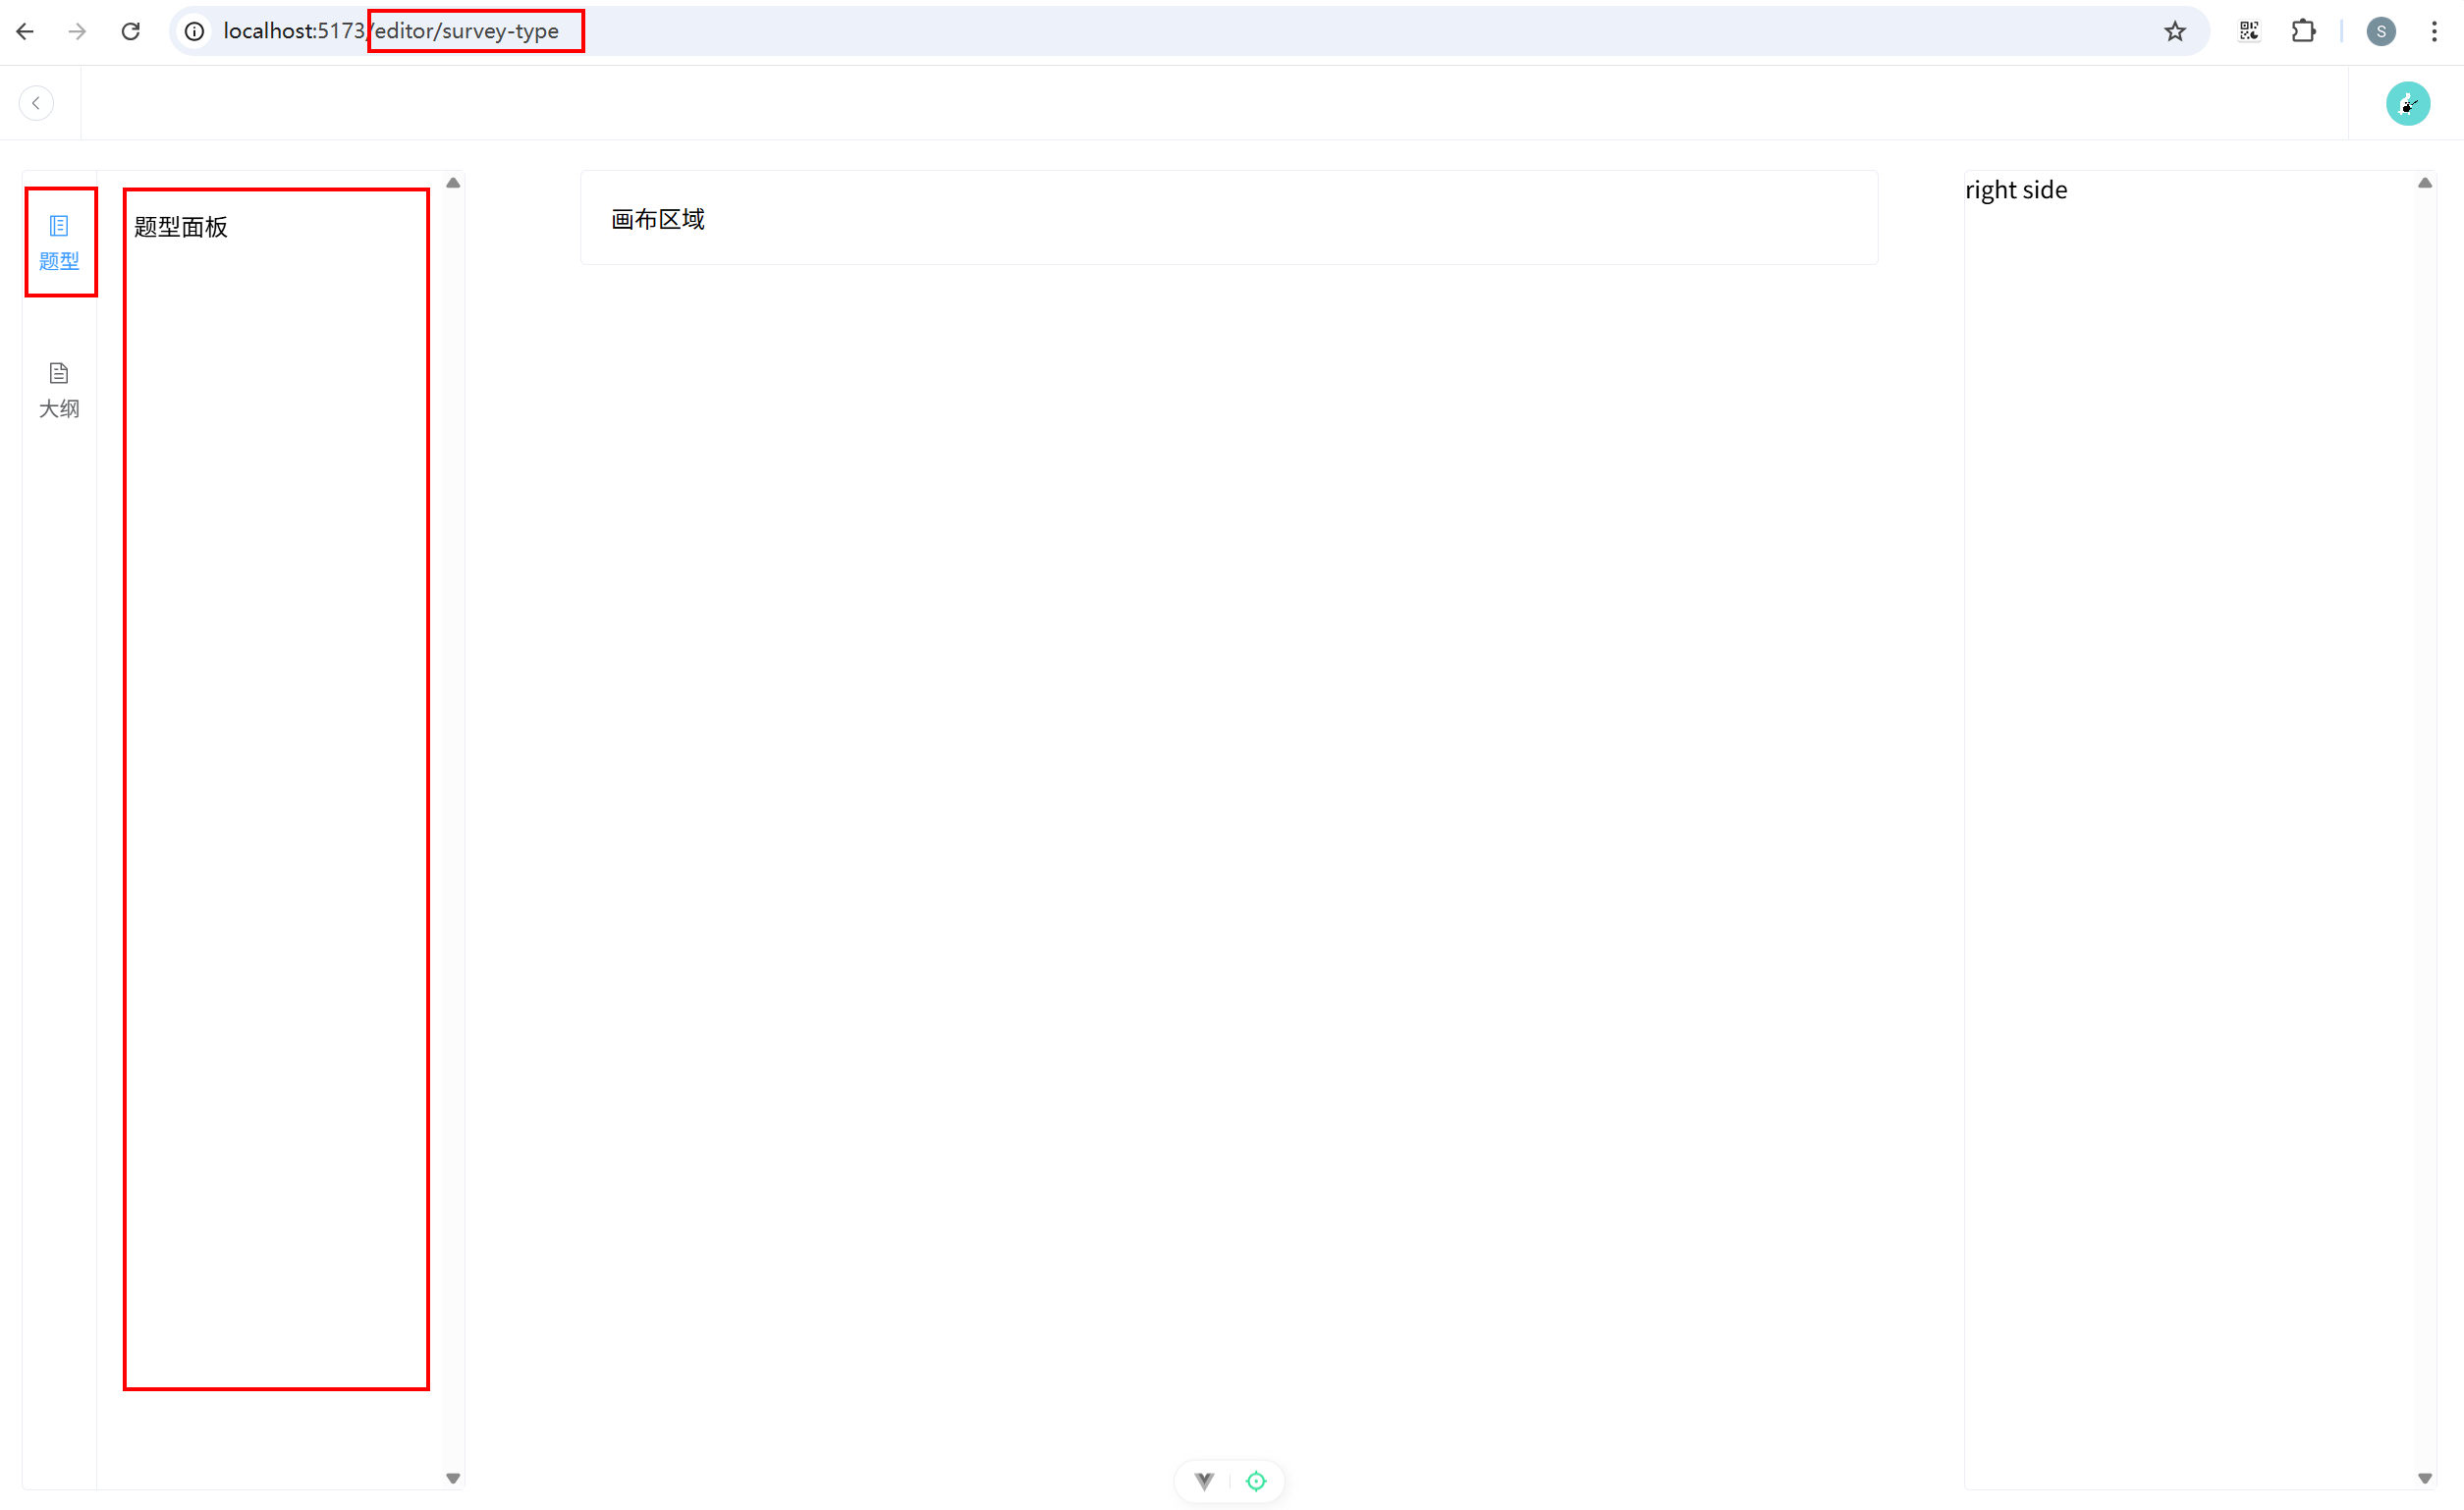
10.3 完成题型面板绘制
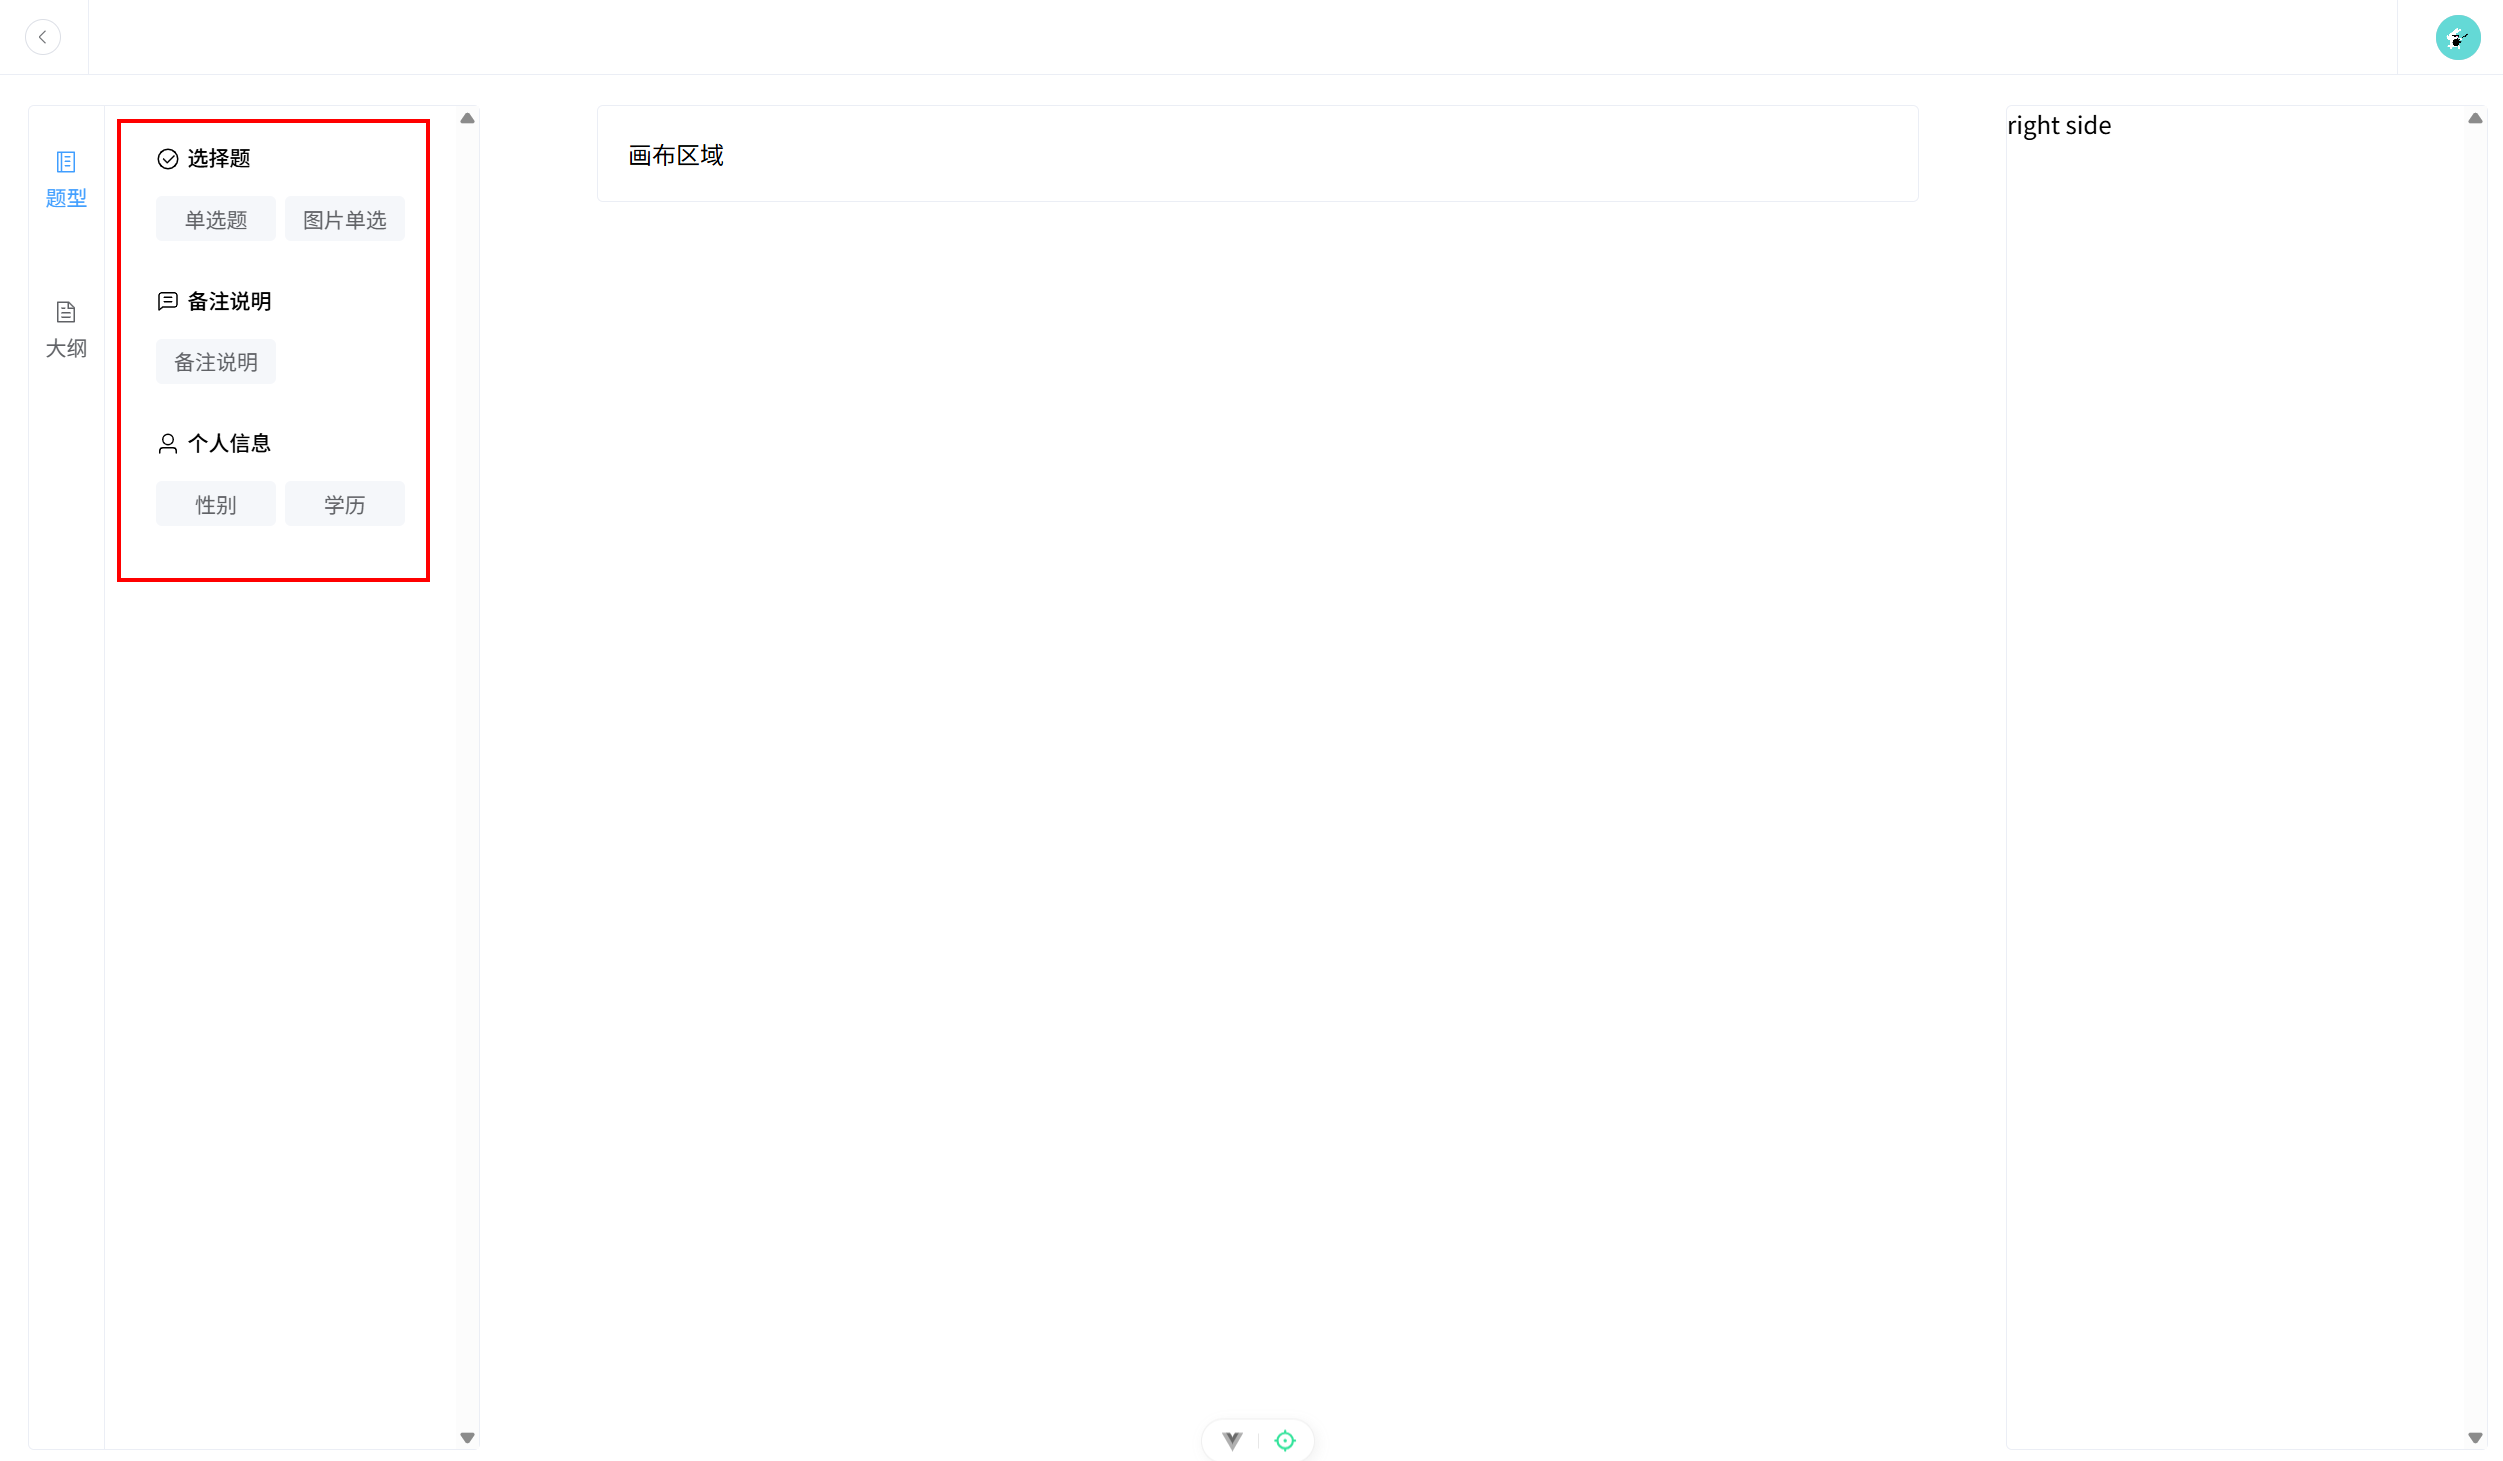
(1)添加题型面板配置文件 configs/SurveyGroupConfig.ts:
javascript
// 该文件是题型面板对应的配置文件,用于配置题型面板的题型信息
import { CircleCheck, ChatLineSquare, User } from '@element-plus/icons-vue';
export const SurveyComsList = [
  {
    title: '选择题',
    icon: CircleCheck,
    list: [
      { materialName: 'single-select', comName: '单选题' },
      { materialName: 'single-pic-select', comName: '图片单选' },
    ],
  },
  {
    title: '备注说明',
    icon: ChatLineSquare,
    list: [{ materialName: 'text-note', comName: '备注说明' }],
  },
  {
    title: '个人信息',
    icon: User,
    list: [
      { materialName: 'personal-info-gender', comName: '性别' },
      { materialName: 'personal-info-education', comName: '学历' },
    ],
  },
];
(2)创建题型项组件 components/Editor/SurveyComItem.vue:
javascript
<template>
  <div>
    <div
      class="survey-com-item-container pointer flex justify-content-center align-items-center self-center pl-10 pr-10 mb-10">
      {{ item.comName }}
    </div>
  </div>
</template>

<script setup lang="ts">
defineProps(['item']);
</script>

<style scoped lang="scss">
.survey-com-item-container {
  width: 60px;
  height: 30px;
  background-color: var(--background-color);
  border-radius: var(--border-radius-md);
  font-size: var(--font-size-base);
  color: var(--font-color-light);
  user-select: none;
}

.survey-com-item-container:hover {
  background-color: var(--font-color-lightest);
}
</style>
(3)创建题型组组件 components/Editor/SurveyComGroup.vue:
javascript
<template>
  <div class="survey-com-group-container mc">
    <div class="mb-20">
      <!-- 分组标题和图标 -->
      <div class="group-title font-weight-500 mb-15 flex align-items-center">
        <el-icon>
          <component :is="icon" />
        </el-icon>
        <div class="ml-5 title">{{ title }}</div>
      </div>
      <!-- 该分组对应的业务组件 -->
      <div class="flex wrap space-between">
        <SurveyComItem v-for="(item, index) in list" :key="index" :item="item" />
      </div>
    </div>
  </div>
</template>

<script setup lang="ts">
import SurveyComItem from './SurveyComItem.vue';
defineProps(['title', 'icon', 'list']);
</script>

<style scoped lang="scss">
.survey-com-group-container {
  width: 90%;
}

.title {
  font-size: var(--font-size-base);
  position: relative;
  bottom: 1px;
}
</style>
(4)绘制题型面板 views/EditorView/LeftSide\SurveyType.vue:
javascript
<template>
  <div class="survey-type-container">
    <SurveyComGroup v-for="(group, index) in SurveyComsList" :key="index" v-bind="group" />
  </div>
</template>

<script setup lang="ts">
import SurveyComGroup from '@/components/Editor/SurveyComGroup.vue';
import { SurveyComsList } from '@/configs/SurveyGroupConfig';
</script>

<style scoped lang="scss">
.survey-type-container {
  height: calc(100vh - 50px - 40px);
  overflow: hidden;
}
</style>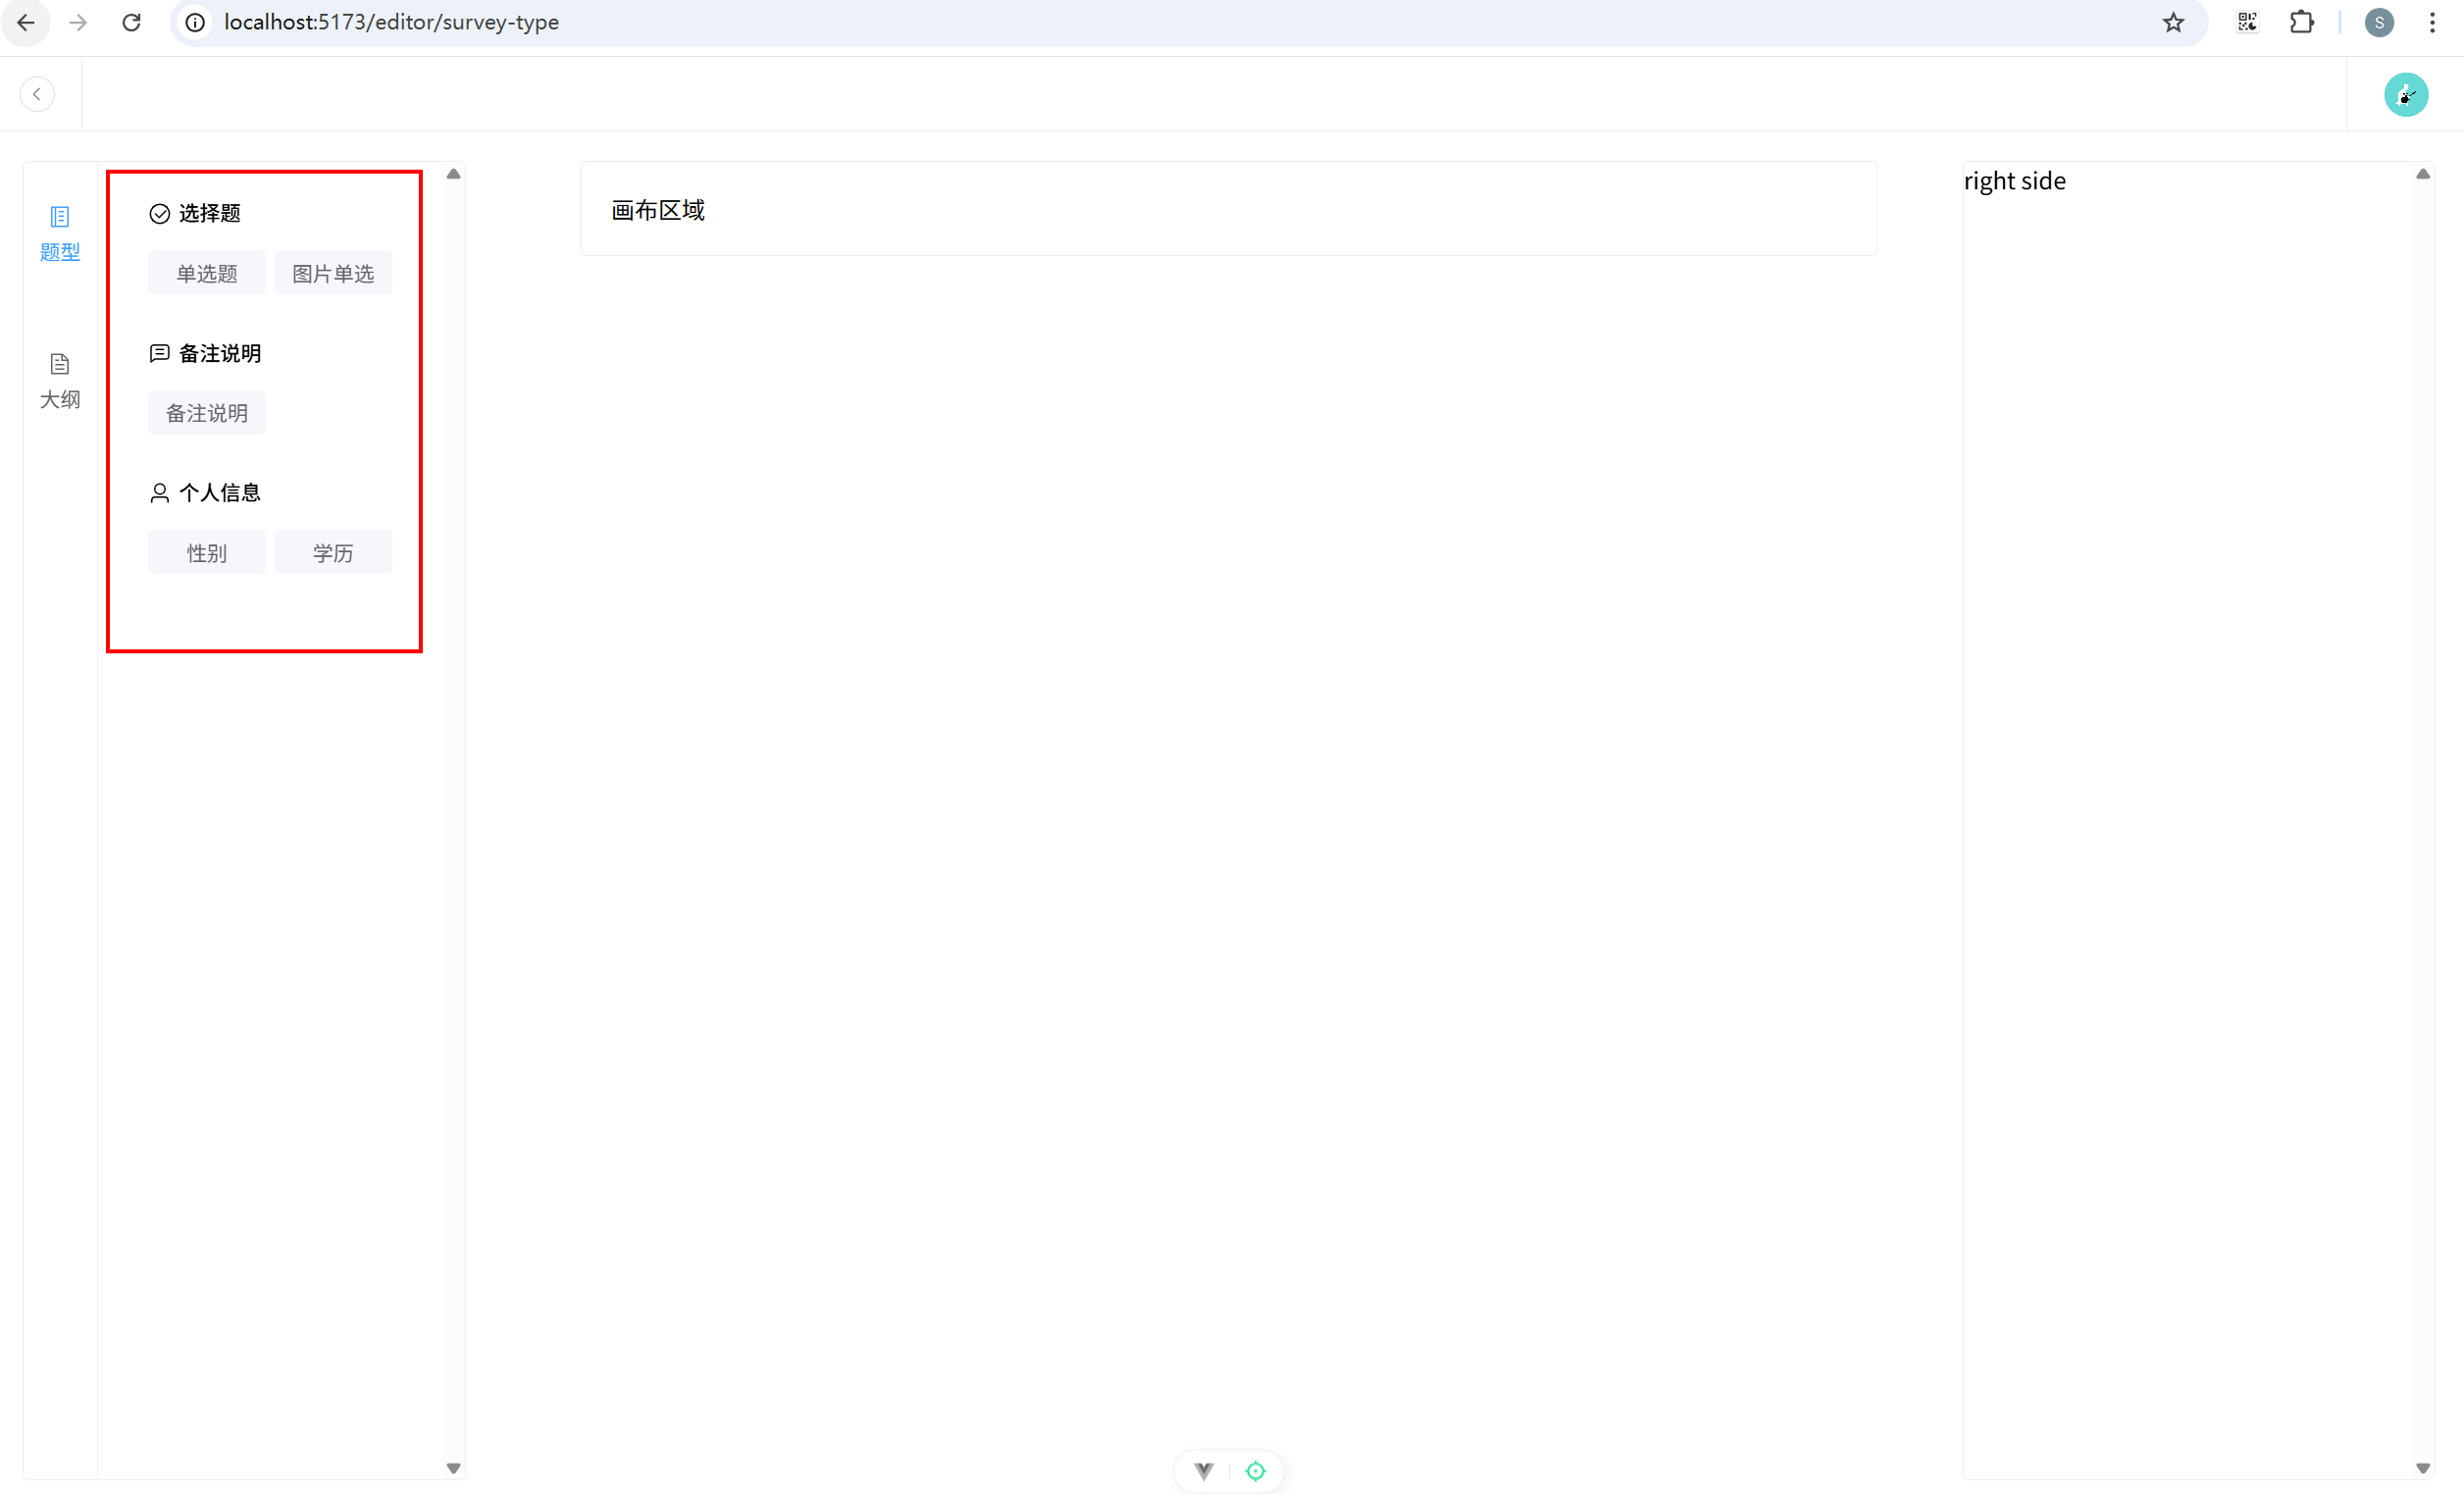
11. 往画布添加组件
11.1 创建编辑器数据仓库
(1)创建 stores/useEditor.ts:
javascript
// 该仓库用于存储画布的状态

import { defineStore } from 'pinia';
import type { Status } from '@/types';
import {
  setTextStatus,
  addOption,
  removeOption,
  setPosition,
  setCurrentStatus,
  setPicLinkByIndex,
} from './actions';

export const useEditorStore = defineStore('editor', {
  state: () => ({
    currentComponentIndex: -1, // 当前选中的组件索引,一开始都没有选中,所以是-1
    surveyCount: 0, // 问卷题目的数量
    coms: [] as Status[], // 问卷题目的数组
  }),
  actions: {
    setTextStatus,
    addOption,
    removeOption,
    setPosition,
    setCurrentStatus,
    setPicLinkByIndex,
  },
});
(2)在编辑器主页引入数据仓库 views/EditorView/Index.vue:
javascript
<template>
  <div>
    <div class="header">
      <Header />
    </div>
    <!-- 编辑器主体区域 -->
    <div class="container">
      <LeftSide />
      <RightSide />
    </div>
    <div>
      <Center />
    </div>
  </div>
</template>

<script setup lang="ts">
import Header from '@/components/Common/Header.vue';
import LeftSide from '@/views/EditorView/LeftSide/Index.vue';
import Center from '@/views/EditorView/Center.vue';
import RightSide from '@/views/EditorView/RightSide.vue';

// 仓库
import { useEditorStore } from '@/stores/useEditor';
useEditorStore();
</script>

<style scoped lang="scss">
.header {
  width: 100%;
  background-color: var(--white);
  position: fixed;
  top: 0;
  z-index: 10;
}
.container {
  width: calc(100vw - 40px);
  padding: 20px;
  // Header的高度50px,上下padding 20px
  height: calc(100vh - 50px - 40px);
  background: url('@/assets/imgs/editor_background.png');
  position: fixed;
  top: 50px;
}
</style>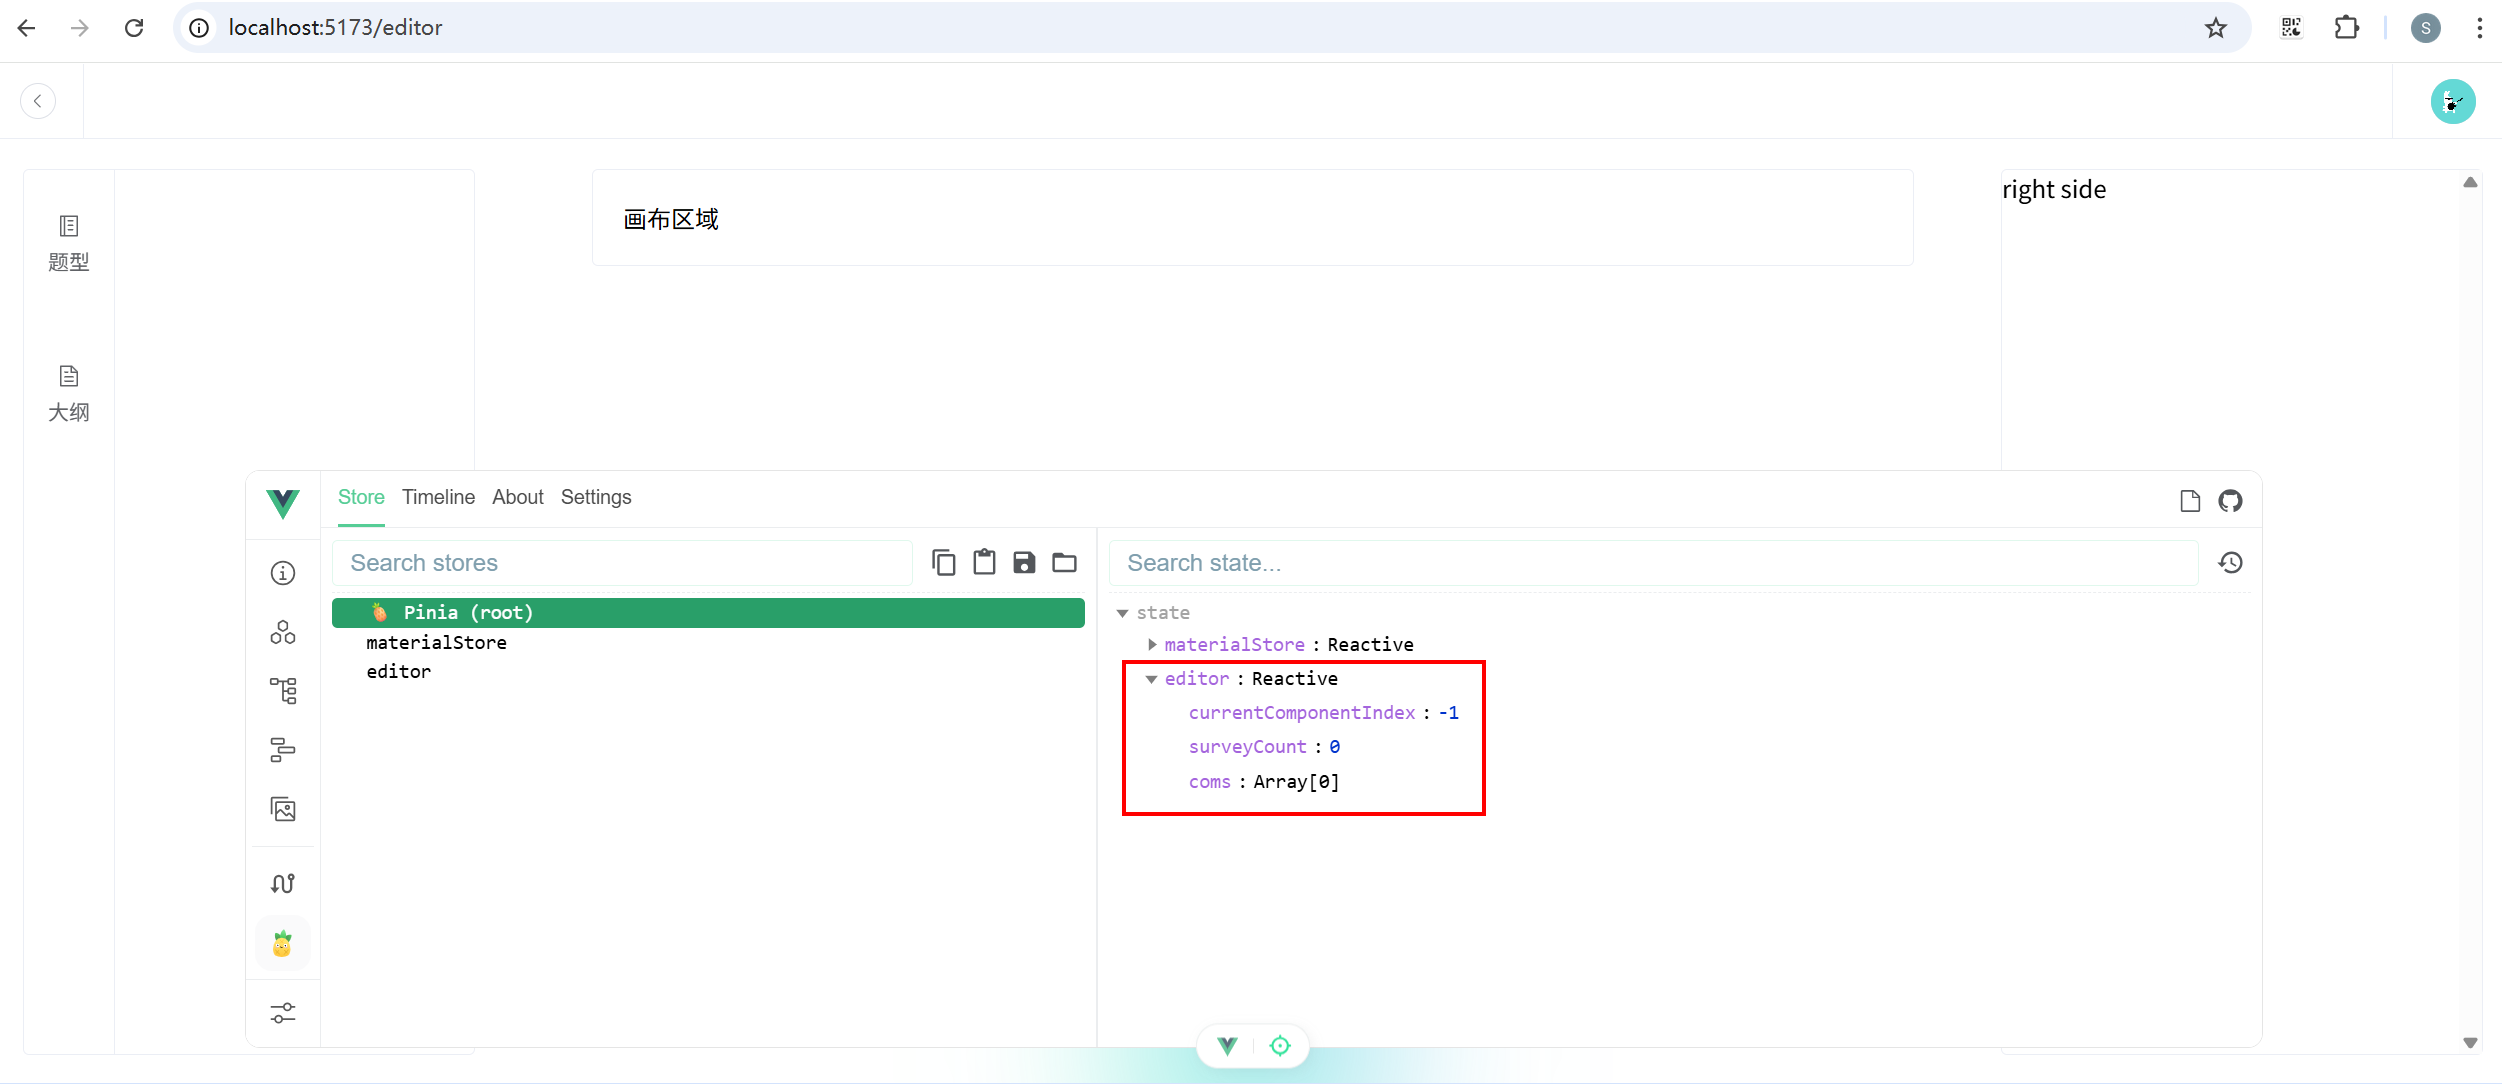
11.2 画布中添加组件
(1)添加当前判断是否为题目类型方法。 types/store.ts 关键代码:
javascript
// 记录题目类型的数组
export const SurveyComNameArr = [
  'single-select',
  'single-pic-select',
  'personal-info-gender',
  'personal-info-education',
];

// 判断传入的值是否为题目类型
export function isSurveyComName(value: string): value is SurveyComName {
  return SurveyComNameArr.includes(value as SurveyComName);
}
(2)数据仓库添加新增问卷题目方法。 stores\useEditor.ts:
javascript
// 该仓库用于存储画布的状态

import { defineStore } from 'pinia';
import type { Status } from '@/types';
import { isSurveyComName } from '@/types';
import {
  setTextStatus,
  addOption,
  removeOption,
  setPosition,
  setCurrentStatus,
  setPicLinkByIndex,
} from './actions';

export const useEditorStore = defineStore('editor', {
  state: () => ({
    currentComponentIndex: -1, // 当前选中的组件索引,一开始都没有选中,所以是-1
    surveyCount: 0, // 问卷题目的数量
    coms: [] as Status[], // 问卷题目的数组
  }),
  actions: {
    setTextStatus,
    addOption,
    removeOption,
    setPosition,
    setCurrentStatus,
    setPicLinkByIndex,
    addCom(newCom: Status) {
      this.coms.push(newCom);
      this.currentComponentIndex = -1;
      if (isSurveyComName(newCom.name)) this.surveyCount++;
    },
  },
});
(3)题型组件使用新增组件方法。components/Editor/SurveyComItem.vue:
javascript
<template>
  <div>
    <div
      class="survey-com-item-container pointer flex justify-content-center align-items-center self-center pl-10 pr-10 mb-10"
      @click="addSurveyCom"
    >
      {{ item.comName }}
    </div>
  </div>
</template>

<script setup lang="ts">
import { defaultStatusMap } from '@/configs/defaultStatus/defaultStatusMap';
import { updateInitStatusBeforeAdd } from '@/utils';
import type { Material, Status } from '@/types';
import { useEditorStore } from '@/stores/useEditor';
const store = useEditorStore();

const props = defineProps(['item']);
const addSurveyCom = () => {
  const newSurveyComName = props.item.materialName as Material;
  if (!newSurveyComName) {
    console.warn('请先选择题型');
    return;
  }
  const newSurveyComStatus = defaultStatusMap[newSurveyComName]() as Status;
  updateInitStatusBeforeAdd(newSurveyComStatus, newSurveyComName);
  store.addCom(newSurveyComStatus);
};
</script>

<style scoped lang="scss">
.survey-com-item-container {
  width: 60px;
  height: 30px;
  background-color: var(--background-color);
  border-radius: var(--border-radius-md);
  font-size: var(--font-size-base);
  color: var(--font-color-light);
  user-select: none;
}
.survey-com-item-container:hover {
  background-color: var(--font-color-lightest);
}
</style>
(4)画布区域关联编辑器数据仓库。views/EditorView/Center.vue:
javascript
<template>
  <div ref="centerContainer" class="center-container">
    <div v-for="(item, index) in store.coms" :key="index">
      <component :is="item.type" :status="item.status" :serialNum="1" />
    </div>
  </div>
</template>

<script setup lang="ts">
import { useEditorStore } from '@/stores/useEditor';
const store = useEditorStore();
</script>

<style scoped>
.center-container {
  width: 50%;
  border: 1px solid var(--border-color);
  border-radius: var(--border-radius-md);
  margin: 70px auto;
  padding: 20px;
  background: var(--white);
  position: relative;
  .content {
    cursor: pointer;
    padding: 10px;
    background-color: var(--white);
    border-radius: var(--border-radius-sm);
    &:hover {
      transform: scale(1.01);
      transition: 0.5s;
      box-shadow: 0 0 10px rgba(0, 0, 0, 0.1);
    }
  }
}
.active {
  transform: scale(1.01);
  transition: 0.5s;
  box-shadow: 0 0 10px rgba(0, 0, 0, 0.1);
}
.delete-btn {
  right: -5px;
  top: -10px;
}
</style>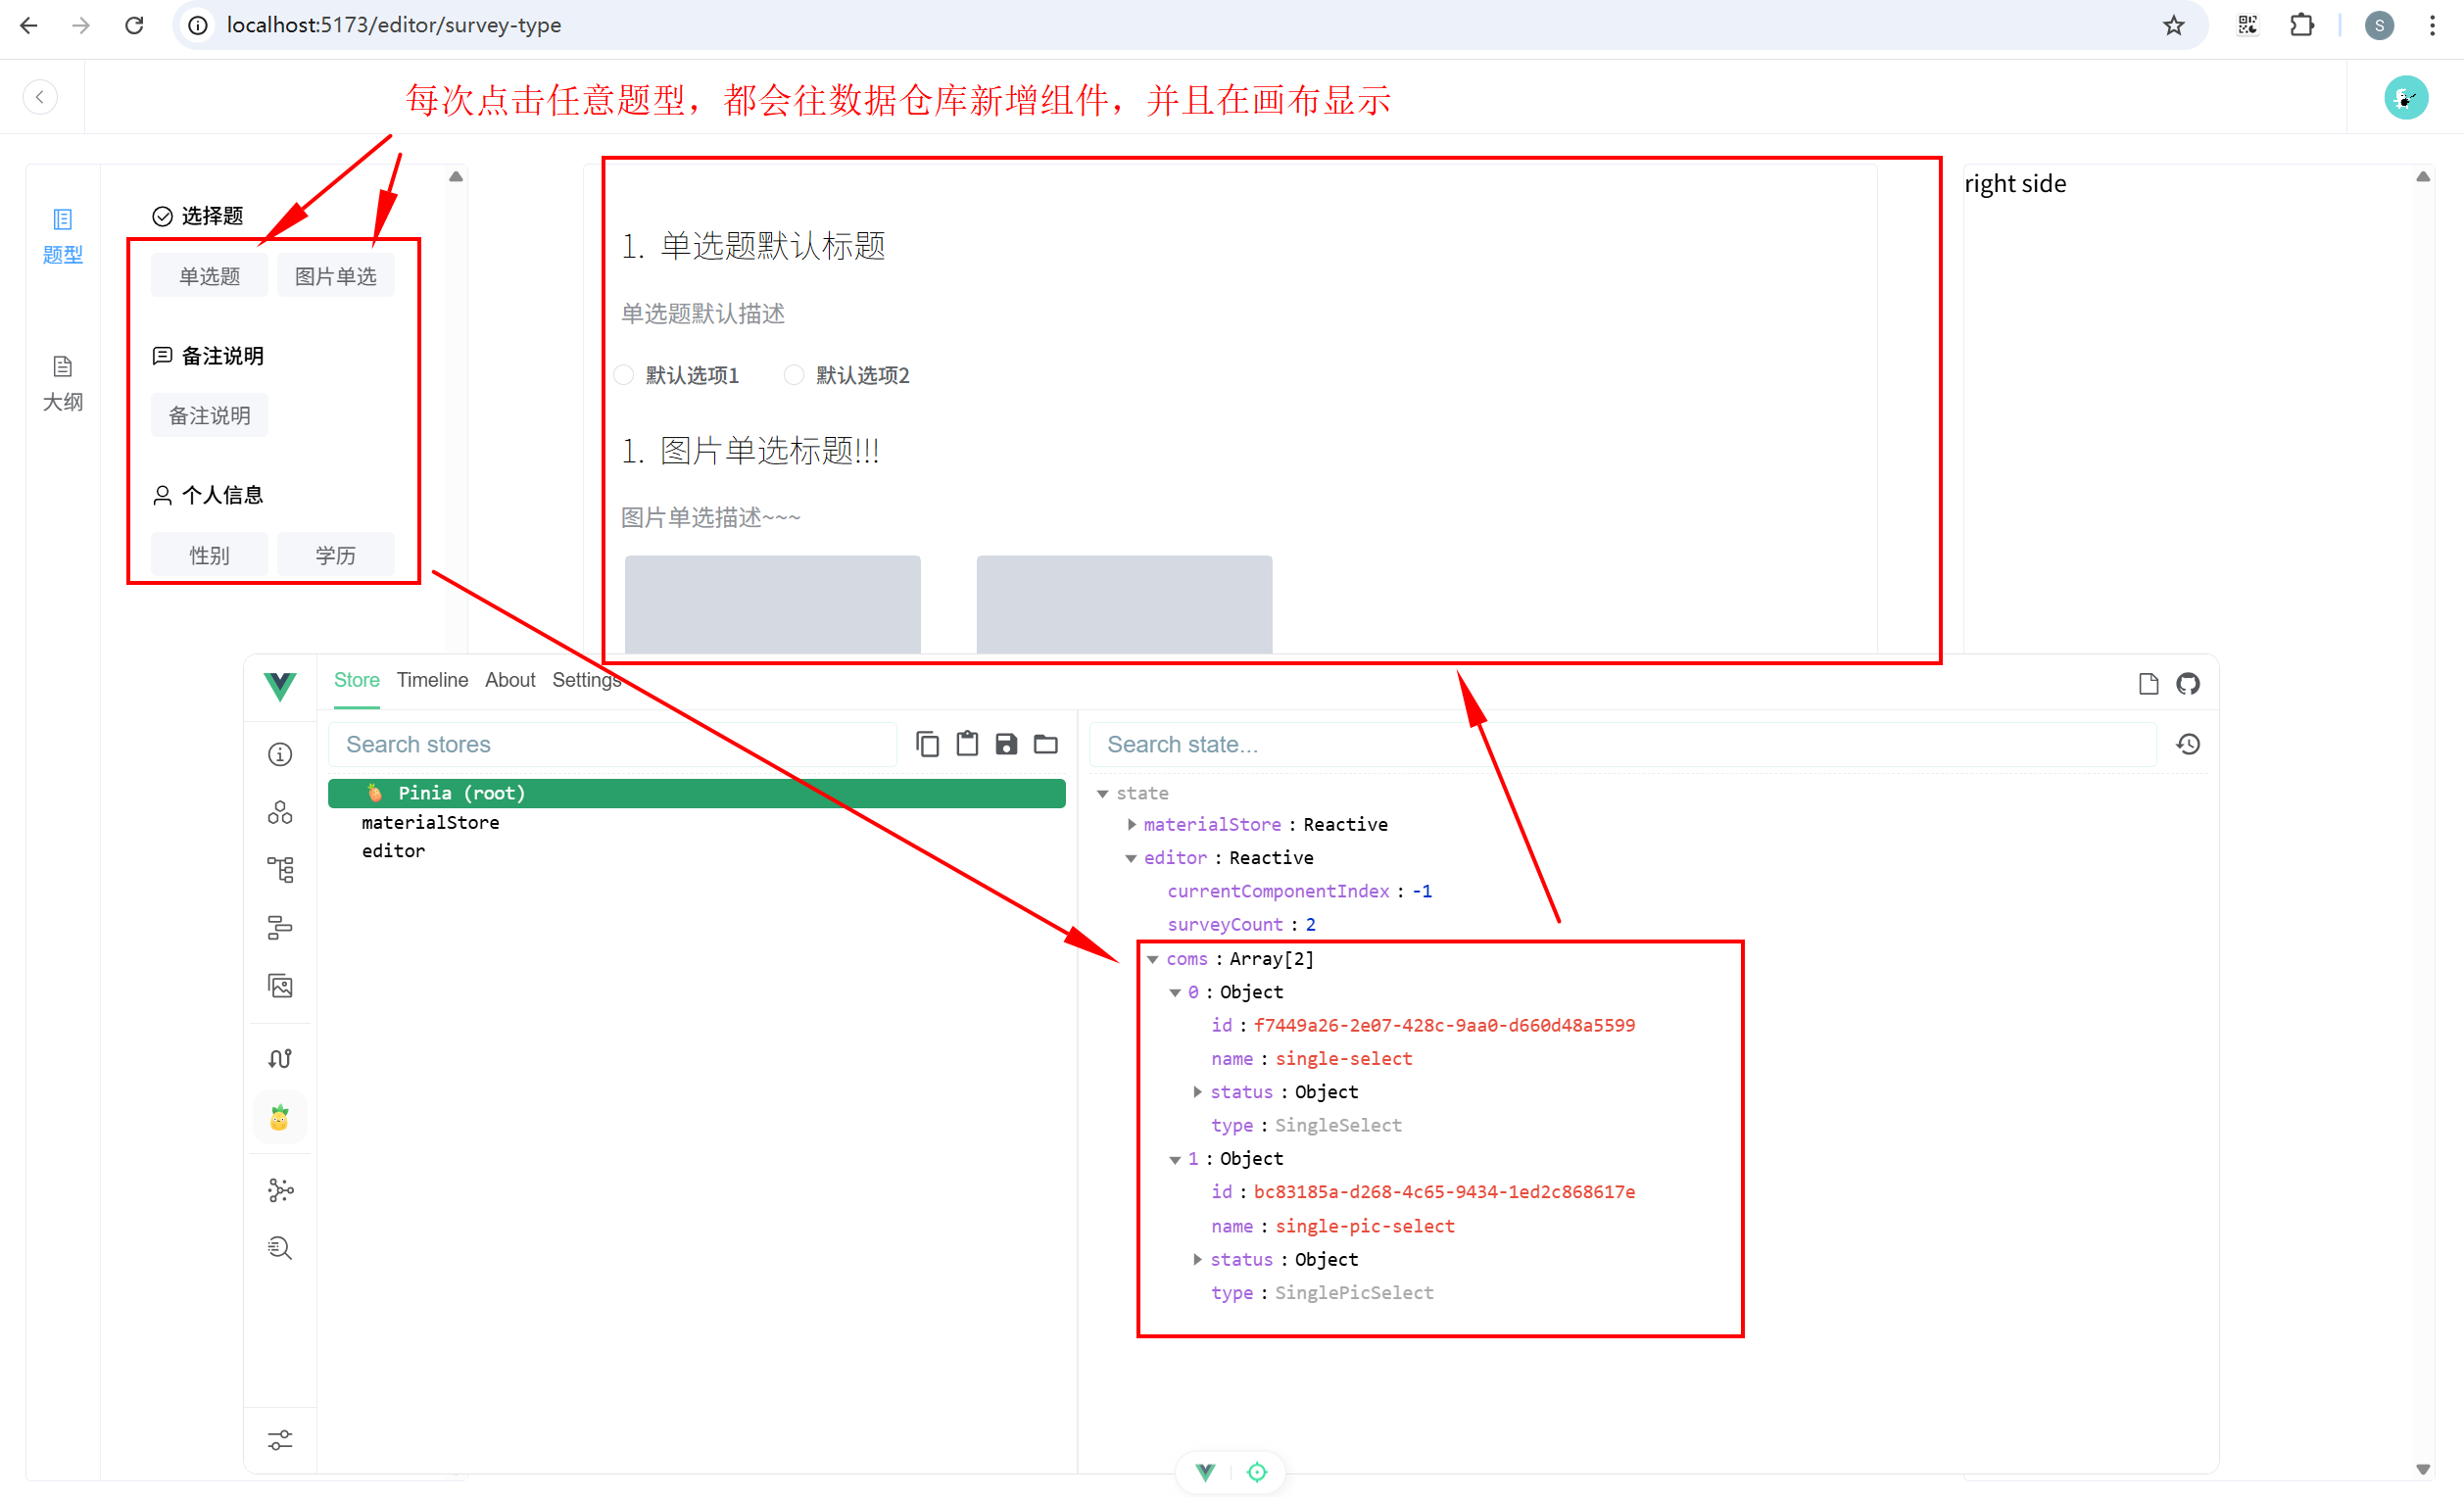
11.3 使用事件总线实现丝滑滚动
(1)下载 mitt 依赖。
javascript
pnpm i mitt(2)定义事件总线类型。创建 types\eventBus.ts:
javascript
export type EventBus = {
  scrollToBottom: void;
};(3)types/index.ts 中引入:
javascript
export * from './editProps';
export * from './common';
export * from './store';
export * from './eventBus';(4)创建事件总线实例。utils/eventBus.ts:
javascript
// 提供事件总线
import mitt from 'mitt';
import type { EventBus } from '@/types';
const emitter = mitt<EventBus>();
export default emitter;
(5)新增题型时触发。components/Editor/SurveyComItem.vue:
javascript
<template>
  <div>
    <div
      class="survey-com-item-container pointer flex justify-content-center align-items-center self-center pl-10 pr-10 mb-10"
      @click="addSurveyCom"
    >
      {{ item.comName }}
    </div>
  </div>
</template>

<script setup lang="ts">
import { defaultStatusMap } from '@/configs/defaultStatus/defaultStatusMap';
import { updateInitStatusBeforeAdd } from '@/utils';
import type { Material, Status } from '@/types';
import { useEditorStore } from '@/stores/useEditor';
const store = useEditorStore();
// 事件总线
import EventBus from '@/utils/eventBus';

const props = defineProps(['item']);
const addSurveyCom = () => {
  const newSurveyComName = props.item.materialName as Material;
  if (!newSurveyComName) {
    console.warn('请先选择题型');
    return;
  }
  const newSurveyComStatus = defaultStatusMap[newSurveyComName]() as Status;
  updateInitStatusBeforeAdd(newSurveyComStatus, newSurveyComName);
  store.addCom(newSurveyComStatus);
  // 每次添加了新的组件,都要滚动到底部
  EventBus.emit('scrollToBottom');
};
</script>

<style scoped lang="scss">
.survey-com-item-container {
  width: 60px;
  height: 30px;
  background-color: var(--background-color);
  border-radius: var(--border-radius-md);
  font-size: var(--font-size-base);
  color: var(--font-color-light);
  user-select: none;
}
.survey-com-item-container:hover {
  background-color: var(--font-color-lightest);
}
</style>
(6)画布页面接收并自定义滚动事件。views/EditorView/Center.vue:
javascript
<template>
  <div ref="centerContainer" class="center-container">
    <div v-for="(item, index) in store.coms" :key="index">
      <component :is="item.type" :status="item.status" :serialNum="1" />
    </div>
  </div>
</template>

<script setup lang="ts">
import { nextTick, ref } from 'vue';
import { useEditorStore } from '@/stores/useEditor';
const store = useEditorStore();
// 事件总线
import EventBus from '@/utils/eventBus';

const centerContainer = ref<HTMLElement | null>(null);

const scrollToBottom = () => {
  nextTick(() => {
    const container = centerContainer.value; // 获取容器的dom元素
    if (container) {
      window.scrollTo({
        top: container.scrollHeight,
        behavior: 'smooth',
      });
    }
  });
};
// 通过事件总线提供滚动方法给外部调用
EventBus.on('scrollToBottom', scrollToBottom);
</script>

<style scoped>
.center-container {
  width: 50%;
  border: 1px solid var(--border-color);
  border-radius: var(--border-radius-md);
  margin: 70px auto;
  padding: 20px;
  background: var(--white);
  position: relative;
  .content {
    cursor: pointer;
    padding: 10px;
    background-color: var(--white);
    border-radius: var(--border-radius-sm);
    &:hover {
      transform: scale(1.01);
      transition: 0.5s;
      box-shadow: 0 0 10px rgba(0, 0, 0, 0.1);
    }
  }
}
.active {
  transform: scale(1.01);
  transition: 0.5s;
  box-shadow: 0 0 10px rgba(0, 0, 0, 0.1);
}
.delete-btn {
  right: -5px;
  top: -10px;
}
</style>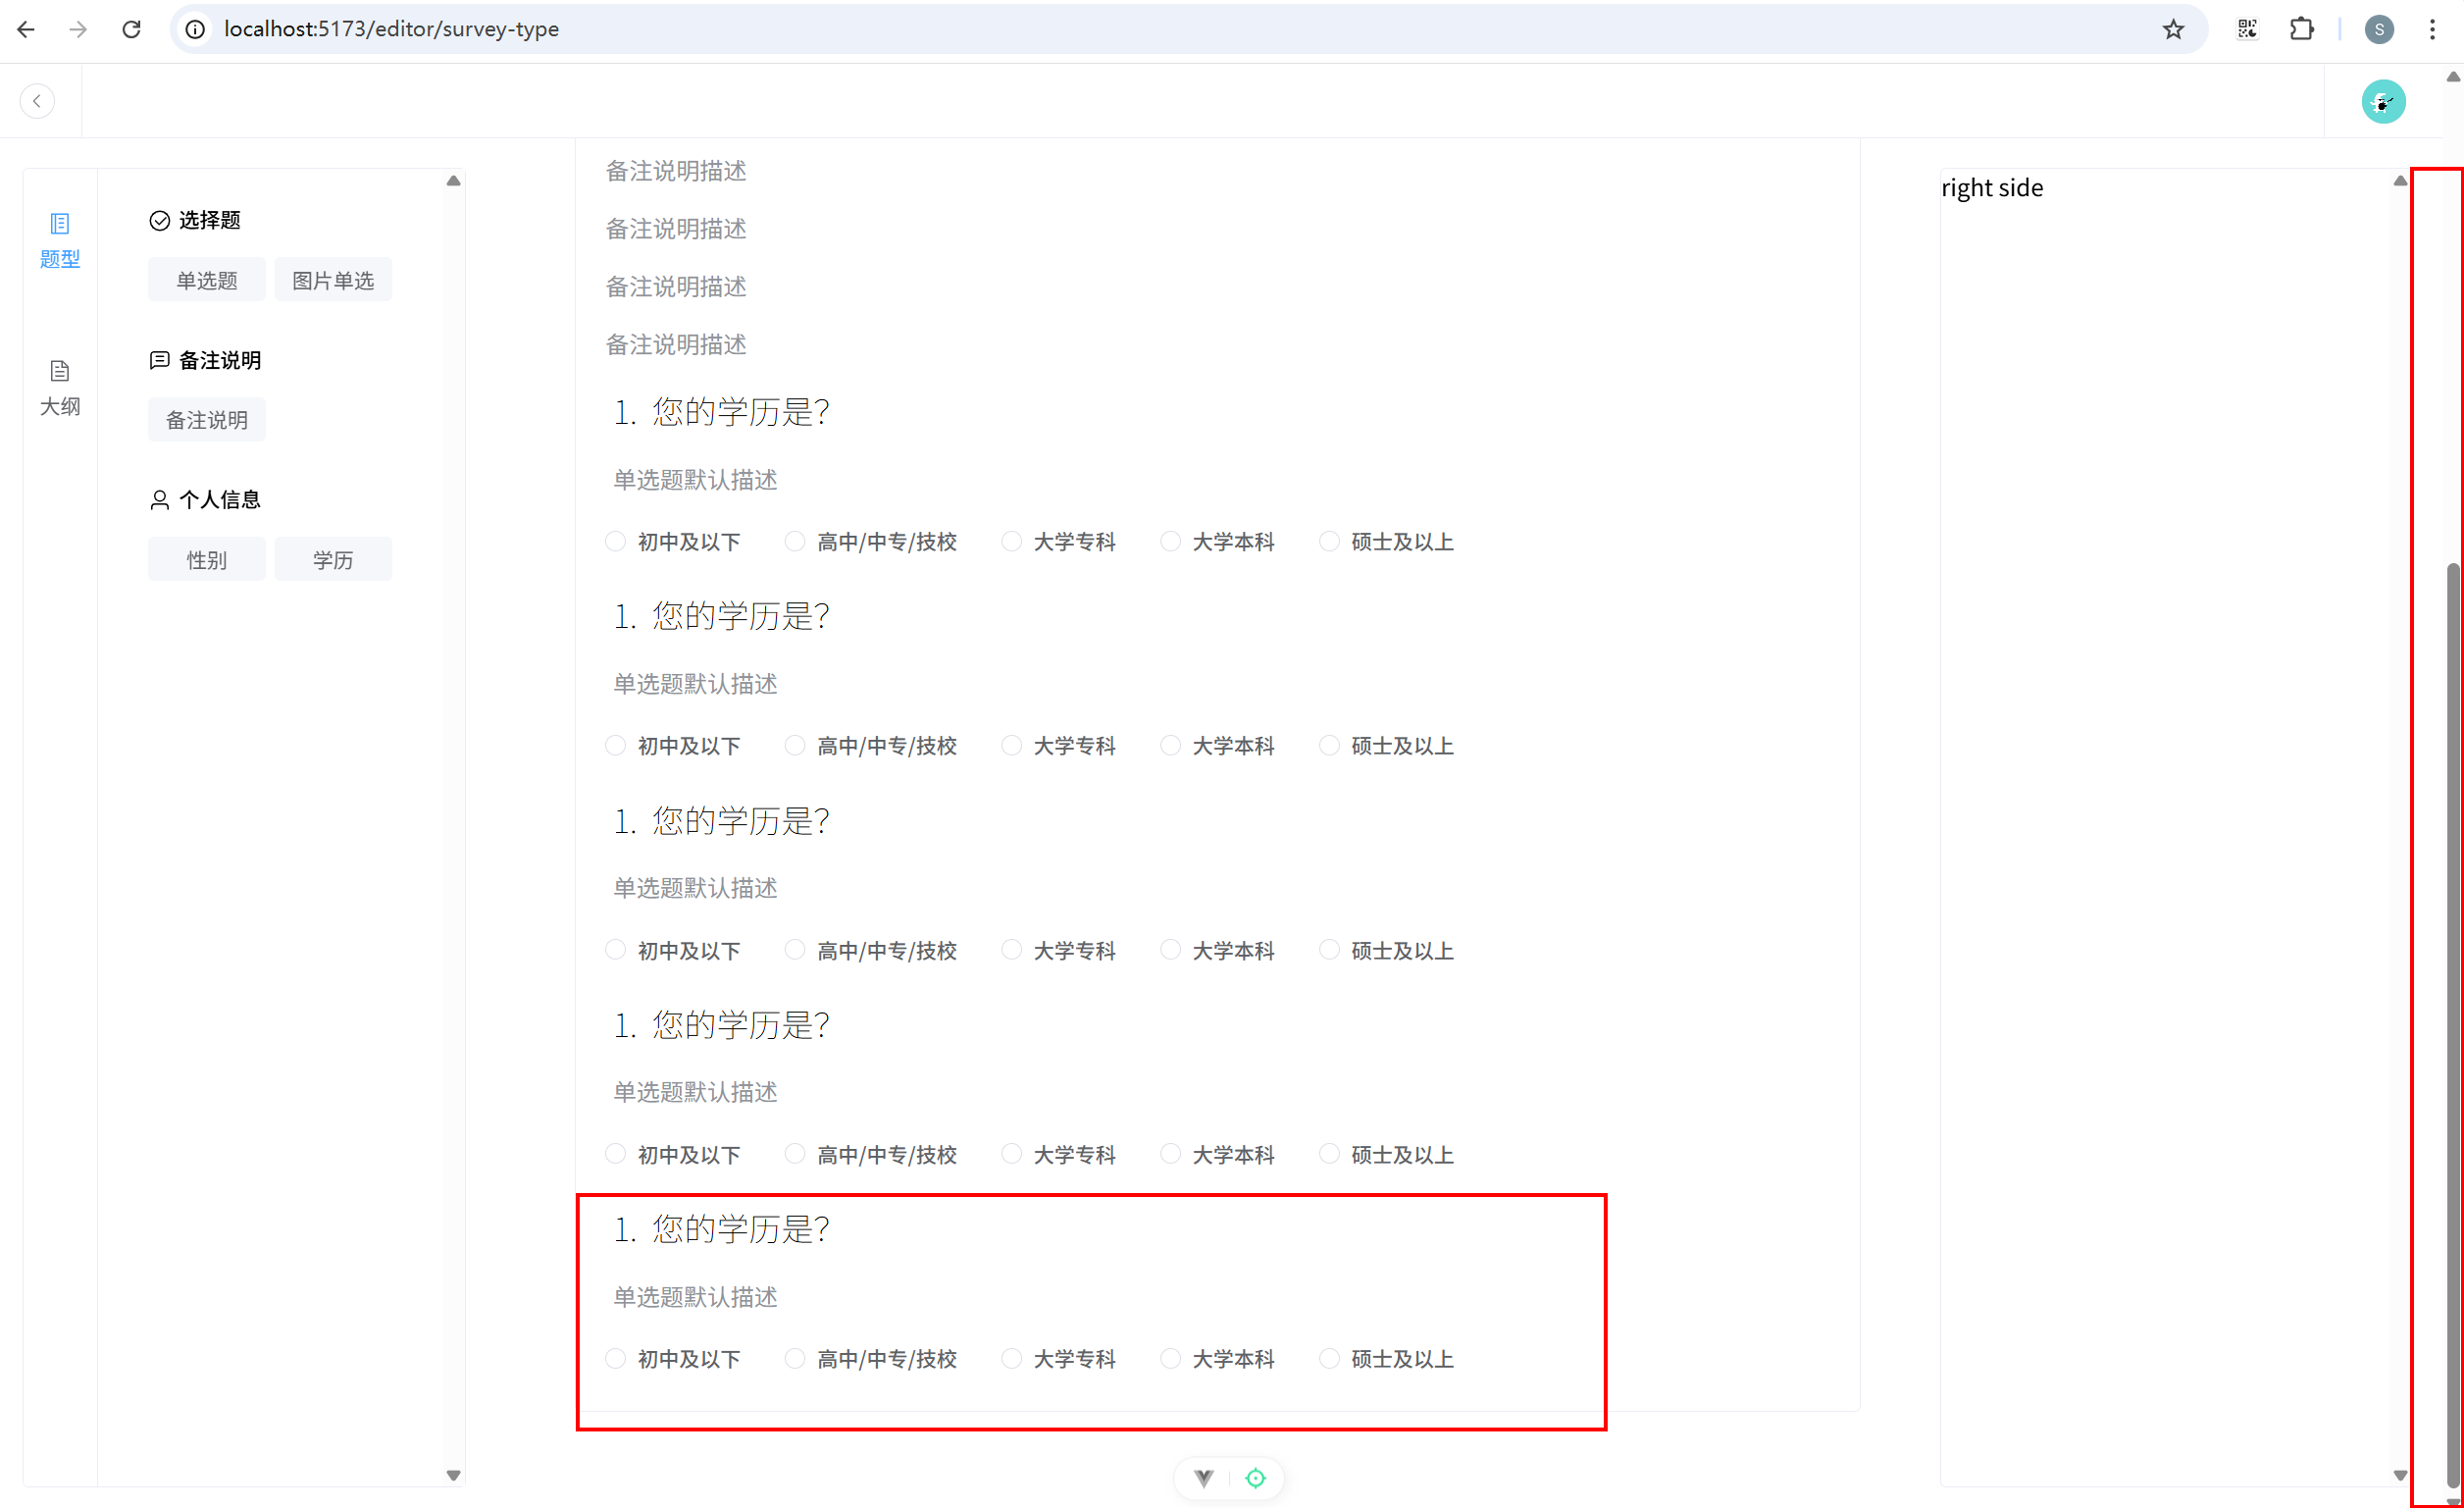
可以发现,每当添加新题型时,中间画布都会跟随滚动到底部。
12. 编辑画布组件
12.1 选中画布组件,展示编辑面板
(1)数据仓库添加设置选中组件方法。stores/useEditor.ts 关键代码:
javascript
actions: {
  // 其他代码省略
  setCurrentComponentIndex(index: number) {
    this.currentComponentIndex = index;
  },
},
(2)画布设置选中方法,并优化选中效果。views/EditorView/Center.vue:
javascript
<template>
  <div ref="centerContainer" class="center-container">
    <div
      v-for="(item, index) in store.coms"
      :key="index"
      class="content mb-10 relative"
      :class="{
        active: store.currentComponentIndex === index,
      }"
      @click="clickHandle(index)"
    >
      <component :is="item.type" :status="item.status" :serialNum="1" />
    </div>
  </div>
</template>

<script setup lang="ts">
import { nextTick, ref } from 'vue';
import { useEditorStore } from '@/stores/useEditor';
const store = useEditorStore();
// 事件总监
import EventBus from '@/utils/eventBus';

const centerContainer = ref<HTMLElement | null>(null);

const scrollToBottom = () => {
  nextTick(() => {
    const container = centerContainer.value; // 获取容器的dom元素
    if (container) {
      window.scrollTo({
        top: container.scrollHeight,
        behavior: 'smooth',
      });
    }
  });
};
// 通过事件总线提供滚动方法给外部调用
EventBus.on('scrollToBottom', scrollToBottom);

const clickHandle = (index: number) => {
  if (store.currentComponentIndex === index) {
    store.setCurrentComponentIndex(-1);
  } else {
    store.setCurrentComponentIndex(index);
  }
};
</script>

<style scoped>
.center-container {
  width: 50%;
  border: 1px solid var(--border-color);
  border-radius: var(--border-radius-md);
  margin: 70px auto;
  padding: 20px;
  background: var(--white);
  position: relative;
  .content {
    cursor: pointer;
    padding: 10px;
    background-color: var(--white);
    border-radius: var(--border-radius-sm);
    &:hover {
      transform: scale(1.01);
      transition: 0.5s;
      box-shadow: 0 0 10px rgba(0, 0, 0, 0.1);
    }
  }
}
.active {
  transform: scale(1.01);
  transition: 0.5s;
  box-shadow: 0 0 10px rgba(0, 0, 0, 0.1);
}
.delete-btn {
  right: -5px;
  top: -10px;
}
</style>
(3)展示右侧编辑面板。views/EditorView/RightSide.vue:
javascript
<template>
  <div class="right-side-container">
    <div
      v-if="store.currentComponentIndex === -1"
      class="content flex justify-content-center align-items-center"
    >
      点击题型进行编辑
    </div>
    <div v-else>
      <EditPannel :com="currentCom" />
    </div>
  </div>
</template>

<script setup lang="ts">
import { computed } from 'vue';
// 仓库
import { useEditorStore } from '@/stores/useEditor';
const store = useEditorStore();
import EditPannel from '@/components/SurveyComs/EditItems/EditPannel.vue';

const currentCom = computed(() => store.coms[store.currentComponentIndex]);

</script>

<style scoped lang="scss">
.right-side-container {
  width: 320px;
  height: calc(100vh - 50px - 40px);
  position: fixed;
  right: 20px;
  top: 70px;
  background-color: var(--white);
  border: 1px solid var(--border-color);
  border-radius: var(--border-radius-md);
  overflow-y: scroll;
}
.content {
  height: 100%;
}
</style>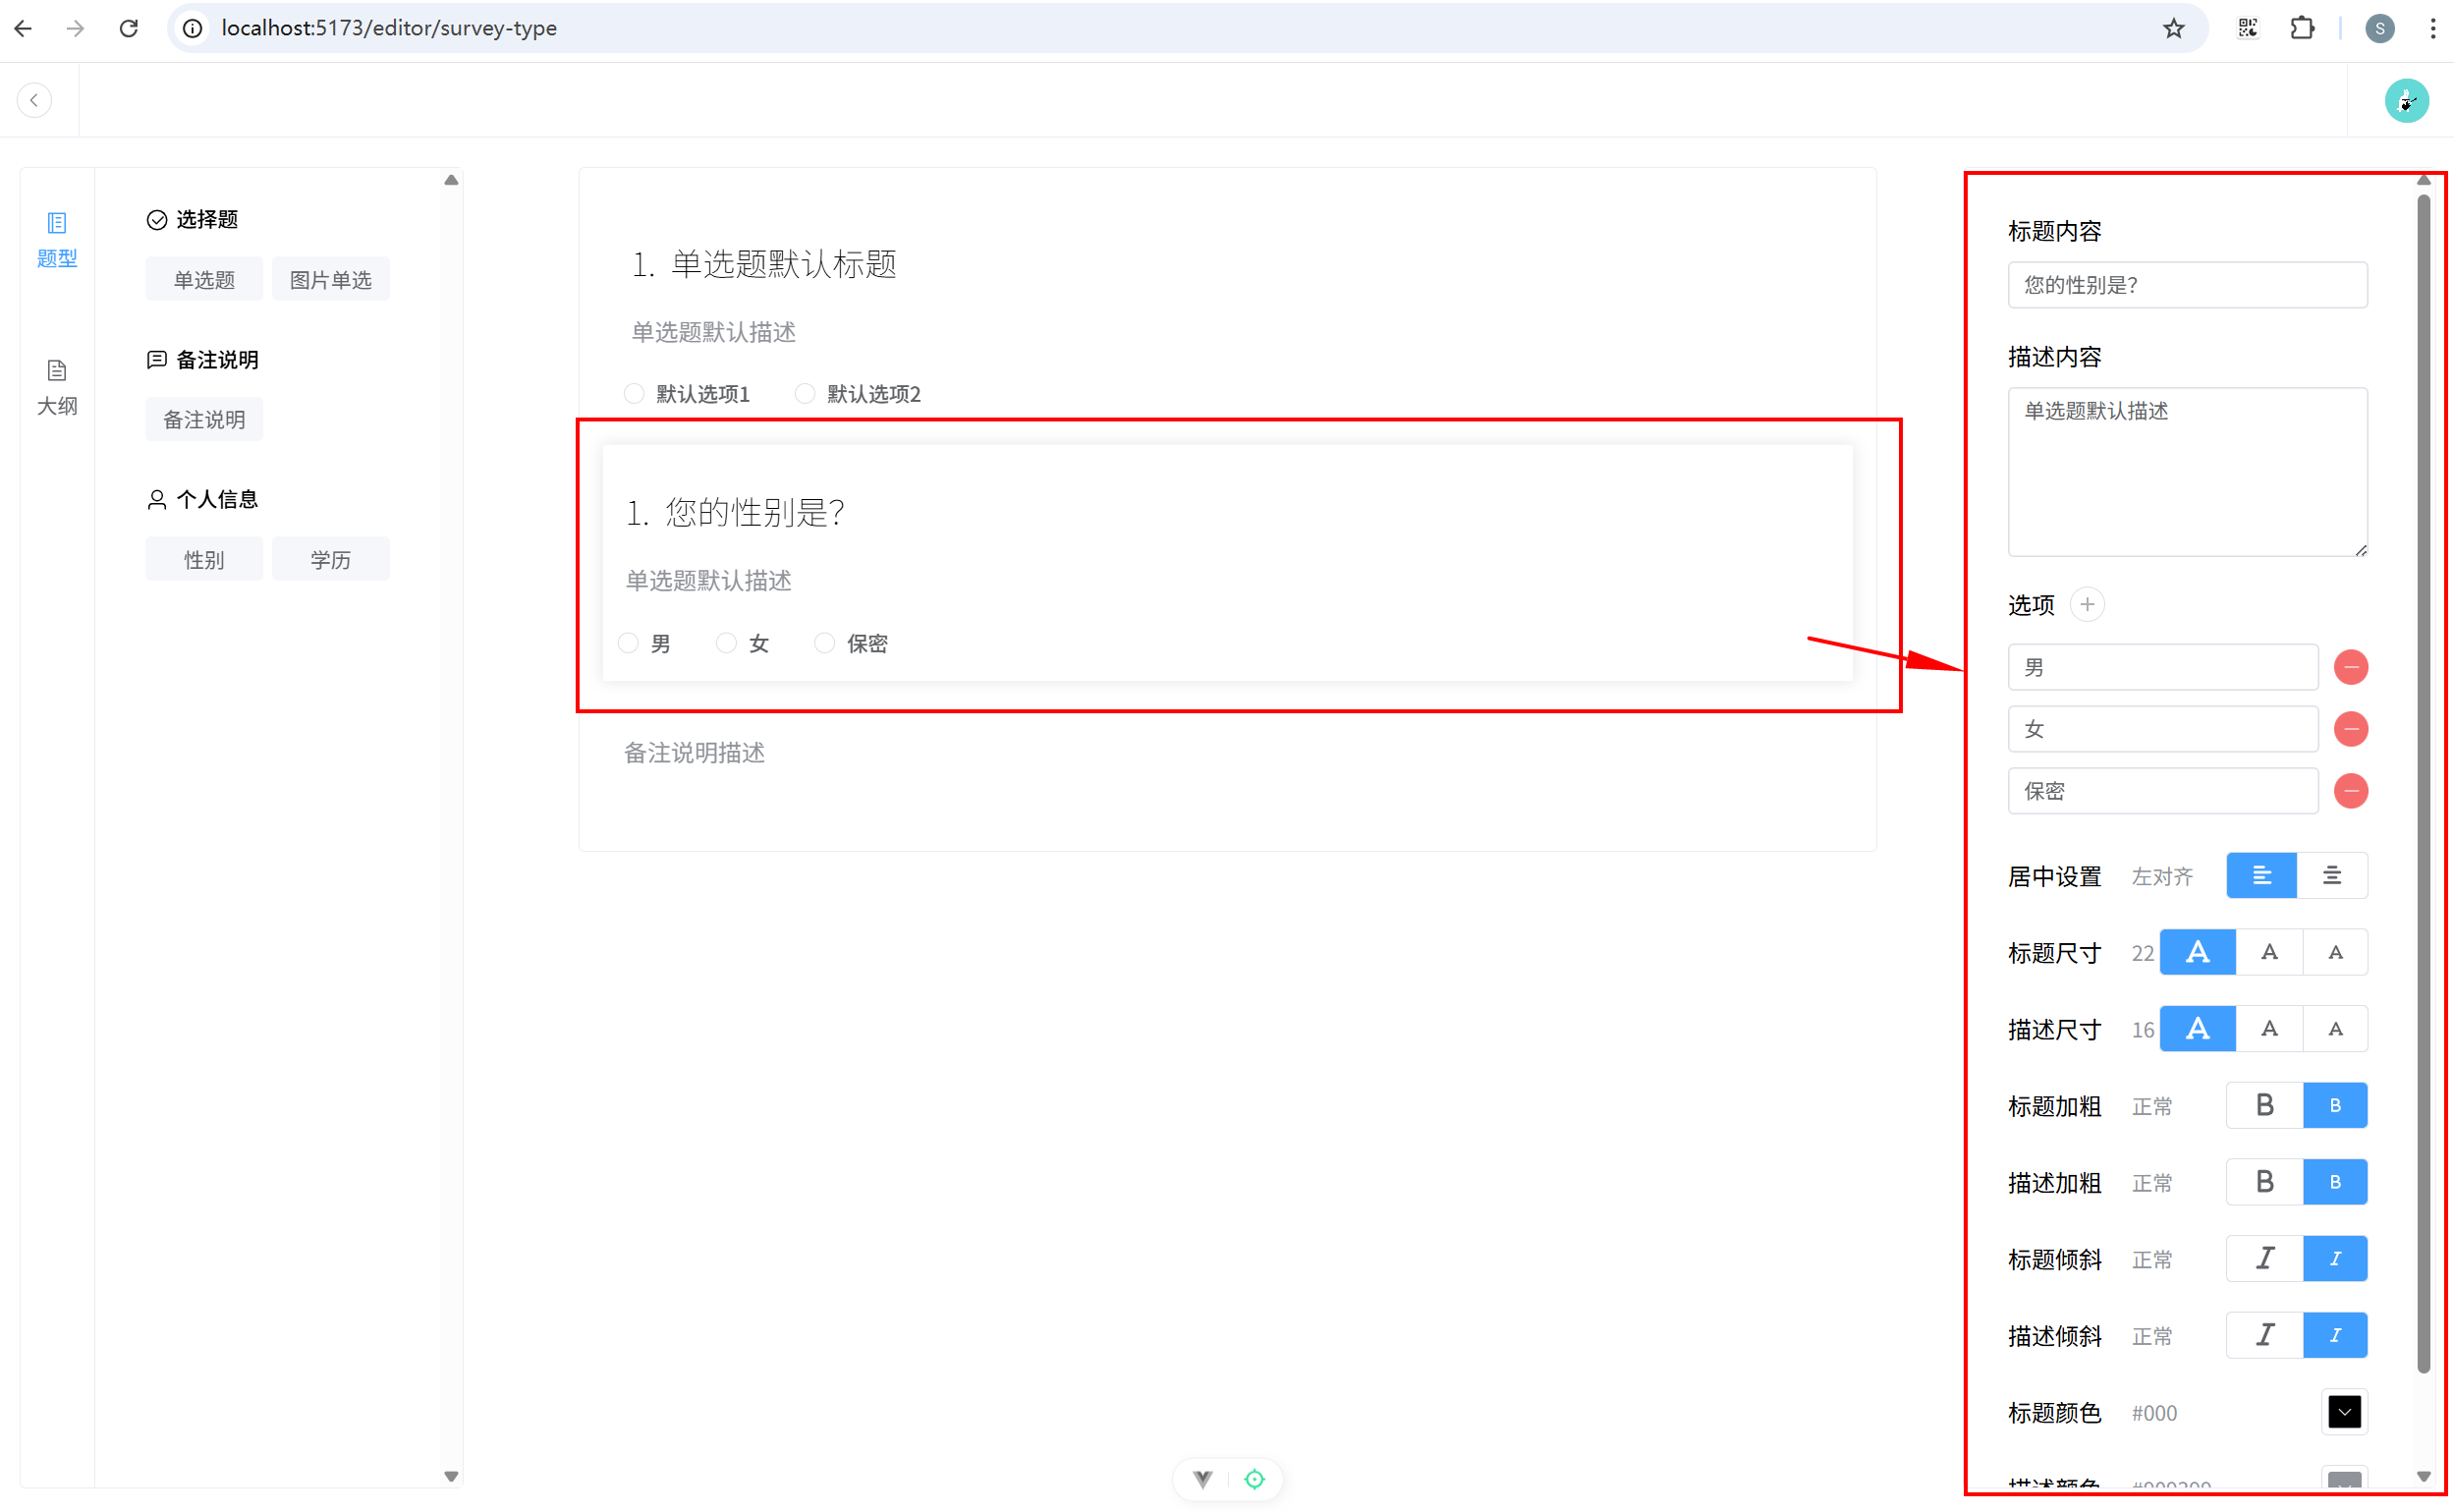
12.2 完成编辑功能
完成画布编辑功能。views/EditorView/RightSide.vue:
javascript
<template>
  <div class="right-side-container">
    <div
      v-if="store.currentComponentIndex === -1"
      class="content flex justify-content-center align-items-center"
    >
      点击题型进行编辑
    </div>
    <div v-else>
      <EditPannel :com="currentCom" />
    </div>
  </div>
</template>

<script setup lang="ts">
import { computed, provide } from 'vue';
// 仓库
import { useEditorStore } from '@/stores/useEditor';
const store = useEditorStore();
import EditPannel from '@/components/SurveyComs/EditItems/EditPannel.vue';

import { ElMessage } from 'element-plus';
import type { PicLink } from '@/types';
import { isPicLink, IsTypeStatus, IsOptionsStatus } from '@/types';
import { changeEditorIsShowStatus } from '@/utils';

const currentCom = computed(() => store.coms[store.currentComponentIndex]);

const updateStatus = (configKey: string, payload?: number | string | boolean | PicLink) => {
  // 拿到新的状态数据之后,就应该去修改仓库里面的数据
  switch (configKey) {
    case 'type': {
      if (typeof payload === 'number' && IsTypeStatus(currentCom.value.status)) {
        // 切换其他编辑器的显示状态
        changeEditorIsShowStatus(currentCom.value.status, payload);
        store.setCurrentStatus(currentCom.value.status[configKey], payload);
      }
      break;
    }
    case 'title':
    case 'desc': {
      if (typeof payload !== 'string') {
        console.error('Invalid payload type for "title or desc". Expected string.');
        return;
      }
      store.setTextStatus(currentCom.value.status[configKey], payload);
      break;
    }
    case 'options': {
      if (IsOptionsStatus(currentCom.value.status))
        if (typeof payload === 'number') {
          // 说明是删除选项
          const result = store.removeOption(currentCom.value.status[configKey], payload);
          if (result) ElMessage.success('删除成功');
          else ElMessage.error('至少保留两个选项');
        } else if (typeof payload === 'object' && isPicLink(payload)) {
          // 说明是在设置图片的链接
          store.setPicLinkByIndex(currentCom.value.status[configKey], payload);
        } else {
          // 说明是新增选项
          store.addOption(currentCom.value.status[configKey]);
        }
      break;
    }
    case 'position': {
      if (typeof payload !== 'number') {
        console.error('Invalid payload type for "position". Expected number.');
        return;
      }
      store.setPosition(currentCom.value.status[configKey], payload);
      break;
    }
    case 'titleSize':
    case 'descSize': {
      if (typeof payload !== 'number') {
        console.error('Invalid payload type for "titleSize or descSize". Expected number.');
        return;
      }
      store.setCurrentStatus(currentCom.value.status[configKey], payload);
      break;
    }
  }
};

const getLink = (link: PicLink) => {
  updateStatus('options', link);
};

provide('updateStatus', updateStatus);
provide('getLink', getLink);
</script>

<style scoped lang="scss">
.right-side-container {
  width: 320px;
  height: calc(100vh - 50px - 40px);
  position: fixed;
  right: 20px;
  top: 70px;
  background-color: var(--white);
  border: 1px solid var(--border-color);
  border-radius: var(--border-radius-md);
  overflow-y: scroll;
}
.content {
  height: 100%;
}
</style>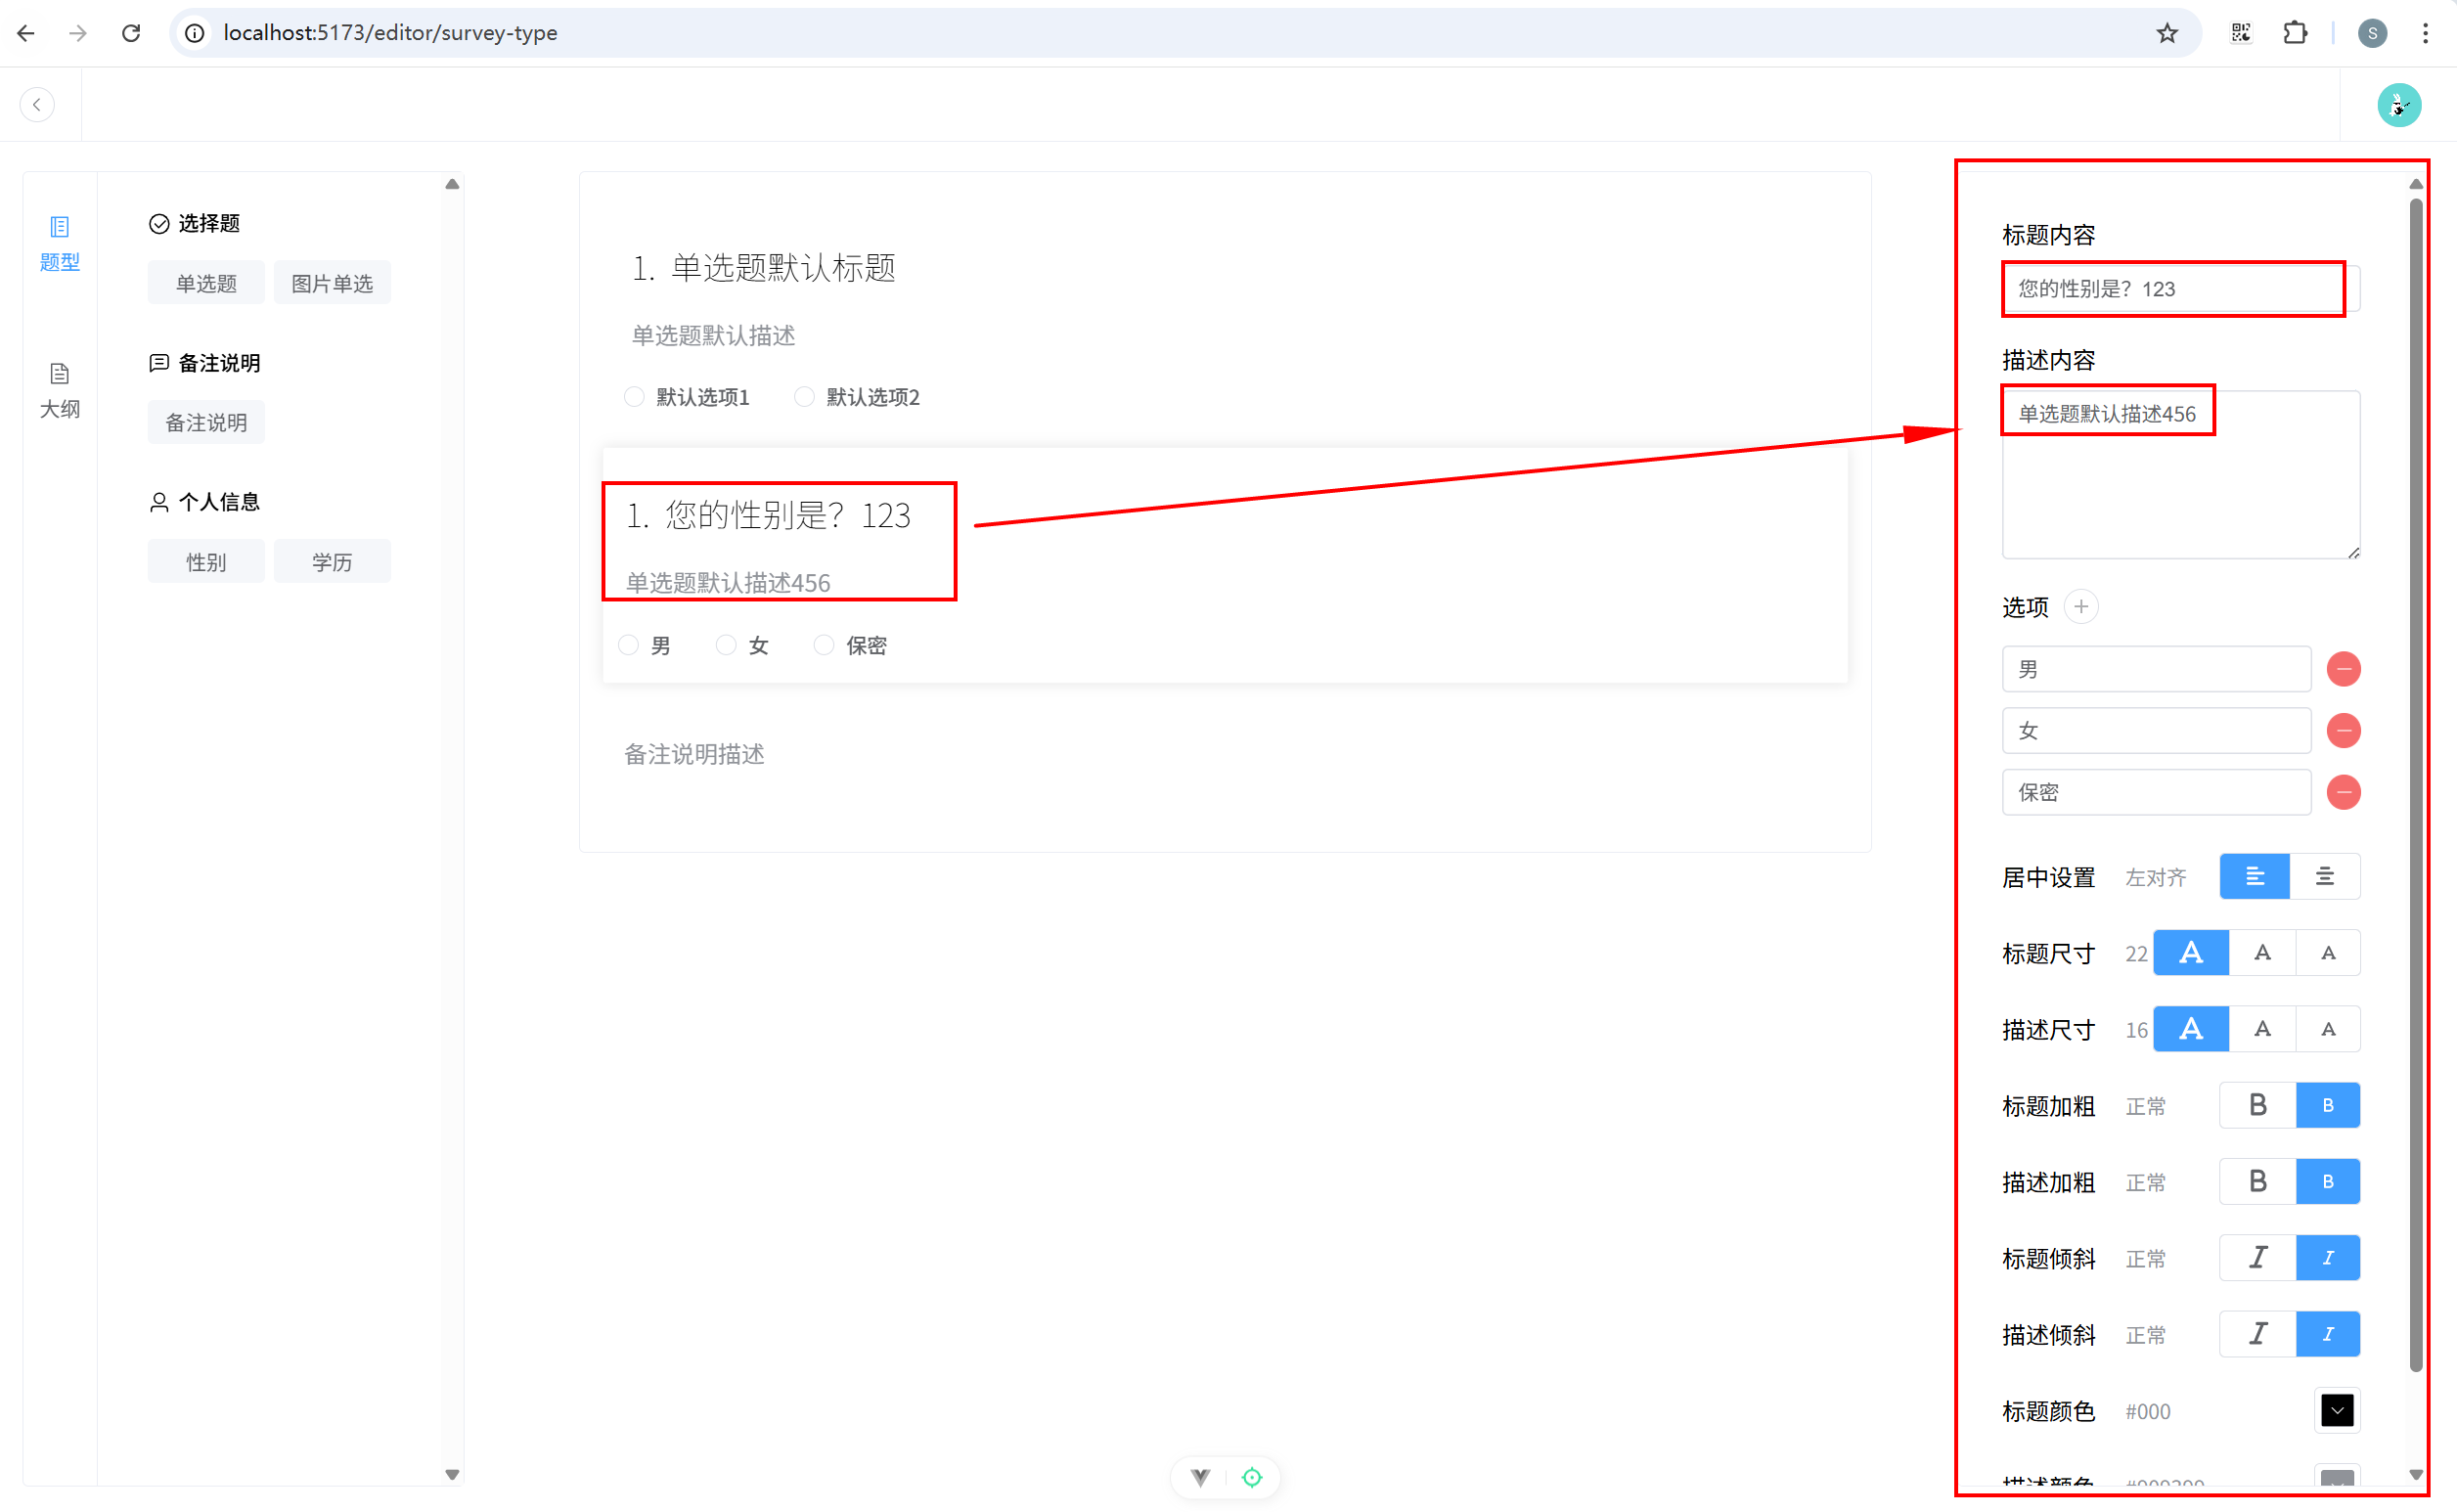
12.3 解决警告
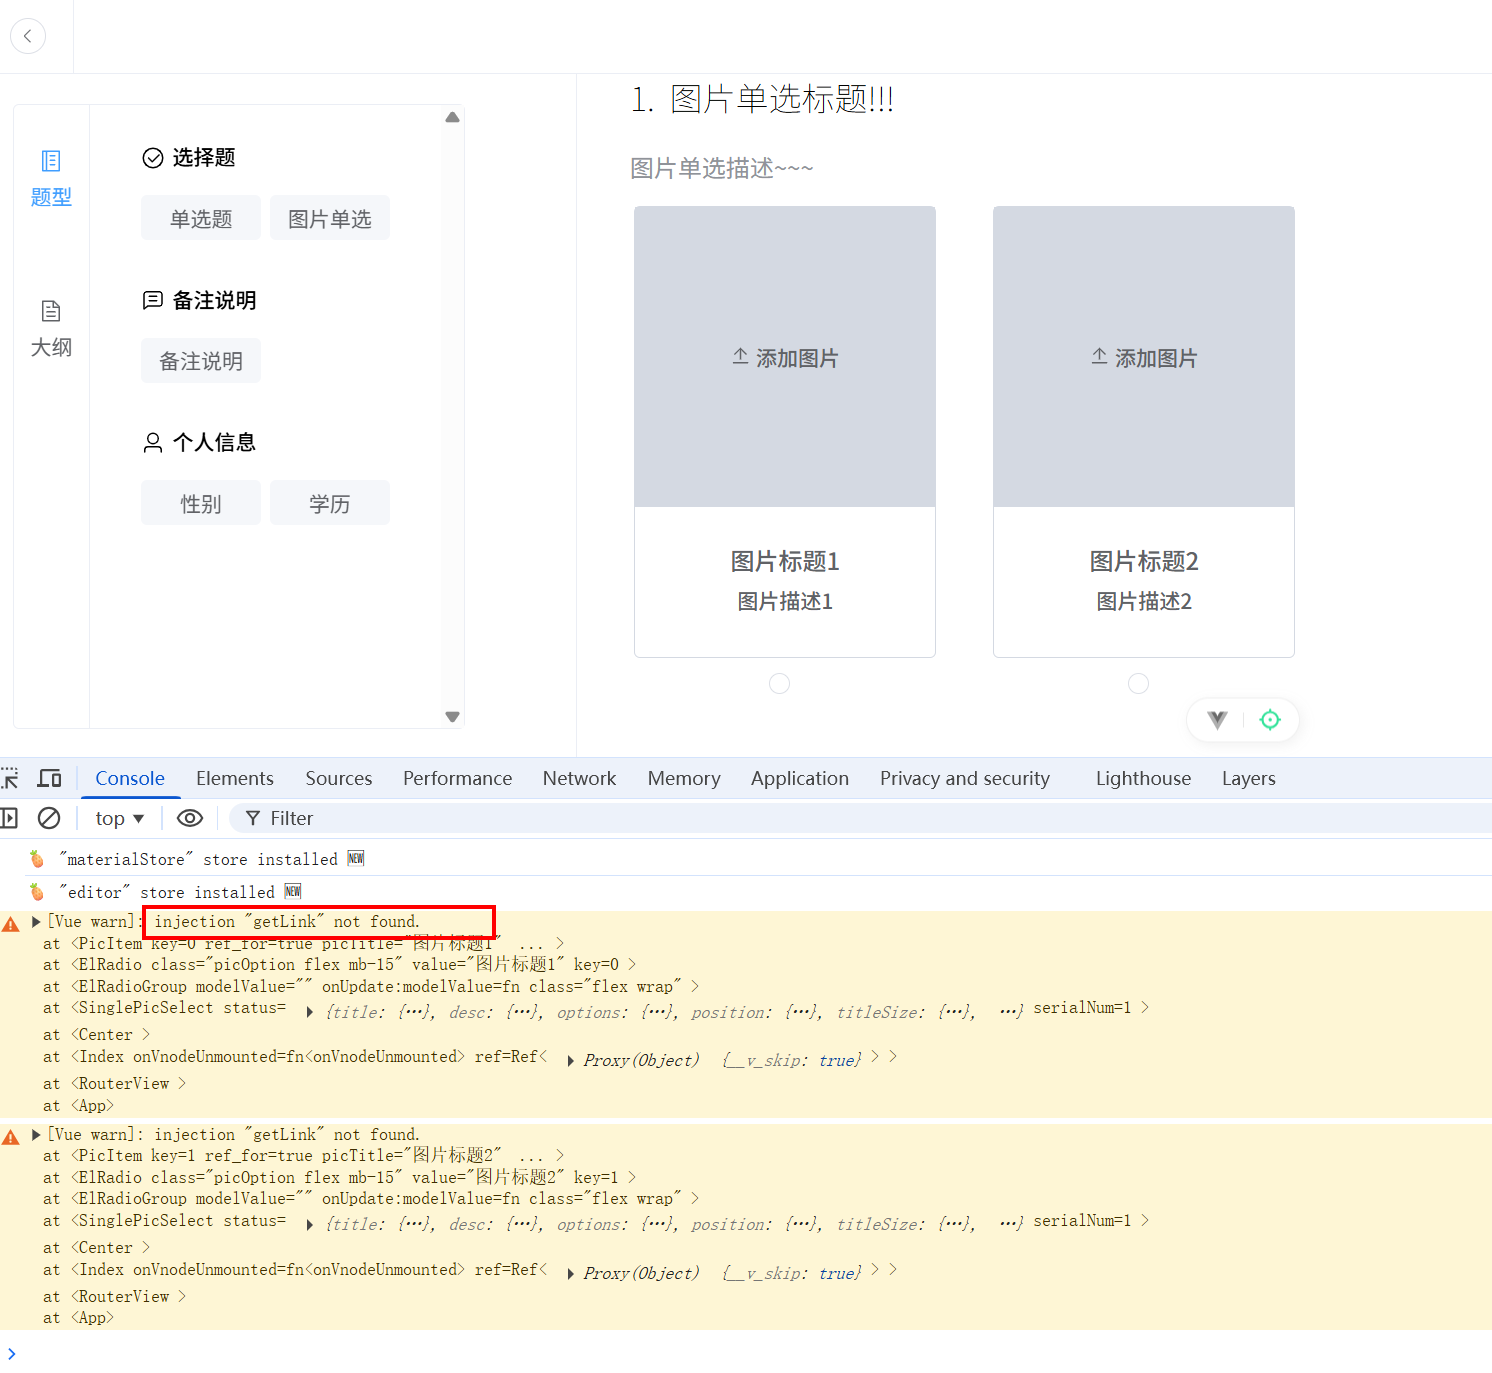
componentsSurveyComs/Common/PicItem.vue 关键代码:
javascript
const getLink = inject<GetLink>('getLink', () => {});
13. vuedraggable 拖拽组件库
13.1 vuedraggable 简介
最新版本链接:https://www.npmjs.com/package/vuedraggable/v/4.1.0
vuedraggable 是一个基于 Sortable.js 的 Vue 组件,用于实现拖拽 和排序功能。它可以让你在 Vue 应用中轻松地实现拖拽排序,并提供了丰富的配置选项和事件来控制拖拽行为。
Sortable.js 是一个轻量级的 JS 库,用于实现拖拽排序功能。它支持 HTML5 的拖拽 API,并提供了丰富的选项和事件,可以轻松地在网页中实现拖拽排序、拖拽交换等功能。Vue.Draggable 是基于 Sortable.js 构建的,用于在 Vue 应用中实现这些功能。
Sortable.js 的特点:
- 轻量级:Sortable.js 非常轻量,核心库只有几千字节。
- 高性能:利用现代浏览器的 HTML5 拖拽 API,提供高性能的拖拽体验。
- 多样的选项:提供丰富的选项和回调函数,可以自定义拖拽行为。
- 多种场景:支持多种拖拽场景,包括列表排序、网格布局、分组拖拽等。
- 与框架集成:容易与主流前端框架集成,如 Vue、React、Angular 等。
13.2 使用方式
(1)下载最新依赖:
bash
npm install vuedraggable@next安装的版本信息:"vuedraggable": "^4.1.0"
注意这里在默认安装的时候不会安装此版本,使用时会有一些问题,务必安装 4.1.0 版本
(2)安装后可以从这个库中导入一个组件:
javascript
<template>
	<draggable
     v-model="myArray"
     group="people"
     @start="drag=true"
     @end="drag=false"
     itemKey="id"
   >
    <template #item="{ element }">
      <div class="task">{{ element.name }}</div>
    </template>
  </draggable>
</template>

<script setup>
import draggable from 'vuedraggable'
</script>
13.3 使用示例
这是 vuedraggable 的一个标准用法。
- v-model="myArray":
- v-model 是 Vue 的双向数据绑定语法糖。在这里,它绑定了一个数组 myArray,这个数组包含了需要拖拽排序的元素。
- 当数组的顺序改变时(由于拖拽),myArray 会自动更新以反映新的顺序。
- group="people":
- group 属性用于配置分组,可以在不同的 draggable 实例之间进行拖拽操作。
- 相同 group 名称的 draggable 实例之间允许相互拖拽元素。在这个例子中,所有 group 为 people 的 draggable 实例之间都可以互相拖拽元素。
- @start="drag=true":
- @start 是一个事件监听器,当拖拽操作开始时触发。
- 在这个例子中,当拖拽操作开始时,将 drag 变量设置为 true。这可以用于在拖拽开始时触发一些行为,比如改变样式或显示一些提示。
- @end="drag=false":
- @end 是一个事件监听器,当拖拽操作结束时触发。
- 在这个例子中,当拖拽操作结束时,将 drag 变量设置为 false。这可以用于在拖拽结束时触发一些行为,比如恢复样式或隐藏一些提示。
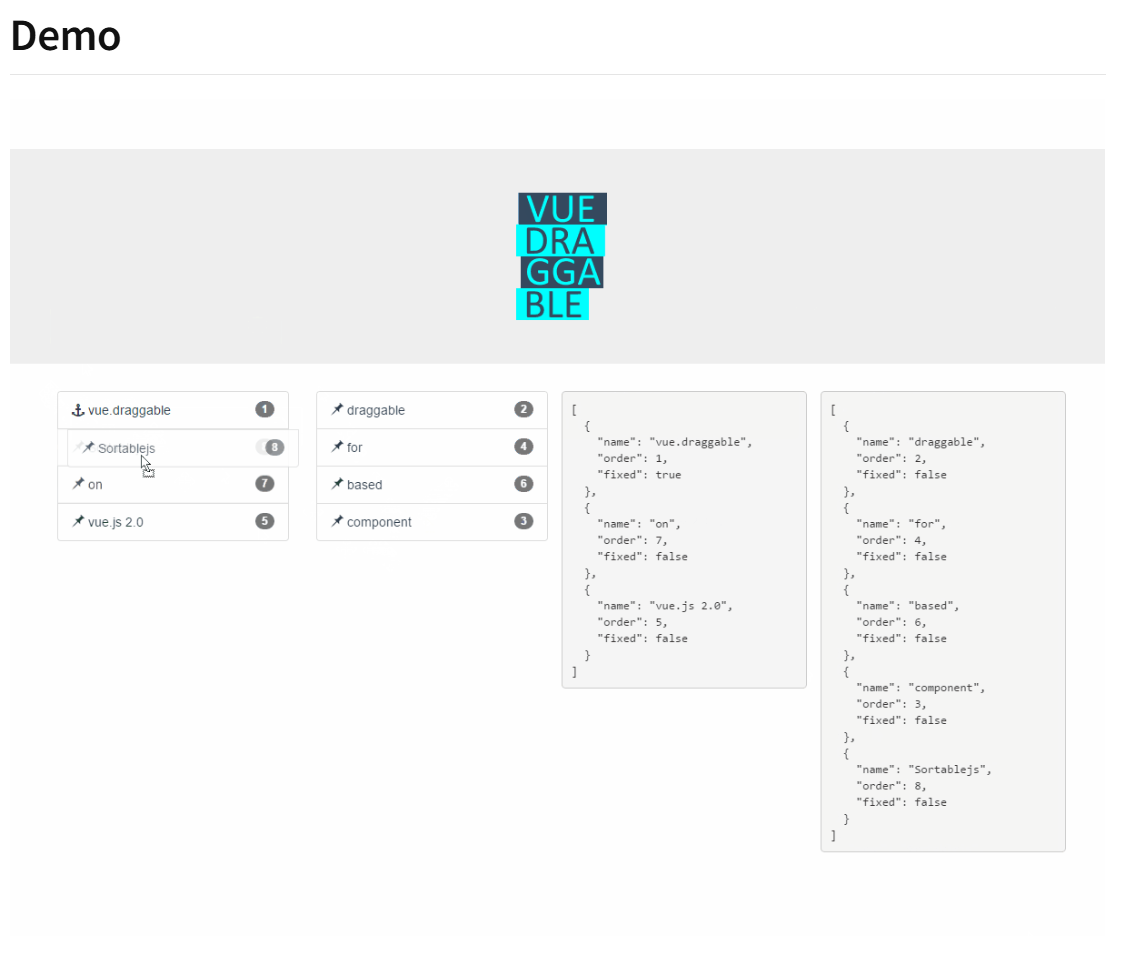
快速入门示例
javascript
<template>
  <div id="app">
    <div class="list">
      <draggable v-model="list1" group="tasks" itemKey="id">
        <template #item="{ element }">
          <div class="task">{{ element.text }}</div>
        </template>
      </draggable>
    </div>
    <div class="list">
      <draggable v-model="list2" group="tasks" itemKey="id">
        <template #item="{ element }">
          <div class="task">{{ element.text }}</div>
        </template>
      </draggable>
    </div>
    <div class="list">
      <div class="ml1em">
        <span>[</span>
        <div v-for="item in list1">
          <div class="item ml2em">
            <span>{</span>
            <div class="attribute ml2em" v-for="(value, key) in item">
              <span>"{{ key }}":</span>
              <span class="value ml1em">"{{ value }}"</span>
              <span>,</span>
            </div>
            <span>},</span>
          </div>
        </div>
        <span>]</span>
      </div>
    </div>
    <div class="list">
      <div class="ml1em">
        <span>[</span>
        <div v-for="item in list2">
          <div class="item ml2em">
            <span>{</span>
            <div class="attribute ml2em" v-for="(value, key) in item">
              <span>"{{ key }}":</span>
              <span class="value ml1em">"{{ value }}"</span>
              <span>,</span>
            </div>
            <span>},</span>
          </div>
        </div>
        <span>]</span>
      </div>
    </div>
  </div>
</template>

<script setup lang="ts">
import { ref } from "vue";
import draggable from "vuedraggable";
const list1 = ref([
  { id: 1, text: "Vue" },
  { id: 2, text: "React" },
  { id: 3, text: "Angular" },
]);
const list2 = ref([
  { id: 4, text: "ref" },
  { id: 5, text: "reactive" },
  { id: 6, text: "watch" },
  { id: 6, text: "watchEffect" },
  { id: 6, text: "computed" },
]);
</script>

<style scoped>
body {
  font-family: Arial, sans-serif;
  background-color: #f4f4f4;
  margin: 0;
  padding: 0;
}

#app {
  max-width: 1240px;
  margin: 50px auto;
  padding: 20px;
  background: white;
  border-radius: 8px;
  box-shadow: 0 0 10px rgba(0, 0, 0, 0.1);
  display: flex;
  margin-top: 20px;
}

.list {
  width: calc(25% - 20px);
  margin: 10px;
  color: darkblue;
  background-color: lightcoral;
}

.ml2em {
  margin-left: 2em;
}

.ml1em {
  margin-left: 1em;
}

.task {
  padding: 15px;
  margin: 5px 0;
  background-color: #42b983;
  color: white;
  border-radius: 4px;
  cursor: move;
  transition: background-color 0.3s, transform 0.3s;
}

.task:hover {
  background-color: #369870;
  transform: scale(1.02);
}
</style>
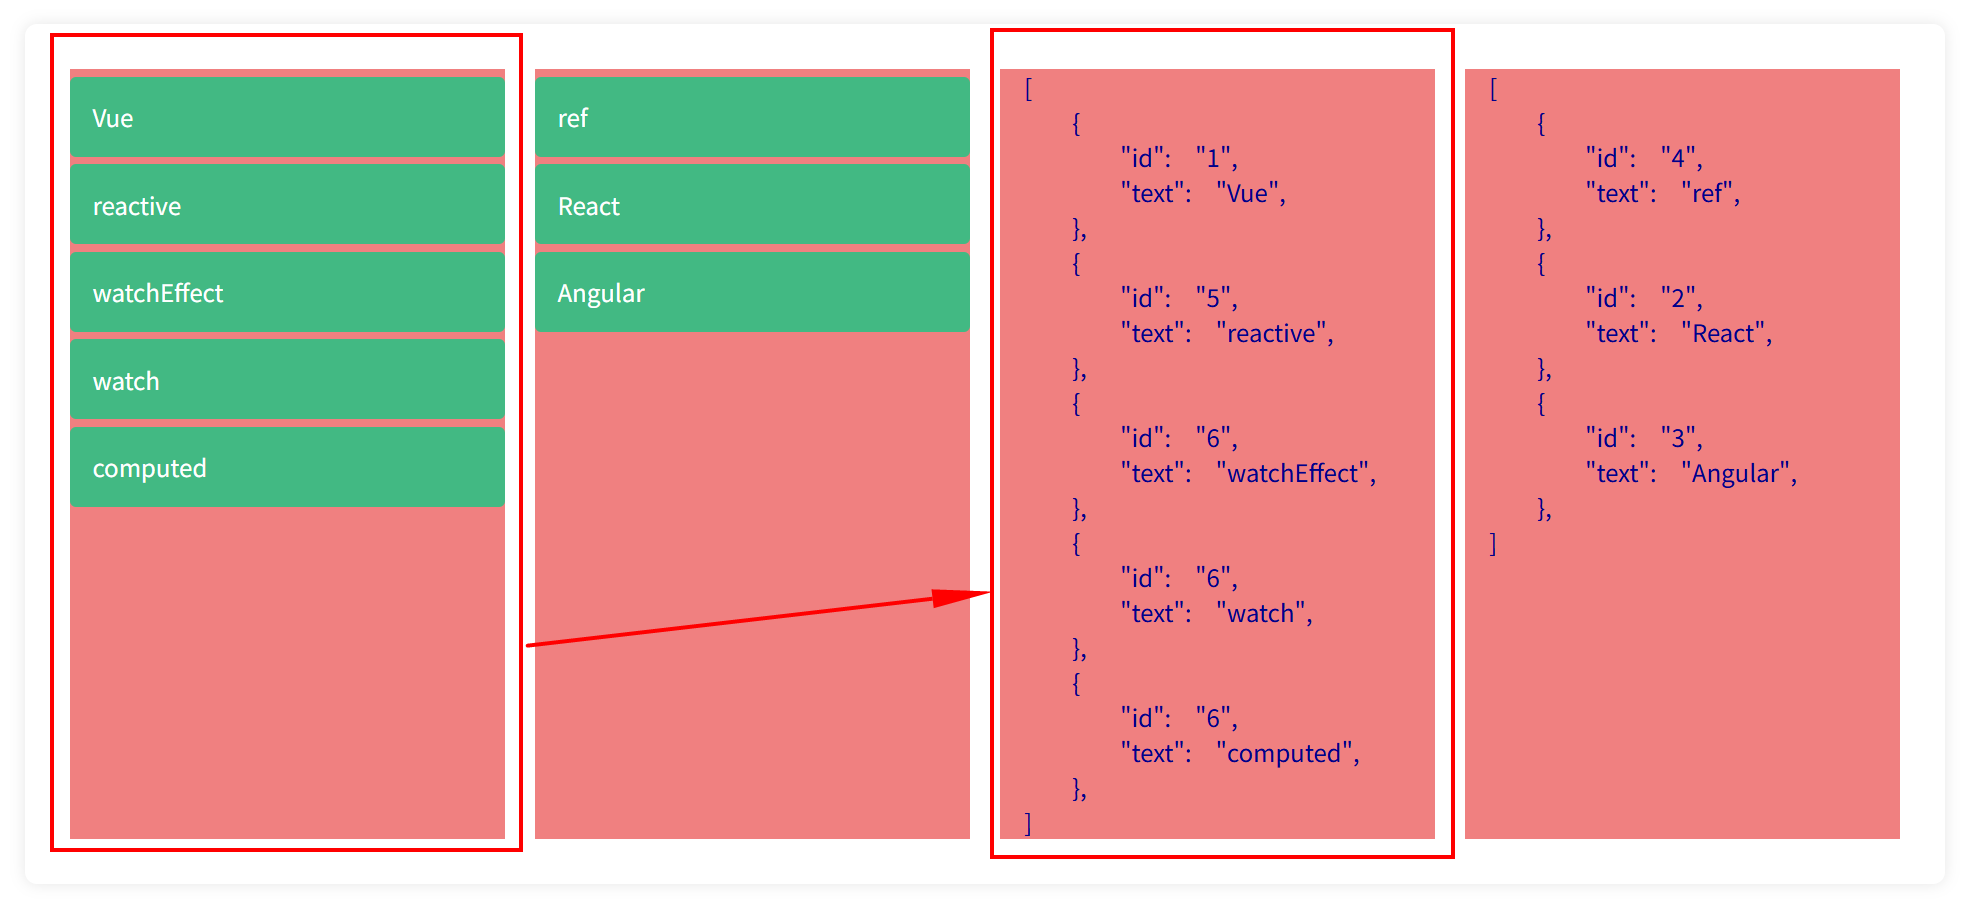
可以看到 draggable 组件使用的是 v-model 进行双向数据绑定,因此拖拽数据项时,对应的列表数据也会发生改变。
14. 拖动组件
14.1 拖动画布中组件
(1)下载拖拽依赖
javascript
pnpm i vuedraggable@next(2)画布中使用拖拽组件。views/EditorView/Center.vue:
javascript
<template>
  <div ref="centerContainer" class="center-container">
    <draggable v-model="store.coms" item-key="index" @start="dragstart">
      <template #item="{ element, index }">
        <div
          class="content mb-10 relative"
          :class="{
            active: store.currentComponentIndex === index,
          }"
          @click="clickHandle(index)"
        >
          <component :is="element.type" :status="element.status" :serialNum="1" />
        </div>
      </template>
    </draggable>
  </div>
</template>

<script setup lang="ts">
import { nextTick, ref } from 'vue';
import { useEditorStore } from '@/stores/useEditor';
const store = useEditorStore();
// 事件总监
import EventBus from '@/utils/eventBus';
import draggable from 'vuedraggable';

const centerContainer = ref<HTMLElement | null>(null);

const scrollToBottom = () => {
  nextTick(() => {
    const container = centerContainer.value; // 获取容器的dom元素
    if (container) {
      window.scrollTo({
        top: container.scrollHeight,
        behavior: 'smooth',
      });
    }
  });
};
// 通过事件总线提供滚动方法给外部调用
EventBus.on('scrollToBottom', scrollToBottom);

const clickHandle = (index: number) => {
  if (store.currentComponentIndex === index) {
    store.setCurrentComponentIndex(-1);
  } else {
    store.setCurrentComponentIndex(index);
  }
};
const dragstart = () => {
  store.setCurrentComponentIndex(-1);
};
</script>

<style scoped>
.center-container {
  width: 50%;
  border: 1px solid var(--border-color);
  border-radius: var(--border-radius-md);
  margin: 70px auto;
  padding: 20px;
  background: var(--white);
  position: relative;

  .content {
    cursor: pointer;
    padding: 10px;
    background-color: var(--white);
    border-radius: var(--border-radius-sm);

    &:hover {
      transform: scale(1.01);
      transition: 0.5s;
      box-shadow: 0 0 10px rgba(0, 0, 0, 0.1);
    }
  }
}

.active {
  transform: scale(1.01);
  transition: 0.5s;
  box-shadow: 0 0 10px rgba(0, 0, 0, 0.1);
}

.delete-btn {
  right: -5px;
  top: -10px;
}
</style>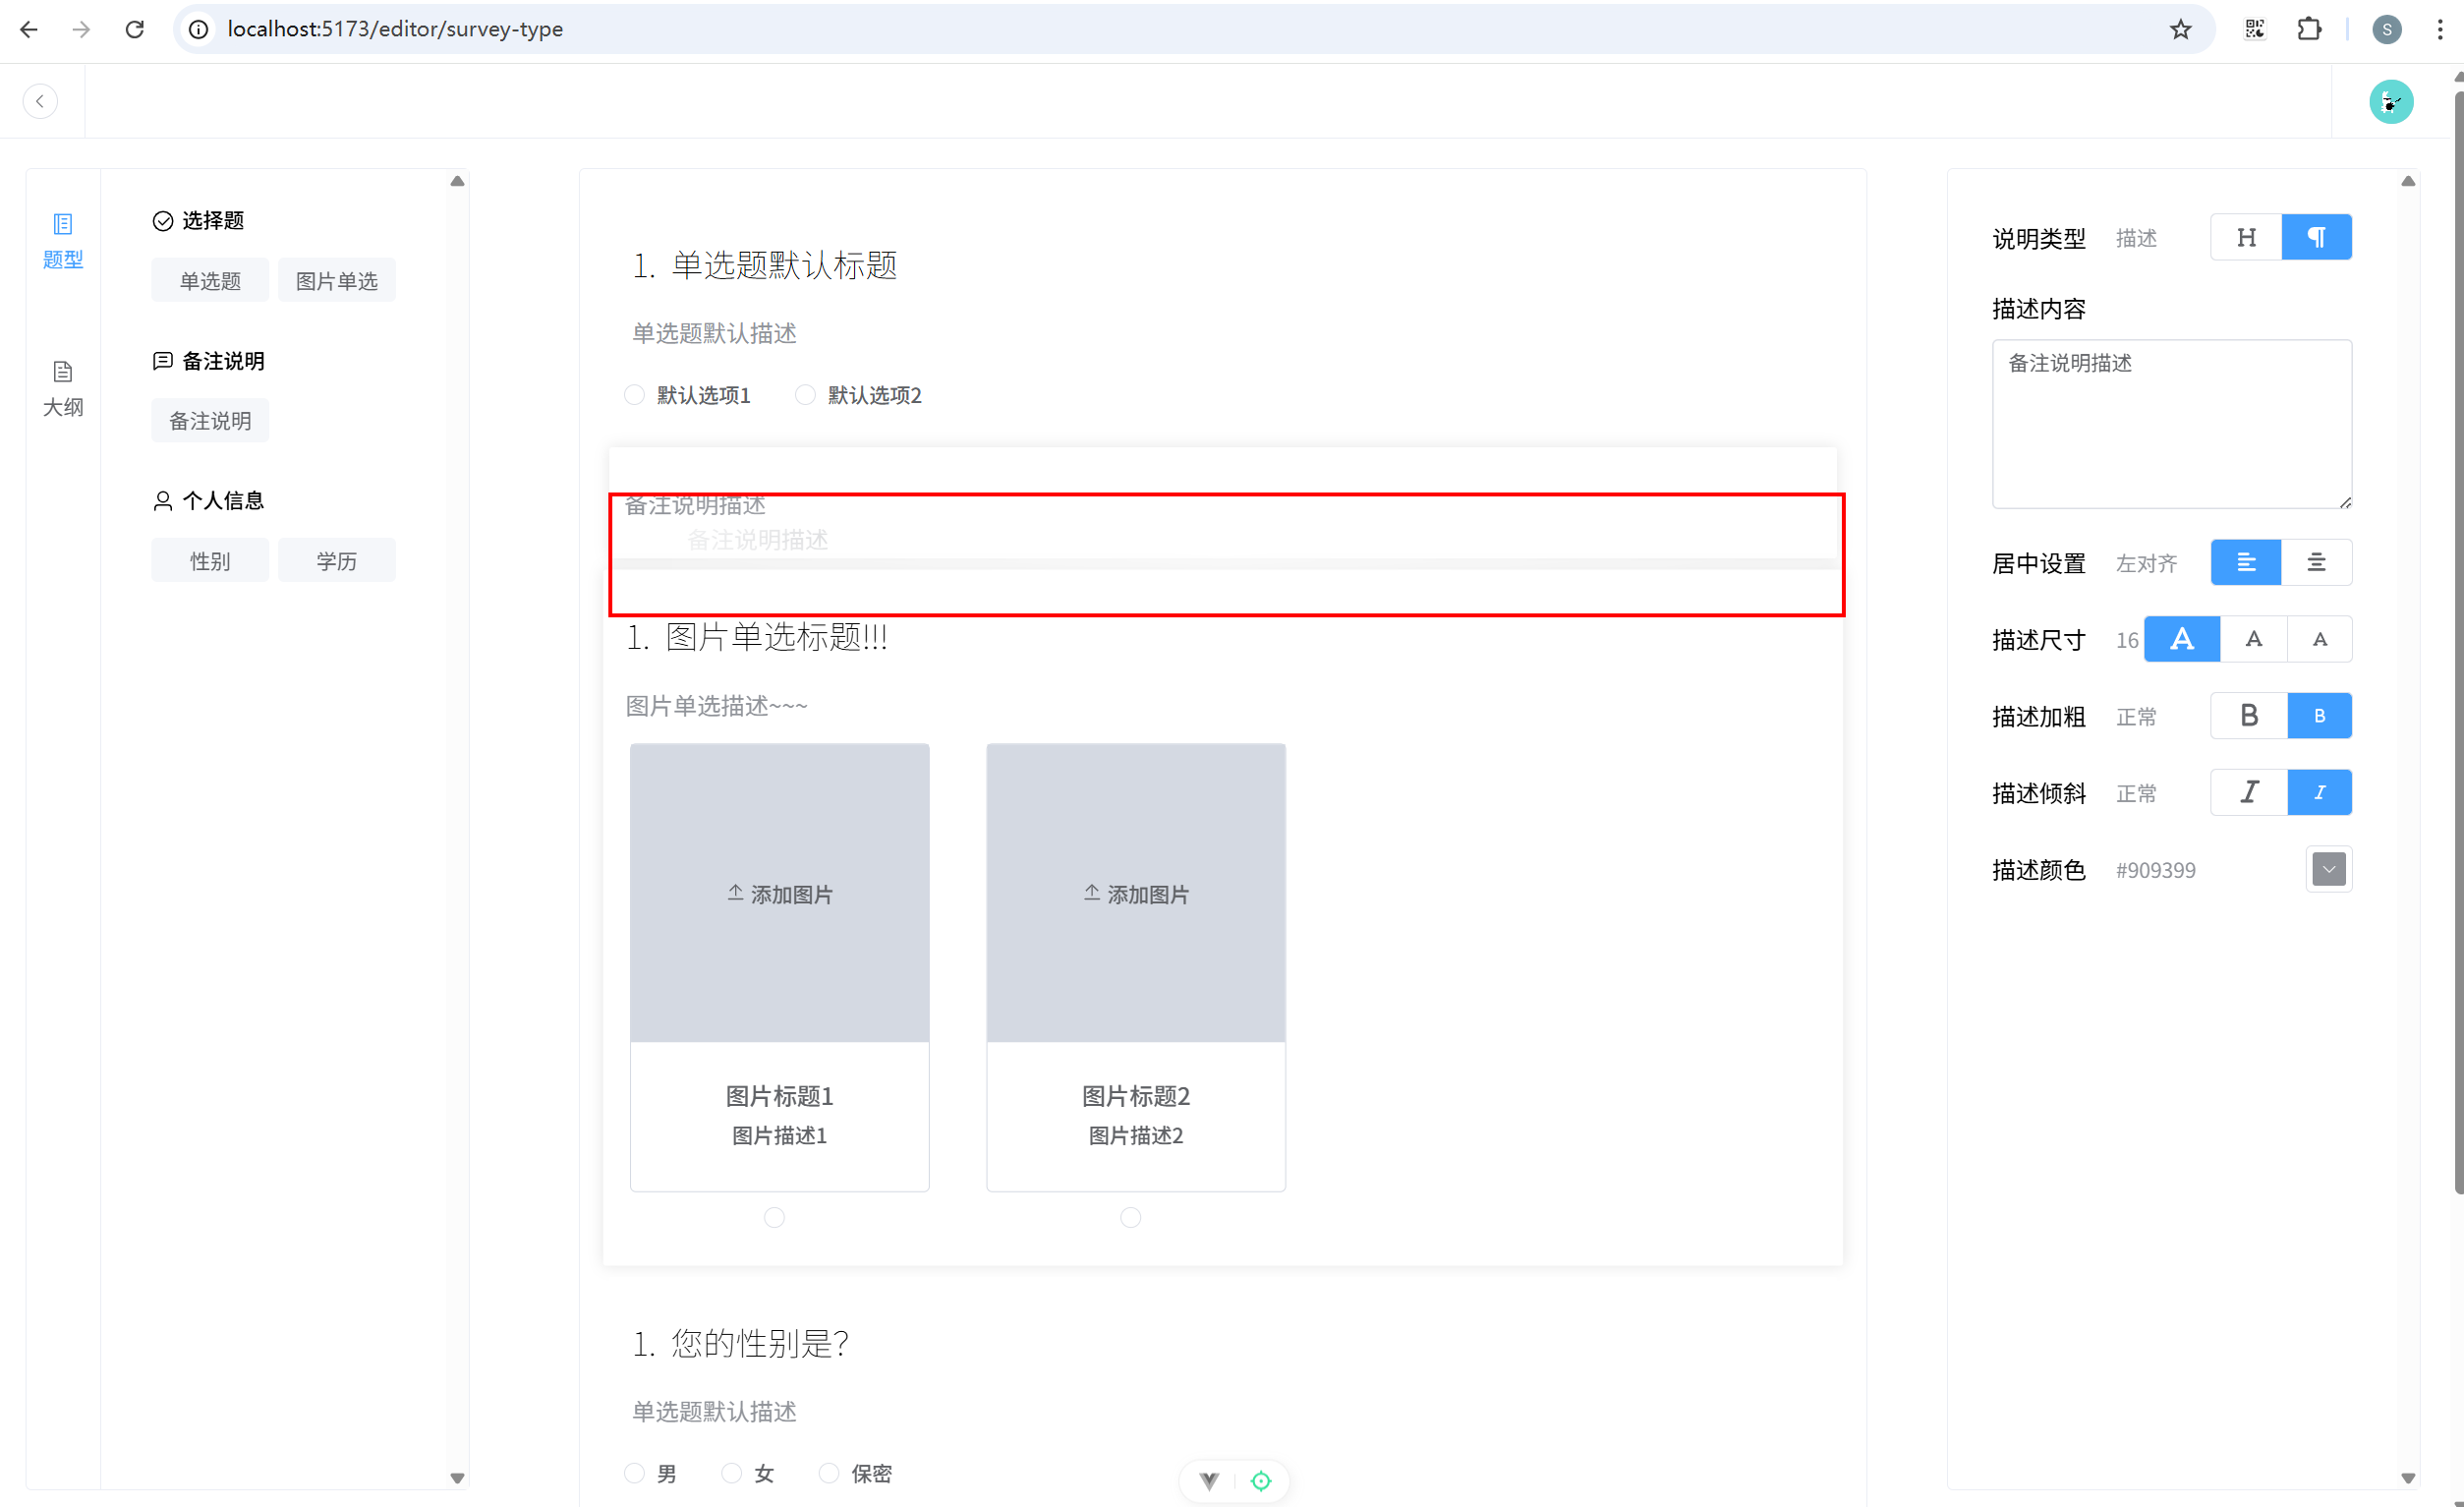
14.2 绘制大纲组件,并实现拖拽
views/EditorView/LeftSide/Outline.vue:
javascript
<template>
  <div v-if="store.surveyCount">
    <draggable v-model="store.coms" item-key="index" @start="dragstart">
      <template #item="{ element, index }">
        <div
          class="mb-10"
          @click="clickHandle(index)"
          :class="{
            active: store.currentComponentIndex === index,
          }"
        >
          <div class="item">
            1. {{
              element.status.title.status.length > 10
              ? element.status.title.status.substring(0, 10) + '...'
              : element.status.title.status

               }}
          </div>
        </div>
      </template>
    </draggable>
  </div>
  <div v-else class="tip flex align-items-center justify-content-center">请添加题目</div>
</template>

<script setup>
import draggable from 'vuedraggable';
// 仓库
import { useEditorStore } from '@/stores/useEditor';
const store = useEditorStore();
const dragstart = () => {
  store.setCurrentComponentIndex(-1);
};
const clickHandle = (index: number) => {
  if (store.currentComponentIndex === index) {
    store.setCurrentComponentIndex(-1);
  } else {
    store.setCurrentComponentIndex(index);
  }
};
</script>

<style lang="scss" scoped>
.item {
  /* outline: 1px solid black; */
  color: var(--font-color-light);
  font-size: var(--font-size-base);
  padding: 10px;
  cursor: pointer;
}
.tip {
  height: calc(100% - 50px);
}
.active {
  transform: scale(1.04);
  transition: 0.5s;
  background-color: var(--border-color);
  border-radius: var(--border-radius-lg);
}
</style>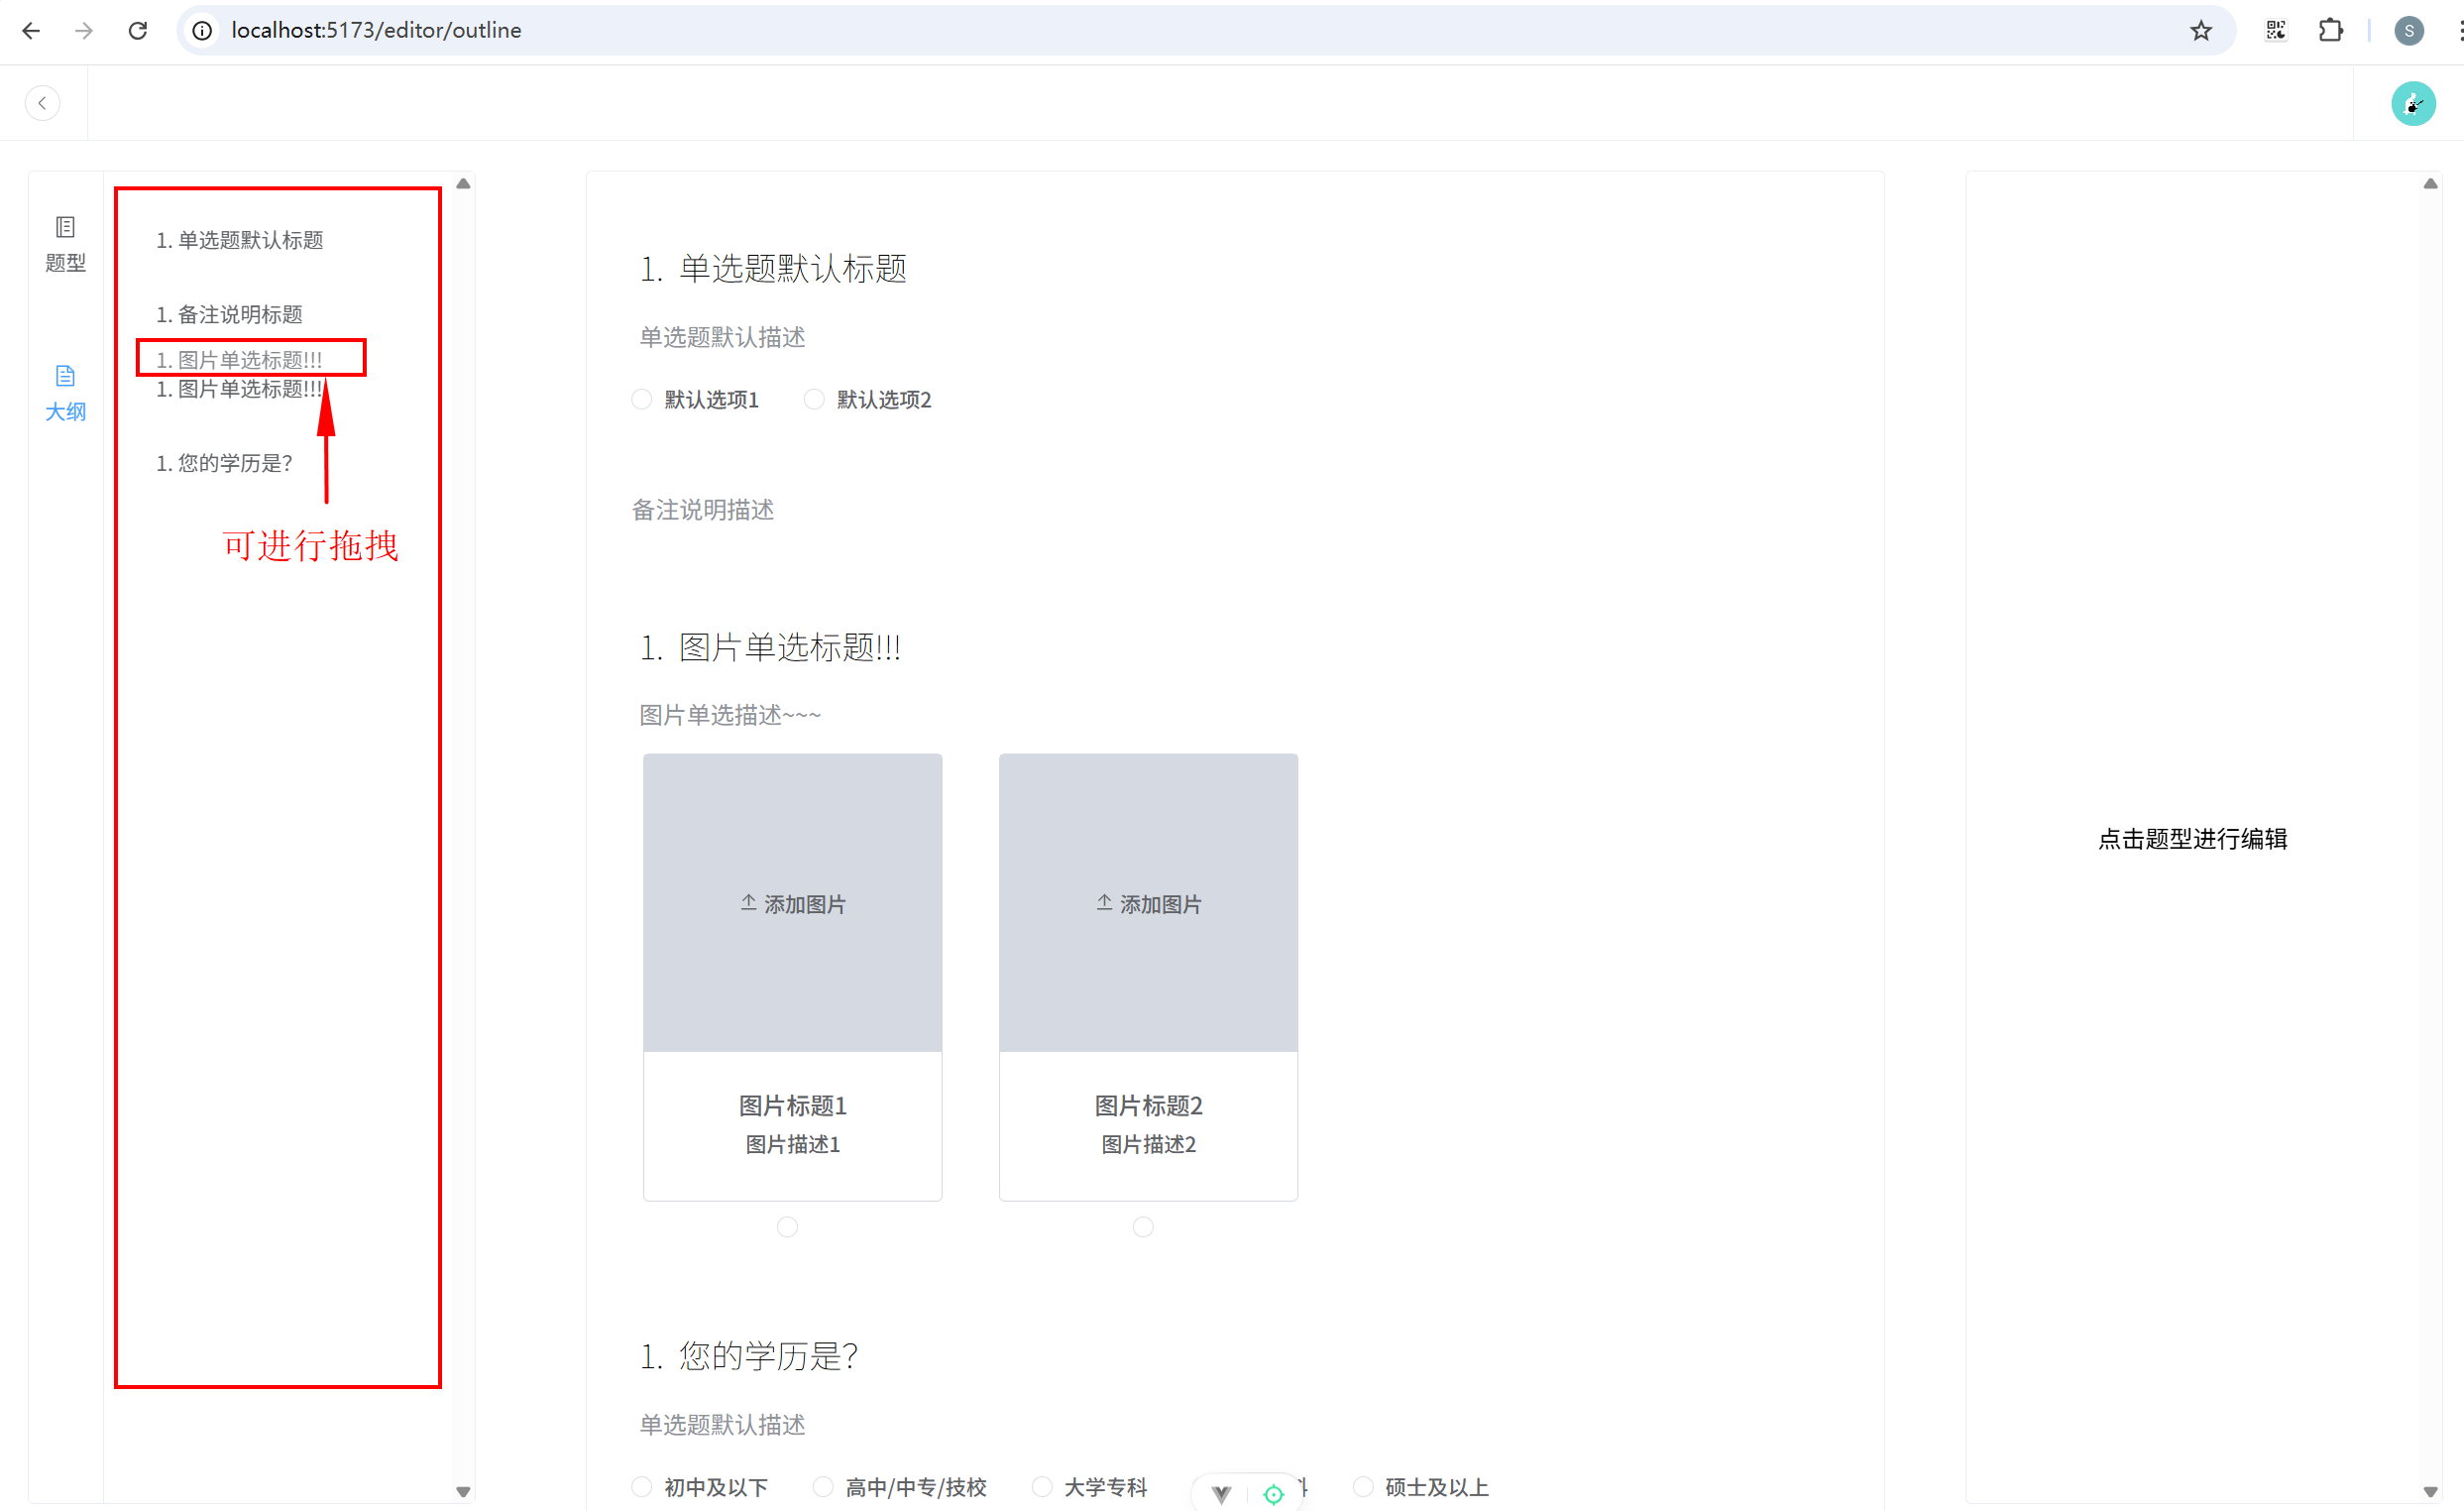
14.3 解决计算序号问题
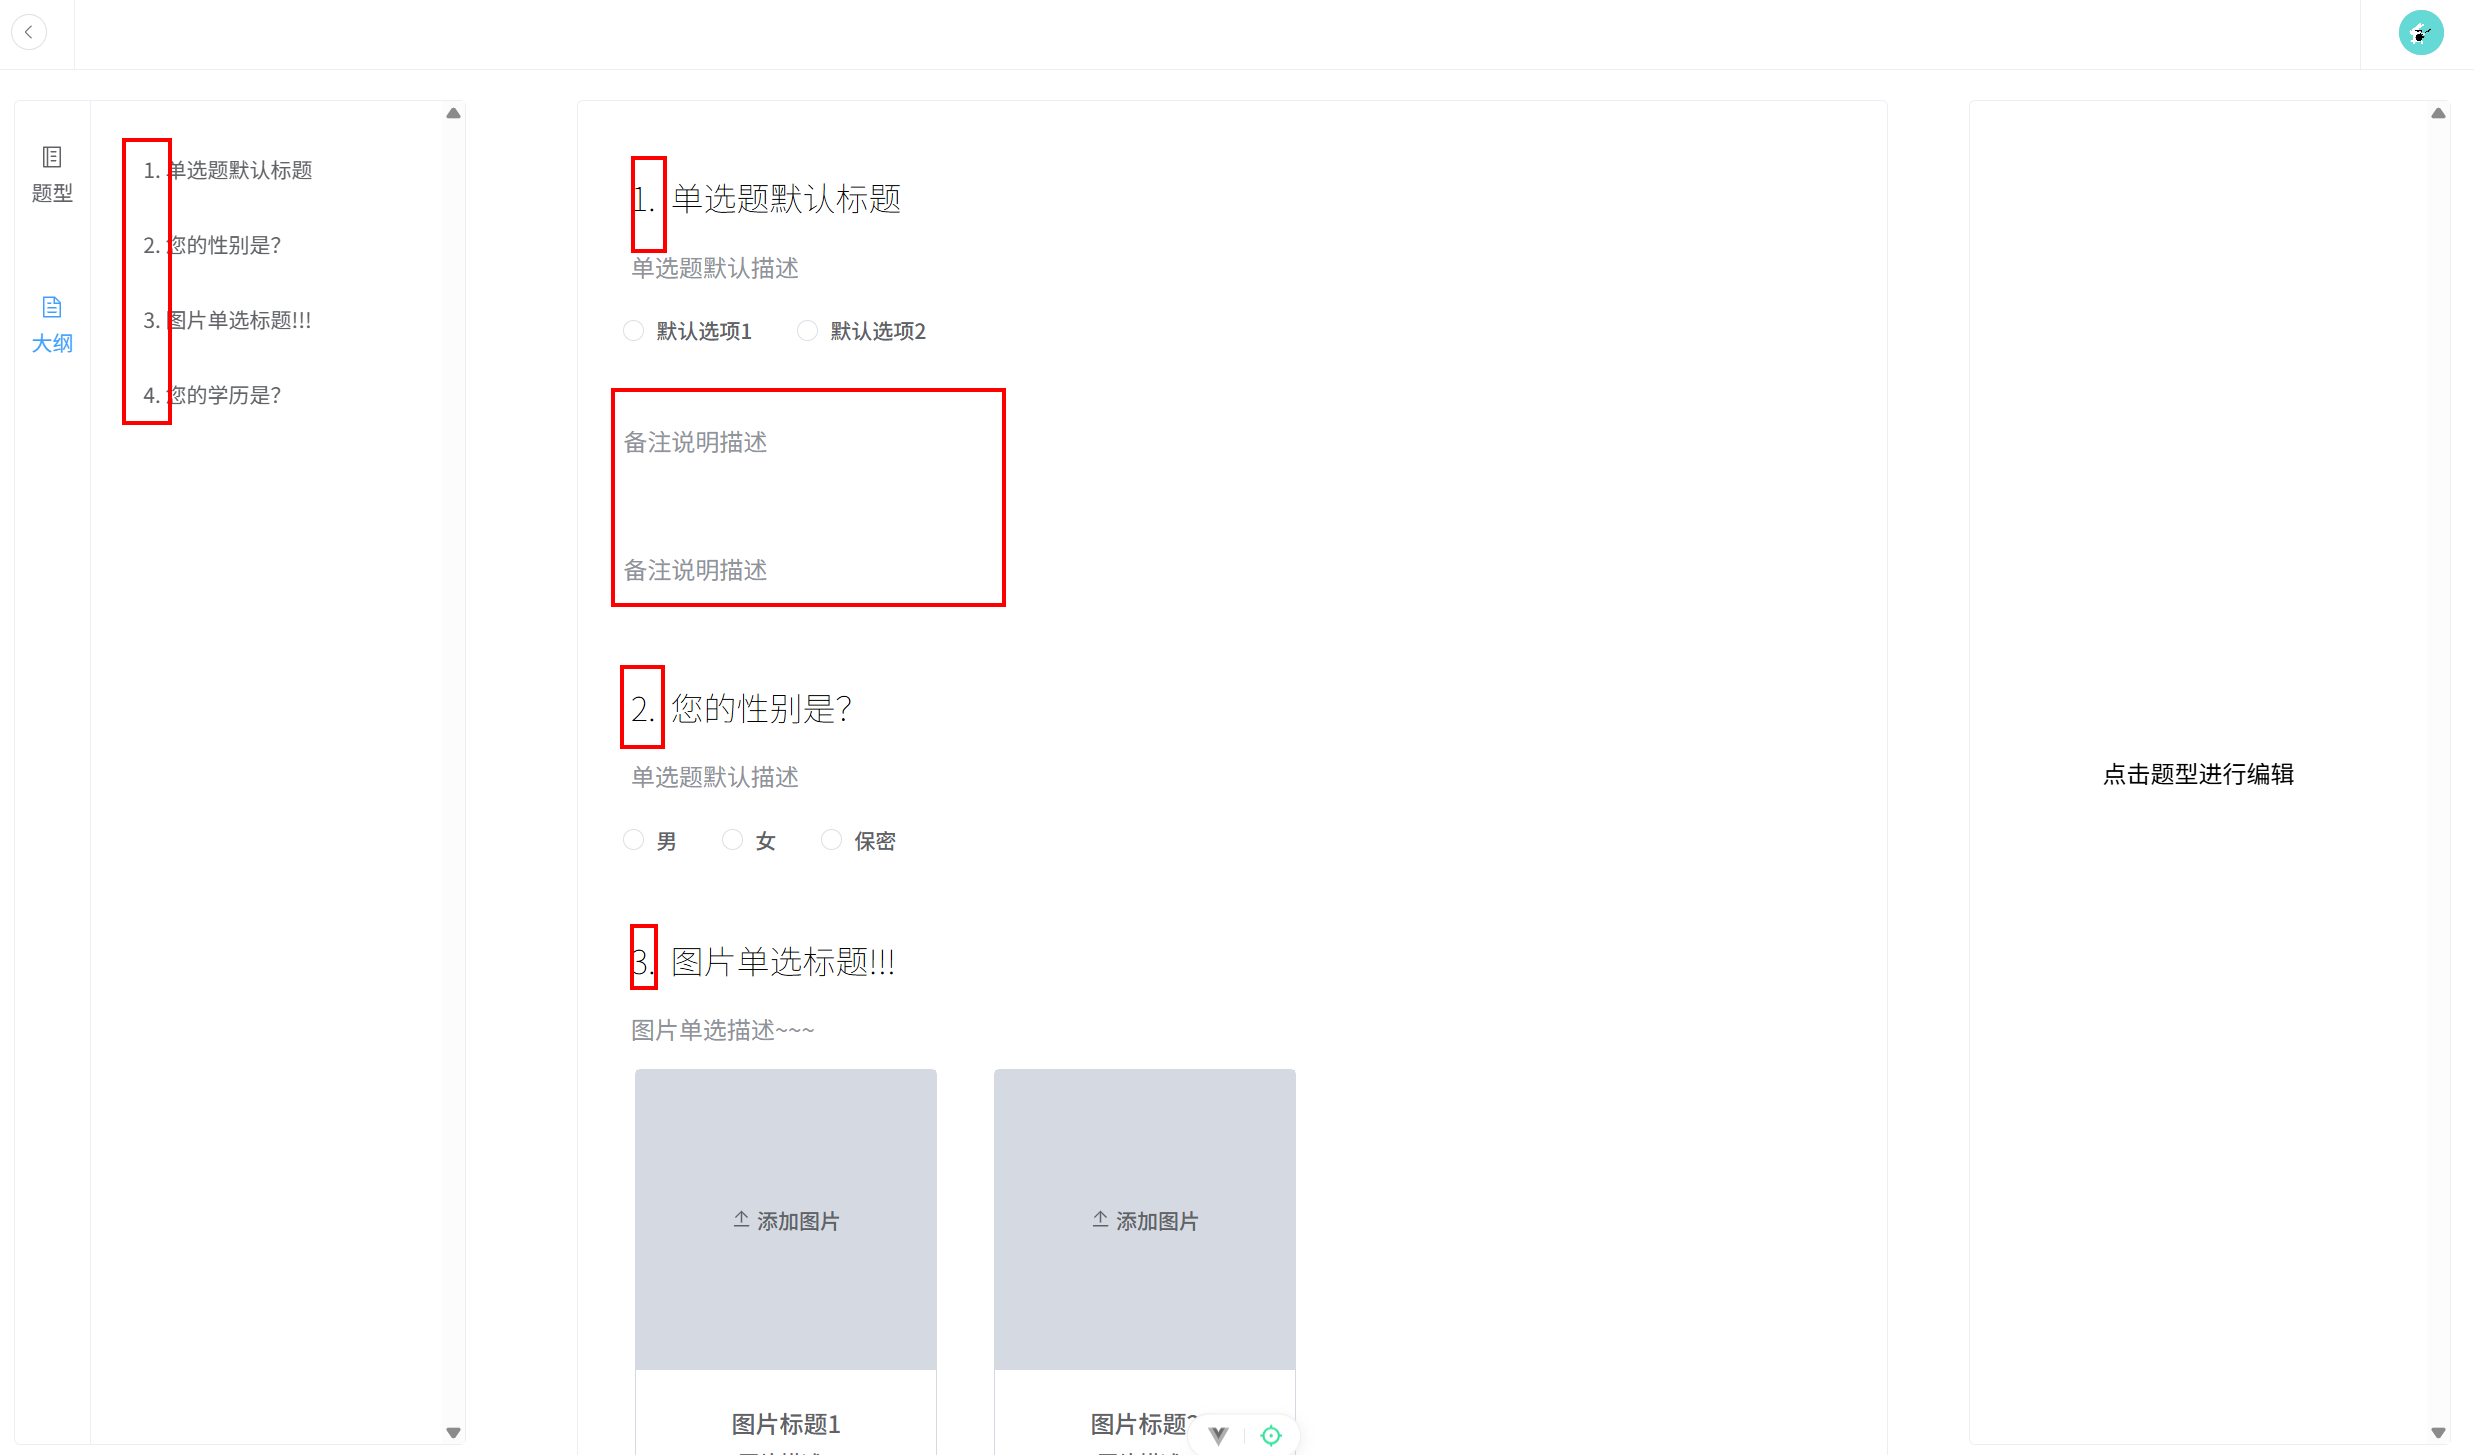
注意,至于题目类型的业务组件才会有序号,备注之类的非题目类型是没有序号,并且不应该显示在提纲中的。
(1)创建组合式函数 utils/hooks.ts:
javascript
import { computed } from 'vue';
import type { Status } from '@/types';
import { isSurveyComName } from '@/types';
// 返回问卷题目序号的数组
export function useSurveyNo(coms: Status[]) {
  return computed(() => {
    let questionNumber = 1;
    return coms.map((com) => {
      // 需要判断当前这个组件是不是问卷题目
      if(isSurveyComName(com.name)){
        return questionNumber++
      }
      return null;
    })
  })
}
(2)画布中引入 useSurveyNo。views/EditorView/Center.vue 关键代码:
javascript
<template>
  <div ref="centerContainer" class="center-container">
    <draggable v-model="store.coms" item-key="index" @start="dragstart">
      <template #item="{ element, index }">
        <div
          class="content mb-10 relative"
          :class="{
            active: store.currentComponentIndex === index,
          }"
          @click="clickHandle(index)"
        >
          <component :is="element.type" :status="element.status" :serialNum="serialNum[index]" />
        </div>
      </template>
    </draggable>
  </div>
</template>

<script setup lang="ts">
// 其他代码省略
import { nextTick, ref, computed } from 'vue';
// 组合式函数
import { useSurveyNo } from '@/utils/hooks';

const serialNum = computed(() => useSurveyNo(store.coms).value)
</script>
提纲组件同理,只是非题目组件部分需要隐藏。
14.4 点击提纲,画布对应组件滚动居中
(1)添加新的事件总线类型。 types/eventBus.ts:
javascript
export type EventBus = {
  scrollToBottom: void;
  scrollToCenter: number;
};
(2)点击提纲题目时触发。views/EditorView/LeftSide/Outline.vue:
javascript
<template>
  <div v-if="store.surveyCount">
    <draggable v-model="store.coms" item-key="index" @start="dragstart">
      <template #item="{ element, index }">
        <div
          class="mb-10"
          v-show="isSurveyComName(element.name)"
          @click="clickHandle(index)"
          :class="{
            active: store.currentComponentIndex === index,
          }"
        >
          <div class="item">
            {{ serialNum[index] }}.
            {{
              element.status.title.status.length > 10
                ? element.status.title.status.substring(0, 10) + '...'
                : element.status.title.status
            }}
          </div>
        </div>
      </template>
    </draggable>
  </div>
  <div v-else class="tip flex align-items-center justify-content-center">请添加题目</div>
</template>

<script setup lang="ts">
import { computed } from 'vue';
// 拖动组件
import draggable from 'vuedraggable';
import { isSurveyComName } from '@/types';
// 事件总线
import EventBus from '@/utils/eventBus';
// 仓库
import { useEditorStore } from '@/stores/useEditor';
const store = useEditorStore();
// 组合式函数
import { useSurveyNo } from '@/utils/hooks';
// 获取题目编号
const serialNum = computed(() => useSurveyNo(store.coms).value);

const dragstart = () => {
  store.setCurrentComponentIndex(-1);
};

const clickHandle = (index: number) => {
  if (store.currentComponentIndex === index) {
    store.setCurrentComponentIndex(-1);
  } else {
    store.setCurrentComponentIndex(index);
    EventBus.emit('scrollToCenter', index);
  }
};
</script>

<style scoped>
.item {
  /* outline: 1px solid black; */
  color: var(--font-color-light);
  font-size: var(--font-size-base);
  padding: 10px;
  cursor: pointer;
}
.tip {
  height: calc(100% - 50px);
}
.active {
  transform: scale(1.04);
  transition: 0.5s;
  background-color: var(--border-color);
  border-radius: var(--border-radius-lg);
}
</style>
(3)画布接收对应事件并定义。views/EditorView/Center.vue:
javascript
<template>
  <div ref="centerContainer" class="center-container">
    <draggable v-model="store.coms" item-key="index" @start="dragstart">
      <template #item="{ element, index }">
        <div
          class="content mb-10 relative"
          :class="{
            active: store.currentComponentIndex === index,
          }"
          @click="clickHandle(index)"
          :key="element.id"
          :ref="(el) => (componentsRefs[index] = el)"
        >
          <component :is="element.type" :status="element.status" :serialNum="serialNum[index]" />
        </div>
      </template>
    </draggable>
  </div>
</template>

<script setup lang="ts">
import { nextTick, ref, computed, type ComponentPublicInstance } from 'vue';
import { useEditorStore } from '@/stores/useEditor';
const store = useEditorStore();
// 事件总监
import EventBus from '@/utils/eventBus';
import draggable from 'vuedraggable';
// 组合式函数
import { useSurveyNo } from '@/utils/hooks';

const serialNum = computed(() => useSurveyNo(store.coms).value)

const centerContainer = ref<HTMLElement | null>(null);
const componentsRefs = ref<(Element | ComponentPublicInstance | null)[]>([]);

const scrollToBottom = () => {
  nextTick(() => {
    const container = centerContainer.value; // 获取容器的dom元素
    if (container) {
      window.scrollTo({
        top: container.scrollHeight,
        behavior: 'smooth',
      });
    }
  });
};
const scrollToCenter = (index: number) => {
  nextTick(() => {
    const element = componentsRefs.value[index]; // 获取当前题目的dom元素
    // 判断当前元素是否是HTMLElement
    if (element instanceof HTMLElement) {
      element.scrollIntoView({
        behavior: 'smooth',
        block: 'center',
      });
    }
  });
};

// 通过事件总线提供滚动方法给外部调用
EventBus.on('scrollToBottom', scrollToBottom);
EventBus.on('scrollToCenter', scrollToCenter);

const clickHandle = (index: number) => {
  if (store.currentComponentIndex === index) {
    store.setCurrentComponentIndex(-1);
  } else {
    store.setCurrentComponentIndex(index);
  }
};
const dragstart = () => {
  store.setCurrentComponentIndex(-1);
};
</script>

<style scoped>
.center-container {
  width: 50%;
  border: 1px solid var(--border-color);
  border-radius: var(--border-radius-md);
  margin: 70px auto;
  padding: 20px;
  background: var(--white);
  position: relative;

  .content {
    cursor: pointer;
    padding: 10px;
    background-color: var(--white);
    border-radius: var(--border-radius-sm);

    &:hover {
      transform: scale(1.01);
      transition: 0.5s;
      box-shadow: 0 0 10px rgba(0, 0, 0, 0.1);
    }
  }
}

.active {
  transform: scale(1.01);
  transition: 0.5s;
  box-shadow: 0 0 10px rgba(0, 0, 0, 0.1);
}

.delete-btn {
  right: -5px;
  top: -10px;
}
</style>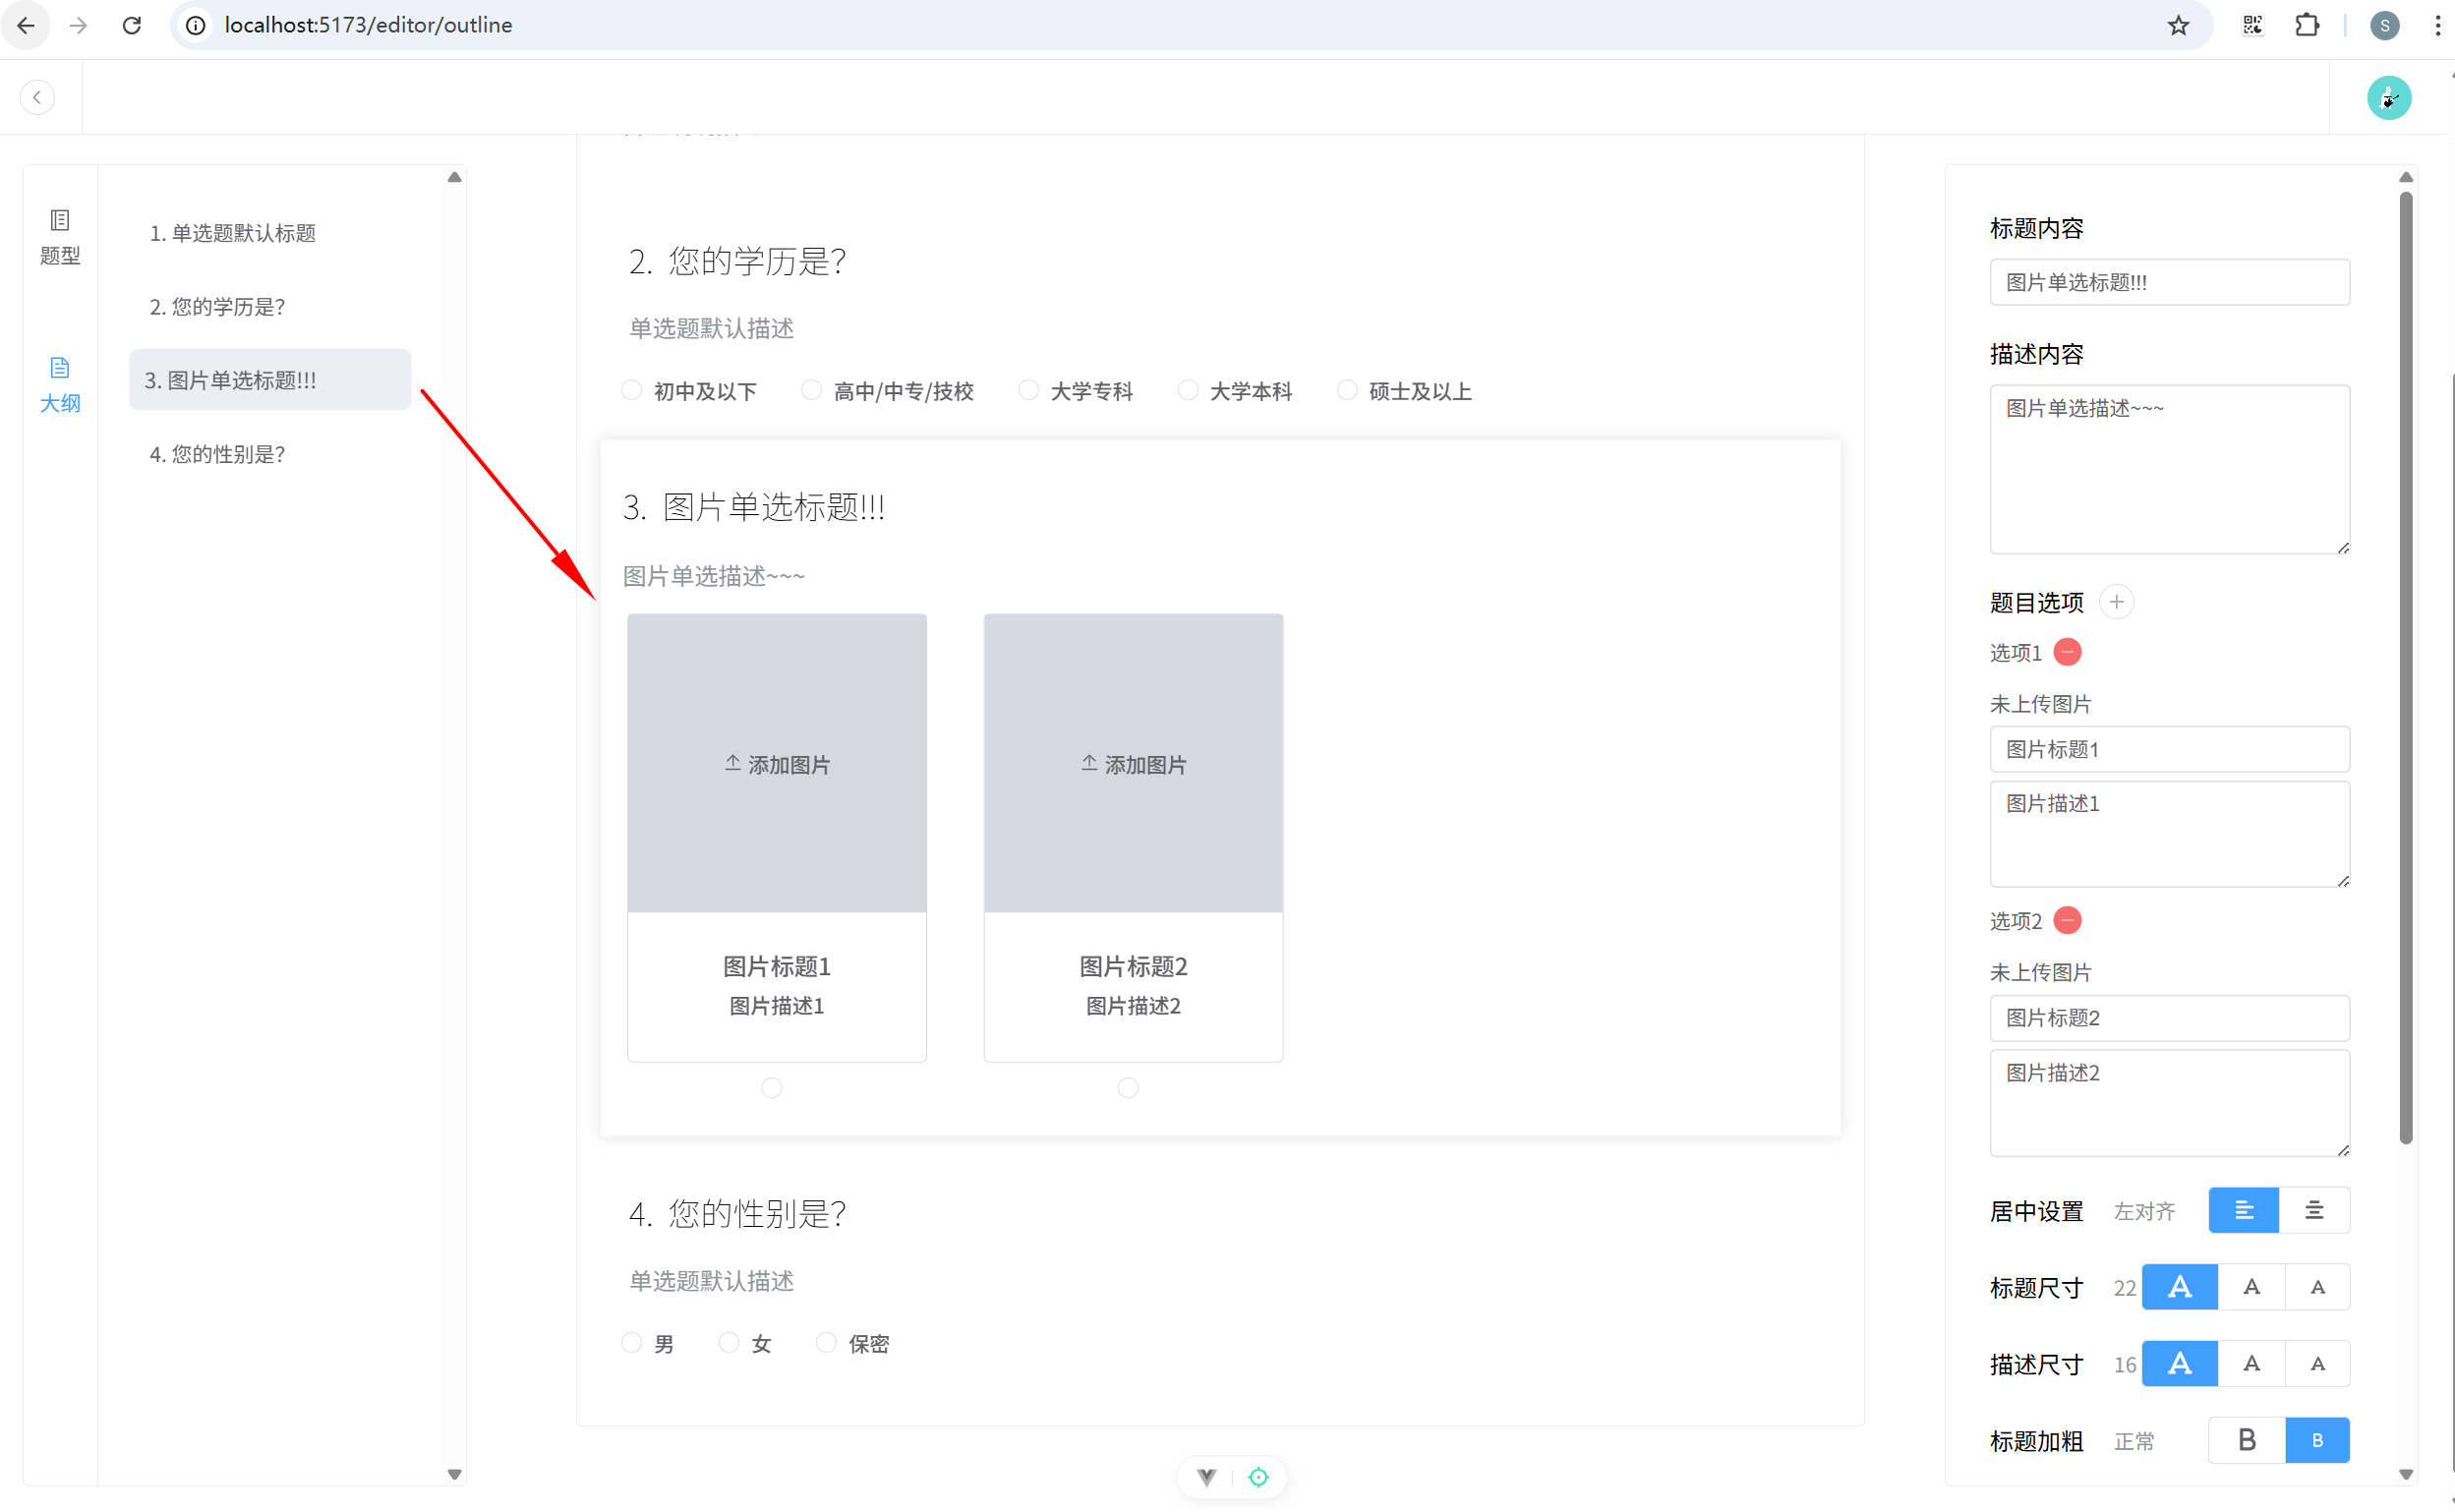
14.5 添加删除功能
(1)编辑器数据仓库 actions 添加删除方法。stores/useEditor.ts 关键代码:
javascript
removeCom(index: number) {
  // 删除的时候要看删除的是不是问卷题目
  if (isSurveyComName(this.coms[index].name)) {
    this.surveyCount--;
  }
  this.coms.splice(index, 1);
},
(2)画布添加删除按钮。views/EditorView/Center.vue:
javascript
<template>
  <div ref="centerContainer" class="center-container">
    <draggable v-model="store.coms" item-key="index" @start="dragstart">
      <template #item="{ element, index }">
        <div
          class="content mb-10 relative"
          :class="{
            active: store.currentComponentIndex === index,
          }"
          @click="clickHandle(index)"
          :key="element.id"
          :ref="(el) => (componentsRefs[index] = el)"
        >
          <component :is="element.type" :status="element.status" :serialNum="serialNum[index]" />
          <!-- 删除按钮 -->
          <div class="absolute delete-btn" v-show="store.currentComponentIndex === index">
            <el-button
              type="danger"
              class="ml-10"
              size="small"
              :icon="Close"
              circle
              @click.stop="removeCom(index)"
            />
          </div>
        </div>
      </template>
    </draggable>
  </div>
</template>

<script setup lang="ts">
import { nextTick, ref, computed, type ComponentPublicInstance } from 'vue';
import { useEditorStore } from '@/stores/useEditor';
import { Close } from '@element-plus/icons-vue';
import { ElMessage, ElMessageBox } from 'element-plus';
// 拖动组件
import draggable from 'vuedraggable';
const store = useEditorStore();
// 事件总监
import EventBus from '@/utils/eventBus';
// 组合式函数
import { useSurveyNo } from '@/utils/hooks';

// 获取题目编号
const serialNum = computed(() => useSurveyNo(store.coms).value);

const centerContainer = ref<HTMLElement | null>(null);
const componentsRefs = ref<(Element | ComponentPublicInstance | null)[]>([]);

const scrollToBottom = () => {
  nextTick(() => {
    const container = centerContainer.value; // 获取容器的dom元素
    if (container) {
      window.scrollTo({
        top: container.scrollHeight,
        behavior: 'smooth',
      });
    }
  });
};
const scrollToCenter = (index: number) => {
  nextTick(() => {
    const element = componentsRefs.value[index]; // 获取当前题目的dom元素
    // 判断当前元素是否是HTMLElement
    if (element instanceof HTMLElement) {
      element.scrollIntoView({
        behavior: 'smooth',
        block: 'center',
      });
    }
  });
};

// 通过事件总线提供滚动方法给外部调用
EventBus.on('scrollToBottom', scrollToBottom);
EventBus.on('scrollToCenter', scrollToCenter);

const clickHandle = (index: number) => {
  if (store.currentComponentIndex === index) {
    store.setCurrentComponentIndex(-1);
  } else {
    store.setCurrentComponentIndex(index);
  }
};

const dragstart = () => {
  store.setCurrentComponentIndex(-1);
};
// 删除选中的组件
const removeCom = (index: number) => {
  ElMessageBox.confirm('确定删除该组件吗?', '提示', {
    confirmButtonText: '确定',
    cancelButtonText: '取消',
    type: 'warning',
  })
    .then(() => {
      store.removeCom(index);
      store.setCurrentComponentIndex(-1);
      ElMessage.success('删除成功');
    })
    .catch(() => {
      ElMessage.info('已取消删除');
    });
};
</script>

<style scoped>
.center-container {
  width: 50%;
  border: 1px solid var(--border-color);
  border-radius: var(--border-radius-md);
  margin: 70px auto;
  padding: 20px;
  background: var(--white);
  position: relative;
  .content {
    cursor: pointer;
    padding: 10px;
    background-color: var(--white);
    border-radius: var(--border-radius-sm);
    &:hover {
      transform: scale(1.01);
      transition: 0.5s;
      box-shadow: 0 0 10px rgba(0, 0, 0, 0.1);
    }
  }
}
.active {
  transform: scale(1.01);
  transition: 0.5s;
  box-shadow: 0 0 10px rgba(0, 0, 0, 0.1);
}
.delete-btn {
  right: -5px;
  top: -10px;
}
</style>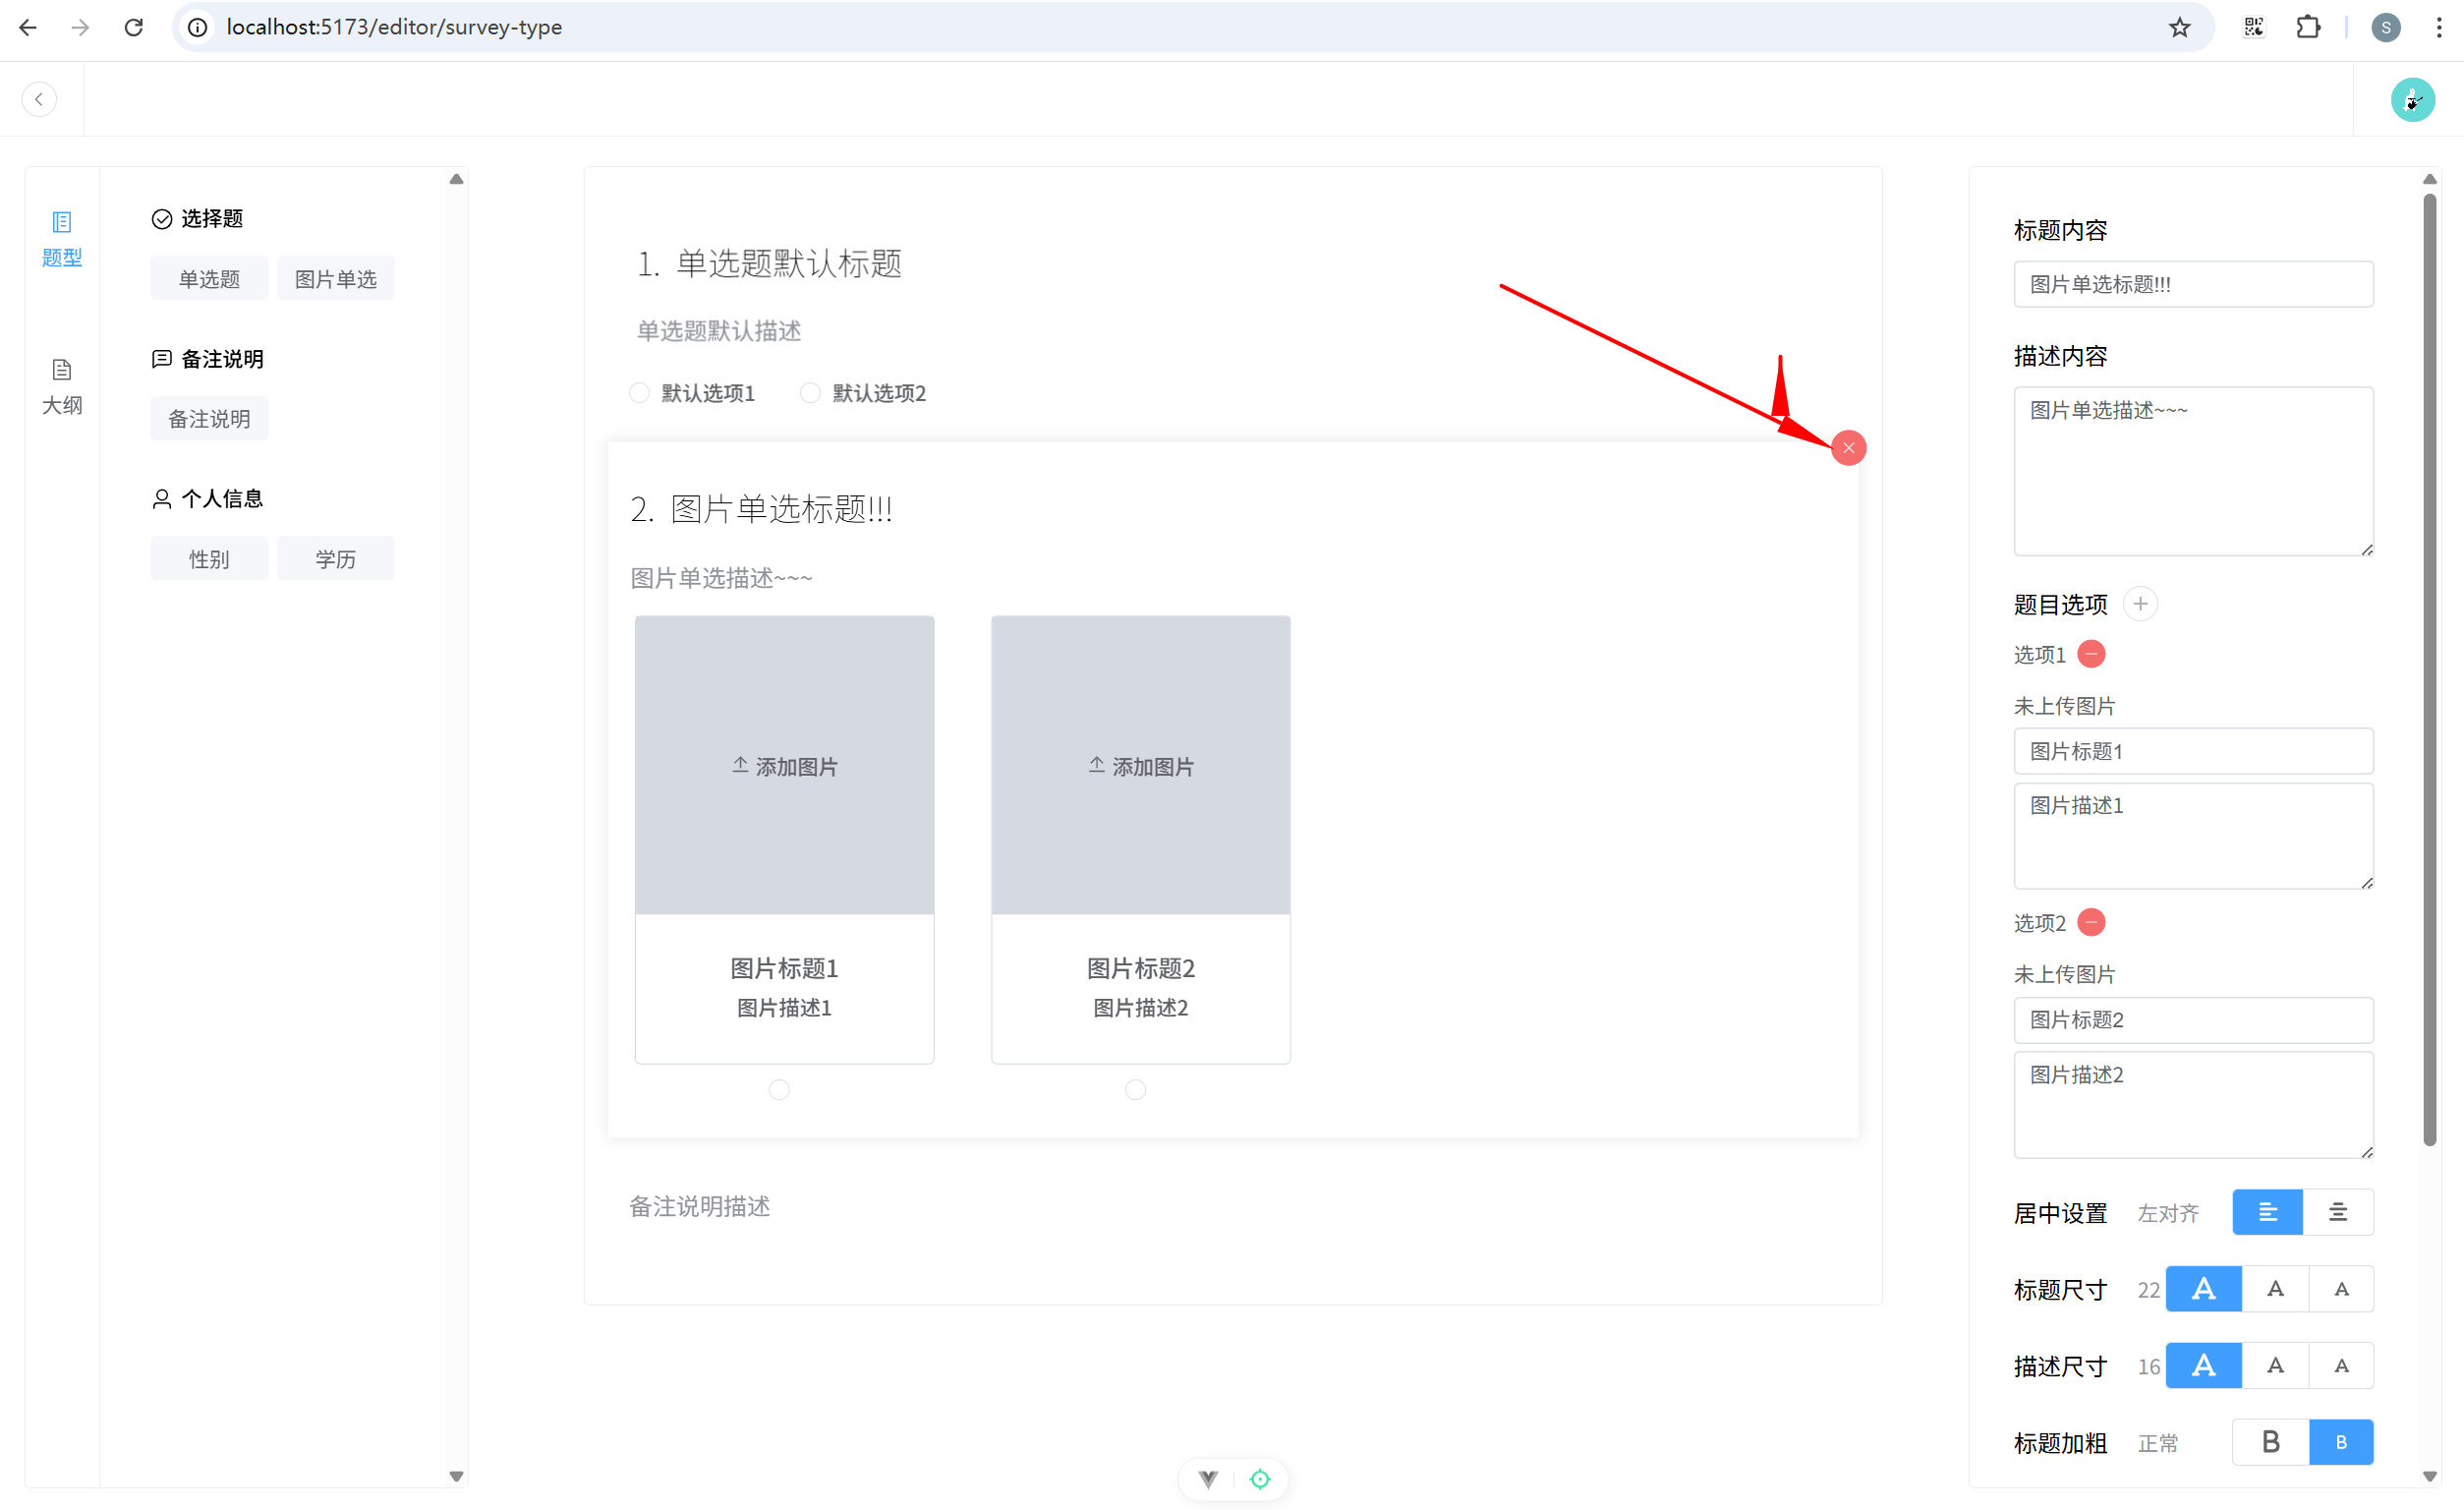
14.6 修复警告
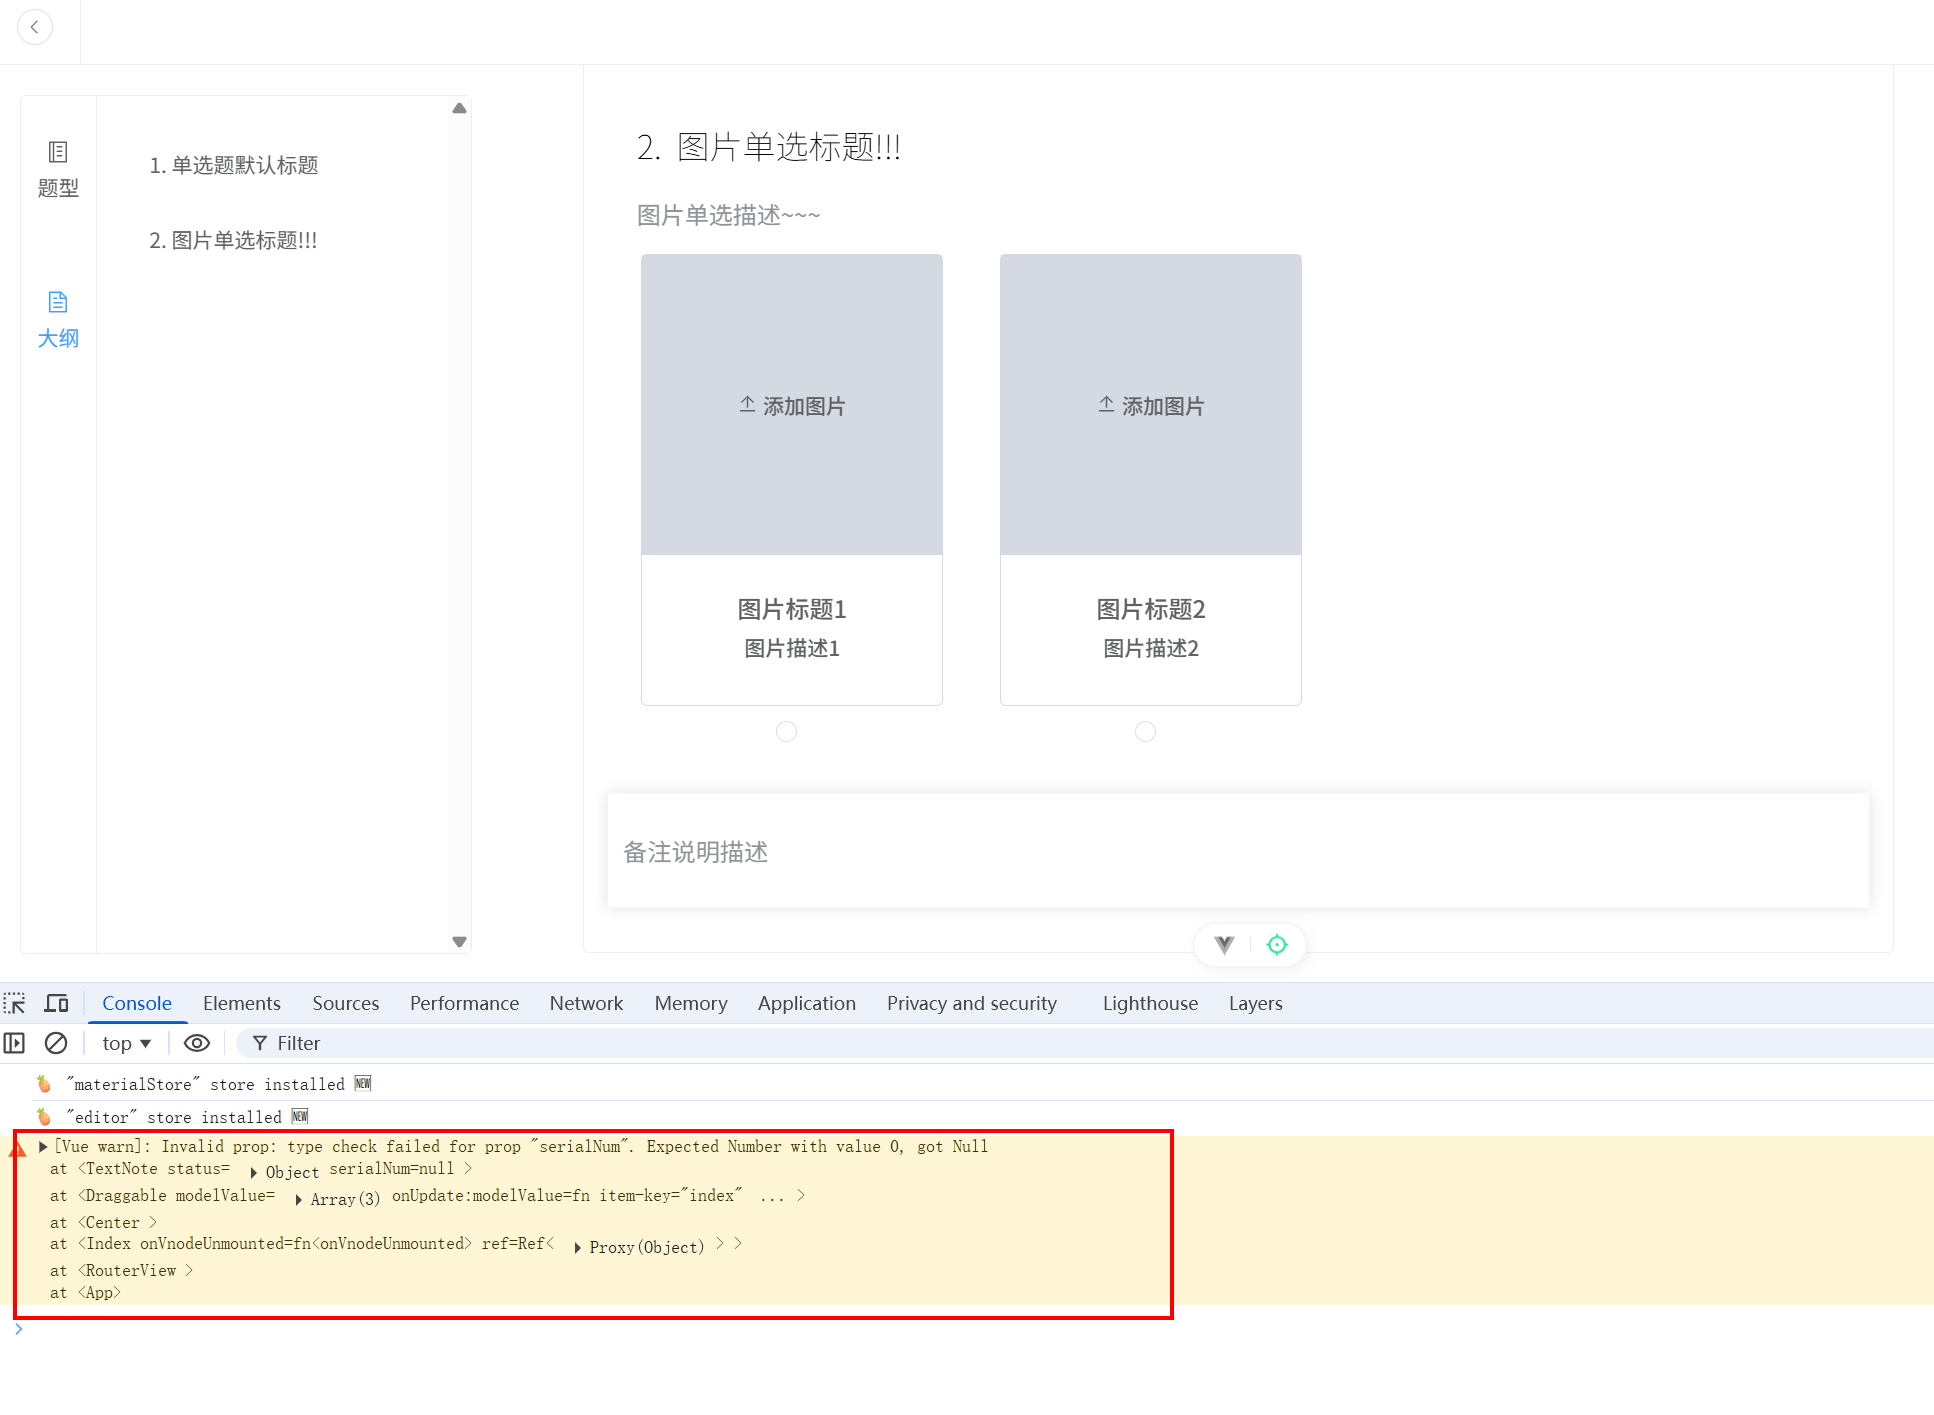
chunk-FTY4BB2I.js?v=00923d30:2476 Vue warn: Invalid prop: type check
failed for prop "serialNum". Expected Number with value 0, got Null
备注组件不需要 serialNum 这个 prop。
components/SurveyComs/Materials/NoteComs/TextNote.vue 关键代码:
javascript
const props = defineProps<{
  serialNum: number;
  status: TypeStatus;
}>();
修改为
javascript
const props = defineProps<{
  status: TypeStatus;
}>();
15. 存储问卷
按道理来说,应该使用服务器进行存储。但是我们这边为了讲解新知识,使用IndexedDB(浏览器内置的本地存储数据库,可以存储大量结构化数据,并且支持事务和索引查询)来进行存储。
15.1 dexie 简介(IndexedDB API 的轻量级 JS 库)
(1)简介。
npm 地址:https://www.npmjs.com/package/dexie
dexie.js 是一个封装了 IndexedDB API 的轻量级 JS 库,提供了简化且强大的数据库操作方式。
Dexie 主要特点和功能:
- 简洁易用的 API:Dexie.js 提供了一个更高层次的 API,使得数据库操作更加直观和简洁。你可以轻松地进行增删改查等操作。
- 事务支持:支持事务管理,确保多个操作要么全部成功,要么全部失败,从而保证数据的一致性。
- 异步操作:使用 Promise 进行异步操作,避免回调地狱,使代码更加清晰易读。
- 丰富的查询能力:提供了丰富的查询方法,支持复杂的查询条件和排序操作。
- 兼容性好:兼容大多数现代浏览器,包括 Chrome、Firefox、Safari 等。
- TypeScript 支持:Dexie.js 是用 TypeScript 编写的,提供了完善的类型定义,方便在 TypeScript 项目中使用。
(2)使用示例
js
import Dexie from 'dexie';

// 创建数据库实例
const db = new Dexie('MyDatabase');

// 定义数据库的表结构
db.version(1).stores({
  friends: '++id,name,age'
});

// 打开数据库
db.open().catch((error) => {
  console.error("Failed to open db:", error);
});

// 添加数据
db.friends.add({name: 'John', age: 30}).then(() => {
  return db.friends.add({name: 'Doe', age: 25});
}).then(() => {
  // 查询数据
  return db.friends.where('age').above(25).toArray();
}).then((friends) => {
  console.log("Friends older than 25:", friends);
}).catch((error) => {
  console.error("Error:", error);
});
15.2 使用 dexie 定义和操作 IndexedDB
(1)下载依赖
javascript
pnpm i dexie(2)添加问卷表的数据类型文件。创建 types\db.ts:
javascript
import type { Status } from './common'
// 表的类型
export interface SurveyDBData {
  createDate: number;
  updateDate: number;
  title: string;
  surveyCount: number;
  coms: Status[];
}
在 types\index.ts 中引入:
javascript
export * from './editProps';
export * from './common';
export * from './store';
export * from './eventBus';
export * from './db';
(3)定义数据库及表的结构。创建 db\db.ts:
javascript
// 负责定义数据库以及表的结构
import Dexie, { type Table } from 'dexie';
import type { SurveyDBData } from '@/types';

class SurveyDataBase extends Dexie {
  // 定义了一个属性 survey,后面是该属性的类型
  // 该类型表示表的每一条记录是 SurveyDBData 类型,主键是 number 类型
  // survey后面的!叫做非空断言,表示 survey 是非空的
  surveys!: Table<SurveyDBData, number>;

  constructor() {
    super('SurveyDataBase'); // 数据库的名称
    this.version(1).stores({
      surveys: '++id, createDate, updateDate, title, surveyCount, coms',
    });
  }
}

const db = new SurveyDataBase();

export { db };
(4)添加数据库操作方法。创建 db/operation.ts:
javascript
// 该文件提供具体的数据库操作方法的支持

import { db } from './db';
import type { SurveyDBData } from '@/types';

// 保存数据
export async function saveSurvey(data: SurveyDBData) {
  return await db.surveys.add(data);
}

// 查询所有数据
export async function getAllSurveys() {
  return await db.surveys.toArray();
}

// 根据 id 查询某一条数据
export async function getSurveyById(id: number) {
  return await db.surveys.get(id);
}

// 根据 id 删除某一条数据
export async function deleteSurveyById(id: number) {
  return await db.surveys.delete(id);
}

// 根据 id 更新某一条数据
export async function updateSurveyById(id: number, data: Partial<SurveyDBData>) {
  return await db.surveys.update(id, data);
}
15.3 重置问卷
(1)在编辑器数据仓库初始化数据,并添加重置方法。stores/useEditor.ts:
javascript
// 该仓库用于存储画布的状态
import { defineStore } from 'pinia';
import type { Status } from '@/types';
import { isSurveyComName } from '@/types';
import {
setTextStatus,
addOption,
removeOption,
setPosition,
setCurrentStatus,
setPicLinkByIndex,
} from './actions';
import { v4 as uuidv4 } from 'uuid';
import type { TypeStatus } from '@/types';
import { markRaw } from 'vue';
// 编辑器
import TextTypeEditor from '@/components/SurveyComs/EditItems/TextTypeEditor.vue';
import TitleEditor from '@/components/SurveyComs/EditItems/TitleEditor.vue';
import DescEditor from '@/components/SurveyComs/EditItems/DescEditor.vue';
import PositionEditor from '@/components/SurveyComs/EditItems/PositionEditor.vue';
import SizeEditor from '@/components/SurveyComs/EditItems/SizeEditor.vue';
import WeightEditor from '@/components/SurveyComs/EditItems/WeightEditor.vue';
import ItalicEditor from '@/components/SurveyComs/EditItems/ItalicEditor.vue';
import ColorEditor from '@/components/SurveyComs/EditItems/ColorEditor.vue';
import textNoteDefaultStatus from '@/configs/defaultStatus/TextNote';
// 仓库的初始化状态
const initStore = () => [
Object.assign({}, textNoteDefaultStatus(), {
status: <TypeStatus>{
type: {
id: uuidv4(),
currentStatus: 0,
status: ['标题', '段落'],
isShow: true,
editCom: markRaw(TextTypeEditor),
name: 'text-type-editor',
},
title: {
id: uuidv4(),
status: '问卷标题',
isShow: true,
editCom: markRaw(TitleEditor),
name: 'title-editor',
},
desc: {
id: uuidv4(),
status: '默认描述内容',
isShow: false,
editCom: DescEditor,
name: 'desc-editor',
},
position: {
id: uuidv4(),
currentStatus: 0,
status: ['左对齐', '居中对齐'],
isShow: false,
editCom: markRaw(PositionEditor),
name: 'position-editor',
},
titleSize: {
id: uuidv4(),
currentStatus: 0,
status: ['26', '24', '22'],
isShow: true,
editCom: markRaw(SizeEditor),
name: 'size-editor',
},
descSize: {
id: uuidv4(),
currentStatus: 0,
status: ['16', '14', '12'],
isShow: false,
editCom: markRaw(SizeEditor),
name: 'size-editor',
},
titleWeight: {
id: uuidv4(),
currentStatus: 1,
status: ['加粗', '正常'],
isShow: true,
editCom: markRaw(WeightEditor),
name: 'weight-editor',
},
descWeight: {
id: uuidv4(),
currentStatus: 1,
status: ['加粗', '正常'],
isShow: false,
editCom: markRaw(WeightEditor),
name: 'weight-editor',
},
titleItalic: {
id: uuidv4(),
currentStatus: 1,
status: ['斜体', '正常'],
isShow: true,
editCom: markRaw(ItalicEditor),
name: 'italic-editor',
},
descItalic: {
id: uuidv4(),
currentStatus: 1,
status: ['斜体', '正常'],
isShow: false,
editCom: markRaw(ItalicEditor),
name: 'italic-editor',
},
titleColor: {
id: uuidv4(),
status: '#000',
isShow: true,
editCom: markRaw(ColorEditor),
name: 'color-editor',
},
descColor: {
id: uuidv4(),
status: '#909399',
isShow: false,
editCom: markRaw(ColorEditor),
name: 'color-editor',
},
},
}),
Object.assign({}, textNoteDefaultStatus(), {
status: <TypeStatus>{
type: {
id: uuidv4(),
currentStatus: 1,
status: ['标题', '段落'],
isShow: true,
editCom: markRaw(TextTypeEditor),
name: 'text-type-editor',
},
title: {
id: uuidv4(),
status: '默认标题内容',
isShow: false,
editCom: markRaw(TitleEditor),
name: 'title-editor',
},
desc: {
id: uuidv4(),
status:
'为了给您提供更好的服务,希望您能抽出几分钟时间,将您的感受和建议告诉我们,我们非常重视每位用户的宝贵意见,期待您的参与!现在我们就马上开始吧!',
isShow: true,
editCom: markRaw(DescEditor),
name: 'desc-editor',
},
position: {
id: uuidv4(),
currentStatus: 0,
status: ['左对齐', '居中对齐'],
isShow: true,
editCom: markRaw(PositionEditor),
name: 'position-editor',
},
titleSize: {
id: uuidv4(),
currentStatus: 0,
status: ['26', '24', '22'],
isShow: false,
editCom: markRaw(SizeEditor),
name: 'size-editor',
},
descSize: {
id: uuidv4(),
currentStatus: 0,
status: ['16', '14', '12'],
isShow: true,
editCom: markRaw(SizeEditor),
name: 'size-editor',
},
titleWeight: {
id: uuidv4(),
currentStatus: 1,
status: ['加粗', '正常'],
isShow: false,
editCom: markRaw(WeightEditor),
name: 'weight-editor',
},
descWeight: {
id: uuidv4(),
currentStatus: 1,
status: ['加粗', '正常'],
isShow: true,
editCom: markRaw(WeightEditor),
name: 'weight-editor',
},
titleItalic: {
id: uuidv4(),
currentStatus: 1,
status: ['斜体', '正常'],
isShow: false,
editCom: markRaw(ItalicEditor),
name: 'italic-editor',
},
descItalic: {
id: uuidv4(),
currentStatus: 1,
status: ['斜体', '正常'],
isShow: true,
editCom: markRaw(ItalicEditor),
name: 'italic-editor',
},
titleColor: {
id: uuidv4(),
status: '#000',
isShow: false,
editCom: markRaw(ColorEditor),
name: 'color-editor',
},
descColor: {
id: uuidv4(),
status: '#909399',
isShow: true,
editCom: markRaw(ColorEditor),
name: 'color-editor',
},
},
}),
];
export const useEditorStore = defineStore('editor', {
state: () => ({
currentComponentIndex: -1, // 当前选中的组件索引,一开始都没有选中,所以是-1
surveyCount: 0, // 问卷题目的数量
coms: initStore() as Status[], // 问卷题目的数组
}),
actions: {
setTextStatus,
addOption,
removeOption,
setPosition,
setCurrentStatus,
setPicLinkByIndex,
addCom(newCom: Status) {
this.coms.push(newCom);
this.currentComponentIndex = -1;
if (isSurveyComName(newCom.name)) this.surveyCount++;
},
setCurrentComponentIndex(index: number) {
this.currentComponentIndex = index;
},
removeCom(index: number) {
// 删除的时候要看删除的是不是问卷题目
if (isSurveyComName(this.coms[index].name)) {
this.surveyCount--;
}
this.coms.splice(index, 1);
},
resetComs() {
this.coms = initStore() as Status[];
this.surveyCount = 0;
this.currentComponentIndex = -1;
},
},
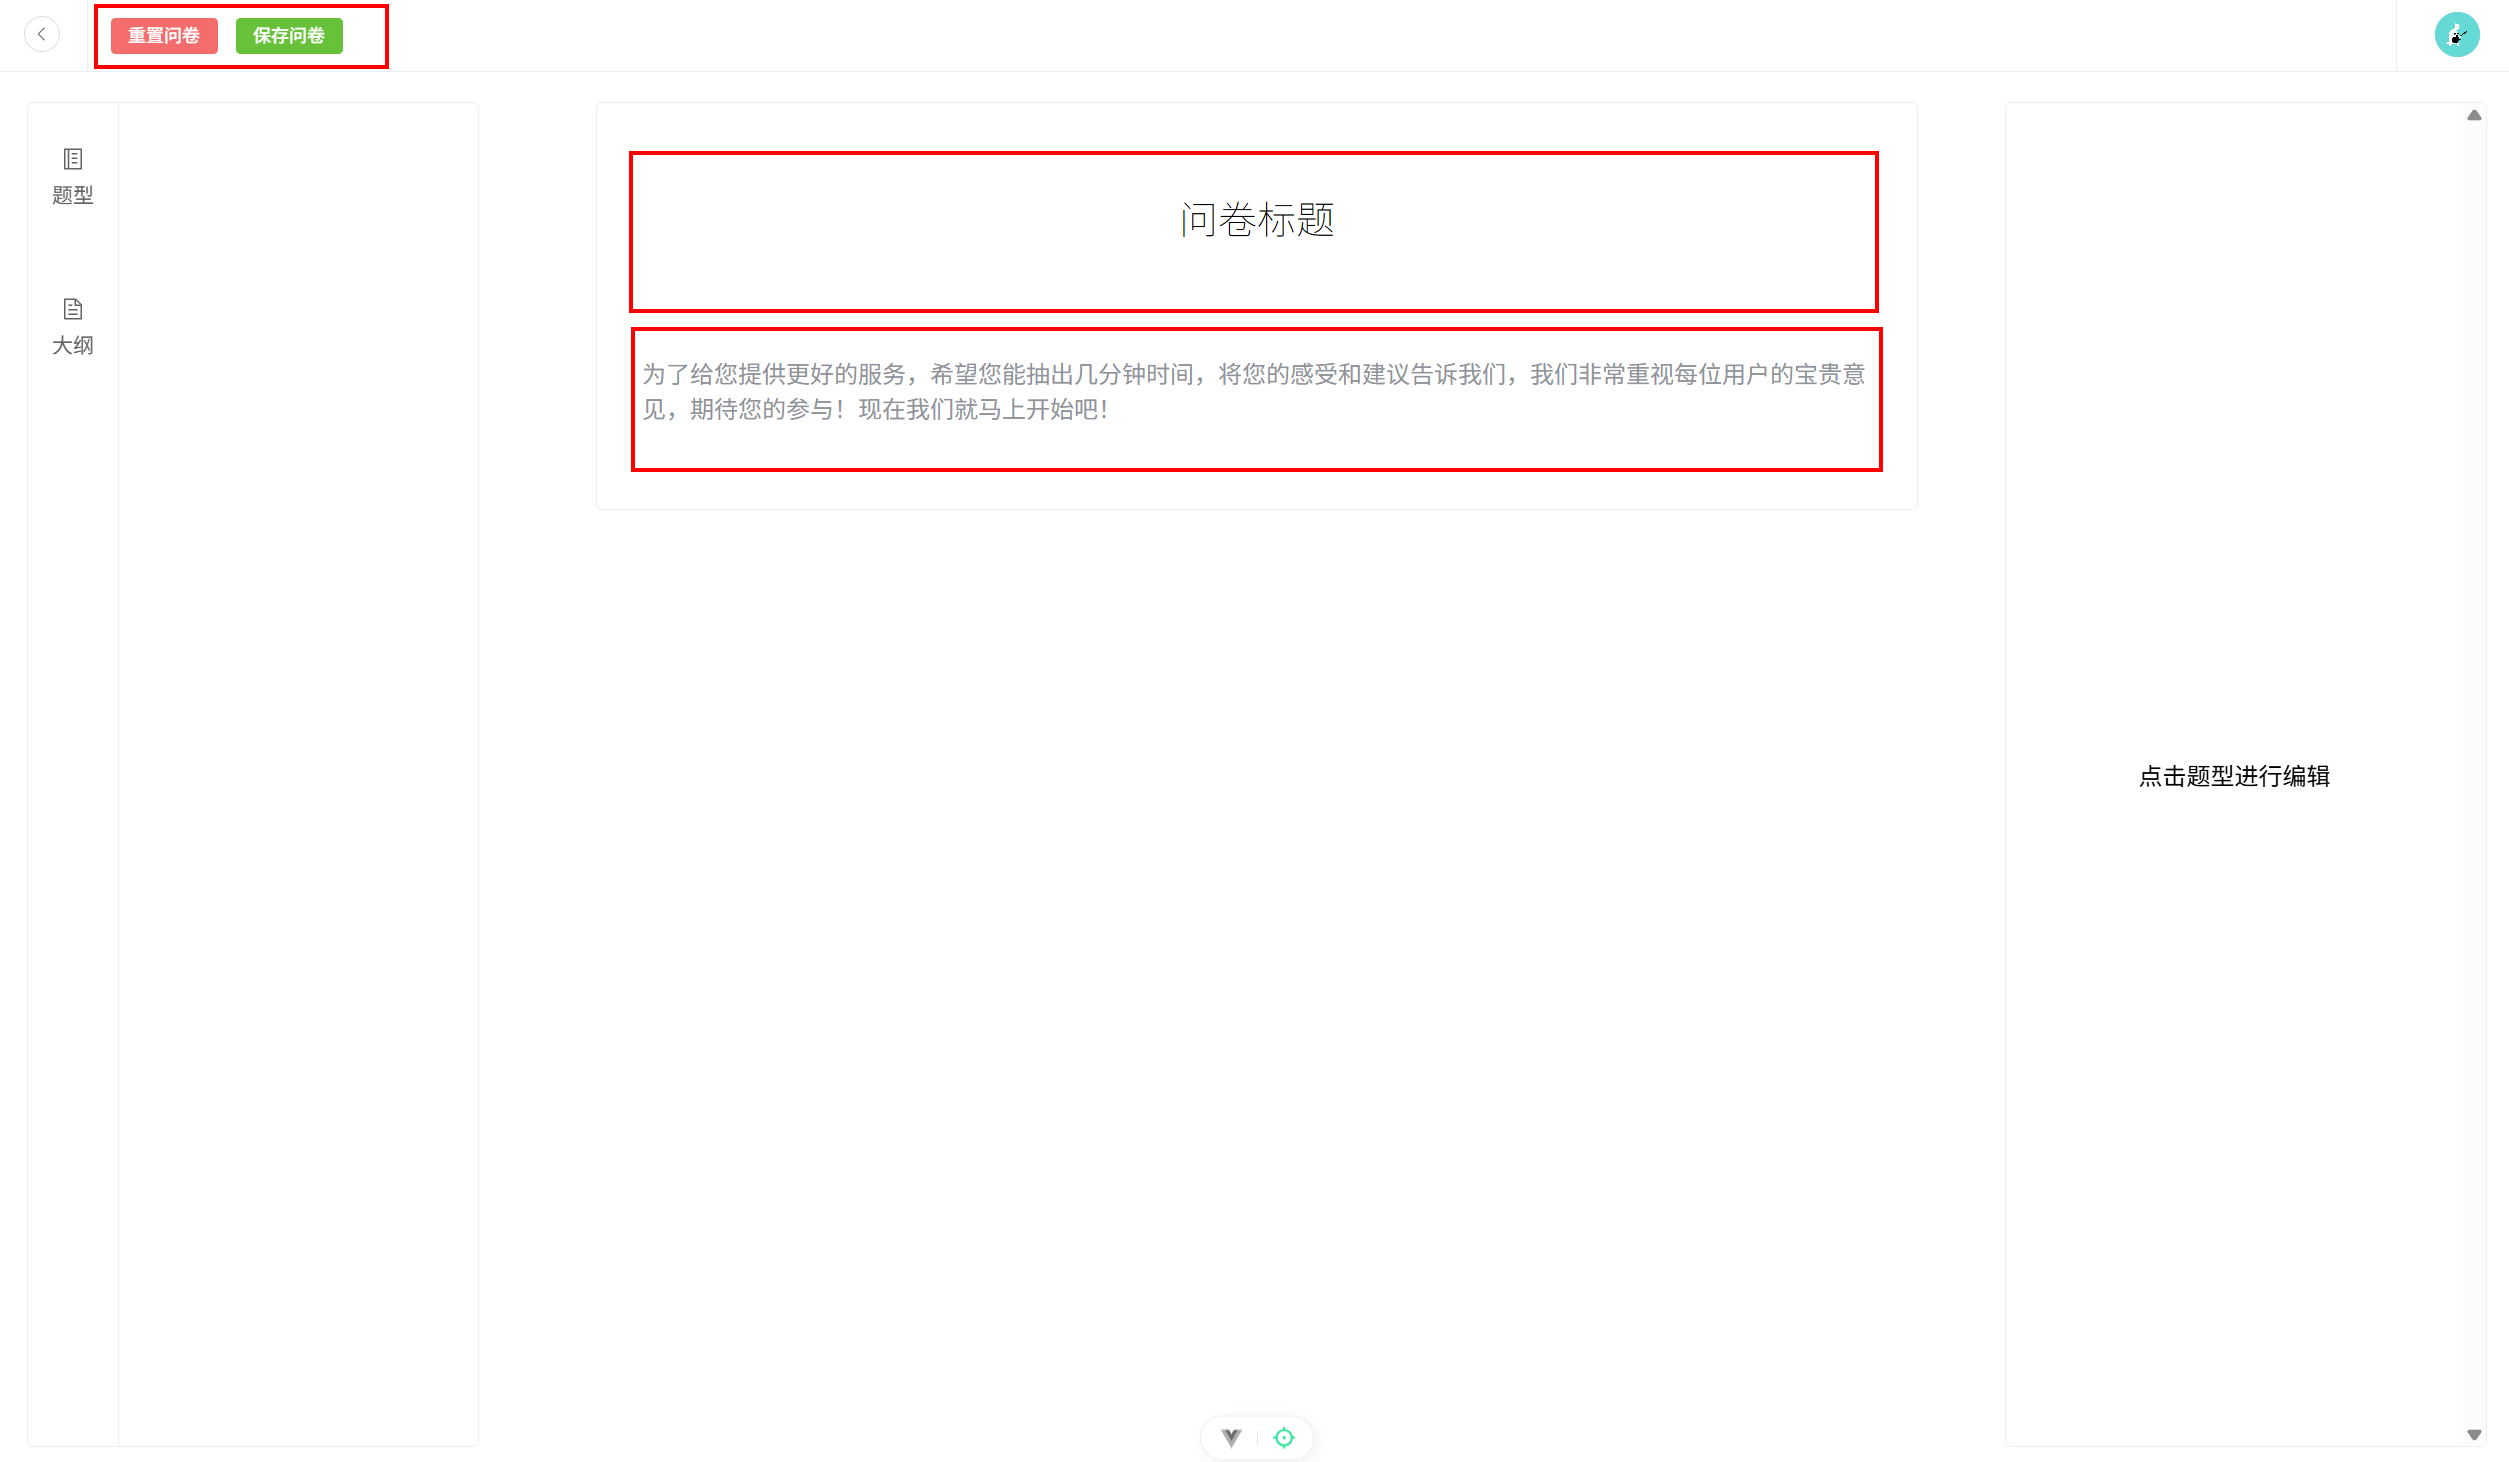
});(2)在头部组件新增重置问卷按钮。components/Common/Header.vue:
javascript
<template>
  <div>
    <div class="container flex self-start align-items-center border-box">
      <!-- 分为三个部分 -->
      <div class="left flex justify-content-center align-items-center">
        <el-button :icon="ArrowLeft" circle size="small" @click="goHome" />
      </div>
      <div class="center flex align-items-center space-between pl-15 pr-15">
        <div v-if="isEditor">
          <div>
            <el-button type="danger"  size="small" @click="reset()">重置问卷</el-button>
            <el-button type="success" size="small">保存问卷</el-button>
          </div>
        </div>
      </div>
      <div class="right flex justify-content-center align-items-center">
        <el-avatar :size="30" :src="avatar" />
      </div>
    </div>
  </div>
</template>

<script setup lang="ts">
import { ArrowLeft } from '@element-plus/icons-vue';
import { ElMessage, ElMessageBox } from 'element-plus';
import { useRouter } from 'vue-router';
const router = useRouter();
import { ref } from 'vue';
// 仓库
import { useEditorStore } from '@/stores/useEditor';
const store = useEditorStore();

defineProps({
  isEditor: {
    type: Boolean,
    default: true
  }
})

const goHome = () => {
  localStorage.setItem('activeView', 'home');
  router.push('/');
};

const avatar = ref('https://wpimg.wallstcn.com/f778738c-e4f8-4870-b634-56703b4acafe.gif');

// 重置问卷
const reset = () => {
  ElMessageBox.confirm('确定要重置问卷吗?', '提示', {
    confirmButtonText: '确定',
    cancelButtonText: '取消',
    type: 'warning'
  }).then(() => {
    store.resetComs();
    ElMessage.success('重置成功');
  }).catch(() => {
    ElMessage.info('已取消重置');
  })
}
</script>

<style scoped lang="scss">
.container {
  width: 100%;
  height: 50px;
  border-bottom: 1px solid var(--border-color);

  .left {
    width: 60px;
    height: 100%;
  }

  .center {
    flex: 1;
    height: 100%;
    border-left: 1px solid var(--border-color);
    border-right: 1px solid var(--border-color);
  }

  .right {
    width: 80px;
    height: 100%;
  }
}
</style>
(3)在编辑器页面设置 isEditor 属性为 true。views/EditorView/Index.vue 关键代码:
javascript
<Header :is-editor="true" />(4)在业务视图页面设置 isEditor 属性为 false。views/MaterialsView/Index.vue 关键代码:
javascript
<Header :is-editor="false"/>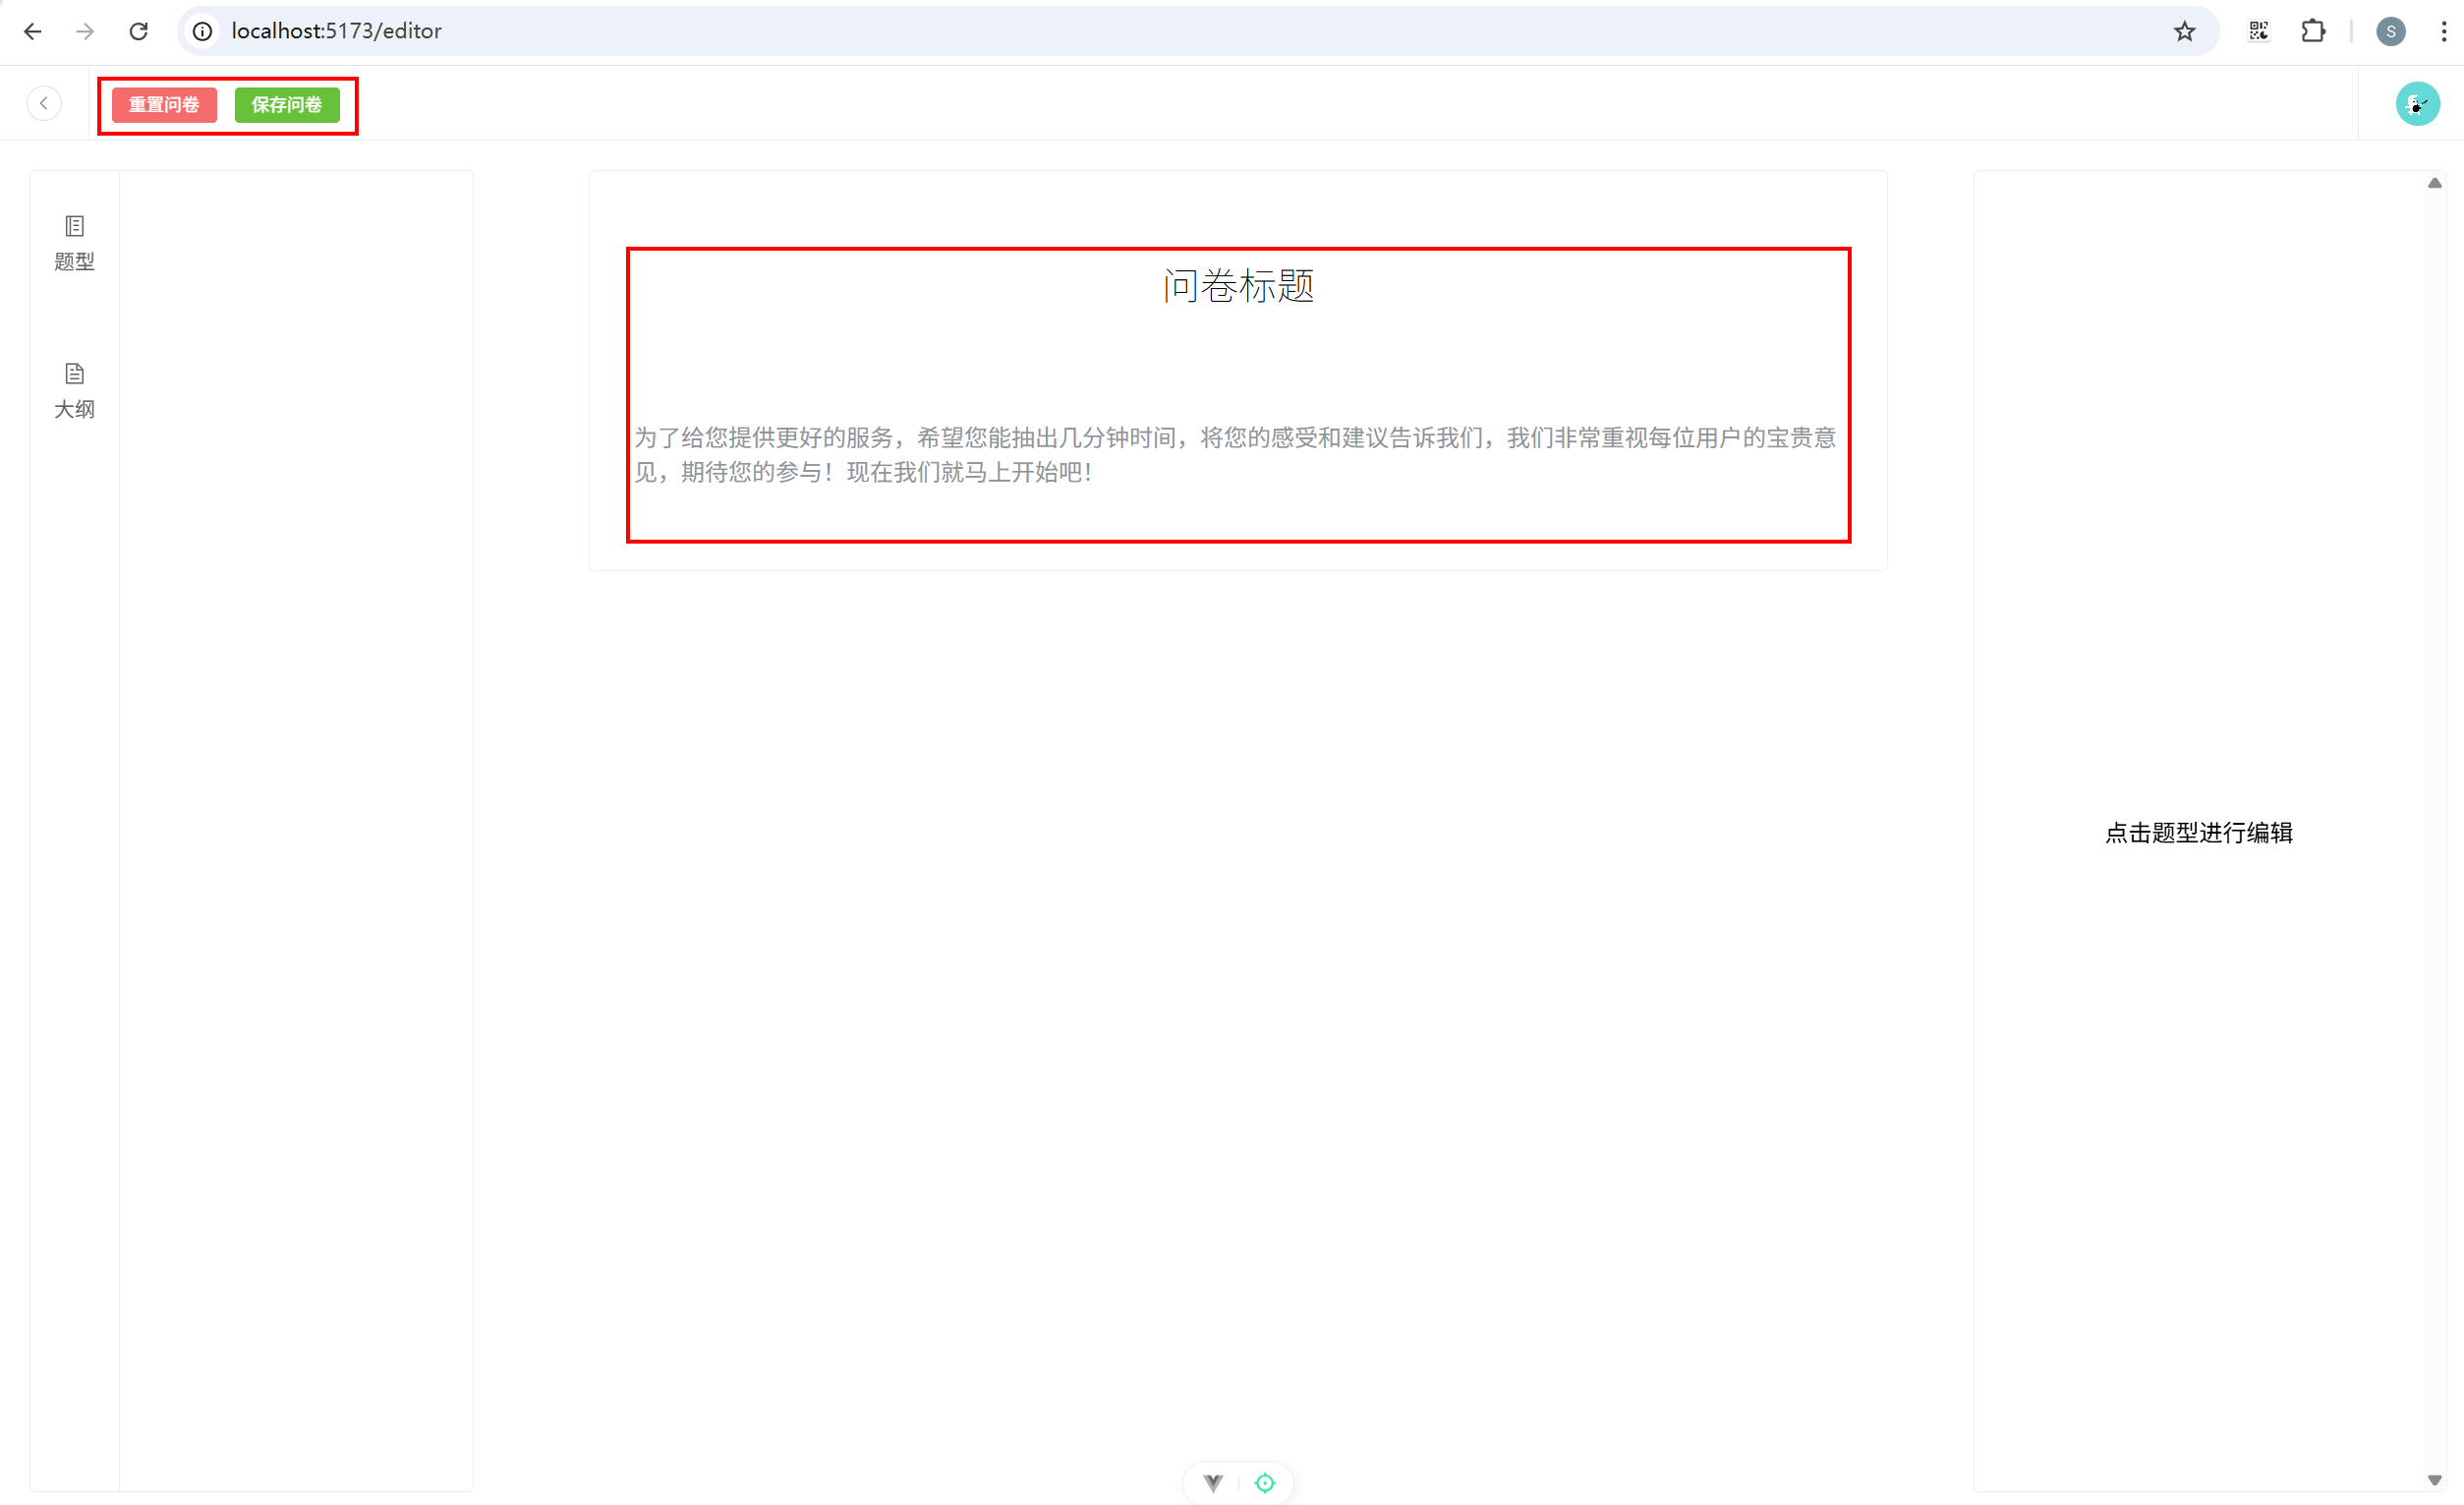
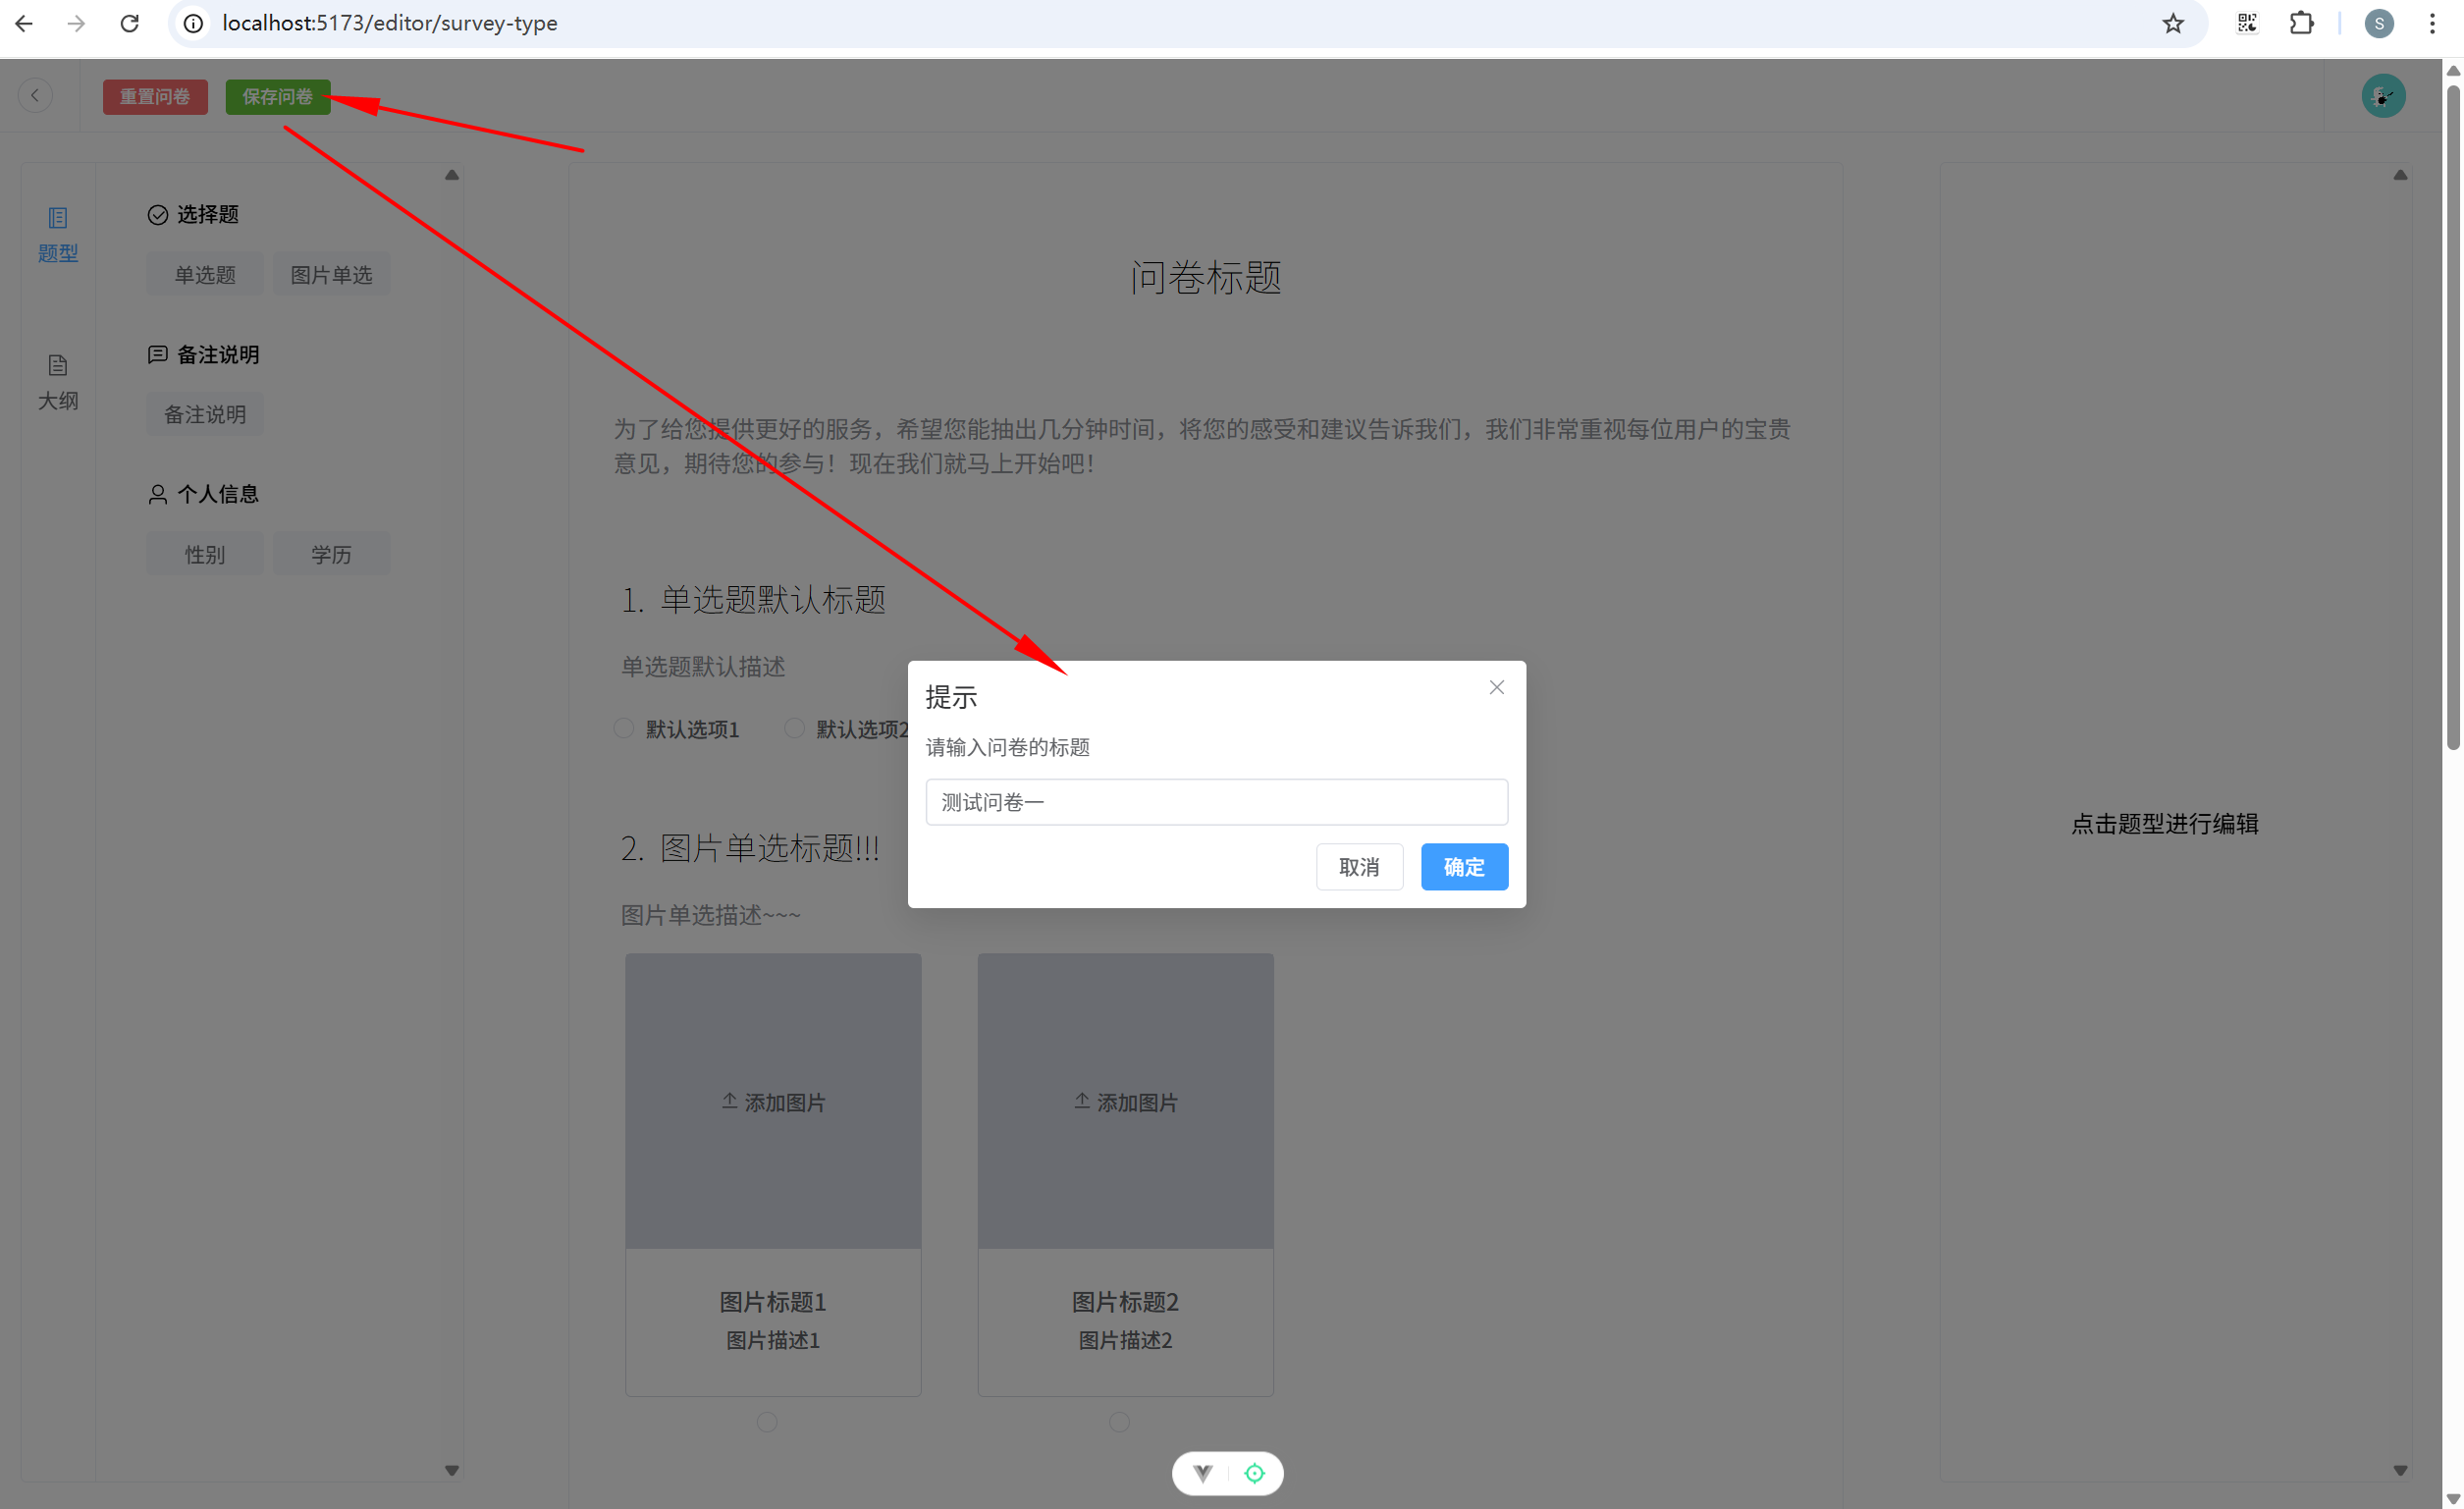
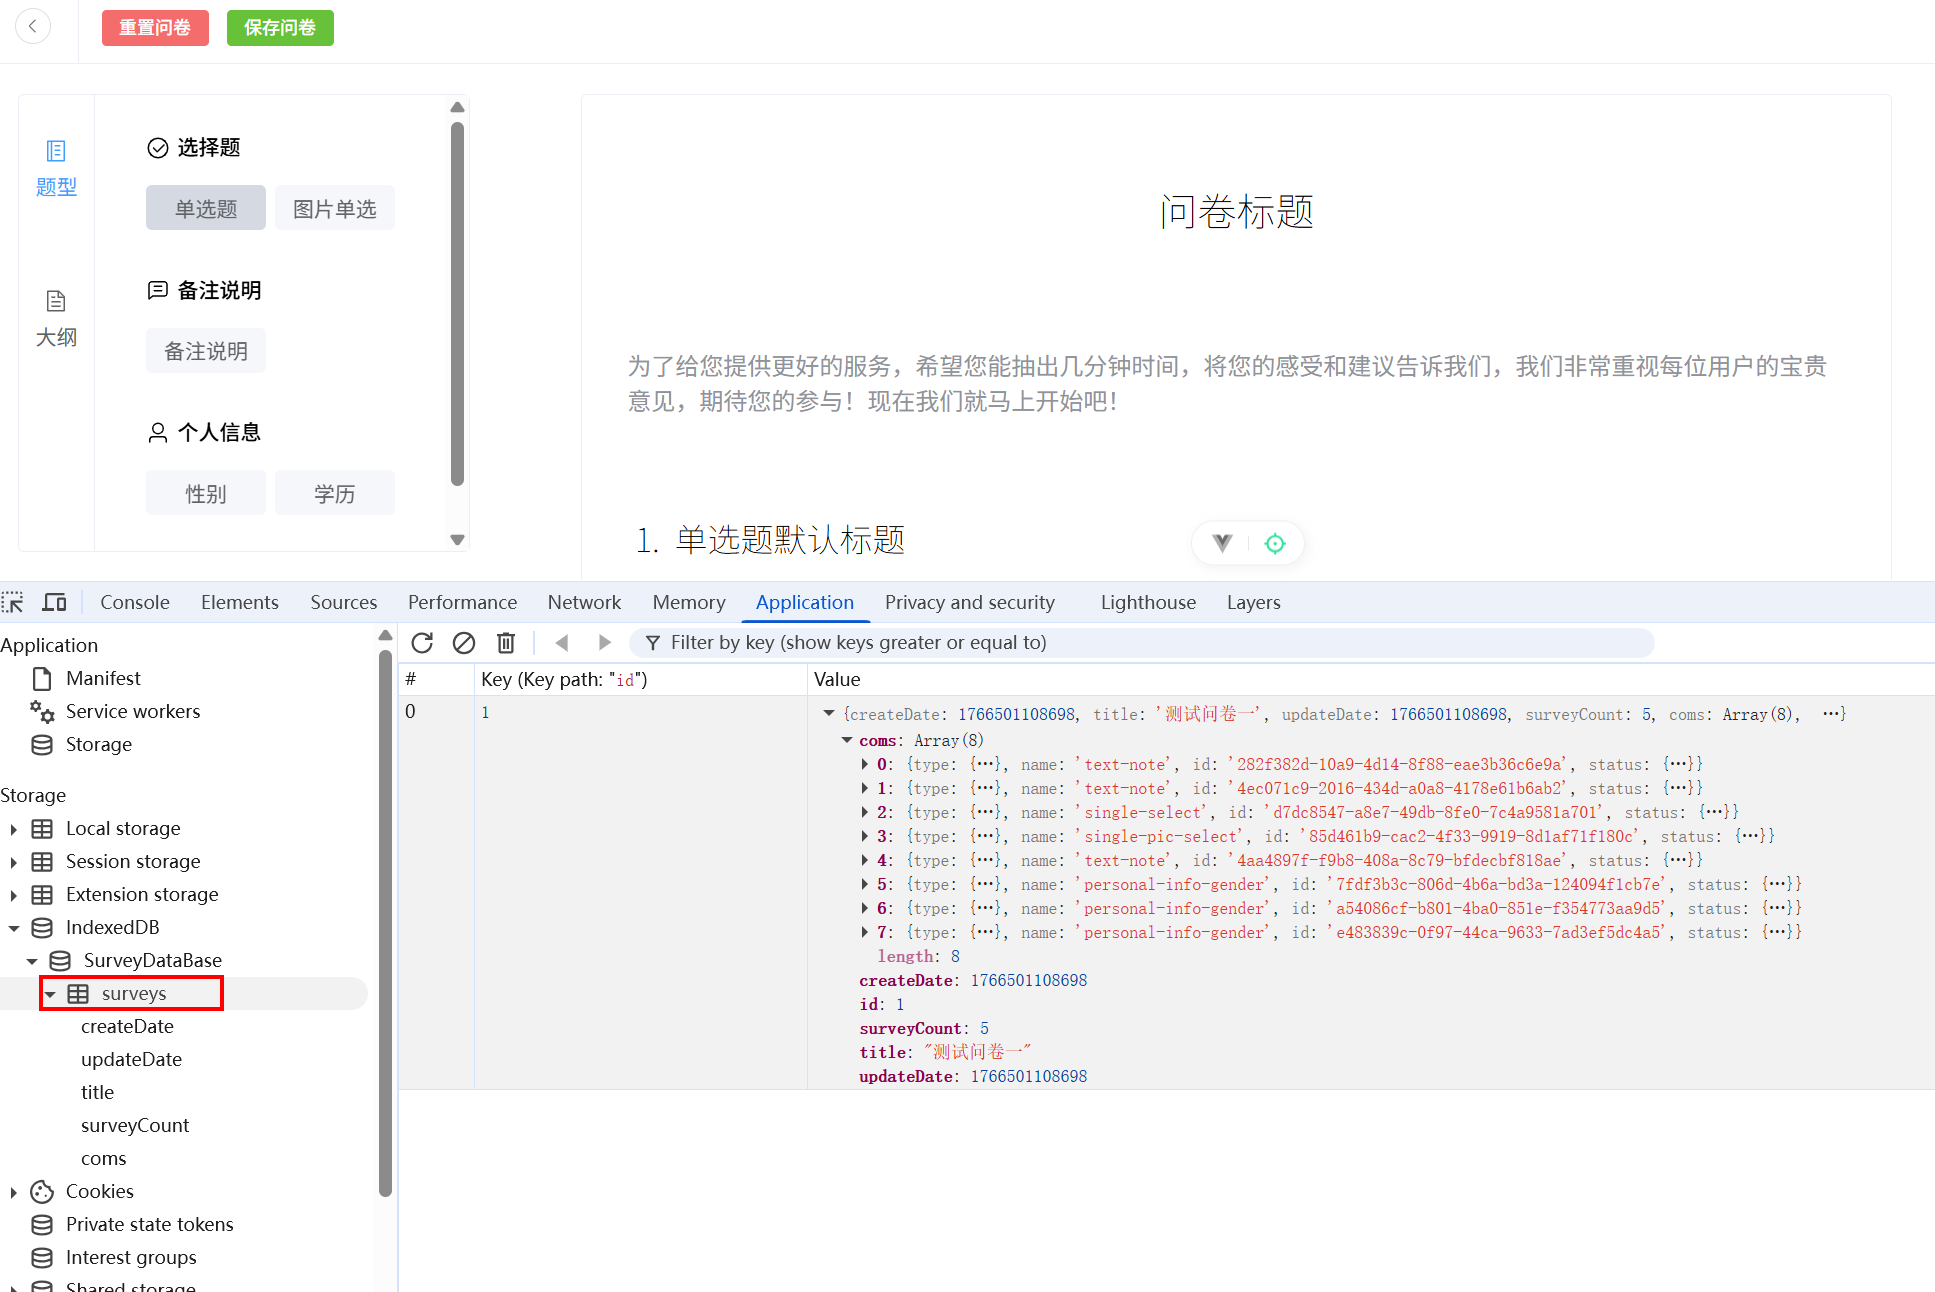
15.4 保存问卷
(1)编辑器数据仓库添加保存问卷方法。stores\useEditor.ts 关键代码:
javascript
// indexedDB数据库操作方法
import { saveSurvey } from '@/db/operation';

// 保存问卷数据
saveComs(data: SurveyDBData) {
  return saveSurvey(data);
},
(2)头部组件添加保存问卷方法。components/Common/Header.vue 关键代码:
html
<el-button type="success" size="small" @click="saveSurvey()">保存问卷</el-button>
javascript
// 保存问卷
const saveSurvey = () => {
  ElMessageBox.prompt('请输入问卷的标题', '提示', {
    confirmButtonText: '确定',
    cancelButtonText: '取消'
  }).then(({ value }) => {
    const surveyToSave = {
      createDate: new Date().getTime(),
      title: value,
      updateDate: new Date().getTime(),
      surveyCount: store.surveyCount,
      coms: JSON.parse(JSON.stringify(store.coms)),
    };
    store
      .saveComs(surveyToSave)
      .then(() => {
        console.log(store.coms);
        ElMessage.success('问卷已保存');
      })
      .catch(() => {
        ElMessage.error('问卷保存失败');
      });
  }).catch(() => {
    ElMessage.info('已取消保存');
  })
}
15.5 显示问卷列表
(1)添加处理日期格式的辅助方法。 utils/index.ts 关键代码:
javascript
// 处理日期格式的辅助方法
export function formatDate(
  row: SurveyDBData,
  column: TableColumnCtx<SurveyDBData>,
  cellValue: number,
) {
  const options: Intl.DateTimeFormatOptions = {
    year: 'numeric',
    month: '2-digit',
    day: '2-digit',
    hour: '2-digit',
    minute: '2-digit',
    second: '2-digit',
  };
  return new Intl.DateTimeFormat('zh-CN', options).format(new Date(cellValue));
}
(2)主页面请求IndexedDB 数据。views/HomeView.vue:
javascript
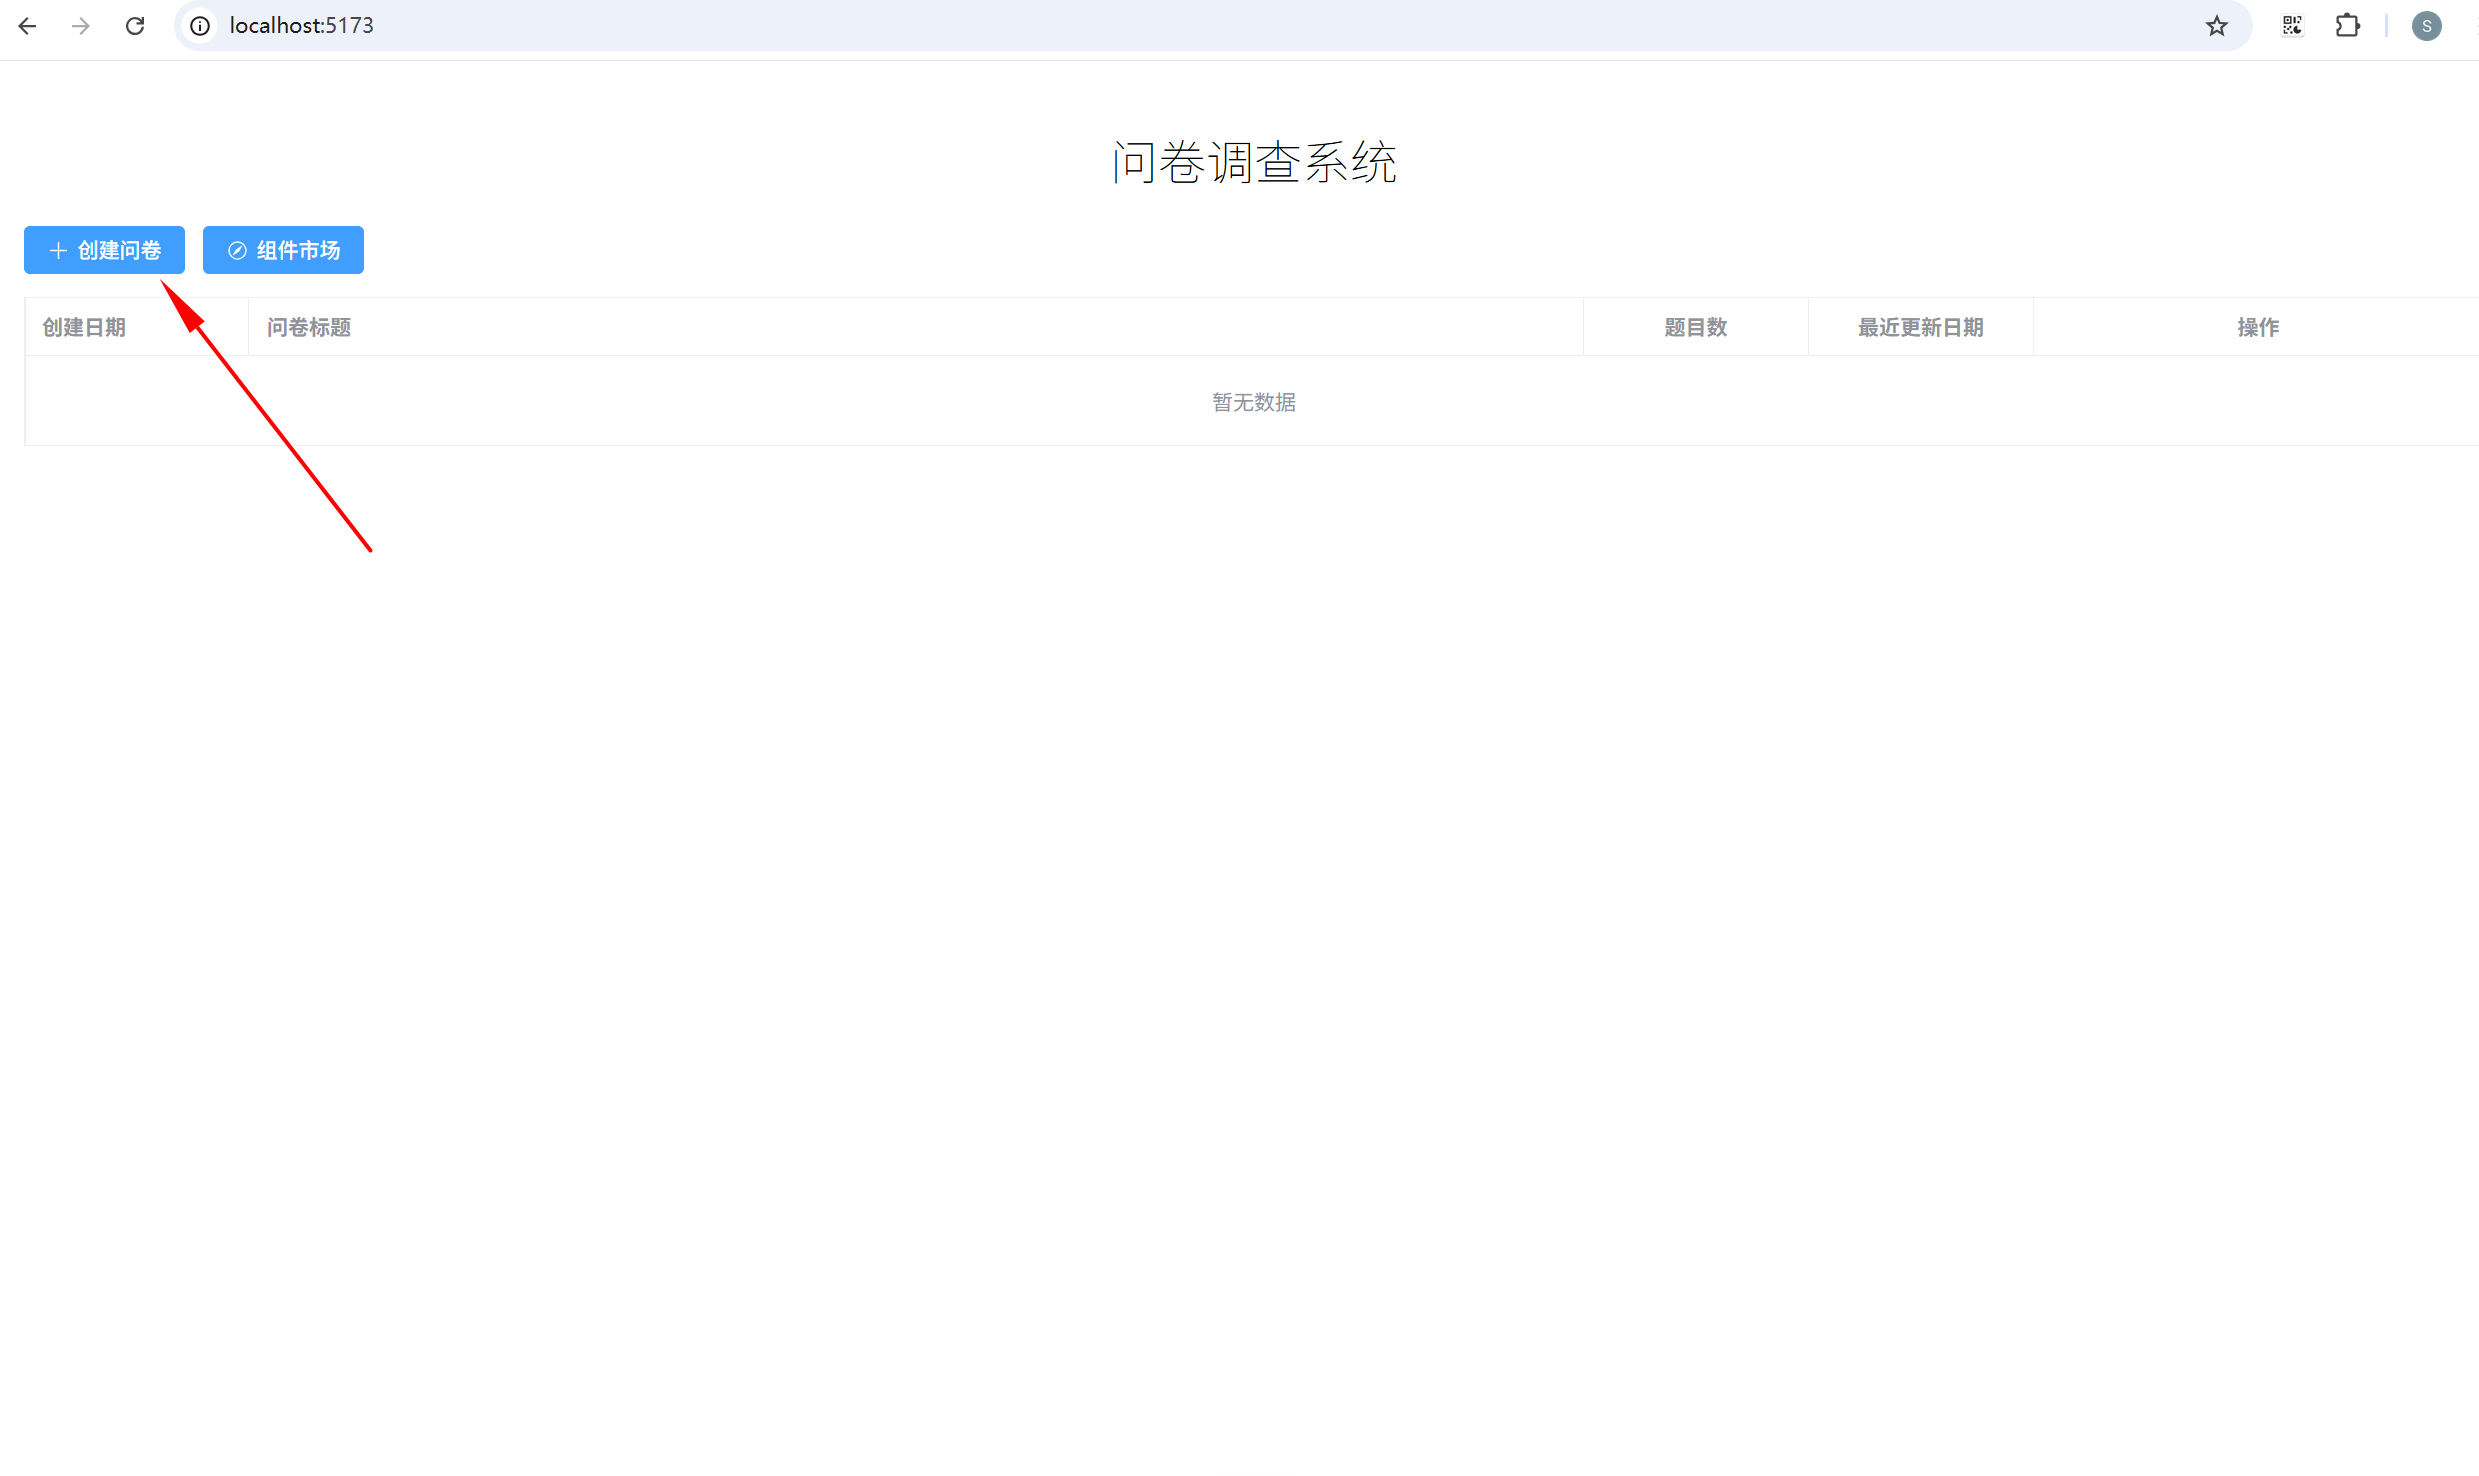
<template>
  <div class="pt-20 pb-20 pl-20 pr-20">
    <h1 class="font-weight-100 text-center">问卷调查系统</h1>
    <!--按钮组 -->
    <div class="mb-15">
      <el-button type="primary" :icon="Plus" @click="goToEditor()">创建问卷</el-button>
      <el-button type="primary" :icon="Compass" @click="goToComMarket()">组件市场</el-button>
    </div>
    <!-- 数据表格 -->
    <el-table :data="tableData" style="width: 100%" border>
      <el-table-column
        fixed
        prop="createDate"
        label="创建日期"
        width="160"
        :formatter="formatDate"
      />
      <el-table-column prop="title" label="问卷标题" />
      <el-table-column prop="surveyCount" label="题目数" width="150" align="center" />
      <el-table-column
        prop="updateDate"
        label="最近更新日期"
        width="160"
        align="center"
        :formatter="formatDate"
      />
      <el-table-column fixed="right" label="操作" width="300" align="center">
        <template #default="scope">
          <el-button link type="primary" size="small">查看问卷</el-button>
          <el-button link type="primary" size="small">编辑</el-button>
          <el-button link type="primary" size="small">删除</el-button>
        </template>
      </el-table-column>
    </el-table>
  </div>
</template>

<script setup lang="ts">
import { Plus, Compass } from '@element-plus/icons-vue'
import { ref } from 'vue'
// 路由
import { useRouter } from 'vue-router'
const router = useRouter()
// 类型
import type { SurveyDBData } from '@/types';
// 工具方法
import { formatDate } from '@/utils';

import { getAllSurveys } from '@/db/operation';

const tableData = ref<SurveyDBData[]>([])

function getData() {
  getAllSurveys().then(res => {
    tableData.value = res;
  })
}

getData()

const goToEditor = () => {
  localStorage.setItem('activeView', 'editor');
  router.push('/editor');
};

const goToComMarket = () => {
  localStorage.setItem('activeView', 'materials');
  router.push('/materials');
};

</script>

<style lang="scss" scoped></style>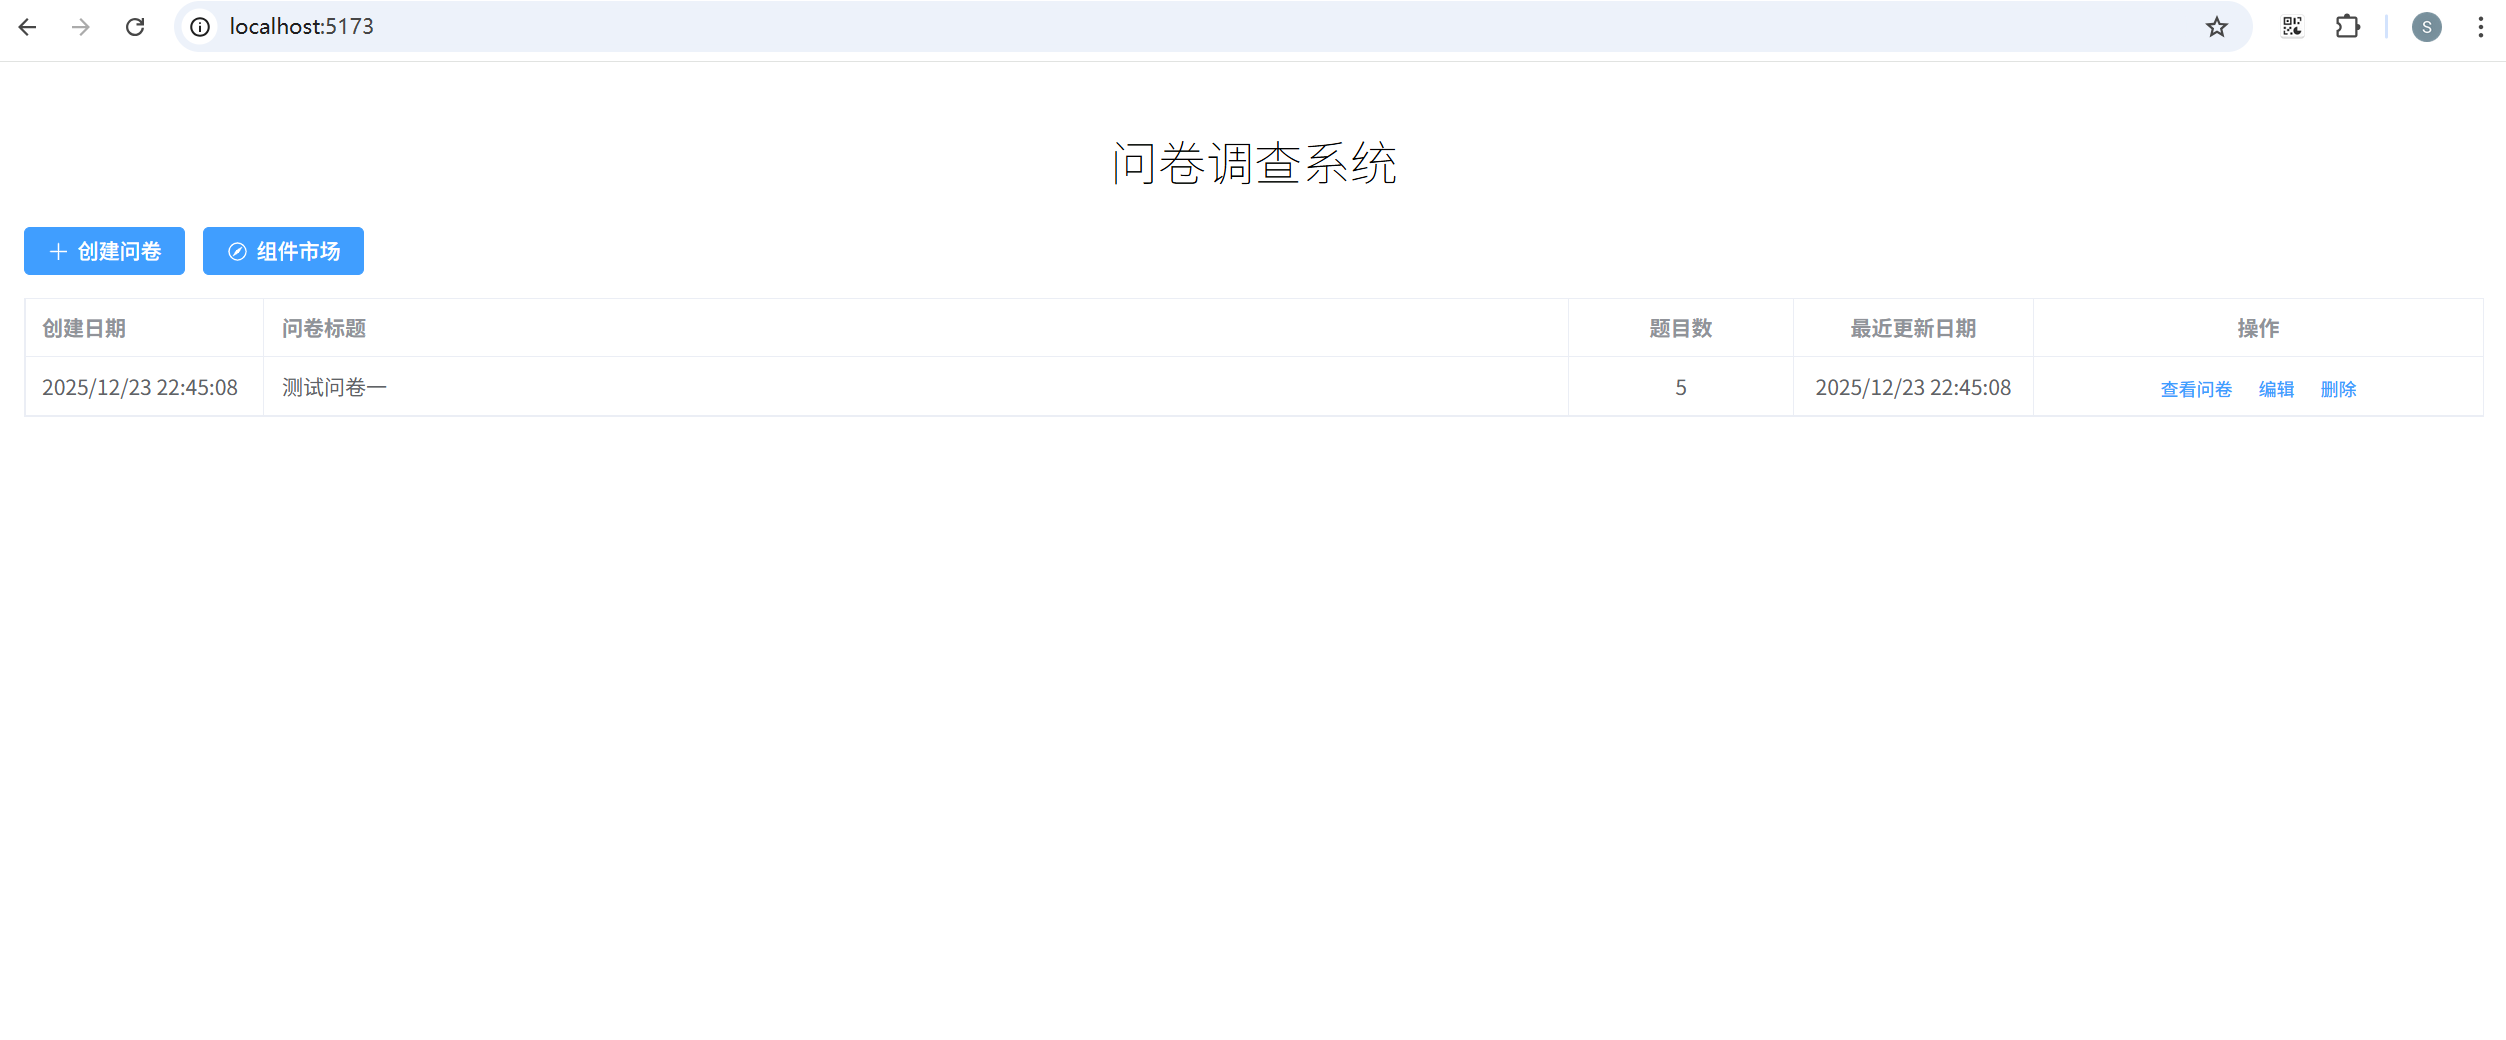
16. 预览问卷
16.1 创建预览问卷页面
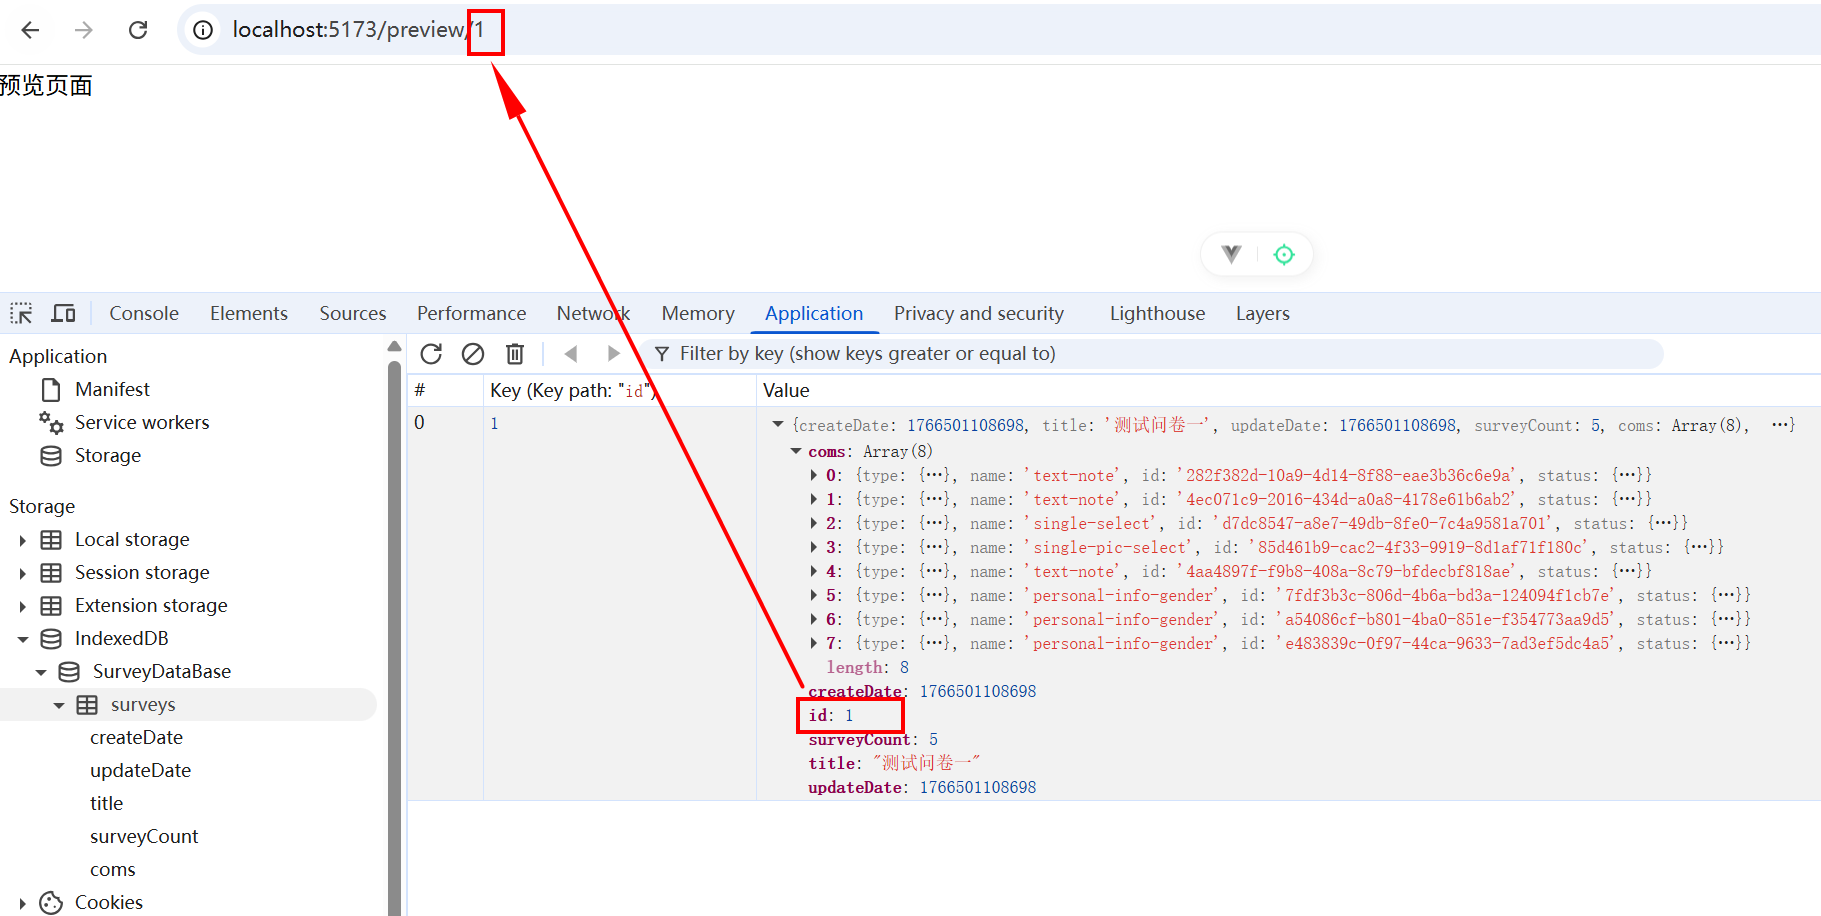
(1)创建 views/Preview.vue:
javascript
<template>
  <div>
    预览页面
  </div>
</template>

<script setup lang="ts">

</script>

<style scoped>

</style>
(2)添加路由。router/index.ts 关键代码:
javascript
{
  path: '/preview/:id(\\d+)',
  name: 'preview',
  component: () => import('@/views/Preview.vue'),
}
(3)添加返回问卷类型 SurveyDBReturnData。types/db.ts:
javascript
import type { Status } from './common'
// 表的类型
export interface SurveyDBData {
createDate: number;
updateDate: number;
title: string;
surveyCount: number;
coms: Status[];
}
export interface SurveyDBReturnData extends SurveyDBData {
id: number;
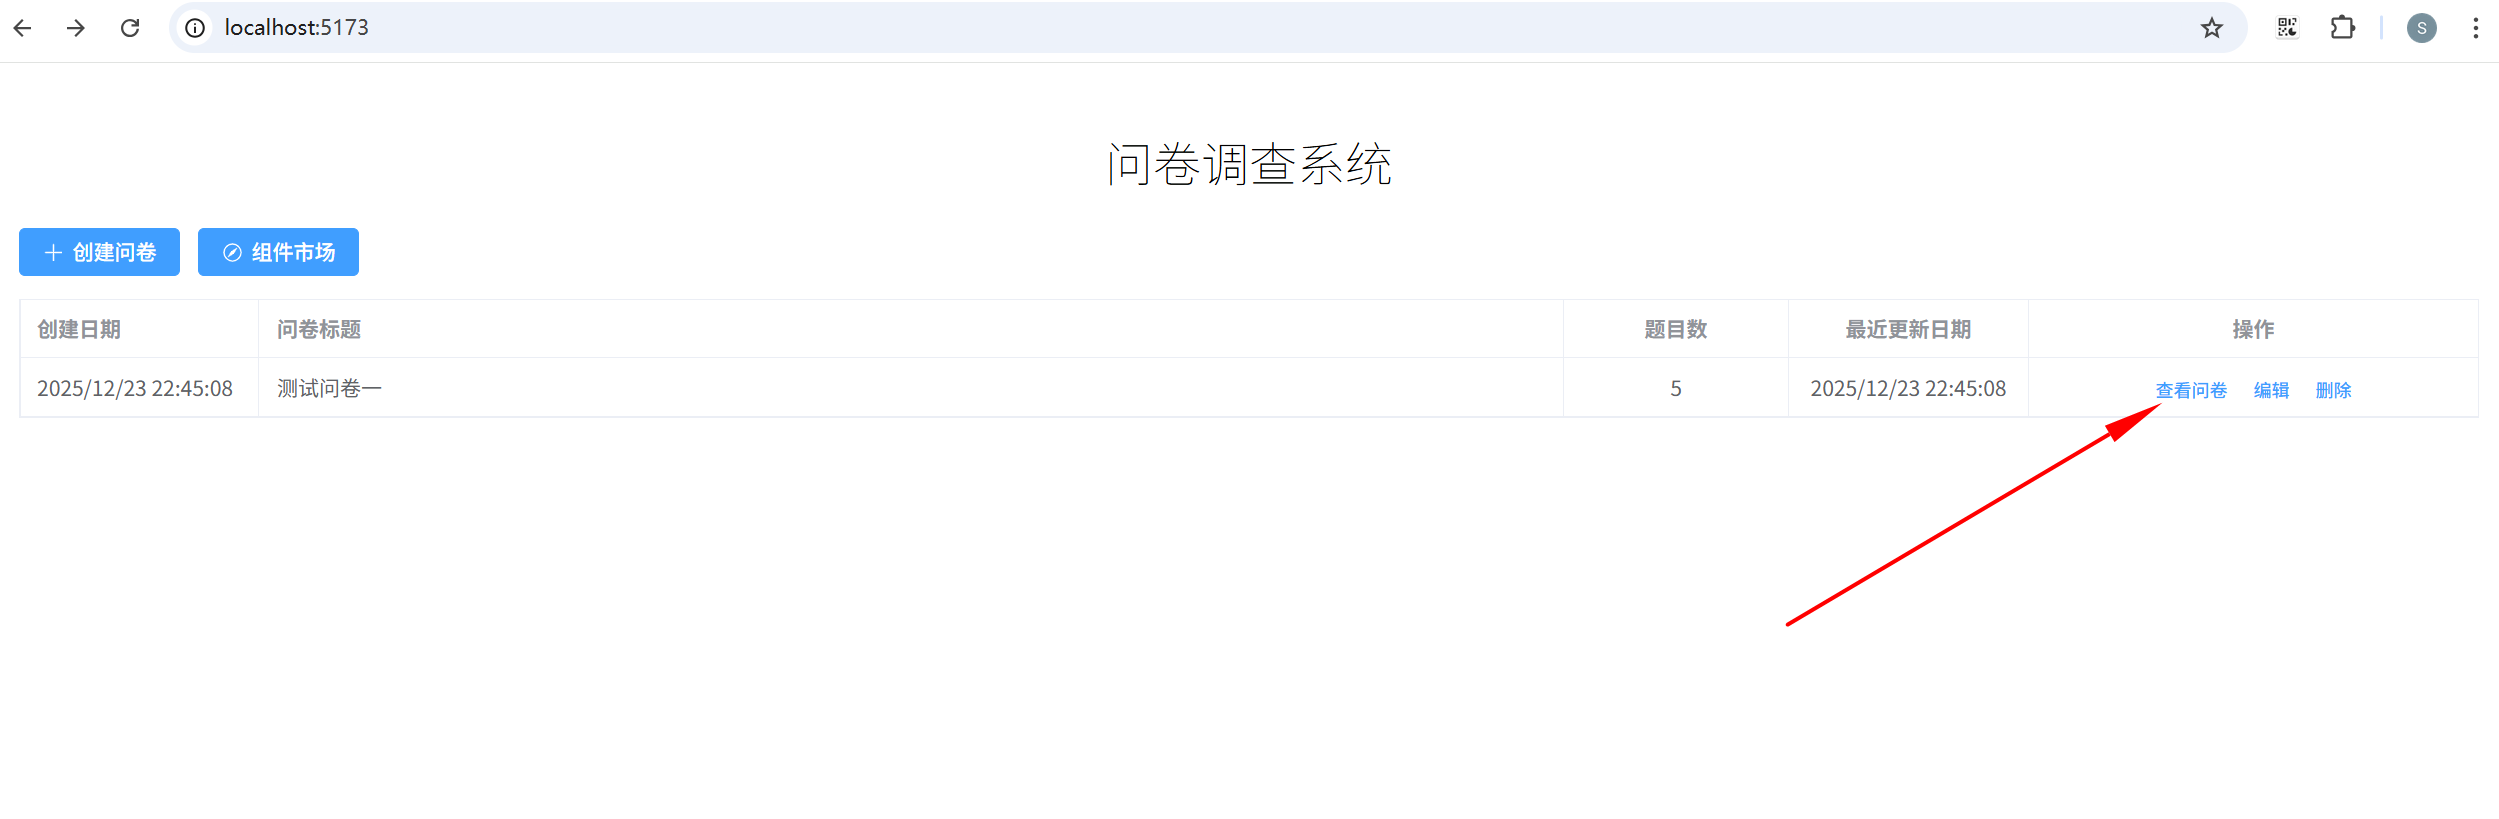
}(4)views/HomeView.vue 关键代码:
javascript
<el-button link type="primary" size="small" @click="viewSurvey(scope.row)">查看问卷</el-button>
javascript
// 类型
import type { SurveyDBData, SurveyDBReturnData } from '@/types';
javascript
// 预览问卷
const viewSurvey = (surveyInfo: SurveyDBReturnData) => {
  router.push({
    path: `/preview/${surveyInfo.id}`,
    state: {
      from: 'home'
    }
  });
}
这里之所以要创建 SurveyDBReturnData,是因为 SurveyDBData 并没有 id 属性,如果使用 SurveyDBData 标注 surveyInfo,使用 surveyInfo.id 时会有警告。
16.2 还原问卷数据
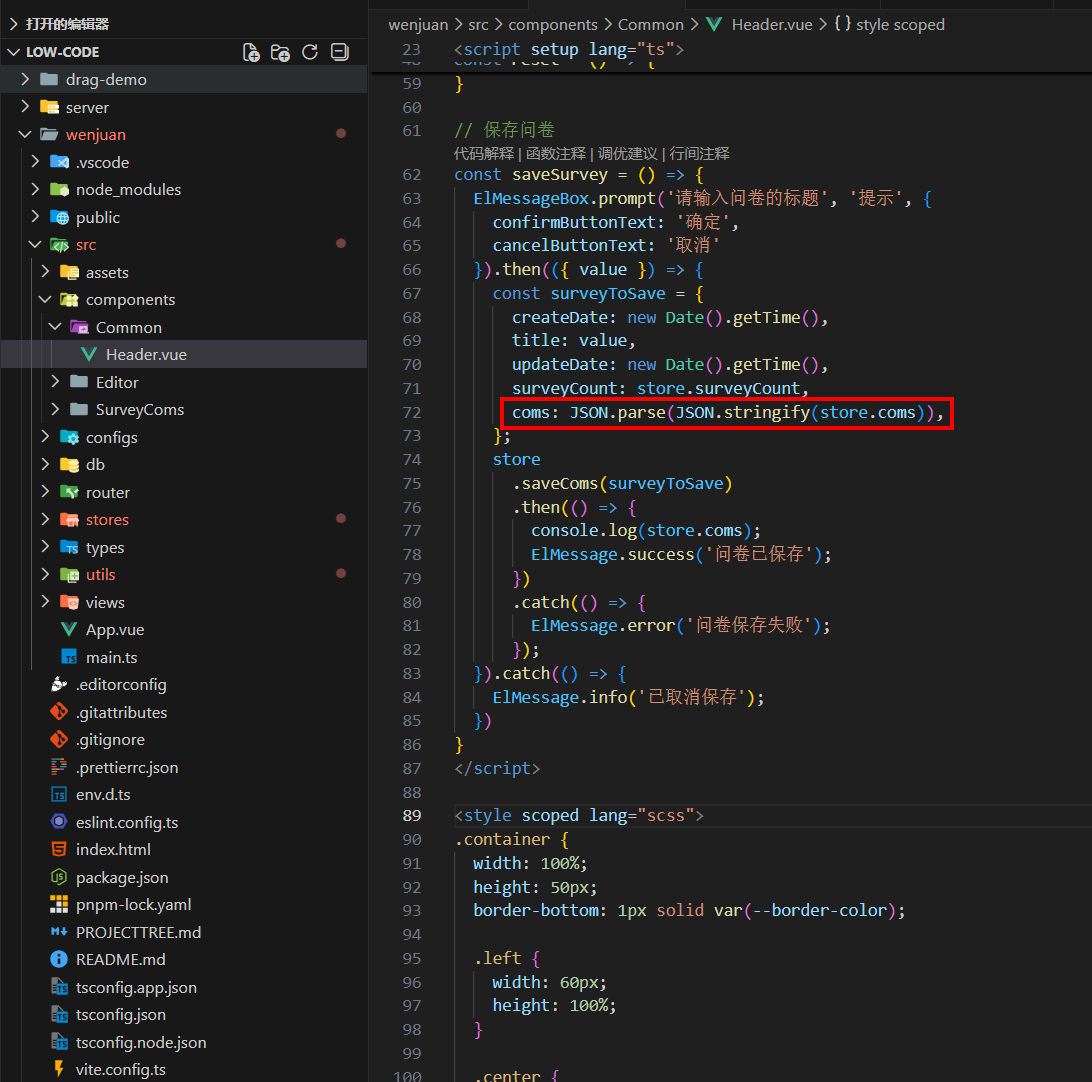
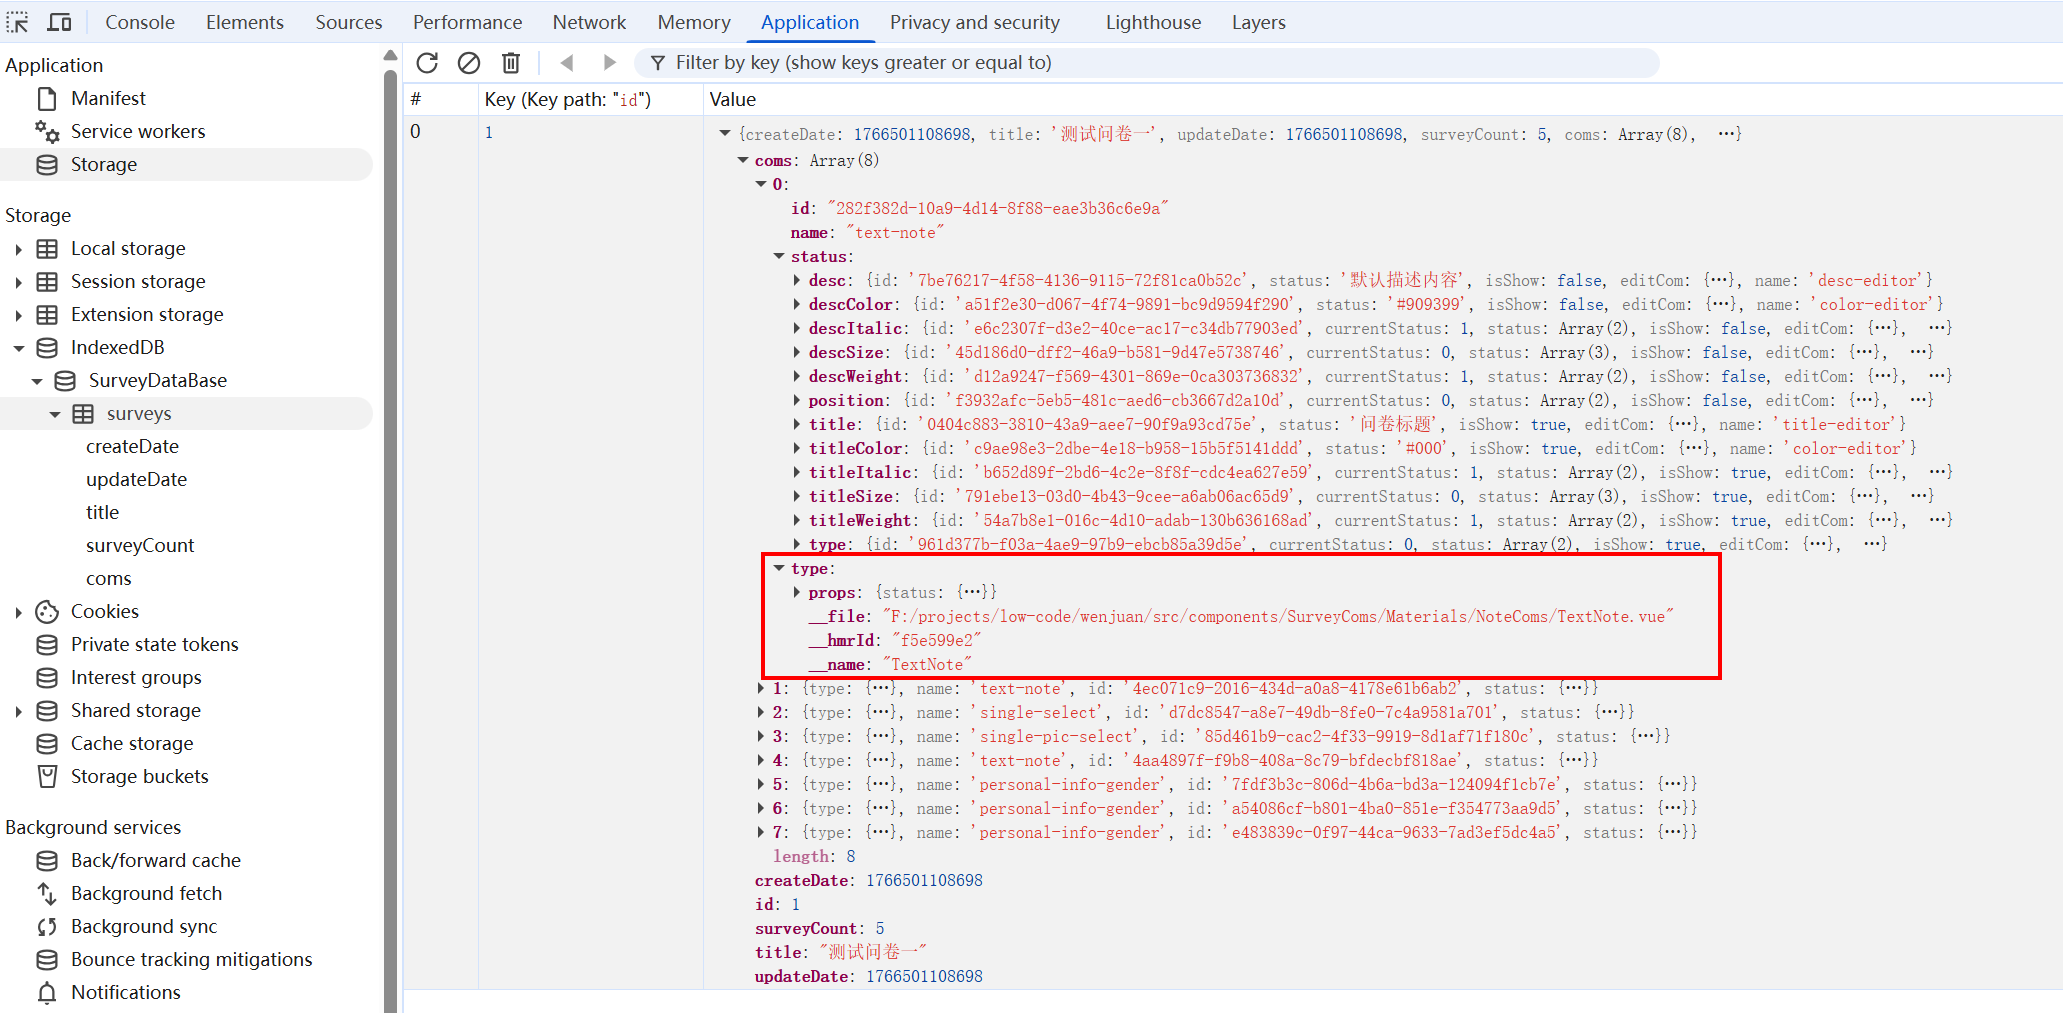
因为直接存储 coms: store.coms 会报错,IndexedDB 无法直接克隆。因此使用 coms: JSON.parse(JSON.stringify(store.coms)) 进行存储。但是这样也存在问题,就是会丢失组件原本的 render 和 setup ,从而导致无法直接还原试卷。
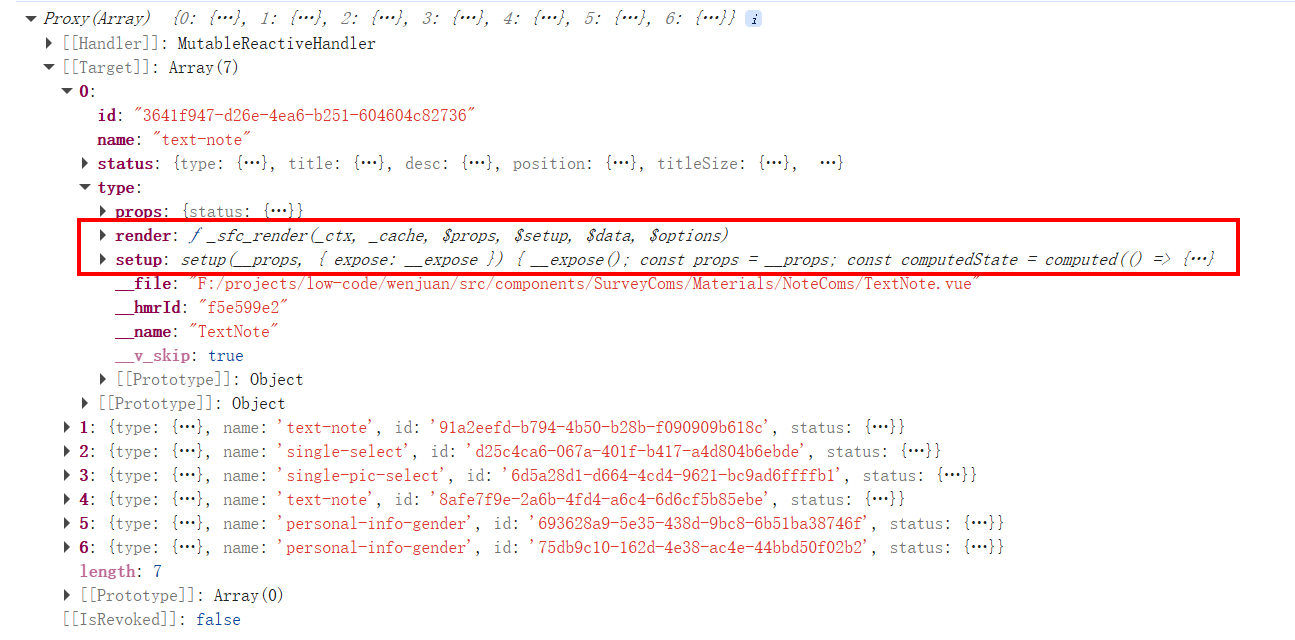
不过,好在我们可以根据 name 找到程序中对应的组件进行还原。
(1)新增组件名和具体组件映射。创建 configs/componentMap.ts:
javascript
// 该文件只做一件事,就是形成组件名和具体组件的一个映射关系
// 业务组件
import SingleSelect from "@/components/SurveyComs/Materials/SelectComs/SingleSelect.vue"
import SinglePicSelect from "@/components/SurveyComs/Materials/SelectComs/SinglePicSelect.vue"
import TextNote from "@/components/SurveyComs/Materials/NoteComs/TextNote.vue"
// 编辑组件
import TitleEditor from '@/components/SurveyComs/EditItems/TitleEditor.vue';
import DescEditor from '@/components/SurveyComs/EditItems/DescEditor.vue';
import PositionEditor from '@/components/SurveyComs/EditItems/PositionEditor.vue';
import SizeEditor from '@/components/SurveyComs/EditItems/SizeEditor.vue';
import WeightEditor from '@/components/SurveyComs/EditItems/WeightEditor.vue';
import ItalicEditor from '@/components/SurveyComs/EditItems/ItalicEditor.vue';
import ColorEditor from '@/components/SurveyComs/EditItems/ColorEditor.vue';
import TextTypeEditor from '@/components/SurveyComs/EditItems/TextTypeEditor.vue';
import OptionsEditor from '@/components/SurveyComs/EditItems/OptionsEditor.vue';
import PicOptionsEditor from '@/components/SurveyComs/EditItems/PicOptionsEditor.vue';
import { markRaw } from 'vue';
import type { ComponentMap } from '@/types'

export const componentMap: ComponentMap = {
  // 业务组件
  'single-select': markRaw(SingleSelect), // 单选组件
  'single-pic-select': markRaw(SinglePicSelect), // 单图单选组件
  'text-note': markRaw(TextNote), // 文本组件
  'personal-info-gender': markRaw(SingleSelect), // 个人信息-性别组件
  'personal-info-education': markRaw(SingleSelect), // 个人信息-学历组件
  // 编辑组件
  'title-editor': markRaw(TitleEditor),
  'desc-editor': markRaw(DescEditor),
  'position-editor': markRaw(PositionEditor),
  'size-editor': markRaw(SizeEditor),
  'weight-editor': markRaw(WeightEditor),
  'italic-editor': markRaw(ItalicEditor),
  'color-editor': markRaw(ColorEditor),
  'text-type-editor': markRaw(TextTypeEditor),
  'options-editor': markRaw(OptionsEditor),
  'pic-options-editor': markRaw(PicOptionsEditor),
};
(2)添加相关类型。store.ts 关键代码:
javascript
import type { TextProps, OptionsProps, PicLink, Status, VueComType } from '@/types';
// 题目类型
export type SurveyComName =
  | 'single-select'
  | 'single-pic-select'
  | 'personal-info-gender'
  | 'personal-info-education';

// 业务组件类型(题目类型 + 非题目类型)
export type Material = SurveyComName | 'text-note';

// 编辑组件类型:集合了所有的编辑组件
export type EditComName =
  | 'title-editor'
  | 'desc-editor'
  | 'position-editor'
  | 'size-editor'
  | 'weight-editor'
  | 'italic-editor'
  | 'text-type-editor'
  | 'pic-options-editor'
  | 'options-editor'
  | 'color-editor';

// 所有的组件类型:业务组件类型 + 编辑组件类型
export type ComponentName = Material | EditComName;

export type ComponentMap = {
  [key in ComponentName]: VueComType;
};
(3)types/common.ts 修改 status 属性类型:
javascript
import type { defineComponent } from 'vue';
import type { TextProps, Material, OptionsProps } from '@/types';
// import type { OptionsStatus, Material, TypeStatus } from '@/types';

// 导出 vue 组件类型
export type VueComType = ReturnType<typeof defineComponent>;

// 业务组件状态,也就是包含了 type、name、id、status 这些属性
export interface Status {
  type: VueComType;
  name: Material;
  id: string;
  // status: OptionsStatus | TypeStatus;
  status: {
    [key: string]: TextProps | OptionsProps;
  };
}
(4)utils/index.ts 新增还原组件状态方法。关键代码:
javascript
export const restoreComponentStatus = (coms: Status[]) => {
  coms.forEach((com) => {
    // 业务组件还原
    com.type = componentMap[com.name]
    // 编辑组件还原
    for (const key in com.status) {
      const name = com.status[key].name as EditComName
      com.status[key].editCom = componentMap[name]
    }
  })
}
(5)HomeView 组件不使用懒加载,否则会导致部分组件无法初始化。
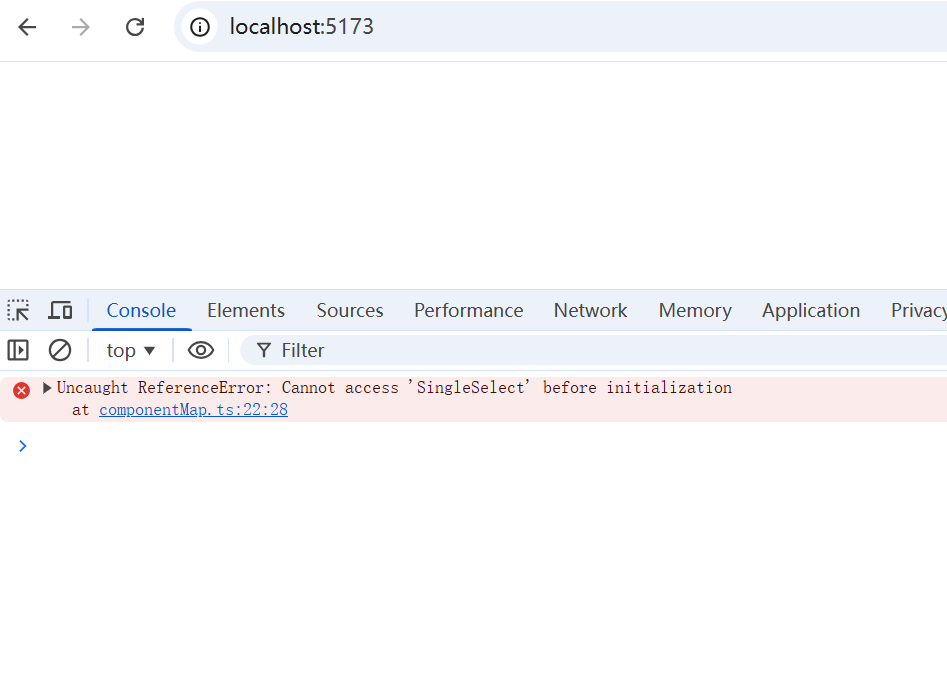
router/index.ts 关键代码:
javascript
import HomeView from '@/views/HomeView.vue';
import { useMaterialStore } from '@/stores/useMaterial';
import { createRouter, createWebHistory } from 'vue-router';

const router = createRouter({
  history: createWebHistory(import.meta.env.BASE_URL),
  routes: [
    {
      path: '/',
      name: 'home',
      // component: () => import('@/views/HomeView.vue'),
      component: HomeView,
    },
    // 下面代码省略
(6)预览页面获取存储的问卷题目并进行还原。views/Preview.vue:
javascript
<template>
  <div>
    预览页面
  </div>
</template>

<script setup lang="ts">
import { useRouter, useRoute } from 'vue-router'
// const router = useRouter();
const route = useRoute();
import { getSurveyById } from '@/db/operation';
// 仓库
import { useEditorStore } from '@/stores/useEditor';
const store = useEditorStore();

import { restoreComponentStatus } from '@/utils';

// 获取路由参数
const id = Number(route.params.id);
// 根据id 获取存储的问卷题目
if(id) {
  getSurveyById(id).then(res => {
    // console.log(res);
    if(res) {
      // 拿到数据后,组件部分需要重新还原
      restoreComponentStatus(res.coms)
      // 将还原的数据设置为仓库里面的 coms 即可。
      store.setStore(res)
    }
    console.log(res);
  })
}
</script>

<style scoped>

</style>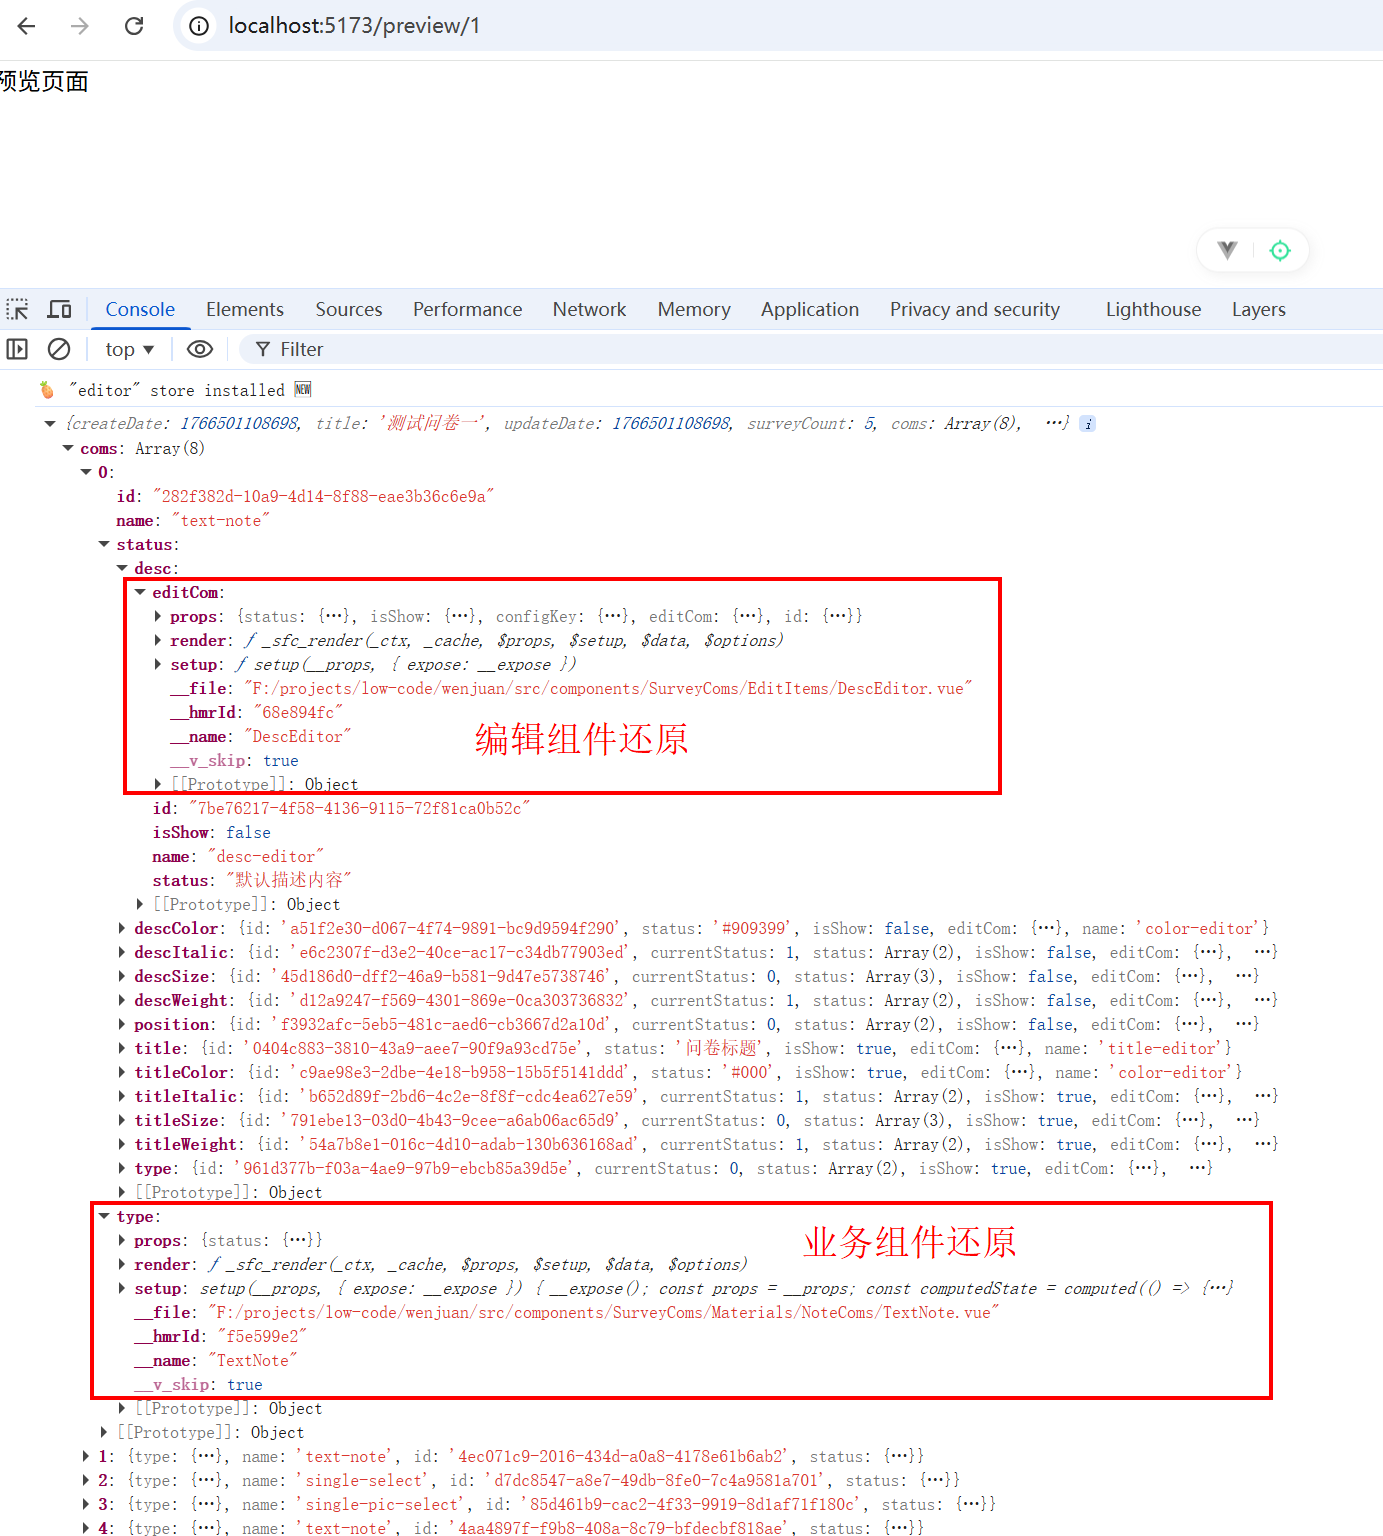
16.3 绘制预览页面
views/Preview.vue:
javascript
<template>
  <div class="preview-container pb-40">
    <div class="center mc">
      <!-- 上面的按钮组 -->
      <div class="button-group flex space-between align-items-center">
        <!-- 左边按钮 -->
        <div class="flex space-between">
          <el-button type="danger" @click="gobackHandle">返回</el-button>
          <el-button type="success">生成在线问卷</el-button>
          <el-button type="warning">生成本地PDF</el-button>
        </div>
        <!-- 题目数量 -->
        <div class="mr-15">
          <el-text class="mx-1">题目数量:{{ store.surveyCount }}</el-text>
        </div>
      </div>
      <!-- 对应的问卷 -->
      <div class="content-group no-border">
        <div class="content mb-10" v-for="(com, index) in store.coms" :key="index">
          <component :is="com.type" :status="com.status" :serialNum="serialNum[index]" />
        </div>
      </div>
    </div>
  </div>
</template>

<script setup lang="ts">
import { computed } from 'vue';
import { useRouter, useRoute } from 'vue-router';
const router = useRouter();
const route = useRoute();
import { getSurveyById } from '@/db/operation';
// 仓库
import { useEditorStore } from '@/stores/useEditor';
const store = useEditorStore();
// 工具方法
import { restoreComponentStatus } from '@/utils';
// 自定义Hook
import { useSurveyNo } from '@/utils/hooks';
// 获取序号
const serialNum = computed(() => useSurveyNo(store.coms).value);
// 获取路由参数
const id = Number(route.params.id);
// 接下来应该根据拿到的 id 去获取存储的问卷题目
if (id) {
  getSurveyById(id).then((res) => {
    if (res) {
      // 拿到数据后,组件部分需要重新还原
      restoreComponentStatus(res.coms);
      // 还原完成之后,将还原的数据设置为仓库里面的 coms 即可
      store.setStore(res);
    }
    console.log(res);
  });
}
// 返回按钮对应逻辑
const gobackHandle = () => {
  const path = history.state.from;
  if (path === 'home') {
    // 说明是从首页进来的
    router.back();
  } else {
    // 说明是从编辑页面进来的
    router.push(`/editor/${id}/survey-type`);
  }
};
</script>

<style scoped lang="scss">
.preview-container {
  width: 100%;
  min-height: 100vh;
  background: url('@/assets/imgs/editor_background.png');
}
.center {
  width: 800px;
}
.button-group {
  width: 100%;
  height: 60px;
  top: 0;
  left: 0;
  background-color: var(--white);
  z-index: 100;
}
.content-group {
  padding: 20px;
  border: 1px solid var(--border-color);
  border-radius: var(--border-radius-lg);
  background: var(--white);
  box-shadow: 0 0 5px rgba(0, 0, 0, 0.1);
}
</style>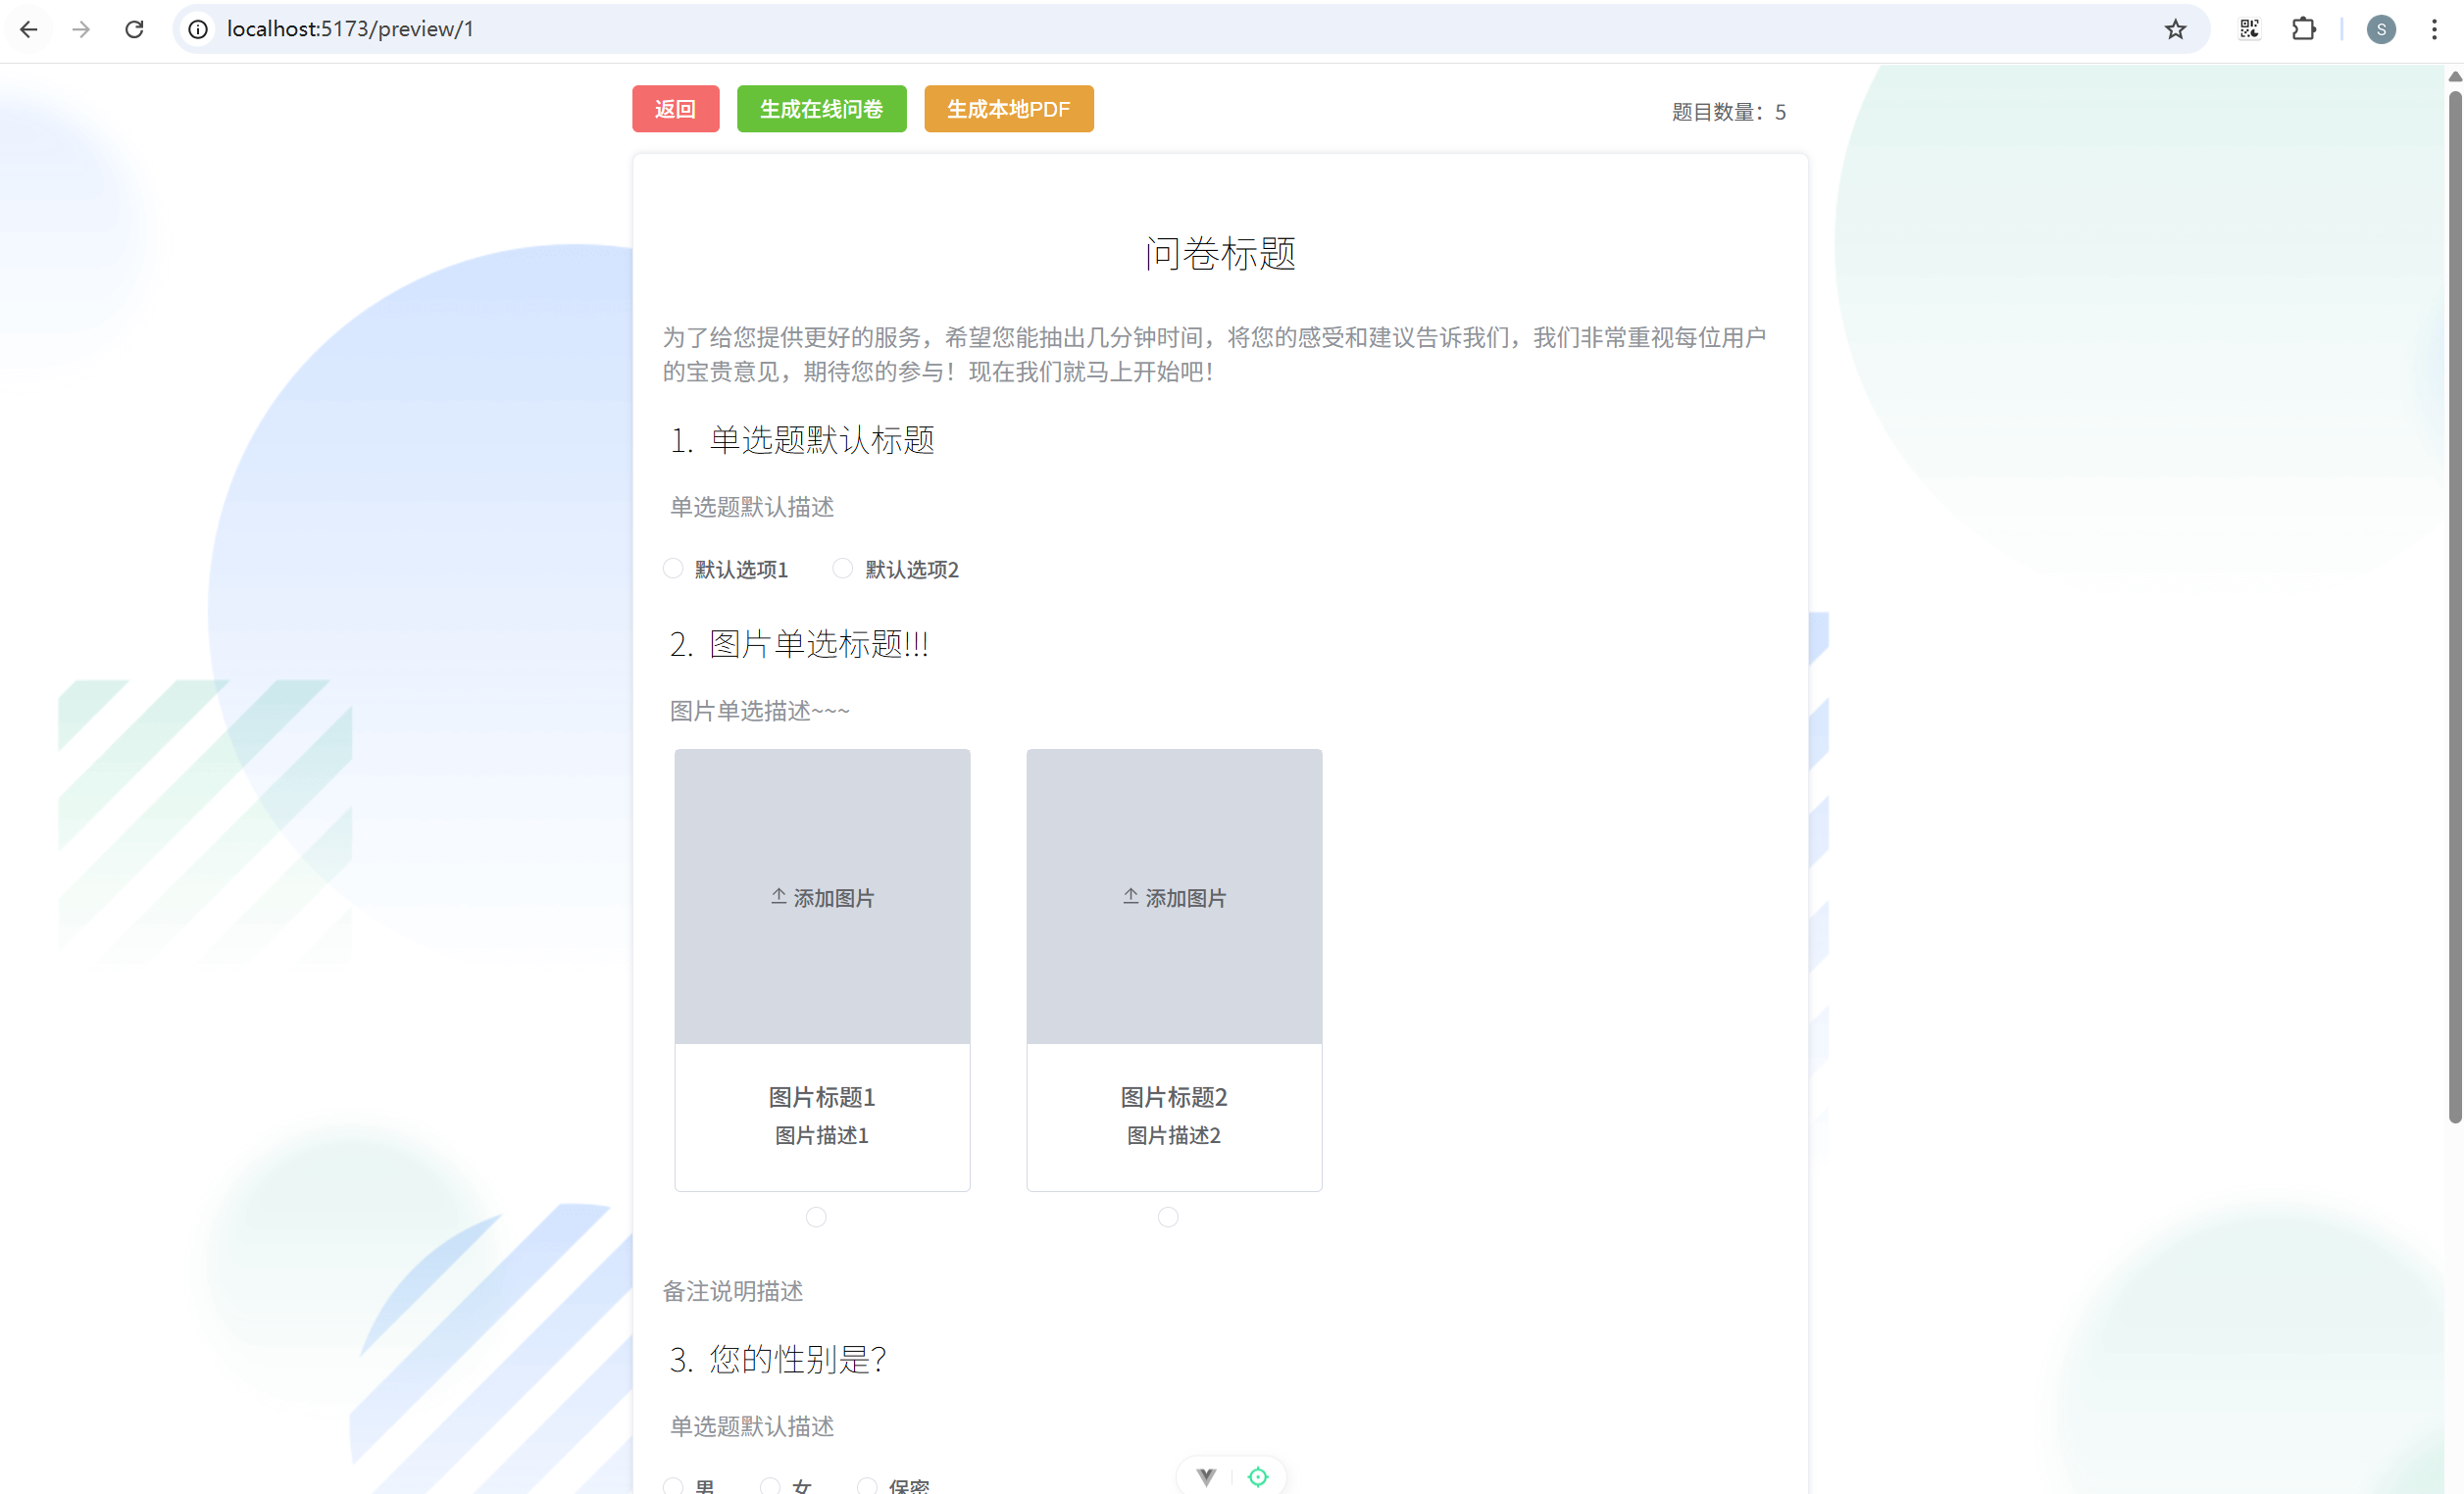
17. 编辑和删除问卷
17.1 编辑问卷
(1)添加编辑页路由。router/index.ts 关键代码:
javascript
{
      path: '/editor/:id(\\d+)?',
      name: 'editor',
      component: () => import('@/views/EditorView/Index.vue'),
      children: [
        {
          path: 'survey-type',
          name: 'survey-type',
          component: () => import('@/views/EditorView/LeftSide/SurveyType.vue'),
        },
        {
          path: 'outline',
          name: 'outline',
          component: () => import('@/views/EditorView/LeftSide/Outline.vue'),
        },
      ],
    },
(2)主页添加前往编辑页方法。views/HomeView.vue 关键代码:
javascript
<el-button link type="primary" size="small" @click="editSurvey(scope.row)">编辑</el-button>
javascript
// 编辑问卷
const editSurvey = (surveyInfo: SurveyDBReturnData) => {
  router.push({
    path: `/editor/${surveyInfo.id}/survey-type`,
  });
}
(3)根据 id 获取对应数据仓库数据。views/EditorView/Index.vue 关键代码:
javascript
<script setup lang="ts">
import { computed } from 'vue';
import Header from '@/components/Common/Header.vue';
import LeftSide from '@/views/EditorView/LeftSide/Index.vue';
import Center from '@/views/EditorView/Center.vue';
import RightSide from '@/views/EditorView/RightSide.vue';
import { getSurveyById } from '@/db/operation';

import { restoreComponentStatus } from '@/utils';

// 路由
import { useRoute } from 'vue-router';
const route = useRoute();
// 仓库
import { useEditorStore } from '@/stores/useEditor';
const store = useEditorStore();
store.resetComs()

const id = computed(() => route.params.id ? String(route.params.id) : '')
if(id.value) {
  getSurveyById(Number(id.value)).then((res) => {
    if(res) {
      restoreComponentStatus(res.coms)
      store.setStore(res)
    }
  })
}
</script>
(4)数据仓库添加更新问卷方法。stores/useEditor.ts 关键代码:
javascript
// indexedDB数据库操作方法
import { saveSurvey, updateSurveyById } from '@/db/operation';
javascript
// 更新问卷
    updateComs(id: number, data: Partial<SurveyDBData>) {
      return updateSurveyById(id, data)
    }
(5)头部组件添加更新相关按钮和逻辑。components/Common/Header.vue:
javascript
<template>
  <div>
    <div class="container flex self-start align-items-center border-box">
      <!-- 分为三个部分 -->
      <div class="left flex justify-content-center align-items-center">
        <el-button :icon="ArrowLeft" circle size="small" @click="goHome" />
      </div>
      <div class="center flex align-items-center space-between pl-15 pr-15">
        <div v-if="isEditor">
          <div v-if="id">
            <el-button type="warning" size="small" @click="updateSurvey()">更新问卷</el-button>
          </div>
          <div v-else>
            <el-button type="danger" size="small" @click="reset()">重置问卷</el-button>
            <el-button type="success" size="small" @click="saveSurvey()">保存问卷</el-button>
          </div>
        </div>
        <div v-if="id">
          <el-button type="primary" size="small" @click="preview()">预览</el-button>
        </div>
      </div>
      <div class="right flex justify-content-center align-items-center">
        <el-avatar :size="30" :src="avatar" />
      </div>
    </div>
  </div>
</template>

<script setup lang="ts">
import { ArrowLeft } from '@element-plus/icons-vue';
import { ElMessage, ElMessageBox } from 'element-plus';
import { useRouter } from 'vue-router';
const router = useRouter();
import { ref } from 'vue';
// 仓库
import { useEditorStore } from '@/stores/useEditor';
const store = useEditorStore();

const props = defineProps({
  isEditor: {
    type: Boolean,
    default: true
  },
  id: {
    type: String,
    default: ''
  }
})

const goHome = () => {
  localStorage.setItem('activeView', 'home');
  router.push('/');
};

const avatar = ref('https://wpimg.wallstcn.com/f778738c-e4f8-4870-b634-56703b4acafe.gif');

// 重置问卷
const reset = () => {
  ElMessageBox.confirm('确定要重置问卷吗?', '提示', {
    confirmButtonText: '确定',
    cancelButtonText: '取消',
    type: 'warning'
  }).then(() => {
    store.resetComs();
    ElMessage.success('重置成功');
  }).catch(() => {
    ElMessage.info('已取消重置');
  })
}

// 保存问卷
const saveSurvey = () => {
  ElMessageBox.prompt('请输入问卷的标题', '提示', {
    confirmButtonText: '确定',
    cancelButtonText: '取消'
  }).then(({ value }) => {
    const surveyToSave = {
      createDate: new Date().getTime(),
      title: value,
      updateDate: new Date().getTime(),
      surveyCount: store.surveyCount,
      coms: JSON.parse(JSON.stringify(store.coms)),
    };
    store
      .saveComs(surveyToSave)
      .then((id) => {
        router.push(`/editor/${id}/survey-type`);
        ElMessage.success('问卷已保存');
      })
      .catch(() => {
        ElMessage.error('问卷保存失败');
      });
  }).catch(() => {
    ElMessage.info('已取消保存');
  })
}

// 更新问卷
const updateSurvey = () => {
  store
    .updateComs(Number(props.id), {
      updateDate: new Date().getTime(),
      surveyCount: store.surveyCount,
      coms: JSON.parse(JSON.stringify(store.coms)),
    })
    .then(() => {
      ElMessage.success('问卷已更新');
    })
    .catch(() => {
      ElMessage.error('问卷更新失败');
    });
};

// 预览问卷
const preview = () => {
  ElMessageBox.confirm('预览会自动保存问卷,是否跳转预览', '提示', {
    confirmButtonText: '确定',
    cancelButtonText: '取消'
  }).then(() => {
    updateSurvey();
    router.push({
      path: `/preview/${props.id}`,
      state: {
        from: 'editor'
      }
    })
  }).catch(() => {
    ElMessage.info('已取消跳转');
  })
}
</script>

<style scoped lang="scss">
.container {
  width: 100%;
  height: 50px;
  border-bottom: 1px solid var(--border-color);

  .left {
    width: 60px;
    height: 100%;
  }

  .center {
    flex: 1;
    height: 100%;
    border-left: 1px solid var(--border-color);
    border-right: 1px solid var(--border-color);
  }

  .right {
    width: 80px;
    height: 100%;
  }
}
</style>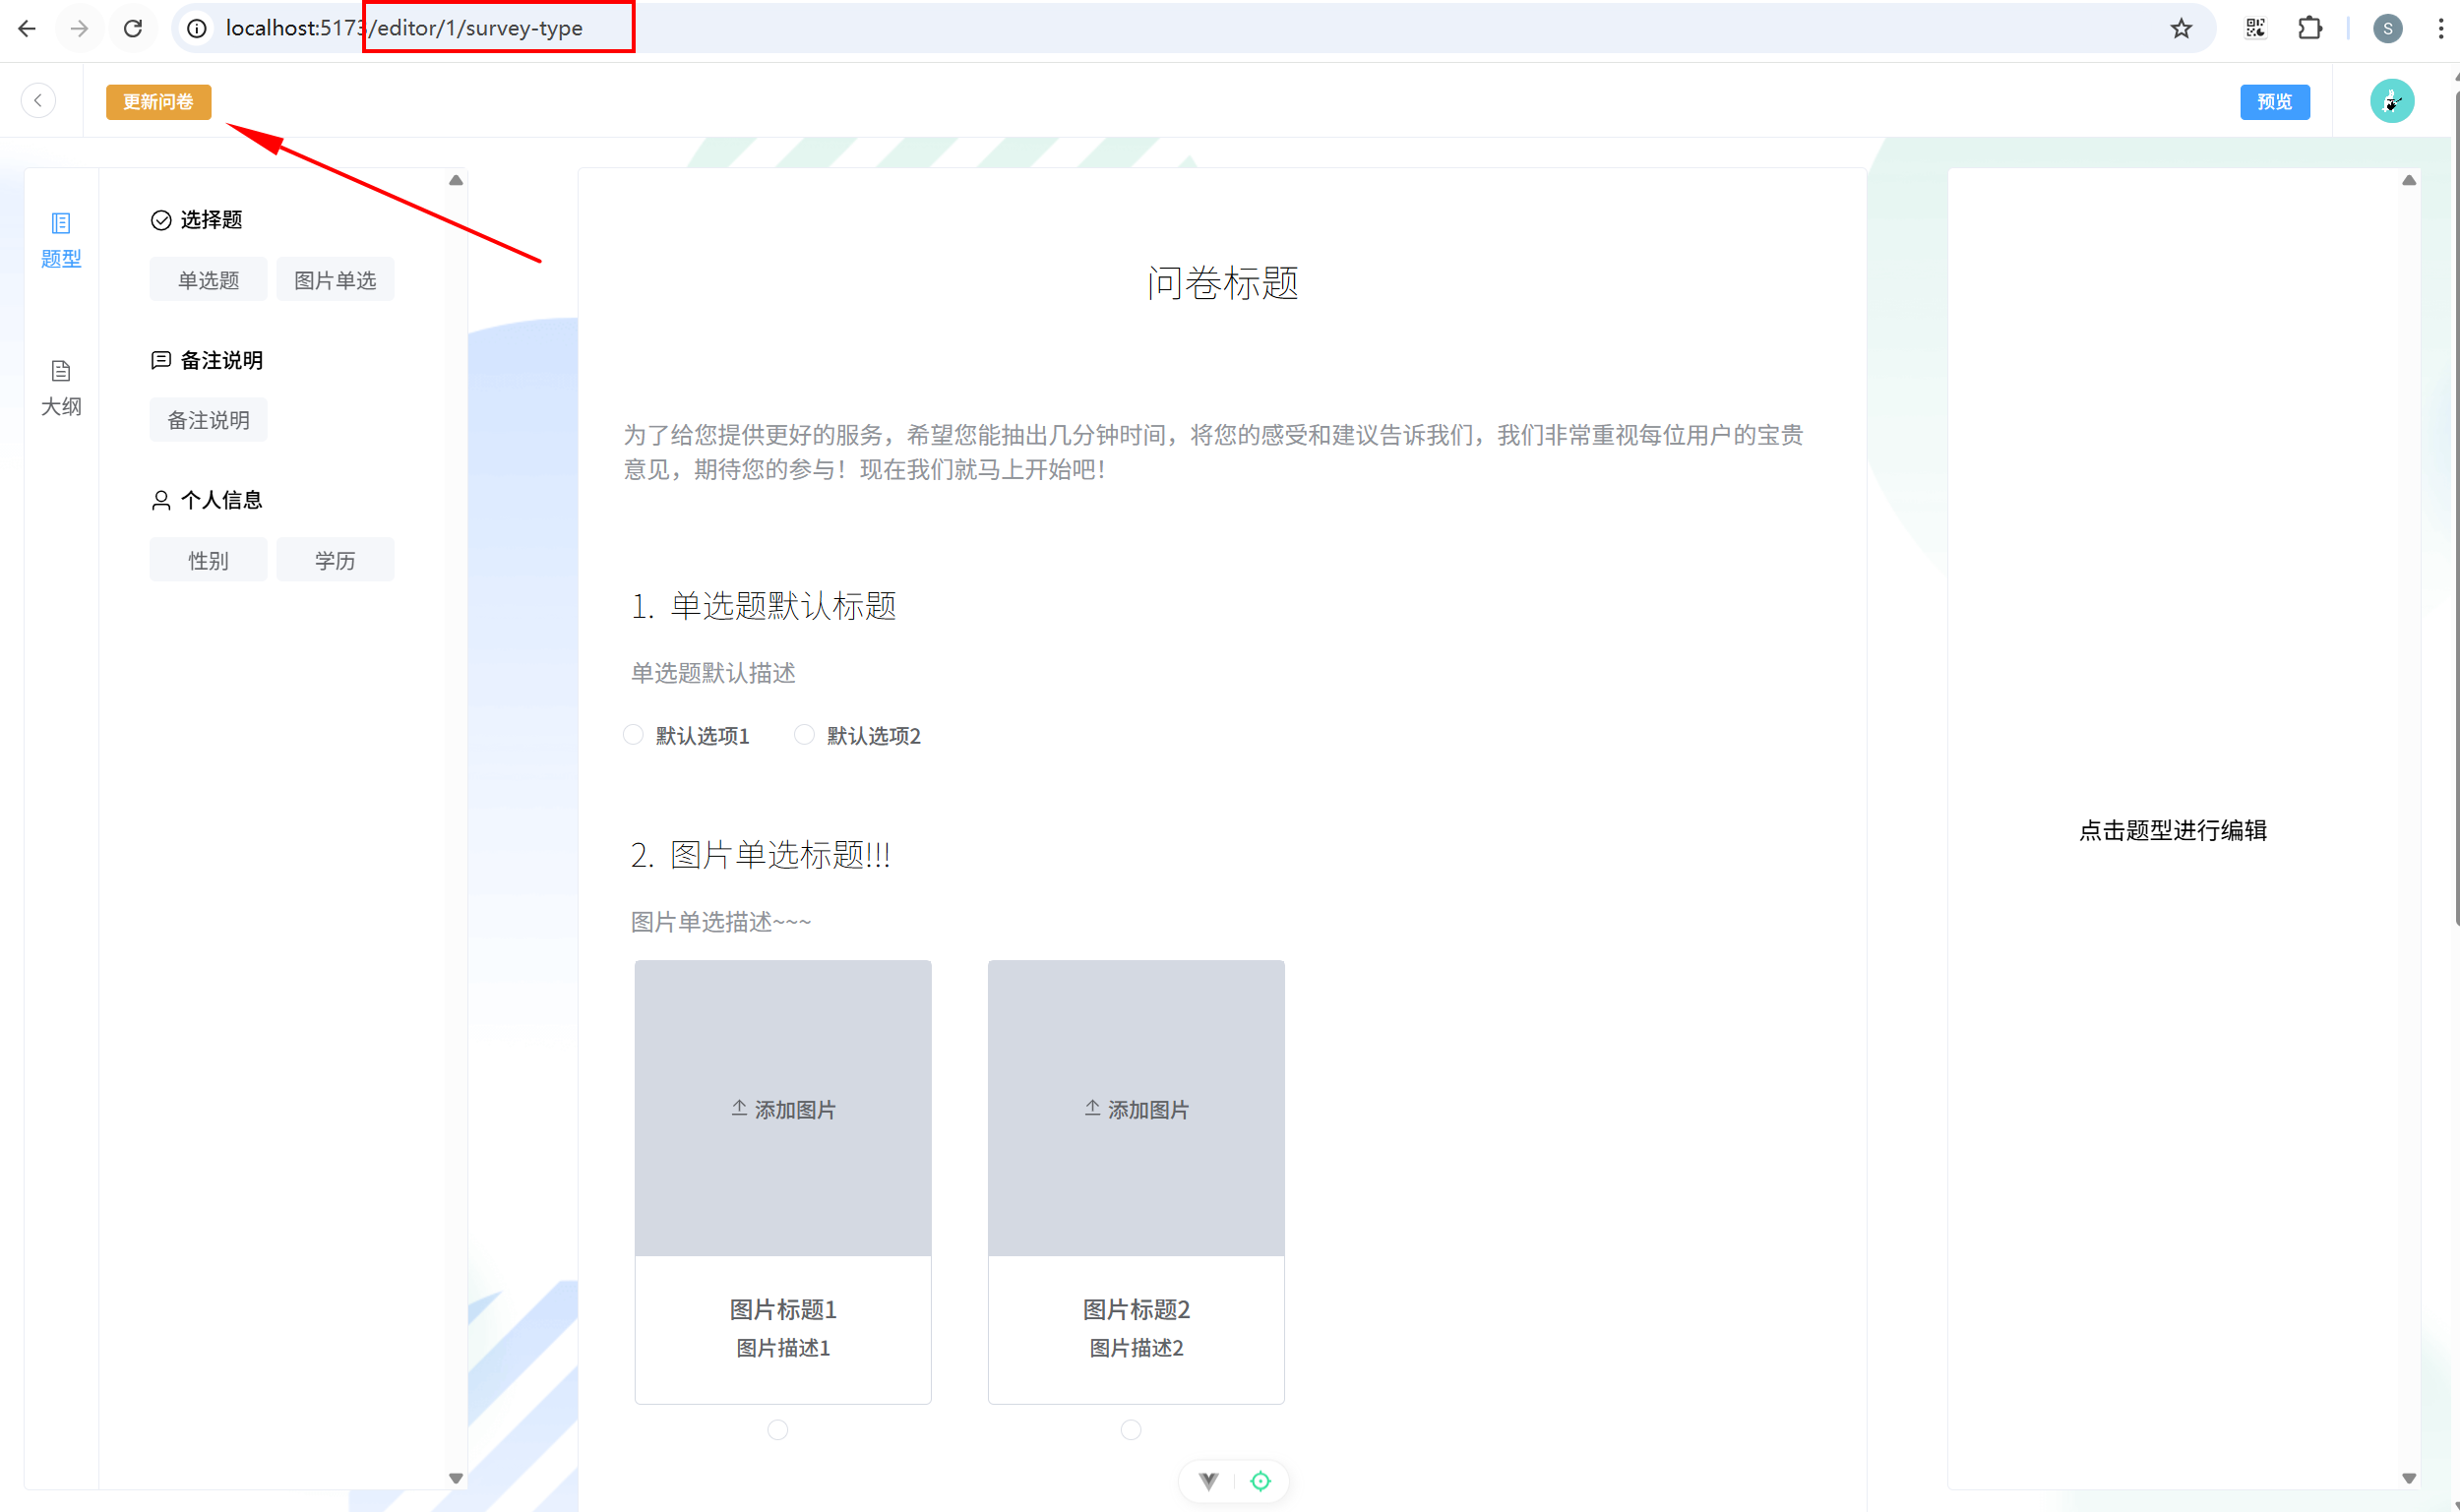
17.2 删除问卷
views/HomeView.vue 关键代码:
javascript
<el-button link type="primary" size="small" @click="deleteSurvey(scope.row)">删除</el-button>
javascript
import { getAllSurveys, deleteSurveyById } from '@/db/operation';
import { ElMessageBox, ElMessage } from 'element-plus';
javascript
// 删除问卷
const deleteSurvey = (surveyInfo: SurveyDBReturnData) => {
  ElMessageBox.confirm('确定删除该问卷吗?', '提示', {
    confirmButtonText: '确定',
    cancelButtonText: '取消',
    type: 'warning'
  }).then(() => {
    deleteSurveyById(surveyInfo.id).then(() => {
      ElMessage.success('删除成功');
      getData()
    })
  }).catch(() => {
    ElMessage.info('已取消删除');
  })
}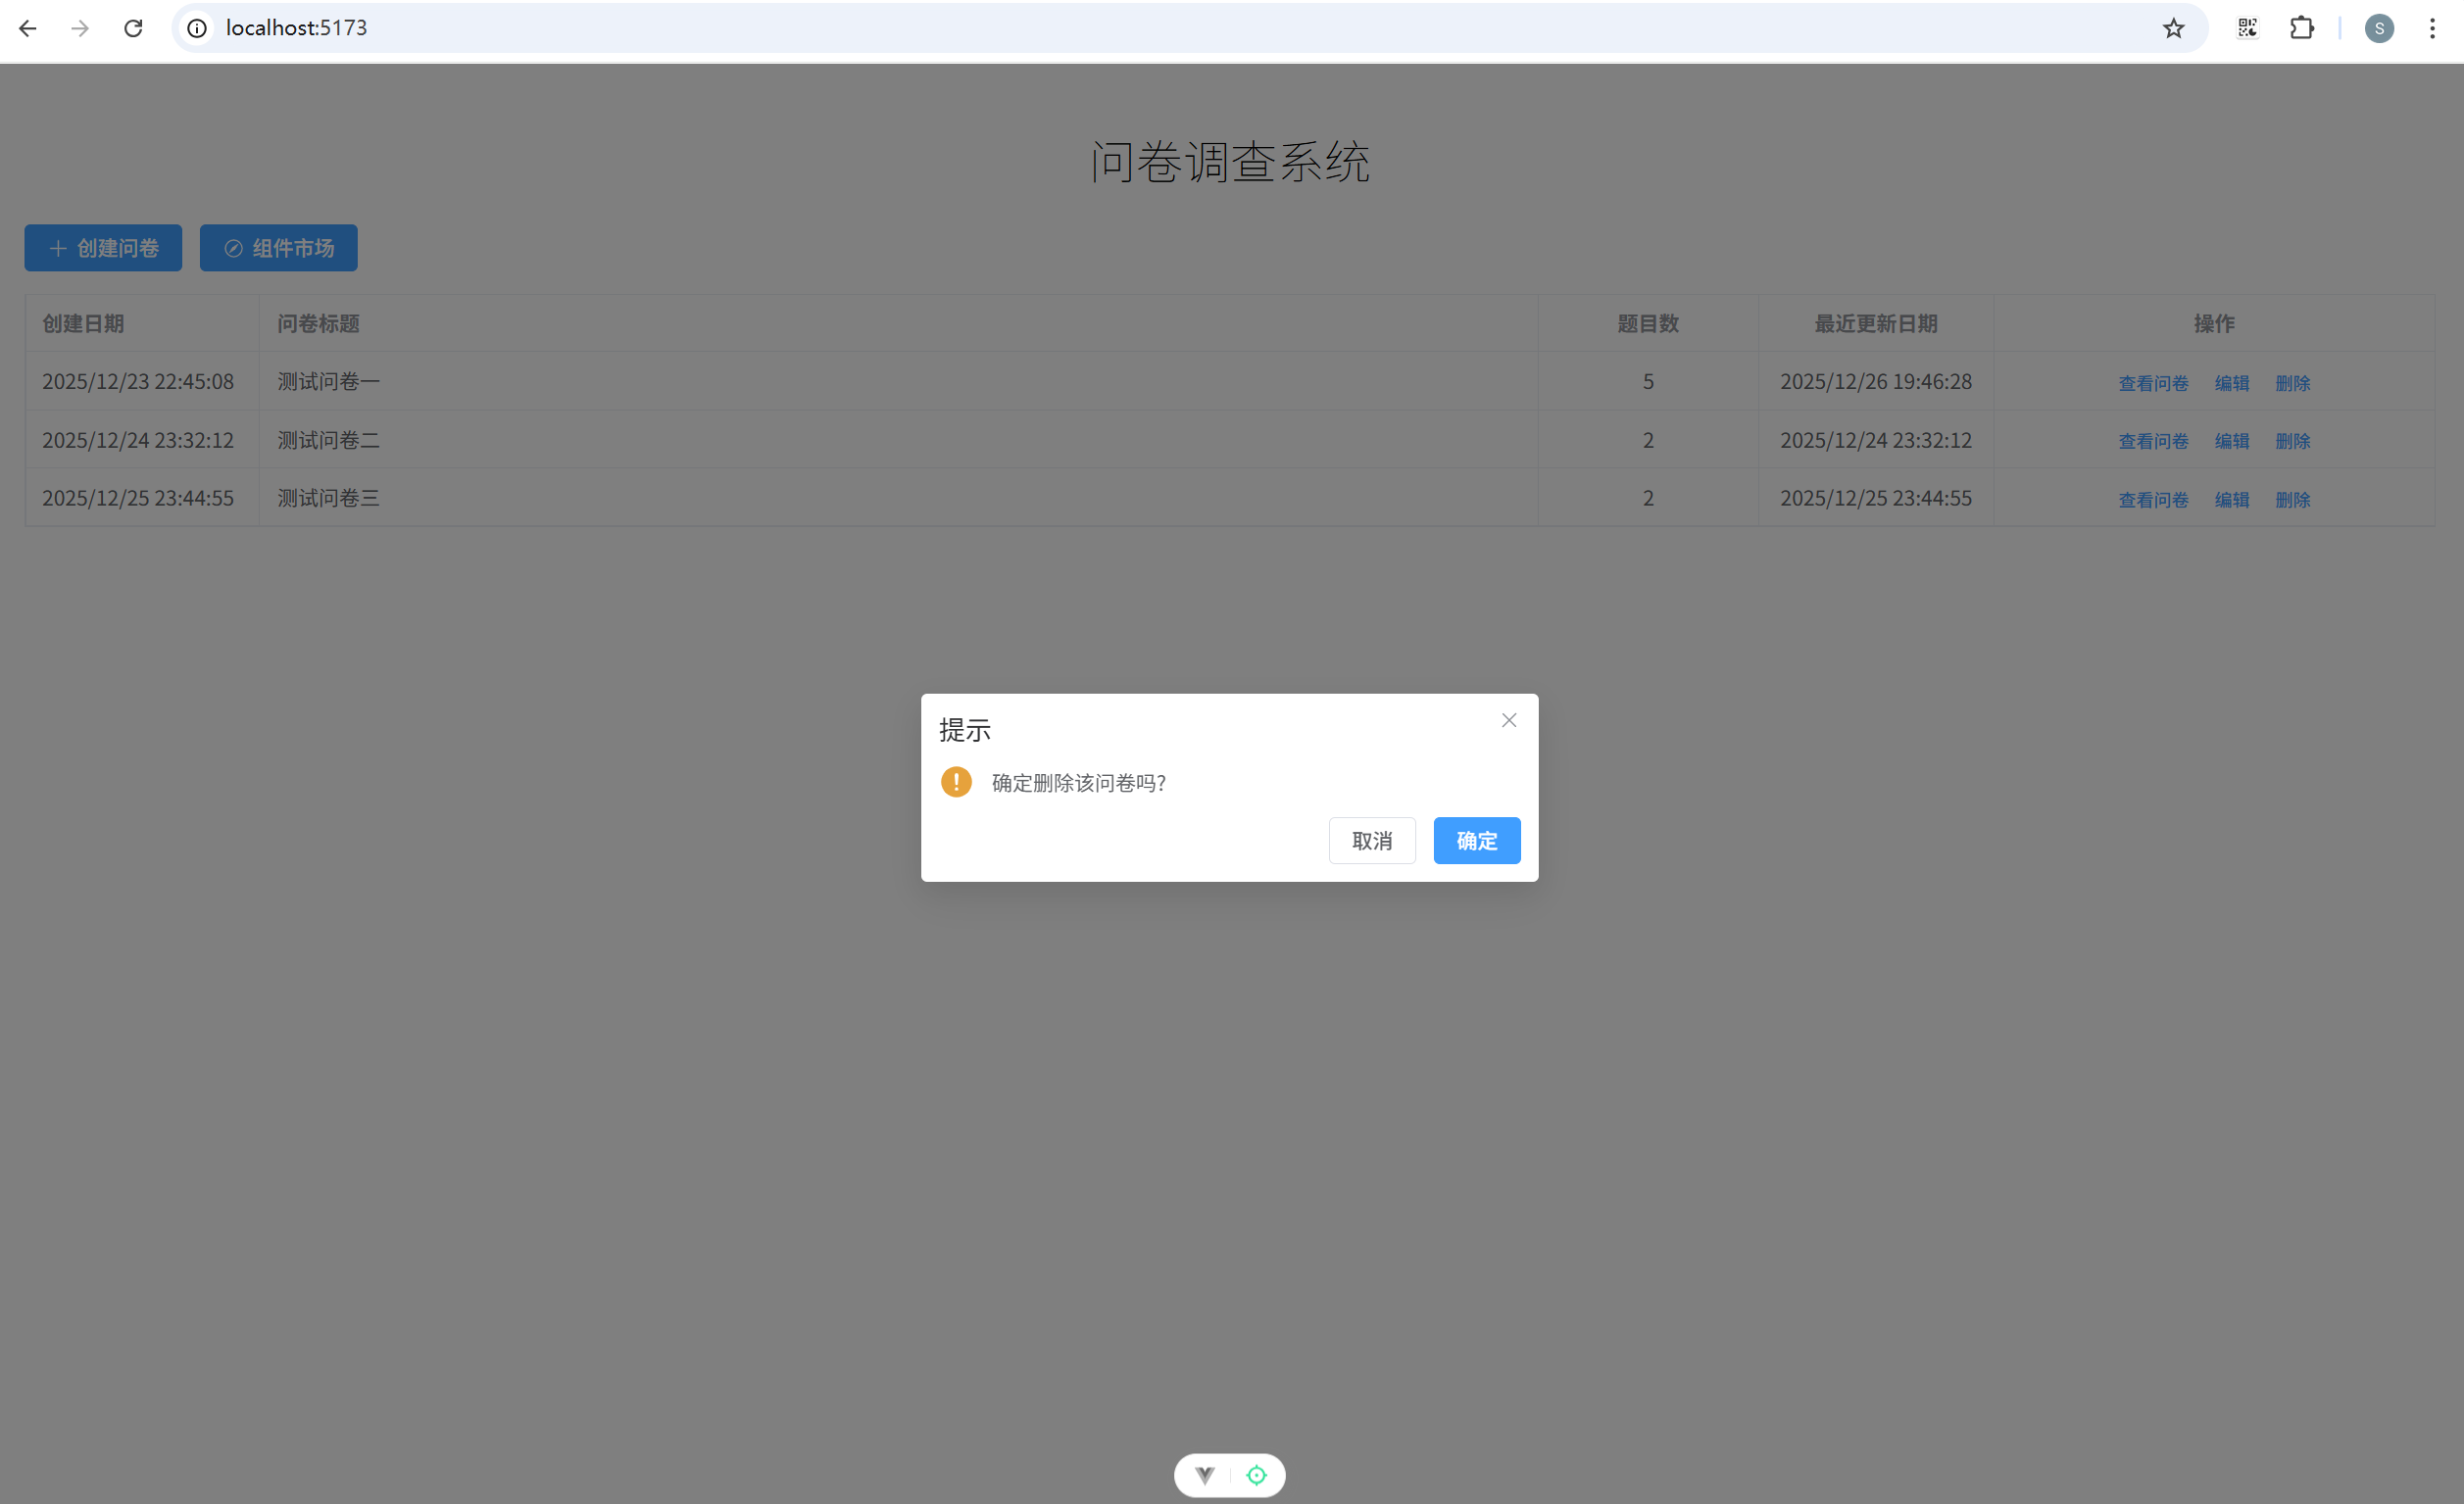
18. 生成PDF和在线问卷
18.1 生成PDF
(1)添加判断当前组件是否可打印方法。types/store.ts 关键代码:
javascript
// 该数组记录适合生成PDF的题目类型
const PDFComs = [
  'single-select',
  'single-pic-select',
  'personal-info-gender',
  'personal-info-education',
  'text-note',
];

export function canUsedForPDF(value: string): boolean {
  return PDFComs.includes(value);
}
(2)预览页添加打印方法和样式。views/Preview.vue:
javascript
<template>
  <div class="preview-container pb-40">
    <div class="center mc">
      <!-- 上面的按钮组 -->
      <div class="button-group flex space-between align-items-center">
        <!-- 左边按钮 -->
        <div class="flex space-between no-print">
          <el-button type="danger" @click="gobackHandle()">返回</el-button>
          <el-button type="success">生成在线问卷</el-button>
          <el-button type="warning" @click="genPDF()">生成本地PDF</el-button>
        </div>
        <!-- 题目数量 -->
        <div class="mr-15">
          <el-text class="mx-1">题目数量:{{ store.surveyCount }}</el-text>
        </div>
      </div>
      <!-- 对应的问卷 -->
      <div class="content-group no-border">
        <div class="content mb-10" v-for="(com, index) in store.coms" :key="index">
          <component :is="com.type" :status="com.status" :serialNum="serialNum[index]" />
        </div>
      </div>
    </div>
  </div>
</template>

<script setup lang="ts">
import { computed } from 'vue';
import { useRouter, useRoute } from 'vue-router';
const router = useRouter();
const route = useRoute();
import { getSurveyById } from '@/db/operation';
// 仓库
import { useEditorStore } from '@/stores/useEditor';
const store = useEditorStore();
// 工具方法
import { restoreComponentStatus } from '@/utils';
// 自定义Hook
import { useSurveyNo } from '@/utils/hooks';

import { canUsedForPDF } from '@/types';
import { ElMessage } from 'element-plus';

// 获取序号
const serialNum = computed(() => useSurveyNo(store.coms).value);
// 获取路由参数
const id = Number(route.params.id);
// 接下来应该根据拿到的 id 去获取存储的问卷题目
if (id) {
  getSurveyById(id).then((res) => {
    if (res) {
      // 拿到数据后,组件部分需要重新还原
      restoreComponentStatus(res.coms);
      // 还原完成之后,将还原的数据设置为仓库里面的 coms 即可
      store.setStore(res);
    }
    console.log(res);
  });
}
// 返回按钮对应逻辑
const gobackHandle = () => {
  const path = history.state.from;
  if (path === 'home') {
    // 说明是从首页进来的
    router.back();
  } else {
    // 说明是从编辑页面进来的
    router.push(`/editor/${id}/survey-type`);
  }
};

// 生成PDF
const genPDF = () => {
  // 1. 检查:当前问卷是否存在不适合生成PDF的业务组件
  const result = store.coms.every((item) => canUsedForPDF(item.name))
  if (!result) {
    ElMessage.warning('当前问卷中存在不支持生成PDF的业务组件,请检查后再试!');
    return;
  }
  // 2. 开始生成PDF
  // 注意:关于生成PDF,解决方案非常的多,可以前端来生成PDF,也可以服务器端来生成PDF
  // 无论是前端还是后端,解决方案都不止一种
  // 因为我们这里生成PDF的需求很简单,所以我们选择使用浏览器的接口来生成PDF
  window.print();
}
</script>

<style scoped lang="scss">
.preview-container {
  width: 100%;
  min-height: 100vh;
  background: url('@/assets/imgs/editor_background.png');
}
.center {
  width: 800px;
}
.button-group {
  width: 100%;
  height: 60px;
  top: 0;
  left: 0;
  background-color: var(--white);
  z-index: 100;
}
.content-group {
  padding: 20px;
  border: 1px solid var(--border-color);
  border-radius: var(--border-radius-lg);
  background: var(--white);
  box-shadow: 0 0 5px rgba(0, 0, 0, 0.1);
}
// 这是一个媒体查询,表示在打印的时候,会应用 no-print 以及 no-border 类
@media print {
  .no-print {
    display: none;
  }
  .no-border {
    border: none;
    box-shadow: none;
  }
}
</style>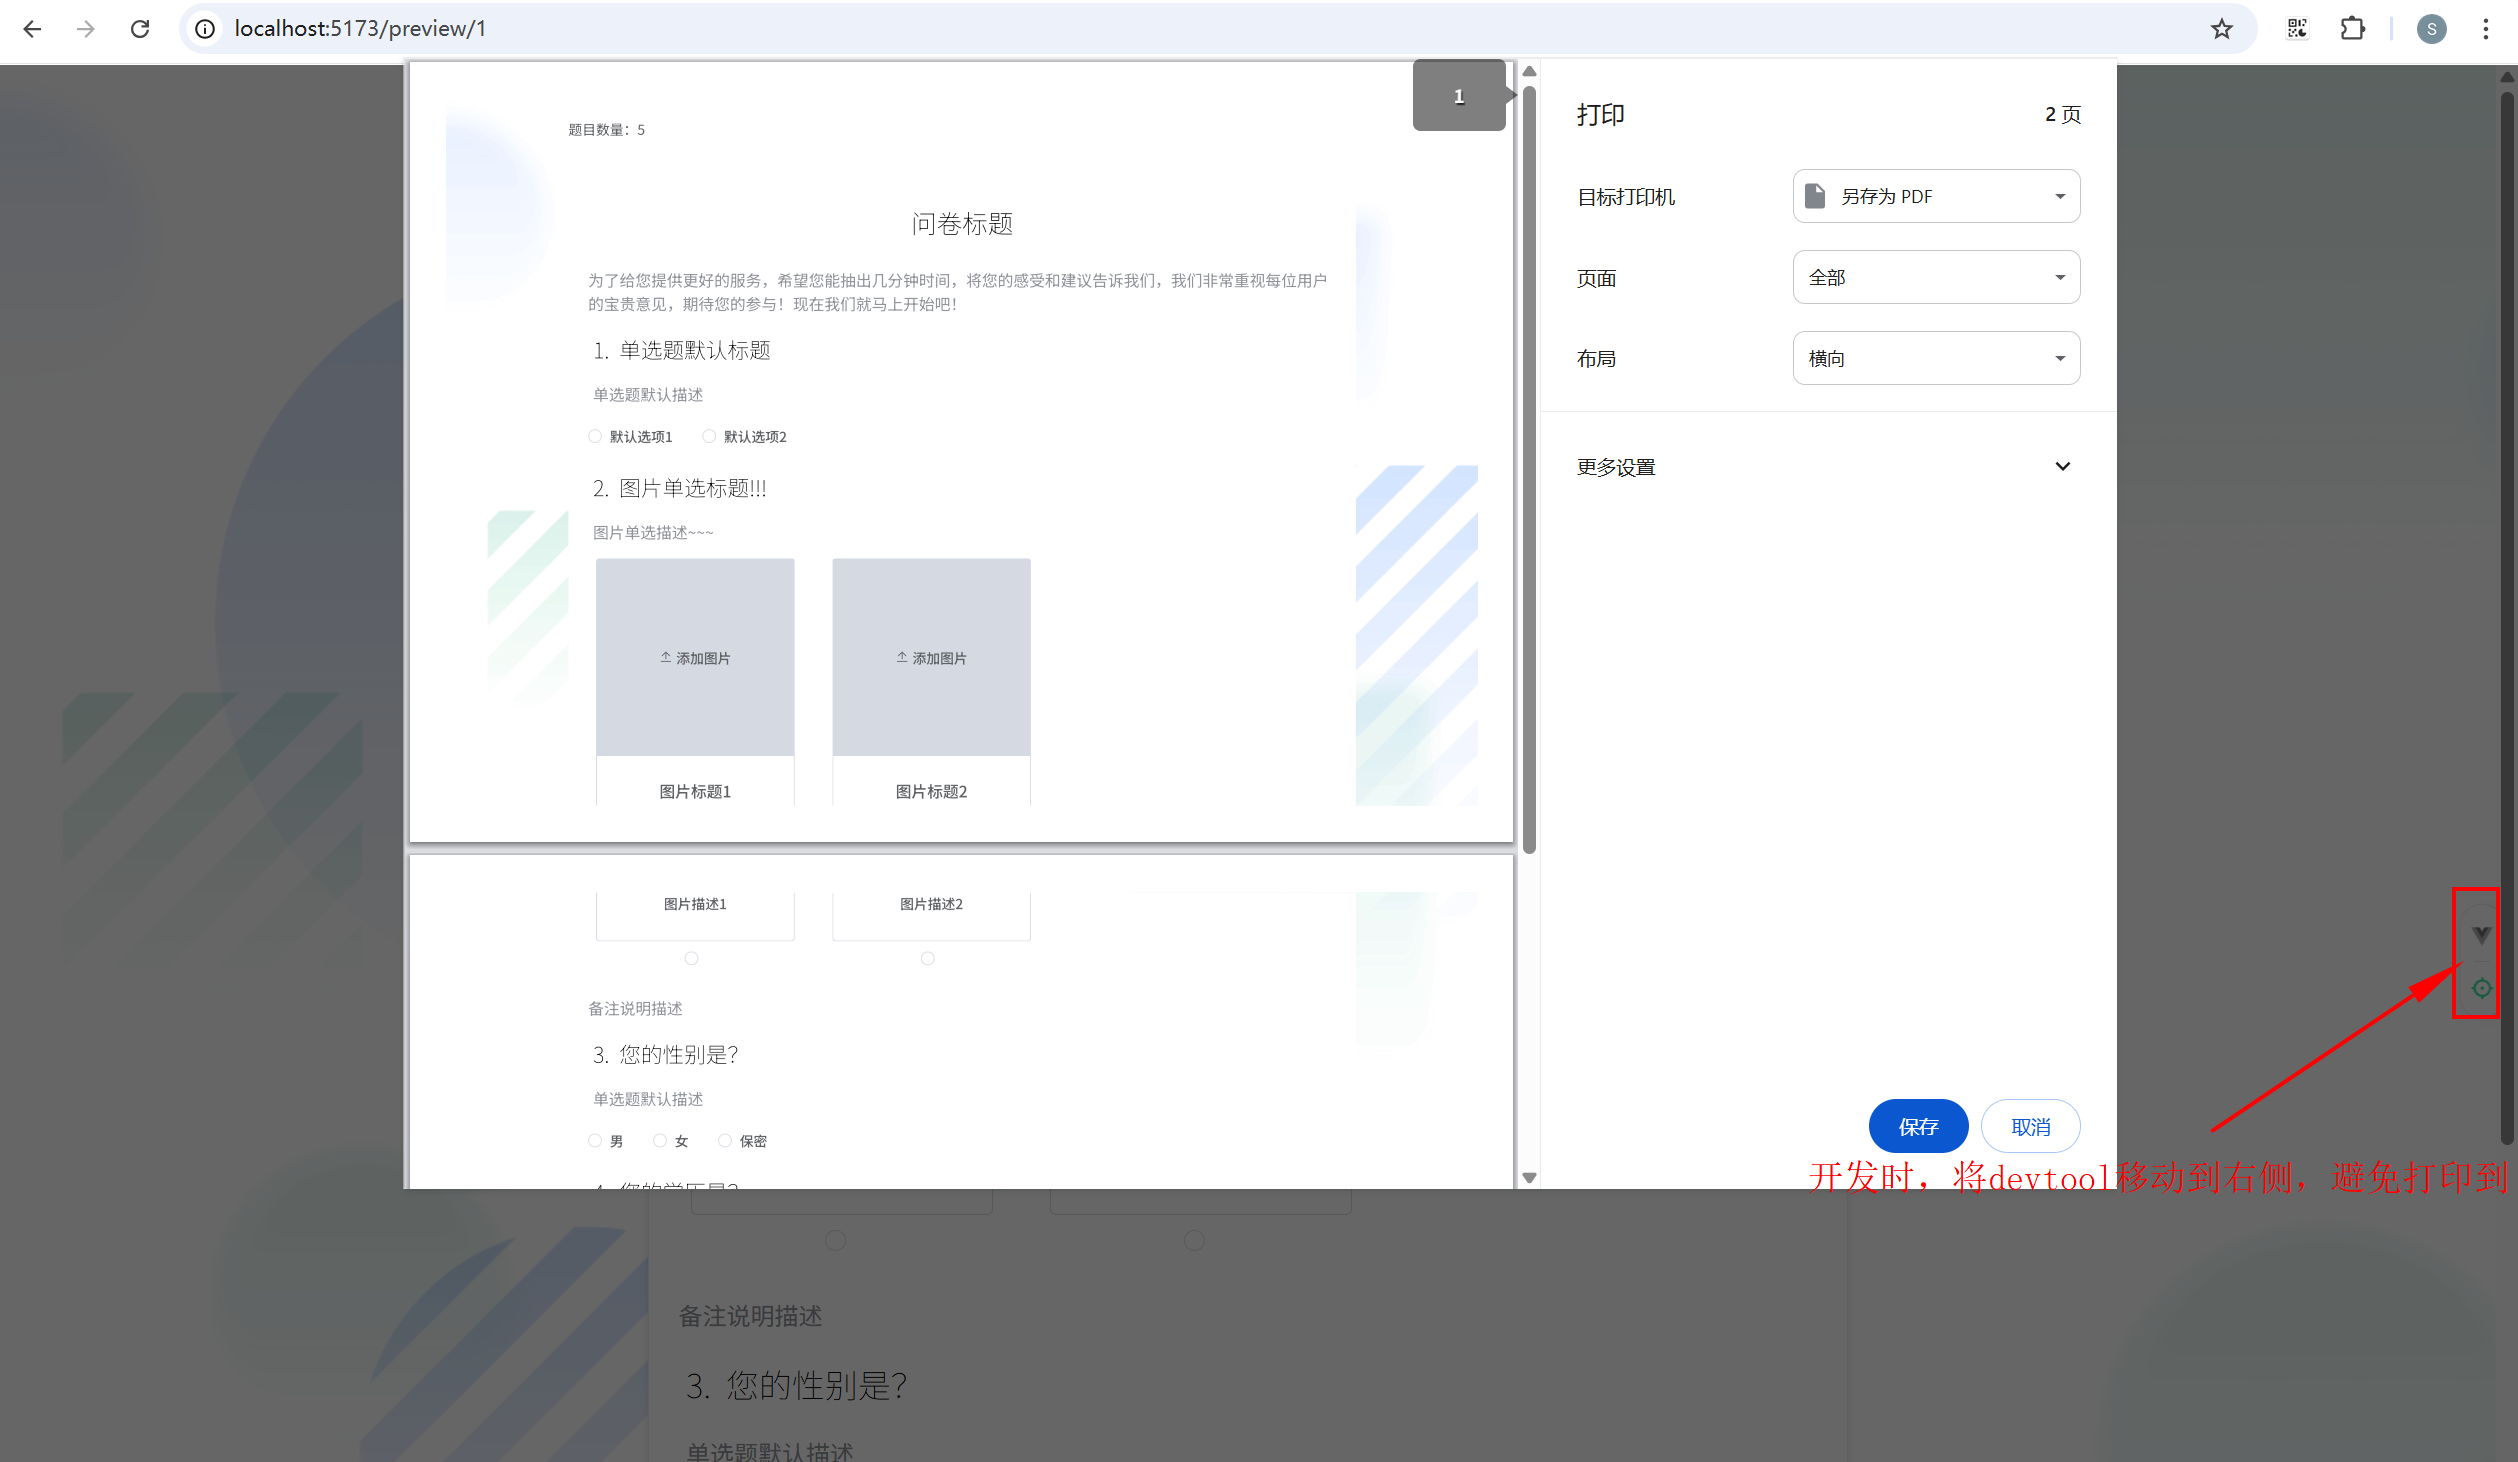
18.2 生成在线问卷
(1)服务器端添加接口,用于存储问卷、获取问卷内容、存储答案server\server.js:
javascript
const express = require("express"); // 引入 express
const bodyParser = require("body-parser");
const multer = require("multer");
const path = require("path");
const fs = require("fs");

const app = express();

// 设置 body-parser 选项,增加请求体大小限制
app.use(bodyParser.json({ limit: "50mb" })); // 允许最大 50MB 的 JSON 请求体
app.use(bodyParser.urlencoded({ limit: "50mb", extended: true })); // 允许最大 50MB 的 URL 编码请求体

let quizzes = {}; // 存储问题
let answers = {}; // 存储答案

// 针对在线答题功能,提供3个新的接口
// 存储问卷
app.post("/api/saveQuiz", (req, res) => {
  const { id, quizData } = req.body;
  quizzes[id] = quizData;
  res.status(200).send({ message: "Quiz saved" });
});
// 根据id获取问卷内容
app.get("/api/getQuiz/:id", (req, res) => {
  // 本来正常的逻辑,这里应该根据前端传递过来的问卷 id,从数据库来获取问卷内容,然后返回给前端
  // 但是我们这是一个简化项目,没有数据库,使用的是 indexedDB 来存储的问卷数据
  // 因此有了saveQuiz这个接口,我们可以直接从内存中获取问卷数据
  const quizData = quizzes[req.params.id];
  res.status(200).send(quizData);
});
// 存储答案
app.post("/api/submitAnswers", (req, res) => {
  const { quizId, answers: userAnswers } = req.body;
  answers[quizId] = userAnswers;
  console.table(answers);
  res.status(200).send({ message: "Answers submitted" });
});

// 设置 multer 存储引擎
const storage = multer.diskStorage({
  // 上传的文件要存储到哪里
  destination: function (req, file, cb) {
    // 上传的文件夹路径,需要在项目根目录下创建 uploads 子文件夹
    const uploadDir = path.join(__dirname, "uploads");
    // 如果 uploads 子文件夹不存在,则创建它
    if (!fs.existsSync(uploadDir)) {
      fs.mkdirSync(uploadDir);
    }
    // 上传的文件夹路径
    cb(null, "uploads");
  },
  // 上传的文件名字如何命名
  filename: function (req, file, cb) {
    // 给上传的文件一个唯一的后缀来保证不重名
    const uniqueSuffix = Date.now() + "-" + Math.round(Math.random() * 1e9);
    cb(
      null,
      file.fieldname + "-" + uniqueSuffix + path.extname(file.originalname)
    );
  },
});

const upload = multer({ storage: storage });

// 添加上传图片的路由接口
app.post("/api/upload", upload.single("image"), (req, res) => {
  try {
    res.status(200).send({
      message: "图片上传成功",
      imageUrl: `/uploads/${req.file.filename}`,
    });
  } catch (error) {
    res.status(500).send({ message: "图片上传失败" });
  }
});

// 提供静态资源服务
app.use("/uploads", express.static(path.join(__dirname, "uploads")));

app.listen(3001, () => {
  console.log("server is running at 3001");
});
(2)重启 server 项目:
javascript
pnpm start(3)创建答题页面。views/QuizView.vue:
javascript
<template>
  <div v-if="quizData">
    <div class="quiz-container mc">
      <div class="mt-30 mb-20">题目数量:{{ quizData.surveyCount }}</div>
      <div class="content mb-10" v-for="(com, index) in quizData.coms" :key="index">
        <component
          :is="com.type"
          :status="com.status"
          :serialNum="serialNum[index]"
          @updateAnswer="updateAnswer(index, $event)"
        />
      </div>
      <div class="mt-20 mb-20 text-center">
        <el-button type="primary" @click="submitAnswers">提交答案</el-button>
      </div>
    </div>
  </div>
</template>

<script setup lang="ts">
import type { Ref } from 'vue';
import { onMounted, ref, computed } from 'vue';
import { ElMessage } from 'element-plus';
import { useRoute } from 'vue-router';
const route = useRoute();

import type { QuizData } from '@/types';

import { restoreComponentStatus } from '@/utils';
// 组合式函数
import { useSurveyNo } from '@/utils/hooks';
// 获取题目编号
const serialNum = computed(() => useSurveyNo(quizData.value?.coms).value);

const quizData = ref<QuizData>({
  coms: [],
  surveyCount: 0,
});

onMounted(async () => {
  const quizId = route.params.id;
  // 从服务器获取试卷内容
  const response = await fetch(`/api/getQuiz/${quizId}`);
  const data = await response.json();
  data.coms = JSON.parse(data.coms);
  restoreComponentStatus(data.coms);
  quizData.value = data;
});

// 用来存储要发送服务器的答案
const answers: Ref<{ [key: number]: string | number | Date }> = ref({});

const updateAnswer = (index: number, answer: string | number) => {
  // console.log(index, answer);
  const serial = serialNum.value[index];
  if (serial !== null) {
    // 说明是题目组件
    answers.value[serial] = answer;
  }
  console.log(answers.value);
};

const submitAnswers = async () => {
  const quizId = route.params.id;
  await fetch(`/api/submitAnswers`, {
    method: 'POST',
    headers: {
      'Content-Type': 'application/json',
    },
    body: JSON.stringify({
      quizId,
      answers: answers.value,
    }),
  });
  ElMessage.success('提交成功!');
};
</script>

<style scoped lang="scss">
.quiz-container {
  width: 800px;
}
</style>
(4)添加答题路由。router/index.ts 关键代码:
javascript
{
  path: '/quiz/:id',
  name: 'quiz',
  component: () => import('@/views/QuizView.vue'),
},
(5)预览页面添加生成在线问卷功能。views/Preview.vue:
javascript
<template>
  <div class="preview-container pb-40">
    <div class="center mc">
      <!-- 上面的按钮组 -->
      <div class="button-group flex space-between align-items-center">
        <!-- 左边按钮 -->
        <div class="flex space-between no-print">
          <el-button type="danger" @click="gobackHandle">返回</el-button>
          <el-button type="success" @click="genQuiz">生成在线问卷</el-button>
          <el-button type="warning" @click="genPDF">生成本地PDF</el-button>
        </div>
        <!-- 题目数量 -->
        <div class="mr-15">
          <el-text class="mx-1">题目数量:{{ store.surveyCount }}</el-text>
        </div>
      </div>
      <!-- 对应的问卷 -->
      <div class="content-group no-border">
        <div class="content mb-10" v-for="(com, index) in store.coms" :key="index">
          <component :is="com.type" :status="com.status" :serialNum="serialNum[index]" />
        </div>
      </div>
    </div>
  </div>
  <el-dialog v-model="dialogVisible" title="在线问卷" width="500">
    分享链接: <a :href="quizLink" target="_blank">{{ quizLink }}</a>
    <template #footer>
      <div class="dialog-footer">
        <el-button type="primary" @click="copyLink">复制链接</el-button>
      </div>
    </template>
  </el-dialog>
</template>

<script setup lang="ts">
import { computed, ref } from 'vue';
import { useRouter, useRoute } from 'vue-router';
const router = useRouter();
const route = useRoute();
import { getSurveyById } from '@/db/operation';
// 仓库
import { useEditorStore } from '@/stores/useEditor';
const store = useEditorStore();
// 工具方法
import { restoreComponentStatus } from '@/utils';
// 自定义Hook
import { useSurveyNo } from '@/utils/hooks';

import { canUsedForPDF } from '@/types';
import { ElMessage } from 'element-plus';
import { v4 as uuidv4 } from 'uuid';

// 控制弹出框是否显示
const dialogVisible = ref(false);
const quizLink = ref(''); // 存储生成的在线答题的链接

// 获取序号
const serialNum = computed(() => useSurveyNo(store.coms).value);
// 获取路由参数
const id = Number(route.params.id);
// 接下来应该根据拿到的 id 去获取存储的问卷题目
if (id) {
  getSurveyById(id).then((res) => {
    if (res) {
      // 拿到数据后,组件部分需要重新还原
      restoreComponentStatus(res.coms);
      // 还原完成之后,将还原的数据设置为仓库里面的 coms 即可
      store.setStore(res);
    }
  });
}
// 返回按钮对应逻辑
const gobackHandle = () => {
  const path = history.state.from;
  if (path === 'home') {
    // 说明是从首页进来的
    router.back();
  } else {
    // 说明是从编辑页面进来的
    router.push(`/editor/${id}/survey-type`);
  }
};

// 生成PDF
const genPDF = () => {
  // 1. 检查:检查当前的问卷是否存在不适合生成PDF的业务组件
  const result = store.coms.every((item) => canUsedForPDF(item.name));
  if (!result) {
    ElMessage.warning('当前问卷中存在不支持生成PDF的业务组件,请检查后再试!');
    return;
  }
  // 2. 开始生成PDF
  // 注意:关于生成PDF,解决方案非常的多,可以前端来生成PDF,也可以服务器端来生成PDF
  // 无论是前端还是后端,解决方案都不止一种
  // 因为我们这里生成PDF的需求很简单,所以我们选择使用浏览器的接口来生成PDF
  window.print();
};

// 生成在线问卷
const genQuiz = () => {
  // 1. 首先将问卷的数据传递到服务器端,服务器端存储到内存中
  const id = uuidv4();
  // 将问卷内容和id传递给服务器
  fetch('/api/saveQuiz', {
    method: 'POST',
    headers: {
      'Content-Type': 'application/json',
    },
    body: JSON.stringify({
      id,
      quizData: {
        coms: JSON.stringify(store.coms),
        surveyCount: store.surveyCount,
      },
    }),
  });
  // 2. 将弹出框显示出来
  quizLink.value = `${window.location.origin}/quiz/${id}`;
  dialogVisible.value = true;
};

// 复制在线答题的链接
const copyLink = () => {
  dialogVisible.value = false;
  navigator.clipboard.writeText(quizLink.value);
  ElMessage.success('在线答题的链接已复制');
};
</script>

<style scoped lang="scss">
.preview-container {
  width: 100%;
  min-height: 100vh;
  background: url('@/assets/imgs/editor_background.png');
}
.center {
  width: 800px;
}
.button-group {
  width: 100%;
  height: 60px;
  top: 0;
  left: 0;
  background-color: var(--white);
  z-index: 100;
}
.content-group {
  padding: 20px;
  border: 1px solid var(--border-color);
  border-radius: var(--border-radius-lg);
  background: var(--white);
  box-shadow: 0 0 5px rgba(0, 0, 0, 0.1);
}
// 这是一个媒体查询,表示在打印的时候,会应用 no-print 以及 no-border 类
@media print {
  .no-print {
    display: none;
  }
  .no-border {
    border: none;
    box-shadow: none;
  }
}
</style>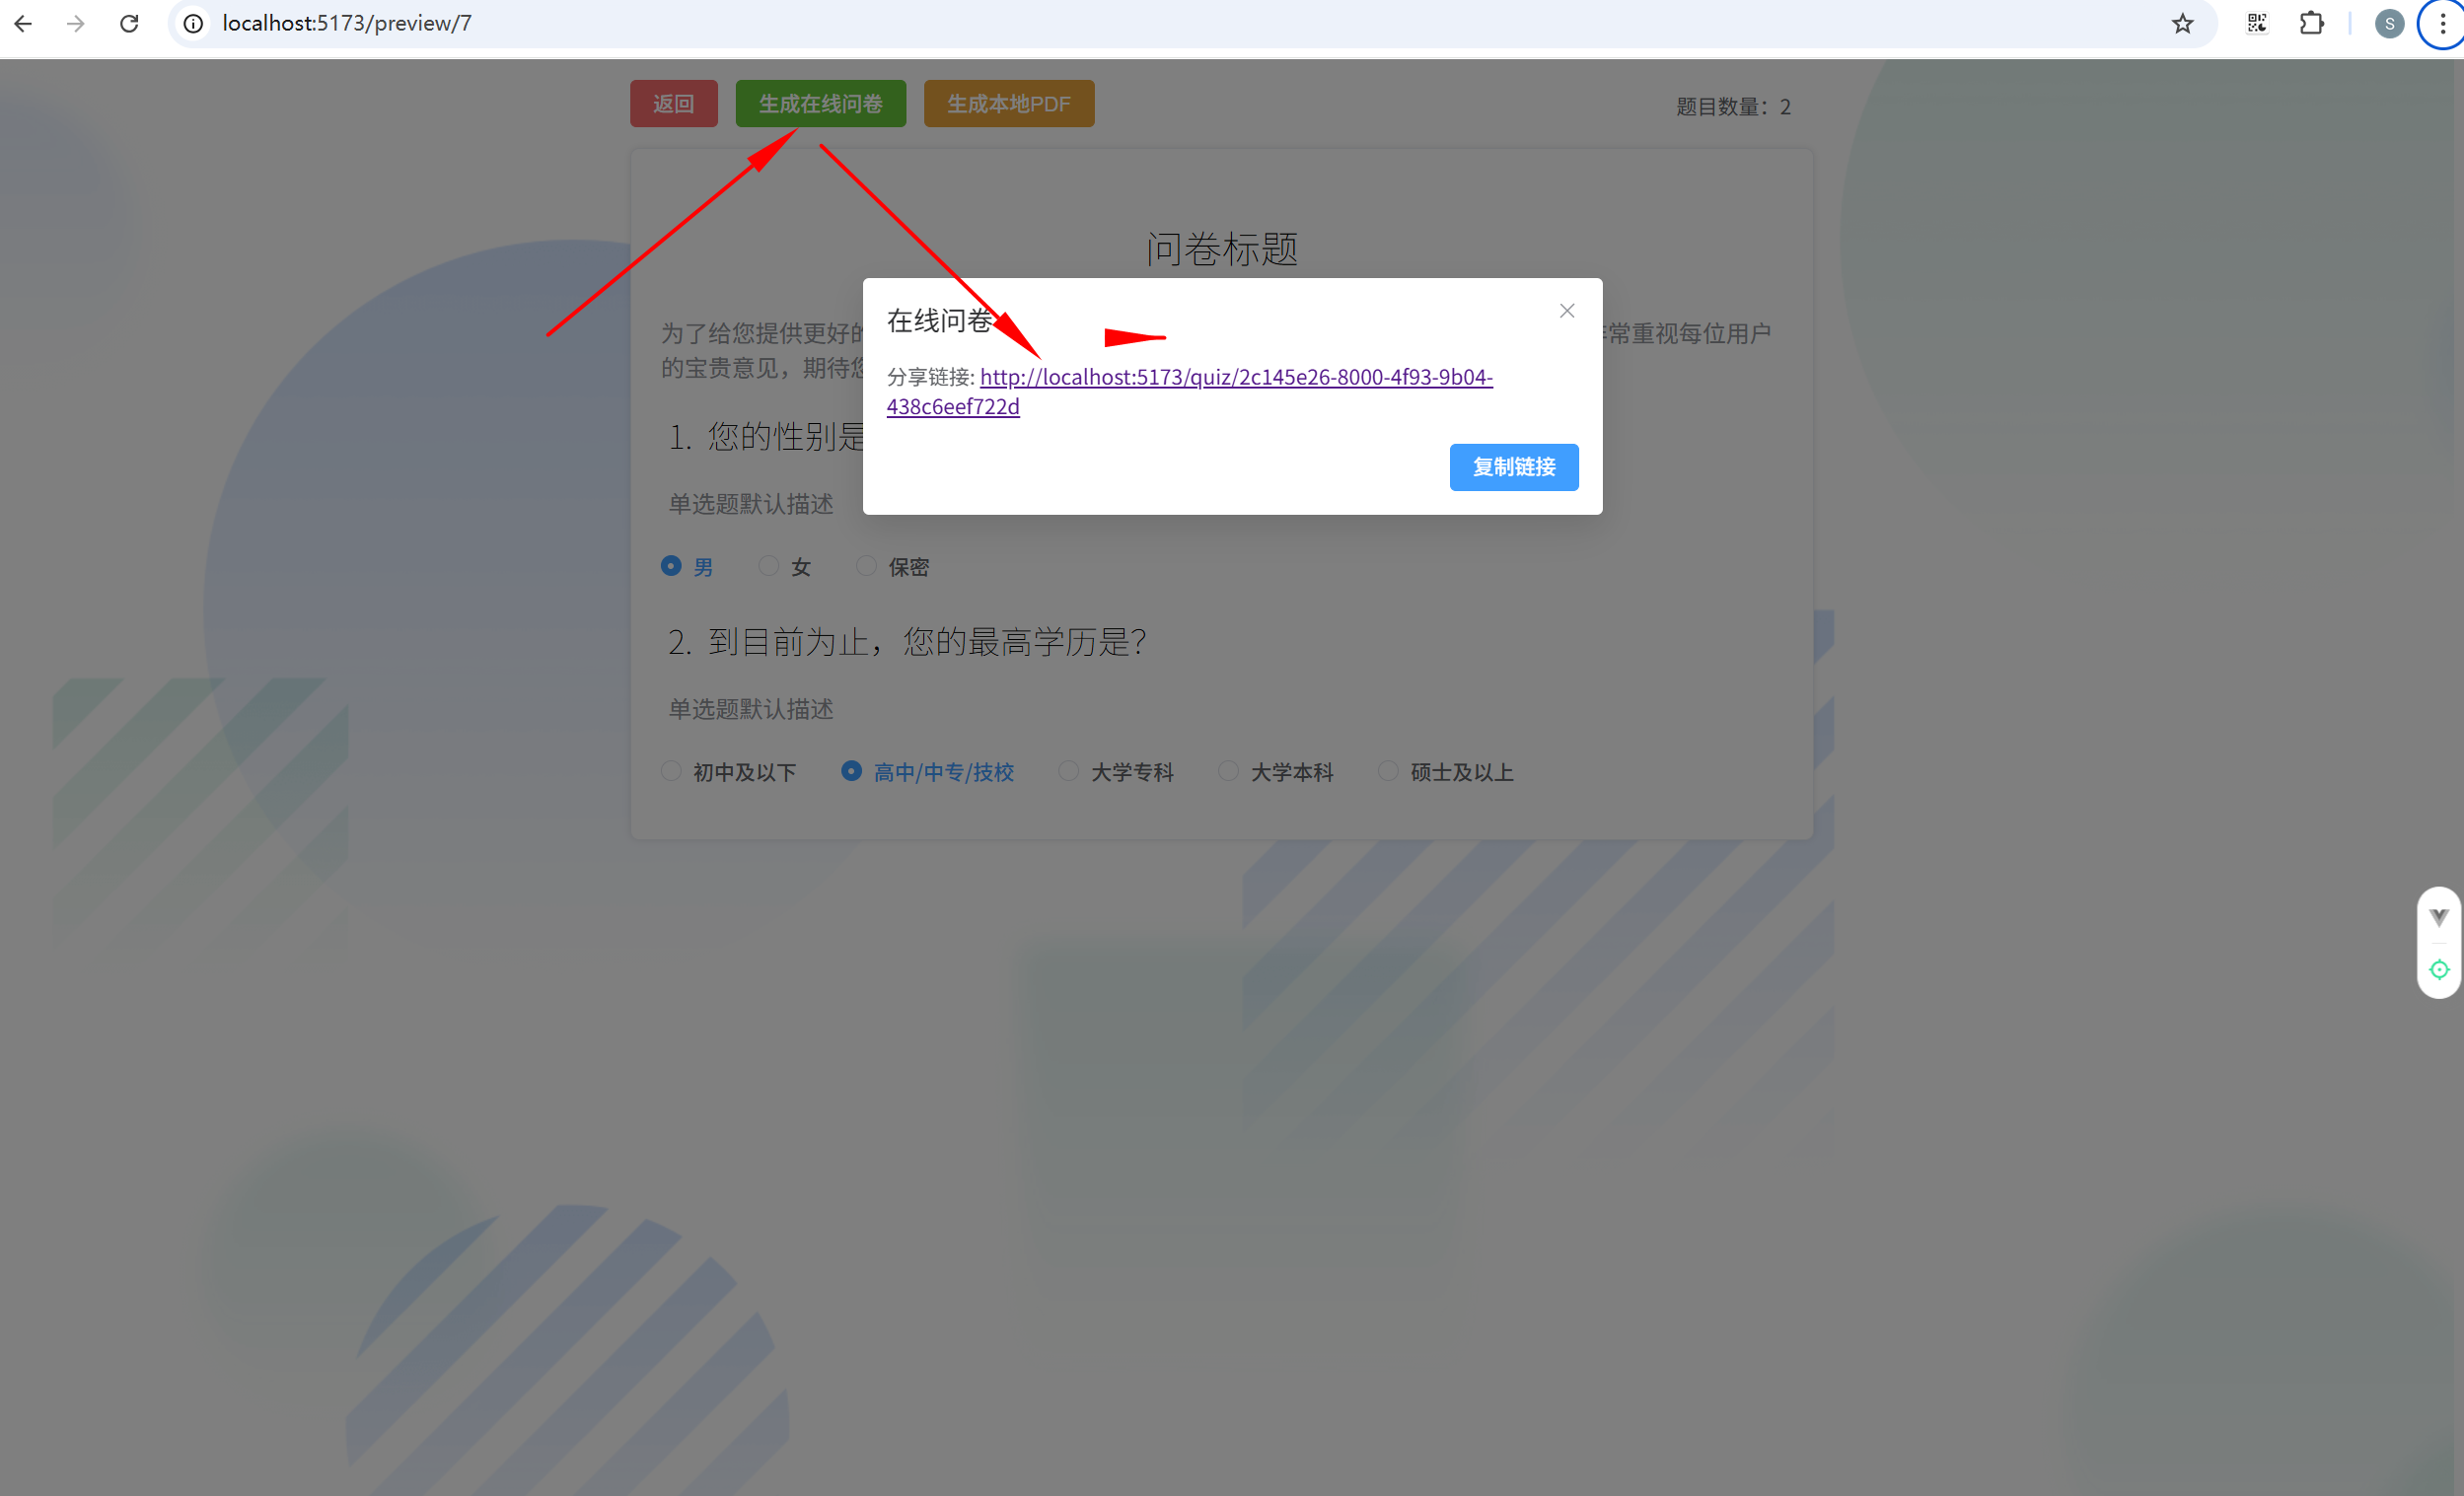

(6)业务组件新增v-model和emitAnswer事件,完善交互。
比如 components/SurveyComs/Materials/SelectComs/SingleSelect.vue:
javascript
<template>
  <div
    :class="{
      'text-center': computedState.position,
    }"
  >
    <MaterialsHeader
      :serialNum="serialNum"
      :title="computedState.title"
      :desc="computedState.desc"
      :titleSize="computedState.titleSize"
      :descSize="computedState.descSize"
      :titleWeight="computedState.titleWeight"
      :descWeight="computedState.descWeight"
      :titleItalic="computedState.titleItalic"
      :descItalic="computedState.descItalic"
      :titleColor="computedState.titleColor"
      :descColor="computedState.descColor"
    />
    <div class="radio-group">
      <el-radio-group v-model="radioValue" @click.stop @change="emitAnswer">
        <el-radio v-for="(item, index) in computedState.options" :value="item" :key="index">{{
          item
        }}</el-radio>
      </el-radio-group>
    </div>
  </div>
</template>

<script setup lang="ts">
import { computed, ref } from 'vue';
import MaterialsHeader from '@/components/SurveyComs/Common/MaterialsHeader.vue';
import type { OptionsStatus } from '@/types';
import {
  getTextStatus,
  getStringStatus,
  getCurrentStatus,
  getStringStatusByCurrentStatus,
} from '@/utils';
const props = defineProps<{
  serialNum: number;
  status: OptionsStatus;
}>();

const computedState = computed(() => ({
  title: getTextStatus(props.status.title),
  desc: getTextStatus(props.status.desc),
  options: getStringStatus(props.status.options),
  position: getCurrentStatus(props.status.position),
  titleSize: getStringStatusByCurrentStatus(props.status.titleSize),
  descSize: getStringStatusByCurrentStatus(props.status.descSize),
  titleWeight: getCurrentStatus(props.status.titleWeight),
  descWeight: getCurrentStatus(props.status.descWeight),
  titleItalic: getCurrentStatus(props.status.titleItalic),
  descItalic: getCurrentStatus(props.status.descItalic),
  titleColor: getTextStatus(props.status.titleColor),
  descColor: getTextStatus(props.status.descColor),
}));

const radioValue = ref('');

// 回头父组件需要传递一个updateAnswer过来
// 通过触发父组件的这个自定义事件将答案传递给父组件
const emits = defineEmits(['updateAnswer']);

const emitAnswer = () => {
  console.log('11', radioValue.value)
  emits('updateAnswer', radioValue.value);
};
</script>

<style scoped></style>
其他组件同样操作,完成交互和双向通信。
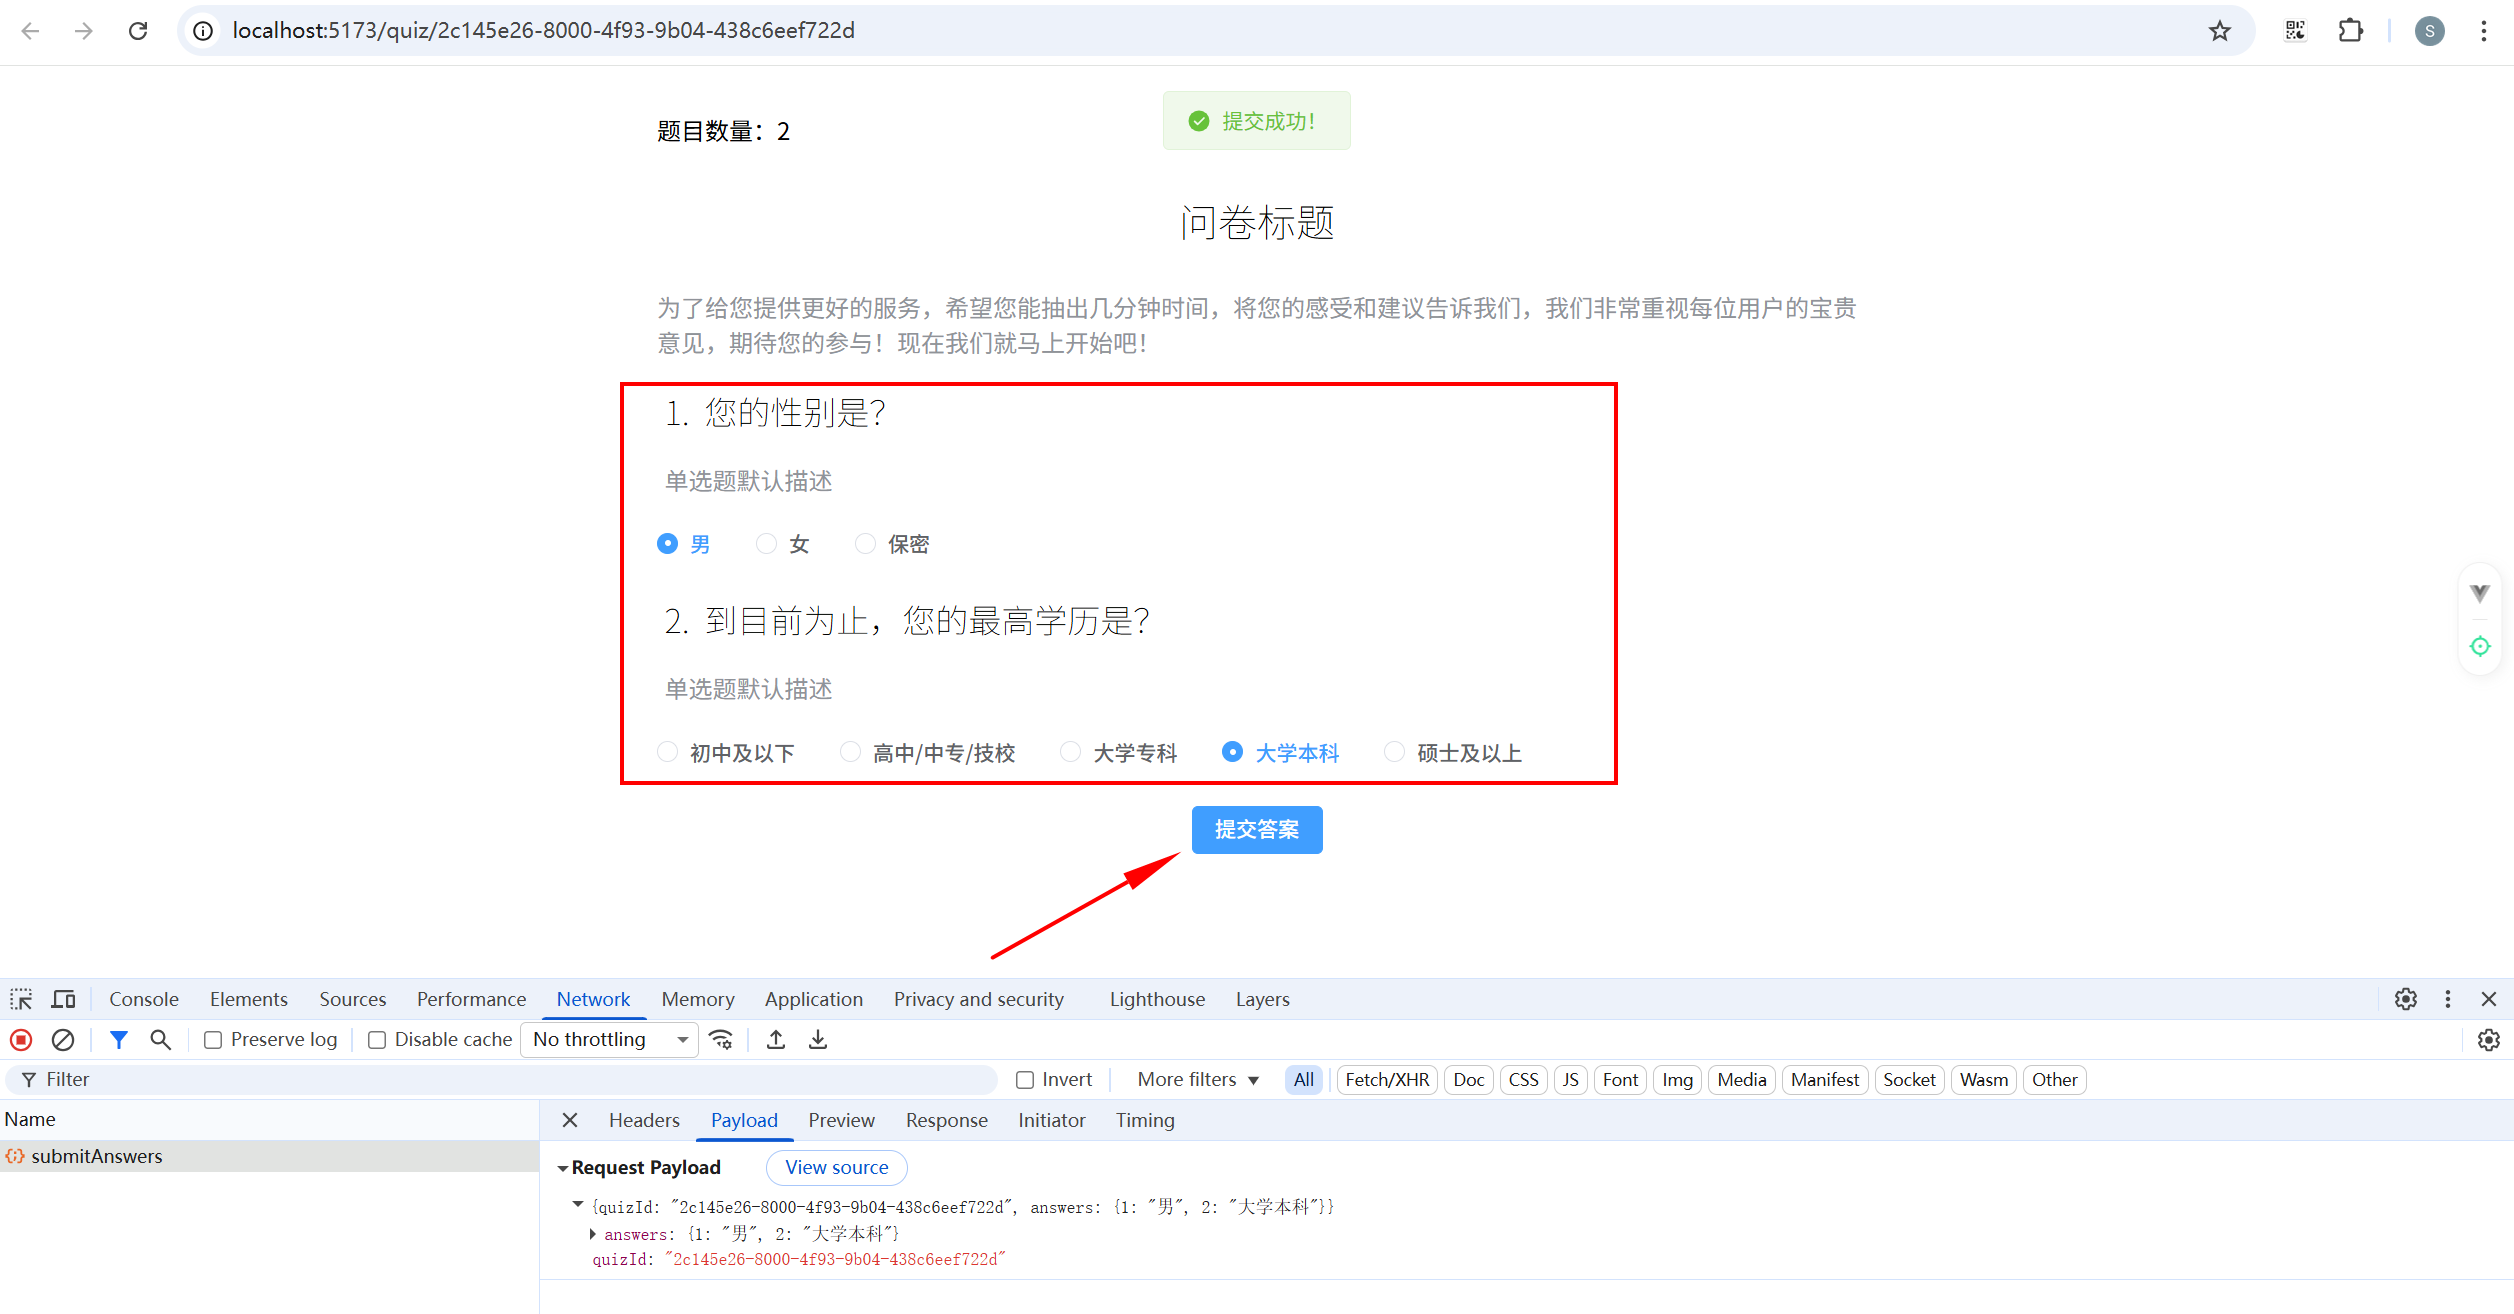
在服务器终端可以看见提交结果:
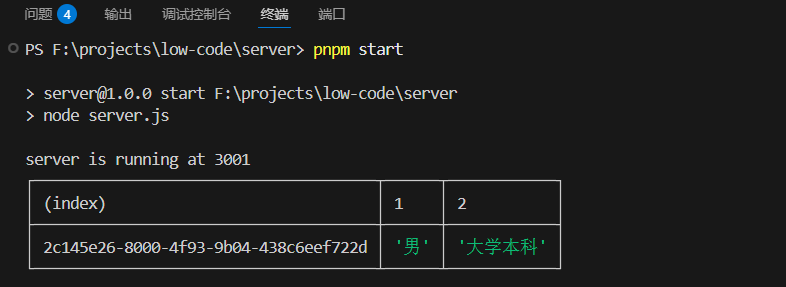
19. 课程收官
19.1 代码优化方向
- 公共方法的提取,比如 getLink、UpdateStatus等。
- 仓库接口统一,对外只暴露一个接口,比如 useStore。
- 分离组件市场和编辑器。
19.2 完整代码项目
完整的低码项目分为5个部分:
- 组件库 / 组件市场
- 编辑器
- 前台项目:主要是提供给用户使用,包含首页、用户登录、用户专属页、用户创建的问卷、用户创建的模板...
- 后台项目:主要是给管理员使用,包含用户管理、问卷管理、模板管理、题库管理...注意,后台也是能够进入到编辑器的,后台拥有创建题库、模板的能力。
- 服务器
19.3 完整的低代码项目涉及技术
-
monorepo(有三种方案)
(1) npm + lerna
(2)yarn + workspace
(3)pnpm + workspace
-
wailwindcss(原子类css)
-
测试框架(Jest 或者 Vitset)
- 保证功能正确
- 早期发现问题
- 提高代码质量
- 自动化测试
- 增强信心
-
JS 工具链
-
自定义脚手架:在低码中,有一些组件的解决方案使用脚手架搭建一个组件的架子,然后单独开发、单独发包。针对组件库,可以有如下的解决方案
(1)通用组件库:提供了90%常用的组件
(2)单独发包的组件:针对一些功能较为复杂的特殊组件
上一章 《Vue3 低代码平台项目实战(上)》