在图形用户界面开发中,单选框(RadioButton)是一种常见的控件,用于让用户从多个互斥的选项中选择一个。在PyQt5框架中,实现RadioButton的互斥选择有多种方法,每种方法都有其适用场景和特点。本文将深入探讨这些实现方式,并提供完整的代码示例。
基本概念与原理
在PyQt5中,QRadioButton是QAbstractButton的子类,它表示一个可以被选中或取消选中的按钮。多个RadioButton之间通常需要实现互斥选择,即当用户选择其中一个选项时,其他选项自动取消选择。这种互斥关系可以通过多种方式实现。
从数学角度理解,RadioButton的互斥性可以用集合论来表示。假设我们有nnn个RadioButton选项R={r1,r2,...,rn}R = \{r_1, r_2, ..., r_n\}R={r1,r2,...,rn},在任意时刻,只能有一个元素处于选中状态。如果用S(t)S(t)S(t)表示在时间ttt时被选中的RadioButton集合,那么对于所有ttt,都有∣S(t)∣≤1|S(t)| \leq 1∣S(t)∣≤1。当用户选择rir_iri时,系统需要确保S(t)={ri}S(t) = \{r_i\}S(t)={ri},这可以通过函数f(ri)f(r_i)f(ri)来实现,该函数将rir_iri的状态设为选中,并将R−{ri}R - \{r_i\}R−{ri}中所有元素的状态设为未选中。
方法一:利用默认的父容器互斥性
在PyQt5中,最简单的实现方式是将多个RadioButton放置在同一个父容器中。默认情况下,同一父容器内的RadioButton会自动实现互斥选择。这种方法的实现最为简单,但灵活性有限。
python
import sys
from PyQt5.QtWidgets import QApplication, QWidget, QVBoxLayout, QRadioButton, QLabel

class DefaultMutexWindow(QWidget):
    def __init__(self):
        super().__init__()
        self.init_ui()

    def init_ui(self):
        # 设置窗口标题和尺寸
        self.setWindowTitle('默认互斥RadioButton示例')
        self.setGeometry(300, 300, 300, 200)

        # 创建垂直布局
        layout = QVBoxLayout()

        # 创建两个RadioButton
        self.radio_option1 = QRadioButton("选项一:默认选中")
        self.radio_option2 = QRadioButton("选项二")

        # 设置第一个选项为默认选中状态
        self.radio_option1.setChecked(True)

        # 创建标签用于显示当前选择
        self.selection_label = QLabel("当前选择: 选项一")

        # 连接信号到槽函数
        self.radio_option1.toggled.connect(self.update_selection_display)
        self.radio_option2.toggled.connect(self.update_selection_display)

        # 将控件添加到布局
        layout.addWidget(self.radio_option1)
        layout.addWidget(self.radio_option2)
        layout.addWidget(self.selection_label)

        # 设置窗口布局
        self.setLayout(layout)

    def update_selection_display(self, checked):
        """更新选择显示的槽函数"""
        sender = self.sender()
        if checked and sender == self.radio_option1:
            self.selection_label.setText("当前选择: 选项一")
        elif checked and sender == self.section_label == self.radio_option2:
            self.selection_label.setText("当前选择: 选项二")

if __name__ == '__main__':
    app = QApplication(sys.argv)
    window = DefaultMutexWindow()
    window.show()
    sys.exit(app.exec_())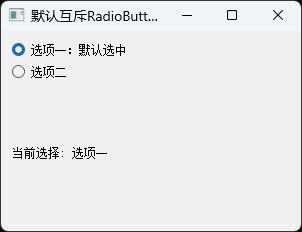
这种方法的核心原理是PyQt5会自动管理同一父容器中RadioButton的互斥性。当用户点击一个RadioButton时,Qt框架会自动取消同一容器中其他RadioButton的选中状态。这种自动管理的实现基于Qt的对象模型和信号槽机制,可以大大简化开发工作。
方法二:使用QButtonGroup实现精确控制
QButtonGroup是PyQt5中专门用于管理按钮组的类,它提供了一种更灵活、更强大的方式来实现RadioButton的互斥选择。与默认的容器互斥相比,QButtonGroup允许开发者将不同容器中的RadioButton分组,并提供更多控制选项。
python
import sys
from PyQt5.QtWidgets import (QApplication, QWidget, QVBoxLayout,
                             QHBoxLayout, QRadioButton, QButtonGroup,
                             QLabel, QGroupBox)

class ButtonGroupWindow(QWidget):
    def __init__(self):
        super().__init__()
        self.init_ui()

    def init_ui(self):
        # 设置窗口属性
        self.setWindowTitle('QButtonGroup示例')
        self.setGeometry(300, 300, 400, 300)

        # 创建主布局
        main_layout = QVBoxLayout()

        # 创建第一组RadioButton
        self.radio1 = QRadioButton("红色")
        self.radio2 = QRadioButton("绿色")
        self.radio3 = QRadioButton("蓝色")

        # 设置默认选中
        self.radio1.setChecked(True)

        # 创建QButtonGroup并添加RadioButton
        self.color_group = QButtonGroup(self)
        self.color_group.addButton(self.radio1, 1)  # 第二个参数是按钮ID
        self.color_group.addButton(self.radio2, 2)
        self.color_group.addButton(self.radio3, 3)

        # 连接信号
        self.color_group.buttonClicked[int].connect(self.on_color_changed)

        # 创建颜色选择组框
        color_box = QGroupBox("选择颜色")
        color_layout = QVBoxLayout()
        color_layout.addWidget(self.radio1)
        color_layout.addWidget(self.radio2)
        color_layout.addWidget(self.radio3)
        color_box.setLayout(color_layout)

        # 创建第二组RadioButton
        self.size_small = QRadioButton("小号")
        self.size_medium = QRadioButton("中号")
        self.size_large = QRadioButton("大号")

        # 设置默认选中
        self.size_medium.setChecked(True)

        # 创建第二个QButtonGroup
        self.size_group = QButtonGroup(self)
        self.size_group.addButton(self.size_small, 1)
        self.size_group.addButton(self.size_medium, 2)
        self.size_group.addButton(self.size_large, 3)

        # 连接信号
        self.size_group.buttonClicked[int].connect(self.on_size_changed)

        # 创建尺寸选择组框
        size_box = QGroupBox("选择尺寸")
        size_layout = QVBoxLayout()
        size_layout.addWidget(self.size_small)
        size_layout.addWidget(self.size_medium)
        size_layout.addWidget(self.size_large)
        size_box.setLayout(size_layout)

        # 创建显示标签
        self.color_label = QLabel("当前颜色: 红色")
        self.size_label = QLabel("当前尺寸: 中号")
        self.info_label = QLabel("")

        # 将控件添加到主布局
        main_layout.addWidget(color_box)
        main_layout.addWidget(self.color_label)
        main_layout.addWidget(size_box)
        main_layout.addWidget(self.size_label)
        main_layout.addWidget(self.info_label)

        # 设置窗口布局
        self.setLayout(main_layout)

        # 更新初始显示
        self.update_info()

    def on_color_changed(self, button_id):
        """颜色选择变化的槽函数"""
        colors = {1: "红色", 2: "绿色", 3: "蓝色"}
        self.color_label.setText(f"当前颜色: {colors[button_id]}")
        self.update_info()

    def on_size_changed(self, button_id):
        """尺寸选择变化的槽函数"""
        sizes = {1: "小号", 2: "中号", 3: "大号"}
        self.size_label.setText(f"当前尺寸: {sizes[button_id]}")
        self.update_info()

    def update_info(self):
        """更新综合信息"""
        color_button = self.color_group.checkedButton()
        size_button = self.size_group.checkedButton()

        if color_button and size_button:
            self.info_label.setText(f"您选择了: {color_button.text()}, {size_button.text()}")
        else:
            self.info_label.setText("请选择颜色和尺寸")

if __name__ == '__main__':
    app = QApplication(sys.argv)
    window = ButtonGroupWindow()
    window.show()
    sys.exit(app.exec_())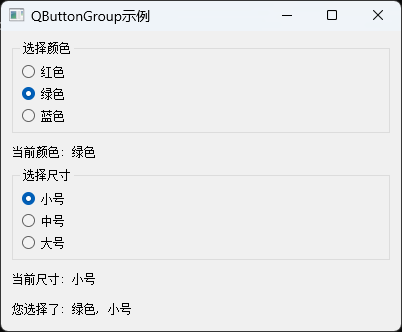
QButtonGroup的核心优势在于它提供了对按钮组的集中管理。通过addButton()方法,我们可以将不同位置的RadioButton添加到同一个组中,并可以为每个按钮分配一个唯一的ID。这种方法特别适用于以下场景:
- 当RadioButton分散在不同容器中时
- 需要以编程方式管理按钮状态时
- 需要获取或设置当前选中的按钮时
- 需要为按钮分配唯一标识符时
从实现原理上看,QButtonGroup内部维护了一个按钮列表和一个当前选中按钮的引用。当组内任何一个按钮的状态发生变化时,QButtonGroup会自动更新其他按钮的状态,确保互斥性。这种机制可以用状态机模型来描述:假设按钮组有nnn个按钮B={b1,b2,...,bn}B = \{b_1, b_2, ..., b_n\}B={b1,b2,...,bn},组的状态可以表示为当前选中按钮的索引iii。当用户点击按钮bjb_jbj时,状态从iii转移到jjj,同时更新所有按钮的视觉状态。
方法三:使用QGroupBox实现视觉分组
QGroupBox是一个带有标题的容器控件,它可以同时提供视觉分组和逻辑分组的功能。在QGroupBox内部的RadioButton会自动形成互斥组,而不同QGroupBox中的RadioButton则互不影响。
python
import sys
from PyQt5.QtWidgets import (QApplication, QWidget, QVBoxLayout,
                             QHBoxLayout, QGroupBox, QRadioButton,
                             QLabel, QPushButton)

class GroupBoxWindow(QWidget):
    def __init__(self):
        super().__init__()
        self.init_ui()

    def init_ui(self):
        # 设置窗口属性
        self.setWindowTitle('QGroupBox示例 - 问卷调查')
        self.setGeometry(300, 300, 500, 400)

        # 创建主布局
        main_layout = QVBoxLayout()

        # 创建性别选择组
        gender_group = QGroupBox("1. 请选择您的性别")
        gender_layout = QVBoxLayout()
        self.gender_male = QRadioButton("男性")
        self.gender_female = QRadioButton("女性")
        self.gender_other = QRadioButton("其他")

        # 设置默认选择
        self.gender_male.setChecked(True)

        gender_layout.addWidget(self.gender_male)
        gender_layout.addWidget(self.gender_female)
        gender_layout.addWidget(self.gender_other)
        gender_group.setLayout(gender_layout)

        # 创建年龄选择组
        age_group = QGroupBox("2. 请选择您的年龄范围")
        age_layout = QVBoxLayout()
        self.age_18_30 = QRadioButton("18-30岁")
        self.age_31_45 = QRadioButton("31-45岁")
        self.age_46_60 = QRadioButton("46-60岁")
        self.age_60plus = QRadioButton("60岁以上")

        # 设置默认选择
        self.age_18_30.setChecked(True)

        age_layout.addWidget(self.age_18_30)
        age_layout.addWidget(self.age_31_45)
        age_layout.addWidget(self.age_46_60)
        age_layout.addWidget(self.age_60plus)
        age_group.setLayout(age_layout)

        # 创建教育程度选择组
        education_group = QGroupBox("3. 请选择您的最高教育程度")
        education_layout = QVBoxLayout()
        self.edu_high_school = QRadioButton("高中及以下")
        self.edu_bachelor = QRadioButton("本科")
        self.edu_master = QRadioButton("硕士")
        self.edu_doctor = QRadioButton("博士")

        # 设置默认选择
        self.edu_bachelor.setChecked(True)

        education_layout.addWidget(self.edu_high_school)
        education_layout.addWidget(self.edu_bachelor)
        education_layout.addWidget(self.edu_master)
        education_layout.addWidget(self.edu_doctor)
        education_group.setLayout(education_layout)

        # 创建提交按钮和结果显示标签
        submit_button = QPushButton("提交问卷")
        self.result_label = QLabel("请完成以上选择后点击提交")

        # 连接按钮点击事件
        submit_button.clicked.connect(self.submit_survey)

        # 将控件添加到主布局
        main_layout.addWidget(gender_group)
        main_layout.addWidget(age_group)
        main_layout.addWidget(education_group)
        main_layout.addWidget(submit_button)
        main_layout.addWidget(self.result_label)

        # 设置窗口布局
        self.setLayout(main_layout)

    def submit_survey(self):
        """提交问卷的槽函数"""
        # 获取性别选择
        gender = ""
        if self.gender_male.isChecked():
            gender = "男性"
        elif self.gender_female.isChecked():
            gender = "女性"
        elif self.gender_other.isChecked():
            gender = "其他"

        # 获取年龄选择
        age = ""
        if self.age_18_30.isChecked():
            age = "18-30岁"
        elif self.age_31_45.isChecked():
            age = "31-45岁"
        elif self.age_46_60.isChecked():
            age = "46-60岁"
        elif self.age_60plus.isChecked():
            age = "60岁以上"

        # 获取教育程度选择
        education = ""
        if self.edu_high_school.isChecked():
            education = "高中及以下"
        elif self.edu_bachelor.isChecked():
            education = "本科"
        elif self.edu_master.isChecked():
            education = "硕士"
        elif self.edu_doctor.isChecked():
            education = "博士"

        # 显示结果
        result_text = f"问卷结果:\n性别: {gender}\n年龄: {age}\n教育程度: {education}"
        self.result_label.setText(result_text)

if __name__ == '__main__':
    app = QApplication(sys.argv)
    window = GroupBoxWindow()
    window.show()
    sys.exit(app.exec_())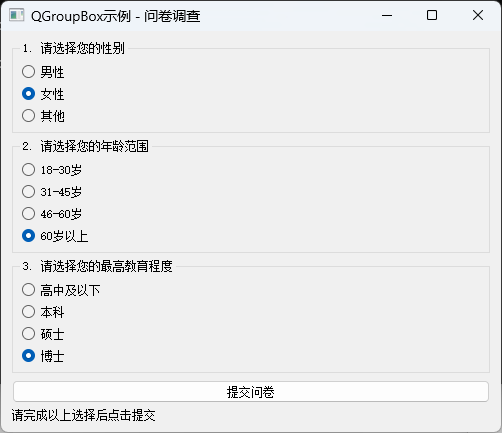
QGroupBox的实现原理是通过创建一个独立的容器控件,该容器内的子控件形成一个逻辑分组。在Qt框架中,QGroupBox内部维护了对其子控件的管理逻辑,特别是对于QRadioButton,它会自动确保同一组内的单选框是互斥的。这种设计模式在需要将界面划分为多个逻辑区域时特别有用,它既提供了视觉上的分隔,也确保了逻辑上的独立性。
从用户界面设计的角度看,QGroupBox提供了清晰的视觉层次结构,帮助用户理解不同选项组之间的关系。每个QGroupBox可以看作一个独立的选择空间GiG_iGi,其中包含一组互斥的选项Ri={ri1,ri2,...,rim}R_i = \{r_{i1}, r_{i2}, ..., r_{im}\}Ri={ri1,ri2,...,rim}。不同组之间的选择是完全独立的,即∀i≠j,S(Gi)∩S(Gj)=∅\forall i \neq j, S(G_i) \cap S(G_j) = \emptyset∀i=j,S(Gi)∩S(Gj)=∅,其中S(Gi)S(G_i)S(Gi)表示组GiG_iGi中被选中的选项。
方法四:手动实现互斥逻辑
在某些特殊情况下,开发者可能需要更精细地控制RadioButton的互斥行为,这时可以手动实现互斥逻辑。这种方法提供了最大的灵活性,但也需要编写更多的代码。
python
import sys
from PyQt5.QtWidgets import (QApplication, QWidget, QVBoxLayout,
                             QHBoxLayout, QRadioButton, QLabel,
                             QPushButton, QGridLayout)

class ManualMutexWindow(QWidget):
    def __init__(self):
        super().__init__()
        self.radio_buttons = []  # 存储所有RadioButton
        self.status_label = None  # 先初始化为None
        self.count_label = None   # 先初始化为None
        self.init_ui()

    def init_ui(self):
        # 设置窗口属性
        self.setWindowTitle('手动互斥实现示例')
        self.setGeometry(300, 300, 500, 300)

        # 创建主布局
        main_layout = QVBoxLayout()

        # 创建标题标签
        title_label = QLabel("手动互斥RadioButton实现")
        title_label.setStyleSheet("font-size: 16px; font-weight: bold;")

        # 创建说明标签
        instruction_label = QLabel("这是一个手动管理互斥状态的示例,展示了如何通过编程方式控制多个RadioButton的互斥选择。")
        instruction_label.setWordWrap(True)

        # 创建网格布局来排列RadioButton
        grid_layout = QGridLayout()

        # 创建6个RadioButton
        radio_texts = [
            "选项A: 高性能模式",
            "选项B: 平衡模式",
            "选项C: 节能模式",
            "选项D: 自定义模式一",
            "选项E: 自定义模式二",
            "选项F: 自定义模式三"
        ]

        self.radio_buttons = []
        for i, text in enumerate(radio_texts):
            radio = QRadioButton(text)
            self.radio_buttons.append(radio)

            # 将每个RadioButton的信号连接到同一个槽函数
            radio.toggled.connect(self.on_radio_toggled)

            # 计算位置
            row = i // 2
            col = i % 2

            # 添加到网格布局
            grid_layout.addWidget(radio, row, col)

        # 创建控制按钮
        button_layout = QHBoxLayout()
        select_all_button = QPushButton("全选测试")
        clear_all_button = QPushButton("清除所有")
        select_third_button = QPushButton("选择第三个")

        # 连接按钮信号
        select_all_button.clicked.connect(self.select_all_test)
        clear_all_button.clicked.connect(self.clear_all)
        select_third_button.clicked.connect(self.select_third)

        button_layout.addWidget(select_all_button)
        button_layout.addWidget(clear_all_button)
        button_layout.addWidget(select_third_button)

        # 创建状态显示标签
        self.status_label = QLabel("当前选中: 无")
        self.status_label.setStyleSheet("font-weight: bold; color: #0066cc;")

        # 创建统计标签
        self.count_label = QLabel(f"总选项数: {len(self.radio_buttons)}")

        # 设置第一个选项为默认选中
        if self.radio_buttons:
            # 在创建完所有控件后再设置默认选中
            self.radio_buttons[0].setChecked(True)

        # 将所有控件添加到主布局
        main_layout.addWidget(title_label)
        main_layout.addWidget(instruction_label)
        main_layout.addLayout(grid_layout)
        main_layout.addLayout(button_layout)
        main_layout.addWidget(self.status_label)
        main_layout.addWidget(self.count_label)

        # 设置窗口布局
        self.setLayout(main_layout)

    def on_radio_toggled(self, checked):
        """RadioButton状态变化的槽函数"""
        sender = self.sender()

        if checked and self.status_label is not None:
            # 确保status_label已创建后再更新
            self.status_label.setText(f"当前选中: {sender.text()}")

            # 可以在这里添加其他逻辑,比如根据选择启用/禁用其他控件
            if "高性能" in sender.text():
                self.status_label.setStyleSheet("font-weight: bold; color: #cc0000;")
            elif "节能" in sender.text():
                self.status_label.setStyleSheet("font-weight: bold; color: #00aa00;")
            else:
                self.status_label.setStyleSheet("font-weight: bold; color: #0066cc;")

    def select_all_test(self):
        """测试全选功能 - 这应该只选中最后一个"""
        for i, radio in enumerate(self.radio_buttons):
            # 注意:这会触发多次信号,但最终只有最后一个会被选中
            radio.setChecked(True)

    def clear_all(self):
        """清除所有选择"""
        for radio in self.radio_buttons:
            radio.setChecked(False)

        if self.status_label is not None:
            self.status_label.setText("当前选中: 无")

    def select_third(self):
        """选择第三个RadioButton"""
        if len(self.radio_buttons) > 2:
            self.radio_buttons[2].setChecked(True)

if __name__ == '__main__':
    app = QApplication(sys.argv)
    window = ManualMutexWindow()
    window.show()
    sys.exit(app.exec_())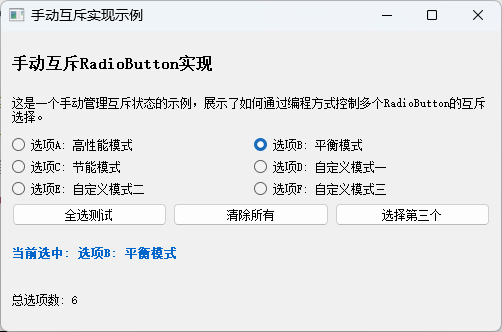
手动实现互斥逻辑的核心思想是通过编程方式管理所有RadioButton的状态。当任何一个RadioButton的状态发生变化时,我们需要手动更新其他所有RadioButton的状态以确保互斥性。这种方法的实现可以用以下算法描述:
- 维护一个RadioButton列表R=r1,r2,...,rnR = r_1, r_2, ..., r_nR=r1,r2,...,rn
- 为每个RadioButton连接
toggled信号到同一个槽函数 - 在槽函数中,当某个RadioButton被选中时,遍历列表RRR,将其他所有RadioButton设置为未选中状态
用伪代码表示:
function on_radio_toggled(checked, sender):
    if checked:
        for each radio in radio_list:
            if radio ≠ sender:
                radio.setChecked(False)
        update_display(sender)
这种方法虽然代码量较多,但提供了最大的灵活性。例如,我们可以实现非标准的互斥行为,或者在某些条件下临时允许选择多个选项。在数学上,这种方法相当于维护一个完全图KnK_nKn,其中每个顶点代表一个RadioButton,当某个顶点被激活时,需要将所有其他顶点的状态设置为非激活。
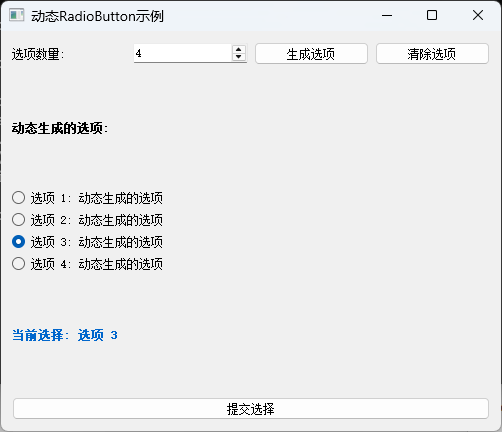
方法五:动态RadioButton与QButtonGroup结合
在实际应用中,有时需要动态创建RadioButton,例如根据数据库查询结果或配置文件生成选项。这种情况下,将动态创建的RadioButton与QButtonGroup结合使用是最佳实践。
python
import sys
from PyQt5.QtWidgets import (QApplication, QWidget, QVBoxLayout,
                             QHBoxLayout, QRadioButton, QButtonGroup,
                             QLabel, QPushButton, QSpinBox, QMessageBox)

class DynamicRadioWindow(QWidget):
    def __init__(self):
        super().__init__()
        self.radio_buttons = []
        self.button_group = None
        self.init_ui()

    def init_ui(self):
        # 设置窗口属性
        self.setWindowTitle('动态RadioButton示例')
        self.setGeometry(300, 300, 500, 400)

        # 创建主布局
        main_layout = QVBoxLayout()

        # 创建控制面板
        control_layout = QHBoxLayout()

        # 创建选项数量选择器
        count_label = QLabel("选项数量:")
        self.count_spinbox = QSpinBox()
        self.count_spinbox.setRange(2, 10)
        self.count_spinbox.setValue(4)

        # 创建生成按钮
        generate_button = QPushButton("生成选项")
        generate_button.clicked.connect(self.generate_radios)

        # 创建清除按钮
        clear_button = QPushButton("清除选项")
        clear_button.clicked.connect(self.clear_radios)

        control_layout.addWidget(count_label)
        control_layout.addWidget(self.count_spinbox)
        control_layout.addWidget(generate_button)
        control_layout.addWidget(clear_button)

        # 创建选项容器布局
        self.radio_container_layout = QVBoxLayout()
        radio_container_label = QLabel("动态生成的选项:")
        radio_container_label.setStyleSheet("font-weight: bold;")

        # 创建显示当前选择的标签
        self.selection_label = QLabel("当前未选择")
        self.selection_label.setStyleSheet("font-weight: bold; color: #0066cc;")

        # 创建提交按钮
        submit_button = QPushButton("提交选择")
        submit_button.clicked.connect(self.submit_selection)

        # 将所有控件添加到主布局
        main_layout.addLayout(control_layout)
        main_layout.addWidget(radio_container_label)
        main_layout.addLayout(self.radio_container_layout)
        main_layout.addWidget(self.selection_label)
        main_layout.addWidget(submit_button)

        # 设置窗口布局
        self.setLayout(main_layout)

        # 初始生成一组RadioButton
        self.generate_radios()

    def generate_radios(self):
        """生成指定数量的RadioButton"""
        # 清除现有的RadioButton
        self.clear_radios()

        # 获取要生成的数量
        count = self.count_spinbox.value()

        # 创建新的QButtonGroup
        self.button_group = QButtonGroup(self)
        self.button_group.setExclusive(True)  # 确保互斥

        # 生成RadioButton
        for i in range(count):
            radio = QRadioButton(f"选项 {i+1}: 动态生成的选项")
            self.radio_buttons.append(radio)

            # 添加到QButtonGroup
            self.button_group.addButton(radio, i)  # 使用索引作为ID

            # 添加到布局
            self.radio_container_layout.addWidget(radio)

        # 设置第一个为选中状态
        if self.radio_buttons:
            self.radio_buttons[0].setChecked(True)
            self.selection_label.setText(f"当前选择: 选项 1")

        # 连接信号
        self.button_group.buttonClicked[int].connect(self.on_radio_clicked)

    def clear_radios(self):
        """清除所有动态生成的RadioButton"""
        # 断开信号连接
        if self.button_group:
            self.button_group.buttonClicked[int].disconnect(self.on_radio_clicked)

        # 从布局中移除并删除所有RadioButton
        for radio in self.radio_buttons:
            self.radio_container_layout.removeWidget(radio)
            radio.deleteLater()

        # 清空列表
        self.radio_buttons.clear()

        # 重置显示
        self.selection_label.setText("当前未选择")

    def on_radio_clicked(self, button_id):
        """RadioButton被点击的槽函数"""
        # 获取被点击的按钮
        button = self.button_group.button(button_id)

        if button:
            self.selection_label.setText(f"当前选择: 选项 {button_id+1}")

    def submit_selection(self):
        """提交选择的槽函数"""
        # 获取当前选中的按钮
        selected_button = self.button_group.checkedButton() if self.button_group else None

        if selected_button:
            # 获取按钮ID
            button_id = self.button_group.id(selected_button)

            # 显示消息框
            QMessageBox.information(
                self,
                "选择结果",
                f"您选择了: 选项 {button_id+1}\n"
                f"这是第 {button_id+1} 个选项,共 {len(self.radio_buttons)} 个选项。"
            )
        else:
            QMessageBox.warning(self, "警告", "请先选择一个选项!")

if __name__ == '__main__':
    app = QApplication(sys.argv)
    window = DynamicRadioWindow()
    window.show()
sys.exit(app.exec_())动态创建RadioButton的核心挑战在于如何有效地管理这些动态生成的对象。QButtonGroup在这里发挥了关键作用,它提供了一种集中管理机制,无论RadioButton是静态创建还是动态生成,都可以被统一管理。
从软件工程的角度看,这种方法体现了"控制反转"(Inversion of Control)原则。应用程序不再直接管理每个RadioButton的状态变化,而是将控制权交给QButtonGroup,由它来协调所有按钮的状态。这种设计模式提高了代码的可维护性和可扩展性。
在动态生成场景中,假设我们需要根据数据集合D={d1,d2,...,dn}D = \{d_1, d_2, ..., d_n\}D={d1,d2,...,dn}创建nnn个RadioButton,每个按钮对应一个数据项。通过QButtonGroup,我们可以轻松地将每个按钮与其对应的数据索引关联起来,当用户选择某个按钮时,我们可以立即知道对应的数据项是什么。这种映射关系可以表示为函数f:B→Df: B \rightarrow Df:B→D,其中BBB是按钮集合,DDD是数据集合。
高级主题:自定义RadioButton与样式定制
PyQt5允许开发者通过样式表(QSS)完全自定义RadioButton的外观,同时保持其功能不变。这对于创建具有品牌特色的用户界面非常重要。
python
import sys
from PyQt5.QtWidgets import (QApplication, QWidget, QVBoxLayout,
                             QHBoxLayout, QRadioButton, QButtonGroup,
                             QLabel, QGroupBox)
from PyQt5.QtGui import QFont, QColor
from PyQt5.QtCore import Qt

class StyledRadioWindow(QWidget):
    def __init__(self):
        super().__init__()
        self.init_ui()

    def init_ui(self):
        # 设置窗口属性
        self.setWindowTitle('自定义样式RadioButton示例')
        self.setGeometry(300, 300, 600, 500)

        # 设置窗口样式
        self.setStyleSheet("""
            QWidget {
                background-color: #f5f5f5;
                font-family: Arial, sans-serif;
            }
            QGroupBox {
                font-weight: bold;
                border: 2px solid #cccccc;
                border-radius: 5px;
                margin-top: 10px;
                padding-top: 10px;
                background-color: white;
            }
            QGroupBox::title {
                subcontrol-origin: margin;
                left: 10px;
                padding: 0 5px 0 5px;
            }
        """)

        # 创建主布局
        main_layout = QVBoxLayout()

        # 创建标题
        title_label = QLabel("自定义样式RadioButton演示")
        title_label.setAlignment(Qt.AlignCenter)
        title_label.setFont(QFont("Arial", 16, QFont.Bold))
        title_label.setStyleSheet("color: #333333; margin: 10px;")

        # 创建第一个样式组
        style1_group = QGroupBox("样式一:传统单选框")
        style1_layout = QVBoxLayout()

        # 创建传统样式的RadioButton
        self.radio_traditional_1 = QRadioButton("传统选项一")
        self.radio_traditional_2 = QRadioButton("传统选项二")
        self.radio_traditional_3 = QRadioButton("传统选项三")

        style1_layout.addWidget(self.radio_traditional_1)
        style1_layout.addWidget(self.radio_traditional_2)
        style1_layout.addWidget(self.radio_traditional_3)
        style1_group.setLayout(style1_layout)

        # 创建第二个样式组
        style2_group = QGroupBox("样式二:现代扁平化设计")
        style2_layout = QVBoxLayout()

        # 创建现代扁平化样式的RadioButton
        self.radio_modern_1 = QRadioButton("现代选项一")
        self.radio_modern_2 = QRadioButton("现代选项二")
        self.radio_modern_3 = QRadioButton("现代选项三")

        # 应用扁平化样式
        modern_style = """
            QRadioButton {
                font-size: 14px;
                padding: 8px;
                border-radius: 4px;
                margin: 2px;
            }
            QRadioButton::indicator {
                width: 20px;
                height: 20px;
                border-radius: 10px;
                border: 2px solid #888888;
            }
            QRadioButton::indicator:checked {
                background-color: #2196F3;
                border: 2px solid #1976D2;
            }
            QRadioButton:hover {
                background-color: #e3f2fd;
            }
        """

        for radio in [self.radio_modern_1, self.radio_modern_2, self.radio_modern_3]:
            radio.setStyleSheet(modern_style)

        style2_layout.addWidget(self.radio_modern_1)
        style2_layout.addWidget(self.radio_modern_2)
        style2_layout.addWidget(self.radio_modern_3)
        style2_group.setLayout(style2_layout)

        # 创建第三个样式组
        style3_group = QGroupBox("样式三:彩色主题")
        style3_layout = QVBoxLayout()

        # 创建彩色主题的RadioButton
        self.radio_color_1 = QRadioButton("红色主题")
        self.radio_color_2 = QRadioButton("绿色主题")
        self.radio_color_3 = QRadioButton("蓝色主题")

        # 为每个RadioButton应用不同的颜色样式
        color_styles = {
            self.radio_color_1: """
                QRadioButton {
                    color: #d32f2f;
                    font-weight: bold;
                }
                QRadioButton::indicator {
                    width: 18px;
                    height: 18px;
                }
                QRadioButton::indicator:checked {
                    background-color: #f44336;
                    border: 2px solid #d32f2f;
                }
            """,
            self.radio_color_2: """
                QRadioButton {
                    color: #388e3c;
                    font-weight: bold;
                }
                QRadioButton::indicator {
                    width: 18px;
                    height: 18px;
                }
                QRadioButton::indicator:checked {
                    background-color: #4caf50;
                    border: 2px solid #388e3c;
                }
            """,
            self.radio_color_3: """
                QRadioButton {
                    color: #1976d2;
                    font-weight: bold;
                }
                QRadioButton::indicator {
                    width: 18px;
                    height: 18px;
                }
                QRadioButton::indicator:checked {
                    background-color: #2196f3;
                    border: 2px solid #1976d2;
                }
            """
        }

        for radio, style in color_styles.items():
            radio.setStyleSheet(style)

        style3_layout.addWidget(self.radio_color_1)
        style3_layout.addWidget(self.radio_color_2)
        style3_layout.addWidget(self.radio_color_3)
        style3_group.setLayout(style3_layout)

        # 创建状态显示标签
        self.status_label = QLabel("请选择一个选项")
        self.status_label.setAlignment(Qt.AlignCenter)
        self.status_label.setFont(QFont("Arial", 12))
        self.status_label.setStyleSheet("""
            QLabel {
                background-color: white;
                border: 1px solid #cccccc;
                border-radius: 4px;
                padding: 10px;
                margin: 10px;
            }
        """)

        # 创建QButtonGroup来管理所有RadioButton
        self.button_group = QButtonGroup()

        # 添加所有RadioButton到按钮组
        all_radios = [
            self.radio_traditional_1, self.radio_traditional_2, self.radio_traditional_3,
            self.radio_modern_1, self.radio_modern_2, self.radio_modern_3,
            self.radio_color_1, self.radio_color_2, self.radio_color_3
        ]

        for i, radio in enumerate(all_radios, 1):
            self.button_group.addButton(radio, i)

        # 连接信号
        self.button_group.buttonClicked.connect(self.on_radio_clicked)

        # 设置默认选择
        self.radio_traditional_1.setChecked(True)
        self.status_label.setText("当前选择: 传统选项一")

        # 将所有控件添加到主布局
        main_layout.addWidget(title_label)
        main_layout.addWidget(style1_group)
        main_layout.addWidget(style2_group)
        main_layout.addWidget(style3_group)
        main_layout.addWidget(self.status_label)

        # 设置窗口布局
        self.setLayout(main_layout)

    def on_radio_clicked(self, button):
        """RadioButton被点击的槽函数"""
        self.status_label.setText(f"当前选择: {button.text()}")

if __name__ == '__main__':
    app = QApplication(sys.argv)
    window = StyledRadioWindow()
    window.show()
    sys.exit(app.exec_())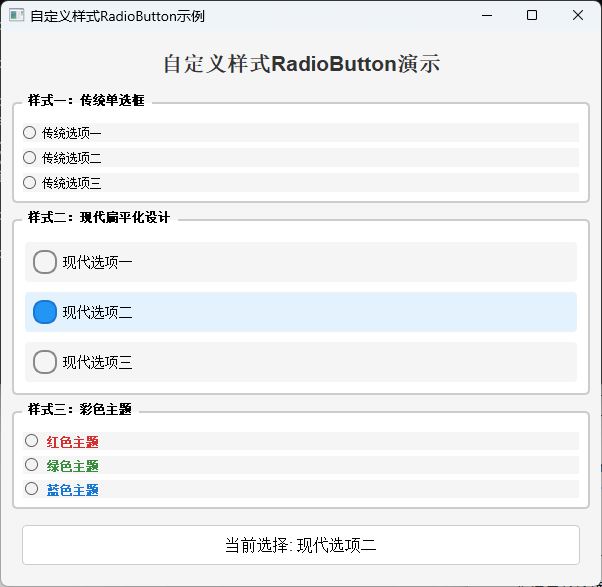
样式定制是PyQt5中一个强大的功能,它允许开发者通过CSS-like的语法自定义控件的外观。对于RadioButton,我们可以通过QSS选择器定位到其不同状态下的各个部分:
QRadioButton:选择RadioButton本身QRadioButton::indicator:选择RadioButton的指示器(圆形按钮)QRadioButton::indicator:checked:选择被选中状态的指示器QRadioButton::indicator:hover:选择鼠标悬停状态的指示器QRadioButton:disabled:选择禁用状态的RadioButton
通过组合这些选择器,我们可以创建出符合任何设计需求的RadioButton样式。从视觉设计的角度,这体现了"关注点分离"原则:业务逻辑和视觉表现被分离开来,使得两者可以独立演化。
性能优化与最佳实践
在实际开发中,当RadioButton数量较多时,性能可能成为一个考虑因素。以下是一些优化建议和最佳实践:
-
使用QButtonGroup而不是手动管理 :
QButtonGroup经过优化,比手动管理多个RadioButton的状态更高效。 -
避免过多的信号连接 :当有大量RadioButton时,为每个按钮单独连接信号可能会影响性能。考虑使用
QButtonGroup的buttonClicked信号,它只需要一次连接。 -
懒加载:如果RadioButton数量非常多,考虑使用懒加载技术,只创建当前可见的选项。
-
虚拟化 :对于极大量选项(数百或数千),考虑使用虚拟列表控件,如
QListView或QTableView,而不是直接创建大量RadioButton。 -
内存管理 :动态创建的RadioButton要确保正确释放内存,使用
deleteLater()而不是直接删除。
从算法复杂度分析,QButtonGroup管理nnn个RadioButton的时间复杂度为:
- 选择操作:O(1)O(1)O(1),通过内部状态直接更新
- 查找操作:O(1)O(1)O(1),通过按钮ID直接访问
- 遍历操作:O(n)O(n)O(n),需要遍历所有按钮
而手动管理nnn个RadioButton的时间复杂度为:
- 选择操作:O(n)O(n)O(n),需要遍历所有按钮
- 查找操作:O(n)O(n)O(n),需要遍历查找
- 遍历操作:O(n)O(n)O(n),需要遍历所有按钮
因此,使用QButtonGroup在性能上具有明显优势,特别是在选项数量较多时。
总结
在PyQt5中实现RadioButton的互斥选择有多种方法,每种方法都有其适用场景:
- 默认容器互斥:最简单的方法,适用于简单场景
- QButtonGroup:最灵活和强大的方法,适用于大多数场景
- QGroupBox:同时提供视觉和逻辑分组,适用于需要界面分组的场景
- 手动实现:提供最大控制权,适用于特殊需求
- 动态生成:适用于选项数量不确定或需要动态变化的场景
- 样式定制:用于创建符合品牌视觉的界面
从软件工程的角度看,QButtonGroup是最佳实践,它提供了良好的封装、高效的实现和灵活的API。通过将RadioButton的逻辑分组与视觉呈现分离,QButtonGroup遵循了单一职责原则,使得代码更易于维护和扩展。
无论选择哪种方法,理解PyQt5中RadioButton的互斥机制都是关键。通过合理运用这些技术,开发者可以创建出既美观又功能完善的用户界面。