各位开发者朋友们很久没有写东西了,这篇稿子是一个给南大做的演讲交流稿子,当时也是考虑到对于初级鸿蒙开发者来说,在项目上有大佬搭建好navigation路由,可能会用但可能让他从零搭建,着实有些困难,那这篇文章可以作为很好的参考。
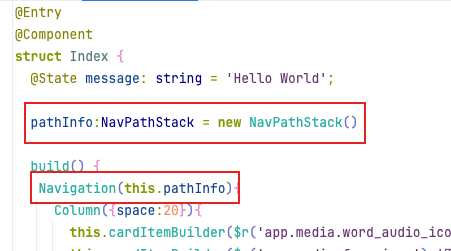
1.建立Navigation主入口页面

ts
@Entry
@Component
struct Index {
  @State message: string = 'Hello World';

  pathInfo:NavPathStack = new NavPathStack()

  build() {
   Navigation(this.pathInfo){
     Column({space:20}){
      }
     .height('100%')
     .width('100%')
     .padding(20)
   }
    .height('100%')
    .width('100%')
    .hideToolBar(true)
   .linearGradient({ angle: 135, colors: [['#d3e1fe', 0.1], ['#FFFFFF', 1 - 0.618], ['#2d96ed', 1]] })
  }

  @Builder
  cardItemBuilder(icon:ResourceStr,title:string,desc:string,pageName:string) {
    Row({space:20}) {
      Image(icon)
        .height(100)
        .width(100)
        .borderRadius(10)
      Column({space:12}) {
        Text(title)
          .fontSize(20)
          .fontWeight(500);
        Text(desc)
          .fontSize(14)
          .fontWeight(400)
          .opacity(0.5);
      }
      .layoutWeight(1)
      .alignItems(HorizontalAlign.Start);
    }
    .width('100%')
    .borderRadius(10)
    .justifyContent(FlexAlign.SpaceBetween)
    .alignItems(VerticalAlign.Center)
    .backgroundColor('#0a59f7')
    .linearGradient({ angle: 135, colors: [['#0a59f7', 0.1], ['#FFFFFF', 1 - 0.618], ['#0a59f7', 1]] })
    .onClick(() => {
      //跳功能页面
      this.pathInfo.pushPathByName(pageName,null)
      // onClickFun()
    })
  }
}
2.建立NavDestination子页面或二级页面
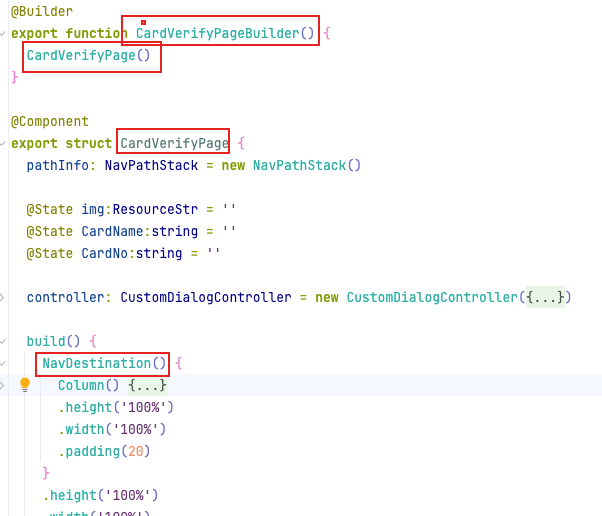
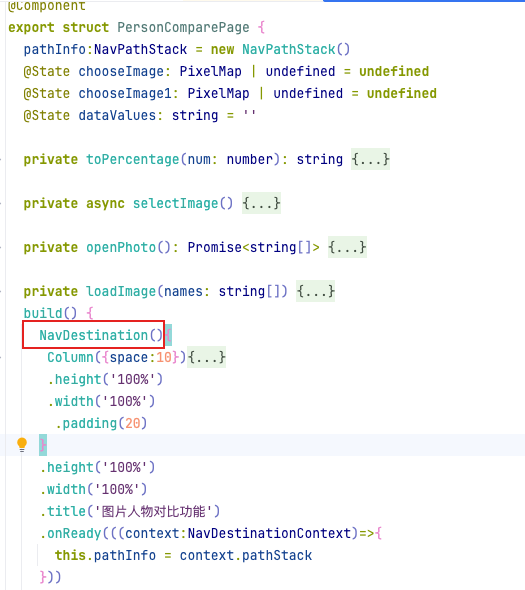
这个构建函数很重要
ts
@Builder
export function CardVerifyPageBuilder() {
  CardVerifyPage()
}
3.创建唯一的导航控制器NavPathStack类型实例,并于Navigation绑定
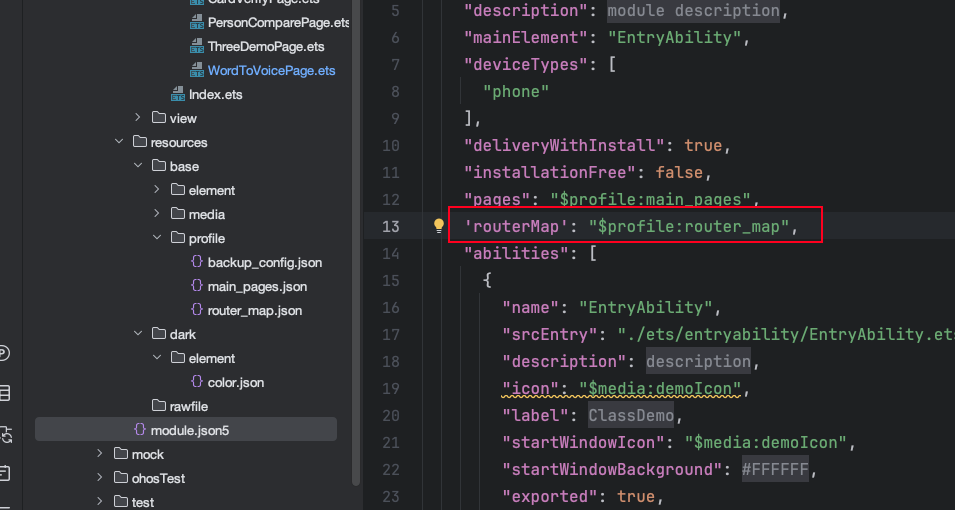
4.建立并注册Navigation路由表 router_map.json
此文件为开发者建立,目前编辑器初始化新工程未带此文件,且文件所在路径固定
建立后,将所有需要路由跳转的子页面路径和页面构建函数放在
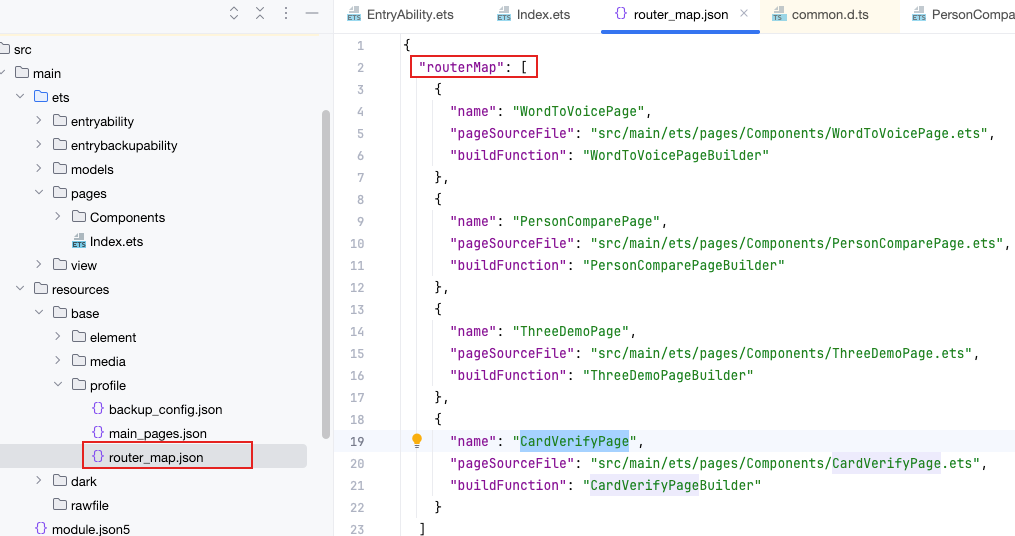
ts
{
  "routerMap": [
    {
      "name": "WordToVoicePage",
      "pageSourceFile": "src/main/ets/pages/Components/WordToVoicePage.ets",
      "buildFunction": "WordToVoicePageBuilder"
    }
  ]
}
5.声明路由方式
这个要在module.json5中声明,注意如果不配置,则路由不生效
6.路由跳转
主页面发送跳转,子页面接收路由导航控制器(如需三级+跳转)
ts
this.navigation.push(router_map.get("page_name"));

 .onReady(((context: NavDestinationContext) => {
      this.pathInfo = context.pathStack
    }))
新的一年祝大家bug越来越少,工资越来越高