背景需求
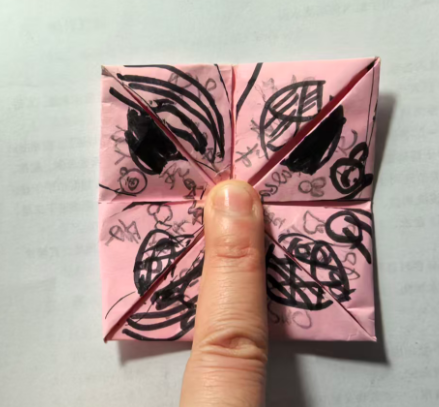
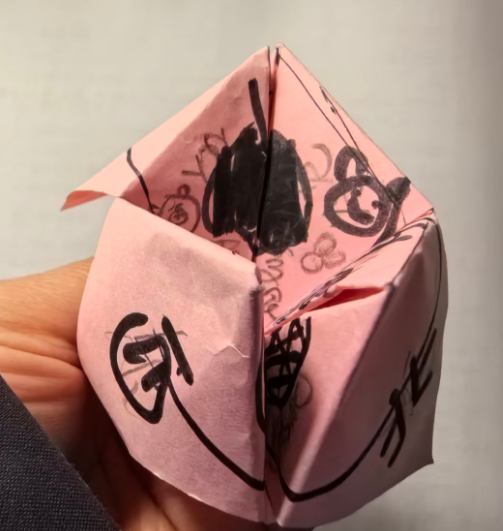
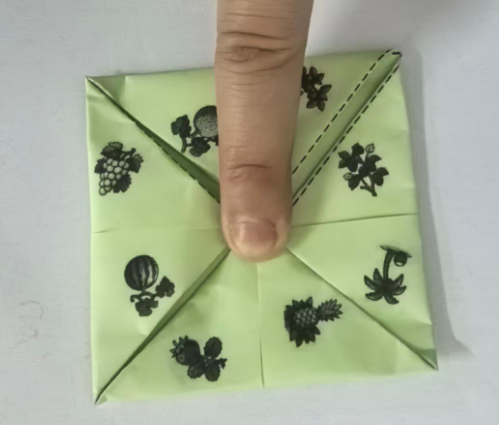
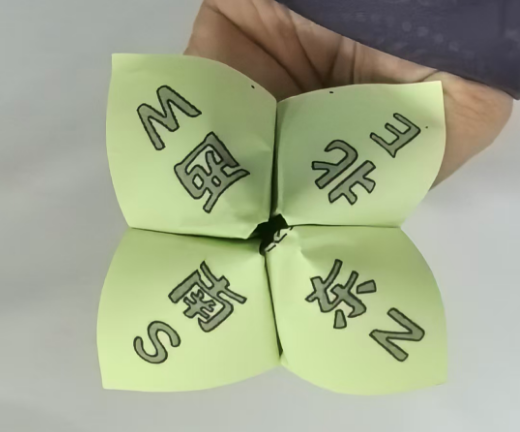
小班小朋友喜欢折纸玩具,经常围着老师,央求老师做"折纸玩具",从效率角度看,为了让更多幼儿得到玩具,我只能做"东南西北中(小嘴巴)""纸飞机"等简单的作品。
但是幼儿喜新厌旧,常常要做第2个、第3个,并点单"我要花花""我要望远镜""我要潜水艇""我要老虎"。这些折纸都要网上找图纸,折叠步骤多。很多孩子等的不耐烦,我折的也快崩溃了。我只能说:"你们自己做自己会的,我来不及做了"
时间不够用,老师不够用!
所以我想让孩子们(特别是几位手指精细动作灵活的孩子)自己练习基础的折纸方法。成为高手,也能代做一批作品,减轻教师的工作量。
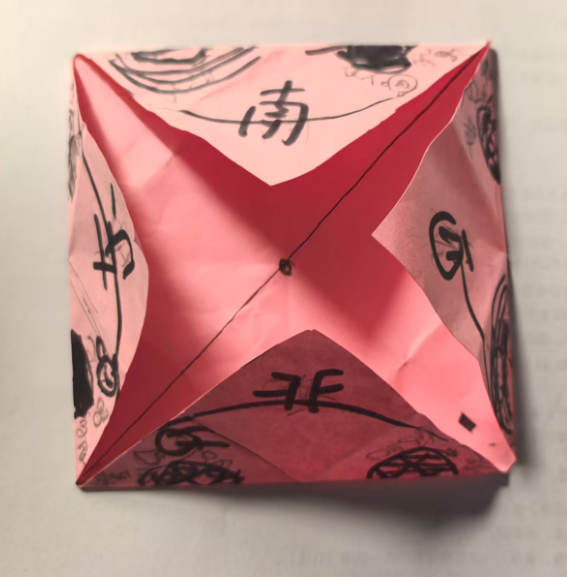
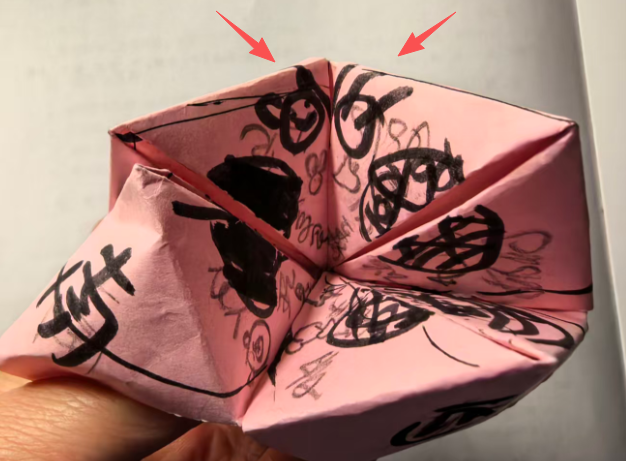
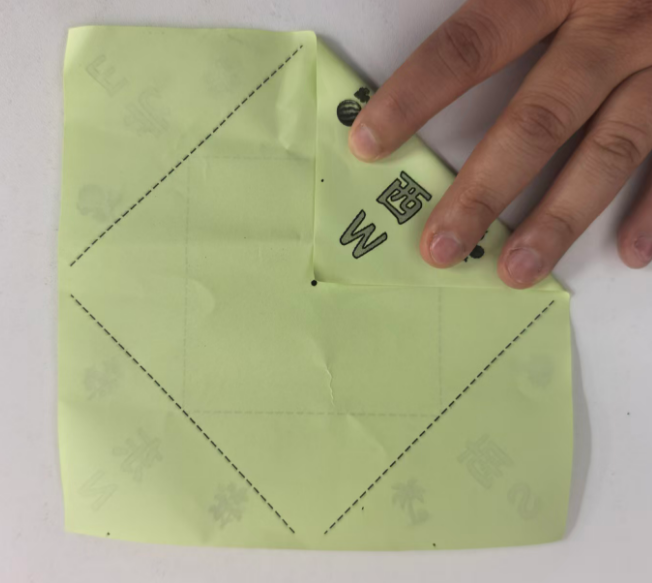
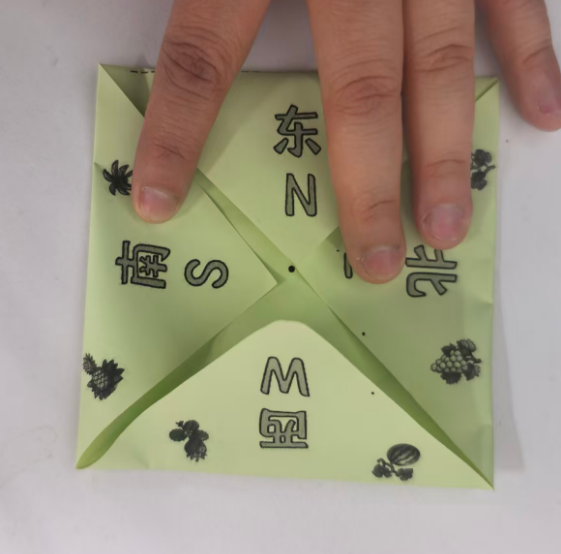
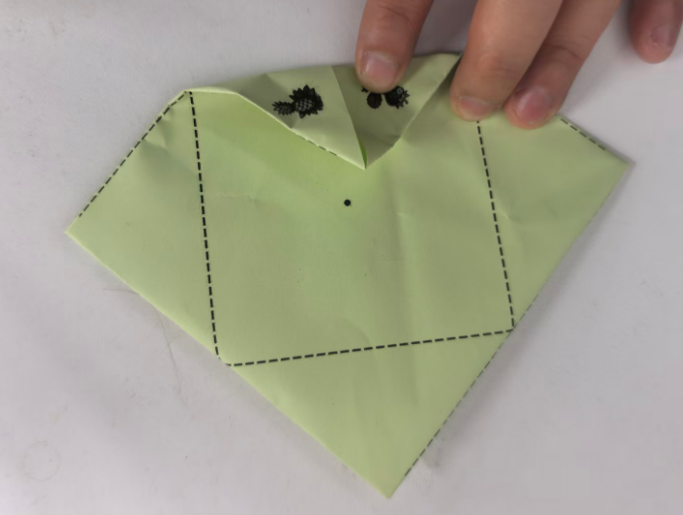
有一天我看见16号男孩拿着手工纸,把四角向内折叠,显然在做"东南西北中"。于是我拿了一支笔,在中间画了一个黑点,"你把四个角提起来,和中点重合......然后把这条边压一下,不压会翘起来"
通过面授,我发现他可以依样画葫芦向中点折,但是完全做不到的角与点的匹配(肌群不灵活)
不过,有虚线的提示提示,是否可以让孩子们对空间、等分有一定的初步概念?
因此我先把"东南西北中"这个折纸的纸模做出来。

折纸模型


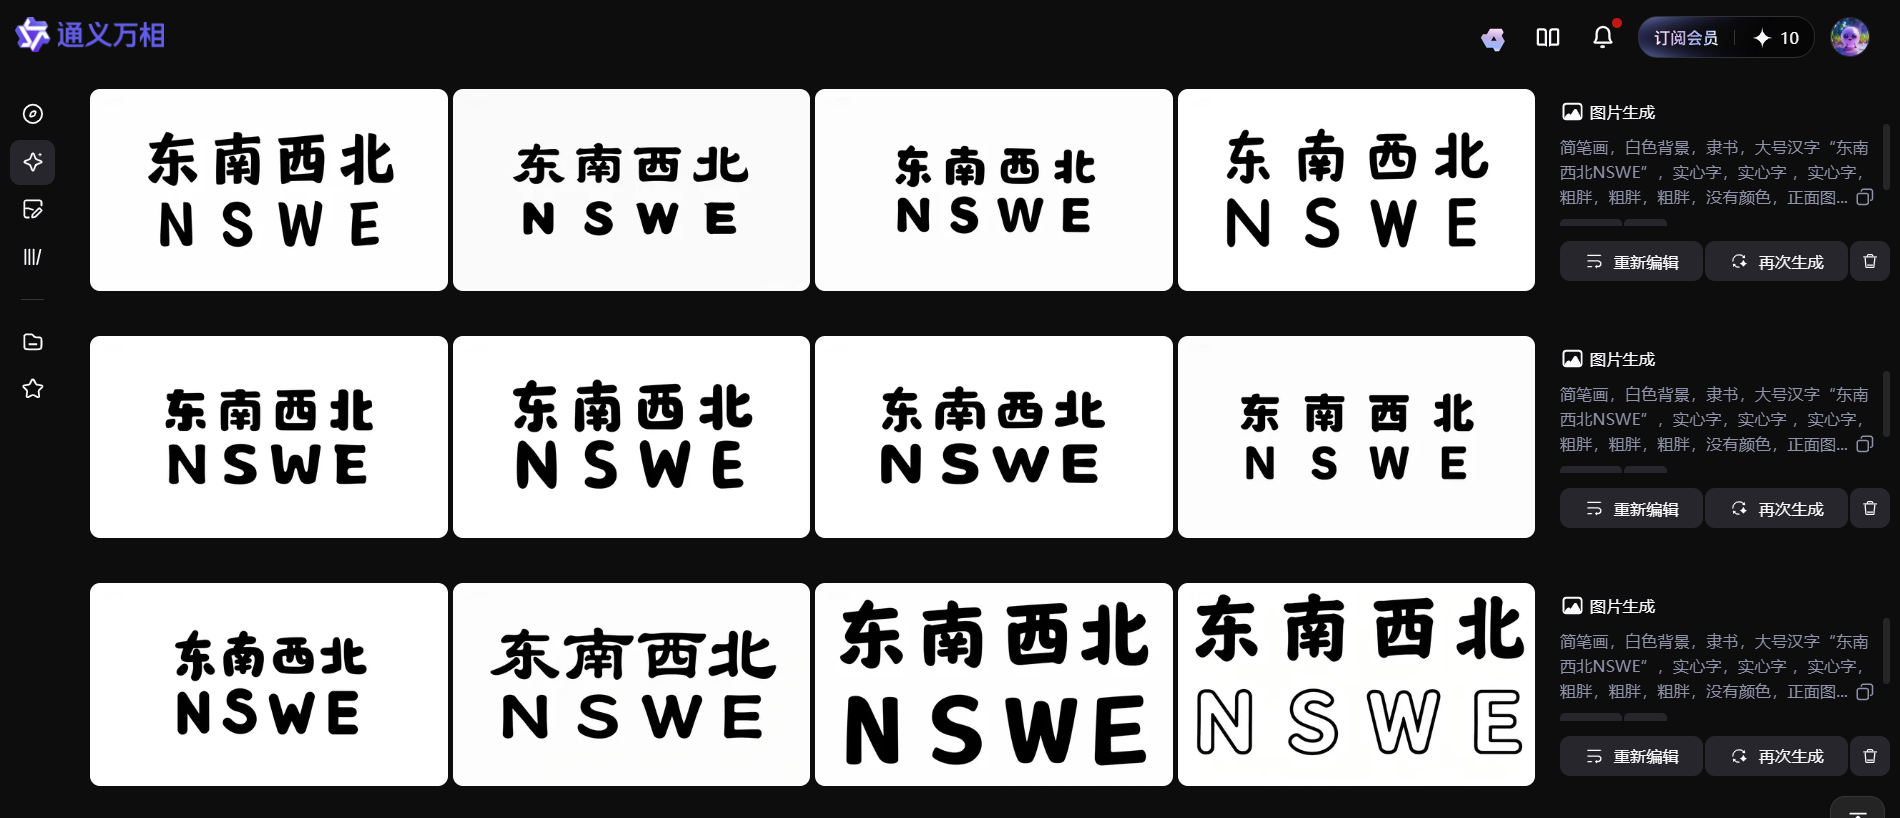
文字下载
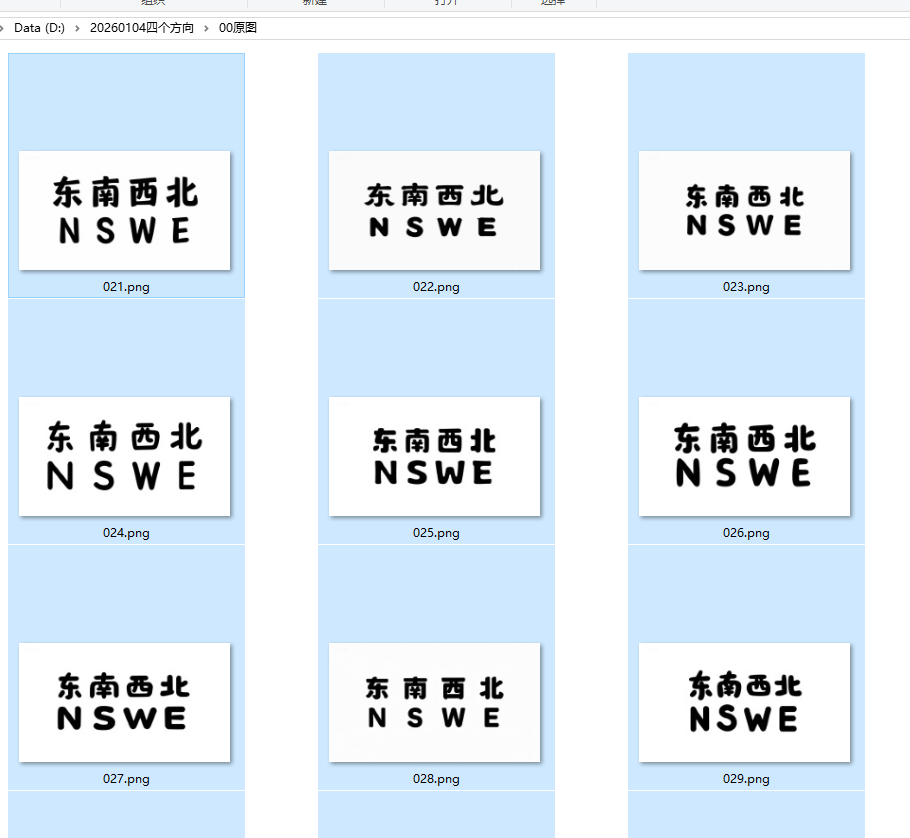
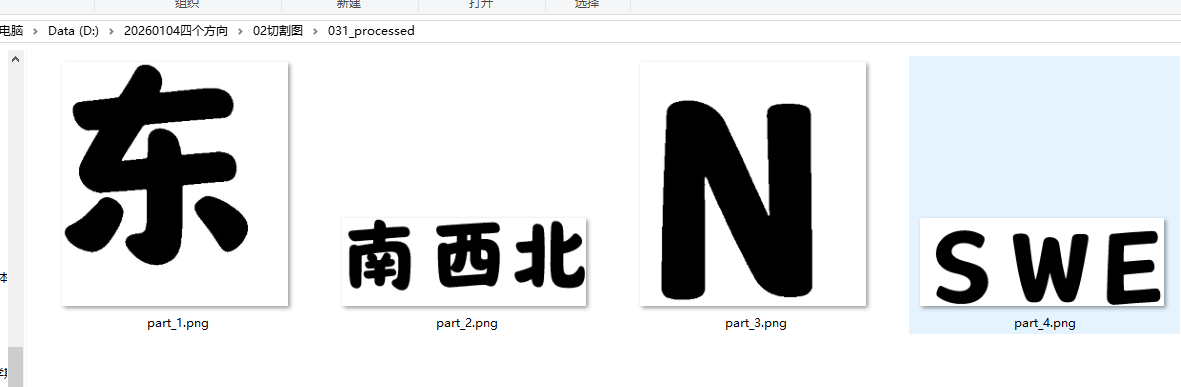
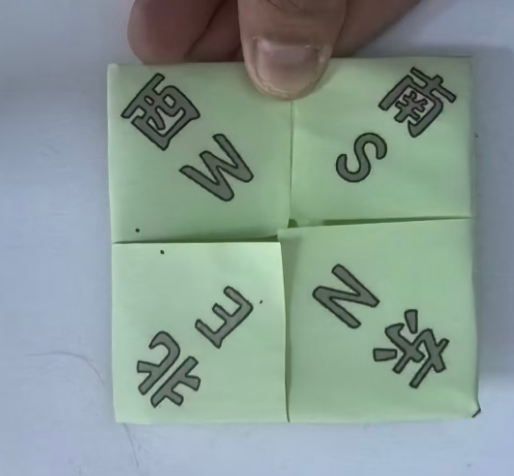
简笔画,白色背景,隶书,大号汉字"东南西北NSWE",实心字,实心字 ,实心字,粗胖,粗胖,粗胖,没有颜色,正面图。白色背景,2*4排列
代码系列
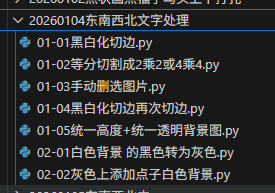
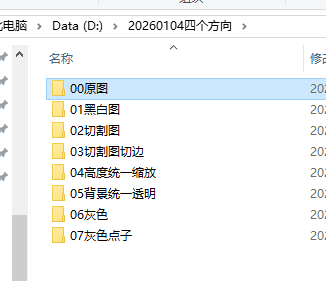
一、通义万相图片下载--00原图
'''
20251219通义万相2.6下载通义照片 copy
Python下载通义万相的图片(存在问题,不能停止,只能默认下载300张,删除多余)
星火讯飞,阿夏
谷歌页面打开通义万相,页面放大到200%
20251003
'''

import os,time
import pyautogui
import pyperclip
import re
import win32api


import win32con
import sys
import ctypes


import time

name='20260104四个方向'


# 先打开微信


num=1
zs=50


# 实际157D:\20251211实心福字\00原图\061


def minimize_active_window():
    try:

        if sys.platform == 'win32':

            # 获取当前活动窗口的句柄

            hwnd = ctypes.windll.user32.GetForegroundWindow()
            # 最小化窗口
            ctypes.windll.user32.ShowWindow(hwnd, 6)  # 6 对应 SW_MINIMIZE
            return True
        else:
            print("此功能仅支持Windows系统")
            return False
    except Exception as e:
        print(f"最小化窗口时出错: {e}")
        return False

print("程序运行中...")
time.sleep(2)  # 等待2秒,让你有时间切换到VS Code窗口

# 尝试最小化活动窗口
if minimize_active_window():
    print("窗口已最小化")
else:
    print("无法最小化窗口")


# 读取文件名称和路径

path=fr'D:\{name}\00原图'

os.makedirs(path,exist_ok=True)


for i in range(num,num+zs):
    # 下载按钮
    pyautogui.moveTo(1569, 302)

    pyautogui.click()
    time.sleep(2)

    # 点击有,无水印要包月
    pyautogui.moveTo(1573, 373)
    pyautogui.click()
    time.sleep(2)

    # 输入图片名称,复制中文内容到剪贴板

    name=path+fr'\{i:03}'
    pyperclip.copy(name)
    # 黏贴图片地址
    pyautogui.hotkey('ctrl', 'v')
    time.sleep(2)

    pyautogui.press('enter')
#     # 图片显示需要时间
    time.sleep(2)

    # 模拟按键"右箭头"

    pyautogui.moveTo (989, 650)
    time.sleep(2)
    pyautogui.moveTo (989, 641)
    pyautogui.click()
    time.sleep(2)
    #  'left'(左箭头)
    # 'up'(上箭头)
    # 'down'(下箭头)

import sys
import ctypes
import time

def minimize_active_window():
    try:
        if sys.platform == 'win32':
            # 获取当前活动窗口的句柄
            hwnd = ctypes.windll.user32.GetForegroundWindow()
            # 最小化窗口
            ctypes.windll.user32.ShowWindow(hwnd, 6)  # 6 对应 SW_MINIMIZE
            return True
        else:
            print("此功能仅支持Windows系统")
            return False
    except Exception as e:
        print(f"最小化窗口时出错: {e}")
        return False

print("程序运行中...")
time.sleep(2)  # 等待2秒,让你有时间切换到VS Code窗口

# 尝试最小化活动窗口
if minimize_active_window():
    print("窗口已最小化")
else:
    print("无法最小化窗口")
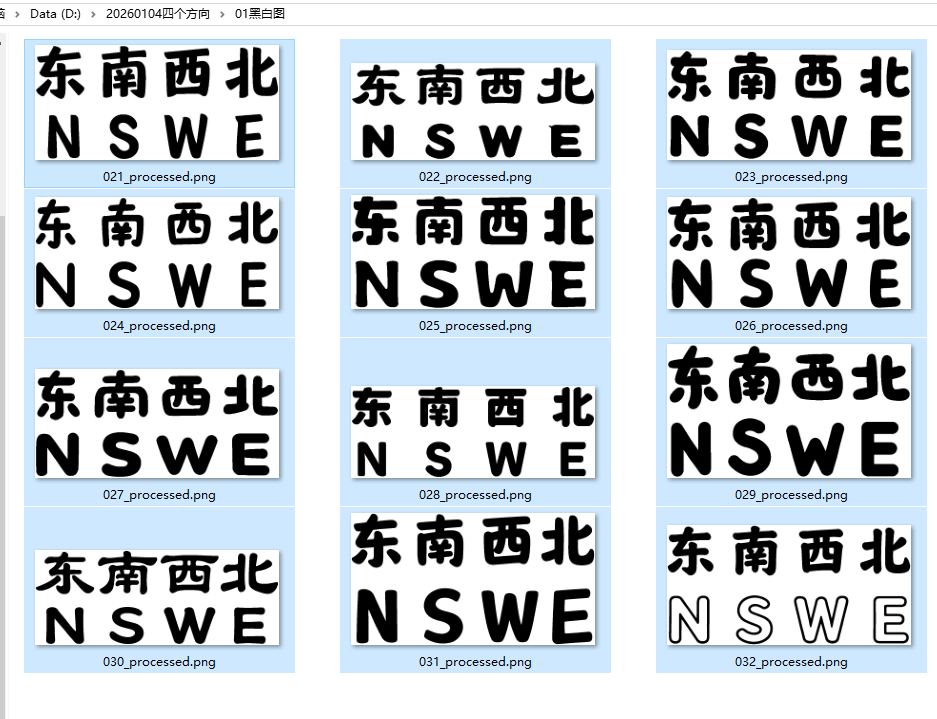
二、黑白二值化,并切掉白边--01黑白图
'''
通义万相四个祝福汉字,黑白化,并切掉白边
豆包、Deepseek,阿夏
20251221
'''

import os
from PIL import Image
import numpy as np

# -------------------------- 核心配置(只需修改这里) --------------------------
# 待处理的原图片文件夹
path = r'D:\20260104四个方向'
SOURCE_FOLDER = os.path.join(path, r'00原图')
TARGET_FOLDER = os.path.join(path, r'01黑白图')
# 二值化阈值(128为分界点)
THRESHOLD = 128
# 切白边后保留的边距(磅),1磅≈1/72英寸,约0.35毫米
MARGIN_PT = 5
# 图片分辨率(DPI),用于磅到像素的转换
DPI = 72

def calculate_margin_pixels(margin_pt, dpi):
    """将磅值转换为像素值"""
    # 1磅 = 1/72英寸,所以像素 = 磅 × DPI / 72
    margin_pixels = int(margin_pt * dpi / 72)
    return margin_pixels

def find_content_bounds(image_array):
    """
    找到图像内容(黑色部分)的边界
    返回:left, top, right, bottom
    """
    # 找到所有黑色像素(值为0)的位置
    rows, cols = np.where(image_array == 0)

    if len(rows) == 0:  # 如果没有黑色像素,返回原图尺寸
        return 0, 0, image_array.shape[1], image_array.shape[0]

    top = np.min(rows)
    bottom = np.max(rows)
    left = np.min(cols)
    right = np.max(cols)

    return left, top, right, bottom

def crop_and_add_margin(img, margin_pixels):
    """
    切掉白边并添加指定边距
    """
    # 转换为数组
    img_array = np.array(img)

    # 找到内容边界
    left, top, right, bottom = find_content_bounds(img_array)

    # 计算裁剪区域(添加原始内容的边界)
    crop_left = max(0, left)
    crop_top = max(0, top)
    crop_right = min(img_array.shape[1], right + 1)
    crop_bottom = min(img_array.shape[0], bottom + 1)

    # 裁剪图像
    cropped_img = img.crop((crop_left, crop_top, crop_right, crop_bottom))

    # 创建新图像(白色背景)
    new_width = cropped_img.width + 2 * margin_pixels
    new_height = cropped_img.height + 2 * margin_pixels
    new_img = Image.new('L', (new_width, new_height), 255)

    # 将裁剪的图像粘贴到新图像中心
    new_img.paste(cropped_img, (margin_pixels, margin_pixels))

    return new_img

def convert_to_binary_black_white():
    """
    将源文件夹中的图片转换为二值化黑白图(128为分界点),
    切掉白边并添加指定边距,保存到目标文件夹
    1-128 → 黑色(0),128-255 → 白色(255)
    """
    # 创建目标文件夹(如果不存在)
    os.makedirs(TARGET_FOLDER, exist_ok=True)

    # 获取源文件夹中的所有文件
    file_list = os.listdir(SOURCE_FOLDER)

    # 支持的图片格式
    supported_formats = ('.jpg', '.jpeg', '.png', '.bmp', '.gif', '.tiff')

    # 计算边距像素值
    margin_pixels = calculate_margin_pixels(MARGIN_PT, DPI)
    print(f"边距设置:{MARGIN_PT}磅 = {margin_pixels}像素")

    # 统计处理的文件数量
    processed_count = 0

    for filename in file_list:
        # 检查文件是否为图片
        if filename.lower().endswith(supported_formats):
            try:
                # 拼接完整的文件路径
                source_path = os.path.join(SOURCE_FOLDER, filename)
                # 保持原文件名,可修改扩展名为png以确保质量
                name, ext = os.path.splitext(filename)
                target_filename = f"{name}_processed.png"
                target_path = os.path.join(TARGET_FOLDER, target_filename)

                # 打开图片并转换为灰度模式
                with Image.open(source_path) as img:
                    # 获取原图DPI信息
                    original_dpi = img.info.get('dpi', (DPI, DPI))[0]
                    if original_dpi:
                        current_dpi = original_dpi
                    else:
                        current_dpi = DPI

                    # 第一步:转换为灰度图
                    gray_img = img.convert('L')

                    # 第二步:将灰度图转换为数组进行二值化处理
                    img_array = np.array(gray_img)
                    # 二值化:小于等于128的设为0(黑色),大于128的设为255(白色)
                    binary_array = np.where(img_array <= THRESHOLD, 0, 255)

                    # 第三步:将数组转回图片对象
                    bw_img = Image.fromarray(binary_array.astype(np.uint8))

                    # 第四步:切白边并添加边距
                    final_img = crop_and_add_margin(bw_img, margin_pixels)

                    # 保存处理后的图片(使用PNG格式保留质量)
                    final_img.save(target_path, 'PNG', dpi=(current_dpi, current_dpi))

                processed_count += 1
                print(f"成功处理:{filename} → {target_filename}")

            except Exception as e:
                print(f"处理失败 {filename}:{str(e)}")

    print(f"\n处理完成!共处理 {processed_count} 张图片")
    print(f"阈值设置:{THRESHOLD}(≤{THRESHOLD}为黑色,>{THRESHOLD}为白色)")
    print(f"边距设置:{MARGIN_PT}磅(≈{margin_pixels}像素)")
    print(f"源文件夹:{SOURCE_FOLDER}")
    print(f"目标文件夹:{TARGET_FOLDER}")

if __name__ == "__main__":
    # 执行二值化黑白处理
    convert_to_binary_black_white()
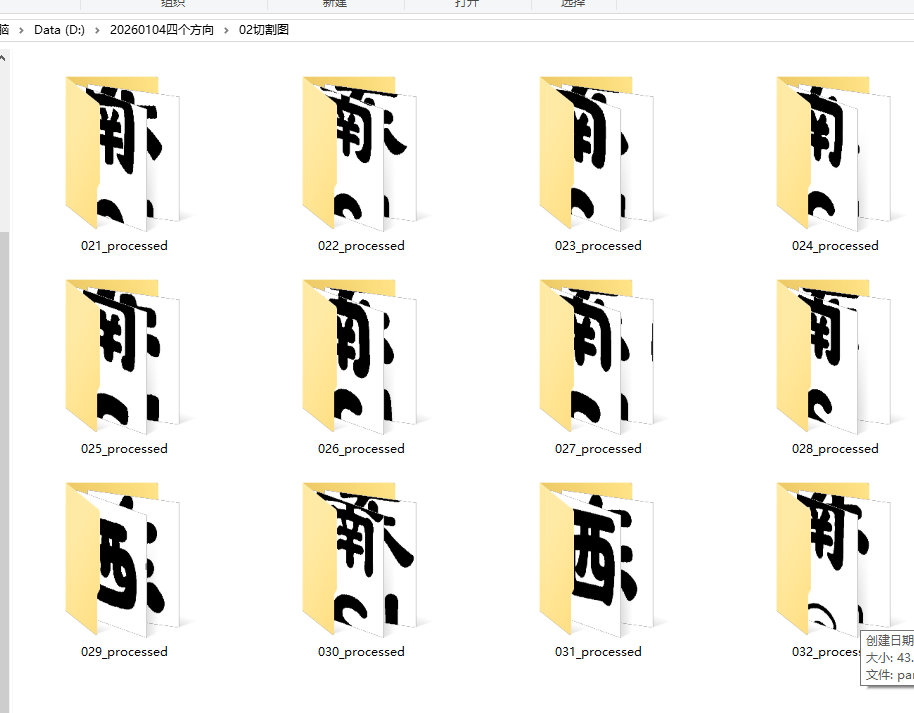
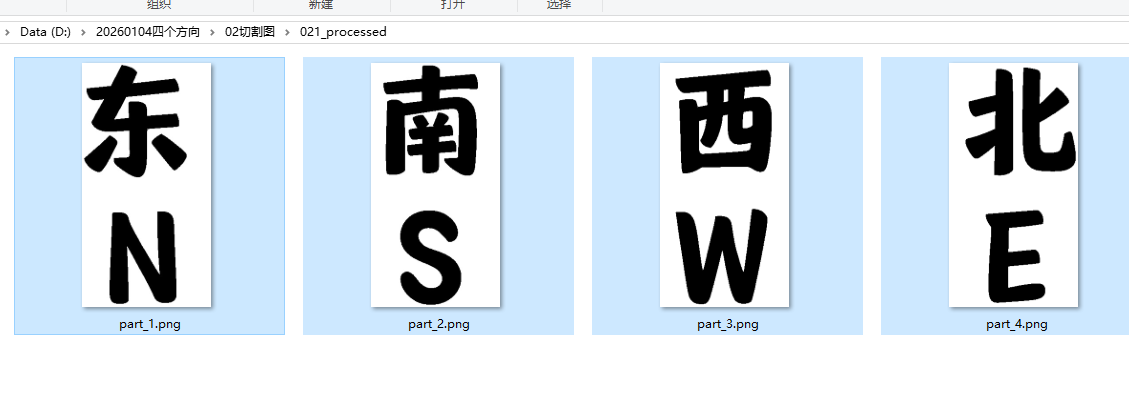
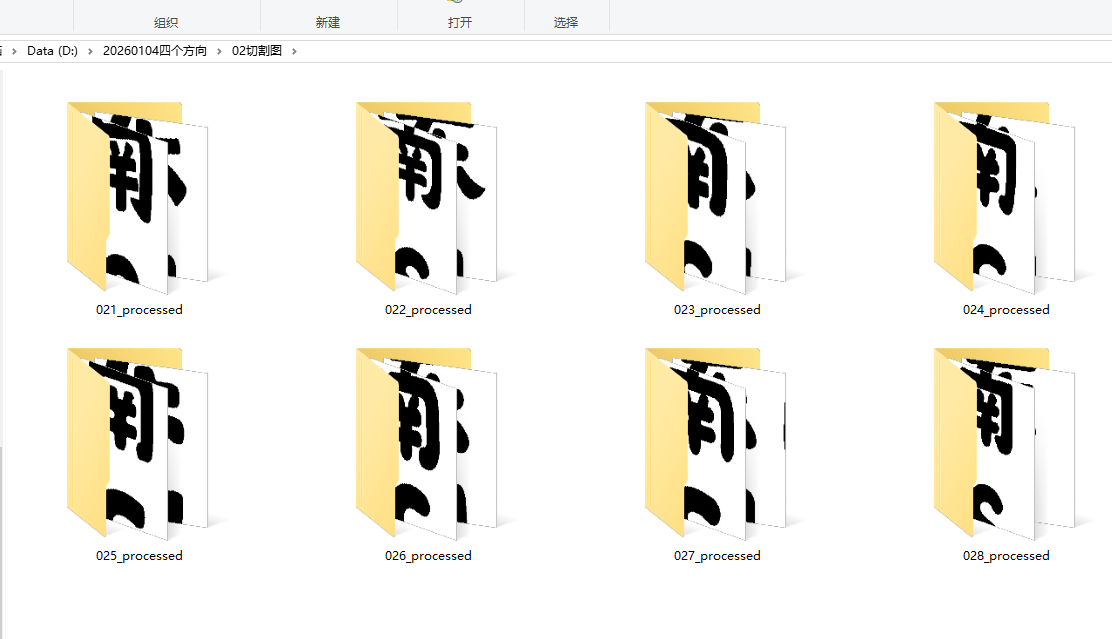
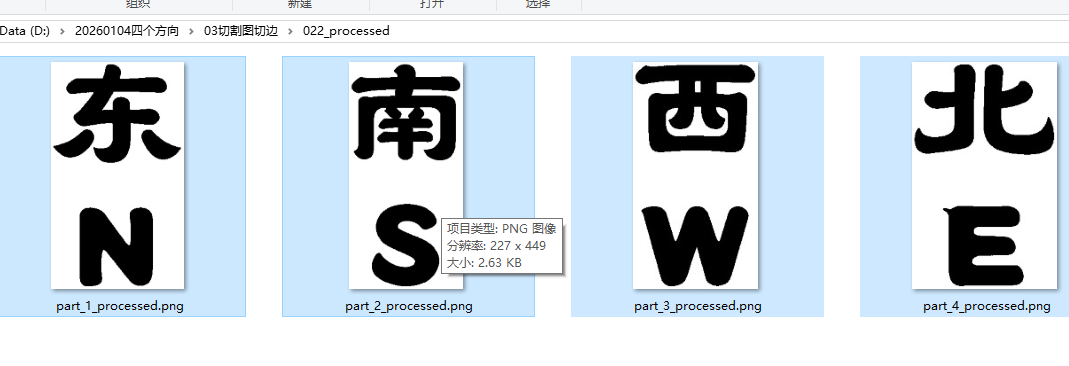
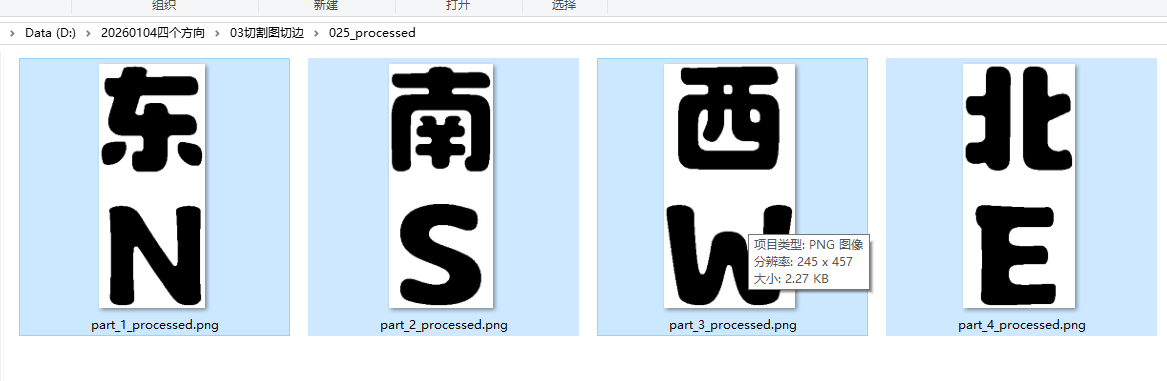
三、切割成1*4图等分--02切割图
'''
通义万相 四个祝福汉字,切割成单个汉字,如果是1*4的图片,就等分切四次,如果是2*2配列的图片,就切成2*2样式
豆包、Deepseek,阿夏
20251221
'''


import cv2
import numpy as np
import os
import glob

# 解决Windows中文路径读取/保存问题
def cv2_imread_chinese(path):
    """读取含中文路径的图片"""
    stream = np.fromfile(path, dtype=np.uint8)
    img = cv2.imdecode(stream, cv2.IMREAD_COLOR)
    return img

def cv2_imwrite_chinese(path, img):
    """保存图片到含中文路径"""
    ext = os.path.splitext(path)[1]
    result, encoded_img = cv2.imencode(ext, img)
    if result:
        encoded_img.tofile(path)

def split_image_by_equally(image_path, output_root_dir):
    """
    严格按尺寸等分切割图片:
    - 宽 ≥ 2×高 → 1×4等分(横向切4份)
    - 其他 → 2×2等分(横竖各切1半)
    """
    # 读取图片
    img = cv2_imread_chinese(image_path)
    if img is None:
        print(f"⚠️ 无法读取图片: {image_path}")
        return

    # 获取图片尺寸和基础信息
    h, w = img.shape[:2]
    img_name = os.path.basename(image_path)
    img_name_no_ext = os.path.splitext(img_name)[0]
    output_dir = os.path.join(output_root_dir, img_name_no_ext)
    os.makedirs(output_dir, exist_ok=True)

    # 按规则等分切割
    split_parts = []  # 存储切割后的图片区域
    if w >= 2 * h:
        # 规则1:宽≥2倍高 → 1×4等分(横向切4份,高度不变)
        part_width = w // 4
        for i in range(4):
            # 计算每个区域的左右边界(最后一份补全剩余像素)
            x_start = i * part_width
            x_end = (i + 1) * part_width if i < 3 else w
            part = img[:, x_start:x_end]  # 高度全选,宽度切分
            split_parts.append(part)
    else:
        # 规则2:其他 → 2×2等分(横竖各切半)
        part_height = h // 2
        part_width = w // 4
        # 左上
        split_parts.append(img[:part_height, :part_width])
        # 右上
        split_parts.append(img[:part_height, part_width:])
        # 左下
        split_parts.append(img[part_height:, :part_width])
        # 右下
        split_parts.append(img[part_height:, part_width:])

    # 保存所有切割后的图片
    for idx, part_img in enumerate(split_parts):
        save_name = f"part_{idx + 1}.png"  # 按1/2/3/4命名
        save_path = os.path.join(output_dir, save_name)
        cv2_imwrite_chinese(save_path, part_img)
        print(f"✅ 保存等分区域 {idx + 1}: {save_path}")

def batch_process_equally(input_dir, output_dir):
    """批量处理文件夹下所有图片"""
    # 支持的图片格式
    img_extensions = ["*.png", "*.jpg", "*.jpeg", "*.bmp", "*.tiff"]
    all_img_paths = []

    # 遍历所有图片(兼容中文路径)
    for ext in img_extensions:
        img_paths = glob.glob(os.path.join(input_dir, ext))
        # 过滤存在的文件
        img_paths = [p for p in img_paths if os.path.exists(p)]
        all_img_paths.extend(img_paths)

    if not all_img_paths:
        print(f"⚠️ 在 {input_dir} 中未找到任何图片")
        return

    # 创建输出根目录
    os.makedirs(output_dir, exist_ok=True)

    # 批量切割
    for img_path in all_img_paths:
        print(f"\n正在处理: {img_path}")
        split_image_by_equally(img_path, output_dir)

if __name__ == "__main__":
    # --------------------------
    # 请修改为你的实际路径(支持中文)
    # --------------------------
    path = r'D:\20260104四个方向'
    INPUT_FOLDER = path+r"\01黑白图"   # 待切割图片文件夹
    OUTPUT_FOLDER = path+r"\02切割图"  # 切割后保存文件夹

    # 执行批量切割
    batch_process_equally(INPUT_FOLDER, OUTPUT_FOLDER)
    print("\n📌 所有图片已按规则等分切割完成!")
删除没有切割好的文件夹
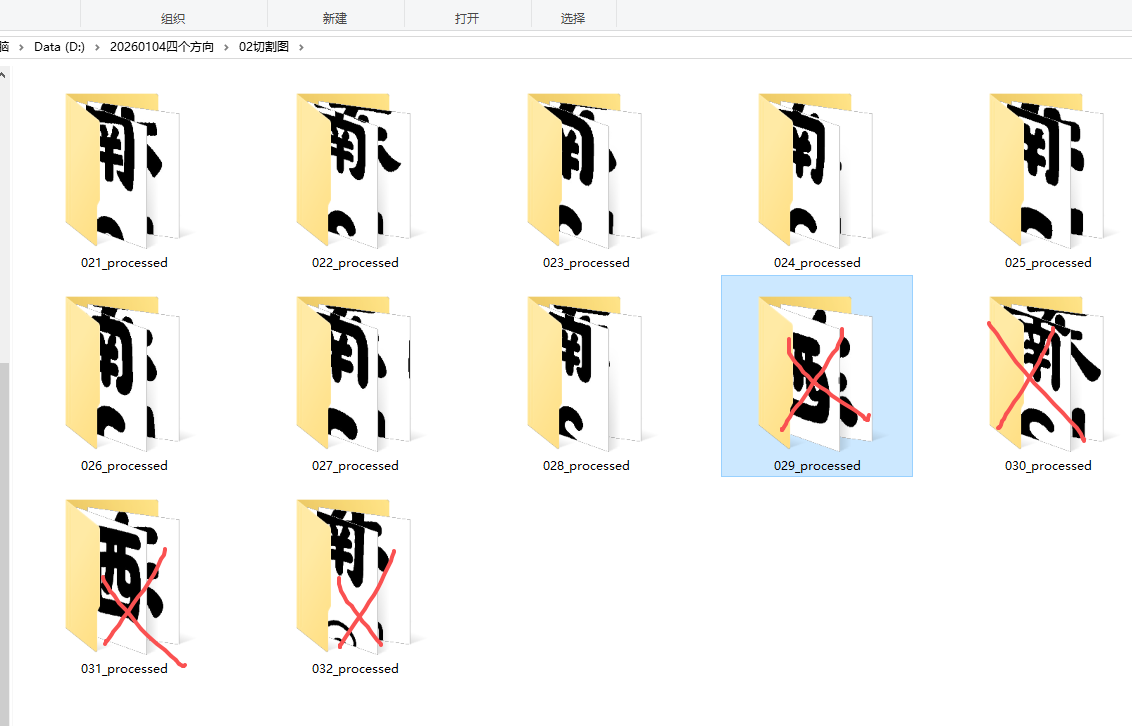
只保留8个
四、切割成1*4图等分的图片,筛选后的图片,再次切白边
'''
1*4图片切割后,手动删除汉字不全的文件夹,再次切掉白边
Deepseek,阿夏
20260101
'''

import os
from PIL import Image
import numpy as np

# -------------------------- 核心配置(只需修改这里) --------------------------
# 待处理的原图片文件夹
path = r'D:\20260104四个方向'
SOURCE_FOLDER = os.path.join(path, r'02切割图')
TARGET_FOLDER = os.path.join(path, r'03切割图切边')
# 二值化阈值(128为分界点)
THRESHOLD = 128
# 切白边后保留的边距(磅),1磅≈1/72英寸,约0.35毫米
MARGIN_PT = 5
# 图片分辨率(DPI),用于磅到像素的转换
DPI = 72

def calculate_margin_pixels(margin_pt, dpi):
    """将磅值转换为像素值"""
    # 1磅 = 1/72英寸,所以像素 = 磅 × DPI / 72
    margin_pixels = int(margin_pt * dpi / 72)
    return margin_pixels

def find_content_bounds(image_array):
    """
    找到图像内容(黑色部分)的边界
    返回:left, top, right, bottom
    """
    # 找到所有黑色像素(值为0)的位置
    rows, cols = np.where(image_array == 0)

    if len(rows) == 0:  # 如果没有黑色像素,返回原图尺寸
        return 0, 0, image_array.shape[1], image_array.shape[0]

    top = np.min(rows)
    bottom = np.max(rows)
    left = np.min(cols)
    right = np.max(cols)

    return left, top, right, bottom

def crop_and_add_margin(img, margin_pixels):
    """
    切掉白边并添加指定边距
    """
    # 转换为数组
    img_array = np.array(img)

    # 找到内容边界
    left, top, right, bottom = find_content_bounds(img_array)

    # 计算裁剪区域(添加原始内容的边界)
    crop_left = max(0, left)
    crop_top = max(0, top)
    crop_right = min(img_array.shape[1], right + 1)
    crop_bottom = min(img_array.shape[0], bottom + 1)

    # 裁剪图像
    cropped_img = img.crop((crop_left, crop_top, crop_right, crop_bottom))

    # 创建新图像(白色背景)
    new_width = cropped_img.width + 2 * margin_pixels
    new_height = cropped_img.height + 2 * margin_pixels
    new_img = Image.new('L', (new_width, new_height), 255)

    # 将裁剪的图像粘贴到新图像中心
    new_img.paste(cropped_img, (margin_pixels, margin_pixels))

    return new_img

def convert_to_binary_black_white():
    """
    遍历源文件夹及其所有子文件夹,将图片转换为二值化黑白图,
    切掉白边并添加指定边距,保存到目标文件夹对应的子文件夹中
    1-128 → 黑色(0),128-255 → 白色(255)
    """
    # 支持的图片格式
    supported_formats = ('.jpg', '.jpeg', '.png', '.bmp', '.gif', '.tiff')

    # 计算边距像素值
    margin_pixels = calculate_margin_pixels(MARGIN_PT, DPI)
    print(f"边距设置:{MARGIN_PT}磅 = {margin_pixels}像素")

    # 统计处理的文件数量
    processed_count = 0
    failed_files = []

    # 遍历源文件夹及其所有子文件夹
    for root, dirs, files in os.walk(SOURCE_FOLDER):
        # 计算当前目录相对于源文件夹的相对路径
        relative_path = os.path.relpath(root, SOURCE_FOLDER)

        # 构建目标目录路径
        target_dir = os.path.join(TARGET_FOLDER, relative_path)

        # 创建目标目录(如果不存在)
        os.makedirs(target_dir, exist_ok=True)

        for filename in files:
            # 检查文件是否为图片
            if filename.lower().endswith(supported_formats):
                try:
                    # 拼接完整的源文件路径
                    source_path = os.path.join(root, filename)

                    # 构建目标文件路径
                    name, ext = os.path.splitext(filename)
                    target_filename = f"{name}_processed.png"
                    target_path = os.path.join(target_dir, target_filename)

                    # 打开图片并转换为灰度模式
                    with Image.open(source_path) as img:
                        # 获取原图DPI信息
                        original_dpi = img.info.get('dpi', (DPI, DPI))[0]
                        if original_dpi:
                            current_dpi = original_dpi
                        else:
                            current_dpi = DPI

                        # 第一步:转换为灰度图
                        gray_img = img.convert('L')

                        # 第二步:将灰度图转换为数组进行二值化处理
                        img_array = np.array(gray_img)
                        # 二值化:小于等于128的设为0(黑色),大于128的设为255(白色)
                        binary_array = np.where(img_array <= THRESHOLD, 0, 255)

                        # 第三步:将数组转回图片对象
                        bw_img = Image.fromarray(binary_array.astype(np.uint8))

                        # 第四步:切白边并添加边距
                        final_img = crop_and_add_margin(bw_img, margin_pixels)

                        # 保存处理后的图片(使用PNG格式保留质量)
                        final_img.save(target_path, 'PNG', dpi=(current_dpi, current_dpi))

                    processed_count += 1
                    print(f"成功处理:{os.path.join(relative_path, filename)} → {os.path.join(relative_path, target_filename)}")

                except Exception as e:
                    error_msg = f"处理失败 {os.path.join(relative_path, filename)}:{str(e)}"
                    print(error_msg)
                    failed_files.append(error_msg)

    # 输出处理结果汇总
    print(f"\n{'='*50}")
    print(f"处理完成!")
    print(f"成功处理:{processed_count} 张图片")
    if failed_files:
        print(f"处理失败:{len(failed_files)} 个文件")
        for msg in failed_files:
            print(f"  - {msg}")
    print(f"\n参数设置:")
    print(f"  二值化阈值:{THRESHOLD}(≤{THRESHOLD}为黑色,>{THRESHOLD}为白色)")
    print(f"  边距设置:{MARGIN_PT}磅(≈{margin_pixels}像素)")
    print(f"  源文件夹:{SOURCE_FOLDER}")
    print(f"  目标文件夹:{TARGET_FOLDER}")
    print(f"{'='*50}")

if __name__ == "__main__":
    # 执行二值化黑白处理
    convert_to_binary_black_white()
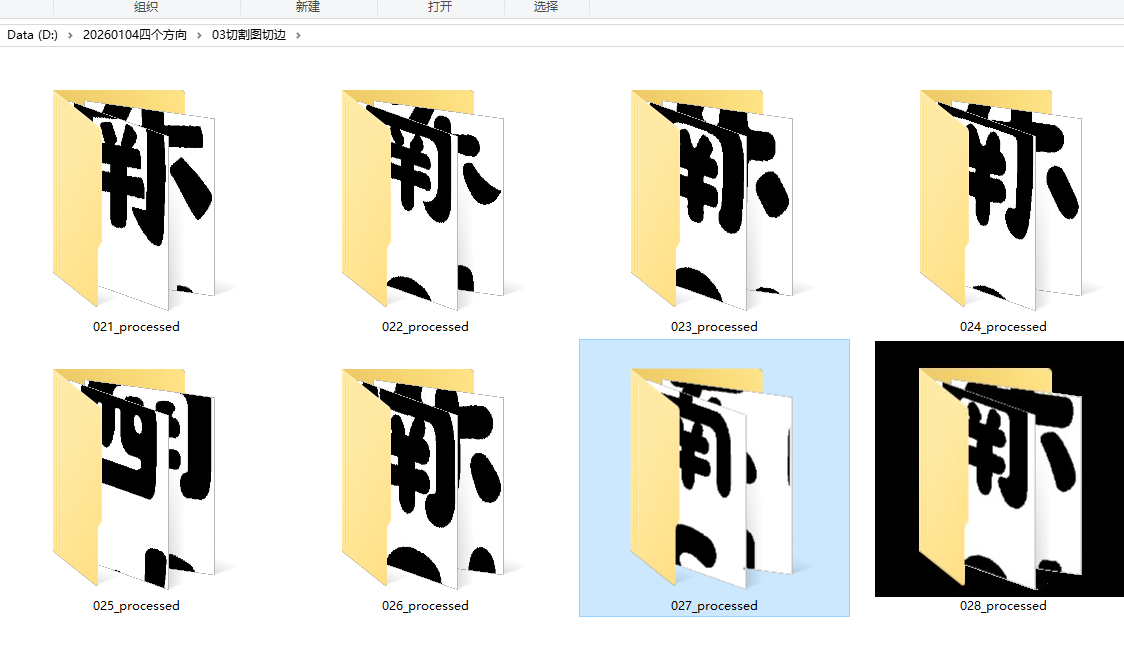
切边后,每张图片没有四周白边
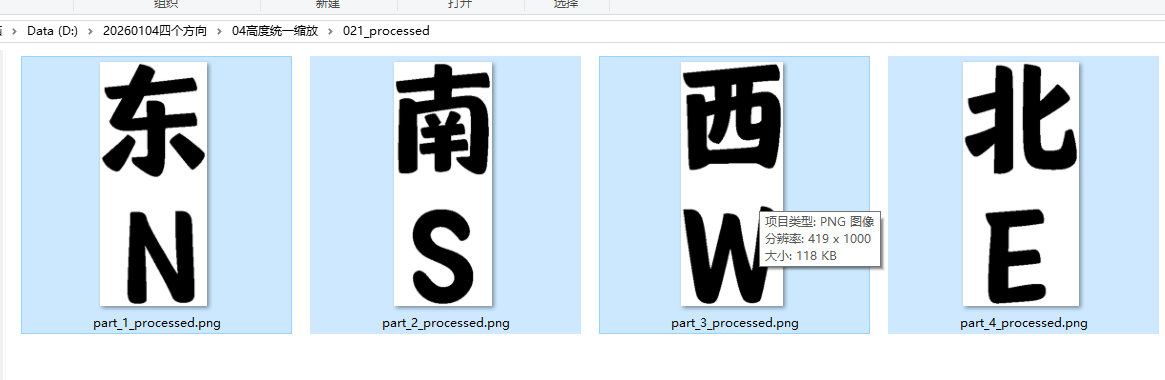
四、四个文字图片统一高度,用最大宽度图片为基准。制作等大的图片
'''
通义万相下载实心吉祥四字,黑白二级值,CV2识别图像并切割,
切割后1会特别细,所以先将数字高度统一为2000,等比例缩放宽度
然后将缩放后的10个数字,获取最宽的哪一张的宽度,把10个数字贴在一个最大宽度*2000高度的透明背景上
豆包、Deepseek,阿夏
20251221
'''
import cv2
import numpy as np
import os
import glob

# -------------------------- 核心配置(只需修改这里) --------------------------
path=r'D:\20260104四个方向'
SOURCE_FOLDER = path + r'\03切割图切边'       # 原始图片文件夹
SCALE_FOLDER = path + r'\04高度统一缩放'   # 第一步缩放后的文件夹
TARGET_FOLDER = path + r'\05背景统一透明'      # 第二步统一画布后的文件夹
SUPPORTED_FORMATS = ('.png', '.jpg', '.jpeg', '.bmp')
TARGET_HEIGHT = 1000                      # 统一缩放后的高度
WHITE_THRESHOLD = 245                     # 白色阈值(接近255的像素视为白色背景)

# -------------------------- 第一步:等比例缩放图片(固定高度2000) --------------------------
def resize_image_keep_ratio(img, target_height):
    """保持宽高比缩放图片:固定高度,宽度等比例自适应"""
    try:
        h, w = img.shape[:2]
        if h == 0:
            return img

        scale_ratio = target_height / h
        new_width = int(w * scale_ratio)
        new_height = target_height

        # 高质量缩放
        resized_img = cv2.resize(img, (new_width, new_height), interpolation=cv2.INTER_LANCZOS4)
        return resized_img
    except Exception as e:
        print(f"⚠️  缩放失败:{str(e)}")
        return img

def process_single_image(img_path, save_path):
    """处理单张图片并保存(第一步缩放)"""
    try:
        with open(img_path, 'rb') as f:
            img_data = np.frombuffer(f.read(), np.uint8)
        img = cv2.imdecode(img_data, cv2.IMREAD_COLOR)

        if img is None:
            print(f"❌ 无法读取图片:{img_path}")
            return False

        resized_img = resize_image_keep_ratio(img, TARGET_HEIGHT)
        cv2.imencode(os.path.splitext(save_path)[1], resized_img)[1].tofile(save_path)
        print(f"✅ 缩放完成:{img_path} → {save_path}")
        return True
    except Exception as e:
        print(f"❌ 处理图片失败 {img_path}:{str(e)}")
        return False

def process_all_folders_scale(source_root, target_root):
    """递归遍历并缩放所有图片(第一步)"""
    os.makedirs(target_root, exist_ok=True)

    for item in os.listdir(source_root):
        item_path = os.path.join(source_root, item)

        if os.path.isdir(item_path):
            target_subdir = os.path.join(target_root, item)
            os.makedirs(target_subdir, exist_ok=True)

            img_paths = []
            for ext in SUPPORTED_FORMATS:
                img_paths.extend(glob.glob(os.path.join(item_path, f"*{ext}")))
                img_paths.extend(glob.glob(os.path.join(item_path, f"*{ext.upper()}")))

            img_paths = list(set(img_paths))
            img_paths.sort()

            if img_paths:
                print(f"\n📂 处理缩放文件夹:{item_path}(共{len(img_paths)}张图片)")
                success_count = 0
                for img_path in img_paths:
                    img_basename = os.path.basename(img_path)
                    save_path = os.path.join(target_subdir, img_basename)
                    if process_single_image(img_path, save_path):
                        success_count += 1
                print(f"📊 缩放完成:成功{success_count}/{len(img_paths)}张")
            else:
                print(f"⚠️  文件夹 {item_path} 中未找到图片")

        elif os.path.isfile(item_path) and item_path.lower().endswith(SUPPORTED_FORMATS):
            img_basename = os.path.basename(item_path)
            save_path = os.path.join(target_root, img_basename)
            process_single_image(item_path, save_path)

# -------------------------- 第二步:抠除白色背景 + 统一透明画布 --------------------------
def get_max_width_in_folder(folder_path):
    """获取文件夹内所有图片的最大宽度(已缩放至高度2000)"""
    max_width = 0
    img_paths = []

    for ext in SUPPORTED_FORMATS:
        img_paths.extend(glob.glob(os.path.join(folder_path, f"*{ext}")))
        img_paths.extend(glob.glob(os.path.join(folder_path, f"*{ext.upper()}")))

    img_paths = list(set(img_paths))

    for img_path in img_paths:
        try:
            with open(img_path, 'rb') as f:
                img_data = np.frombuffer(f.read(), np.uint8)
            img = cv2.imdecode(img_data, cv2.IMREAD_COLOR)
            if img is not None:
                h, w = img.shape[:2]
                if w > max_width:
                    max_width = w
        except Exception as e:
            print(f"⚠️  读取图片尺寸失败 {img_path}:{str(e)}")

    # 兜底:如果没有找到图片,默认宽度为1000
    if max_width == 0:
        max_width = 1000
    return max_width

def remove_white_background(img):
    """抠除图片中的白色背景,返回带Alpha通道的透明图片"""
    # 1. 转换为灰度图
    gray = cv2.cvtColor(img, cv2.COLOR_BGR2GRAY)

    # 2. 二值化:白色背景(>WHITE_THRESHOLD)设为0,数字内容设为255
    _, mask = cv2.threshold(gray, WHITE_THRESHOLD, 255, cv2.THRESH_BINARY_INV)

    # 3. 创建Alpha通道:数字区域不透明(255),白色背景透明(0)
    alpha_channel = mask

    # 4. 将原BGR图片转换为BGRA,添加Alpha通道
    img_bgra = cv2.cvtColor(img, cv2.COLOR_BGR2BGRA)
    img_bgra[:, :, 3] = alpha_channel

    return img_bgra

def paste_to_unified_canvas(img_path, canvas_width, canvas_height, save_path):
    """抠除白色背景后,将图片居中贴到统一尺寸的透明画布上"""
    try:
        # 读取缩放后的图片(RGB格式)
        with open(img_path, 'rb') as f:
            img_data = np.frombuffer(f.read(), np.uint8)
        img = cv2.imdecode(img_data, cv2.IMREAD_COLOR)

        if img is None:
            print(f"❌ 无法读取图片:{img_path}")
            return False

        # 核心步骤:抠除白色背景,得到带Alpha通道的图片
        img_with_alpha = remove_white_background(img)

        # 1. 创建全透明画布(4通道:BGR + Alpha)
        canvas = np.zeros((canvas_height, canvas_width, 4), dtype=np.uint8)
        canvas[:, :, 3] = 0  # 所有区域默认透明

        # 2. 计算居中位置
        img_h, img_w = img.shape[:2]
        x = (canvas_width - img_w) // 2   # 水平居中
        y = (canvas_height - img_h) // 2  # 垂直居中

        # 3. 只将非透明区域贴到画布(避免覆盖透明通道)
        # 获取数字内容的掩码(Alpha>0的区域)
        mask = img_with_alpha[:, :, 3] > 0
        # 只把数字内容贴到画布对应位置
        canvas[y:y+img_h, x:x+img_w][mask] = img_with_alpha[mask]

        # 4. 强制保存为PNG格式(必须用PNG才能保留透明)
        save_path = os.path.splitext(save_path)[0] + '.png'
        # 保存时指定PNG压缩参数,确保透明生效
        cv2.imencode('.png', canvas, [cv2.IMWRITE_PNG_COMPRESSION, 9])[1].tofile(save_path)

        print(f"✅ 透明画布完成:{img_path} → {save_path}(画布:{canvas_width}×{canvas_height})")
        return True
    except Exception as e:
        print(f"❌ 贴图失败 {img_path}:{str(e)}")
        return False

def process_all_folders_unify(scale_root, target_root):
    """递归处理所有文件夹,统一透明画布并居中贴图"""
    os.makedirs(target_root, exist_ok=True)

    for item in os.listdir(scale_root):
        item_path = os.path.join(scale_root, item)

        if os.path.isdir(item_path):
            # 创建对应的目标子文件夹
            target_subdir = os.path.join(target_root, item)
            os.makedirs(target_subdir, exist_ok=True)

            # 获取该文件夹内的最大宽度
            max_width = get_max_width_in_folder(item_path)
            canvas_height = TARGET_HEIGHT
            print(f"\n📂 处理透明画布文件夹:{item_path} → 画布尺寸:{max_width}×{canvas_height}")

            # 遍历所有图片处理
            img_paths = []
            for ext in SUPPORTED_FORMATS:
                img_paths.extend(glob.glob(os.path.join(item_path, f"*{ext}")))
                img_paths.extend(glob.glob(os.path.join(item_path, f"*{ext.upper()}")))

            img_paths = list(set(img_paths))
            img_paths.sort()

            if img_paths:
                success_count = 0
                for img_path in img_paths:
                    img_basename = os.path.basename(img_path)
                    save_path = os.path.join(target_subdir, img_basename)
                    if paste_to_unified_canvas(img_path, max_width, canvas_height, save_path):
                        success_count += 1
                print(f"📊 透明画布完成:成功{success_count}/{len(img_paths)}张")
            else:
                print(f"⚠️  文件夹 {item_path} 中未找到图片")

        elif os.path.isfile(item_path) and item_path.lower().endswith(SUPPORTED_FORMATS):
            max_width = get_max_width_in_folder(scale_root)
            canvas_height = TARGET_HEIGHT
            img_basename = os.path.basename(item_path)
            save_path = os.path.join(target_root, img_basename)
            paste_to_unified_canvas(item_path, max_width, canvas_height, save_path)

# -------------------------- 主执行函数 --------------------------
def main():
    # 检查源文件夹是否存在
    if not os.path.exists(SOURCE_FOLDER):
        raise FileNotFoundError(f"❌ 源文件夹不存在:{SOURCE_FOLDER}")

    print("="*60)
    print("📌 第一步:批量缩放图片(高度固定2000,宽度等比)")
    print(f"🔗 源文件夹:{SOURCE_FOLDER}")
    print(f"🔗 缩放后文件夹:{SCALE_FOLDER}")
    print("="*60 + "\n")

    # 第一步:缩放所有图片
    process_all_folders_scale(SOURCE_FOLDER, SCALE_FOLDER)

    print("\n" + "="*60)
    print("📌 第二步:抠除白色背景 + 统一透明画布")
    print(f"🔗 缩放文件夹:{SCALE_FOLDER}")
    print(f"🔗 透明画布文件夹:{TARGET_FOLDER}")
    print("="*60 + "\n")

    # 第二步:处理透明画布
    process_all_folders_unify(SCALE_FOLDER, TARGET_FOLDER)

    print("\n" + "="*60)
    print(f"🎉 所有处理完成!最终透明图片已保存至:{TARGET_FOLDER}")
    print("💡 提示:用PS/画图3D等工具打开可查看透明效果(普通看图软件可能显示白色背景)")
    print("="*60)

# -------------------------- 执行入口 --------------------------
if __name__ == "__main__":
    main()
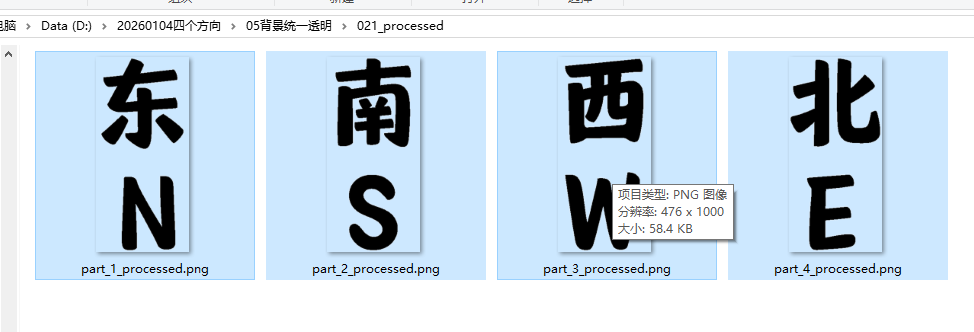
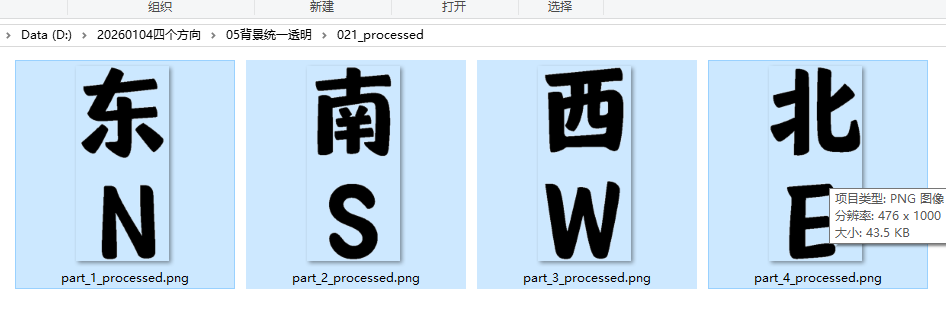
统一高度1000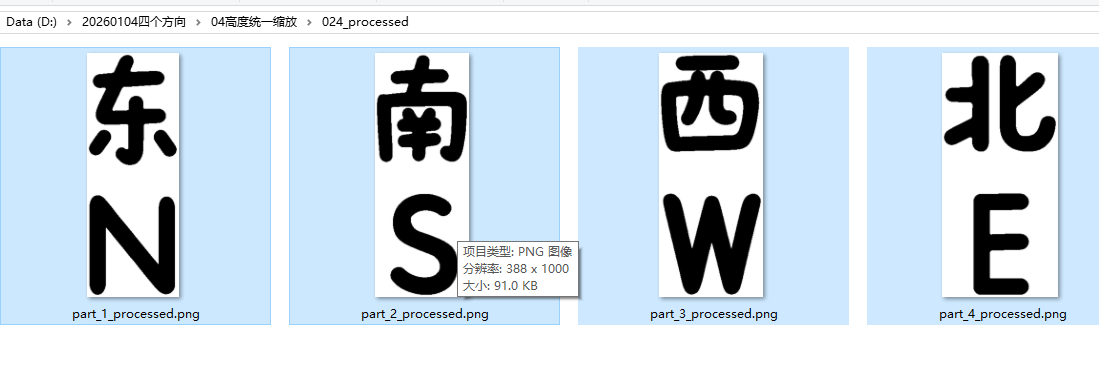
最大宽度并透明背景
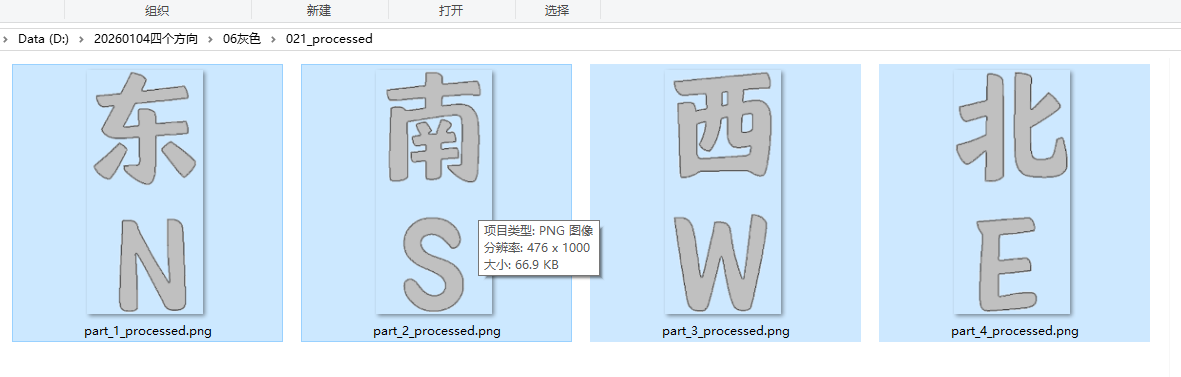
六、黑色转灰色
'''
通义万相下载实心吉祥四字,黑白二级值,CV2识别图像并切割,
切割后1会特别细,所以先将数字高度统一为2000,等比例缩放宽度
然后将缩放后的10个数字,获取最宽的哪一张的宽度,把10个数字贴在一个最大宽度*2000高度的透明背景上
透明背景数字黑色数字转成透明背景灰色填充数字
豆包、Deepseek,阿夏
20251221
'''

import os
from PIL import Image

# ===================== 配置参数(可根据实际需求修改) =====================
path=r'D:\20260104四个方向'
INPUT_FOLDER = path + r"\05背景统一透明"  # 源图片根文件夹路径
OUTPUT_FOLDER = path + r"\06灰色"     # 处理后图片保存根路径(原09灰色改为05灰色)
TARGET_COLOR = (0, 0, 0, 255)        # 要替换的目标颜色(RGBA格式,纯黑色且不透明)
REPLACE_COLOR = (192, 192, 192, 255) # 替换后的颜色(RGBA格式,灰色且不透明)
SUPPORTED_FORMATS = ('.jpg', '.jpeg', '.png', '.bmp', '.gif', '.tiff', '.webp')  # 支持的图片格式

def process_image(img_path, output_path):
    """
    处理单张图片:替换指定颜色并保存
    :param img_path: 源图片路径
    :param output_path: 处理后图片保存路径
    """
    try:
        # 打开图片并确保为RGBA模式(保留透明度)
        with Image.open(img_path) as img:
            # 确保图片是RGBA模式(有透明通道)
            if img.mode != 'RGBA':
                img = img.convert('RGBA')

            # 创建一个新的透明图片作为背景
            new_img = Image.new('RGBA', img.size, (0, 0, 0, 0))
            pixels = img.load()
            new_pixels = new_img.load()

            # 获取图片宽高
            width, height = img.size

            # 遍历所有像素
            for x in range(width):
                for y in range(height):
                    # 获取当前像素的RGBA值
                    r, g, b, a = pixels[x, y]

                    # 判断是否为目标颜色(黑色且不透明)
                    if (r, g, b) == TARGET_COLOR[:3] and a == 255:
                        # 替换为灰色但保持透明区域不变
                        new_pixels[x, y] = REPLACE_COLOR
                    else:
                        # 如果不是黑色,保持原样(包括透明区域)
                        new_pixels[x, y] = (r, g, b, a)

            # 保存处理后的图片(保持PNG格式以保留透明度)
            if not output_path.lower().endswith('.png'):
                output_path = os.path.splitext(output_path)[0] + '.png'
            new_img.save(output_path)
            print(f"✅ 处理完成:{img_path} → {output_path}")

    except Exception as e:
        print(f"❌ 处理失败:{img_path} | 错误:{str(e)}")

def main():
    # 遍历源文件夹下的所有文件(包括子文件夹)
    for root, dirs, files in os.walk(INPUT_FOLDER):
        # 计算当前路径相对于INPUT_FOLDER的相对路径(用于保持目录结构)
        relative_path = os.path.relpath(root, INPUT_FOLDER)
        # 拼接输出文件夹路径(保持子文件夹结构)
        output_root = os.path.join(OUTPUT_FOLDER, relative_path)
        # 创建输出子文件夹(不存在则创建)
        os.makedirs(output_root, exist_ok=True)

        # 筛选当前目录下的图片文件
        img_files = [f for f in files if f.lower().endswith(SUPPORTED_FORMATS)]

        if not img_files:
            continue  # 当前文件夹无图片,跳过

        # 处理当前目录下的所有图片
        for filename in img_files:
            # 源图片完整路径
            input_path = os.path.join(root, filename)
            # 输出图片完整路径(保持文件名,统一为PNG格式)
            output_filename = os.path.splitext(filename)[0] + '.png'
            output_path = os.path.join(output_root, output_filename)

            # 处理图片
            process_image(input_path, output_path)

    print(f"\n🎉 所有图片处理完成!处理后的图片已保存至:{OUTPUT_FOLDER}")
    print(f"🔧 所有输出图片已转换为PNG格式以保留透明背景,且保持原目录结构")

if __name__ == "__main__":
    main()
七、加粗描边
'''
1.通义万相下载实黑色吉祥四字,黑白二级值,CV2识别图像并切割,
2.切割后1会特别细,所以先将数字高度统一为2000,等比例缩放宽度
3.然后将缩放后的10个数字,获取最宽的哪一张的宽度,把10个数字贴在一个最大宽度*2000高度的透明背景上
4.透明背景数字黑色数字转成透明背景灰色填充数字
5.灰色填充数字添加黑色描边线条、添加深灰色点点
豆包、Deepseek,阿夏
20251221
'''

import numpy as np
from pathlib import Path
from PIL import Image, ImageDraw
import os

# 配置参数
s_iterations = 10  # 描边粗细(30磅)
d_size = 60     # 灰点直径
d_spacing = 120   # 点间距
target_gray = (192, 192, 192)  # 目标灰色(需要描边的灰色)
dot_color = (150, 150, 150, 255)  # 要添加的浅灰色点子颜色

def process_with_inner_stroke(image_path, output_path=None):
    """
    核心逻辑修改:
    1. 提取原始RGB为(192,192,192)的非透明灰色区域
    2. 对该区域计算30磅内部描边区域
    3. 绘制浅灰色(200,200,200)点子时跳过与描边区域相交的位置
    4. 裁剪超出原始灰色边缘的点子,再绘制内部30磅黑描边
    5. 背景保持原有状态
    """
    try:
        # 读取原图(保留透明通道)
        img = Image.open(str(image_path)).convert("RGBA")
        img_np = np.array(img)
        width, height = img.size
    except Exception as e:
        print(f"警告:无法读取图片 {image_path},错误:{str(e)}")
        return

    # ------------------- 步骤1:提取目标灰色区域(RGB 192,192,192 且非透明) -------------------
    # 分离RGB通道和Alpha通道
    r_channel = img_np[..., 0]
    g_channel = img_np[..., 1]
    b_channel = img_np[..., 2]
    a_channel = img_np[..., 3]

    # 识别目标灰色区域:RGB=(192,192,192) 且 Alpha>0(非透明)
    r_match = r_channel == target_gray[0]
    g_match = g_channel == target_gray[1]
    b_match = b_channel == target_gray[2]
    non_transparent = a_channel > 0
    original_gray_mask = r_match & g_match & b_match & non_transparent

    # 如果没有找到目标灰色区域,直接保存原图并返回
    if not np.any(original_gray_mask):
        print(f"提示:图片 {image_path} 中未找到RGB(192,192,192)的非透明区域,直接保存原图")
        if output_path is None:
            input_path = Path(image_path)
            output_path = input_path.parent / f"{input_path.stem}_final.png"
        img.save(str(output_path), format="PNG")
        return

    # 导入形态学操作
    from scipy.ndimage import binary_dilation, binary_erosion

    # 计算内部描边区域(30磅=30像素)
    stroke_iterations = s_iterations  # 腐蚀30次=内部描边宽度30像素
    eroded_mask = binary_erosion(original_gray_mask, iterations=stroke_iterations)
    inner_stroke_mask = original_gray_mask & (~eroded_mask)  # 描边区域

    # 原始灰色区域的膨胀边缘(用于裁剪灰点)
    original_edge_expand = binary_dilation(original_gray_mask, iterations=10)

    # ------------------- 步骤2:画浅灰色点子(跳过与描边相交的位置) -------------------
    # 创建点子图层
    dot_layer = Image.new("RGBA", (width, height), (0,0,0,0))
    draw_dot = ImageDraw.Draw(dot_layer)

    # 遍历网格绘制点子,跳过描边区域
    for y in range(d_size//2, height, d_spacing):
        for x in range(d_size//2, width, d_spacing):
            # 条件1:在原始灰色区域内
            if not (0 <= y < height and 0 <= x < width and original_gray_mask[y, x]):
                continue

            # 条件2:点子区域不与描边区域相交
            # 计算点子的边界框
            dot_left = max(0, x - d_size//2)
            dot_right = min(width-1, x + d_size//2)
            dot_top = max(0, y - d_size//2)
            dot_bottom = min(height-1, y + d_size//2)

            # 检查点子范围内是否有描边像素
            has_stroke_overlap = np.any(inner_stroke_mask[dot_top:dot_bottom+1, dot_left:dot_right+1])
            if has_stroke_overlap:
                continue  # 相交则跳过绘制

            # 绘制浅灰色点子
            draw_dot.ellipse(
                [dot_left, dot_top, dot_right, dot_bottom],
                fill=dot_color
            )

    # 裁剪超出原始灰色边缘的点子
    dot_np = np.array(dot_layer)
    dot_np[~original_edge_expand] = [0,0,0,0]  # 超出灰色区域设为透明
    dot_layer_cropped = Image.fromarray(dot_np)

    # 合并原图与裁剪后的点子
    img_with_dots = Image.alpha_composite(img, dot_layer_cropped)

    # ------------------- 步骤3:绘制内部30磅黑色描边 -------------------
    # 绘制描边(仅在灰色区域内部边缘)
    stroke_layer = Image.new("RGBA", (width, height), (0,0,0,0))
    draw_stroke = ImageDraw.Draw(stroke_layer)
    stroke_coords = np.argwhere(inner_stroke_mask)
    for y, x in stroke_coords:
        draw_stroke.point((x, y), fill=(0, 0, 0, 255))

    # 合并最终图层
    final_img = Image.alpha_composite(img_with_dots, stroke_layer)

    # ------------------- 保存 -------------------
    if output_path is None:
        input_path = Path(image_path)
        output_path = input_path.parent / f"{input_path.stem}_final.png"
    try:
        final_img.save(str(output_path), format="PNG")
        print(f"处理完成:{image_path} -> {output_path}(内部30磅描边,浅灰点避开描边)")
    except Exception as e:
        print(f"警告:无法保存图片 {output_path},错误:{str(e)}")

def batch_process(input_dir, output_dir):
    input_dir = Path(input_dir).resolve()
    output_dir = Path(output_dir).resolve()

    # 递归遍历所有子文件夹(包括当前目录)
    for root, dirs, files in os.walk(input_dir):
        # 计算当前路径相对于输入根目录的相对路径(保持目录结构)
        relative_path = os.path.relpath(root, input_dir)
        # 拼接输出文件夹路径
        current_output_dir = output_dir / relative_path
        # 创建输出子文件夹(不存在则创建)
        current_output_dir.mkdir(parents=True, exist_ok=True)

        # 筛选当前目录下的图片文件
        image_extensions = ['.png', '.jpg', '.jpeg']
        image_files = [
            Path(root) / f
            for f in files
            if Path(f).suffix.lower() in image_extensions
        ]

        if not image_files:
            continue  # 当前文件夹无图片,跳过

        # 处理当前目录下的所有图片
        for img_file in image_files:
            output_path = current_output_dir / img_file.name
            process_with_inner_stroke(img_file, output_path)

# ------------------- 核心使用示例 -------------------
if __name__ == "__main__":
    # 替换为你的实际路径
    path=r'D:\20260104四个方向'
    input_dir = Path(path + r'\06灰色').resolve()  # 输入:包含RGB(192,192,192)灰色区域的图
    output_dir = Path(path + r'\07灰色点子').resolve()    # 输出:处理后的图

    batch_process(input_dir, output_dir)
    print(f"\n🎉 所有图片批量处理完成!输出目录:{output_dir}")

把处理后的图片文件夹保存到指定文件夹
图纸设计
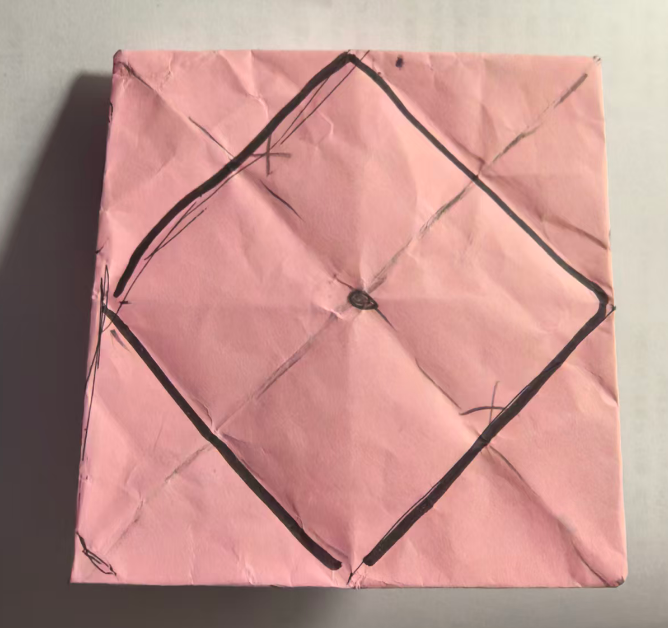
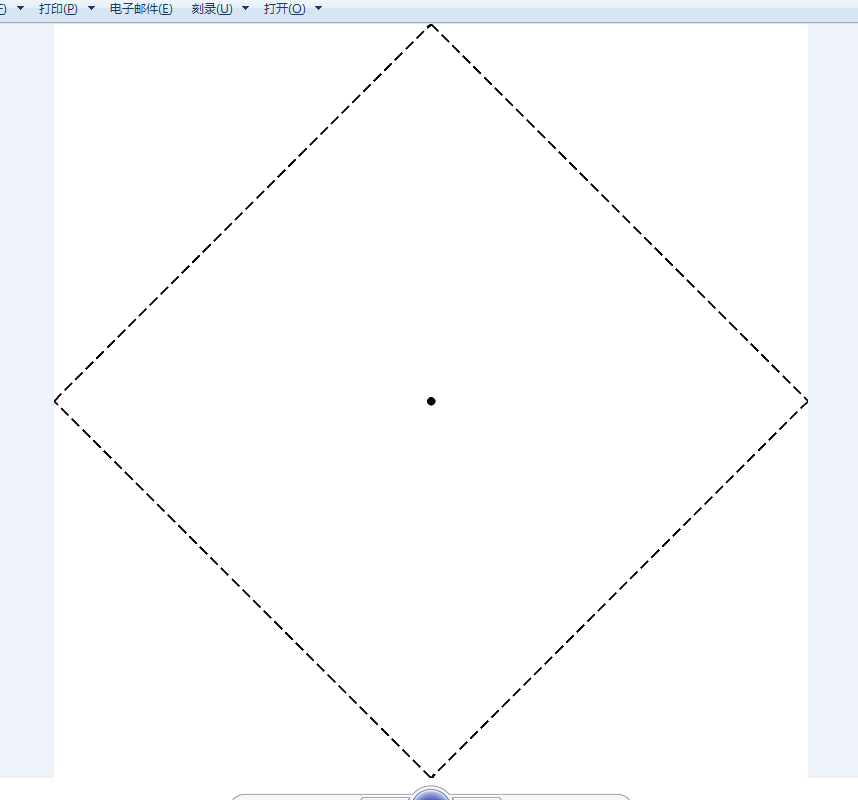
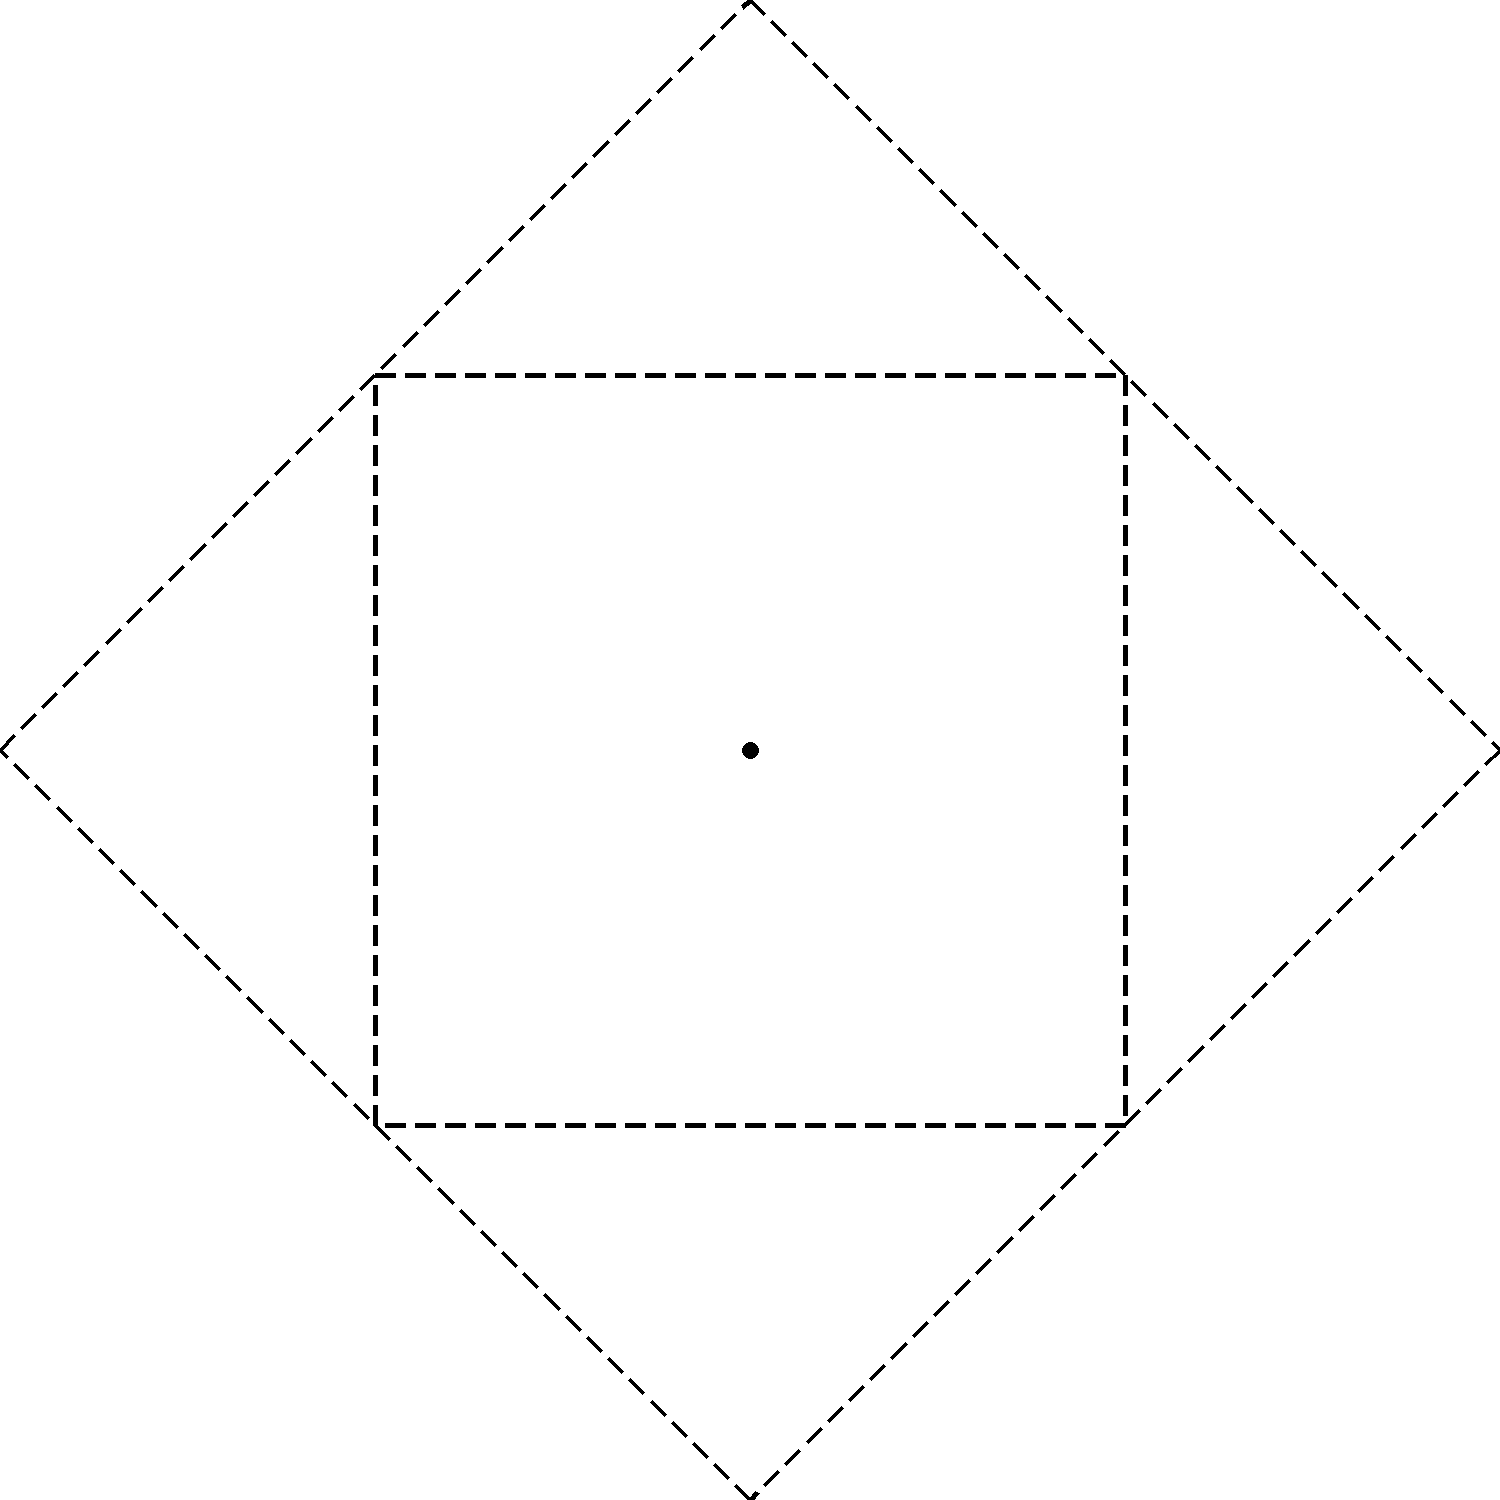
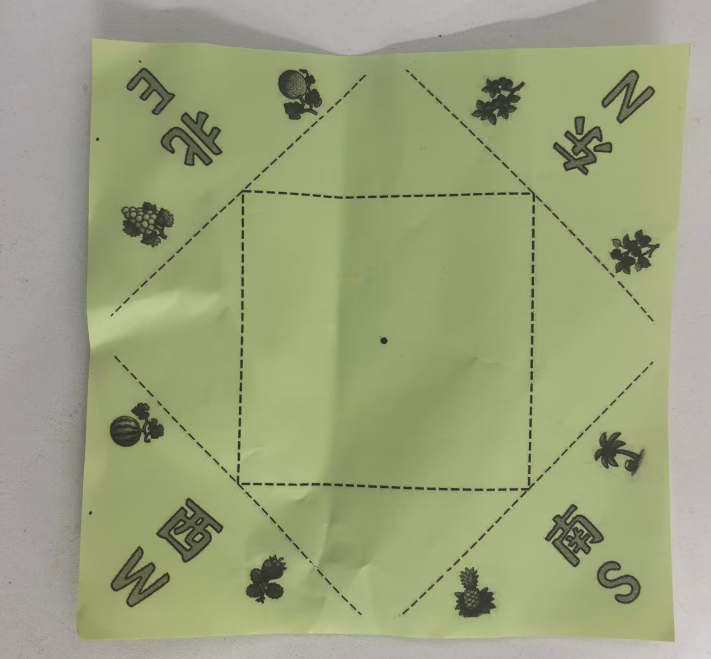
正面图纸(一个菱形,中间黑点)
'''
折纸东南西北中正面1.0 基础线
Deepseek,豆包,阿夏
20260105
'''

from PIL import Image, ImageDraw

# 创建白色背景图片
image_size = 1500
image = Image.new('RGB', (image_size, image_size), 'white')
draw = ImageDraw.Draw(image)

# 定义大菱形的四个顶点(四边中点)
diamond_points = [
    (image_size // 2, 0),        # 上中点
    (image_size, image_size // 2), # 右中点
    (image_size // 2, image_size),  # 下中点
    (0, image_size // 2)         # 左中点
]

# 样式参数
line_width = 5
dash_pattern = [20, 10]  # [实线长度, 间隔长度]
center_dot_radius = 8   # 中心圆点半径(20磅直径)

# 绘制虚线多边形(大菱形)
def draw_dashed_polygon(draw, points, width, pattern):
    """绘制虚线多边形"""
    # 闭合点列表
    closed_points = points + [points[0]]

    for i in range(len(points)):
        start = closed_points[i]
        end = closed_points[i+1]

        # 计算线段长度和单位向量
        dx = end[0] - start[0]
        dy = end[1] - start[1]
        length = ((dx**2 + dy**2) ** 0.5)

        if length == 0:
            continue

        ux = dx / length
        uy = dy / length

        # 绘制虚线
        dash_on, dash_off = pattern
        dash_length = dash_on + dash_off
        current = 0

        while current < length:
            # 计算实线段起止点
            dash_start_x = start[0] + ux * current
            dash_start_y = start[1] + uy * current
            dash_end = min(current + dash_on, length)
            dash_end_x = start[0] + ux * dash_end
            dash_end_y = start[1] + uy * dash_end

            # 绘制实线段
            draw.line([(dash_start_x, dash_start_y), (dash_end_x, dash_end_y)],
                     fill='black', width=width)

            current += dash_length

# 1. 绘制大菱形虚线边框
draw_dashed_polygon(draw, diamond_points, line_width, dash_pattern)

# 2. 绘制中心黑色圆点
center_x = image_size // 2
center_y = image_size // 2
# 计算圆点边界框
dot_bbox = [
    center_x - center_dot_radius,
    center_y - center_dot_radius,
    center_x + center_dot_radius,
    center_y + center_dot_radius
]
# 绘制实心黑圆点
draw.ellipse(dot_bbox, fill='black', outline=None)

# 打印关键信息
print("=== 图片信息 ===")
print(f"图片尺寸: {image_size} x {image_size} 像素")
print(f"大菱形线宽: {line_width} 像素")
print(f"虚线样式: 实线{dash_pattern[0]}px + 间隔{dash_pattern[1]}px")
print(f"中心圆点: 直径 {center_dot_radius * 2} 像素 (半径 {center_dot_radius}px)")
print(f"大菱形顶点:")
print(f"  上: {diamond_points[0]}")
print(f"  右: {diamond_points[1]}")
print(f"  下: {diamond_points[2]}")
print(f"  左: {diamond_points[3]}")

# 保存图片
output_path = r'C:\Users\jg2yXRZ\OneDrive\桌面\20260104折纸东南西北中\正面1.0.png'
image.save(output_path)
print(f"\n图片已保存至: {output_path}")

# 显示图片
# image.show()
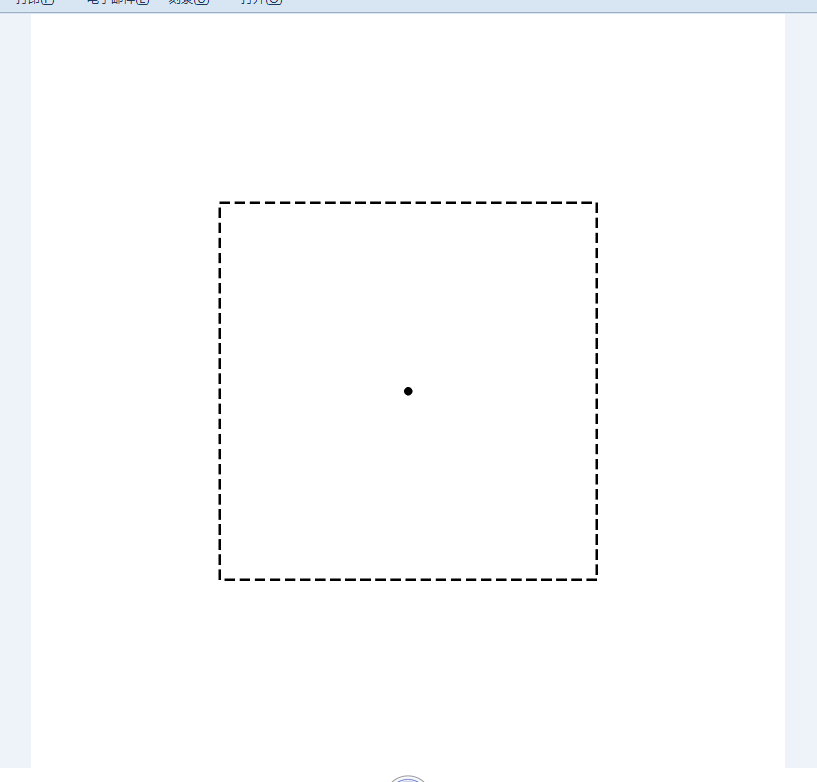
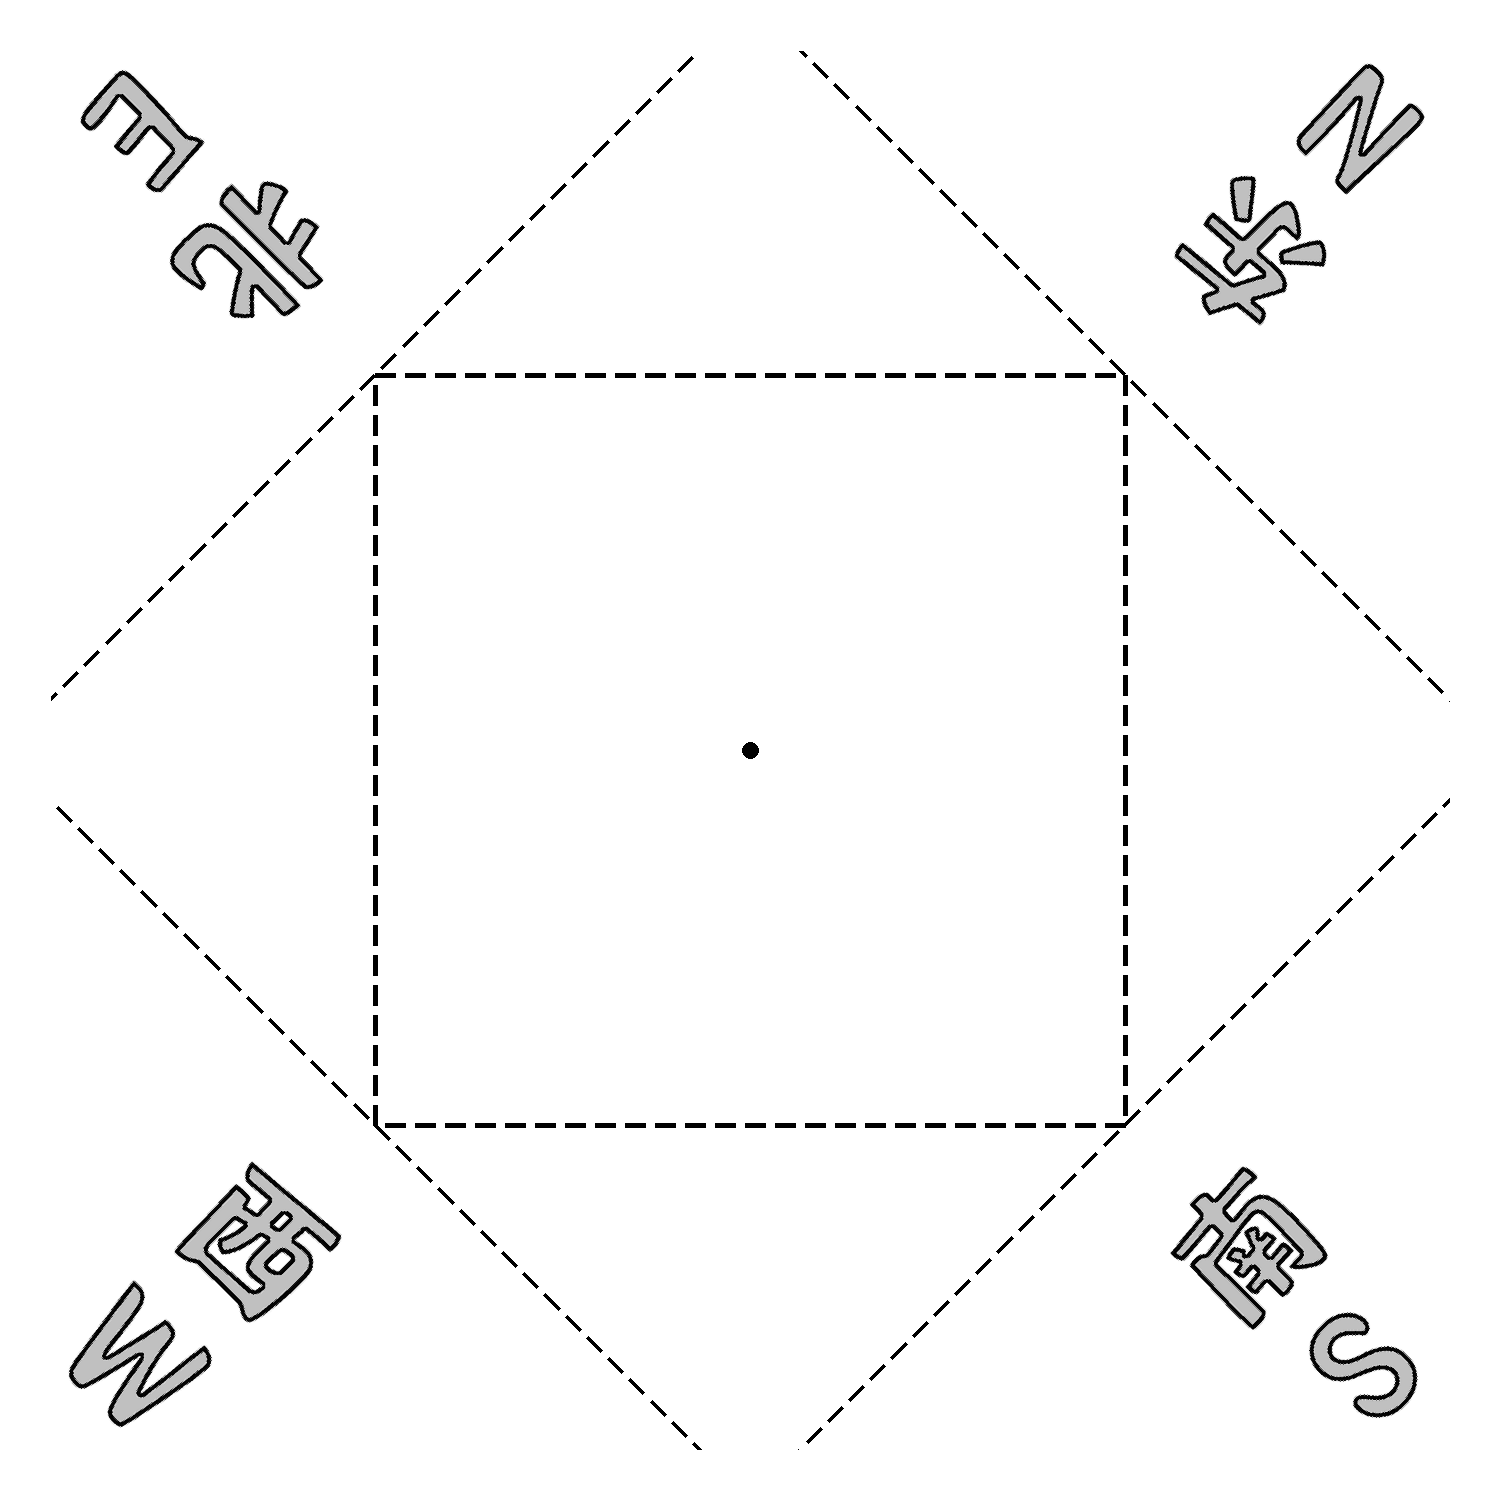
反面图纸01,只有线,中正方形
'''
折纸东南西北中反面1.0 基础线
Deepseek,豆包,阿夏
20260105
'''

from PIL import Image, ImageDraw
import math

# 创建白色背景图片
image_size = 1500
image = Image.new('RGB', (image_size, image_size), 'white')
draw = ImageDraw.Draw(image)

# 定义大菱形的四个顶点(四边中点)
diamond_points = [
    (image_size // 2, 0),        # 上顶点(图片上边中点)
    (image_size, image_size // 2), # 右顶点(图片右边中点)
    (image_size // 2, image_size),  # 下顶点(图片下边中点)
    (0, image_size // 2)         # 左顶点(图片左边中点)
]

# 样式参数
line_width = 5
dash_pattern = [20, 10]  # [实线长度, 间隔长度]
center_dot_radius = 8   # 中心圆点半径
# 新增颜色配置
big_diamond_color = 'black'    # 大菱形虚线颜色(白色)
small_square_color = 'black'   # 小正方形虚线颜色(黑色)

# 优化绘制虚线多边形函数:增加颜色参数
def draw_dashed_polygon(draw, points, width, pattern, color):
    """绘制指定颜色的虚线多边形"""
    # 闭合点列表
    closed_points = points + [points[0]]

    for i in range(len(points)):
        start = closed_points[i]
        end = closed_points[i+1]

        # 计算线段长度和单位向量
        dx = end[0] - start[0]
        dy = end[1] - start[1]
        length = ((dx**2 + dy**2) ** 0.5)

        if length == 0:
            continue

        ux = dx / length
        uy = dy / length

        # 绘制虚线
        dash_on, dash_off = pattern
        dash_length = dash_on + dash_off
        current = 0

        while current < length:
            # 计算实线段起止点
            dash_start_x = start[0] + ux * current
            dash_start_y = start[1] + uy * current
            dash_end = min(current + dash_on, length)
            dash_end_x = start[0] + ux * dash_end
            dash_end_y = start[1] + uy * dash_end

            # 绘制实线段(使用指定颜色)
            draw.line([(dash_start_x, dash_start_y), (dash_end_x, dash_end_y)],
                     fill=color, width=width)

            current += dash_length

# 1. 绘制大菱形虚线边框(白色)
draw_dashed_polygon(draw, diamond_points, line_width, dash_pattern, big_diamond_color)

# 2. 计算大菱形每条边的中点(用于组成小正方形)
# 计算两点之间中点的函数
def get_midpoint(p1, p2):
    return ((p1[0] + p2[0])/2, (p1[1] + p2[1])/2)

# 大菱形四条边的中点
mid_top_right = get_midpoint(diamond_points[0], diamond_points[1])  # 上-右边中点
mid_right_bottom = get_midpoint(diamond_points[1], diamond_points[2])  # 右-下边中点
mid_bottom_left = get_midpoint(diamond_points[2], diamond_points[3])  # 下-左边中点
mid_left_top = get_midpoint(diamond_points[3], diamond_points[0])  # 左-上边中点

# 小正方形的四个顶点(按顺时针顺序)
small_square_points = [
    mid_top_right,
    mid_right_bottom,
    mid_bottom_left,
    mid_left_top
]

# 3. 绘制小正方形虚线边框(黑色)
draw_dashed_polygon(draw, small_square_points, line_width, dash_pattern, small_square_color)

# 4. 绘制中心黑色圆点
center_x = image_size // 2
center_y = image_size // 2
# 计算圆点边界框
dot_bbox = [
    center_x - center_dot_radius,
    center_y - center_dot_radius,
    center_x + center_dot_radius,
    center_y + center_dot_radius
]
# 绘制实心黑圆点
draw.ellipse(dot_bbox, fill='black', outline=None)

# 打印关键信息
print("=== 图片信息 ===")
print(f"图片尺寸: {image_size} x {image_size} 像素")
print(f"线条宽度: {line_width} 像素")
print(f"虚线样式: 实线{dash_pattern[0]}px + 间隔{dash_pattern[1]}px")
print(f"中心圆点: 直径 {center_dot_radius * 2} 像素 (半径 {center_dot_radius}px)")
print(f"大菱形颜色: {big_diamond_color}")
print(f"小正方形颜色: {small_square_color}")
print("\n大菱形顶点:")
print(f"  上: {diamond_points[0]}")
print(f"  右: {diamond_points[1]}")
print(f"  下: {diamond_points[2]}")
print(f"  左: {diamond_points[3]}")
print("\n小正方形顶点(大菱形边中点):")
print(f"  上右中点: {mid_top_right}")
print(f"  右下中点: {mid_right_bottom}")
print(f"  下左中点: {mid_bottom_left}")
print(f"  左上中点: {mid_left_top}")

# 保存图片
output_path = r'C:\Users\jg2yXRZ\OneDrive\桌面\20260104折纸东南西北中\反面2.0.png'
image.save(output_path)
print(f"\n图片已保存至: {output_path}")

# 显示图片(如需查看可取消注释)
# image.show()
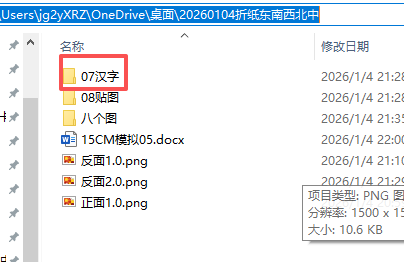
贴四个汉字(有多套汉字)
'''
折纸东南西北中反面2.0 有汉字
Deepseek,豆包,阿夏
20260105
'''
from PIL import Image, ImageDraw
import os
from pathlib import Path
import glob
import math  # 用于角度转坐标计算


def process_images(bg_path, output_folder, root_extra_folder,
                   center_point=(750, 750), small_img_radius=750):
    """
    处理图片:遍历07汉字下的所有子文件夹,每个子文件夹的4张图片贴到背景图四个角(中心放射)
    - 每个子文件夹生成一张独立的输出图片(001.png、002.png...)
    - 小图片中心点对齐:以背景中心为原点,按指定角度放射排列
    - 透明背景方式插入,保留图片透明效果
    - 最后在图片四边绘制白色长矩形(顶层)
    """

    # 创建输出文件夹
    Path(output_folder).mkdir(parents=True, exist_ok=True)

    # 检查背景图片是否存在
    if not os.path.exists(bg_path):
        print(f"错误: 背景图片 {bg_path} 不存在!")
        return

    # 获取背景图尺寸(用于绘制四边矩形)
    bg_img = Image.open(bg_path)
    image_size = bg_img.width  # 假设背景图是正方形
    bg_img.close()

    # 定义四边白色矩形参数
    rect_width = 50  # 矩形宽度(可调整)
    rect_color = (255, 255, 255)  # 白色

    # 获取07汉字下的所有子文件夹
    subfolders = [f for f in Path(root_extra_folder).iterdir() if f.is_dir()]
    if not subfolders:
        print(f"警告: 在 {root_extra_folder} 中未找到任何子文件夹")
        return
    subfolders.sort()  # 按名称排序
    print(f"找到 {len(subfolders)} 个子文件夹,开始处理...")

    # 定义四个角的放射角度(中心放射,可调整)
    # 四个角对应:左上、右上、右下、左下(中心放射)
    small_img_angles = [315, 45, 135, 225]  # 4个角度对应4张图片
    # 统一旋转角度(可调整:90=逆时针90度,-90=顺时针90度,0=不旋转)
    extra_rotate_angle = 90

    # 遍历每个子文件夹
    for folder_idx, subfolder in enumerate(subfolders, 1):
        try:
            # 获取当前子文件夹下的图片
            extra_image_files = glob.glob(os.path.join(subfolder, '*'))
            supported_formats = ('.png', '.jpg', '.jpeg', '.webp', '.bmp', '.gif')
            extra_image_files = [f for f in extra_image_files if f.lower().endswith(supported_formats)]

            if len(extra_image_files) < 4:
                print(f"⚠️  子文件夹 {subfolder.name} 仅找到 {len(extra_image_files)} 张图片(需4张),跳过")
                continue

            extra_image_files.sort()  # 按名称排序
            print(f"\n📂 处理子文件夹 [{folder_idx:03d}]:{subfolder.name}(找到{len(extra_image_files)}张图片)")

            # 打开背景图(每个子文件夹重新加载,避免叠加)
            bg_image = Image.open(bg_path).convert("RGBA")
            result = bg_image.copy()

            # 处理当前子文件夹的4张图片(贴到四个角,中心放射)
            for img_idx in range(min(4, len(extra_image_files))):
                try:
                    img_path = extra_image_files[img_idx]
                    # 1. 打开并处理小图片(保留透明通道)
                    extra_img = Image.open(img_path).convert("RGBA")

                    # 缩放图片(可调整尺寸,保持比例)
                    target_size = (600, 300)  # 目标尺寸
                    extra_img.thumbnail(target_size, Image.Resampling.LANCZOS)
                    # 创建透明画布,居中放置缩放后的图片
                    img_padded = Image.new('RGBA', target_size, (0, 0, 0, 0))
                    paste_x = (target_size[0] - extra_img.width) // 2
                    paste_y = (target_size[1] - extra_img.height) // 2
                    img_padded.paste(extra_img, (paste_x, paste_y), extra_img)

                    # 2. 旋转图片(保留透明背景)
                    angle = small_img_angles[img_idx]
                    # PIL旋转:逆时针为正,转换角度方向
                    pil_rotate_angle = -angle + extra_rotate_angle
                    extra_img_rotated = img_padded.rotate(
                        pil_rotate_angle,
                        expand=True,
                        fillcolor=(0, 0, 0, 0)
                    )

                    # 3. 计算中心放射的粘贴位置(中心点对齐角度线)
                    radian = math.radians(angle)
                    small_center_x = center_point[0] + small_img_radius * math.cos(radian)
                    small_center_y = center_point[1] + small_img_radius * math.sin(radian)
                    paste_x_small = int(small_center_x - extra_img_rotated.width // 2)
                    paste_y_small = int(small_center_y - extra_img_rotated.height // 2)

                    # 4. 粘贴图片(透明背景)
                    result.paste(extra_img_rotated, (paste_x_small, paste_y_small), extra_img_rotated)
                    print(f"  ✔️ 粘贴第{img_idx+1}张 {os.path.basename(img_path)} 到角度{angle}°位置({paste_x_small}, {paste_y_small})")

                    extra_img.close()
                except Exception as e:
                    print(f"  ❌ 处理第{img_idx+1}张图片出错: {e}")

            # ===== 绘制四边白色长矩形(顶层)=====
            draw = ImageDraw.Draw(result)
            # 左侧矩形(x从0到rect_width,y全高)
            draw.rectangle([0, 0, rect_width, image_size], fill=rect_color, outline=None)
            # 顶部矩形(y从0到rect_width,x全宽)
            draw.rectangle([0, 0, image_size, rect_width], fill=rect_color, outline=None)
            # 右侧矩形(x从image_size-rect_width到image_size,y全高)
            draw.rectangle([image_size - rect_width, 0, image_size, image_size], fill=rect_color, outline=None)
            # 底部矩形(y从image_size-rect_width到image_size,x全宽)
            draw.rectangle([0, image_size - rect_width, image_size, image_size], fill=rect_color, outline=None)
            print(f"  🖌️ 已绘制四边白色矩形(宽度:{rect_width}px)")

            # 保存当前子文件夹的结果(三位数编号)
            output_name = f"{folder_idx:03d}.png"
            output_path = os.path.join(output_folder, output_name)
            # 转换为RGB保存(兼容普通图片查看)
            result_rgb = result.convert('RGB')
            result_rgb.save(output_path, "PNG", quality=95)
            print(f"  📸 保存为:{output_name}")

            # 关闭资源
            bg_image.close()
            result.close()

        except Exception as e:
            print(f"❌ 处理子文件夹 {subfolder.name} 出错: {e}")

    print(f"\n🎉 所有处理完成!共生成 {len([f for f in os.listdir(output_folder) if f.endswith('.png')])} 张图片")
    print(f"📁 输出目录:{output_folder}")


def main():
    # 配置路径和参数
    path = r"C:\Users\jg2yXRZ\OneDrive\桌面\20260104折纸东南西北中"
    bg_path = os.path.join(path, "反面2.0.png")
    output_folder = os.path.join(path, "08贴图")
    root_extra_folder = os.path.join(path, "07汉字")  # 包含多个子文件夹的根目录

    # 执行处理
    process_images(
        bg_path=bg_path,
        output_folder=output_folder,
        root_extra_folder=root_extra_folder,
        center_point=(750, 750),  # 背景图中心坐标
        small_img_radius=780      # 放射半径(越大离中心越远)
    )


if __name__ == "__main__":
    try:
        from PIL import Image, ImageDraw
        import glob
        import math
    except ImportError as e:
        missing_module = str(e).split()[-1]
        print(f"正在安装{missing_module}库...")
        import subprocess
        if missing_module in ['PIL', 'ImageDraw']:
            subprocess.check_call(["pip", "install", "pillow"])
        from PIL import Image, ImageDraw
        import glob
        import math

    main()
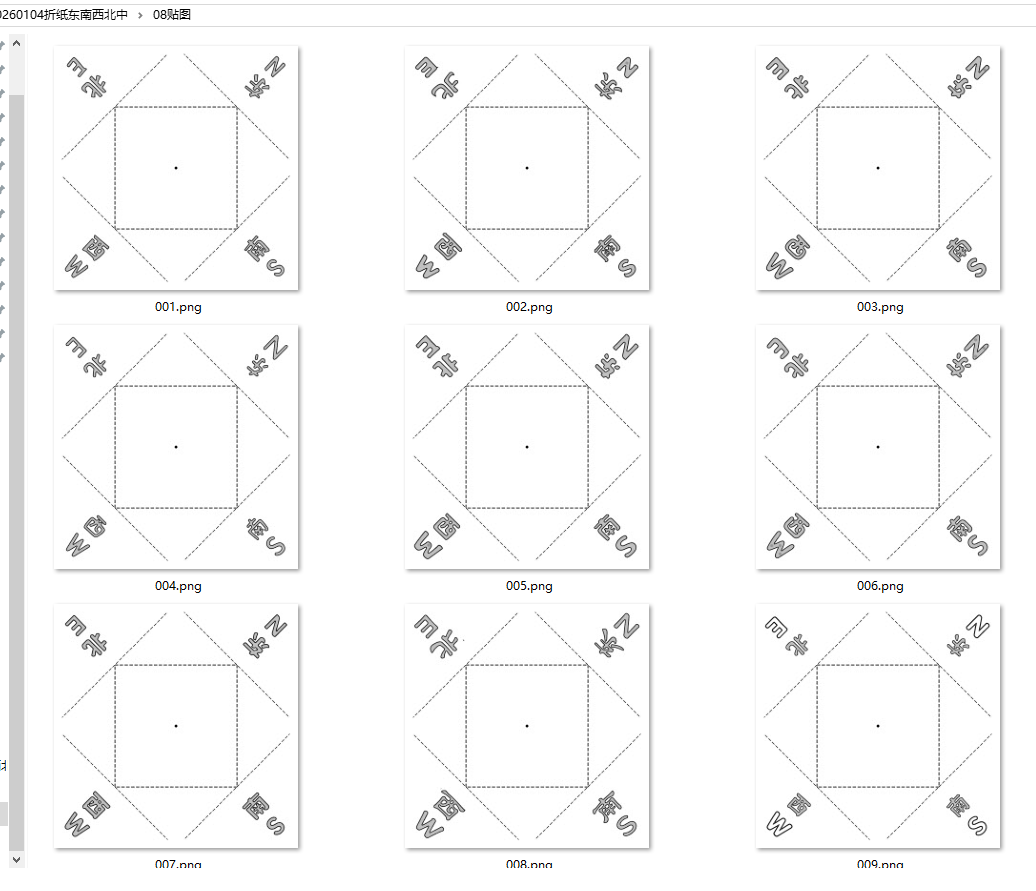
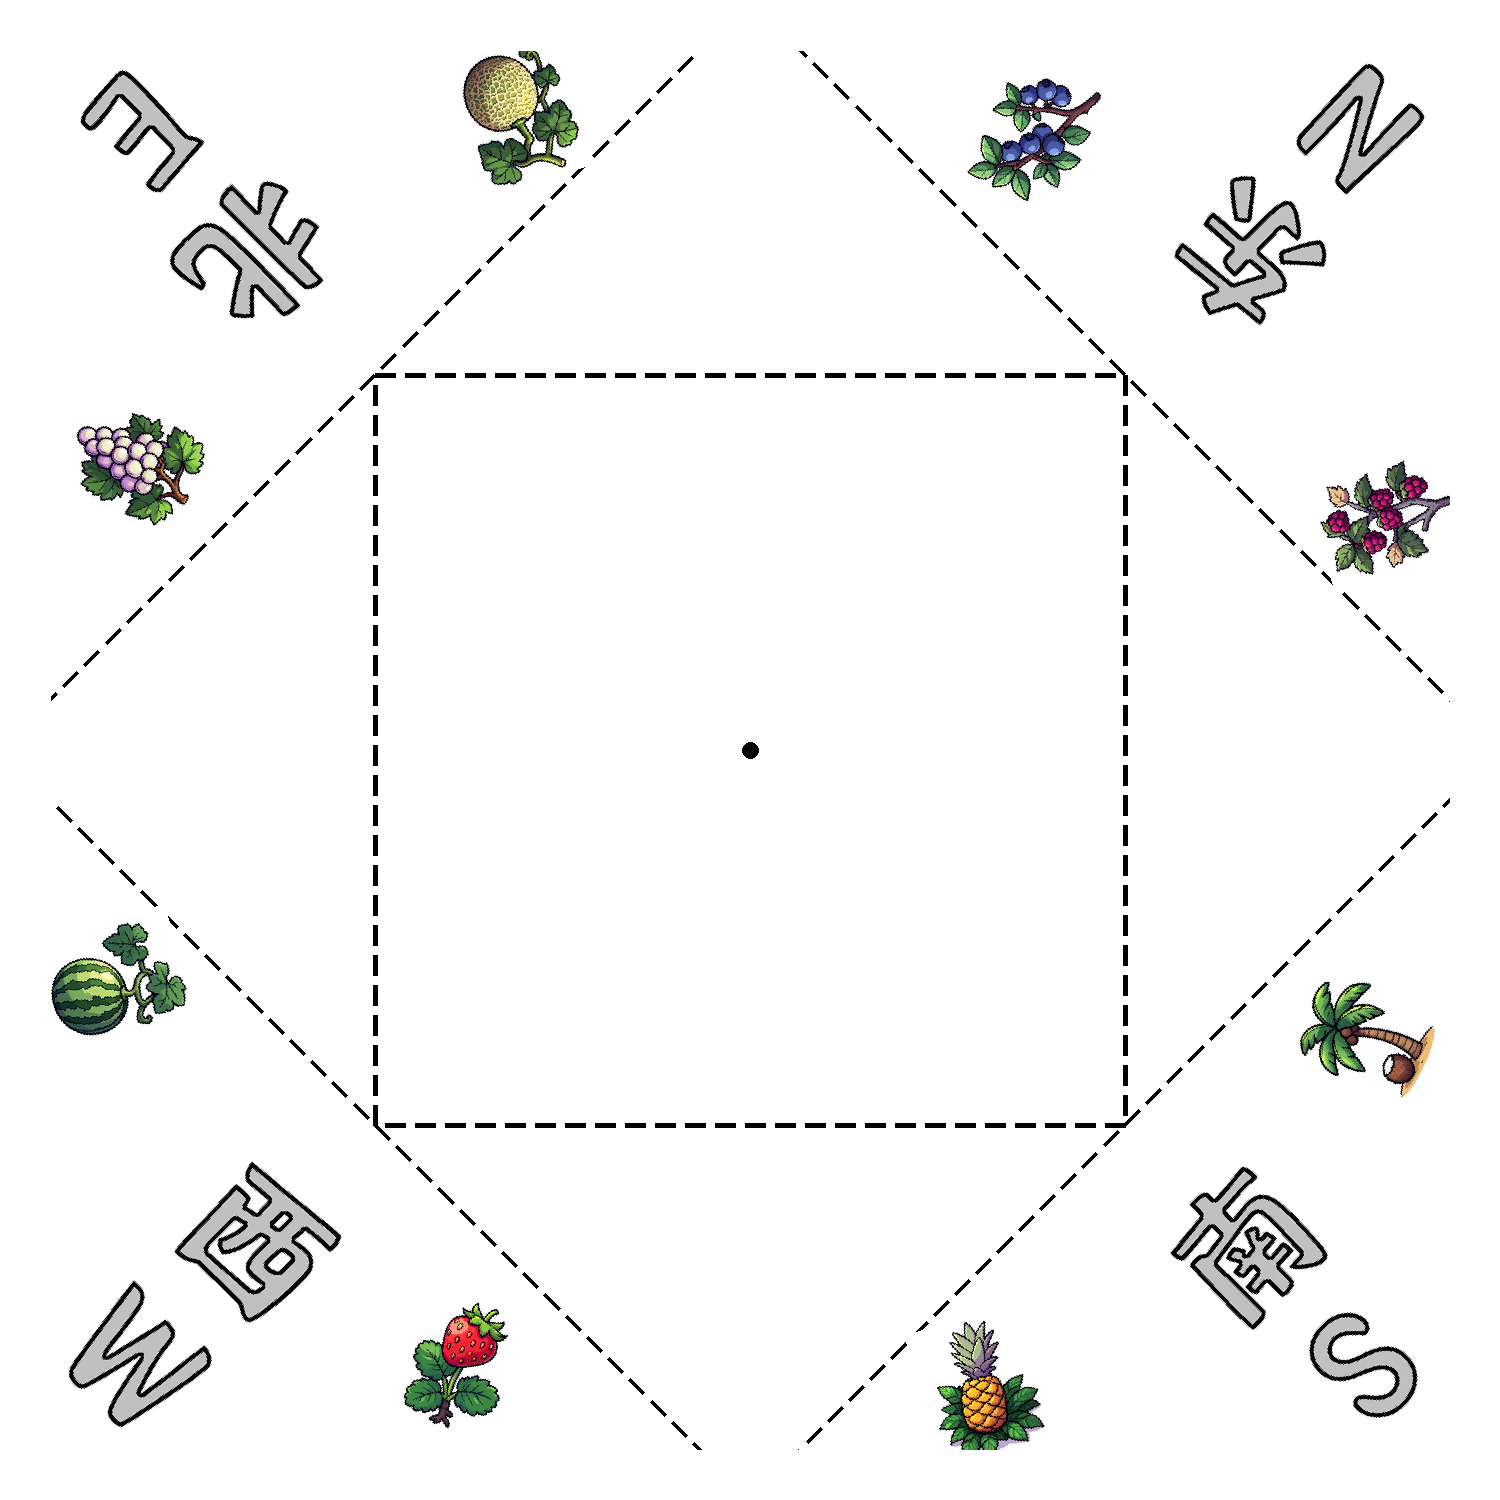
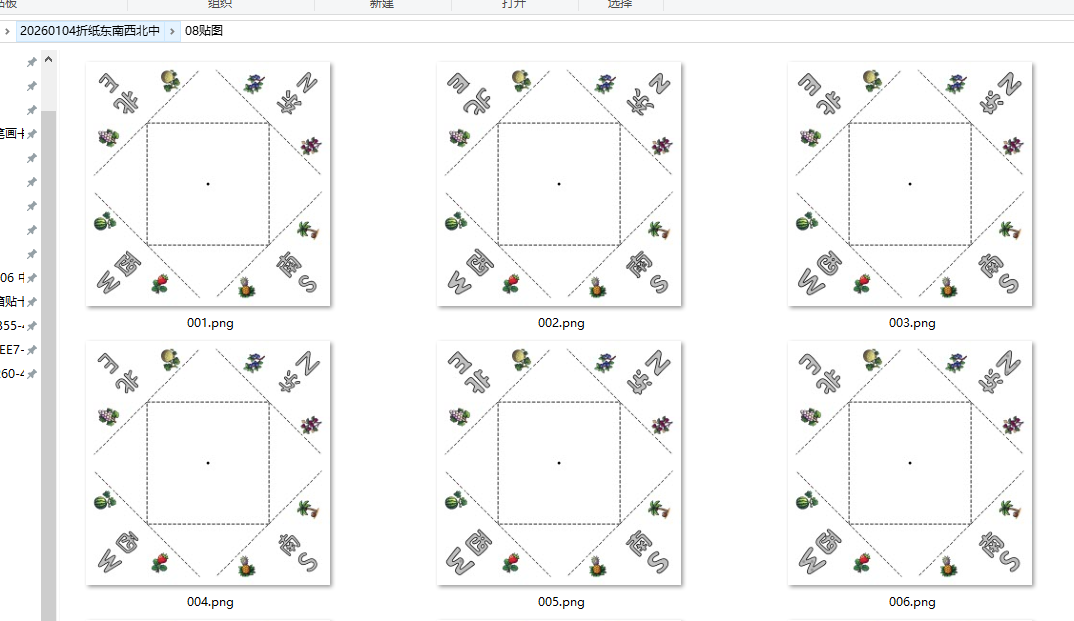
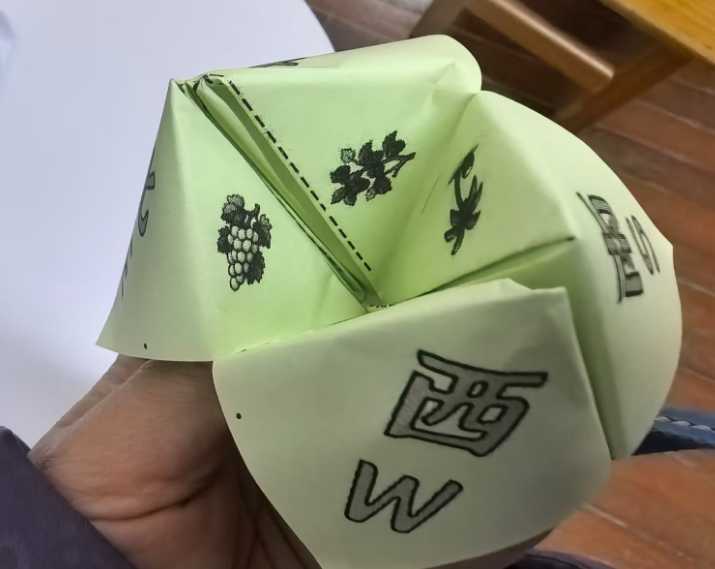
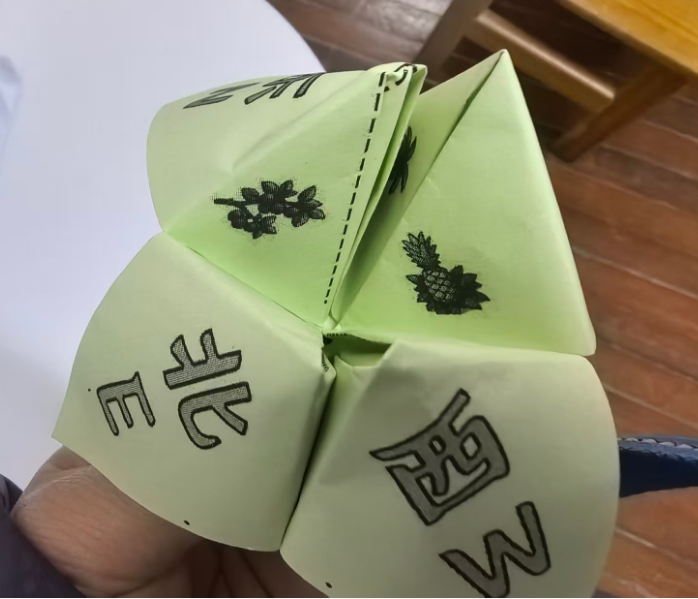
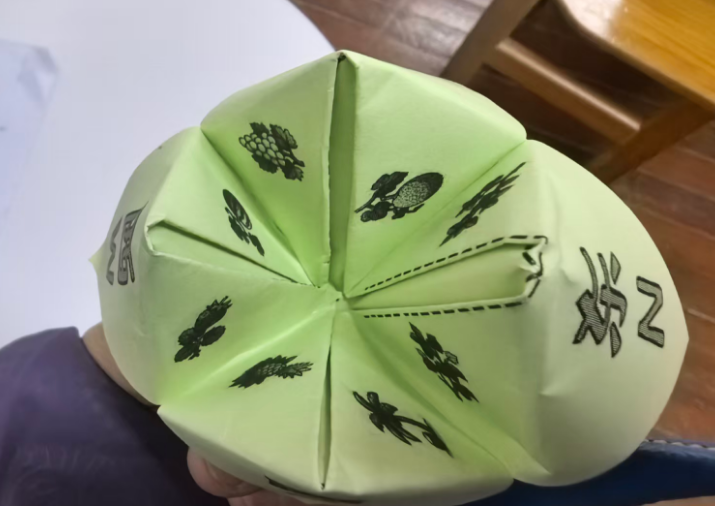
贴四个汉字+8个图案
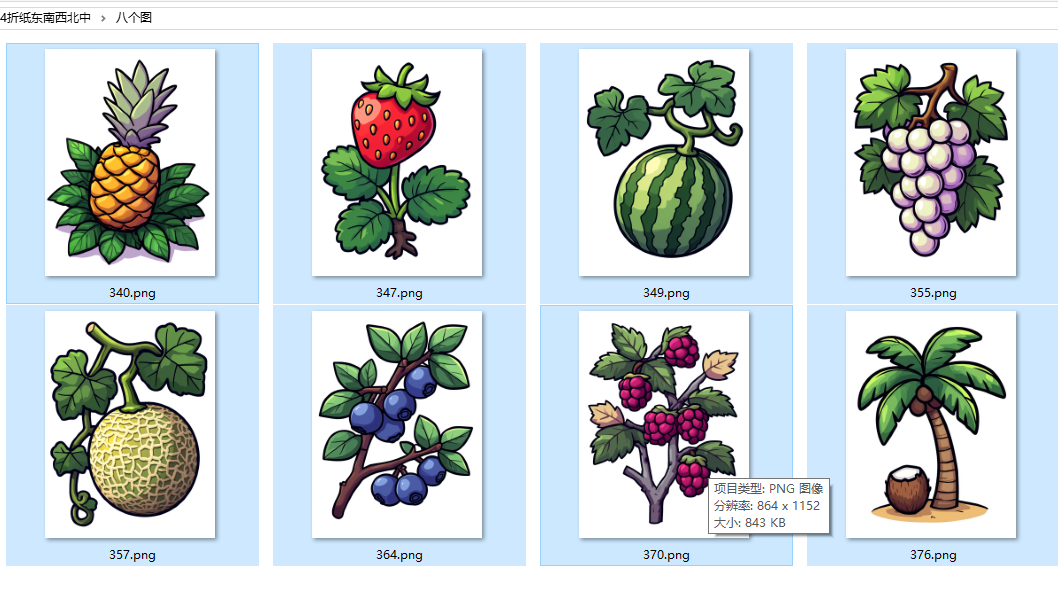
八个图案
'''
折纸东南西北中反面2.0 有4个汉字 8个小图
Deepseek,豆包,阿夏
20260105
'''

from PIL import Image, ImageDraw
import os
from pathlib import Path
import glob
import math  # 用于角度转坐标计算


def process_images(bg_path, output_folder, root_extra_folder, three_folder,
                   center_point=(750, 750), small_img_radius=780, three_img_radius=450):
    """
    处理图片:
    1. 遍历07汉字下的子文件夹,将4张图片贴到四个角(中心放射)
    2. 读取八个图文件夹下的8张图片,贴到附件红色区域对应的8个位置
    3. 最后绘制四边白色长矩形(顶层)
    """

    # 创建输出文件夹
    Path(output_folder).mkdir(parents=True, exist_ok=True)

    # 检查背景图片是否存在
    if not os.path.exists(bg_path):
        print(f"错误: 背景图片 {bg_path} 不存在!")
        return

    # 获取背景图尺寸
    bg_img = Image.open(bg_path)
    image_size = bg_img.width  # 假设背景图是正方形
    bg_img.close()

    # 定义四边白色矩形参数
    rect_width = 50  # 矩形宽度(可调整)
    rect_color = (255, 255, 255)  # 白色

    # -------- 加载八个图文件夹下的8张图片 --------
    if not os.path.exists(three_folder):
        print(f"错误: 八个图文件夹 {three_folder} 不存在!")
        return
    three_image_files = glob.glob(os.path.join(three_folder, '*'))
    supported_formats = ('.png', '.jpg', '.jpeg', '.webp', '.bmp', '.gif')
    three_image_files = [f for f in three_image_files if f.lower().endswith(supported_formats)]
    if len(three_image_files) < 8:
        print(f"警告: 八个图文件夹仅找到 {len(three_image_files)} 张图片(需8张),部分位置可能无图")
    three_image_files.sort()  # 按名称排序
    print(f"八个图文件夹找到 {len(three_image_files)} 张图片")

    # 定义8个红色区域的放射角度(对应附件图的8个红色区域)
    # 角度顺序:右上、右中、右下、下中、左下、左中、左上、上中
    three_img_angles = [70, 115, 160, 205, 250, 295, 340, 385]
    # 八个图图片的缩放尺寸
    three_target_size = (300, 150)  # 可调整
    # 八个图图片的统一旋转角度
    three_rotate_angle = 90

    # -------- 加载07汉字下的子文件夹 --------
    subfolders = [f for f in Path(root_extra_folder).iterdir() if f.is_dir()]
    if not subfolders:
        print(f"警告: 在 {root_extra_folder} 中未找到任何子文件夹")
        return
    subfolders.sort()  # 按名称排序
    print(f"找到 {len(subfolders)} 个子文件夹,开始处理...")

    # 07汉字图片的放射角度(四个角)
    small_img_angles = [315, 45, 135, 225]
    extra_rotate_angle = 90
    target_size = (600, 300)  # 07汉字图片的缩放尺寸

    # -------- 遍历每个子文件夹处理 --------
    for folder_idx, subfolder in enumerate(subfolders, 1):
        try:
            # 获取当前子文件夹下的图片
            extra_image_files = glob.glob(os.path.join(subfolder, '*'))
            extra_image_files = [f for f in extra_image_files if f.lower().endswith(supported_formats)]

            if len(extra_image_files) < 4:
                print(f"⚠️  子文件夹 {subfolder.name} 仅找到 {len(extra_image_files)} 张图片(需4张),跳过")
                continue

            extra_image_files.sort()
            print(f"\n📂 处理子文件夹 [{folder_idx:03d}]:{subfolder.name}")

            # 打开背景图
            bg_image = Image.open(bg_path).convert("RGBA")
            result = bg_image.copy()
            draw = ImageDraw.Draw(result)  # 初始化绘图对象

            # -------- 1. 粘贴07汉字的4张图片(四个角) --------
            for img_idx in range(min(4, len(extra_image_files))):
                try:
                    img_path = extra_image_files[img_idx]
                    extra_img = Image.open(img_path).convert("RGBA")

                    # 缩放+居中
                    extra_img.thumbnail(target_size, Image.Resampling.LANCZOS)
                    img_padded = Image.new('RGBA', target_size, (0, 0, 0, 0))
                    paste_x = (target_size[0] - extra_img.width) // 2
                    paste_y = (target_size[1] - extra_img.height) // 2
                    img_padded.paste(extra_img, (paste_x, paste_y), extra_img)

                    # 旋转
                    angle = small_img_angles[img_idx]
                    pil_rotate_angle = -angle + extra_rotate_angle
                    extra_img_rotated = img_padded.rotate(
                        pil_rotate_angle, expand=True, fillcolor=(0, 0, 0, 0)
                    )

                    # 计算位置
                    radian = math.radians(angle)
                    small_center_x = center_point[0] + small_img_radius * math.cos(radian)
                    small_center_y = center_point[1] + small_img_radius * math.sin(radian)
                    paste_x_small = int(small_center_x - extra_img_rotated.width // 2)
                    paste_y_small = int(small_center_y - extra_img_rotated.height // 2)

                    # 粘贴
                    result.paste(extra_img_rotated, (paste_x_small, paste_y_small), extra_img_rotated)
                    print(f"  ✔️ 粘贴07汉字第{img_idx+1}张到角度{angle}°")
                    extra_img.close()
                except Exception as e:
                    print(f"  ❌ 处理07汉字第{img_idx+1}张出错: {e}")

            # -------- 2. 粘贴八个图文件夹的8张图片(红色区域) --------
            for three_idx in range(min(8, len(three_image_files))):
                try:
                    three_img_path = three_image_files[three_idx]
                    three_img = Image.open(three_img_path).convert("RGBA")

                    # 缩放+居中
                    three_img.thumbnail(three_target_size, Image.Resampling.LANCZOS)
                    three_padded = Image.new('RGBA', three_target_size, (0, 0, 0, 0))
                    t_paste_x = (three_target_size[0] - three_img.width) // 2
                    t_paste_y = (three_target_size[1] - three_img.height) // 2
                    three_padded.paste(three_img, (t_paste_x, t_paste_y), three_img)

                    # 旋转
                    three_angle = three_img_angles[three_idx]
                    three_pil_angle = -three_angle + three_rotate_angle
                    three_rotated = three_padded.rotate(
                        three_pil_angle, expand=True, fillcolor=(0, 0, 0, 0)
                    )

                    # 计算位置(对应红色区域的中心放射)
                    three_radian = math.radians(three_angle)
                    three_center_x = center_point[0] + three_img_radius * math.cos(three_radian)
                    three_center_y = center_point[1] + three_img_radius * math.sin(three_radian)
                    three_paste_x = int(three_center_x - three_rotated.width // 2)
                    three_paste_y = int(three_center_y - three_rotated.height // 2)

                    # 粘贴
                    result.paste(three_rotated, (three_paste_x, three_paste_y), three_rotated)
                    print(f"  ✔️ 粘贴八个图第{three_idx+1}张到角度{three_angle}°")
                    three_img.close()
                except Exception as e:
                    print(f"  ❌ 处理八个图第{three_idx+1}张出错: {e}")

            # -------- 3. 绘制四边白色矩形 --------
            draw.rectangle([0, 0, rect_width, image_size], fill=rect_color, outline=None)
            draw.rectangle([0, 0, image_size, rect_width], fill=rect_color, outline=None)
            draw.rectangle([image_size - rect_width, 0, image_size, image_size], fill=rect_color, outline=None)
            draw.rectangle([0, image_size - rect_width, image_size, image_size], fill=rect_color, outline=None)
            print(f"  🖌️ 已绘制四边白色矩形")

            # -------- 4. 保存结果 --------
            output_name = f"{folder_idx:03d}.png"
            output_path = os.path.join(output_folder, output_name)
            result_rgb = result.convert('RGB')
            result_rgb.save(output_path, "PNG", quality=95)
            print(f"  📸 保存为:{output_name}")

            bg_image.close()
            result.close()

        except Exception as e:
            print(f"❌ 处理子文件夹 {subfolder.name} 出错: {e}")

    print(f"\n🎉 所有处理完成!输出目录:{output_folder}")


def main():
    # 配置路径和参数
    path = r"C:\Users\jg2yXRZ\OneDrive\桌面\20260104折纸东南西北中"
    bg_path = os.path.join(path, "反面2.0.png")
    output_folder = os.path.join(path, "08贴图")
    root_extra_folder = os.path.join(path, "07汉字")  # 07汉字子文件夹
    three_folder = os.path.join(path, "八个图")  # 八个图文件夹(含8张图)

    # 执行处理
    process_images(
        bg_path=bg_path,
        output_folder=output_folder,
        root_extra_folder=root_extra_folder,
        three_folder=three_folder,
        center_point=(750, 750),
        small_img_radius=780,    # 07汉字图片的放射半径
        three_img_radius=680     # 八个图图片的放射半径(对应红色区域的位置)
    )


if __name__ == "__main__":
    try:
        from PIL import Image, ImageDraw
        import glob
        import math
    except ImportError as e:
        missing_module = str(e).split()[-1]
        print(f"正在安装{missing_module}库...")
        import subprocess
        if missing_module in ['PIL', 'ImageDraw']:
            subprocess.check_call(["pip", "install", "pillow"])
        from PIL import Image, ImageDraw
        import glob
        import math

    main()
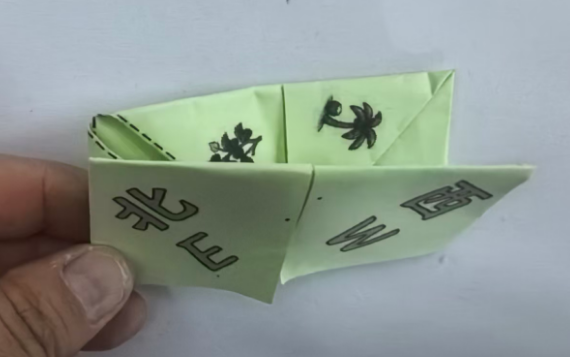
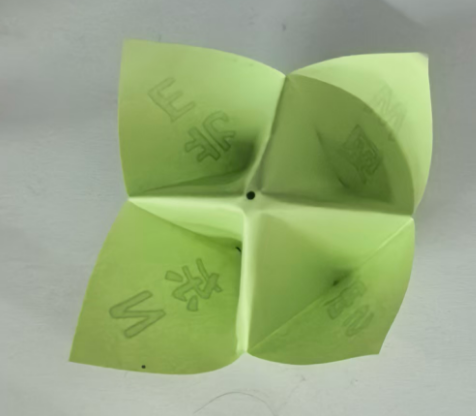
为了测试,我把正反图片手动插入WORD
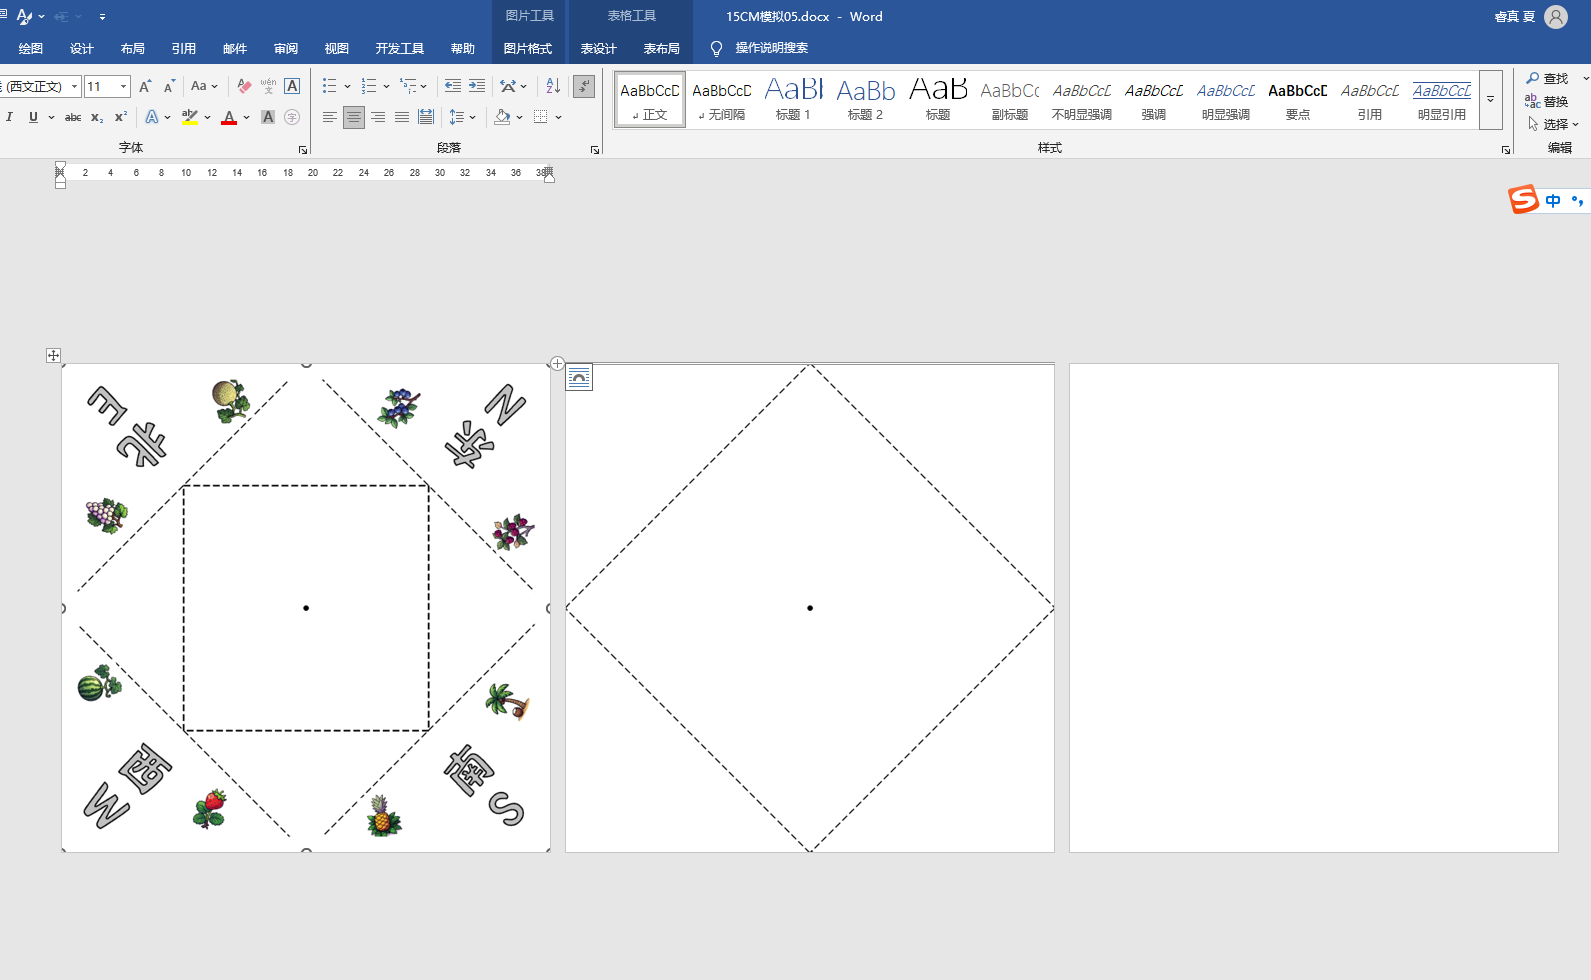
打印效果-自定义
即使不贴四条白边,打印时,也会自动把0.7CM白边不打印
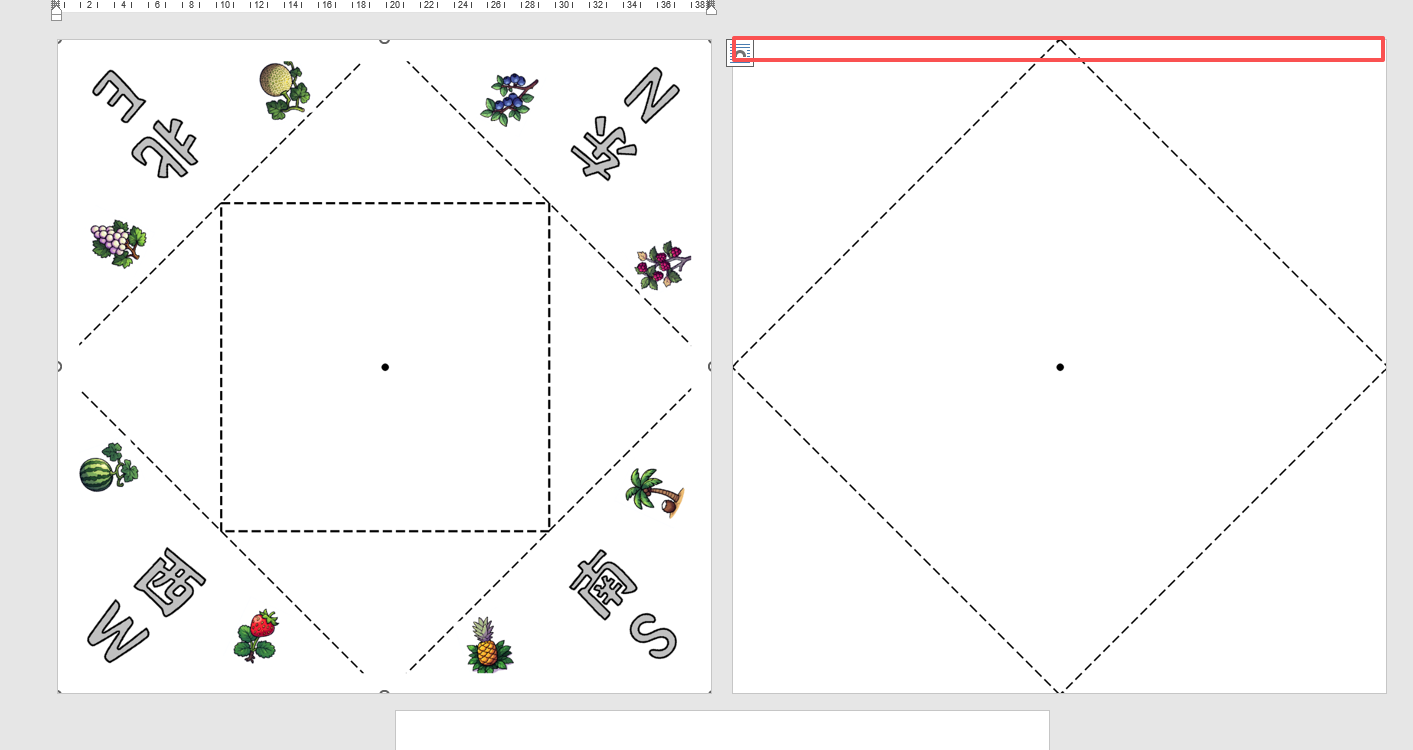
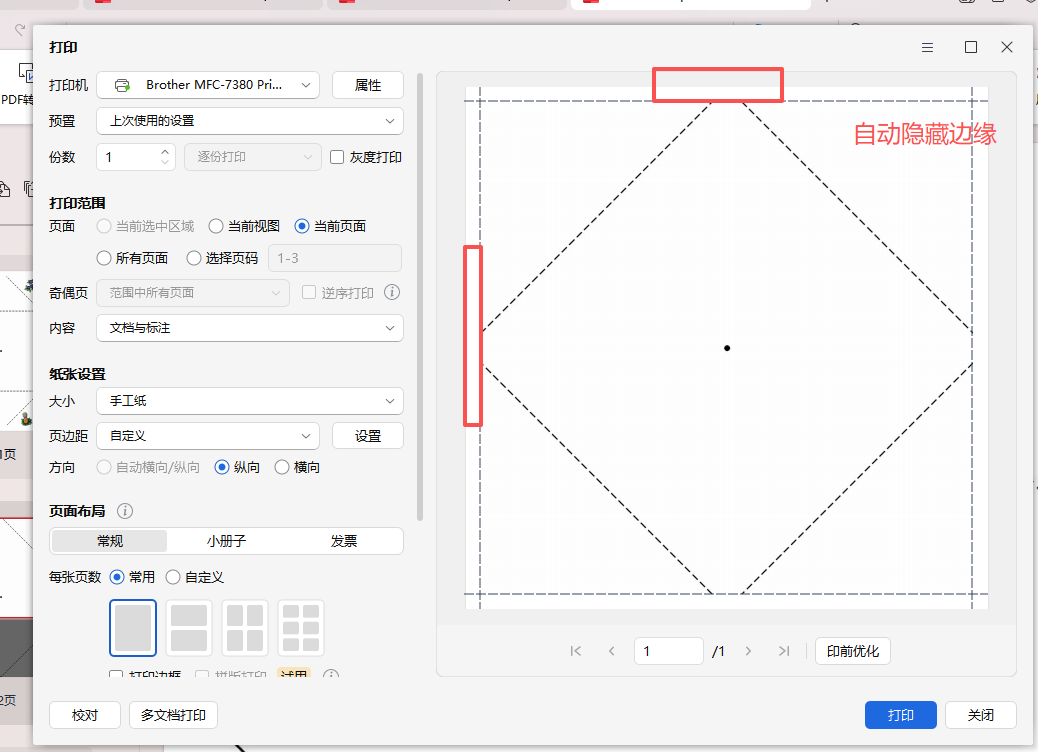
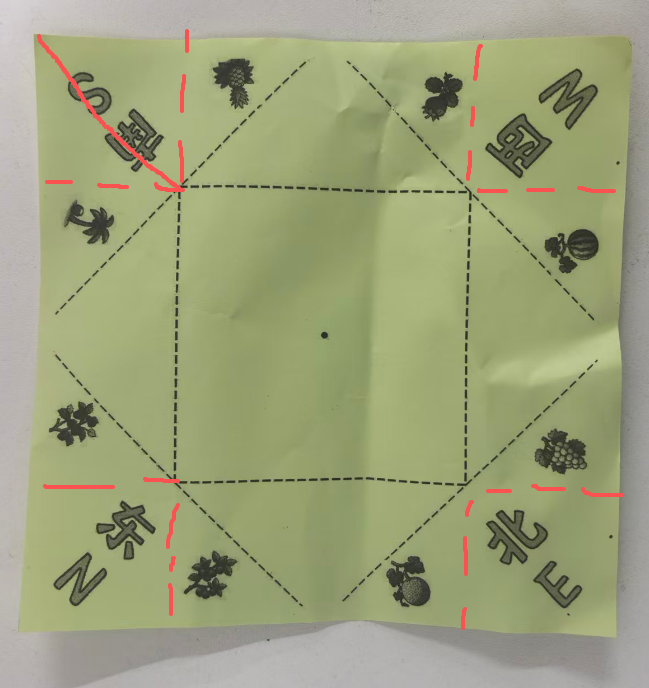
效果图:有0.7的白边,但是打印时,图案还是不能完全中心对位,左上角的S南的图片中线与折纸斜线不是完全对位

中文和英文不对应,重新下载


简笔画,白色背景,隶书,大号汉字"北南西东NSWE",实心字,实心字 ,实心字,粗胖,粗胖,粗胖,没有颜色,正面图。白色背景,2*4排列。
上北下南左西右东