1 添加导航
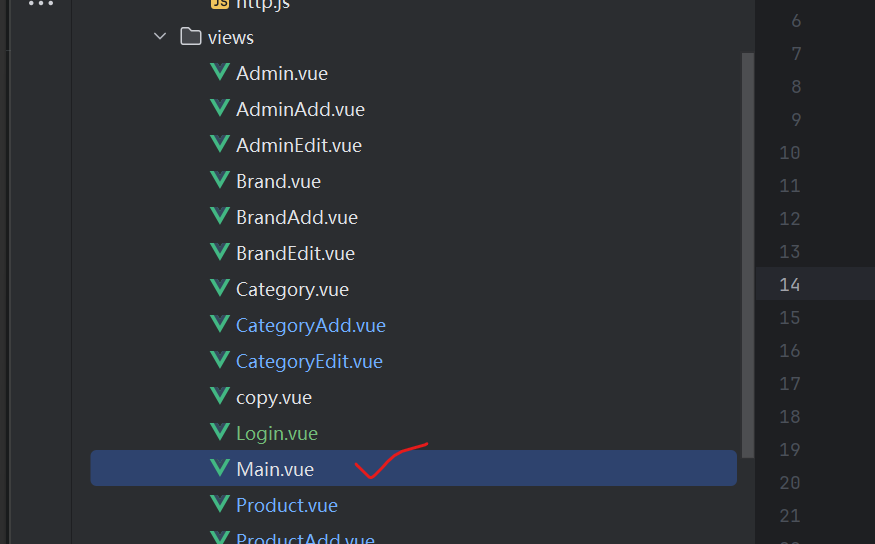
1.1 写一个Main.vue
让相应的的路由对应起来
java
<template>
  <el-container class="main-container">
    <!-- 头部导航栏 -->
    <el-header class="main-header">
      <div class="header-left">
        <el-icon size="24" class="header-logo"><Shop /></el-icon>
        <span class="header-title">商品管理系统</span>
      </div>
      <div class="header-right">
        <el-dropdown :disabled="isSubmitting" @command="handleDropdownCommand">
          <span class="user-info">
            <el-icon><User /></el-icon>
            {{ userName }}
          </span>
          <template #dropdown>
            <el-dropdown-menu>
              <el-dropdown-item command="profile">个人中心</el-dropdown-item>
              <el-dropdown-item command="logout" divided>退出登录</el-dropdown-item>
            </el-dropdown-menu>
          </template>
        </el-dropdown>
      </div>
    </el-header>

    <el-container>
      <!-- 左侧侧边导航栏 -->
      <el-aside width="200px" class="main-aside">
        <el-menu
            :default-active="activeMenu"
            class="el-menu-vertical-demo"
            router
            :disabled="isSubmitting"
            background-color="#f5f5f5"
            text-color="#333"
            active-text-color="#409eff"
            collapse-transition
        >
          <!-- 首页 -->
          <el-menu-item index="/dashboard">
            <el-icon><House /></el-icon>
            <template #title>首页</template>
          </el-menu-item>


          <!-- 管理员管理 -->
          <el-menu-item index="/adminpage">
            <el-icon><Menu /></el-icon>
            <template #title>管理员管理</template>
          </el-menu-item>

          <!-- 用户管理 -->
          <el-menu-item index="/userpage">
            <el-icon><Menu /></el-icon>
            <template #title>用户管理</template>
          </el-menu-item>

          <!-- 分类管理 -->
          <el-menu-item index="/categorypage">
            <el-icon><Menu /></el-icon>
            <template #title>分类管理</template>
          </el-menu-item>

          <!-- 分类管理 -->
          <el-menu-item index="/brandpage">
            <el-icon><Menu /></el-icon>
            <template #title>品牌管理</template>
          </el-menu-item>

          <!-- 订单管理 -->
          <el-menu-item index="/productpage">
            <el-icon><Tickets /></el-icon>
            <template #title>商品管理</template>
          </el-menu-item>
        </el-menu>
      </el-aside>

      <!-- 主内容区域(路由视图容器) -->
      <el-main class="main-content">
        <router-view />
      </el-main>
    </el-container>
  </el-container>
</template>

<script setup lang="ts">
import { ref, computed, onMounted } from 'vue'
import { useRouter, useRoute, type RouteLocationNormalized } from 'vue-router'
import {
  Shop, User, UserFilled, House, Goods, List, Menu, Plus, Tickets, Edit
} from '@element-plus/icons-vue'
import { ElMessage, ElMessageBox } from 'element-plus'

// 状态管理:提交中(禁用交互)
const isSubmitting = ref<boolean>(false)
// 当前登录用户名(可从本地存储/接口获取)
const userName = ref<string>(localStorage.getItem('username') || '管理员')

// 路由实例
const router = useRouter()
const route = useRoute()

// 计算当前激活的菜单(匹配路由路径)
const activeMenu = computed<string>(() => {
  // 处理嵌套路由的菜单激活(如 /user/list 匹配 /user)
  const path = route.path
  const firstLevelPath = path.split('/')[1]
  return firstLevelPath ? `/${firstLevelPath}` : '/dashboard'
})

// 处理下拉菜单命令
const handleDropdownCommand = (command: 'profile' | 'logout') => {
  switch (command) {
    case 'profile':
      router.push('/profile')
      break
    case 'logout':
      handleLogout()
      break
  }
}

// 退出登录逻辑
const handleLogout = async () => {
  try {
    await ElMessageBox.confirm(
        '确定要退出登录吗?',
        '提示',
        {
          confirmButtonText: '确定',
          cancelButtonText: '取消',
          type: 'warning',
          closeOnClickModal: false, // 点击遮罩层不关闭弹窗
          draggable: true // 弹窗可拖拽,提升交互体验
        }
    )
    // 清除登录状态
    localStorage.removeItem('token')
    localStorage.removeItem('username')
    // 跳转登录页
    await router.push('/login')
    ElMessage.success('退出登录成功!')
  } catch {
    ElMessage.info('已取消退出登录')
  }
}

// 路由守卫:切换路由后重置提交状态
onMounted(() => {
  router.afterEach((to: RouteLocationNormalized, from: RouteLocationNormalized) => {
    isSubmitting.value = false
    // 同步用户名(防止刷新后丢失)
    userName.value = localStorage.getItem('username') || '管理员'
  })
})
</script>

<style scoped>
/* 整体容器 - 占满视口高度 */
.main-container {
  height: 100vh;
  overflow: hidden;
}

/* 头部导航样式 */
.main-header {
  background-color: #ffffff;
  color: #333333;
  line-height: 60px;
  border-bottom: 1px solid #e6e6e6;
  display: flex;
  justify-content: space-between;
  align-items: center;
  padding: 0 20px;
  box-shadow: 0 1px 4px rgba(0, 0, 0, 0.05);
  z-index: 10;
}

.header-left {
  display: flex;
  align-items: center;
  gap: 12px;
}

.header-logo {
  color: #409eff;
  transition: color 0.3s;
}

.header-logo:hover {
  color: #66b1ff;
}

.header-title {
  font-size: 18px;
  font-weight: 600;
  color: #1f2937;
}

.header-right {
  display: flex;
  align-items: center;
}

.user-info {
  cursor: pointer;
  color: #666666;
  padding: 8px 12px;
  border-radius: 4px;
  transition: background-color 0.3s, color 0.3s;
  display: flex;
  align-items: center;
  gap: 6px;
}

.user-info:hover {
  background-color: #f0f9ff;
  color: #409eff;
}

/* 左侧侧边导航样式 */
.main-aside {
  background-color: #f5f5f5;
  border-right: 1px solid #e6e6e6;
  transition: width 0.3s ease;
}

/* 穿透样式:Element Plus 菜单组件 */
:deep(.el-menu-vertical-demo) {
  height: 100%;
  border-right: 0;
  padding-top: 16px;
  font-size: 14px;
}

:deep(.el-menu-item),
:deep(.el-sub-menu__title) {
  height: 48px;
  line-height: 48px;
}

:deep(.el-menu-item.is-active) {
  background-color: #e8f4ff !important;
}

/* 主内容区域样式 */
.main-content {
  background-color: #ffffff;
  padding: 24px;
  overflow-y: auto;
  height: calc(100vh - 60px);
  box-sizing: border-box;
  scroll-behavior: smooth;
}

/* 响应式适配 - 小屏幕(平板/手机) */
@media (max-width: 768px) {
  .main-aside {
    width: 64px !important;
  }

  /* 隐藏菜单文字和箭头 */
  :deep(.el-menu-vertical-demo .el-menu-item__title),
  :deep(.el-sub-menu__title span),
  :deep(.el-sub-menu__icon-arrow) {
    display: none;
  }

  /* 小屏幕下菜单图标居中 */
  :deep(.el-menu-item .el-icon),
  :deep(.el-sub-menu__title .el-icon) {
    margin: 0 auto;
  }

  /* 主内容区域自适应 */
  .main-content {
    padding: 16px;
  }
}

</style>
1.2 修改index.js
1、新增一个main的路由
java
{
        path: '/adminlogin',
        name: 'Login',
        component: Login
    },
2、然后再在main的路由里面写一个children数组
java
{
        path: '/adminlogin',
        name: 'Login',
        component: Login,
        children[]
    },
3、然后把之前的路由全部剪切到children数组中
java
{
        path: '/adminlogin',
        name: 'Login',
        component: Login,
        children[剪切到这里面]
    },
2 登录功能
2.1 写后端AdminLoginController
java
package com.easy.controller;

import com.baomidou.mybatisplus.core.conditions.query.LambdaQueryWrapper;
import com.easy.bean.Admin;
import com.easy.service.AdminService;
import com.easy.util.PasswordUtil;
import com.easy.util.Result;
import com.easy.util.TokenUtil;
import org.springframework.beans.factory.annotation.Autowired;
import org.springframework.web.bind.annotation.*;

@CrossOrigin
@RestController
@RequestMapping("adminlogin")
public class AdminLoginController {
    @Autowired
    AdminService adminService;

    @PostMapping("dologin")
    public Result dologin(@RequestBody Admin admin){
        // 根据账号查询管理员的信息
        LambdaQueryWrapper<Admin> lambdaQueryWrapper=new LambdaQueryWrapper();
        lambdaQueryWrapper.eq(Admin::getAdminname,admin.getAdminname());
        Admin admin_db=adminService.getOne(lambdaQueryWrapper);
        if(admin_db!=null){
            //比对密码
            if(PasswordUtil.equalsPassword(admin.getPassword(),admin_db.getPassword())){
                //生成token
                String token= TokenUtil.generateAdminToken(admin_db.getId().toString());
                return Result.success("管理员登录成功",token);

            }
        }
        return Result.fail("管理员登录失败,请重新尝试");


    }
}
2.2 修改TokenUtil
User
Admin
generateToken改为generateAdminToken和generateUserToken
getLoginID改为getLoginAdminID和getLoginUserID
相应的内容也要做出修改
3 生成登录的前端页面
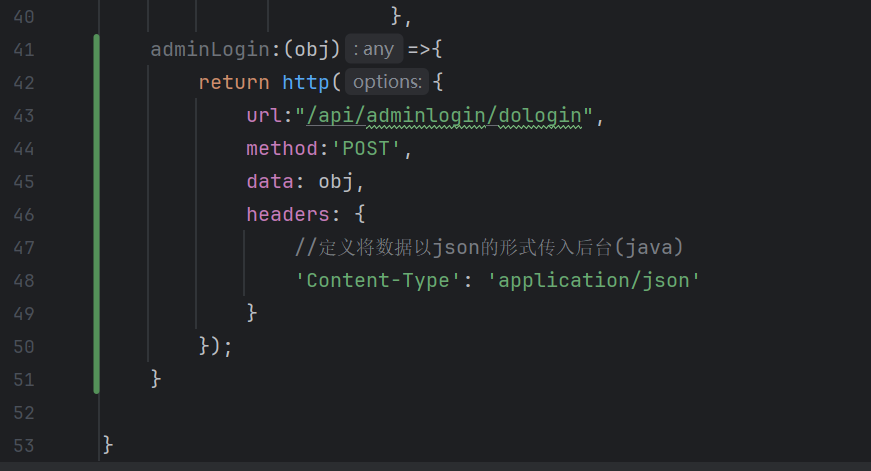
3.1 修改admin_api,在最后添加
3.2 创建Login.vue文件
java
<template>
  <div class="login-container">
    <!-- 背景装饰区 -->
    <div class="login-bg"></div>

    <!-- 登录卡片 -->
    <div class="login-card">
      <!-- 登录标题 -->
      <div class="login-header">
        <h2 class="login-title">系统登录</h2>
        <p class="login-desc">欢迎登录管理系统,请输入您的账号信息</p>
      </div>

      <!-- 登录表单 -->
      <el-form
          ref="loginFormRef"
          :model="loginForm"
          :rules="loginRules"
          class="login-form"
          label-width="0px"
      >
        <!-- 账号输入框 -->
        <el-form-item prop="adminname">
          <el-input
              v-model="loginForm.adminname"
              placeholder="请输入账号"
              prefix-icon="User"
              size="large"
              autocomplete="adminname"
          />
        </el-form-item>

        <!-- 密码输入框 -->
        <el-form-item prop="password">
          <el-input
              v-model="loginForm.password"
              type="password"
              placeholder="请输入密码"
              prefix-icon="Lock"
              size="large"
              show-password
              autocomplete="current-password"
          />
        </el-form-item>

        <!-- 记住密码 & 忘记密码 -->
        <el-form-item class="login-form-options">
          <el-checkbox v-model="loginForm.remember">记住密码</el-checkbox>
          <span class="forget-password">忘记密码?</span>
        </el-form-item>

        <!-- 登录按钮 -->
        <el-form-item class="login-form-submit">
          <el-button
              type="primary"
              size="large"
              class="login-btn"
              @click="handleLogin"
              :loading="isLoading"
          >
            登录
          </el-button>
        </el-form-item>
      </el-form>
    </div>
  </div>
</template>

<script setup>
import { ref, reactive } from 'vue'
import { ElMessage } from 'element-plus'
import admin_api from '@/api/admin_api.js'
import {useRoute,useRouter} from 'vue-router'

const router=useRouter();
const route=useRoute();

// 表单引用
const loginFormRef = ref(null)

// 加载状态
const isLoading = ref(false)

// 登录表单数据
const loginForm = reactive({
  adminname: '',
  password: '',
  remember: false
})

// 表单验证规则
const loginRules = reactive({
  adminname: [
    { required: true, message: '请输入账号', trigger: 'blur' },
    { min: 3, max: 20, message: '账号长度在 3 到 20 个字符', trigger: 'blur' }
  ],
  password: [
    { required: true, message: '请输入密码', trigger: 'blur' },
    { min: 6, message: '密码长度不少于 6 个字符', trigger: 'blur' }
  ]
})

// 登录处理函数
const handleLogin = async () => {
  try {
    // 表单验证
    await loginFormRef.value.validate()

    // 模拟登录加载
    isLoading.value = true
    const result=await admin_api.adminLogin(loginForm);
    isLoading.value = false
    if(result.data){
      // 登录成功提示
      ElMessage.success(result.message)
      localStorage.setItem("token",result.data);
      setTimeout(function(){
        router.push('/userPage')
      },1500);
      // 这里可添加路由跳转逻辑,例如:router.push('/home')
    }else{
      ElMessage.error('请检查账号或密码格式!')
    }

  } catch (error) {
    // 表单验证失败
    ElMessage.error('请检查账号或密码格式!')
    console.error('登录验证失败:', error)
  }
}
</script>

<style scoped>
/* 全局登录容器 */
.login-container {
  width: 100vw;
  height: 100vh;
  background-color: #f5f7fa;
  display: flex;
  justify-content: center;
  align-items: center;
  position: relative;
  overflow: hidden;
}

/* 背景装饰 */
.login-bg {
  position: absolute;
  top: 0;
  left: 0;
  width: 100%;
  height: 100%;
  background: linear-gradient(135deg, #409eff 0%, #67c23a 100%);
  opacity: 0.1;
  z-index: 1;
}

/* 登录卡片 */
.login-card {
  width: 420px;
  padding: 40px;
  background-color: #fff;
  border-radius: 12px;
  box-shadow: 0 8px 24px rgba(0, 0, 0, 0.12);
  position: relative;
  z-index: 2;
}

/* 登录标题区 */
.login-header {
  text-align: center;
  margin-bottom: 30px;
}

.login-title {
  font-size: 24px;
  font-weight: 600;
  color: #1f2937;
  margin: 0 0 8px 0;
}

.login-desc {
  font-size: 14px;
  color: #6b7280;
  margin: 0;
}

/* 登录表单 */
.login-form {
  width: 100%;
}

/* 表单项间距 */
.el-form-item {
  margin-bottom: 20px;
}

/* 记住密码 & 忘记密码 */
.login-form-options {
  display: flex;
  justify-content: space-between;
  align-items: center;
  margin-bottom: 30px;
}

.forget-password {
  cursor: pointer;
  font-size: 14px;
  color: #6b7280;
}

.forget-password:hover {
  color: #3590f3;
}

/* 登录按钮 */
.login-form-submit {
  margin-bottom: 0;
}

.login-btn {
  width: 100%;
  height: 48px;
  font-size: 16px;
  background-color: #409eff;
  border: none;
  border-radius: 8px;
}

.login-btn:hover {
  background-color: #3590f3;
}

/* 适配小屏幕 */
@media (max-width: 500px) {
  .login-card {
    width: 90%;
    padding: 30px 20px;
  }
}
</style>
3.3 数据库文件
在admin的数据库中新增一条数据,密码为
84551d67acace512f1251495b28e0403f6
这一串字符为123123的密文形式

3.4 启动登录
手动跳转到
/adminlogin
然后输入数据库中存好的信息,密码为明文形式(123123),然后点击登录即可
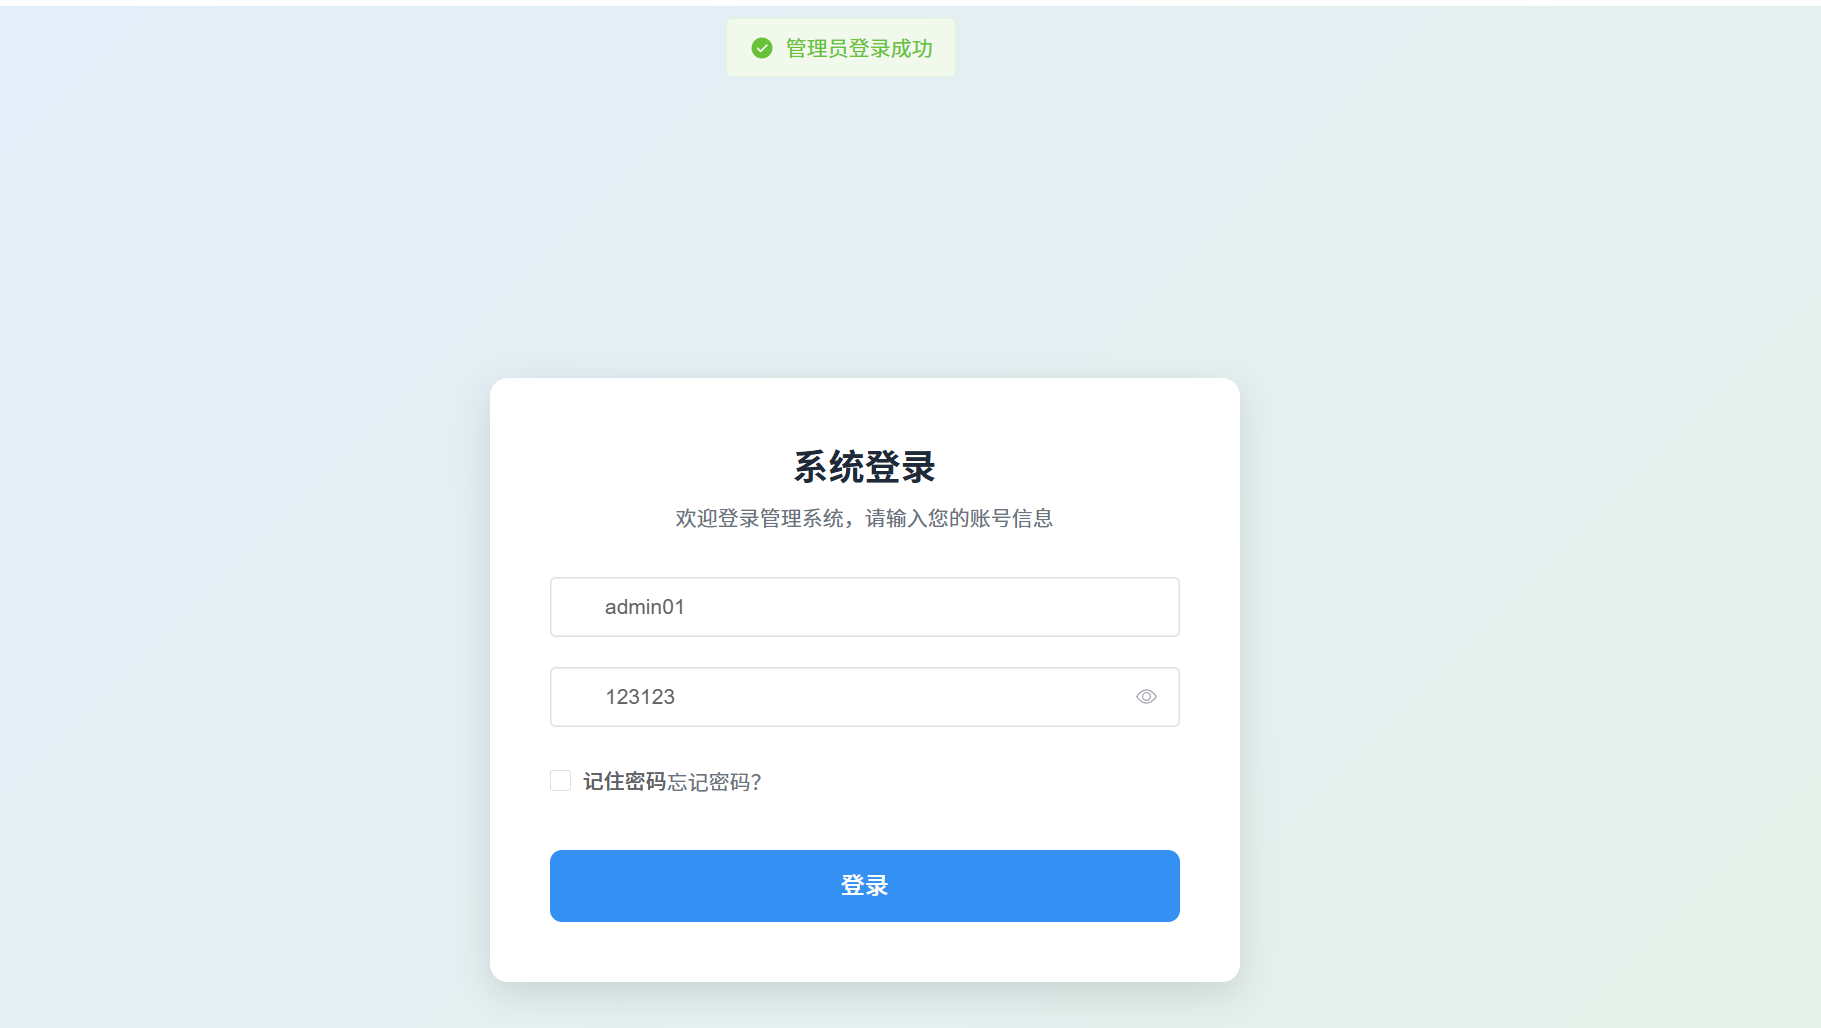
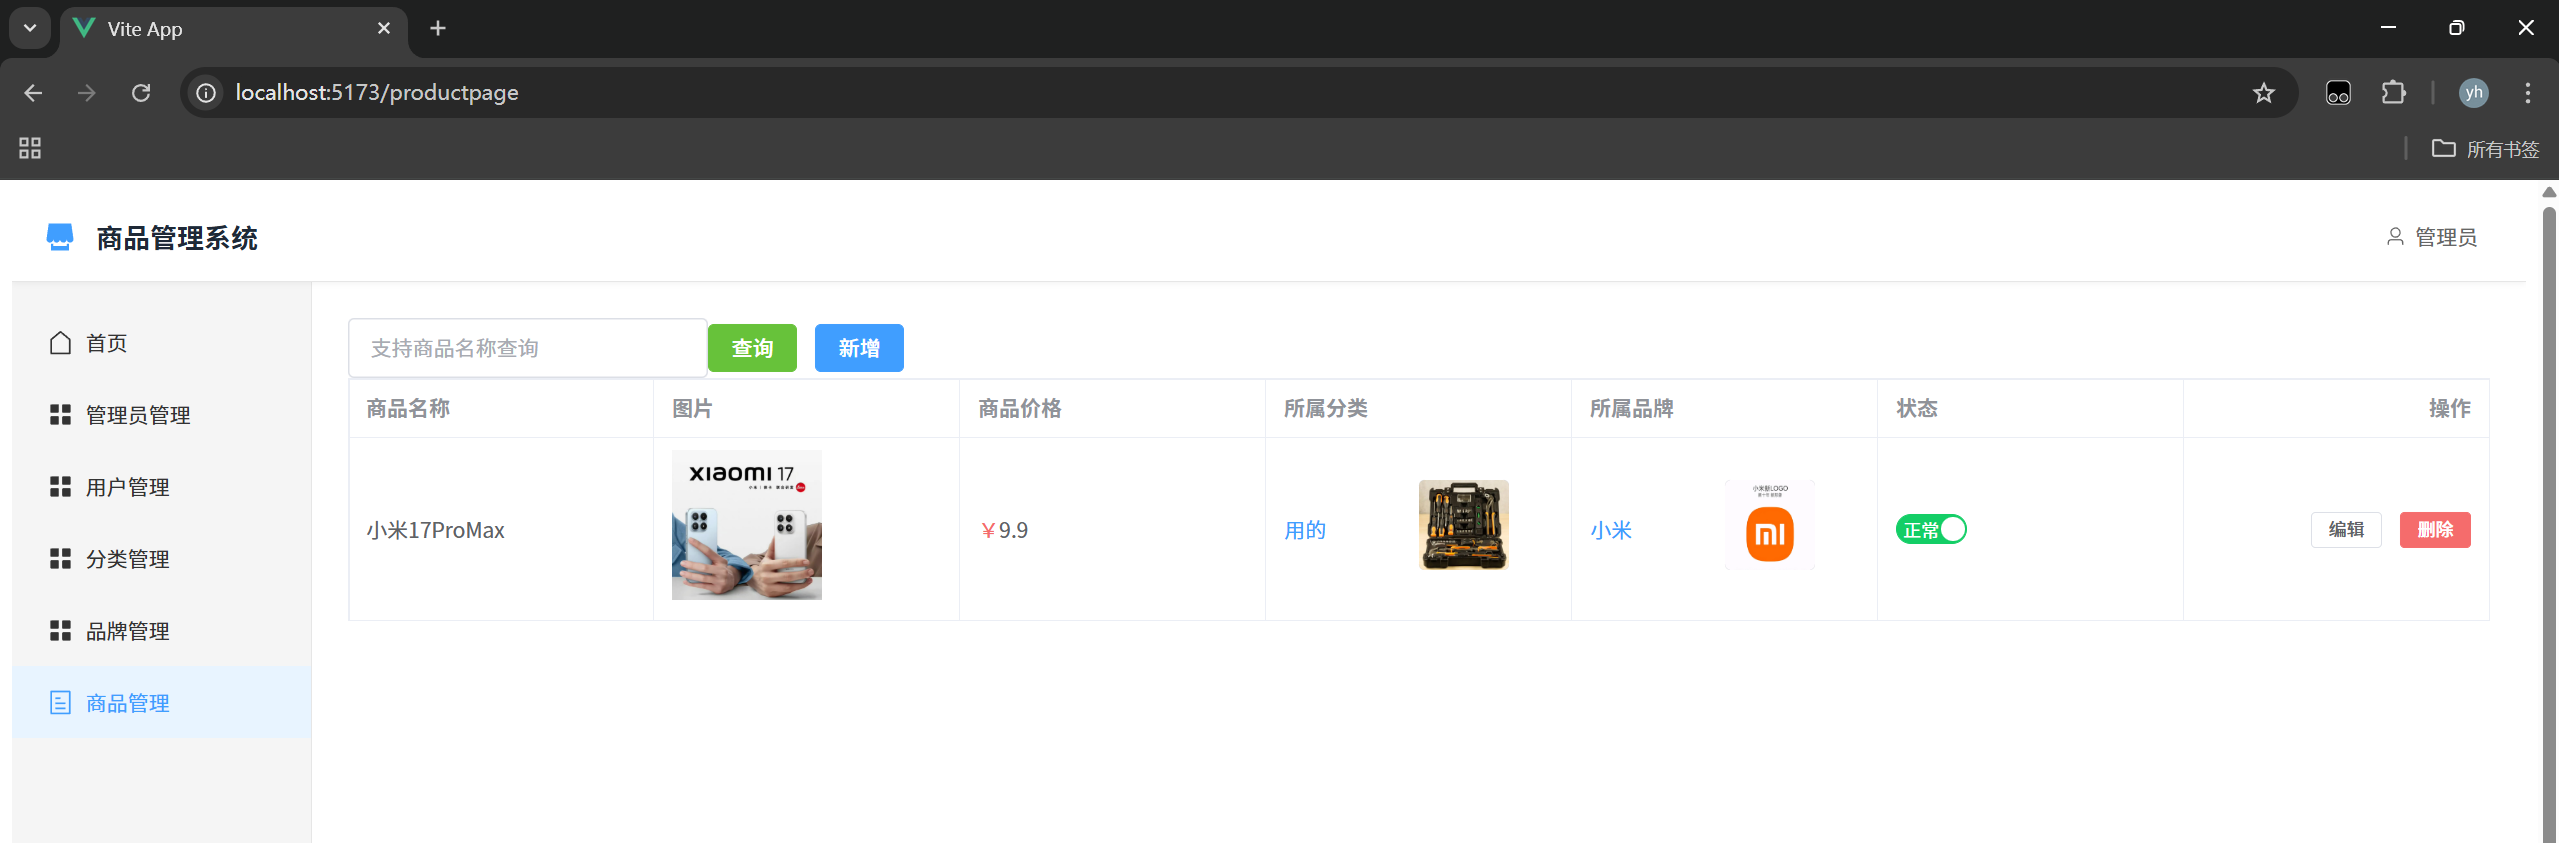
显示登录成功后,会跳转到商品系统管理页面
4 商品Product页面没有匹配数据问题
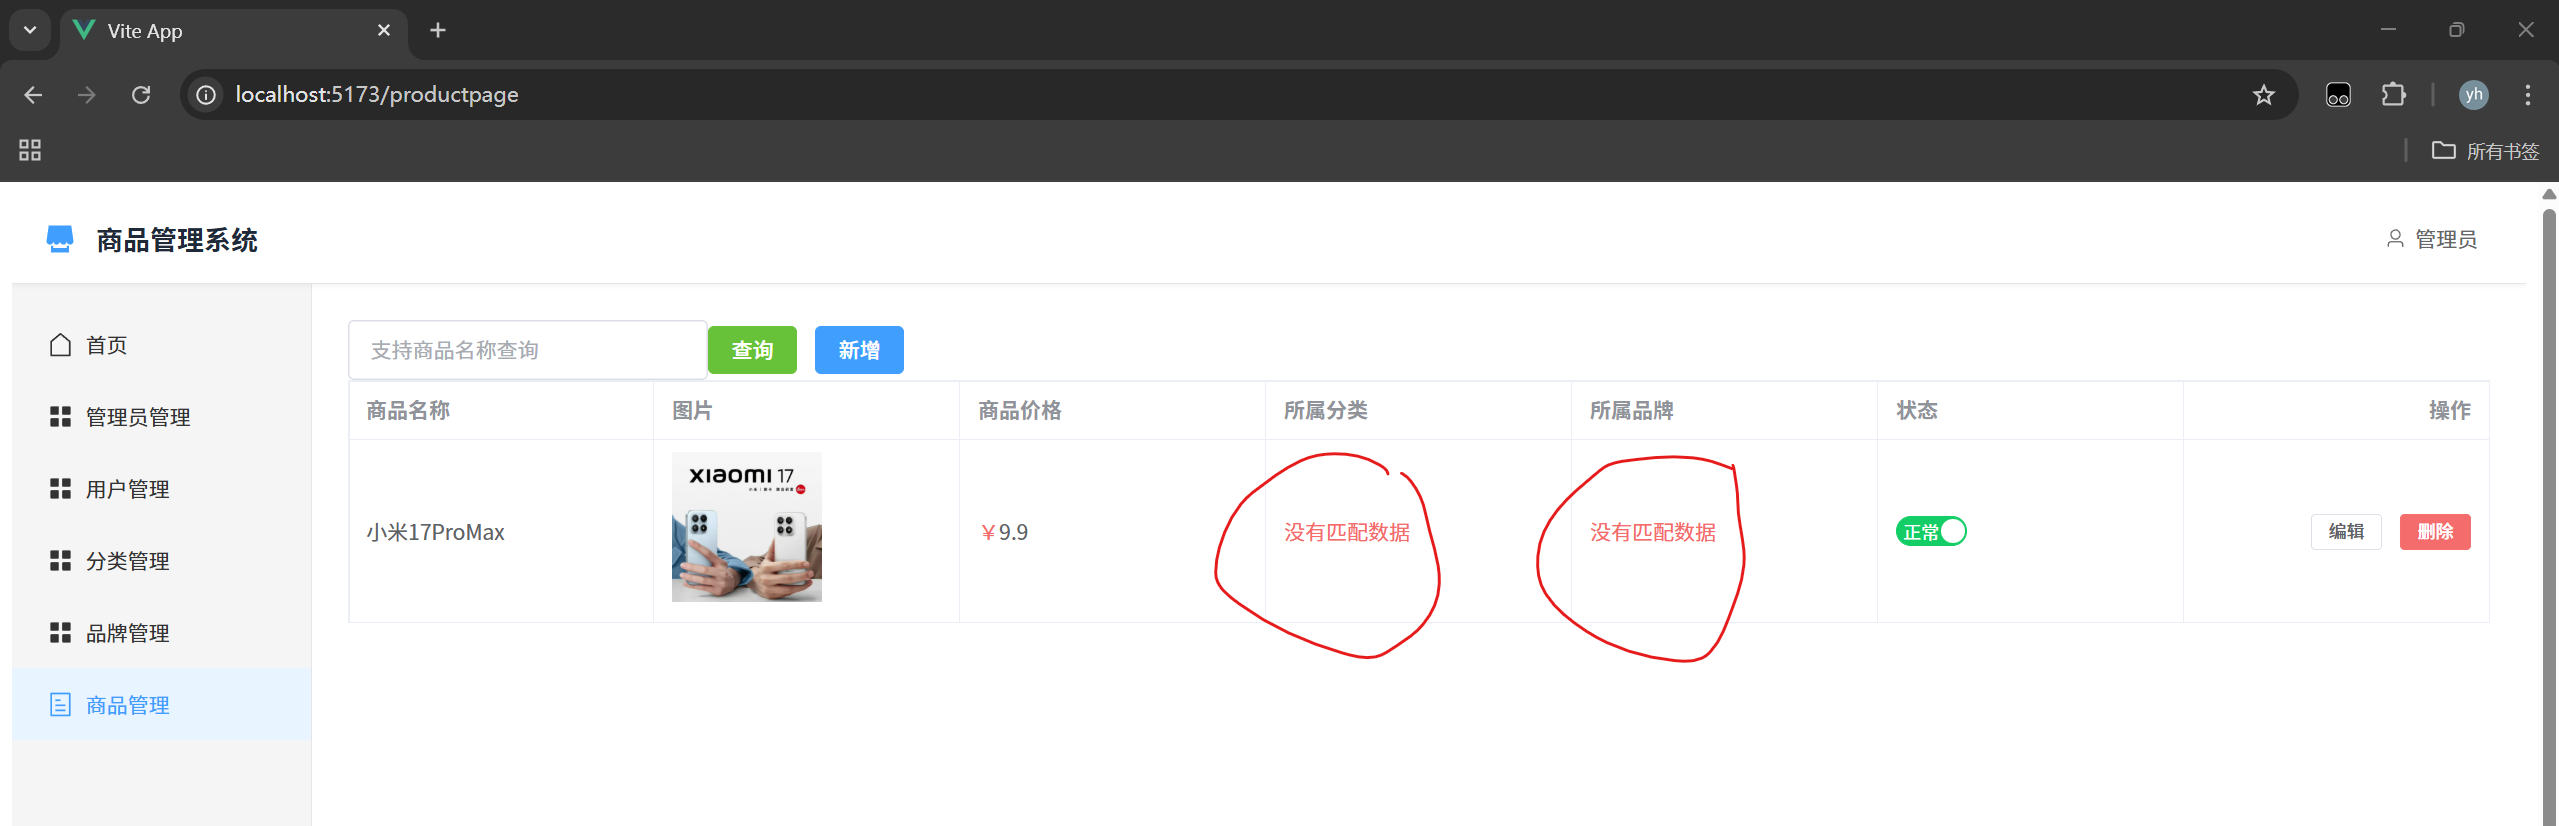
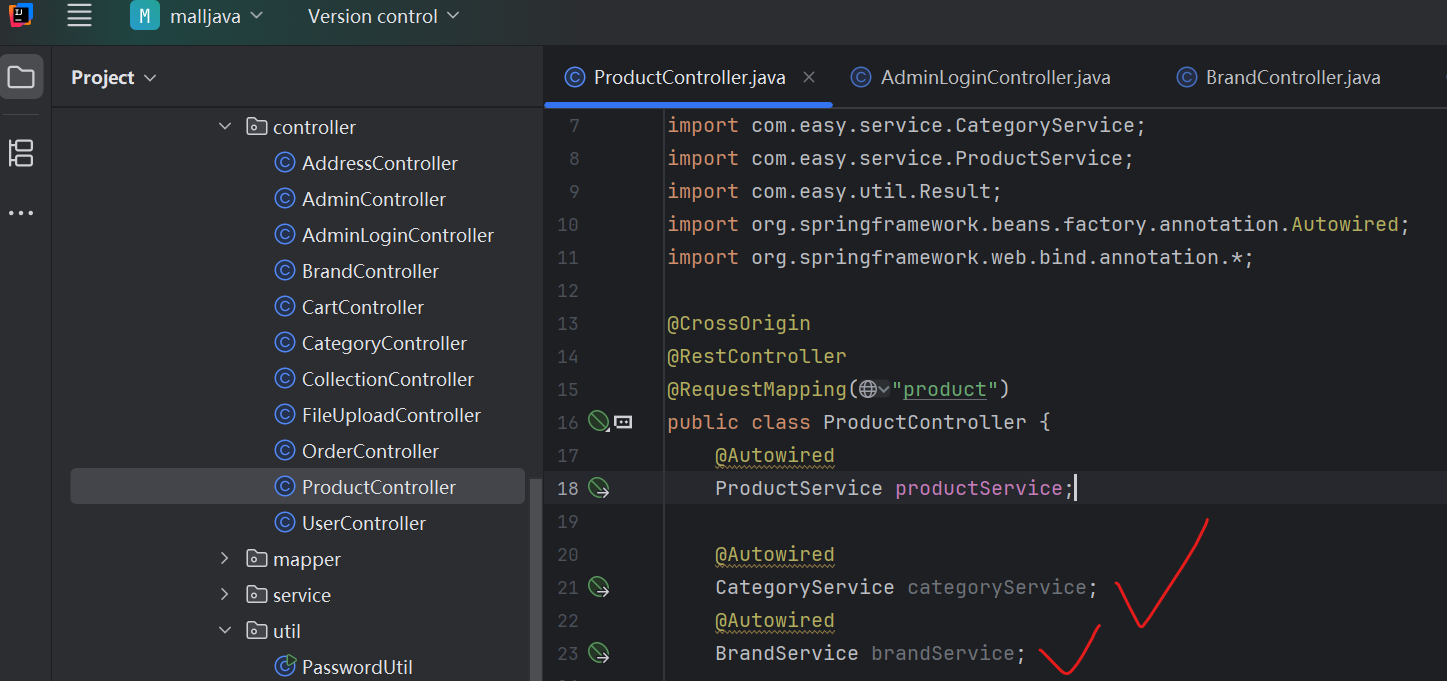
修改后端ProductController.java文件
步骤1:
1、在ProductController.java中引入品牌(brand)和分类(category)的Service
步骤2:
2、在getPage方法中新写入一个for循环
内容为两个方法的set方法
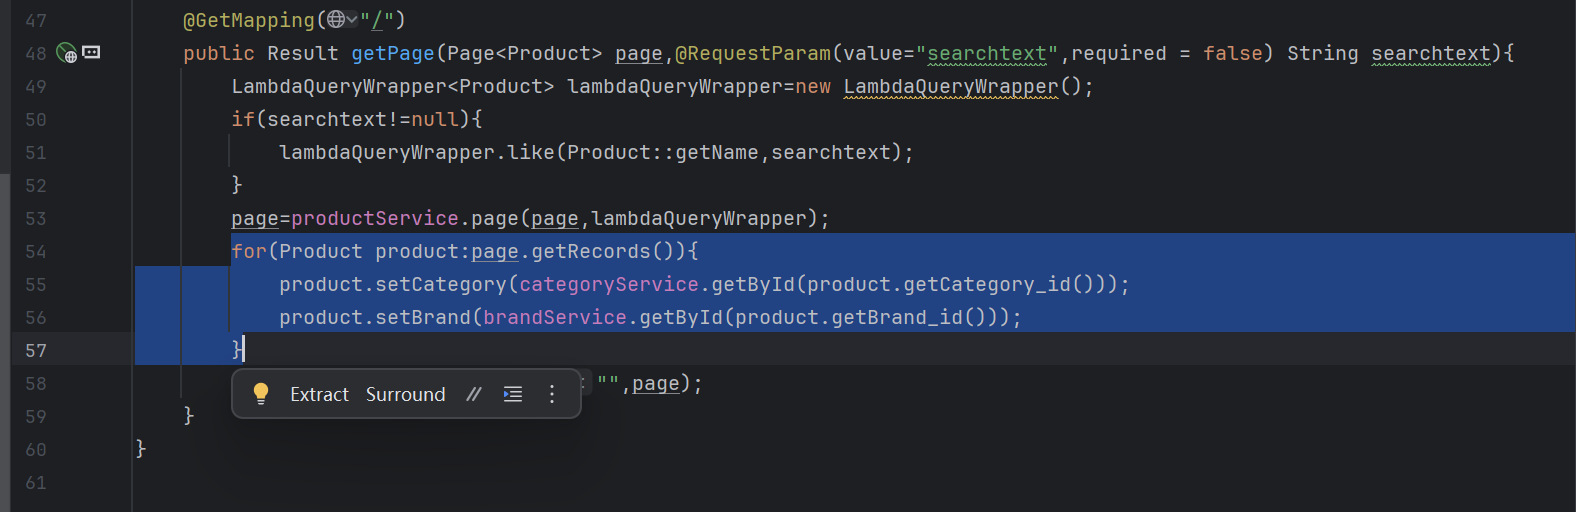
步骤3:
重新启动程序即可
5 守卫
java
meta: {
            requiresAuth: true
        },
index.js
javascript
// 1. 导入必要的依赖
import { createRouter, createWebHistory, createWebHashHistory } from 'vue-router'
import { ElMessage } from 'element-plus'

// 导入路由组件(推荐使用懒加载,优化首屏加载速度)
// 方式1:普通导入(不推荐,会一次性加载所有组件)
import User from '@/views/User.vue'
import UserAdd from '@/views/UserAdd.vue'
import UserEdit from '@/views/UserEdit.vue'

import Brand from '@/views/Brand.vue'
import BrandAdd from '@/views/BrandAdd.vue'
import BrandEdit from '@/views/BrandEdit.vue'

import Category from '@/views/Category.vue'
import CategoryAdd from '@/views/CategoryAdd.vue'
import CategoryEdit from '@/views/CategoryEdit.vue'

import Admin from '@/views/Admin.vue'
import AdminAdd from '@/views/AdminAdd.vue'
import AdminEdit from '@/views/AdminEdit.vue'

import Product from '@/views/Product.vue'
import ProductAdd from '@/views/ProductAdd.vue'
import ProductEdit from '@/views/ProductEdit.vue'

import Main from '@/views/Main.vue'
import Login from '@/views/Login.vue'


// import About from '@/views/About.vue'

// 方式2:懒加载(推荐,按需加载组件)
//const User = () => import('@/views/User.vue')

// 2. 定义路由规则
const routes = [
  // 重定向:访问根路径时跳转到首页
  {
    path: '/',
    redirect: '/home'
  },

    {
        path: '/adminlogin',
        name: 'Login',
        component: Login
    },

  // 动态路由(带参数)

    // Main
    {
        path: '/main',
        name: 'Main',
        component: Main,
        meta: {
            requiresAuth: true
        },
        children:[
            {
                path: '/userpage', // :id 是动态参数
                name: 'User',
                component: User,
                meta: {
                    requiresAuth: true
                },
            },
            {
                path: '/useradd', // :id 是动态参数
                name: 'UserAdd',
                component: UserAdd,
                meta: {
                    requiresAuth: true
                },
            },
            {
                path: '/useredit', // :id 是动态参数
                name: 'UserEdit',
                component: UserEdit,
                meta: {
                    requiresAuth: true
                },
            },
            {
                path: '/brandpage', // :id 是动态参数
                name: 'Brand',
                component: Brand,
                meta: {
                    requiresAuth: true
                },
            },
            {
                path: '/brandadd', // :id 是动态参数
                name: 'BrandAdd',
                component: BrandAdd,
                meta: {
                    requiresAuth: true
                },
            },
            {
                path: '/brandedit', // :id 是动态参数
                name: 'BrandEdit',
                component: BrandEdit,
                meta: {
                    requiresAuth: true
                },
            },
            {
                path: '/categorypage', // :id 是动态参数
                name: 'Category',
                component: Category,
                meta: {
                    requiresAuth: true
                },
            },
            {
                path: '/categoryadd', // :id 是动态参数
                name: 'CategoryAdd',
                component: CategoryAdd,
                meta: {
                    requiresAuth: true
                },
            },
            {
                path: '/categoryedit', // :id 是动态参数
                name: 'CategoryEdit',
                component: CategoryEdit,
                meta: {
                    requiresAuth: true
                },
            },
            {
                path: '/adminpage', // :id 是动态参数
                name: 'Admin',
                component: Admin,
                meta: {
                    requiresAuth: true
                },
            },
            {
                path: '/adminadd', // :id 是动态参数
                name: 'AdminAdd',
                component: AdminAdd,
                meta: {
                    requiresAuth: true
                },
            },
            {
                path: '/adminedit', // :id 是动态参数
                name: 'AdminEdit',
                component: AdminEdit,
                meta: {
                    requiresAuth: true
                },
            },
            {
                path: '/productpage', // :id 是动态参数
                name: 'Product',
                component: Product,
                meta: {
                    requiresAuth: true
                },
            },
            {
                path: '/productadd', // :id 是动态参数
                name: 'ProductAdd',
                component: ProductAdd,
                meta: {
                    requiresAuth: true
                },
            },
            {
                path: '/productedit', // :id 是动态参数
                name: 'ProductEdit',
                component: ProductEdit,
                meta: {
                    requiresAuth: true
                },
            },

        ]
    },
  // 404 页面(必须放在最后)
//  {
//    path: '/:pathMatch(.*)*', // 匹配所有未定义的路由
//    name: 'NotFound',
//    component: NotFound,
//    meta: {
//      title: '页面不存在'
//    }
//  }
]

// 3. 创建路由实例
const router = createRouter({
  // 路由模式:
  // - createWebHistory:history 模式(无 # 号,需要后端配置)
  // - createWebHashHistory:hash 模式(有 # 号,无需后端配置)
  history: createWebHistory(import.meta.env.BASE_URL), // import.meta.env.BASE_URL 是 Vue 项目的基础路径
  // history: createWebHashHistory(), // 如需使用 hash 模式,替换上面这行
  routes // 传入路由规则
})

// 4. 全局路由守卫(可选,用于全局权限控制、页面标题设置等)
// 全局前置守卫:路由跳转前执行
// 路由前置守卫(每次跳转路由前触发)
router.beforeEach((to, from, next) => {
    // 1. 设置页面标题
    // if (to.meta.title) {
    //     document.title = to.meta.title + ' - 管理系统'
    // }

    // 2. 获取本地存储的token(登录成功后存储)
    const token = localStorage.getItem('token')

    // 3. 登录状态验证逻辑
    if (to.meta.requiresAuth) {
        // 目标路由需要登录权限
        if (token) {
            // 有token,视为已登录,放行
            next()
        } else {
            // 无token,未登录,跳转到登录页
            ElMessage.warning('请先登录!')
            next({
                path: '/adminlogin',
                query: { redirect: to.fullPath } // 记录跳转前的页面,登录后可返回
            })
        }
    } else {
        // 目标路由是公开路由(白名单)
        if (token && to.path === '/adminlogin') {
            // 已登录用户访问登录页,自动跳转到首页
            ElMessage.info('您已登录,无需重复登录')
            next({ path: '/mainpage' })
        } else {
            // 未登录用户访问公开路由,放行
            next()
        }
    }
})

// 5. 导出路由实例(供 main.js 引入)
export default router