《按钮事件》
Button 常用属性
1 UseWaitCursor :是否使用等待鼠标类型
2 backgroundImage :背景图
3backgroundImagelayout :背景图分布方式:如果图片过小生成多张图片:stretch 拉伸图片以适应控件大小:zoom按照图像原比例进行缩放图片
4TextAlign :对齐方式
5 Dock 控件的停靠方式 设置处于父控件的哪个方向 top:处于父控件上面
事件:触发函数的行为,例如在点击的时候调用一个函数。需要给按钮绑定一个点击事件,
事件也有很多种类:鼠标的点击事件,输入框textbox的TextChanged文本输入事件。键盘事件等
代码:
private void button1_Click(object sender, EventArgs e)
{
//textBox1.Text;输入框文本内容
//label2.Text label2的文本
label2.Text = textBox1.Text;//输入框文本内容
}
private void textBox1_TextChanged(object sender, EventArgs e)
{
//输入文本的时候触发
label2.Text= textBox1.Text;
}
效果:

《菜单》
private void toolStripComboBox1_Click(object sender, EventArgs e)
{
}
private void 新闻2ToolStripMenuItem_Click(object sender, EventArgs e)
{
MessageBox.Show("111");
}
private void toolStripLabel1_Click(object sender, EventArgs e)
{
}
效果如下:
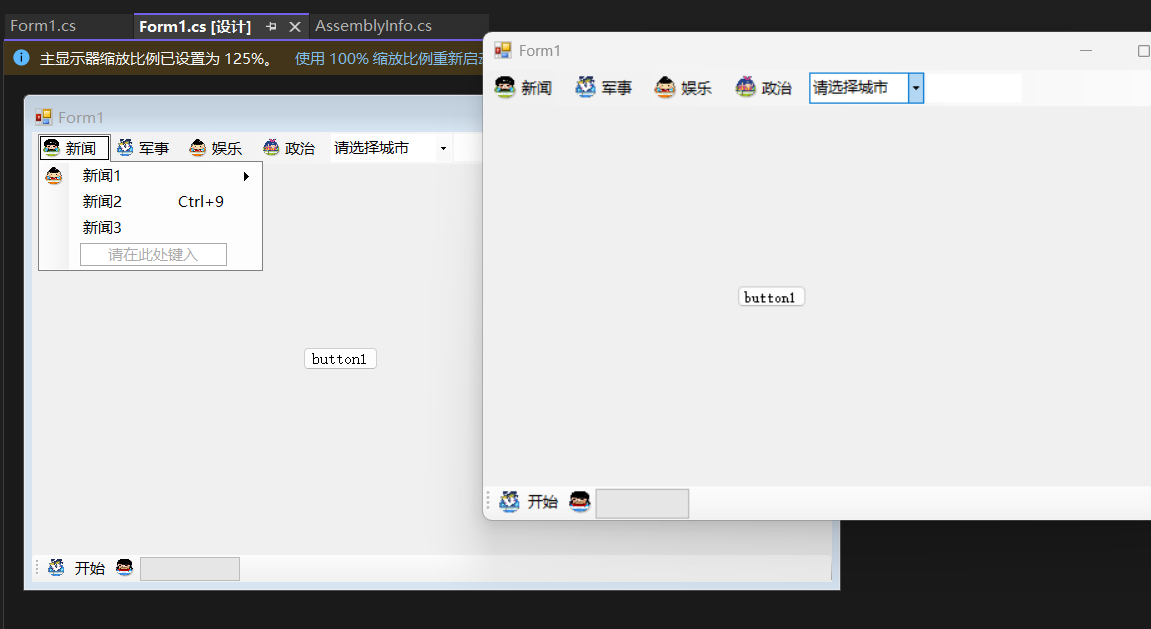
可以进行图片增加 进行多个子菜单
《下单列表》
comboBox
手动添加 通过集合
//通过 SelectedIndex设置默认列表选择的项
comboBox1.SelectedIndex = 0;
private void comboBox1_SelectedIndexChanged(object sender, EventArgs e)
{
//comboBox1.SelectedIndex 下拉列表的选择的索引值
//comboBox1.Text;获取当前下拉列表的文本
label1.Text= comboBox1.SelectedIndex.ToString() + comboBox1.ItemscomboBox1.SelectedIndex.ToString();
}
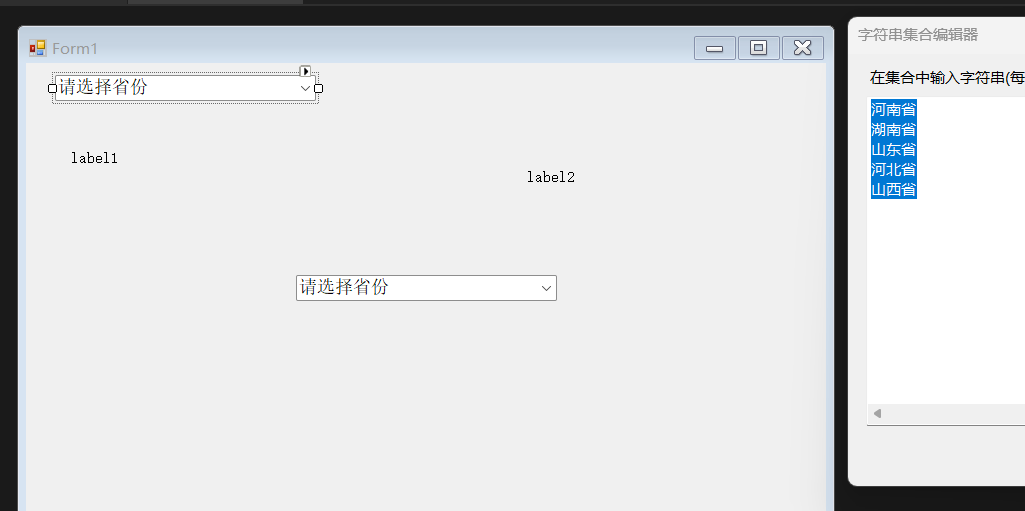
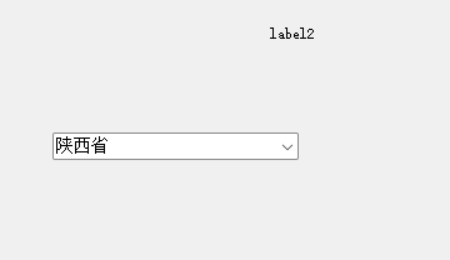
通过代码来添加
//通过代码来添加数据源
List<string> list = new List<string>();
list.Add("请选择省份");
list.Add("湖北省");
list.Add("陕西省");
list.Add("广东省");
list.Add("广西省");
comboBox2.DataSource=list;
}
private void label1_Click(object sender, EventArgs e)
{
}
//当选择的索引值发生变化的触发
效果图如下
《表格》
dataGridView1
private void dataGridView1_RowPostPaint(object sender, DataGridViewRowPostPaintEventArgs e)
{
string s = e.RowIndex + 1 + " ";//显示的内容
//dataGridView1.Font;//表格的默认字体
//创建一个矩形 绘制的区域
//e.RowBounds.Left,开始绘制行的左边界位置
// e.RowBounds.Top 开始绘制行的上边界位置
Rectangle rect = new Rectangle(e.RowBounds.Left, e.RowBounds.Top, dataGridView1.RowHeadersWidth , e.RowBounds.Height);
StringFormat sf = new StringFormat()
{
Alignment = StringAlignment.Center,//水平对齐方式居中
LineAlignment = StringAlignment.Center,//竖直对齐方式居中
};
//Brushes.Black 画笔的颜色
//Grapics 图形类
//DrawString 绘制一个文本 参数1是绘制的字符串 ,参数2是绘制字体,参数3绘制的笔刷颜色 参数4绘制的区域
e.Graphics.DrawString(s, dataGridView1.Font,Brushes.Black, rect);
}
通过Colums添加表头

通过添加四个button来实现表格作用(代码实现)

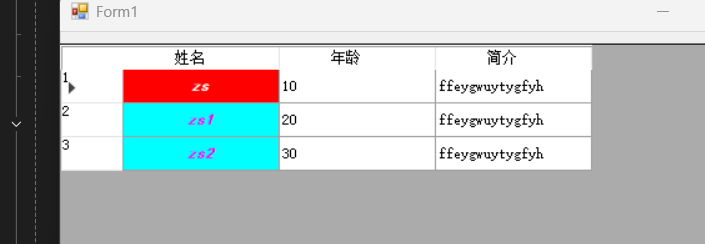
用代码给表格默认对象
public class Student
{
public string Name { get; set; }
public int Age { get; set; }
public string Info { get; set; }
}
public List<Student> list = new List<Student>();//学生集合对象
list.Add(new Student() { Name = "zs", Age = 10, Info = "ffeygwuytygfyh" });
list.Add(new Student() { Name = "zs1", Age = 20, Info = "ffeygwuytygfyh" });
list.Add(new Student() { Name = "zs2", Age = 30, Info = "ffeygwuytygfyh" });
//AutoGenerateColumns是否自动生成列,设置false 需要自己通过界面绑定类的属性(自己设置列的标题,自己设置列显示哪个属性
//设置为true,表格自动显示列的标题为绑定类的属性
dataGridView1.AutoGenerateColumns = false;
//dataGridView1 表格 可以通过.DataSource属性进行绑定数据源 ,但是后续添加的新的数据不会立即显示到控件上,需要
//再次对dataGridView1.DataSource=null之后 再重新赋值
dataGridView1.DataSource = list;
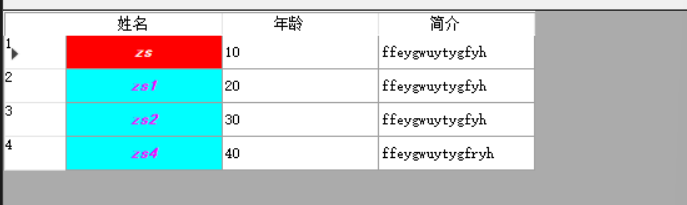
添加数据源代码
private void button1_Click(object sender, EventArgs e)
{
list.Add(new Student() { Name = "zs4", Age = 40, Info = "ffeygwuytygfryh" });
dataGridView1.DataSource = null;
dataGridView1.DataSource = list;
}
效果如下:
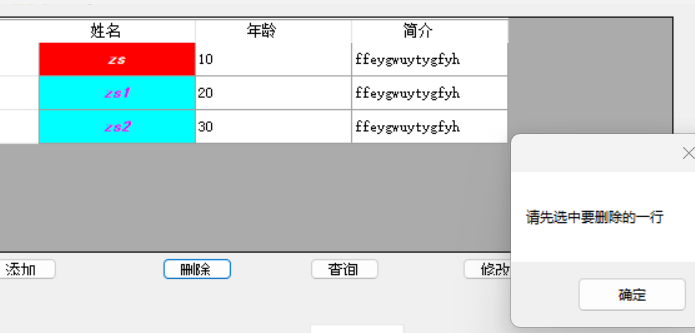
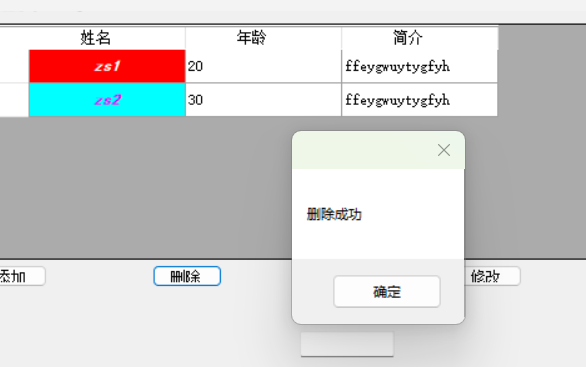
删除数据源
private void button2_Click(object sender, EventArgs e)
{
//先判断是否选中行
//SelectedRows 选中的行 可以选择多个
if (dataGridView1.SelectedRows.Count == 0) //没选中行
{
MessageBox.Show("请先选中要删除的一行");
return;
}
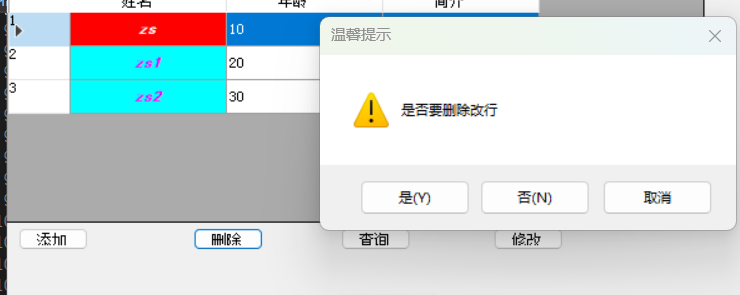
//选中行了 获取选中的一行索引值 或者这一行对象
Student stu = null;//要删除的一行对象
//DataBoundItem 获取选中行绑定对象
//as 强制转换成Student
stu = dataGridView1.SelectedRows0.DataBoundItem as Student;
//essageBox.Show是有返回值的,为DialogResult(对话结果对象)
DialogResult result = MessageBox.Show("是否要删除改行", "温馨提示", MessageBoxButtons.YesNoCancel, MessageBoxIcon.Warning);
if (result != DialogResult.Yes)//如果没有选择yes 直接retur
{
return;
}
//如果选择警告框的yes键时候 再删除
list.Remove(stu);
//刷新界面
dataGridView1.DataSource = null;
dataGridView1.DataSource = list;
//删除成功之后 可以再次提示一下
MessageBox.Show("删除成功");
}
效果如下:
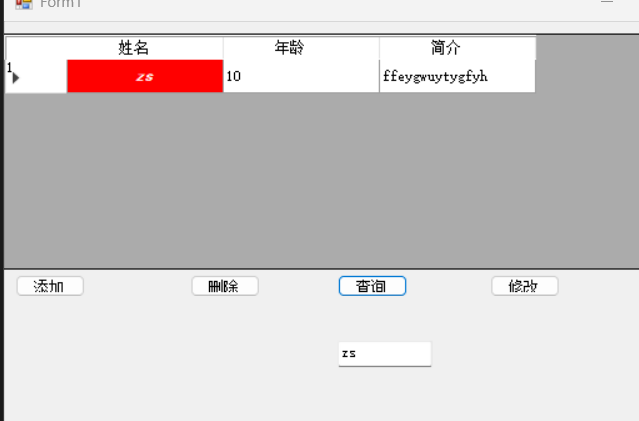
查询数据源 把满足查询条件的数据源重新绑定给表格
private void button3_Click(object sender, EventArgs e)
{
//FindAll() 查找满足条件的所有的元素对象 ,与输入框文本内容一样的对象
List<Student> currentList = list.FindAll(v => v.Name == textBox1.Text);
if (currentList.Count == 0)
{
MessageBox.Show("没找到要找的学生");
return;
}
dataGridView1.DataSource = null;
dataGridView1.DataSource = currentList;
}
效果如下:
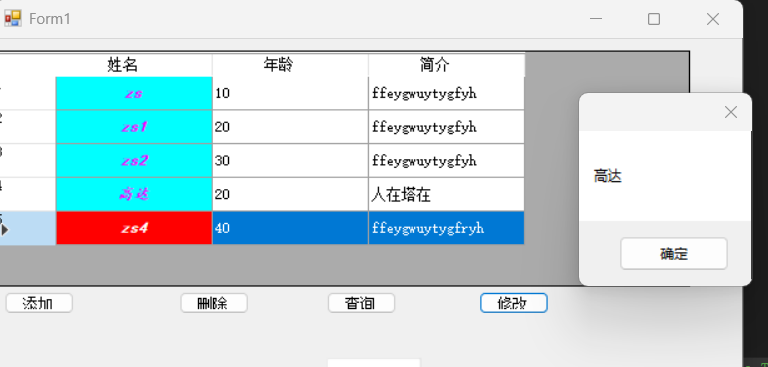
修改数据源
private void button4_Click(object sender, EventArgs e)
{
if (dataGridView1.SelectedRows.Count == 0)
{
MessageBox.Show("请先选中要修改的一行");
return;
}
//获取选中一行的对象
DataGridViewRow cc = dataGridView1.SelectedRows0;
Student stu = cc.DataBoundItem as Student;
stu.Name = "高达";
stu.Age = 20;
stu.Info = "人在塔在";
MessageBox.Show(cc.Cells"Name1".Value.ToString());
dataGridView1.DataSource = null;
dataGridView1.DataSource = list;
//获取单元格的内容
//Cells"Name1" 获取name属性为Name1单元格的内容
//MessageBox.Show ( dataGridView1.SelectedRows0.Cells"Name1".Value.ToString()+"");
// DataGridViewRow cc1 = dataGridView1.SelectedRows0;
// MessageBox.Show(dataGridView1.SelectedRows0.Cells"Column2".Value.ToString() + "");
}
效果如下
《定时器》
public Form1()
{
InitializeComponent();
//this.timer1.Stop();//关闭定时器
//this.timer1.Start();//开启定时器
this.timer1.Enabled = true;//设置定时器为激活状态的
this.timer1.Interval = 100;//触发定时器函数时间间隔 ms为单位
label1.Font = new Font(new FontFamily("楷体"), 20);
}
Random ran=new Random();//随机对象
int count=0;
//定时器事件
private void timer1_Tick(object sender, EventArgs e)
{
count++;
// MessageBox.Show("定时器事件");
//Color.FromArgb(255,255,255) 通过三原色取值合成一个颜色
//三个值分别为红绿蓝 值的范围是0-255,哪个值越大,越接近该颜色 255,255,255 白色;0,0,0黑色,
int r =ran.Next(256);
int g=ran.Next(256);
int b=ran.Next(256);
label1.BackColor = Color.FromArgb(r,g,b);
//label1.Left label的左边的距离
label1.Location = new Point(label1.Left, count++);
if (count>=400)
{
count = 0;
}
}
private void startTimer_Click(object sender, EventArgs e)
{
this.timer1.Start();//开启定时器
}
private void stopTimer_Click(object sender, EventArgs e)
{
this.timer1.Stop();
}
效果如下:

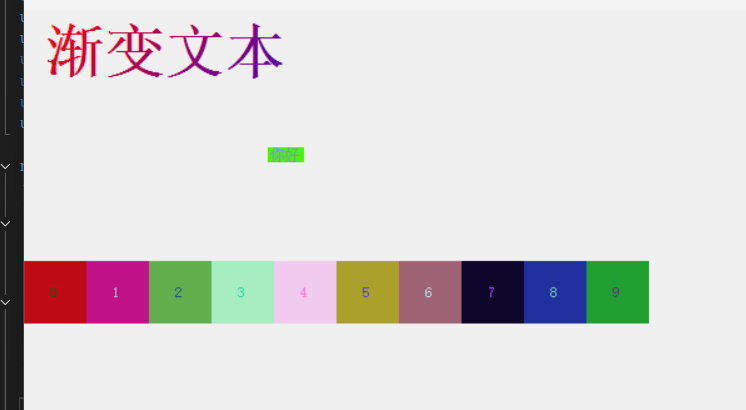
《用代码创建定时器》
代码如下:
public Form1()
{
InitializeComponent();
//创建定时器对象
timer = new Timer() { Enabled =true,Interval=10000};
timer.Tick += Timer_Tick;//绑定定时器事件
for (int i = 0; i < 10; i++)
{
Label label = new Label()
{
Text = i.ToString(),
Location = new Point(50*i,200),
BackColor = Color.Aqua,
Size = new Size(50,50),
TextAlign=ContentAlignment.MiddleCenter
};
this.Controls.Add(label);
}
}
//override 重写OnPaint方法 当绘制窗体的时候触发
protected override void OnPaint(PaintEventArgs e)
{
base.OnPaint(e);//base调用基类的重新绘制方法
// 自定义绘图逻辑
Graphics g = e.Graphics;
Rectangle rect = new Rectangle(10, 10, 300, 50); //窗户一个矩形区域
Font font = new Font("Arial", 32, FontStyle.Bold);
LinearGradientBrush brush = new LinearGradientBrush(rect, Color.Red, Color.Blue, 45f);// 创建一个线性渐变的笔刷
g.DrawString("渐变文本", font, brush, new PointF(10, 10));
}
Random rnd = new Random();
private void Timer_Tick(object sender, EventArgs e)
{
for (int i = 0; i<this.Controls.Count; i++)//this.Controls.Count 控件的个数
{
if (this.Controlsi is Label)//判断控件是不是Label
{
this.Controlsi.BackColor = Color.FromArgb(rnd.Next(256),rnd.Next(256),rnd.Next(256));
this.Controlsi.ForeColor = Color.FromArgb(rnd.Next(256), rnd.Next(256), rnd.Next(256));
}
}
}
效果如下