一、项目背景
在现代Web应用中,实时通信已成为必不可少的功能。无论是在线聊天、即时通知,还是实时数据展示,WebSocket技术都能提供高效的解决方案。本文将通过一个完整的实战案例,详细介绍如何使用Spring Boot + WebSocket + STOMP协议实现点对点消息推送功能。
二、技术选型
核心技术栈
- Spring Boot 4.0.0 - 基础框架
- WebSocket - HTML5提供的全双工通信协议
- STOMP (Simple Text Oriented Messaging Protocol) - 简单的文本定向消息协议
- SimMessagingTemplate - Spring提供的消息发送模板
- Lombok - 简化Java代码
- SockJS + STOMP.js - 前端WebSocket客户端库
为什么选择STOMP?
STOMP协议为WebSocket提供了消息路由功能,使得消息可以精确地发送到指定的订阅者,特别适合实现点对点消息推送。
三、项目结构
websocketdemo/
├── config/
│   └── WebSocketConfig.java          # WebSocket配置类
├── controller/
│   └── WebSocketDemoController.java  # REST接口控制器
├── service/
│   ├── WebSocketService.java          # WebSocket服务接口
│   ├── MessageService.java           # 消息服务接口
│   └── impl/
│       ├── WebSocketServiceImpl.java # WebSocket服务实现
│       └── MessageServiceImpl.java   # 消息服务实现
└── vo/
    └── MessageVO.java               # 消息VO对象
四、核心实现详解
4.1 Maven依赖配置
首先在 pom.xml 中添加WebSocket依赖:
xml
<!-- Spring Boot WebSocket -->
<dependency>
    <groupId>org.springframework.boot</groupId>
    <artifactId>spring-boot-starter-websocket</artifactId>
</dependency>

<!-- Lombok -->
<dependency>
    <groupId>org.projectlombok</groupId>
    <artifactId>lombok</artifactId>
</dependency>
4.2 WebSocket配置类
WebSocketConfig.java 是整个WebSocket功能的核心配置:
java
@Configuration
@EnableWebSocketMessageBroker
public class WebSocketConfig implements WebSocketMessageBrokerConfigurer {

    @Override
    public void configureMessageBroker(MessageBrokerRegistry config) {
        // 启用简单消息代理,客户端订阅前缀为 /topic 和 /queue
        config.enableSimpleBroker("/topic", "/queue");
        // 客户端发送消息前缀为 /app
        config.setApplicationDestinationPrefixes("/app");
    }

    @Override
    public void registerStompEndpoints(StompEndpointRegistry registry) {
        // 注册WebSocket端点,允许跨域
        registry.addEndpoint("/ws/message")
                .setAllowedOrigins("*");
        // 如需兼容不支持WebSocket的浏览器,可取消下面注释
        // .withSockJS();
    }
}
配置说明:
/topic- 广播模式,所有订阅该主题的客户端都能收到消息/queue- 点对点模式,消息只发送给特定用户/app- 客户端向服务器发送消息的前缀/ws/message- WebSocket连接端点
4.3 消息VO对象
MessageVO.java 定义了消息的数据结构:
java
@Data
public class MessageVO implements Serializable {
    private static final long serialVersionUID = 1L;

    private Long userId;      // 接收者ID
    private String title;     // 消息标题
    private String content;   // 消息内容
    private String senderId;  // 发送者ID
}
4.4 WebSocket服务层
服务接口
WebSocketService.java 定义了两个核心方法:
java
public interface WebSocketService {
    // 广播消息
    void sendMessage(String destination, Object payload);

    // 点对点发送消息
    void sendMessageToUser(String userId, String destination, Object payload);
}
服务实现
WebSocketServiceImpl.java 实现了消息发送逻辑:
java
@Service
@RequiredArgsConstructor
public class WebSocketServiceImpl implements WebSocketService {

    private final SimpMessagingTemplate messagingTemplate;

    @Override
    public void sendMessage(String destination, Object payload) {
        try {
            messagingTemplate.convertAndSend(destination, payload);
            log.debug("发送消息成功,目标: {}, 内容: {}", destination, payload);
        } catch (Exception e) {
            log.error("发送消息失败,目标: {}, 错误: {}", destination, e.getMessage(), e);
        }
    }

    @Override
    public void sendMessageToUser(String userId, String destination, Object payload) {
        try {
            // 发送到特定用户的队列
            String userDestination = "/queue/user/" + userId + "/" + destination;
            messagingTemplate.convertAndSend(userDestination, payload);
            log.debug("发送消息给用户成功,用户: {}, 目标: {}, 内容: {}", userId, destination, payload);
        } catch (Exception e) {
            log.error("发送消息给用户失败,用户: {}, 目标: {}, 错误: {}", userId, destination, e.getMessage(), e);
        }
    }
}
关键点:
- 使用
SimpMessagingTemplate进行消息发送 - 点对点消息使用
/queue/user/{userId}/{destination}格式 - 添加了异常处理和日志记录
4.5 消息服务层
MessageServiceImpl.java 封装了业务逻辑:
java
@Service
@RequiredArgsConstructor
public class MessageServiceImpl implements MessageService {

    private final WebSocketService webSocketService;

    @Override
    public String sendMessage(MessageVO messageVO) {
        // 发送WebSocket通知
        webSocketService.sendMessageToUser(
            messageVO.getUserId().toString(),
            "new-message",
            messageVO
        );

        log.info("发送消息成功,messageVO: {}", messageVO);
        return "发送成功";
    }
}
4.6 REST控制器
WebSocketDemoController.java 提供HTTP接口用于触发消息推送:
java
@RestController
@RequestMapping("/websockt-demo")
@RequiredArgsConstructor
public class WebSocketDemoController {

    private final MessageService messageService;

    /**
     * 发送消息接口
     * 请求地址: http://localhost:8091/demo-pro/websockt-demo/send?userId=1&content=hello
     */
    @RequestMapping("/send")
    public String send(@RequestParam("userId") Long userId,
                       @RequestParam("content") String content) {
        MessageVO messageVO = new MessageVO();
        messageVO.setUserId(userId);
        messageVO.setContent(content);
        messageVO.setSenderId("demo-pro-system");
        messageVO.setTitle("通知");
        messageService.sendMessage(messageVO);
        return "success";
    }
}
五、应用配置
application.yml 配置文件:
yaml
server:
  port: 8091
  servlet:
    context-path: /demo-pro

spring:
  application:
    name: demo-pro

message:
  websocket:
    endpoint: /ws/message
    allowed-origins: "*"

logging:
  level:
    org.springframework.web.socket: DEBUG
    org.springframework.messaging: DEBUG
六、前端实现
test-websocket.html 提供了一个完整的测试页面:
html
<!DOCTYPE html>
<html>
<head>
<meta charset="UTF-8">
<title>WebSocket测试</title>
<style>
body { font-family: Arial, sans-serif; padding: 20px; max-width: 1200px; margin: 0 auto; }
#status { margin-bottom: 20px; padding: 10px; background: #f0f0f0; border-radius: 4px; }
.connected { background: #d4edda; color: #155724; }
.disconnected { background: #f8d7da; color: #721c24; }
.connecting { background: #fff3cd; color: #856404; }
#messages { border: 1px solid #ccc; padding: 10px; height: 400px; overflow-y: auto; background: #fafafa; }
.message { margin: 5px 0; padding: 10px; background: #e9ecef; border-left: 3px solid #007bff; border-radius: 4px; }
.log { color: #666; font-size: 12px; margin: 3px 0; }
.error { color: #dc3545; background: #f8d7da; padding: 10px; margin: 10px 0; border-radius: 4px; }
.info { color: #004085; background: #cce5ff; padding: 10px; margin: 10px 0; border-radius: 4px; }
.controls { margin: 20px 0; padding: 15px; background: #f8f9fa; border-radius: 4px; }
input[type="text"] { padding: 8px; border: 1px solid #ccc; border-radius: 4px; width: 200px; }
button { padding: 8px 16px; margin: 0 5px; border: none; border-radius: 4px; cursor: pointer; background: #007bff; color: white; }
button:hover { background: #0056b3; }
button:disabled { background: #ccc; cursor: not-allowed; }
</style>
</head>
<body>
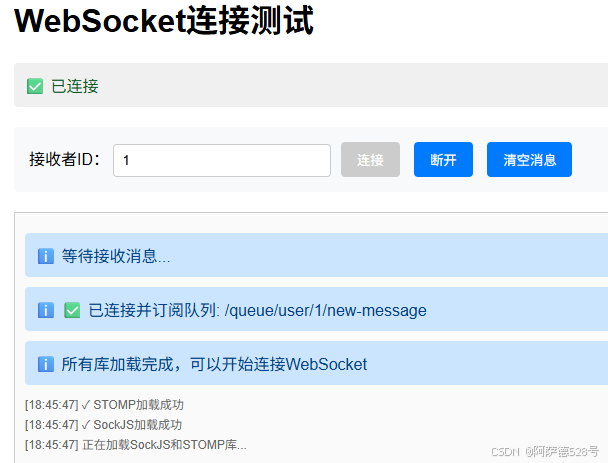
<h1>WebSocket连接测试</h1>
<div id="status" class="disconnected">⚠️ 未连接</div>
<div class="controls">
<label>接收者ID:</label>
<input type="text" id="userId" value="1" placeholder="输入用户ID">
<button onclick="connect()" id="connectBtn">连接</button>
<button onclick="disconnect()" id="disconnectBtn" disabled>断开</button>
<button onclick="clearMessages()">清空消息</button>
</div>
<div id="messages"></div>
<script>
let stompClient = null;
// 加载脚本函数,支持多个CDN源
function loadScript(src, fallbackSrc) {
return new Promise((resolve, reject) => {
const script = document.createElement('script');
script.src = src;
script.onload = () => resolve();
script.onerror = () => {
if (fallbackSrc) {
const fallback = document.createElement('script');
fallback.src = fallbackSrc;
fallback.onload = () => resolve();
fallback.onerror = () => reject(new Error('Failed to load ' + src + ' and ' + fallbackSrc));
document.head.appendChild(fallback);
} else {
reject(new Error('Failed to load ' + src));
}
};
document.head.appendChild(script);
});
}
// 页面加载时初始化
window.addEventListener('load', async function() {
try {
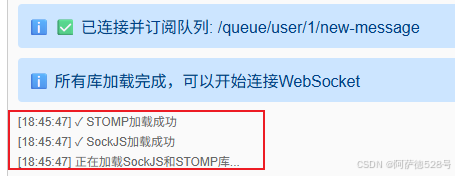
addLog('正在加载SockJS和STOMP库...');
// 使用多个CDN源作为备份
await loadScript(
'https://cdn.jsdelivr.net/npm/sockjs-client@1.6.1/dist/sockjs.min.js',
'https://cdnjs.cloudflare.com/ajax/libs/sockjs-client/1.6.1/sockjs.min.js'
);
addLog('✓ SockJS加载成功');
await loadScript(
'https://cdn.jsdelivr.net/npm/stompjs@2.3.3/lib/stomp.min.js',
'https://cdnjs.cloudflare.com/ajax/libs/stomp.js/2.3.3/stomp.min.js'
);
addLog('✓ STOMP加载成功');
addInfo('所有库加载完成,可以开始连接WebSocket');
// 检查库是否正确加载
if (typeof SockJS === 'undefined' || typeof Stomp === 'undefined') {
throw new Error('库加载失败,请检查网络连接');
}
} catch (error) {
addError('库加载失败: ' + error.message);
addError('请尝试以下解决方案:');
addError('1. 检查网络连接');
addError('2. 手动下载库文件到本地:');
addError(' - SockJS: https://cdn.jsdelivr.net/npm/sockjs-client@1.6.1/dist/sockjs.min.js');
addError(' - STOMP: https://cdn.jsdelivr.net/npm/stompjs@2.3.3/lib/stomp.min.js');
addError('3. 将下载的文件放在与HTML文件同级目录,并修改script标签');
}
});
function connect() {
const userId = document.getElementById('userId').value.trim();
if (!userId) {
addError('请输入接收者ID');
return;
}
if (typeof SockJS === 'undefined' || typeof Stomp === 'undefined') {
addError('库未加载,请刷新页面重试');
return;
}
updateStatus('connecting', '🔄 正在连接...');
document.getElementById('connectBtn').disabled = true;
try {
const socket = new WebSocket('ws://localhost:8091/demo-pro/ws/message');
stompClient = Stomp.over(socket);
// 开启调试日志
stompClient.debug = function(str) {
console.log(str);
};
// 设置连接超时
const timeout = setTimeout(() => {
if (stompClient && !stompClient.connected) {
addError('连接超时,请检查:');
addError('1. message-center服务是否正在运行');
addError('2. 端口10120是否正确');
addError('3. 浏览器控制台是否有错误信息');
disconnect();
}
}, 10000); // 10秒超时
stompClient.connect({}, function (frame) {
clearTimeout(timeout);
console.log('Connected: ' + frame);
updateStatus('connected', '✅ 已连接');
document.getElementById('disconnectBtn').disabled = false;
// 订阅用户的专属队列
const subscription = '/queue/user/' + userId + '/new-message';
stompClient.subscribe(subscription, function (message) {
try {
const msg = JSON.parse(message.body);
console.log('Received message:', msg);
showMessage(msg);
} catch (e) {
addError('解析消息失败: ' + e.message);
console.error('Parse error:', message.body);
}
});
addInfo('✅ 已连接并订阅队列: ' + subscription);
addInfo('等待接收消息...');
}, function (error) {
clearTimeout(timeout);
console.error('Connection error:', error);
updateStatus('disconnected', '❌ 连接失败');
document.getElementById('connectBtn').disabled = false;
if (error && error.headers && error.headers.message) {
addError('连接失败: ' + error.headers.message);
} else {
addError('连接失败: ' + JSON.stringify(error));
}
addError('请检查:');
addError('1. message-center服务是否正在运行');
addError('2. 端口10120是否正确');
addError('3. 浏览器控制台(F12)是否有详细错误信息');
});
} catch (error) {
addError('连接异常: ' + error.message);
updateStatus('disconnected', '❌ 连接异常');
document.getElementById('connectBtn').disabled = false;
}
}
function disconnect() {
if (stompClient !== null && stompClient.connected) {
stompClient.disconnect();
stompClient = null;
addInfo('已断开连接');
}
updateStatus('disconnected', '⚠️ 未连接');
document.getElementById('connectBtn').disabled = false;
document.getElementById('disconnectBtn').disabled = true;
}
function showMessage(message) {
const messagesDiv = document.getElementById('messages');
const messageDiv = document.createElement('div');
messageDiv.className = 'message';
const sendTime = message.sendTime || new Date().toLocaleString();
const title = message.title || '无标题';
const content = message.content || '无内容';
const sender = message.senderId || '未知发送者';
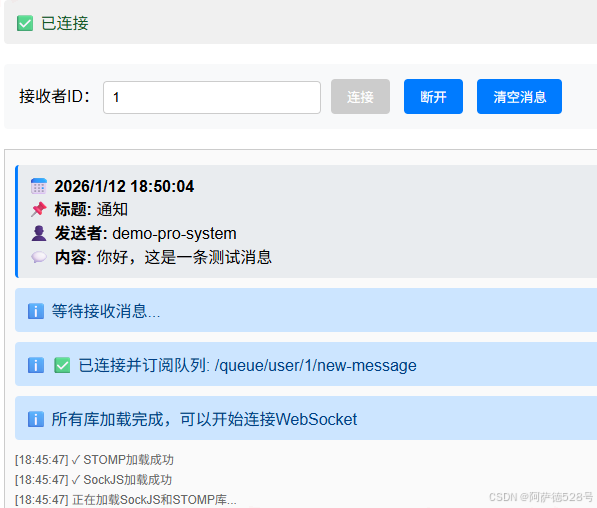
messageDiv.innerHTML = `
<strong>📅 ${sendTime}</strong><br>
<strong>📌 标题:</strong> ${title}<br>
<strong>👤 发送者:</strong> ${sender}<br>
<strong>💬 内容:</strong> ${content}
`;
messagesDiv.insertBefore(messageDiv, messagesDiv.firstChild);
}
function addLog(log) {
const messagesDiv = document.getElementById('messages');
const logDiv = document.createElement('div');
logDiv.className = 'log';
logDiv.textContent = '[' + new Date().toLocaleTimeString() + '] ' + log;
messagesDiv.insertBefore(logDiv, messagesDiv.firstChild);
}
function addError(error) {
const messagesDiv = document.getElementById('messages');
const errorDiv = document.createElement('div');
errorDiv.className = 'error';
errorDiv.textContent = '❌ ' + error;
messagesDiv.insertBefore(errorDiv, messagesDiv.firstChild);
}
function addInfo(info) {
const messagesDiv = document.getElementById('messages');
const infoDiv = document.createElement('div');
infoDiv.className = 'info';
infoDiv.textContent = 'ℹ️ ' + info;
messagesDiv.insertBefore(infoDiv, messagesDiv.firstChild);
}
function updateStatus(status, message) {
const statusDiv = document.getElementById('status');
statusDiv.textContent = message;
statusDiv.className = status;
}
function clearMessages() {
document.getElementById('messages').innerHTML = '';
addLog('消息已清空');
}
</script>
</body>
</html>连接WebSocket
javascript
function connect() {
    const userId = document.getElementById('userId').value.trim();
    const socket = new WebSocket('ws://localhost:8091/demo-pro/ws/message');
    stompClient = Stomp.over(socket);

    stompClient.connect({}, function (frame) {
        // 订阅用户的专属队列
        const subscription = '/queue/user/' + userId + '/new-message';
        stompClient.subscribe(subscription, function (message) {
            const msg = JSON.parse(message.body);
            showMessage(msg);
        });
    });
}
消息展示
javascript
function showMessage(message) {
    const messagesDiv = document.getElementById('messages');
    const messageDiv = document.createElement('div');
    messageDiv.className = 'message';

    messageDiv.innerHTML = `
        <strong>📅 ${sendTime}</strong><br>
        <strong>📌 标题:</strong> ${title}<br>
        <strong>👤 发送者:</strong> ${sender}<br>
        <strong>💬 内容:</strong> ${content}
    `;
    messagesDiv.insertBefore(messageDiv, messagesDiv.firstChild);
}
七、消息流程图
消息代理 SimpMessagingTemplate WebSocket服务 消息服务 REST控制器 客户端 消息代理 SimpMessagingTemplate WebSocket服务 消息服务 REST控制器 客户端 HTTP请求 /send?userId=1&content=hello sendMessage(messageVO) sendMessageToUser(userId, destination, payload) convertAndSend(/queue/user/1/new-message, payload) 转发消息 推送消息到订阅者
八、测试步骤
1. 启动应用
bash
mvn spring-boot:run或者使用IDEA的话,直接启动应用。
2. 打开测试页面
访问 http://localhost:8091/demo-pro/test_websocket/test-websocket.html
要等待页面所需依赖加载完成⬇️⬇️⬇️,再点击连接
3. 连接WebSocket
- 输入用户ID(如:1)
- 点击"连接"按钮
- 等待连接成功
4. 发送消息
在浏览器或Postman中访问:
http://localhost:8091/demo-pro/websockt-demo/send?userId=1&content=你好,这是一条测试消息
5. 查看结果
客户端页面会实时显示收到的消息
九、核心概念总结
STOMP消息路由规则
| 前缀 | 用途 | 示例 |
|---|---|---|
/topic |
广播消息,所有订阅者都能收到 | /topic/notifications |
/queue |
点对点消息,只发送给特定用户 | /queue/user/1/new-message |
/app |
客户端向服务器发送消息 | /app/hello |
消息发送方式
- 广播模式 - 所有订阅
/topic的客户端都能收到 - 点对点模式 - 只有特定用户能收到消息
- 用户会话模式 - 基于用户会话的精确推送
十、进阶优化建议
1. 消息持久化
将消息存储到数据库,实现历史消息查询和离线消息推送。
2. 消息确认机制
实现消息送达确认,确保重要消息不会丢失。
3. 集群支持
使用Redis或RabbitMQ作为消息代理,支持多实例部署。
4. 安全增强
- 添加WebSocket连接认证
- 实现消息加密传输
- 限制消息频率防止滥用
5. 性能优化
- 使用连接池管理WebSocket连接
- 实现消息批量发送
- 添加消息压缩功能
十一、常见问题
Q1: WebSocket连接失败怎么办?
检查以下几点:
- 服务器端口是否正确
- 防火墙是否允许WebSocket连接
- 浏览器是否支持WebSocket
- 查看服务器日志获取详细错误信息
Q2: 如何实现离线消息推送?
在用户上线时,查询数据库中的未读消息,通过WebSocket推送给用户。
Q3: 如何处理消息重复?
在消息VO中添加唯一ID,客户端收到消息后进行去重处理。
十二、总结
本文通过一个完整的实战案例,详细介绍了Spring Boot + WebSocket + STOMP的实现方案。该方案具有以下优势:
✅ 实时性强 - WebSocket提供全双工通信,消息推送延迟低
✅ 扩展性好 - 基于STOMP协议,易于实现复杂的消息路由
✅ 易于集成 - Spring Boot提供了完善的支持,开发效率高
✅ 生产可用 - 包含异常处理、日志记录等生产环境必需功能
通过以上代码,就可以独立实现一个最简单的基本功能完善的实时消息推送系统。如有疑问,欢迎在评论区交流讨论!