基于 CLIP 多模态模型的高性能人脸属性分析系统
📋 目录
- 项目概述
- 核心技术方案
- [Prompt 工程实践](#Prompt 工程实践 "#3-prompt-%E5%B7%A5%E7%A8%8B%E5%AE%9E%E8%B7%B5")
- 3.1 Prompt 设计的理论依据
- 3.2 单个语句设计注意点
- 3.3 一组语句设计注意点
- 3.4 核心策略总结
- 3.5 发型检测:词汇语义精确理解
- 3.6 正负样本对应设计
- 3.7 实战案例
- 3.8 多市场适配
- 高性能架构设计
- 难点痛点与解决方案
- 性能数据与总结
- 思考和展望
1. 项目概述
1.1 业务背景
年底了,各个厂商都在生成各种各样的年终总结。 像是淘宝、京东、拼多多都有类似的展示您今年在平台上花了多少钱。
Shopee 作为东南亚最大的电商平台也不例外,不过除了数据的展示之外,在大模型能力今非昔比的2025年底,我们也是拥抱最新的大模型,利用为用户生成个人的定制化动漫形象。
如下图为AI生成的几张模板图片,其中人物会被替换为用户本人的虚拟形象: 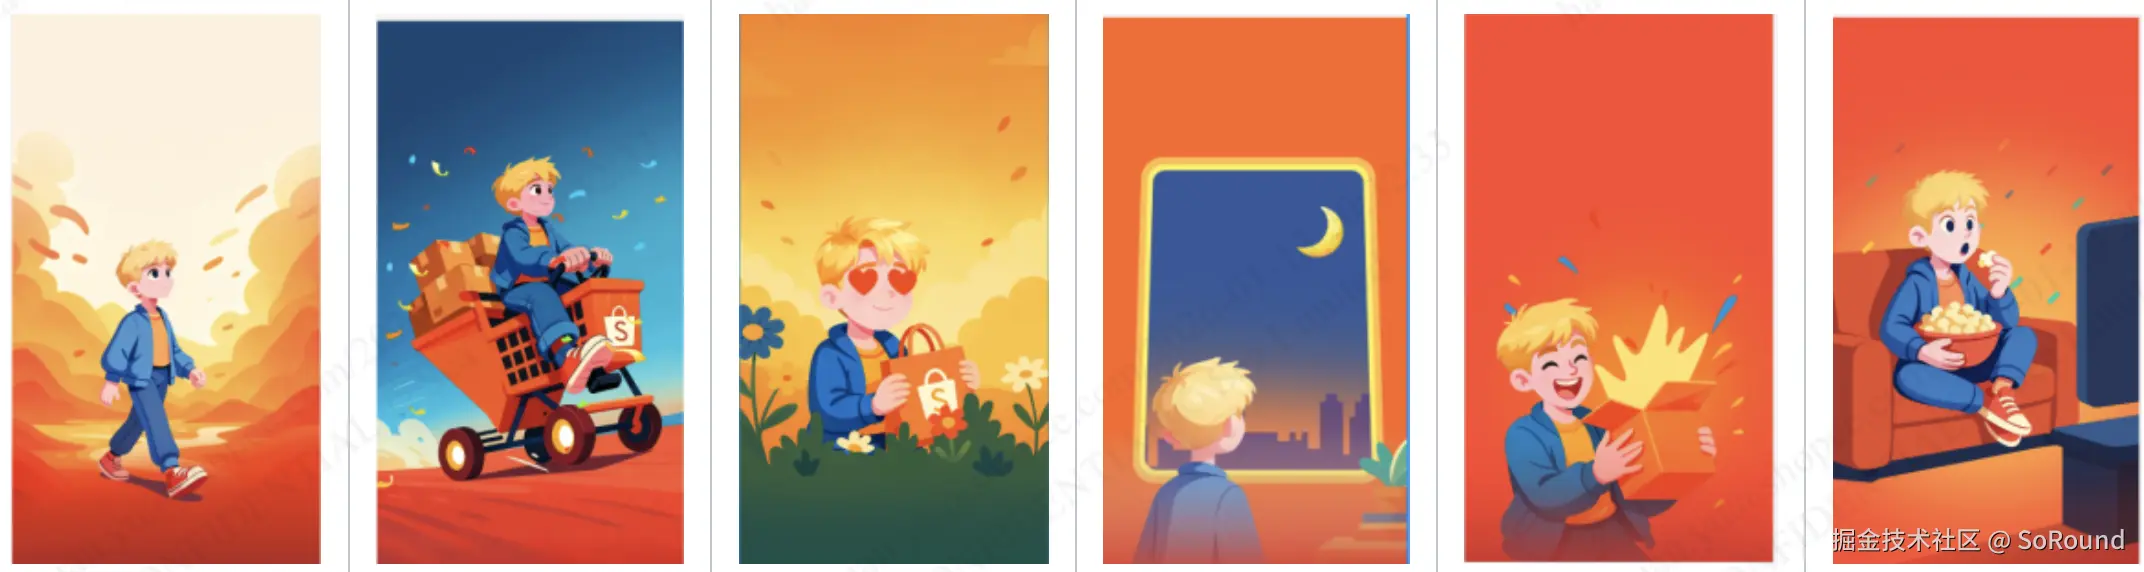
1.2 技术选型
在技术选型之前,首先必须提到一些前置条件(并非吐槽QAQ):
- 预算问题:大概2~4k美金的预算。
- 用户量级:预计需要支持1~2亿级别的用户量。
- 服务QPS:需要能够支持4k左右的请求峰值。
- 机器配置:0 GPU + 400 Core CPU
- 开发时间:1个月
基于上述的一些现状,基本上断掉了在线使用大模型的可能性(QPS、配置、预算均不能满足)。
因此,只能基于离线来生成实现此方案,经过一番讨论,最终确定:
- 定义人物特征,包括:性别、年龄、五官、发型、头饰等
- 给予自定义的特征,使用 Gemini 等大模型离线生成 TOP-N 组合的特征构成的动漫形象图。
- 审核图片,按不同特征放进数据库,
- 用户上传自拍图,服务提取人脸特征
- 根据特征,找到动漫形象图并返回。
本文将分享我们如何进行人脸的特征提取。
(省略调研工作,仅展示最终的结果)
方案:Python-HTTP-Service
| 组件 | 技术方案 | 选型理由 |
|---|---|---|
| 模型 | CLIP (ViT-B/32) | 零样本学习能力强,无需训练即可识别新类别,速度快,模型小 |
| 人脸检测 | MediaPipe | 轻量级,可区分真人与动漫 |
| Web 框架 | FastAPI + Uvicorn | 高性能异步框架 |
| 进程管理 | Gunicorn 多进程 | 充分利用多核 CPU |
2. 核心技术方案
2.1 CLIP 模型原理
CLIP(Contrastive Language-Image Pre-Training)是 OpenAI 发布的多模态模型,核心思想是通过对比学习将图像和文本映射到同一语义空间。
scss
                    ┌─────────────────┐
                    │   Input Image   │
                    └────────┬────────┘
                             │
                    ┌────────▼────────┐
                    │  Vision Encoder │  (ViT-B/32)
                    │   (图像编码器)    │
                    └────────┬────────┘
                             │
                    ┌────────▼────────┐
                    │  Image Feature  │  [1, 512]
                    └────────┬────────┘
                             │
              ┌──────────────┴──────────────┐
              │      Cosine Similarity       │
              │        (余弦相似度)           │
              └──────────────┬──────────────┘
                             │
                    ┌────────▼────────┐
                    │  Text Features  │  [N, 512]
                    │  (预编码文本)     │
                    └────────┬────────┘
                             │
                    ┌────────▼────────┐
                    │  Softmax 概率   │
                    │  → 属性判定      │
                    └─────────────────┘
2.2 零样本分类流程
python
# 简化的核心代码逻辑
def classify_face_attributes(image):
    # 1. 图像编码
    image_features = model.get_image_features(image)
    image_features = normalize(image_features)

    # 2. 计算与所有文本特征的相似度
    logits = logit_scale * image_features @ text_features.T

    # 3. Softmax 得到概率分布
    probs = softmax(logits)

    # 4. 按属性分组,取最高概率类别
    return parse_results(probs)
2.3 检测的属性维度
| 属性 | 分类 | 说明 |
|---|---|---|
| 性别 | male / female / neutral | 置信度 < 75% 判为 neutral |
| 年龄 | child / youth / middle_age / elderly | 0-10 / 10-45 / 45-65 / 65+ |
| 发型 | 17 种(含卷发、马尾、寸头等) | 支持刘海、长度检测 |
| 发色 | black / dark_brown / chestnut / salt_and_pepper | 支持挑染 |
| 肤色 | 5 档(从浅米色到深古铜色) | 带偏移修正 |
| 脸型 | oval / round / square / oblong / heart | 椭圆/圆/方/长/心形 |
| 眼睛 | round / almond / narrow | 圆眼/杏仁眼/眯缝眼 |
| 眼镜 | 有/无 | 支持墨镜检测 |
| 头饰 | hat / headscarf / none | 帽子/头巾/无 |
| 人脸真实性 | real_human / anime_face / no_face | 过滤非真实人脸 |
3. CLIP 模型 Prompt 工程实践
3.1 Prompt 设计的理论依据
📚 来源一:OpenAI 官方论文
CLIP 原始论文(Learning Transferable Visual Models From Natural Language Supervision)中有几个关键点:
1:完整句式优于单词
python
# ❌ 直接使用单词
"man" / "woman"

# ✅ 官方推荐的完整句式
"a photo of a man" / "a photo of a woman"
原因 :CLIP 是在互联网图文对上训练的,训练数据中的文本大多是完整的句子而非单词。使用完整句式更符合训练数据的分布。
2:Prompt Ensemble(提示词集成)显著提升准确率
OpenAI 在 ImageNet 分类中使用了 80 个不同的模板:
- "a photo of a {label}"
- "a blurry photo of a {label}"
- "a cropped photo of a {label}"
- "a good photo of a {label}"
- "a photo of the small {label}"
通过多模板平均,ImageNet 准确率提升了 3.5%(从 72% → 75.5%)
📚 来源二:社区实践经验
| 来源 | 贡献 |
|---|---|
| Hugging Face 论坛 | Prompt 模板分享、效果对比实验 |
| CoOp 论文 | Prompt 自适应学习研究 |
| Reddit r/MachineLearning | 实战踩坑经验 |
| 我们的 A/B 测试 | 针对人脸属性的专项优化 |
3.2 单个语句设计注意点
✅ 推荐做法(DO)
| 原则 | 好的示例 | 说明 |
|---|---|---|
| 完整句式 | "a photo of a person with short hair" | 符合训练数据分布 |
| 具体特征 | "short hair above the ears" | 而非模糊的 "short hair" |
| 可观测描述 | "with smooth skin" | 而非主观的 "young person" |
| 避免歧义 | "black hair color" | "dark hair" 可能是 brown |
❌ 避免做法(DON'T)
| 问题类型 | 错误示例 | 原因 |
|---|---|---|
| 单词/短语 | "youth" / "young" | 不符合训练数据句式 |
| 主观描述 | "beautiful woman" | CLIP 对主观审美不敏感 |
| 过于抽象 | "middle-aged person" | 没有具体可观测特征 |
| 文化依赖 | "Asian eyes" | 不精确且可能敏感 |
💡 改进示例
python
# ❌ 不好的写法 - 太抽象
"a young person"

# ✅ 好的写法 - 加入可观测特征
"a photo of a person in their prime years with smooth skin"
"a photo of a vigorous adult aged 20 to 40 with youthful appearance"
3.3 一组语句设计注意点
原则一:描述角度多样化
python
AGE_TEXTS = {
    'youth': [
        # 角度1: 直接年龄范围
        "a photo of a person aged 10 to 45 years old",

        # 角度2: 变体表述
        "a photo of a young person between 10 and 45",

        # 角度3: 外观特征(皮肤状态)
        "a photo of a person in their prime years with smooth skin",

        # 角度4: 综合描述(精神状态 + 外观)
        "a photo of a vigorous adult aged 20 to 40 with youthful appearance"
    ]
}
数学原理 :多描述融合相当于 投票机制,减少单一描述带来的随机误差
scss
最终概率 = mean([prob_desc1, prob_desc2, prob_desc3, prob_desc4])原则二:各类别描述数量平衡
python
# ⚠️ 各类别的描述数量应该大致相等
GLASSES_TEXTS = {
    'positive': [  # 2 条
        "a photo of a person wearing glasses...",
        "a photo of a person wearing sunglasses..."
    ],
    'negative': [  # 2 条 ✅ 保持平衡
        "a photo of a person without any glasses...",
        "a photo of a person without sunglasses..."
    ]
}原因:如果 positive 有 5 条,negative 只有 1 条,会导致概率计算时 positive 类别被过度加权。
原则三:避免语义重叠
python
# ❌ 不好:描述过于相似,信息增益低
[
    "a photo of a person with short hair",
    "a photo of a person having short hair",    # 几乎相同
    "a photo of a person who has short hair"    # 几乎相同
]

# ✅ 好:每条提供不同的信息角度
[
    "a (Prompt Ensemble) photo of a person with short hair above the ears",           # 长度特征
    "a (Prompt Ensemble) photo of a person with short hair above ear level without bangs",  # + 刘海信息
    "a (Prompt Ensemble) photo of a person with short hair not reaching the ears",    # 换种表述
    "a (Prompt Ensemble) photo of a person with a short cut above the ears with bangs"  # 有刘海变体
]
3.4 核心策略总结
策略一:多描述融合
对于同一类别使用多个不同角度的描述,取平均概率:
python
# 年龄检测 - youth 类别(10-45岁)
AGE_TEXTS = {
    'youth': [
        "a photo of a person aged 10 to 45 years old",
        "a photo of a young person between 10 and 45",
        "a photo of a person in their prime years with smooth skin",
        "a photo of a vigorous adult aged 20 to 40 with youthful appearance"
    ]
}效果:单一描述准确率 ~70%,多描述融合后提升至 ~85%
策略二:特征描述具象化
python
# ❌ 模糊描述
"a photo of a person with short hair"

# ✅ 具象描述
"a photo of a person with short hair above the ears"
"a photo of a person with short hair above ear level without bangs"
"a photo of a person with short hair not reaching the ears, without bangs"
策略三:正负样本对比
python
# 眼镜检测 - 使用 positive/negative 对比
GLASSES_TEXTS = {
    'positive': [
        "a photo of a person wearing glasses, eyeglasses or spectacles on their face",
        "a photo of a person wearing sunglasses or dark glasses on their face"
    ],
    'negative': [
        "a photo of a person without any glasses, eyeglasses or spectacles on their face",
        "a photo of a person without sunglasses or dark glasses on their face"
    ]
}
这里特别需要注意的是:构建完整的对比维度
对于复杂特征(如发型),需要在多个维度上构建正负对比:
markdown
                    ┌─────────────────────────────────────┐
                    │         发型特征矩阵                  │
                    ├─────────────┬───────────────────────┤
                    │   维度       │    对比组             │
                    ├─────────────┼───────────────────────┤
                    │   长度       │  长发 ↔ 短发          │
                    │   卷曲度     │  卷发 ↔ 直发          │
                    │   刘海       │  有刘海 ↔ 无刘海       │
                    │   扎发       │  马尾 ↔ 披发          │
                    └─────────────┴───────────────────────┘
完整的发型分类矩阵
python
# 按「长度 × 卷曲度 × 刘海」三个维度组合
HAIRSTYLE_TEXTS = {
    # ========== 长发系列 ==========
    'long_straight_hair_no_bangs': [
        "a photo of a person with long straight hair past shoulders without bangs",
        "a photo of a person with long straight hair flowing past shoulders, forehead exposed"
    ],
    'long_straight_hair_with_bangs': [
        "a photo of a person with long straight hair past shoulders with bangs",
        "a photo of a person with long straight hair and full bangs covering forehead"
    ],
    'long_wavy_hair_no_bangs': [
        "a photo of a person with long wavy hair past shoulders without bangs",
        "a photo of a person with long wavy hair with forehead exposed"
    ],
    'long_wavy_hair_with_bangs': [
        "a photo of a person with long wavy hair past shoulders with bangs",
        "a photo of a person with long wavy hair and full bangs"
    ],
    'long_curly_hair_no_bangs': [
        "a photo of a person with long curly hair past shoulders without bangs",
        "a photo of a person with long curly hair with forehead exposed"
    ],
    'long_curly_hair_with_bangs': [
        "a photo of a person with long curly hair past shoulders with bangs",
        "a photo of a person with long curly hair and full bangs"
    ],

    # ========== 短发系列 ==========
    'short_straight_hair_no_bangs': [
        "a photo of a person with short straight hair above the ears without bangs",
        "a photo of a person with short straight hair not reaching the ears, forehead exposed"
    ],
    'short_straight_hair_with_bangs': [
        "a photo of a person with short straight hair above the ears with bangs",
        "a photo of a person with short straight hair and full bangs"
    ],
    'short_wavy_hair_no_bangs': [
        "a photo of a person with short wavy hair above the ears without bangs",
        "a photo of a person with short wavy hair, forehead exposed"
    ],
    'short_wavy_hair_with_bangs': [
        "a photo of a person with short wavy hair above the ears with bangs",
        "a photo of a person with short wavy hair and full bangs"
    ],
    'short_curly_hair_no_bangs': [
        "a photo of a person with short curly hair above the ears without bangs",
        "a photo of a person with short curly hair, forehead exposed"
    ],
    'short_curly_hair_with_bangs': [
        "a photo of a person with short curly hair above the ears with bangs",
        "a photo of a person with short curly hair and full bangs"
    ],
}
对比组可视化
markdown
                长发                              短发
    ┌─────────────────────────┐     ┌─────────────────────────┐
    │  直发    波浪    卷发    │     │  直发    波浪    卷发    │
    │   │       │       │     │     │   │       │       │     │
    │ ┌─┴─┐   ┌─┴─┐   ┌─┴─┐   │     │ ┌─┴─┐   ┌─┴─┐   ┌─┴─┐   │
    │ 无  有  无  有  无  有   │     │ 无  有  无  有  无  有   │
    │刘海刘海刘海刘海刘海刘海  │     │刘海刘海刘海刘海刘海刘海  │
    └─────────────────────────┘     └─────────────────────────┘
              6 种                            6 种
                         共 12 种基础发型
关键点:为什么需要完整对比组?
python
# ❌ 问题场景:只有「长卷发」的描述,没有「短卷发」
# CLIP 在检测短卷发时,可能会被「卷发」特征吸引,错误判定为「长卷发」

# ✅ 解决方案:构建完整的对比组
# 当「长卷发」和「短卷发」同时存在时,CLIP 会综合考虑「长度」和「卷曲度」两个特征
策略四:词汇语义精确理解
英文词汇的精确语义理解至关重要。
比如,在做卷发的发型检测时,我一开始对两个词经常混淆,但在 CLIP 中有完全不同的语义表示:
| 词汇 | 含义 | 视觉特征 | 中文对应 |
|---|---|---|---|
| Curly | 卷发 | 紧密的螺旋卷、弹簧状卷曲 | 卷发、螺旋卷 |
| Wavy | 波浪发 | 松散的 S 形波浪、自然波纹 | 波浪发、微卷 |
markdown
Curly(卷发)          Wavy(波浪发)
    ∿∿∿                   ~~~
   紧密螺旋               松散波浪
   弹簧状卷曲             S 形波纹
正确的 Prompt 设计
python
# ❌ 错误:混为一谈
"a photo of a person with curly or wavy hair"

# ✅ 正确:分开描述
HAIRSTYLE_TEXTS = {
    'curly_hair': [
        "a photo of a person with curly hair",           # 卷发
        "a photo of a person with tight curls",          # 紧密卷曲
        "a photo of a person with spiral curly hair"     # 螺旋卷
    ],
    'wavy_hair': [
        "a photo of a person with wavy hair",            # 波浪发
        "a photo of a person with loose waves",          # 松散波浪
        "a photo of a person with natural wavy hair"     # 自然波纹
    ]
}
4. 高性能架构设计
4.1 整体架构
scss
                            ┌─────────────────────────────────┐
                            │           Load Balancer          │
                            └───────────────┬─────────────────┘
                                            │
                    ┌───────────────────────┼───────────────────────┐
                    │                       │                       │
            ┌───────▼───────┐       ┌───────▼───────┐       ┌───────▼───────┐
            │   Worker 1    │       │   Worker 2    │       │   Worker N    │
            │  (Uvicorn)    │       │  (Uvicorn)    │       │  (Uvicorn)    │
            └───────┬───────┘       └───────┬───────┘       └───────┬───────┘
                    │                       │                       │
            ┌───────▼───────┐       ┌───────▼───────┐       ┌───────▼───────┐
            │  CLIP Model   │       │  CLIP Model   │       │  CLIP Model   │
            │  (独立实例)    │       │  (独立实例)    │       │  (独立实例)    │
            └───────────────┘       └───────────────┘       └───────────────┘
4.2 QPS 优化策略
🚀 优化一:文本特征预编码
问题:每次请求都要编码 100+ 个文本描述,耗时 ~50ms
方案:服务启动时预编码所有文本,推理时只需计算图像特征
python
class ClipFeatureExtractor:
    def __init__(self):
        # 服务启动时预编码所有文本特征
        self._precompute_text_features()

    def _precompute_text_features(self):
        all_texts, text_ranges = collect_all_texts_and_ranges()

        text_inputs = self.processor(text=all_texts, return_tensors="pt", padding=True)
        with torch.no_grad():
            text_features = self.model.get_text_features(**text_inputs)
            text_features = text_features / text_features.norm(p=2, dim=-1, keepdim=True)

        # 缓存预编码结果
self.precomputed_text_features = text_features效果:单次推理从 ~80ms 降至 ~30ms
🚀 优化二:批量推理
问题:逐张处理图片无法利用模型的并行能力
方案:支持批量图片一次性推理
python
def extract_batch(self, images: List, batch_size: int = 8):
    """批量提取多张图片的特征"""
    results = []

    for batch_idx in range(0, len(images), batch_size):
        batch_images = images[batch_idx:batch_idx + batch_size]

        # 批量编码图片
        image_inputs = self.processor(images=batch_images, return_tensors="pt")
        with torch.no_grad():
            image_features = self.model.get_image_features(**image_inputs)

        # 批量计算相似度
        logits_per_image = image_features @ self.precomputed_text_features.t()
        probs_batch = logits_per_image.softmax(dim=1)

        # 解析每张图片的结果
        for probs in probs_batch:
            results.append(self._parse_single_result(probs))

return results效果:batch_size=8 时,吞吐量提升 ~3 倍
🚀 优化三:多进程 + 单线程模式
问题:PyTorch 默认使用所有 CPU 核进行矩阵运算,多进程时会严重抢占资源
方案:限制每个进程只使用 1 个线程,通过多进程并行
python
# server.py - 必须在 import torch 之前设置
os.environ['OMP_NUM_THREADS'] = '1'
os.environ['MKL_NUM_THREADS'] = '1'
os.environ['OPENBLAS_NUM_THREADS'] = '1'
os.environ['VECLIB_MAXIMUM_THREADS'] = '1'
os.environ['NUMEXPR_NUM_THREADS'] = '1'
bash
# 启动脚本 - 使用多个 worker
uvicorn server:app --host 0.0.0.0 --port 8080 --workers $CPUS效果:4 核 CPU 上 QPS 从 ~30 提升至 ~120
🚀 优化四:异步请求处理
python
@router.post('/batch_face_analysis')
async def batch_user_face_analysis(request: BatchUserFaceAnalysisRequest):
    # 使用线程池执行 CPU 密集型任务,不阻塞事件循环
    loop = asyncio.get_event_loop()
    results = await loop.run_in_executor(
        None,  # 默认线程池
        process_batch_face_analysis,
        batch_data,
        'user',
        need_features,
        region,
        trace_id
    )
    return results
5. 一些其他问题
5.1 MediaPipe 多线程安全问题
问题:MediaPipe 在多线程环境下会出现奇怪的错误
原因:MediaPipe 内部使用了非线程安全的数据结构
解决方案:使用 ThreadLocal 为每个线程创建独立实例
python
class FaceAnalysisService:
    def __init__(self):
        # 线程本地存储
        self._thread_local = threading.local()

    def _get_thread_local_face_mesh(self):
        """获取当前线程的 MediaPipe 实例"""
        if not hasattr(self._thread_local, 'face_mesh'):
            # 为当前线程创建独立实例
            self._thread_local.face_mesh = self.mp_face_mesh.FaceMesh(
                static_image_mode=True,
                max_num_faces=10,
                refine_landmarks=True,
                min_detection_confidence=0.5
            )
        return self._thread_local.face_mesh
5.2 肤色检测普遍偏黑
问题:CLIP 检测出的肤色普遍比实际深 1-2 个色阶
分析:可能与 CLIP 训练数据分布有关
解决方案:检测后向浅色方向偏移一档
python
def _parse_skin_tone(self, skin_tone_probs):
    detected_tone = max(all_probs, key=all_probs.get)

    # 肤色往浅的方向偏移一个阶段
    skin_tone_shift_map = {
        'light_beige_skin': 'light_beige_skin',      # 最浅保持不变
        'warm_light_brown_skin': 'light_beige_skin', # 往前移一档
        'golden_brown_skin': 'warm_light_brown_skin',
        'medium_sunkissed_brown_skin': 'golden_brown_skin',
        'deep_bronze_skin': 'medium_sunkissed_brown_skin',
    }

    return skin_tone_shift_map.get(detected_tone, detected_tone)
5.3 年龄误判老年
问题:部分中年用户被误判为老年
解决方案:提高老年判定阈值
python
def _parse_age(self, age_probs):
    detected_group = max(all_probs, key=all_probs.get)
    confidence = all_probs[detected_group]

    # 特殊处理:老年需要 > 75% 才算老年
    if detected_group == 'elderly' and confidence <= 75.0:
        other_groups = {k: v for k, v in all_probs.items() if k != 'elderly'}
        detected_group = max(other_groups, key=other_groups.get)
        confidence = other_groups[detected_group]

    return detected_group, confidence
5.4 人脸真实性误判
问题:低置信度时动漫人脸容易误判
解决方案:分层阈值判定
python
def _parse_face_realness(self, face_realness_probs):
    # - no_face > 90% 时判定为无人脸
    # - anime_face > 65% 时判定为动漫人脸
    # - 其他情况判定为真实人脸

    is_anime = (detected_type == 'anime_face' and anime_face_prob > 65.0)
    is_no_face = (detected_type == 'no_face' and no_face_prob > 90.0)
    is_real_human = not (is_anime or is_no_face)
6. 性能数据与总结
6.1 最终性能指标
最终我们一台 4 CPU 的机器大概能顶得住 16~20 左右的QPS ,400个CPU能抗1600~2000的QPS。
(实际上是个位数的QPS、但是平均一个请求包含6张左右的图片)
6.2 关键技术总结
- CLIP 零样本学习:通过精心设计的文本 Prompt 实现多属性识别,无需标注数据
- Prompt 工程:多描述融合、具象化描述、正负对比显著提升准确率
- 性能优化组合拳 :
- 文本预编码(2.7x)
- 批量推理(3x)
- 多进程 + 单线程(Nx)
- 异步请求处理
- 补丁机制:针对特定属性(马尾、肤色、老年)的阈值和比例调优
6.3 后续优化方向
- GPU 推理支持(预计可达 5000+ QPS)
- 模型量化(INT8)进一步降低推理时间
- 特征缓存:对相同/相似图片进行缓存
- 模型蒸馏:训练更轻量的专用模型
7.思考和展望
实际上
📚 参考资料
- CLIP: Learning Transferable Visual Models From Natural Language Supervision
- MediaPipe Face Mesh
- FastAPI Documentation