用 Vibe Coding 打造 React 飞机大战游戏 ------ 我的实践与学习心得
- 引用参考datawhale开源项目:datawhale开源vibecoding教程
一、项目背景:从小游戏入门前端"游戏开发"
一直想用前端做一个经典的「飞机大战」小游戏,一方面可以练习 React 的组件化和状态管理,另一方面也能体验一下"游戏循环 + 碰撞检测"这类偏游戏的开发模式。
这次我选择在 Vibe Coding 智能编码环境 里完成这个小项目,它相当于一个集成了 AI 搭档的 IDE,可以直接让 AI:
- 初始化 React 项目(
create-react-app) - 自动检查/安装依赖
- 帮我写核心逻辑代码(游戏循环、键盘控制、敌机生成等)
- 启动开发服务器,打开浏览器实时预览
最后完成的是一个 基于 React 的飞机大战游戏,支持:
- 方向键
↑↓←→控制飞机移动(限制在屏幕范围内) - 空格键发射子弹
- 3 种敌机(小 / 中 / 大),不同血量、速度、得分
- 子弹与敌机碰撞检测、玩家与敌机/底部的碰撞检测
- 实时计分 + 游戏开始 / 游戏结束界面
下面按步骤分享整个过程。
二、项目初始化:Vibe Coding
1. 使用 create-react-app 初始化项目
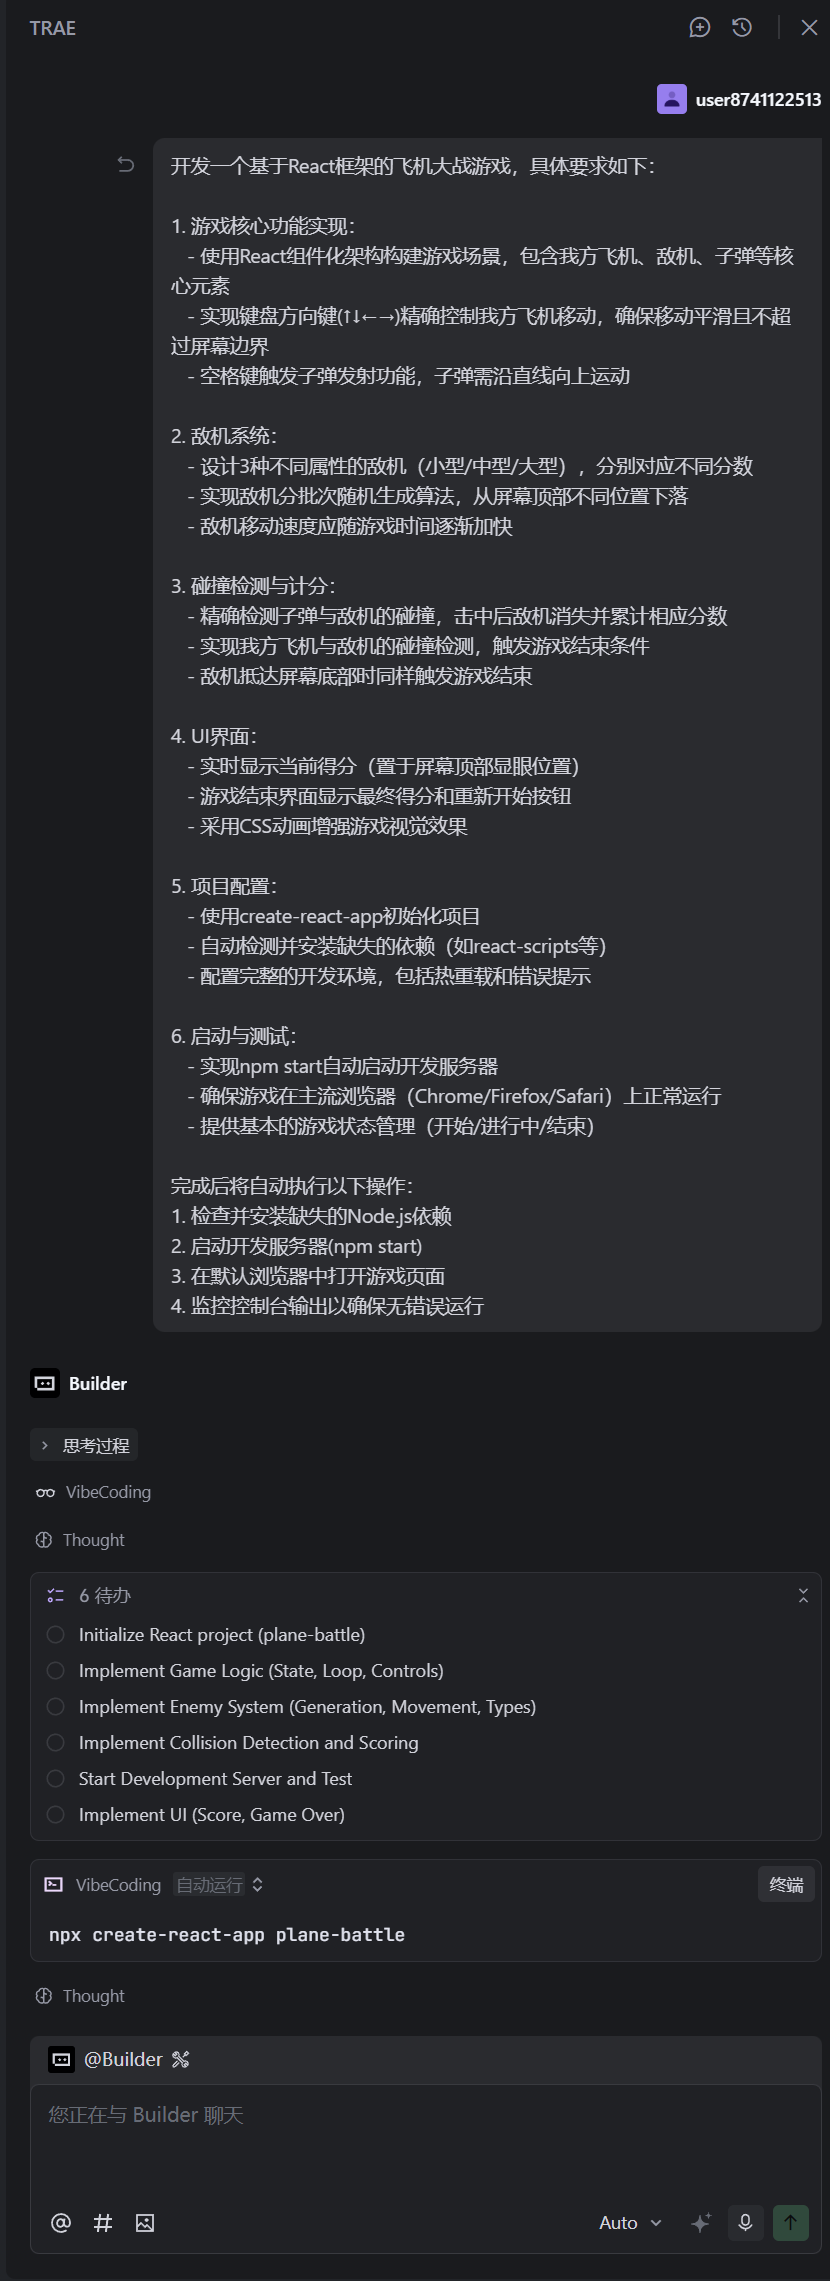
在 Vibe Coding 中,我让 AI 帮我执行项目初始化:
bash
npx create-react-app plane-battle这一步自动完成了:
- 创建
plane-battle目录 - 安装
react、react-dom、react-scripts等依赖 - 初始化项目结构和基础配置(支持热更新、错误提示等)
项目结构的核心部分:
text
plane-battle/
  src/
    App.js
    App.css
    index.js
    ...
2. 启动开发服务器
在项目根目录执行(或让 Vibe Coding 自动执行):
bash
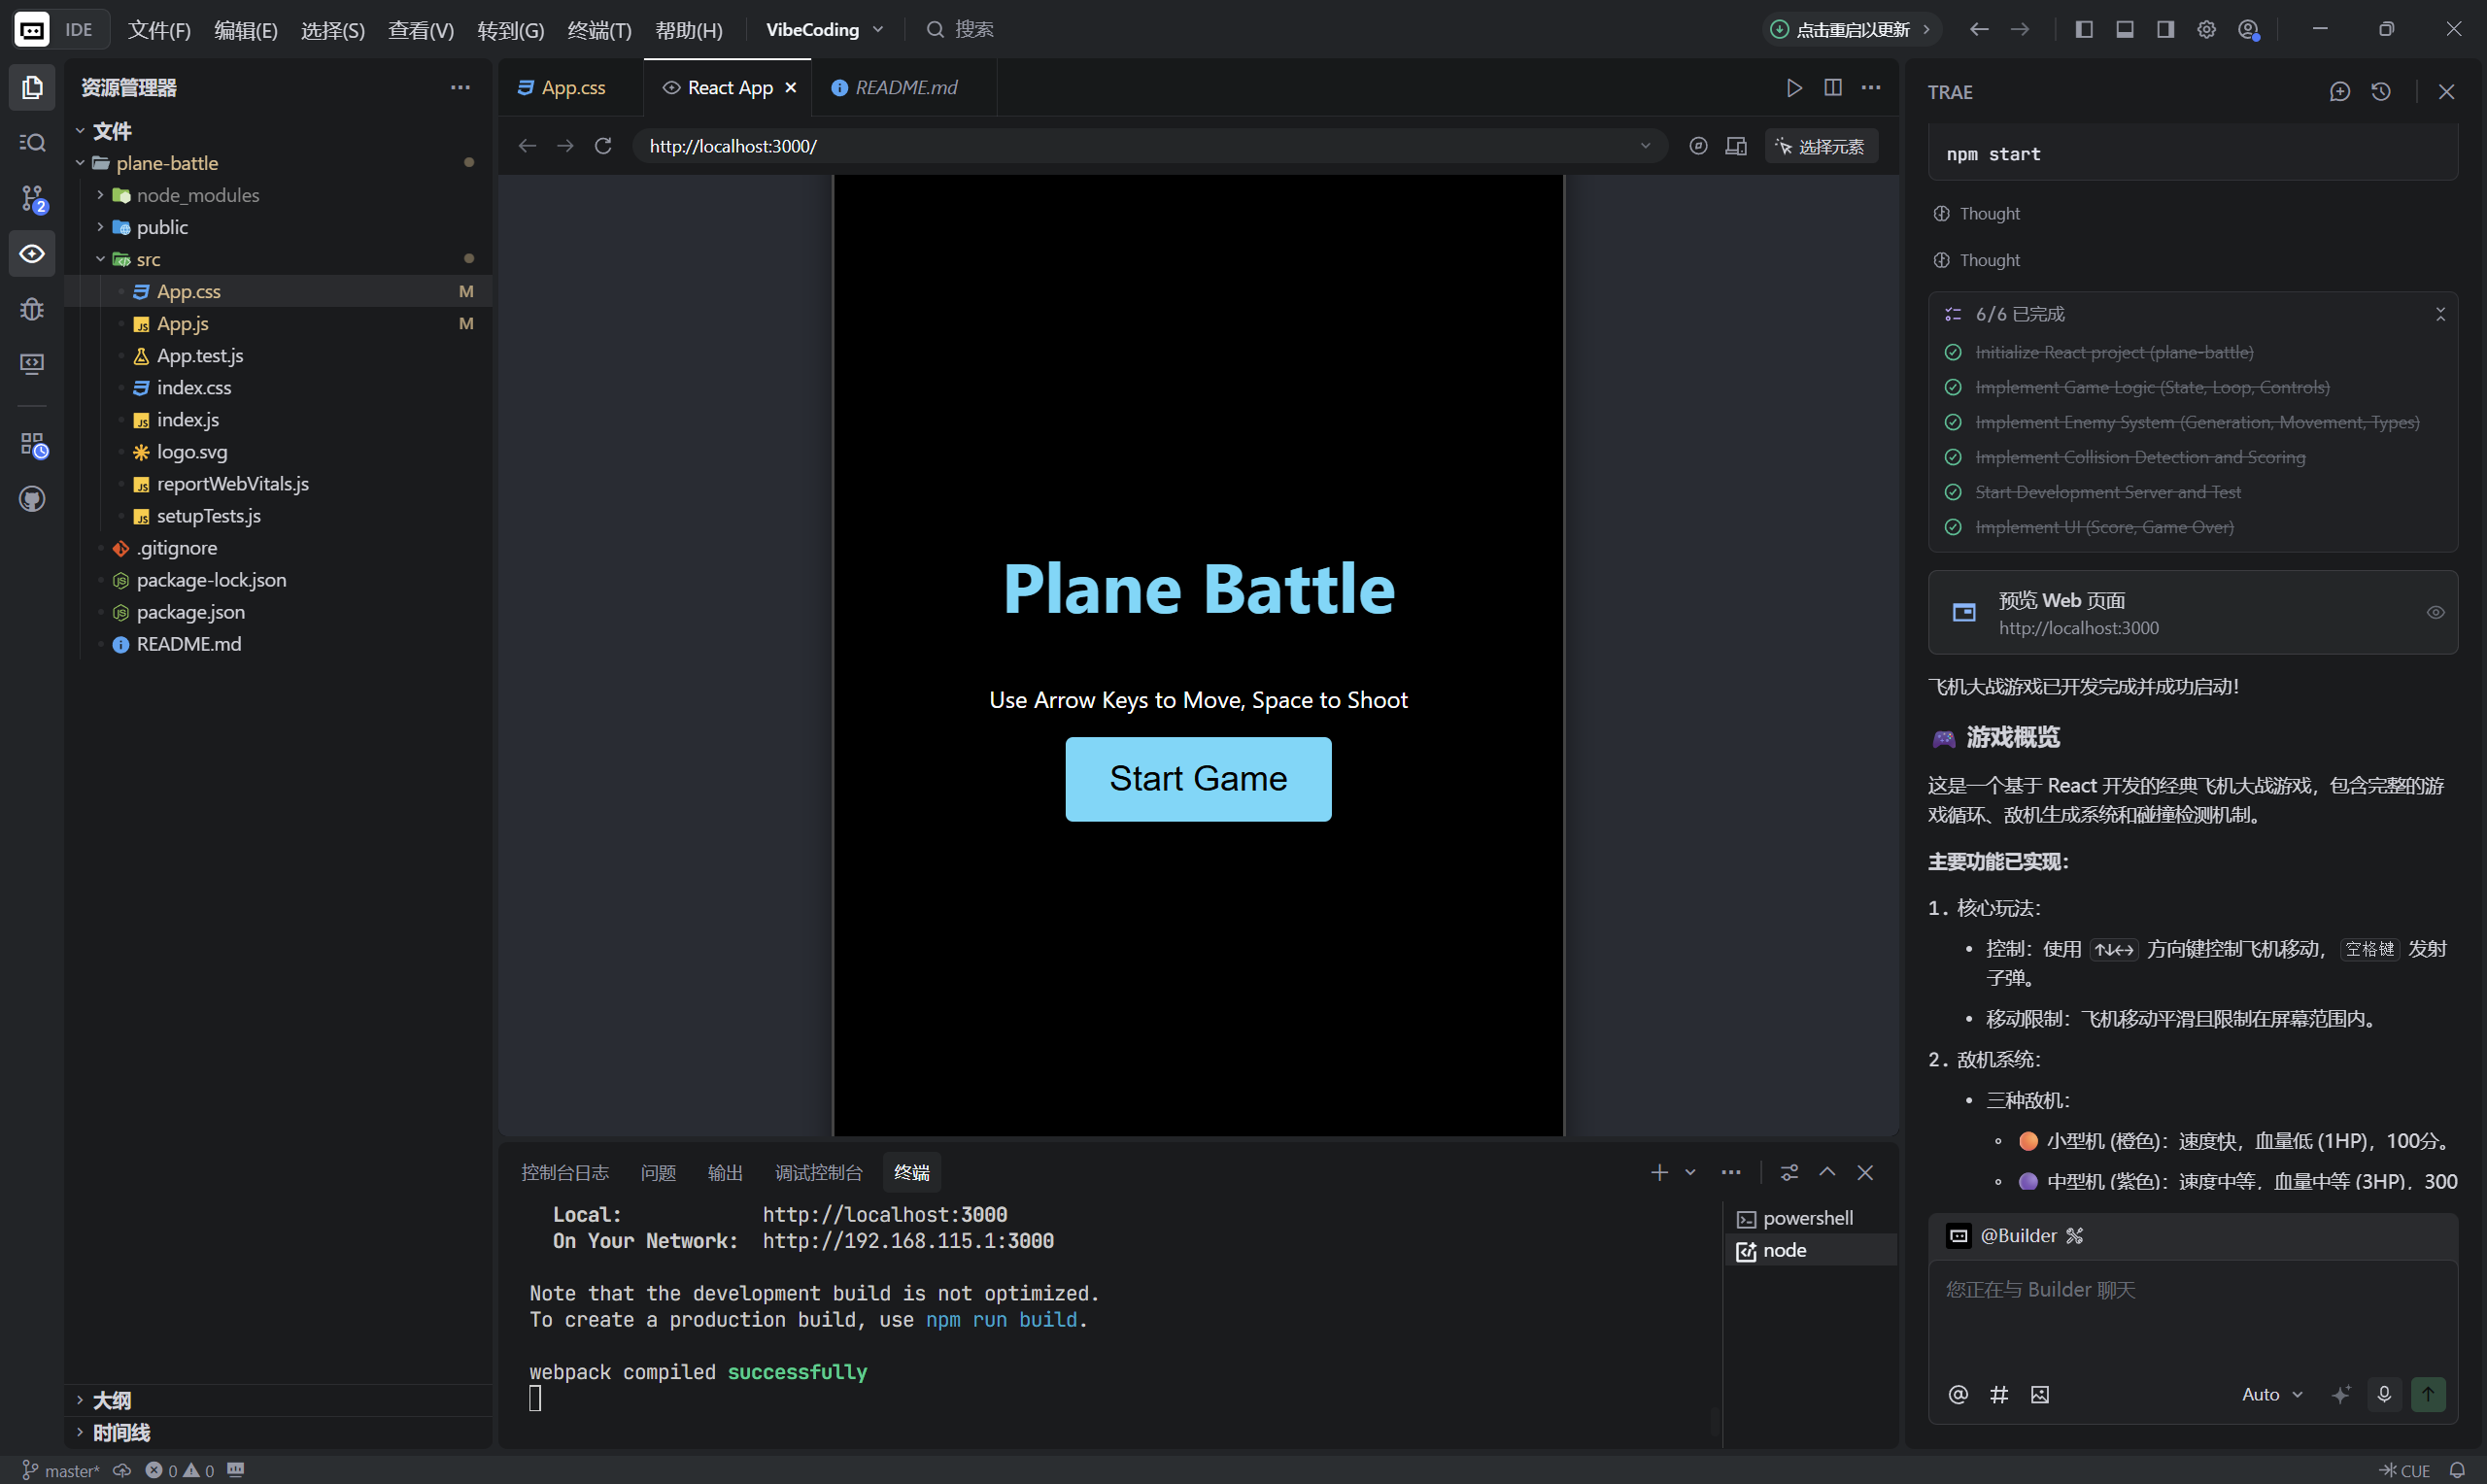
npm start开发服务器启动后,可在浏览器中访问:
http://localhost:3000
热重载和报错提示也都是 create-react-app 原生自带,Vibe Coding 会在终端实时显示编译状态,非常适合快速迭代。
三、游戏整体设计:用 React 写一个"小引擎"
整个游戏放在 src/App.js 与 src/App.css 中实现,核心思想是:
- 用 React 管理游戏状态(开始 / 进行中 / 结束、得分、渲染用的实体列表)
- 用
requestAnimationFrame实现游戏循环 - 高频变化的数据(玩家位置、子弹列表、敌机列表)用
useRef存储,避免每帧触发 React 重渲染造成卡顿 - 通过键盘事件控制玩家移动与发射子弹
四、核心代码拆解:从键盘到画面的一帧
1. 游戏常量与敌机配置
在 src/App.js 中定义游戏画布尺寸、玩家、子弹和敌机的基础属性:
js
const GAME_WIDTH = 500;
const GAME_HEIGHT = 800;
const PLAYER_WIDTH = 40;
const PLAYER_HEIGHT = 40;
const BULLET_WIDTH = 6;
const BULLET_HEIGHT = 15;
const BULLET_SPEED = 10;
const PLAYER_SPEED = 7;

const ENEMY_TYPES = {
  small: { width: 30, height: 30, speed: 4, hp: 1, score: 100, className: 'enemy-small' },
  medium: { width: 50, height: 50, speed: 2, hp: 3, score: 300, className: 'enemy-medium' },
  large: { width: 80, height: 80, speed: 1, hp: 10, score: 1000, className: 'enemy-large' },
};
这里将不同敌机的宽高、速度、血量和得分统一配置,便于后续随机生成和统一处理。
2. React 状态与 useRef:渲染 vs 逻辑
js
const [gameState, setGameState] = useState('start'); // start, playing, gameover
const [score, setScore] = useState(0);

// 用于渲染的状态
const [playerPos, setPlayerPos] = useState({ x: GAME_WIDTH / 2 - PLAYER_WIDTH / 2, y: GAME_HEIGHT - 100 });
const [bullets, setBullets] = useState([]);
const [enemies, setEnemies] = useState([]);

// 用于游戏逻辑的 ref(避免每帧 setState)
const playerPosRef = useRef({ x: GAME_WIDTH / 2 - PLAYER_WIDTH / 2, y: GAME_HEIGHT - 100 });
const bulletsRef = useRef([]);
const enemiesRef = useRef([]);
const scoreRef = useRef(0);
const keysPressed = useRef({});
const gameTimeRef = useRef(0);
const lastShotTime = useRef(0);
const requestRef = useRef();
心得:
- 高频更新(每帧)的数据用
useRef存储非常合适,不会触发 React 重渲染。 - 每一帧更新完逻辑后,再把 ref 中的数据同步到 state,用于渲染当前帧画面,是性能和 React 响应式之间的平衡。
3. 键盘事件:方向控制 + 发射子弹
js
useEffect(() => {
  const handleKeyDown = (e) => {
    keysPressed.current[e.code] = true;
  };
  const handleKeyUp = (e) => {
    keysPressed.current[e.code] = false;
  };

  window.addEventListener('keydown', handleKeyDown);
  window.addEventListener('keyup', handleKeyUp);

  return () => {
    window.removeEventListener('keydown', handleKeyDown);
    window.removeEventListener('keyup', handleKeyUp);
  };
}, []);e.code区分按键,如ArrowUp、ArrowDown、ArrowLeft、ArrowRight、Space。keysPressed.current是一个键盘状态表,游戏循环每帧读取这个表,来决定玩家是否移动或发射子弹。
4. 游戏循环:requestAnimationFrame 驱动
核心循环使用 useCallback + requestAnimationFrame:
js
const gameLoop = useCallback(() => {
  if (gameState !== 'playing') return;

  const player = playerPosRef.current;

  // 玩家移动
  if (keysPressed.current['ArrowUp']) player.y = Math.max(0, player.y - PLAYER_SPEED);
  if (keysPressed.current['ArrowDown']) player.y = Math.min(GAME_HEIGHT - PLAYER_HEIGHT, player.y + PLAYER_SPEED);
  if (keysPressed.current['ArrowLeft']) player.x = Math.max(0, player.x - PLAYER_SPEED);
  if (keysPressed.current['ArrowRight']) player.x = Math.min(GAME_WIDTH - PLAYER_WIDTH, player.x + PLAYER_SPEED);

  // 发射子弹(带冷却)
  if (keysPressed.current['Space']) {
    const now = Date.now();
    if (now - lastShotTime.current > 200) {
      bulletsRef.current.push({
        id: now,
        x: player.x + PLAYER_WIDTH / 2 - BULLET_WIDTH / 2,
        y: player.y,
      });
      lastShotTime.current = now;
    }
  }

  // 子弹向上运动
  bulletsRef.current = bulletsRef.current
    .map(b => ({ ...b, y: b.y - BULLET_SPEED }))
    .filter(b => b.y + BULLET_HEIGHT > 0);

  // 难度随时间提升
  gameTimeRef.current += 1;
  const difficultyMultiplier = 1 + Math.floor(gameTimeRef.current / 600) * 0.1;

  // 随机生成敌机
  if (Math.random() < 0.02 * difficultyMultiplier) {
    const rand = Math.random();
    let type = 'small';
    if (rand > 0.7) type = 'medium';
    if (rand > 0.9) type = 'large';

    const enemyConfig = ENEMY_TYPES[type];
    enemiesRef.current.push({
      id: Date.now() + Math.random(),
      x: Math.random() * (GAME_WIDTH - enemyConfig.width),
      y: -enemyConfig.height,
      type,
      hp: enemyConfig.hp,
      ...enemyConfig,
    });
  }

  // 敌机下落
  enemiesRef.current = enemiesRef.current.map(e => ({
    ...e,
    y: e.y + e.speed * difficultyMultiplier,
  }));

  // 碰撞检测等(后面单独展开)...

  requestRef.current = requestAnimationFrame(gameLoop);
}, [gameState]);
配合 useEffect 启动 / 停止循环:
js
useEffect(() => {
  if (gameState === 'playing') {
    requestRef.current = requestAnimationFrame(gameLoop);
  }
  return () => cancelAnimationFrame(requestRef.current);
}, [gameState, gameLoop]);
心得:
- 用
requestAnimationFrame来做游戏循环,比setInterval更平滑,浏览器也会自动优化。 - React 本身不是为"每帧渲染 60 次"设计的,所以用
ref+同步到state的方式是比较推荐的方案。
五、敌机系统与碰撞检测:简单 AABB 盒模型
1. 敌机随机生成与难度提升
敌机采用"随机 + 权重"的方式生成:
- 每一帧都有一定概率生成新敌机
- 随着时间推移,这个概率和敌机速度都增加(
difficultyMultiplier)
三种敌机的出现概率大致为:
- 小型机:基础概率
- 中型机:
rand > 0.7 - 大型机:
rand > 0.9
这样游戏前期小怪多,后期慢慢会出现中型和大型敌机,难度自然增加。
2. 子弹与敌机碰撞检测
使用轴对齐矩形碰撞(AABB):
js
bulletsRef.current.forEach(b => {
  enemiesRef.current.forEach(e => {
    if (
      b.x < e.x + e.width &&
      b.x + BULLET_WIDTH > e.x &&
      b.y < e.y + e.height &&
      b.y + BULLET_HEIGHT > e.y
    ) {
      e.hp -= 1;
      b.remove = true;
      if (e.hp <= 0) {
        e.remove = true;
        scoreRef.current += e.score;
      }
    }
  });
});

bulletsRef.current = bulletsRef.current.filter(b => !b.remove);
enemiesRef.current = enemiesRef.current.filter(e => !e.remove);
心得:
- AABB 碰撞足够简单、性能好,非常适合这种 2D 平面小项目。
- 不需要引入物理引擎,纯 JS 就可以快速实现。
3. 玩家与敌机/底部碰撞
js
let gameOver = false;

enemiesRef.current.forEach(e => {
  // 玩家与敌机
  if (
    player.x < e.x + e.width &&
    player.x + PLAYER_WIDTH > e.x &&
    player.y < e.y + e.height &&
    player.y + PLAYER_HEIGHT > e.y
  ) {
    gameOver = true;
  }
  // 敌机落到底部
  if (e.y > GAME_HEIGHT) {
    gameOver = true;
  }
});

if (gameOver) {
  setGameState('gameover');
  setScore(scoreRef.current);
}
规则很简单:
- 玩家一旦被敌机碰到 -> 游戏结束
- 任何一架敌机落到底部 -> 游戏结束
六、UI 与 CSS 动效:简单但有"游戏味道"
1. 游戏主界面结构
在 App.js 中返回的 JSX:
jsx
<div className="App">
  <div className="game-container">
    <div className="score-board">Score: {score}</div>

    {gameState === 'playing' && (
      <>
        <div className="player" style={{ left: playerPos.x, top: playerPos.y }} />
        {bullets.map(b => (
          <div key={b.id} className="bullet" style={{ left: b.x, top: b.y }} />
        ))}
        {enemies.map(e => (
          <div key={e.id} className={`enemy ${e.className}`} style={{ left: e.x, top: e.y }} />
        ))}
      </>
    )}

    {gameState === 'start' && (
      <div className="start-screen">
        <h1>Plane Battle</h1>
        <p>Use Arrow Keys to Move, Space to Shoot</p>
        <button onClick={startGame}>Start Game</button>
      </div>
    )}

    {gameState === 'gameover' && (
      <div className="game-over-screen">
        <h2>Game Over</h2>
        <p>Final Score: {score}</p>
        <button onClick={startGame}>Try Again</button>
      </div>
    )}
  </div>
</div>
2. 样式与动画(App.css)
仅展示部分关键样式:
css
.App {
  text-align: center;
  display: flex;
  justify-content: center;
  align-items: center;
  height: 100vh;
  background-color: #282c34;
  overflow: hidden;
}

.game-container {
  position: relative;
  width: 500px;
  height: 800px;
  background-color: #000;
  overflow: hidden;
  border: 2px solid #444;
  box-shadow: 0 0 20px rgba(0, 0, 0, 0.5);
}

/* 玩家飞机 */
.player {
  position: absolute;
  width: 40px;
  height: 40px;
  background-color: #61dafb;
  clip-path: polygon(50% 0%, 0% 100%, 100% 100%);
  box-shadow: 0 0 10px #61dafb;
}

/* 子弹 */
.bullet {
  position: absolute;
  width: 6px;
  height: 15px;
  background-color: #ffeb3b;
  border-radius: 3px;
}

/* 敌机不同造型 */
.enemy-small {
  width: 30px;
  height: 30px;
  background-color: #ff5722;
  border-radius: 50%;
}

.enemy-medium {
  width: 50px;
  height: 50px;
  background-color: #9c27b0;
  clip-path: polygon(20% 0%, 80% 0%, 100% 20%, 100% 80%, 80% 100%, 20% 100%, 0% 80%, 0% 20%);
}

.enemy-large {
  width: 80px;
  height: 80px;
  background-color: #f44336;
  clip-path: polygon(50% 0%, 100% 38%, 82% 100%, 18% 100%, 0% 38%);
}
利用 clip-path 和阴影等简单 CSS 技巧,就能做出看起来还不错的飞机、敌机造型,整体效果干净利落。
七、在 Vibe Coding 中的实际体验
对比传统"自己敲命令 + 写代码"的方式,这次用 Vibe Coding 的体验有几个明显感受:
-
项目初始化更省心
直接让 AI 执行
npx create-react-app plane-battle,并自动安装依赖、初始化项目。 -
核心逻辑可以"对话式"设计
比如描述需求:"玩家用方向键移动,不超出边界;空格键发射子弹;敌机随机生成并随时间加速;碰撞后加分或游戏结束",AI 会按这个思路写出完整的
App.js,然后我再细调。 -
实时运行 + 自动打开浏览器
npm start由环境帮我执行好后,浏览器直接打开http://localhost:3000,修改代码即刻看到效果。 -
更专注在"游戏设计"和"逻辑理解"上
大量样板代码(如
useEffect注册监听、requestAnimationFrame结构等)由 AI 生成,我主要精力放在:- 游戏规则怎么更好玩
- 敌机速度和出现概率怎么调
- 碰撞逻辑是否严谨
八、这次实践中学到的知识点
-
React 与高频更新的协调方式
- 高频变化用
useRef存储逻辑状态 - 每帧结束后再同步一次到
useState做渲染
- 高频变化用
-
键盘控制的通用模式
keydown/keyup分别设置keysPressed[code] = true/false- 游戏循环只关心当前按键状态,不跟事件本身耦合
-
简单而实用的碰撞检测(AABB)
jsrect1.x < rect2.x + rect2.width && rect1.x + rect1.width > rect2.x && rect1.y < rect2.y + rect2.height && rect1.y + rect1.height > rect2.y -
难度随时间变化的设计思路
- 用
gameTime计帧数或时间 - 用
difficultyMultiplier统一调节敌人的生成概率和速度
- 用
-
前端也可以做"小型游戏引擎"
- React 虽不是专为游戏设计,但配合
requestAnimationFrame和合理的数据结构,也能写出小型 2D 游戏。
- React 虽不是专为游戏设计,但配合
九、踩坑与小总结
踩坑点
- 一开始如果所有状态都用
useState,每一帧setState会触发大量重渲染,导致明显卡顿。 - 键盘事件记得在组件卸载时移除监听,否则会出现"幽灵按键"问题。
- 敌机和子弹的 ID 要确保唯一,否则 React 渲染列表时会有警告。
总结
这次在 Vibe Coding 中完成 React 飞机大战的实践,让我同时收获了:
- 对 React 状态管理和
useRef的更深理解 - 对简单游戏循环、碰撞检测的实践体验
- 对"AI 辅助编程"的全新感受:更多精力放在思路和规则设计上,而不是重复手敲样板代码
我觉得想提高 React 水平、同时体验下前端小游戏开发,我非常推荐尝试用类似 Vibe Coding 这样的智能编码环境,从一个小小的飞机大战开始,会非常有成就感。
十、后续可以扩展的方向
这个项目还可以继续进化:
- 增加敌机爆炸动画、音效
- 增加道具系统(加速、护盾、激光等)
- 增加关卡或 BOSS 模式
- 用 Redux / Zustand 等管理更复杂的游戏状态