Fabric.js 简介
Fabric.js是一个功能强大且操作简单的Javascript HTML5 canvas工具库。
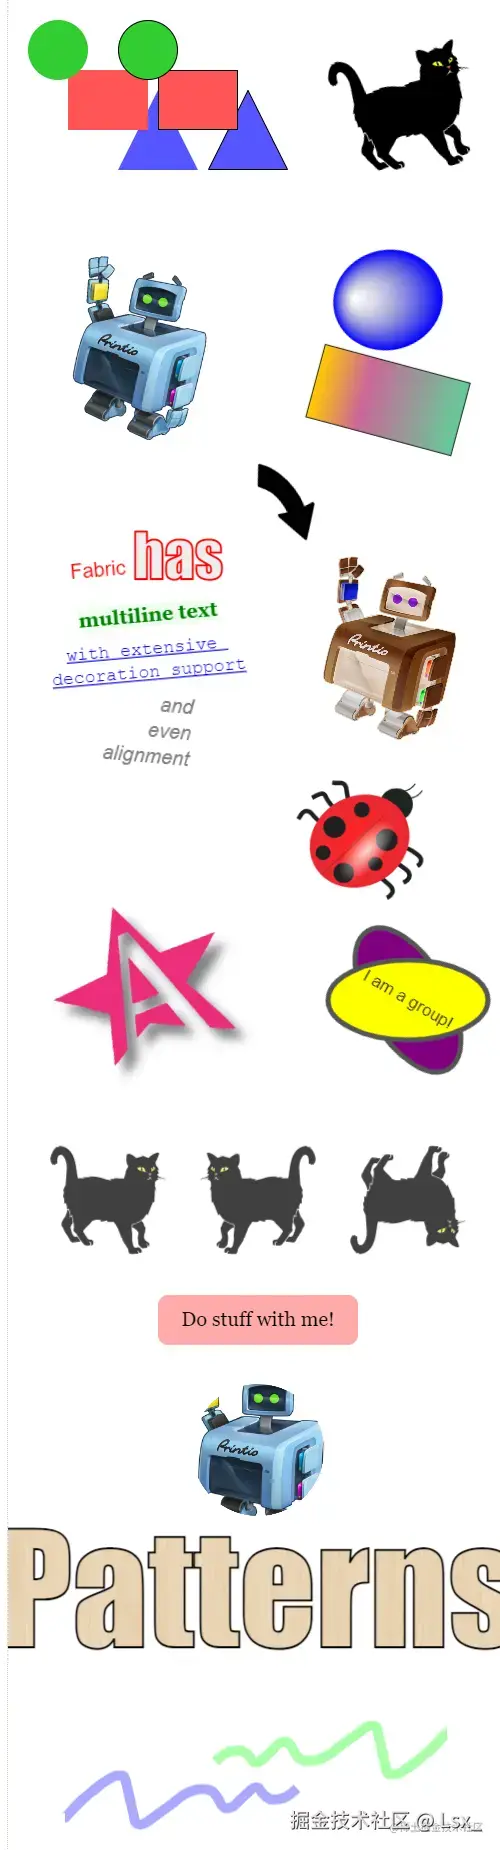
本文主要讲解 Fabric.js 有基础也有实战,包括:
- 画布的基本操作
- 基础图形绘制方法(矩形、圆形、三角形、椭圆、多边形、线段等)
- 自定义图形
- 图片的使用
- 文本和文本框
- 图形和文本的基础样式
- 渐变
- 选中状态
- 分组和取消分组
- 动画
- 设置和获取图形层级
- 基础事件
- 禁止水平、垂直移动
- 缩放和平移画布
- 视口坐标和画布坐标转换
- 序列化和反序列化
- ......
起步
1. 新建页面并引入 Fabric.js
ts
import { fabric } from 'fabric'2. 创建 canvas 容器
在 HTML 中创建 <canvas>,并设置容器的 id 和 宽高,width/height
html
<canvas width="400" height="400" id="c" style="border: 1px solid #ccc;"></canvas>这里创建了一个 canvas 容器,边框为灰色,id="c" 。指定长宽都为 400px。
3. 使用 fabric 接管容器,并画一个矩形
在 JS 中实例化 fabric ,之后就可以使用 fabric 的 api 管理 canvas 了。
html
<script setup>
import { onMounted } from 'vue'
import { fabric } from 'fabric' // 引入 fabric
function init() {
const canvas = new fabric.Canvas('c') // 这里传入的是canvas的id
// 创建一个长方形
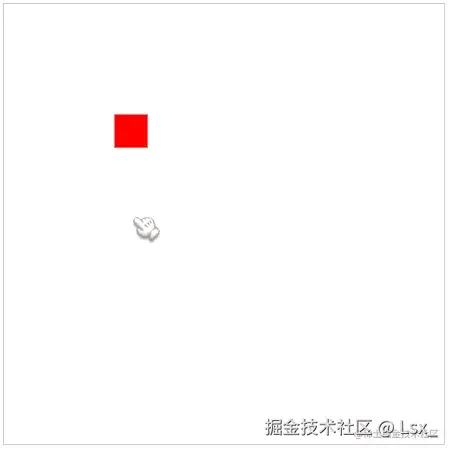
const rect = new fabric.Rect({
top: 30, // 距离容器顶部 30px
left: 30, // 距离容器左侧 30px
width: 100, // 宽 100px
height: 60, // 高 60px
fill: 'red' // 填充 红色
})
// 在canvas画布中加入矩形(rect)。
canvas.add(rect)
}
onMounted(() => {
init()
})
</script>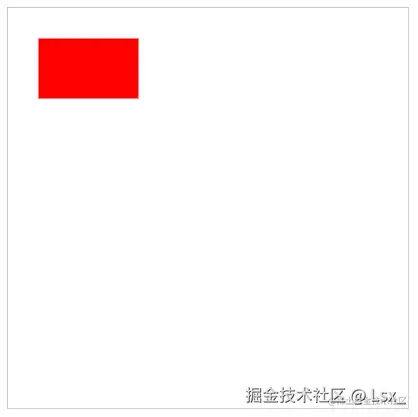
画布
Fabric.js 的画布操作性是非常强的。
基础版(可交互)
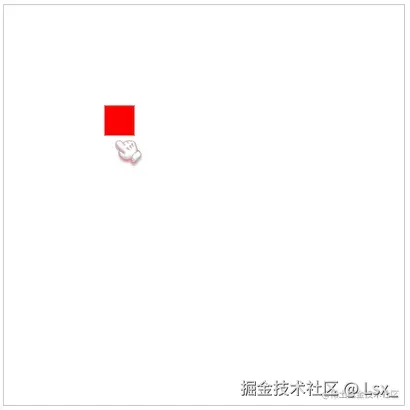
基础版就是"起步"章节所说的那个例子。
html
<template>
  <canvas width="400" height="400" id="canvas" style="border: 1px solid #ccc;"></canvas>
</template>

<script setup>
import { onMounted } from 'vue'
import { fabric } from 'fabric'

function init() {
  const canvas = new fabric.Canvas('canvas') // 这里传入的是canvas元素的id

  // 创建一个长方形
  const rect = new fabric.Rect({
    top: 100, // 距离容器顶部 100px
    left: 100, // 距离容器左侧 100px
    width: 30, // 矩形宽度 30px
    height: 30, // 矩形高度 30px
    fill: 'red' // 填充 红色
  })

  canvas.add(rect) // 将矩形添加到 canvas 画布里
}

onMounted(() => {
  init()
})
</script>
不可交互
html
<template>
  <canvas width="400" height="400" id="canvas" style="border: 1px solid #ccc;"></canvas>
</template>

<script setup>
import { onMounted } from 'vue'
import { fabric } from 'fabric'

function init() {
  // 使用 StaticCanvas 创建一个不可操作的画布
  const canvas = new fabric.StaticCanvas('canvas') // 这里传入的是canvas元素的id

  // 创建一个长方形
  const rect = new fabric.Rect({
    top: 100, // 距离容器顶部 100px
    left: 100, // 距离容器左侧 100px
    width: 30, // 矩形宽度 30px
    height: 30, // 矩形高度 30px
    fill: 'red' // 填充 红色
  })

  canvas.add(rect)
}

onMounted(() => {
  init()
})
</script>
创建不可交互的画布,其实只需把 new fabric.Canvas 改成 new fabric.StaticCanvas 即可。
在js设定画布参数
ts
const canvas = new fabric.Canvas('canvas', {
    width: 300, // 画布宽度
    height: 300, // 画布高度
    backgroundColor: '#eee' // 画布背景色
})
</script>
使用背景图
html
<template>
  <canvas width="400" height="400" id="canvas" style="border: 1px solid #ccc;"></canvas>
</template>

<script setup>
import { onMounted } from 'vue'
import { fabric } from 'fabric'

function init() {
  const canvas = new fabric.Canvas('canvas')

  // 设置背景图
  // 参数1:背景图资源(可以引入本地,也可以使用网络图)
  // 参数2:设置完背景图执行以下重新渲染canvas的操作,这样背景图就会展示出来了
  canvas.setBackgroundImage(
    '图片url',
    canvas.renderAll.bind(canvas)
  )
}

onMounted(() => {
  init()
})
</script>
拉伸背景图
html
<template>
  <canvas width="400" height="400" id="canvas" style="border: 1px solid #ccc;"></canvas>
</template>

<script setup>
import { onMounted } from 'vue'
import { fabric } from 'fabric'

function init() {
  const canvas = new fabric.Canvas('canvas')

  // fabric.Image.fromURL:加载图片的api
  // 第一个参数:图片地址(可以是本地的,也可以是网络图)
  // 第二个参数:图片加载的回调函数
  fabric.Image.fromURL(
    '图片url',
    (img) => {
      // 设置背景图
      canvas.setBackgroundImage(
        img,
        canvas.renderAll.bind(canvas),
        {
          scaleX: canvas.width / img.width, // 计算出图片要拉伸的宽度
          scaleY: canvas.height / img.height // 计算出图片要拉伸的高度
        }
      )
    }
  )
}

onMounted(() => {
  init()
})
</script>
这个例子使用了 fabric.Image.fromURL 这个 api 来加载图片,第一个参数是图片地址,第二个参数是回调函数。
拿到图片的参数和画布的宽高进行计算,从而使图片充满全屏。
基础图形
矩形
html
<template>
<canvas width="400" height="375" id="canvas" style="border: 1px solid #ccc;"></canvas>
</template>
<script setup>
import { onMounted } from 'vue'
import { fabric } from 'fabric'
function init() {
const canvas = new fabric.Canvas('canvas')
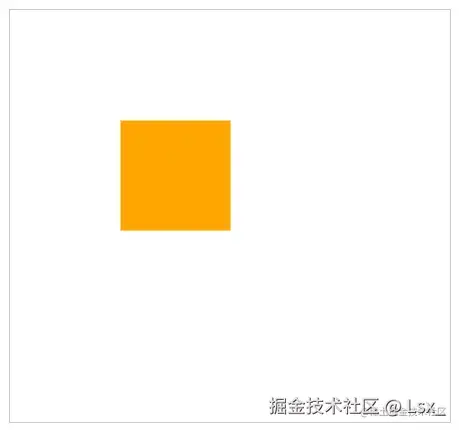
const rect = new fabric.Rect({
top: 100, // 距离容器顶部 100px
left: 100, // 距离容器左侧 100px
fill: 'orange', // 填充 橙色
width: 100, // 宽度 100px
height: 100 // 高度 100px
})
// 将矩形添加到画布中
canvas.add(rect)
}
onMounted(() => {
init()
})
</script>使用 new fabric.Rect 创建 矩形。
圆角矩形
html
<template>
<canvas width="400" height="375" id="canvas" style="border: 1px solid #ccc;"></canvas>
</template>
<script setup>
import { onMounted } from 'vue'
import { fabric } from 'fabric'
function init() {
const canvas = new fabric.Canvas('canvas')
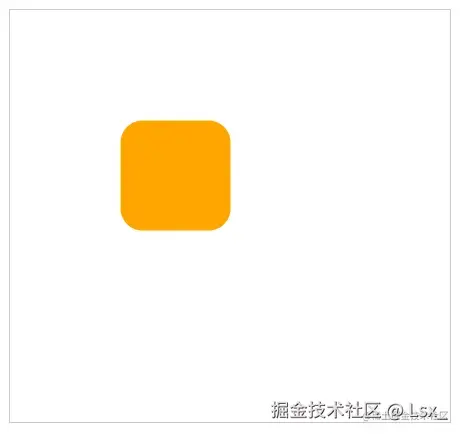
const rect = new fabric.Rect({
top: 100, // 距离容器顶部 100px
left: 100, // 距离容器左侧 100px
fill: 'orange', // 填充 橙色
width: 100, // 宽度 100px
height: 100, // 高度 100px
rx: 20, // x轴的半径
ry: 20 // y轴的半径
})
// 将矩形添加到画布中
canvas.add(rect)
}
onMounted(() => {
init()
})
</script>画圆角矩形,需要添加 rx 和 ry。
圆形

html
<template>
<canvas width="400" height="375" id="canvas" style="border: 1px solid #ccc;"></canvas>
</template>
<script setup>
import { onMounted } from 'vue'
import { fabric } from 'fabric'
function init() {
const canvas = new fabric.Canvas('canvas')
const circle = new fabric.Circle({
top: 100,
left: 100,
radius: 50, // 圆的半径 50
fill: 'green'
})
canvas.add(circle)
}
onMounted(() => {
init()
})
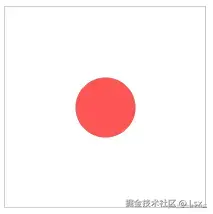
</script>使用 new fabric.Circle 创建圆形。
圆形需要使用 radius 设置半径大小。
椭圆形
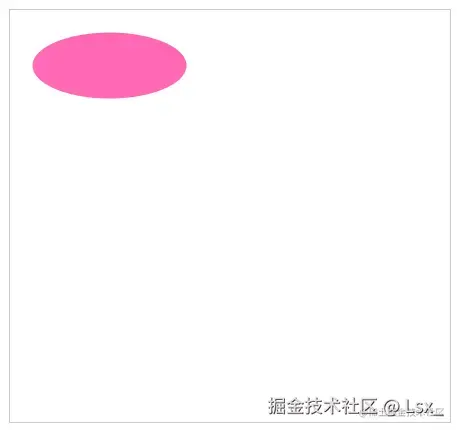
html
<template>
<canvas width="400" height="375" id="canvas" style="border: 1px solid #ccc;"></canvas>
</template>
<script setup>
import { onMounted } from 'vue'
import { fabric } from 'fabric'
function init() {
const canvas = new fabric.Canvas('canvas')
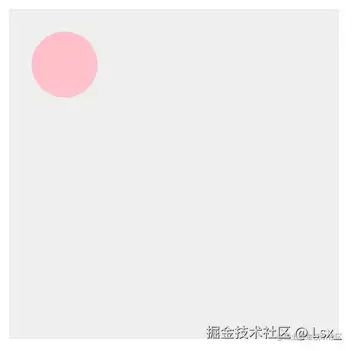
const ellipse = new fabric.Ellipse({
top: 20,
left: 20,
rx: 70,
ry: 30,
fill: 'hotpink'
})
canvas.add(ellipse)
}
onMounted(() => {
init()
})
</script>需要使用 new fabric.Ellipse 创建 椭圆。
和圆形不同,椭圆不需要设置 radius ,但要设置 rx 和 ry。
- 当
rx>ry:椭圆是横着的 - 当
rx<ry:椭圆是竖着的 - 当
rx=ry: 看上去就是个圆形
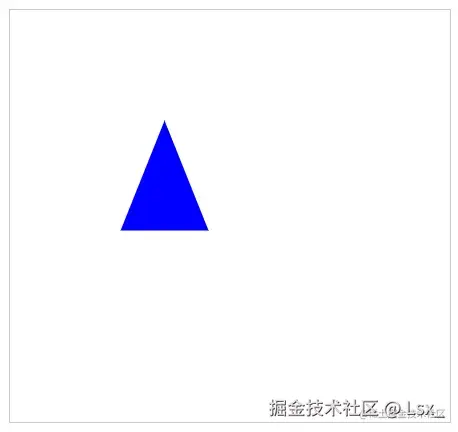
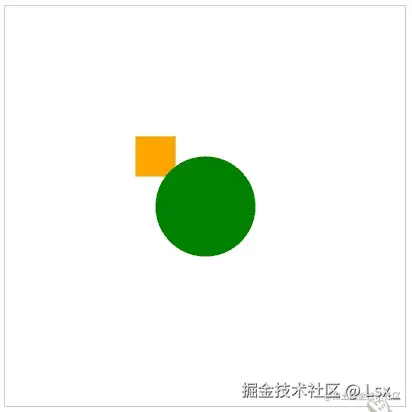
三角形
html
<template>
  <canvas width="400" height="375" id="canvas" style="border: 1px solid #ccc;"></canvas>
</template>

<script setup>
import { onMounted } from 'vue'
import { fabric } from 'fabric'

function init() {
  const canvas = new fabric.Canvas('canvas')

  const triangle = new fabric.Triangle({
    top: 100,
    left: 100,
    width: 80, // 底边长度
    height: 100, // 底边到对角的距离
    fill: 'blue'
  })
  canvas.add(triangle)
}

onMounted(() => {
  init()
})
</script>
使用 new fabric.Triangle 创建三角形,三角形是需要给定 "底和高" 的。
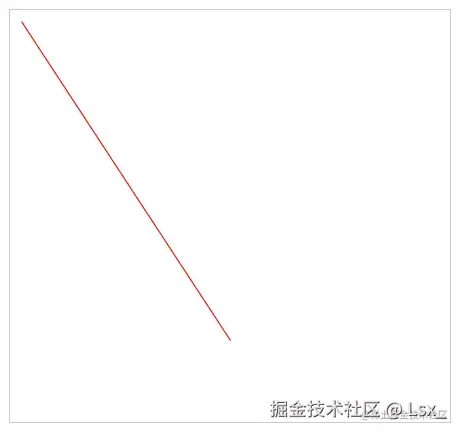
线段
html
<template>
  <canvas width="400" height="375" id="canvas" style="border: 1px solid #ccc;"></canvas>
</template>

<script setup>
import { onMounted } from 'vue'
import { fabric } from 'fabric'

function init() {
  const canvas = new fabric.Canvas('canvas')

  const line = new fabric.Line(
    [
      10, 10, // 起始点坐标
      200, 300 // 结束点坐标
    ],
    {
      stroke: 'red', // 笔触颜色
    }
  )
  canvas.add(line)
}

onMounted(() => {
  init()
})
</script>
使用 new fabric.Line 创建线段。
new fabric.Line 需要传入2个参数。
-
第一个参数是 数组 ,数组需要传4个值,前2个值是起始坐标的x和y,后2个值是结束坐标的x和y。
-
第二个参数是 线段的样式 ,要设置线段的颜色,需要使用
stroke。
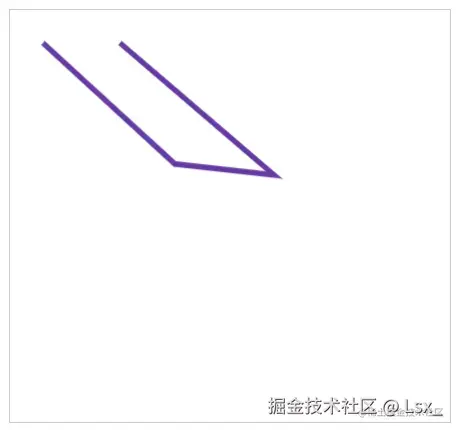
折线
html
<template>
<canvas width="400" height="375" id="canvas" style="border: 1px solid #ccc;"></canvas>
</template>
<script setup>
import { onMounted } from 'vue'
import { fabric } from 'fabric'
function init() {
const canvas = new fabric.Canvas('canvas')
const polyline = new fabric.Polyline([
{x: 30, y: 30},
{x: 150, y: 140},
{x: 240, y: 150},
{x: 100, y: 30}
], {
fill: 'transparent', // 如果画折线,需要填充透明
stroke: '#6639a6', // 线段颜色:紫色
strokeWidth: 5 // 线段粗细 5
})
canvas.add(polyline)
}
onMounted(() => {
init()
})
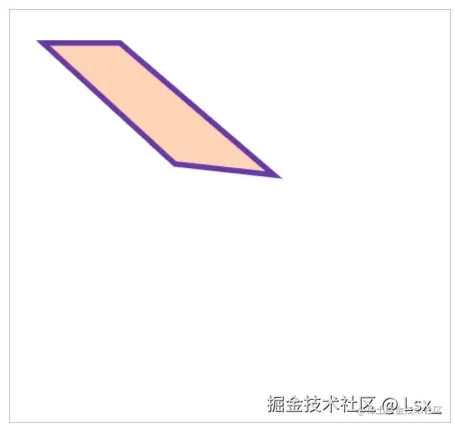
</script>使用 new fabric.Polyline 创建线段 。
new fabric.Polyline 需要传入2个参数。
- 第一个参数是数组,描述线段的每一个点
- 第二个参数用来描述线段样式
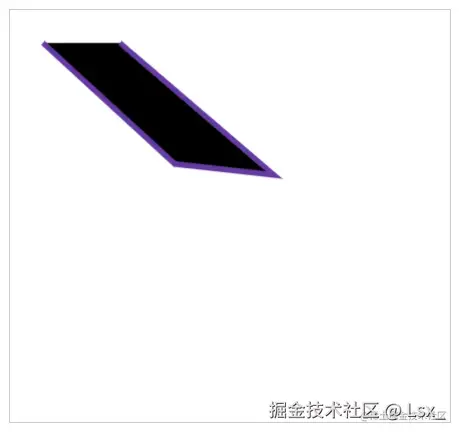
需要注意的是, fill 设置成透明才会显示成线段,如果不设置,会默认填充黑色,如下图所示:
你也可以填充自己喜欢的颜色,new fabric.Polyline 是不会自动把 起始点 和 结束点 自动闭合起来的。
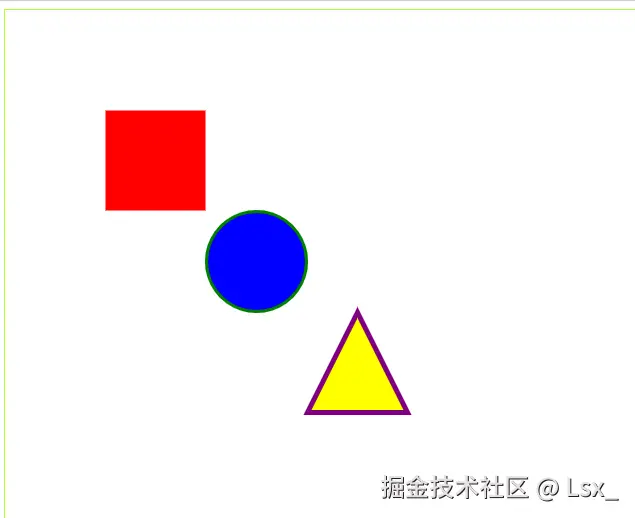
多边形
html
<template>
  <canvas width="400" height="375" id="canvas" style="border: 1px solid #ccc;"></canvas>
</template>

<script setup>
import { onMounted } from 'vue'
import { fabric } from 'fabric'

function init() {
  const canvas = new fabric.Canvas('canvas')

  const polygon = new fabric.Polygon([
    {x: 30, y: 30},
    {x: 150, y: 140},
    {x: 240, y: 150},
    {x: 100, y: 30}
  ], {
    fill: '#ffd3b6', // 填充色
    stroke: '#6639a6', // 线段颜色:紫色
    strokeWidth: 5 // 线段粗细 5
  })
  canvas.add(polygon)
}

onMounted(() => {
  init()
})
</script>
使用 new fabric.Polygon 绘制多边形,用法和 new fabric.Polyline 差不多,但最大的不同点是 new fabric.Polygon 会自动把 起始点 和 结束点 连接起来。
自定义图形
在Fabric.js中,几乎所有的2d图形直接或间接继承自 Object 类,那么如果我们不用其自带的2d图形,而是自建图形,要怎么应用 Fabric.js 中的方法呢?
Fabric.js 提供了 fabric.util.createClass 方法解决这个问题
一个自定义子类的结构:
ts
      // 创建一个自定义子类
      const customClass = fabric.util.createClass(fabric.Object, {
        type: "customClass",
        initialize: function (options) {
          options || (options = {});
          this.callSuper("initialize", options);
          // 自定义属性
        },

        toObject: function () {
          return fabric.util.object.extend(this.callSuper("toObject"), {
            // 将自定义属性添加到序列化对象中
          });
        },

        _render: function (ctx) {
          this.callSuper("_render", ctx);
          // 自定义渲染逻辑
        },
      });
一个简单的自定义类主要要修改3个地方,分别是:
- initialize : 添加的自定义属性方法放这
- toObject: 将自定义属性添加到序列化对象中,方便canvas记录
- _render: 处理自定义渲染逻辑
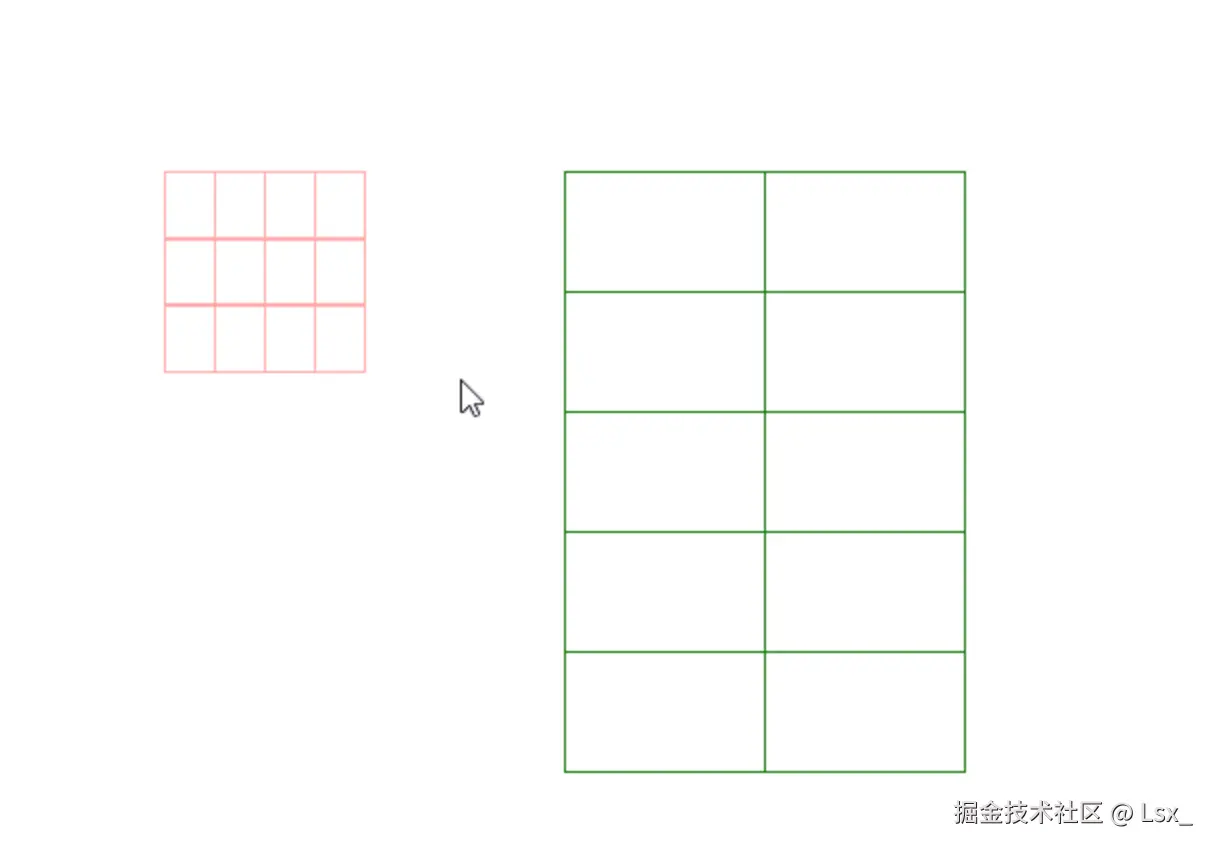
此处举一个简单的例子,写一个自定义表格图形:
新增绘制网格图的方法 initMap:
ts
      // 绘制表格图形
      function initTable(options, ctx) {
        const { gridNumX, gridNumY, width, height, fill, left, top } = options;
        ctx.save();
        ctx.translate(-width / 2, -height / 2)
        // 开始路径并绘制线条
        ctx.beginPath();
        // 设置线条样式
        ctx.lineWidth = 1;
        ctx.strokeStyle = fill;
        // 开始绘制横线
        for (let i = 0; i < gridNumY + 1; i++) {
          // 注意要算线的宽度,也就是后面那个+i
          ctx.moveTo(0, height / gridNumY * i);
          ctx.lineTo(width, height / gridNumY * i);
          ctx.stroke();
        }
        // 开始绘制竖线
        for (let i = 0; i < gridNumX + 1; i++) {
          ctx.moveTo(width / gridNumX * i, 0);
          ctx.lineTo(width / gridNumX * i, height);
          ctx.stroke();
        }
        ctx.restore();
      }
创建 Table 子类:
ts
      // 创建一个自定义子类
      const Map = fabric.util.createClass(fabric.Object, {
        type: "Table",
        initialize: function (options) {
          options || (options = {});
          this.callSuper("initialize", options);
          this.set("gridNumX", options.gridNumX || "");
          this.set("gridNumY", options.gridNumY || "");
        },

        toObject: function () {
          return fabric.util.object.extend(this.callSuper("toObject"), {
            gridNumX: this.get("gridNumX"),
            gridNumY: this.get("gridNumY"),
          });
        },

        _render: function (ctx) {
          this.callSuper("_render", ctx);
          initTable({
            ...this
          }, ctx)
        },
      });
新建 Table 实例并添加到canvas:
ts
      const table = new Table({
        left: 100,
        top: 100,
        label: "test",
        fill: "#faa",
        width: 100,
        height: 100,
        gridNumX: 4,
        gridNumY: 3
      });

      const table2 = new Table({
        left: 300,
        top: 100,
        label: "test",
        fill: "green",
        width: 200,
        height: 300,
        gridNumX: 2,
        gridNumY: 5
      });
      // 将所有图形添加到 canvas 中
      canvas.add(table, table2);
如图所示,成功创建了可复用的自定义图形,而且能够使用 Object 类的功能。
文本
Fabric.js 有3类跟文本相关的 api。
- 普通文本
- 可编辑文本
- 文本框
普通文本 Text
html
<template>
  <canvas width="400" height="400" id="canvas" style="border: 1px solid #ccc;"></canvas>
</template>

<script setup>
import { onMounted } from 'vue'
import { fabric } from 'fabric'

function init() {
  const canvas = new fabric.Canvas('canvas')

  const text = new fabric.Text('hello')
  canvas.add(text)
}

onMounted(() => {
  init()
})
</script>
使用 new fabric.Text 创建文本,传入第一个参数就是文本内容。
new fabric.Text 还支持第二个参数,可以设置文本样式。
可编辑文本 IText
html
<template>
  <canvas width="400" height="400" id="canvas" style="border: 1px solid #ccc;"></canvas>
</template>

<script setup>
import { onMounted } from 'vue'
import { fabric } from 'fabric'

function init() {
  const canvas = new fabric.Canvas('canvas')

  const itext = new fabric.IText('hello')
  canvas.add(itext)
}

onMounted(() => {
  init()
})
</script>
使用 new fabric.IText 可以创建可编辑文本 ,用法和 new fabric.Text 一样。
文本框 Textbox
html
<template>
  <canvas width="400" height="400" id="canvas" style="border: 1px solid #ccc;"></canvas>
</template>

<script setup>
import { onMounted } from 'vue'
import { fabric } from 'fabric'

function init() {
  const canvas = new fabric.Canvas('canvas')

  const textbox = new fabric.Textbox('What are you doing?', {
    width: 250
  })
  canvas.add(textbox)
}

onMounted(() => {
  init()
})
</script>
使用 new fabric.Textbox 可以创建文本框。
new fabric.Textbox 第二个参数是对象,使用 width 可以设定了文本框的宽度,文本内容超过设定的宽度会自动换行。
new fabric.Textbox 的内容同样是可编辑的。
基础样式
图形常用样式
html
<template>
  <canvas width="400" height="400" id="canvas" style="border: 1px solid #ccc;"></canvas>
</template>

<script setup>
import { onMounted } from 'vue'
import { fabric } from 'fabric'

function init() {
  const canvas = new fabric.Canvas('canvas')

  const circle = new fabric.Circle({
    top: 100,
    left: 100,
    radius: 50, // 半径:50px
    backgroundColor: 'green', // 背景色:绿色
    fill: 'orange', // 填充色:橙色
    stroke: '#f6416c', // 边框颜色:粉色
    strokeWidth: 5, // 边框粗细:5px
    strokeDashArray: [20, 5, 14], // 边框虚线规则:填充20px 空5px 填充14px 空20px 填充5px ......
    shadow: '10px 20px 6px rgba(10, 20, 30, 0.4)', // 投影:向右偏移10px,向下偏移20px,羽化6px,投影颜色及透明度
    transparentCorners: false, // 选中时,角是被填充了。true 空心;false 实心
    borderColor: '#16f1fc', // 选中时,边框颜色:天蓝
    borderScaleFactor: 5, // 选中时,边的粗细:5px
    borderDashArray: [20, 5, 10, 7], // 选中时,虚线边的规则
    cornerColor: "#a1de93", // 选中时,角的颜色是 青色
    cornerStrokeColor: 'pink', // 选中时,角的边框的颜色是 粉色
    cornerStyle: 'circle', // 选中时,叫的属性。默认rect 矩形;circle 圆形
    cornerSize: 20, // 选中时,角的大小为20
    cornerDashArray: [10, 2, 6], // 选中时,虚线角的规则
    selectionBackgroundColor: '#7f1300', // 选中时,选框的背景色:朱红
    padding: 40, // 选中时,选择框离元素的内边距:40px
    borderOpacityWhenMoving: 0.6, // 当对象活动和移动时,对象控制边界的不透明度
  })

  canvas.add(circle)
}

onMounted(() => {
  init()
})
</script>
文本常用样式
html
<template>
  <canvas width="400" height="400" id="canvas" style="border: 1px solid #ccc;"></canvas>
</template>

<script setup>
import { onMounted } from 'vue'
import { fabric } from 'fabric'

function init() {
  const canvas = new fabric.Canvas('canvas')

  const text = new fabric.Text('hello', {
    top: 40,
    left: 40,
    fontSize: 120,
    backgroundColor: 'green', // 背景色:绿色
    fill: 'orange', // 填充色:橙色
    stroke: '#f6416c', // 边框颜色:粉色
    strokeWidth: 3, // 边框粗细:3px
    strokeDashArray: [20, 5, 14], // 边框虚线规则:填充20px 空5px 填充14px 空20px 填充5px ......
    shadow: '10px 20px 6px rgba(10, 20, 30, 0.4)', // 投影:向右偏移10px,向下偏移20px,羽化6px,投影颜色及透明度
    transparentCorners: false, // 选中时,角是被填充了。true 空心;false 实心
    borderColor: '#16f1fc', // 选中时,边框颜色:天蓝
    borderScaleFactor: 5, // 选中时,边的粗细:5px
    borderDashArray: [20, 5, 10, 7], // 选中时,虚线边的规则
    cornerColor: "#a1de93", // 选中时,角的颜色是 青色
    cornerStrokeColor: 'pink', // 选中时,角的边框的颜色是 粉色
    cornerStyle: 'circle', // 选中时,叫的属性。默认rect 矩形;circle 圆形
    cornerSize: 20, // 选中时,角的大小为20
    cornerDashArray: [10, 2, 6], // 选中时,虚线角的规则
    selectionBackgroundColor: '#7f1300', // 选中时,选框的背景色:朱红
    padding: 40, // 选中时,选择框离元素的内边距:40px
    borderOpacityWhenMoving: 0.6, // 当对象活动和移动时,对象控制边界的不透明度
  })

  canvas.add(text)
}

onMounted(() => {
  init()
})
</script>
除此之外,还可以配置 上划线 、下划线 、删除线 、左对齐 、 右对齐 、 居中对齐 、 行距 等。
html
<template>
<canvas width="600" height="400" id="canvas" style="border: 1px solid #ccc;"></canvas>
</template>
<script setup>
import { onMounted } from 'vue'
import { fabric } from 'fabric'
function init() {
const canvas = new fabric.Canvas('canvas')
// 上划线
const overline = new fabric.Text('上划线', {
top: 30,
left: 10,
fontSize: 20,
overline: true, // 上划线
})
// 下划线
const underline = new fabric.Text('下划线', {
top: 30,
left: 100,
fontSize: 20,
underline: true, // 下划线
})
// 删除线
const linethrough = new fabric.Text('删除线', {
top: 30,
left: 200,
fontSize: 20,
linethrough: true, // 删除线
})
// 左对齐
const msg1 = '左\n左左\n左对齐'
const left = new fabric.Text(msg1, {
top: 100,
left: 10,
fontSize: 16,
textAlign: 'left', // 左对齐
})
// 居中对齐
const msg2 = '中\n中中\n居中对齐'
const center = new fabric.Text(msg2, {
top: 100,
left: 100,
fontSize: 16,
textAlign: 'center',// 居中对齐
})
// 右对齐
const msg3 = '右\n右右\n右对齐'
const right = new fabric.Text(msg3, {
top: 100,
left: 200,
fontSize: 16,
textAlign: 'right', // 右对齐
})
// 文本内容
const msg4 = "What are you doing,\nWhat are you doing,\nWhat are you doing\What are you doing"
const lineHeight1 = new fabric.Text(msg4, {
top: 250,
left: 10,
fontSize: 16,
lineHeight: 1, // 行高
})
const lineHeight2 = new fabric.Text(msg4, {
top: 250,
left: 300,
fontSize: 16,
lineHeight: 2, // 行高
})
canvas.add(
overline,
underline,
linethrough,
left,
center,
right,
lineHeight1,
lineHeight2
)
}
onMounted(() => {
init()
})
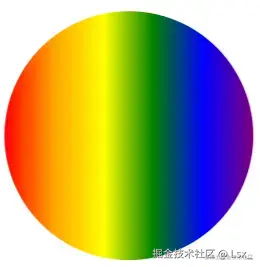
</script>渐变
线性渐变
html
<template>
  <canvas width="600" height="600" id="canvas" style="border: 1px solid #ccc;"></canvas>
</template>

<script setup>
import { onMounted } from 'vue'
import { fabric } from 'fabric'

function init() {
  let canvas = new fabric.Canvas('canvas')

  // 圆
  let circle = new fabric.Circle({
    left: 100,
    top: 100,
    radius: 50,
  })

  // 线性渐变
  let gradient = new fabric.Gradient({
    type: 'linear', // linear or radial
    gradientUnits: 'pixels', // pixels or pencentage 像素 或者 百分比
    coords: { x1: 0, y1: 0, x2: circle.width, y2: 0 }, // 至少2个坐标对(x1,y1和x2,y2)将定义渐变在对象上的扩展方式
    colorStops:[ // 定义渐变颜色的数组
      { offset: 0, color: 'red' },
      { offset: 0.2, color: 'orange' },
      { offset: 0.4, color: 'yellow' },
      { offset: 0.6, color: 'green' },
      { offset: 0.8, color: 'blue' },
      { offset: 1, color: 'purple' },
    ]
  })
  circle.set('fill', gradient);
  canvas.add(circle)
}

onMounted(() => {
  init()
})
</script>
径向渐变
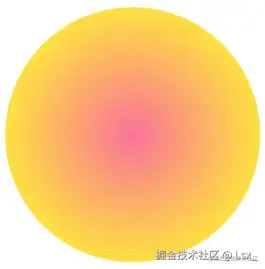
html
<template>
  <canvas width="600" height="600" id="canvas" style="border: 1px solid #ccc;"></canvas>
</template>

<script setup>
import { onMounted } from 'vue'
import { fabric } from 'fabric'

function init() {
  let canvas = new fabric.Canvas('canvas')

  // 圆
  let circle = new fabric.Circle({
    left: 100,
    top: 100,
    radius: 50,
  })

  let gradient = new fabric.Gradient({
    type: 'radial',
    coords: {
      r1: 50, // 该属性仅径向渐变可用,外圆半径
      r2: 0, // 该属性仅径向渐变可用,外圆半径
      x1: 50, // 焦点的x坐标
      y1: 50, // 焦点的y坐标
      x2: 50, // 中心点的x坐标
      y2: 50, // 中心点的y坐标
    },
    colorStops: [
      { offset: 0, color: '#fee140' },
      { offset: 1, color: '#fa709a' }
    ]
  })

  circle.set('fill', gradient);
  canvas.add(circle)
}

onMounted(() => {
  init()
})
</script>
选中状态
Fabric.js 创建出来的元素(图形、图片、组等)默认是可以被选中的。
禁止选中

html
<template>
  <canvas width="400" height="400" id="canvas" style="border: 1px solid #ccc;"></canvas>
</template>

<script setup>
import { onMounted } from 'vue'
import { fabric } from 'fabric'

function init() {
  const canvas = new fabric.Canvas('canvas')

  const rect = new fabric.Rect({
    top: 100,
    left: 100,
    width: 200,
    height: 100,
    fill: 'red'
  })

  // 元素禁止选中
  rect.selectable = false

  canvas.add(rect)
}

onMounted(() => {
  init()
})
</script>
框选样式
html
<template>
  <canvas width="200" height="200" id="canvas" style="border: 1px solid #ccc;"></canvas>
</template>

<script setup>
import { onMounted } from 'vue'
import { fabric } from 'fabric'

function init() {
  const canvas = new fabric.Canvas('canvas')

  // 圆形
  const circle = new fabric.Circle({
    radius: 30,
    fill: '#f55',
    top: 70,
    left: 70
  })

  canvas.add(circle)

  canvas.selection = true // 画布是否可选中。默认true;false 不可选中
  canvas.selectionColor = 'rgba(106, 101, 216, 0.3)' // 画布鼠标框选时的背景色
  canvas.selectionBorderColor = "#1d2786" // 画布鼠标框选时的边框颜色
  canvas.selectionLineWidth = 6 // 画布鼠标框选时的边框厚度
  canvas.selectionDashArray = [30, 4, 10] // 画布鼠标框选时边框虚线规则
  canvas.selectionFullyContained = true // 只选择完全包含在拖动选择矩形中的形状
}

onMounted(() => {
  init()
})
</script>
自定义边和控制角样式
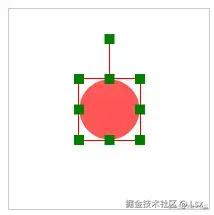
html
<template>
  <canvas width="200" height="200" id="canvas" style="border: 1px solid #ccc;"></canvas>
</template>

<script setup>
import { onMounted } from 'vue'
import { fabric } from 'fabric'

function init() {
  const canvas = new fabric.Canvas('canvas')

  // 圆形
  const circle = new fabric.Circle({
    radius: 30,
    fill: '#f55',
    top: 70,
    left: 70
  })

  circle.set({
    borderColor: 'red', // 边框颜色
    cornerColor: 'green', // 控制角颜色
    cornerSize: 10, // 控制角大小
    transparentCorners: false // 控制角填充色不透明
  })

  canvas.add(circle)

  canvas.setActiveObject(circle) // 选中圆
}

onMounted(() => {
  init()
})
</script>
没有控制角
没有控制角将意味着无法用鼠标直接操作缩放和旋转,只允许移动操作。
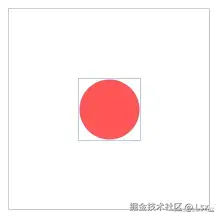
html
<template>
  <canvas width="200" height="200" id="canvas" style="border: 1px solid #ccc;"></canvas>
</template>

<script setup>
import { onMounted } from 'vue'
import { fabric } from 'fabric'

function init() {
  const canvas = new fabric.Canvas('canvas')

  // 圆形
  const circle = new fabric.Circle({
    radius: 30,
    fill: '#f55',
    top: 70,
    left: 70
  })

  circle.hasControls = false // 禁止控制角

  canvas.add(circle)

  canvas.setActiveObject(circle) // 选中第一项
}

onMounted(() => {
  init()
})
</script>
不允许框选
不允许从画布框选,但允许选中元素。
html
<template>
  <canvas width="200" height="200" id="canvas" style="border: 1px solid #ccc;"></canvas>
</template>

<script setup>
import { onMounted } from 'vue'
import { fabric } from 'fabric'

function init() {
  const canvas = new fabric.Canvas('canvas')

  // 圆形
  const circle = new fabric.Circle({
    radius: 30,
    fill: '#f55',
    top: 70,
    left: 70
  })

  canvas.add(circle)
  canvas.selection = false // 不允许直接从画布框选
}

onMounted(() => {
  init()
})
</script>
分组
建组

html
<template>
  <div>
    <canvas width="400" height="400" id="canvas" style="border: 1px solid #ccc;"></canvas>
  </div>
</template>

<script setup>
import { onMounted } from 'vue'
import { fabric } from 'fabric'

function init() {
  const canvas = new fabric.Canvas('canvas')

  // 椭圆
  const ellipse = new fabric.Ellipse({
    top: 20,
    left: 20,
    rx: 100,
    ry: 50,
    fill: '#ddd',
    originX: 'center', // 旋转x轴:left, right, center
    originY: 'center' // 旋转y轴:top, bottom, center
  })

  // 文本
  const text = new fabric.Text('Hello World', {
    top: 40,
    left: 20,
    fontSize: 20,
    originX: "center",
    originY: "center"
  })

  // 建组
  const group = new fabric.Group([ellipse, text], {
    top: 50, // 整组距离顶部100
    left: 100, // 整组距离左侧100
    angle: -10, // 整组旋转-10deg
  })

  canvas.add(group)
}

onMounted(() => {
  init()
})
</script>
new fabric.Group 可以创建一个组,把多个图层放在同一个组内,实现同步的操作,比如拖拽、缩放等。
操作组
Fabric.js 的组提供了很多方法,这里列一些常用的:
-
getObjects()返回一组中所有对象的数组 -
size()所有对象的数量 -
contains()检查特定对象是否在group中 -
item()组中元素 -
forEachObject()遍历组中对象 -
add()添加元素对象 -
remove()删除元素对象 -
fabric.util.object.clone()克隆
html
<template>
  <div>
    <canvas width="400" height="400" id="canvas" style="border: 1px solid #ccc;"></canvas>
  </div>
</template>

<script setup>
import { onMounted } from 'vue'
import { fabric } from 'fabric'

function init() {
  const canvas = new fabric.Canvas('canvas')

  // 椭圆
  const ellipse = new fabric.Ellipse({
    top: 20,
    left: 20,
    rx: 100,
    ry: 50,
    fill: '#ddd',
    originX: 'center', // 旋转x轴:left, right, center
    originY: 'center' // 旋转y轴:top, bottom, center
  })

  // 文本
  const text = new fabric.Text('Hello World', {
    top: 40,
    left: 20,
    fontSize: 20,
    originX: "center",
    originY: "center"
  })

  // 建组
  const group = new fabric.Group([ellipse, text], {
    top: 50, // 整组距离顶部100
    left: 100, // 整组距离左侧100
    angle: -10, // 整组旋转-10deg
  })

  // 控制第一个元素(椭圆)
  group.item(0).set('fill', '#ea5455')

  // 控制第二个元素(文本)
  group.item(1).set({
    text: '雷猴,世界',
    fill: '#fff'
  })

  canvas.add(group)
}

onMounted(() => {
  init()
})
</script>
取消分组
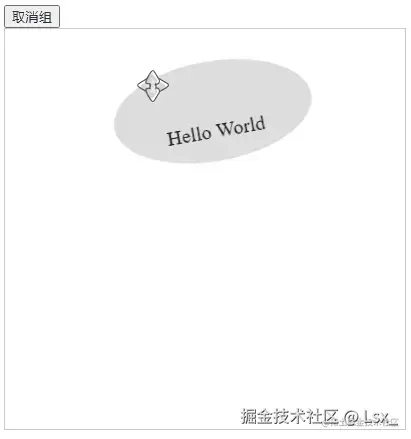
html
<template>
  <div>
    <button @click="ungroup">取消组</button>
    <canvas width="400" height="400" id="canvas" style="border: 1px solid #ccc;"></canvas>
  </div>
</template>

<script setup>
import { onMounted } from 'vue'
import { fabric } from 'fabric'

let canvas = null

// 初始化
function init() {
  canvas = new fabric.Canvas('canvas')

  // 椭圆
  const ellipse = new fabric.Ellipse({
    top: 20,
    left: 20,
    rx: 100,
    ry: 50,
    fill: '#ddd',
    originX: 'center', // 旋转x轴:left, right, center
    originY: 'center' // 旋转y轴:top, bottom, center
  })

  // 文本
  const text = new fabric.Text('Hello World', {
    top: 40,
    left: 20,
    fontSize: 20,
    originX: "center",
    originY: "center"
  })

  // 建组
  const group = new fabric.Group([ellipse, text], {
    top: 50, // 整组距离顶部100
    left: 100, // 整组距离左侧100
    angle: -10, // 整组旋转-10deg
  })

  canvas.add(group)
}

// 取消组
function ungroup() {
  // 判断当前有没有选中元素,如果没有就不执行任何操作
  if (!canvas.getActiveObject()) {
    return
  }

  // 判断当前是否选中组,如果不是,就不执行任何操作
  if (canvas.getActiveObject().type !== 'group') {
    return
  }

  // 先获取当前选中的对象,然后打散
  canvas.getActiveObject().toActiveSelection()
}

onMounted(() => {
  init()
})
</script>
动画
绝对值动画
html
<template>
<div>
<canvas width="400" height="400" id="canvas" style="border: 1px solid #ccc;"></canvas>
</div>
</template>
<script setup>
import { onMounted } from 'vue'
import { fabric } from 'fabric'
// 初始化
function init() {
const canvas = new fabric.Canvas('canvas')
const rect = new fabric.Rect({
left: 100,
top: 100,
width: 100,
height: 100,
fill: 'red'
})
// 设置矩形动画
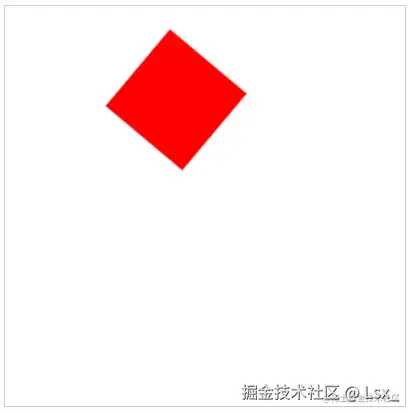
rect.animate('angle', "-50", {
onChange:canvas.renderAll.bind(canvas), // 每次刷新的时候都会执行
})
canvas.add(rect)
}
onMounted(() => {
init()
})
</script>每个 Fabric 对象都有一个 animate 方法,该方法可以动画化该对象。
用法:animate(动画属性, 动画的结束值, [画的详细信息])
第一个参数是要设置动画的属性。
第二个参数是动画的结束值。
第三个参数是一个对象,包括:
ts
{

   rom:允许指定可设置动画的属性的起始值(如果我们不希望使用当前值)。

   duration:默认为500(ms)。可用于更改动画的持续时间。

   onComplete:在动画结束时调用的回调。

   easing:缓动功能。

}
相对值动画
html
<template>
  <div>
    <canvas width="400" height="400" id="canvas" style="border: 1px solid #ccc;"></canvas>
  </div>
</template>

<script setup>
import { onMounted } from 'vue'
import { fabric } from 'fabric'

// 初始化
function init() {
  const canvas = new fabric.Canvas('canvas')
  const rect = new fabric.Rect({
    left: 100,
    top: 100,
    width: 100,
    height: 100,
    fill: 'red'
  })

  // 请注意第二个参数:+=360
  rect.animate('angle', '+=360', {
    onChange:canvas.renderAll.bind(canvas), // 每次刷新的时候都会执行
    duration: 2000, // 执行时间
    easing: fabric.util.ease.easeOutBounce, // 缓冲效果
  })

  canvas.add(rect)
}

onMounted(() => {
  init()
})
</script>
绝对值动画 和 相对值动画 的用法是差不多的,只是 第二个参数 用法不同。
相对值动画 是把 animate 改成带上运算符的值,这样就会在原基础上做计算。
设置图形层级
-
Canvas对象层级操作方法:
canvas.bringToFront(object): 将指定对象移到最前面。canvas.sendToBack(object): 将指定对象移到最后面。canvas.bringForward(object): 将指定对象向前移动一个层级。canvas.sendBackwards(object): 将指定对象向后移动一个层级。canvas.moveTo(object, index): 将指定对象移动到指定的层级索引。
-
Object对象层级操作方法:
object.bringToFront(): 将当前对象移到最前面。object.sendToBack(): 将当前对象移到最后面。object.bringForward(intersecting): 将当前对象向前移动一个层级,若intersecting为true则会跳过所有交叉的对象。object.sendBackwards(intersecting): 将当前对象向后移动一个层级,若intersecting为true则会跳过所有交叉的对象。object.moveTo(index): 将当前对象移动到指定的层级索引。
想要获取具体图形的层级一般使用 canvas.getObjects().indexOf(xxx) 。
显然,这个有点麻烦,我们自己加一个 level 方法让其直接显示对象的层级。
ts
// 新增 level 方法
fabric.Object.prototype.getLevel = function() {
  return this.canvas.getObjects().indexOf(this);
}
// 添加到画布
canvas.add(rect, circle, triangle);
// 调用level方法
console.log(rect.getLevel()); // 0
console.log(triangle.getLevel()); // 1
事件
Fabric.js 提供了一套很方便的事件系统,可以用 on 方法可以初始化事件监听器,用 off 方法将其删除。
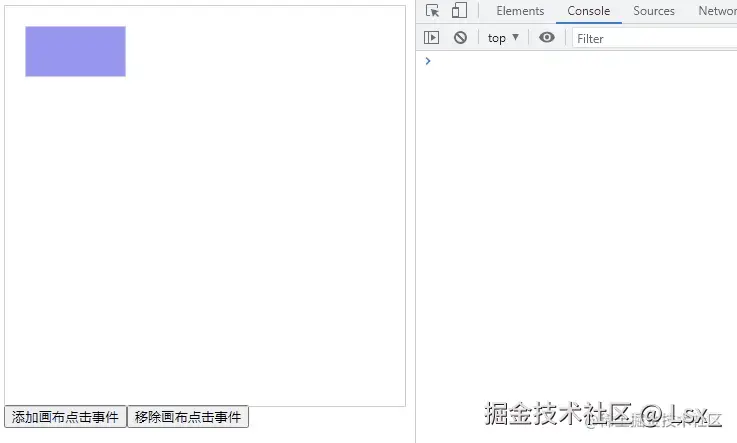
html
<template>
  <div>
    <canvas width="400" height="400" id="canvas" style="border: 1px solid #ccc;"></canvas>
    <button @click="addClickEvent">添加画布点击事件</button>
    <button @click="removeClickEvent">移除画布点击事件</button>
  </div>
</template>

<script setup>
import { onMounted } from 'vue'
import { fabric } from 'fabric'

let canvas = null

// 初始化画布
function init() {
  canvas = new fabric.Canvas('canvas')

  const rect = new fabric.Rect({
    top: 20,
    left: 20,
    width: 100,
    height: 50,
    fill: '#9896f1'
  })

  // 给矩形添加一个选中事件
  rect.on('selected', options => {
    console.log('选中矩形啦', options)
  })
  canvas.add(rect)

  addClickEvent()
}

// 移除画布点击事件
function removeClickEvent() {
  canvas.off('mouse:down')
}

// 添加画布点击事件
function addClickEvent() {
  removeClickEvent() // 在添加事件之前先把该事件清除掉,以免重复添加
  canvas.on('mouse:down', options => {
    console.log(`x轴坐标: ${options.e.clientX};    y轴坐标: ${options.e.clientY}`)
  })
}

onMounted(() => {
  init()
})
</script>
禁止操作框的部分功能
禁止水平移动
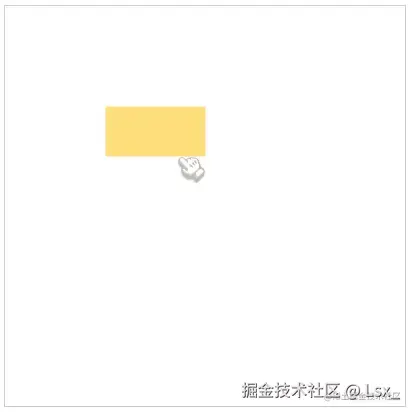
html
<template>
  <div>
    <canvas id="canvas" width="400" height="400" style="border: 1px solid #ccc;"></canvas>
  </div>
</template>

<script setup>
import { onMounted } from 'vue'
import { fabric } from 'fabric'

// 初始化画布
function init() {
  const canvas = new fabric.Canvas('canvas')

  const rect = new fabric.Rect({
    top: 100,
    left: 100,
    width: 100,
    height: 50,
    fill: '#ffde7d'
  })

  // 不允许水平移动
  rect.lockMovementX = true

  canvas.add(rect)
}

onMounted(() => {
  init()
})
</script>
禁止垂直移动
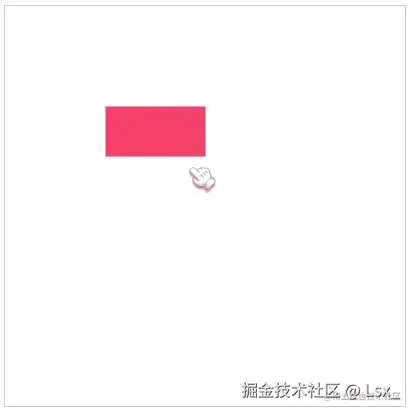
html
<template>
  <div>
    <canvas id="canvas" width="400" height="400" style="border: 1px solid #ccc;"></canvas>
  </div>
</template>

<script setup>
import { onMounted } from 'vue'
import { fabric } from 'fabric'

// 初始化画布
function init() {
  const canvas = new fabric.Canvas('canvas')

  const rect = new fabric.Rect({
    top: 100,
    left: 100,
    width: 100,
    height: 50,
    fill: '#f6416c'
  })

  // 不允许垂直移动
  rect.lockMovementY = true

  canvas.add(rect)
}

onMounted(() => {
  init()
})
</script>
缩放和平移画布
缩放画布
以原点为基准缩放画布
需要监听鼠标的滚轮事件:mouse:wheel。
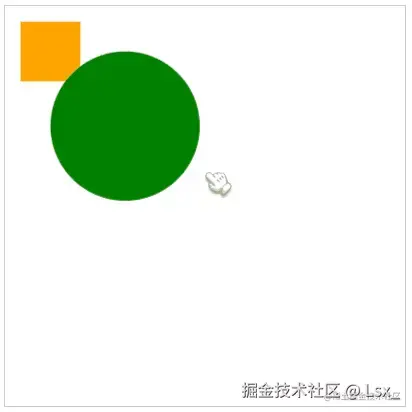
html
<template>
  <div>
    <canvas id="canvas" width="400" height="400" style="border: 1px solid #ccc;"></canvas>
  </div>
</template>

<script setup>
import { onMounted } from 'vue'
import { fabric } from 'fabric'

function init() {
  // 初始化画布
  const canvas = new fabric.Canvas('canvas')

  // 矩形
  const rect = new fabric.Rect({
    top: 10,
    left: 10,
    width: 40,
    height: 40,
    fill: 'orange'
  })

  // 圆形
  const circle = new fabric.Circle({
    top: 30,
    left: 30,
    radius: 50,
    fill: 'green'
  })
  canvas.add(rect, circle) // 将矩形和圆形添加到画布中

  // 监听鼠标滚轮事件
  canvas.on('mouse:wheel', opt => {
    let delta = opt.e.deltaY // 滚轮向上滚一下是 -100,向下滚一下是 100
    let zoom = canvas.getZoom() // 获取画布当前缩放值

    // 控制缩放范围在 0.01~20 的区间内
    zoom *= 0.999 ** delta
    if (zoom > 20) zoom = 20
    if (zoom < 0.01) zoom = 0.01

    // 设置画布缩放比例
    canvas.setZoom(zoom)
  })
}

onMounted(() => {
  init()
})
</script>
以鼠标指针为基准缩放画布
html
<template>
  <div>
    <canvas id="canvas" width="400" height="400" style="border: 1px solid #ccc;"></canvas>
  </div>
</template>

<script setup>
import { onMounted } from 'vue'
import { fabric } from 'fabric'

function init() {
  // 初始化画布
  const canvas = new fabric.Canvas('canvas')

  // 矩形
  const rect = new fabric.Rect({
    top: 130,
    left: 130,
    width: 40,
    height: 40,
    fill: 'orange'
  })

  // 圆形
  const circle = new fabric.Circle({
    top: 150,
    left: 150,
    radius: 50,
    fill: 'green'
  })
  canvas.add(rect, circle) // 将矩形和圆形添加到画布中

  // 监听鼠标滚轮事件
  canvas.on('mouse:wheel', opt => {
    let delta = opt.e.deltaY // 滚轮向上滚一下是 -100,向下滚一下是 100
    let zoom = canvas.getZoom() // 获取画布当前缩放值

    // 控制缩放范围在 0.01~20 的区间内
    zoom *= 0.999 ** delta
    if (zoom > 20) zoom = 20
    if (zoom < 0.01) zoom = 0.01

    // 设置画布缩放比例
    // 关键点!!!
    // 参数1:将画布的所放点设置成鼠标当前位置
    // 参数2:传入缩放值
    canvas.zoomToPoint(
      {
        x: opt.e.offsetX, // 鼠标x轴坐标
        y: opt.e.offsetY  // 鼠标y轴坐标
      },
      zoom // 最后要缩放的值
    )
  })
}

onMounted(() => {
  init()
})
</script>
平移画布
html
<template>
  <div>
    <canvas id="canvas" width="400" height="400" style="border: 1px solid #ccc;"></canvas>
  </div>
</template>

<script setup>
import { onMounted } from 'vue'
import { fabric } from 'fabric'

function init() {
  // 初始化画布
  const canvas = new fabric.Canvas('canvas')

  // 矩形
  const rect = new fabric.Rect({
    top: 130,
    left: 130,
    width: 40,
    height: 40,
    fill: 'orange'
  })

  // 圆形
  const circle = new fabric.Circle({
    top: 150,
    left: 150,
    radius: 50,
    fill: 'green'
  })
  canvas.add(rect, circle) // 将矩形和圆形添加到画布中

  canvas.on('mouse:down', opt => { // 鼠标按下时触发
    let evt = opt.e
    if (evt.altKey === true) { // 是否按住alt
      canvas.isDragging = true // isDragging 是自定义的,开启移动状态
      canvas.lastPosX = evt.clientX // lastPosX 是自定义的
      canvas.lastPosY = evt.clientY // lastPosY 是自定义的
    }
  })

  canvas.on('mouse:move', opt => { // 鼠标移动时触发
    if (canvas.isDragging) {
      let evt = opt.e
      let vpt = canvas.viewportTransform // 聚焦视图的转换
      vpt[4] += evt.clientX - canvas.lastPosX
      vpt[5] += evt.clientY - canvas.lastPosY
      canvas.requestRenderAll() // 重新渲染
      canvas.lastPosX  = evt.clientX
      canvas.lastPosY  = evt.clientY
    }
  })

  canvas.on('mouse:up', opt => { // 鼠标松开时触发
    canvas.setViewportTransform(canvas.viewportTransform) // 设置此画布实例的视口转换
    canvas.isDragging = false // 关闭移动状态
  })
}

onMounted(() => {
  init()
})
</script>
获取真实的转换坐标
在图像处理的过程中,我们经常会用到坐标点信息,以便于进行一些交互操作。
此处举一个简单的例子,当鼠标点击时,在鼠标的位置创建一个方块对象:
ts
      // 当鼠标按下时
      canvas.on('mouse:down', function(option) {
        const evt = option.e;
        // 创建一个小方块
        this.add(new fabric.Rect({
          left: evt.offsetX,
          top: evt.offsetY,
          width: 50,
          height: 50,
          fill: 'yellow'
        }))
        this.renderAll();
      });
从上图可见,当canvas未平移或缩放时,可以很简单的获取相应点位置,但是一但平移或者缩放后,鼠标点的位置就全乱了。Fabric.js 提供了 transformPoint 方法解决这一问题。
-
fabric.util.transformPoint(Point, transform) :
- 将Canvas坐标点转换为视口坐标点
- 例如:fabric.util.transformPoint(new fabric.Point(100, 100), canvas.viewportTransform) ,将视口的(100,100)坐标点转化为平移缩放后的坐标点。
-
Canvas.getPointer(event) :
- 用于获取事件(如鼠标或触摸事件)发生时相对于画布的坐标。它考虑了当前视口的变换(包括平移和缩放),因此可以正确地将鼠标或触摸事件的屏幕坐标转换为画布坐标。
修改代码:
ts
      // 当鼠标按下时
      canvas.on('mouse:down', function(option) {
        const evt = option.e;
        // 用transformPoint创建一个小方块
        // 注意 transformPoint 作用是将一个坐标从一个坐标系转换到另一个坐标系
        // 由于这里的将按下的视口坐标转换成 canvas画布坐标系,所以需要用 invertTransform 反转变换
        this.add(new fabric.Rect({
          left: fabric.util.transformPoint({ x: evt.offsetX, y: evt.offsetY },  fabric.util.invertTransform(canvas.viewportTransform)).x,
          top: fabric.util.transformPoint({ x: evt.offsetX, y: evt.offsetY }, fabric.util.invertTransform(canvas.viewportTransform)).y,
          width: 50,
          height: 50,
          fill: 'red'
        }))
        // 用getPointer创建一个小方块
        const pointer = canvas.getPointer(evt);
        console.log('potint, ', pointer)
        this.add(new fabric.Rect({
          left: pointer.x,
          top: pointer.y,
          width: 50,
          height: 50,
          fill: 'blue'
        }))
        this.renderAll();
      });
注意 transformPoint 作用是将一个坐标从一个坐标系转换到另一个坐标系,由于这里的将按下的视口坐标转换成 canvas画布坐标系,所以需要用 invertTransform 反转变换。
序列化
输出JSON
html
<template>
  <div>
    <canvas id="canvas" width="200" height="200" style="border: 1px solid #ccc;"></canvas>
  </div>
</template>

<script setup>
import { onMounted } from 'vue'
import { fabric } from 'fabric'

function init() {
  // 初始化画布
  const canvas = new fabric.Canvas('canvas')

  console.log('canvas stringify ', JSON.stringify(canvas))
  console.log('canvas toJSON', canvas.toJSON())
  console.log('canvas toObject', canvas.toObject())
}

onMounted(() => {
  init()
})
</script>
打开控制台可以看到输出。
输出base64
html
<template>
  <div>
    <canvas id="canvas" width="200" height="200" style="border: 1px solid #ccc;"></canvas>
  </div>
</template>

<script setup>
import { onMounted } from 'vue'
import { fabric } from 'fabric'

function init() {
  // 初始化画布
  const canvas = new fabric.Canvas('canvas', {
    backgroundColor: '#a5dee5'
  })

  const rect = new fabric.Rect({
    left: 50,
    top: 50,
    height: 20,
    width: 20,
    fill: 'green'
  })

  const circle = new fabric.Circle({
    left: 80,
    top: 80,
    radius: 40,
    fill: "red"
  })

  canvas.add(rect, circle)

  console.log('toPng', canvas.toDataURL('png')) // 在控制台输出 png(base64)
  canvas.requestRenderAll()
}

onMounted(() => {
  init()
})
</script>
输出 SVG
html
<template>
  <div>
    <canvas id="canvas" width="200" height="200" style="border: 1px solid #ccc;"></canvas>
  </div>
</template>

<script setup>
import { onMounted } from 'vue'
import { fabric } from 'fabric'

function init() {
  // 初始化画布
  const canvas = new fabric.Canvas('canvas', {
    backgroundColor: '#a5dee5'
  })

  const rect = new fabric.Rect({
    left: 50,
    top: 50,
    height: 20,
    width: 20,
    fill: 'green'
  })

  const circle = new fabric.Circle({
    left: 80,
    top: 80,
    radius: 40,
    fill: "red"
  })

  canvas.add(rect, circle)

  console.log(canvas.toSVG()) // 输出 SVG
}

onMounted(() => {
  init()
})
</script>
反序列化
反序列化就是把 JSON 数据渲染到画布上。
通常把从后台请求回来的数据渲染到画布上。
html
<template>
  <div>
    <canvas id="canvas" width="200" height="200" style="border: 1px solid #ccc;"></canvas>
  </div>
</template>

<script setup>
import { onMounted } from 'vue'
import { fabric } from 'fabric'

function init() {
  const jsonStr = ''

  // 初始化画布
  const canvas = new fabric.Canvas('canvas')

  // 反序列化
  canvas.loadFromJSON(jsonStr)
}

onMounted(() => {
  init()
})
</script>
总结
写到这里,我们已经把 Fabric.js 常见功能都过了一遍。如果你坚持看到这里,恭喜你!你已经具备构建一个简单画板/海报编辑器/可视化工具的基础能力。
Fabric.js 是一个非常强大的前端 Canvas 库,随着你不断实践,你会发现它能做的事情远不止本文展示的这些。
如果你有什么想法、问题或希望我继续写的方向,欢迎在评论区告诉我,我会持续更新更多相关内容。