课程:B站大学
记录python学习,直到学会基本的爬虫,使用python搭建接口自动化测试,后续进阶UI自动化测试
接口自动化测试
- 数据驱动测试-Excel
- csv文件数据驱动化
- allure介绍
-
- allure安装:
- allure生成测试报告流程
- allure常用的命令
- allure的用法
- [Allure特性 - 设置优先级](#Allure特性 - 设置优先级)
- 测试报告是自动化测试最终呈现的结果
- 实践是检验真理的唯一标准
数据驱动测试-Excel
参数化可以使用excel进行操作,测试数据分析时也可以用到excel
常用的第三方库:
• xlrd
• xlwings
• pandas
• openpyxl
• 官方文档:openpyxl
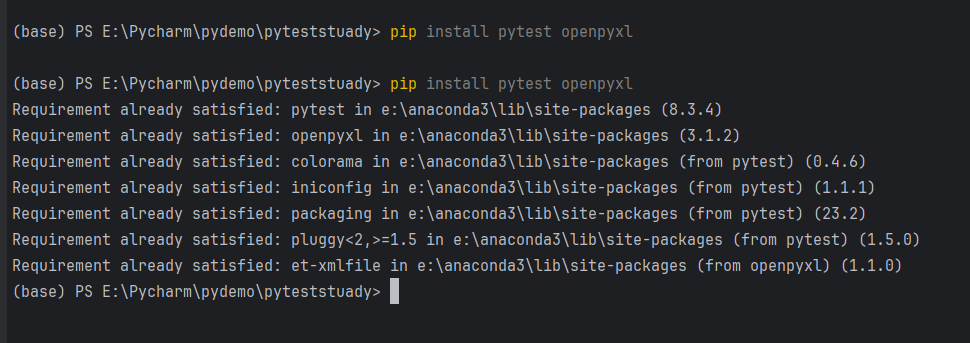
使用:pip install pytest openpyxl
源码:
python
import pytest
from openpyxl import Workbook, load_workbook
import os

# 测试文件路径(临时文件,测试后自动清理)
TEST_FILE = "test_data.xlsx"


def test_create_and_write_excel():
    """测试创建Excel并写入数据"""
    # 1. 创建工作簿和工作表
    wb = Workbook()
    ws = wb.active
    ws.title = "TestSheet"  # 重命名工作表

    # 2. 写入表头和数据
    headers = ["姓名", "年龄", "城市"]
    data = [
        ["张三", 25, "北京"],
        ["李四", 30, "上海"],
        ["王五", 28, "广州"]
    ]

    # 写入表头
    for col_num, header in enumerate(headers, 1):
        ws.cell(row=1, column=col_num, value=header)

    # 写入数据行
    for row_num, row_data in enumerate(data, 2):  # 从第2行开始
        for col_num, value in enumerate(row_data, 1):
            ws.cell(row=row_num, column=col_num, value=value)

    # 3. 保存文件
    wb.save(TEST_FILE)
    assert os.path.exists(TEST_FILE), "Excel文件未成功创建"


def test_read_excel_data():
    """测试读取Excel数据并验证内容"""
    # 1. 加载已创建的Excel文件
    wb = load_workbook(TEST_FILE)
    ws = wb["TestSheet"]  # 获取指定工作表

    # 2. 验证表头
    headers = [cell.value for cell in ws[1]]  # 读取第1行所有单元格
    assert headers == ["姓名", "年龄", "城市"], f"表头不匹配,实际:{headers}"

    # 3. 验证数据行(跳过表头,从第2行开始)
    expected_data = [
        ["张三", 25, "北京"],
        ["李四", 30, "上海"],
        ["王五", 28, "广州"]
    ]
    for row_idx, expected_row in enumerate(expected_data, 2):  # 行号从2开始
        actual_row = [ws.cell(row=row_idx, column=col).value for col in range(1, 4)]
        assert actual_row == expected_row, f"第{row_idx}行数据不匹配,实际:{actual_row}"

    wb.close()


def test_modify_excel_cell():
    """测试修改Excel单元格的值"""
    # 1. 加载文件
    wb = load_workbook(TEST_FILE)
    ws = wb["TestSheet"]

    # 2. 修改单元格值(例如:将张三的年龄改为26)
    target_cell = ws.cell(row=2, column=2)  # 第2行第2列(年龄)
    original_value = target_cell.value
    target_cell.value = 26

    # 3. 保存修改
    wb.save(TEST_FILE)
    wb.close()

    # 4. 重新加载验证修改结果
    wb_reload = load_workbook(TEST_FILE)
    ws_reload = wb_reload["TestSheet"]
    modified_value = ws_reload.cell(row=2, column=2).value
    assert modified_value == 26, f"单元格修改失败,预期26,实际:{modified_value}"
    wb_reload.close()


def test_add_new_sheet():
    """测试添加新工作表并写入数据"""
    wb = load_workbook(TEST_FILE)

    # 1. 创建新工作表(避免名称重复)
    new_sheet_name = "NewSheet"
    if new_sheet_name in wb.sheetnames:
        del wb[new_sheet_name]  # 若已存在则删除旧表
    ws_new = wb.create_sheet(new_sheet_name)

    # 2. 写入新表数据
    ws_new["A1"] = "产品"
    ws_new["B1"] = "销量"
    ws_new["A2"] = "手机"
    ws_new["B2"] = 1000

    # 3. 保存并验证
    wb.save(TEST_FILE)
    wb.close()

    # 验证新表是否存在且数据正确
    wb_verify = load_workbook(TEST_FILE)
    assert new_sheet_name in wb_verify.sheetnames, "新工作表未创建"
    ws_verify = wb_verify[new_sheet_name]
    assert ws_verify["A2"].value == "手机", "新表数据写入失败"
    assert ws_verify["B2"].value == 1000, "新表数据写入失败"
    wb_verify.close()


@pytest.fixture(scope="session", autouse=True)
def cleanup_test_file():
    """会话级别的fixture:测试结束后自动删除临时Excel文件"""
    yield  # 测试执行阶段
    # 测试结束后清理文件
    if os.path.exists(TEST_FILE):
        os.remove(TEST_FILE)
        print(f"\n已清理临时文件:{TEST_FILE}")


if __name__ == "__main__":
    # 直接运行pytest(或通过命令行 pytest test_excel_operations.py -v)
    pytest.main(["-v"])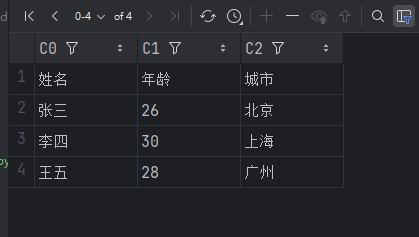
csv文件数据驱动化
CSV文件定义及相关特点
• 定义:csv 是"逗号分隔值"的英文"Comma - Separated Values"的缩写。
• 存储形式:以纯文本形式存储数字和文本。
• 文件结构:
◦ 文件由任意数目的记录组成。
◦ 每行记录由多个字段组成。
• 读取数据
• 内置函数:open()
• 内置模块:csv
• 方法:csv.reader(iterable)
• 参数:iterable,文件或列表对象
• 返回:迭代器,每次迭代会返回一行数据。
python
# 读取csv文件内容
import csv


def get_csv():
    with open('demo.csv', 'r', encoding='utf-8') as file:
        raw = csv.reader(file)
        for line in raw:
            print(line)


if __name__ == "__main__":
    get_csv()
allure介绍
• Allure是一个轻量级,灵活的,支持多语言的测试报告工具
• 多平台的, 奢华的report框架
• 可以为dev/qa提供详尽的的测试报告、测试步骤、log
• 也可以为管理层提供high level统计报告
• Java语言开发的,支持pytest, JavaScript, PHP, ruby等
• 可以集成到Jenkins
python
import allure
import pytest


@allure.feature("用户登录模块")  # 定义功能模块
class TestLogin:
    @allure.story("正常登录场景")  # 定义用户故事
    def test_normal_login(self):
        with allure.step("输入用户名"):
            username = "test_user"
            allure.attach("用户名", username)  # 附加信息
        with allure.step("输入密码"):
            password = "test_password"
            allure.attach("密码", password)
        with allure.step("点击登录按钮"):
            result = True  # 模拟登录结果,这里假设登录成功
            allure.attach("登录结果", str(result))
        assert result

    @allure.story("密码错误登录场景")
    def test_wrong_password_login(self):
        with allure.step("输入用户名"):
            username = "test_user"
            allure.attach("用户名", username)
        with allure.step("输入错误密码"):
            password = "wrong_password"
            allure.attach("密码", password)
        with allure.step("点击登录按钮"):
            result = False  # 模拟登录结果,这里假设登录失败
            allure.attach("登录结果", str(result))
        assert not result
allure安装:
- Java 8+ (Allure 基于 Java 开发)
- Python 3.6+ (如果使用 Python 进行自动化测试)
- Node.js (可选,用于某些高级功能)
java中的jdk安装和环境变量就不赘述了
使用包管理进行安装allure
python
# 核心包:allure-pytest
pip install allure-pytest

# 可选:allure-python-commons(通常作为依赖自动安装)
pip install allure-python-commons

# 验证安装
pip list | grep allure
allure生成测试报告流程

allure常用的命令
| 命令 | 作用描述 | 示例 |
|---|---|---|
allure generate |
将Allure测试结果(如JUnit/TestNG的XML报告)转换为HTML报告 | allure generate ./allure-results -o ./allure-report --clean |
allure serve |
启动临时服务器,直接查看HTML报告(自动生成+打开浏览器,适合快速预览) | allure serve ./allure-results |
allure open |
打开已生成的HTML报告(需先通过generate生成报告目录) |
allure open ./allure-report |
allure results |
查看Allure测试结果目录的基本信息(如报告数量、状态统计) | allure results ./allure-results |
allure clear |
清空Allure测试结果目录(删除旧的测试结果,避免干扰新报告) | allure clear ./allure-results |
allure version |
查看当前安装的Allure版本 | allure version |
allure history |
查看历史报告记录(需配合--append参数保留历史数据) |
allure generate ./allure-results -o ./allure-report --append |
allure plugin list |
列出Allure支持的插件(如behaviors、packages、timeline等) | allure plugin list |
allure plugin install |
安装指定的Allure插件 | allure plugin install allure-behaviors |
allure测试报告示例:
python
import allure
import pytest


# ------------------------------
# 1. 基础测试用例(带描述和步骤)
# ------------------------------
@allure.feature("用户管理")  # 一级模块
@allure.story("用户登录")  # 二级功能
def test_login_success():
    """正常登录场景"""
    with allure.step("输入用户名和密码"):  # 测试步骤1
        username = "admin"
        password = "123456"

    with allure.step("调用登录接口"):  # 测试步骤2
        result = login_api(username, password)  # 假设调用登录接口

    with allure.step("验证登录结果"):  # 测试步骤3
        assert result["code"] == 200
        assert result["msg"] == "登录成功"


# ------------------------------
# 2. 异常测试用例(带附件和严重等级)
# ------------------------------
@allure.feature("用户管理")
@allure.story("用户登录")
@allure.severity(allure.severity_level.CRITICAL)  # 标记严重等级(CRITICAL/HIGH/MEDIUM/LOW)
def test_login_failure_wrong_pwd():
    """密码错误场景"""
    with allure.step("输入错误密码"):
        username = "admin"
        password = "wrong_pwd"

    with allure.step("调用登录接口"):
        result = login_api(username, password)

    with allure.step("验证错误信息"):
        assert result["code"] == 401
        assert result["msg"] == "密码错误"

    # 添加附件(如错误日志)
    allure.attach(
        body="登录失败:密码错误",
        name="错误日志",
        attachment_type=allure.attachment_type.TEXT
    )


# ------------------------------
# 3. 参数化测试(多组数据)
# ------------------------------
@allure.feature("商品管理")
@allure.story("商品价格计算")
@pytest.mark.parametrize("price,count,expected", [
    (100, 2, 200),  # 正常计算
    (99.9, 3, 299.7),  # 小数计算
    (0, 5, 0)  # 边界值(价格为0)
], ids=["正常计算", "小数计算", "边界值"])
def test_calculate_total_price(price, count, expected):
    """测试商品价格计算逻辑"""
    with allure.step(f"计算 {price} * {count}"):
        total = calculate_price(price, count)

    with allure.step("验证结果"):
        assert total == expected, f"预期{expected},实际{total}"


# ------------------------------
# 模拟业务函数(测试用)
# ------------------------------
def login_api(username, password):
    """模拟登录接口"""
    if password == "123456":
        return {"code": 200, "msg": "登录成功"}
    else:
        return {"code": 401, "msg": "密码错误"}


def calculate_price(price, count):
    """模拟价格计算函数"""
    return price * count
allure的用法
| 使用方法 | 参数值 | 参数说明 |
|---|---|---|
| @allure.epic() | epic(描述) | 定义项目,当有多个项目是使用。往下是Feature |
| @allure.feature() | 模块名称 | 用例按照模块区分,有多个模块时给每个起名字 |
| @allure.story() | 用例名称 | 用例的描述 |
| @allure.title() | 用例标题 | 用例标题 |
| @allure.testcase() | 用例相关链接 | 自动化用例对应的功能用例存放系统的地址 |
| @allure.issue() | 缺陷地址 | 对应缺陷管理系统里边的缺陷地址 |
| @allure.description() | 用例描述 | 对测试用例的详细描述 |
| @allure.step() | 操作步骤 | 测试用例的操作步骤 |
| @allure.severity() | 用例等级 | blocker、critical、normal、minor、trivial |
| @allure.link() | 定义连接 | 用于定义一个需要在测试报告中展示的连接 |
| @allure.attachment() | 附件 | 添加测试报告附件 |
示例:
python
import pytest
import allure
import requests
from allure_commons.types import AttachmentType

@allure.epic("电商平台")
@allure.feature("用户管理模块")
class TestUserManagement:

    @allure.story("用户登录功能")
    @allure.title("测试用户正常登录")
    @allure.severity(allure.severity_level.CRITICAL)
    @allure.description("验证用户使用正确的用户名和密码能够成功登录系统")
    @allure.testcase("http://testcase-manager.com/login-test", "登录测试用例")
    def test_user_login_success(self):
        with allure.step("准备测试数据"):
            test_data = {
                "username": "test_user",
                "password": "correct_password"
            }
            allure.attach(str(test_data), name="测试数据", attachment_type=AttachmentType.JSON)

        with allure.step("发送登录请求"):
            response = requests.post(
                "https://api.example.com/login",
                json=test_data
            )
            allure.attach(str(response.json()), name="响应数据", attachment_type=AttachmentType.JSON)

        with allure.step("验证响应结果"):
            assert response.status_code == 200
            assert "token" in response.json()

    @allure.story("用户注册功能")
    @allure.title("测试新用户注册")
    @allure.severity(allure.severity_level.BLOCKER)
    @allure.description("验证新用户能够成功注册账号")
    def test_user_registration(self):
        with allure.step("生成测试数据"):
            import random
            username = f"test_user_{random.randint(1000, 9999)}"
            test_data = {
                "username": username,
                "password": "Test@123",
                "email": f"{username}@example.com"
            }

        with allure.step("发送注册请求"):
            response = requests.post(
                "https://api.example.com/register",
                json=test_data
            )

        with allure.step("验证注册结果"):
            assert response.status_code == 201
            assert "user_id" in response.json()

    @allure.story("用户信息修改")
    @allure.title("测试修改用户信息")
    @allure.severity(allure.severity_level.NORMAL)
    def test_update_user_info(self):
        # 先登录获取token
        login_data = {
            "username": "test_user",
            "password": "correct_password"
        }
        login_response = requests.post(
            "https://api.example.com/login",
            json=login_data
        )
        token = login_response.json().get("token")

        with allure.step("准备更新数据"):
            update_data = {
                "nickname": "新的昵称",
                "avatar": "https://example.com/new_avatar.jpg"
            }

        with allure.step("发送更新请求"):
            headers = {"Authorization": f"Bearer {token}"}
            response = requests.put(
                "https://api.example.com/user/profile",
                json=update_data,
                headers=headers
            )

        with allure.step("验证更新结果"):
            assert response.status_code == 200
            assert response.json().get("nickname") == "新的昵称"

    @allure.story("异常场景测试")
    @allure.title("测试使用错误密码登录")
    @allure.severity(allure.severity_level.MINOR)
    def test_login_with_wrong_password(self):
        with allure.step("准备错误密码"):
            test_data = {
                "username": "test_user",
                "password": "wrong_password"
            }

        with allure.step("发送登录请求"):
            response = requests.post(
                "https://api.example.com/login",
                json=test_data
            )

        with allure.step("验证错误响应"):
            assert response.status_code == 401
            assert response.json().get("error") == "Invalid credentials"

@allure.epic("电商平台")
@allure.feature("商品管理模块")
class TestProductManagement:

    @allure.story("商品搜索功能")
    @allure.title("测试按关键词搜索商品")
    @allure.severity(allure.severity_level.CRITICAL)
    def test_product_search(self):
        with allure.step("准备搜索关键词"):
            search_params = {
                "keyword": "手机",
                "page": 1,
                "page_size": 10
            }

        with allure.step("发送搜索请求"):
            response = requests.get(
                "https://api.example.com/products/search",
                params=search_params
            )

        with allure.step("验证搜索结果"):
            assert response.status_code == 200
            assert len(response.json().get("products", [])) > 0

    @allure.story("商品详情查看")
    @allure.title("测试查看商品详情")
    @allure.severity(allure.severity_level.NORMAL)
    def test_product_detail(self):
        # 先获取一个商品ID
        search_response = requests.get(
            "https://api.example.com/products/search",
            params={"keyword": "手机", "page": 1, "page_size": 1}
        )
        product_id = search_response.json().get("products", [{}])[0].get("id")

        with allure.step("获取商品详情"):
            response = requests.get(
                f"https://api.example.com/products/{product_id}"
            )

        with allure.step("验证商品详情"):
            assert response.status_code == 200
            assert "name" in response.json()
            assert "price" in response.json()
Allure特性 - 设置优先级
五种级别:
- BLOCKER("blocker"),阻塞缺陷(功能未实现,无法下一步)
- CRITICAL("critical"),严重缺陷(功能点缺失)
- NORMAL("normal"),一般缺陷(边界情况,格式错误)
- MINOR("minor"),次要缺陷(界面错误与ui需求不符)
- TRIVIAL("trivial"),轻微缺陷(必须项无提示,或者提示不规范)
示例:
python
import pytest
import allure
from allure_commons.types import AttachmentType

@allure.epic("电商系统")
@allure.feature("用户管理")
class TestUserManagementWithPriority:

    @allure.story("用户登录")
    @allure.title("【阻塞】用户无法登录系统")
    @allure.severity(allure.severity_level.BLOCKER)
    @allure.description("这是最严重的问题,用户完全无法使用系统,必须立即修复")
    def test_user_login_blocker(self):
        """
        阻塞级别测试 - 系统无法使用
        """
        with allure.step("尝试用户登录"):
            # 模拟登录失败
            login_result = False
            allure.attach("登录失败", "系统错误:数据库连接失败",
                         attachment_type=AttachmentType.TEXT)

        with allure.step("验证登录结果"):
            assert login_result == True, "用户无法登录,系统完全不可用"

        allure.attach("严重级别:BLOCKER", "这是阻塞级别问题,需要立即修复",
                     attachment_type=AttachmentType.TEXT)

    @allure.story("用户注册")
    @allure.title("【严重】用户注册功能缺失")
    @allure.severity(allure.severity_level.CRITICAL)
    @allure.description("重要功能缺失,影响核心业务流程")
    def test_user_registration_critical(self):
        """
        严重级别测试 - 重要功能缺失
        """
        with allure.step("检查注册功能"):
            registration_available = False
            allure.attach("注册功能不可用", "注册接口返回404",
                         attachment_type=AttachmentType.TEXT)

        with allure.step("验证注册功能"):
            assert registration_available == True, "用户注册功能缺失,影响业务"

        allure.attach("严重级别:CRITICAL", "重要功能缺失,需要优先修复",
                     attachment_type=AttachmentType.TEXT)

    @allure.story("用户信息修改")
    @allure.title("【一般】用户名格式验证不通过")
    @allure.severity(allure.severity_level.NORMAL)
    @allure.description("一般功能问题,不影响核心流程但影响用户体验")
    def test_user_update_normal(self):
        """
        一般级别测试 - 边界情况处理
        """
        with allure.step("准备测试数据"):
            test_cases = [
                {"username": "ab", "expected": False},  # 太短
                {"username": "a"*31, "expected": False},  # 太长
                {"username": "valid_user", "expected": True}  # 有效
            ]
            allure.attach(str(test_cases), "测试用例数据",
                         attachment_type=AttachmentType.JSON)

        with allure.step("执行格式验证"):
            for case in test_cases:
                result = self.validate_username(case["username"])
                allure.attach(f"用户名: {case['username']}, 结果: {result}",
                             f"验证结果 - {case['username']}",
                             attachment_type=AttachmentType.TEXT)
                assert result == case["expected"]

    def validate_username(self, username):
        """模拟用户名验证逻辑"""
        if len(username) < 3 or len(username) > 30:
            return False
        return True

    @allure.story("用户界面")
    @allure.title("【次要】按钮样式不符合设计规范")
    @allure.severity(allure.severity_level.MINOR)
    @allure.description("UI界面问题,不影响功能但影响视觉效果")
    def test_ui_elements_minor(self):
        """
        次要级别测试 - UI界面问题
        """
        with allure.step("检查按钮样式"):
            button_color = "#FF0000"  # 红色
            expected_color = "#007BFF"  # 蓝色

            allure.attach(f"当前颜色: {button_color}", "按钮颜色检查",
                         attachment_type=AttachmentType.TEXT)
            allure.attach(f"期望颜色: {expected_color}", "设计规范",
                         attachment_type=AttachmentType.TEXT)

        with allure.step("验证UI规范"):
            # 这里只是示例,实际项目中可能需要截图对比
            assert button_color == expected_color, "按钮颜色不符合设计规范"

        allure.attach("次要级别:MINOR", "UI问题,可以在后续版本修复",
                     attachment_type=AttachmentType.TEXT)

    @allure.story("用户提示")
    @allure.title("【轻微】必填项缺少提示信息")
    @allure.severity(allure.severity_level.TRIVIAL)
    @allure.description("轻微问题,不影响功能但影响用户体验")
    def test_required_field_trivial(self):
        """
        轻微级别测试 - 提示信息问题
        """
        with allure.step("检查必填项提示"):
            required_fields = ["用户名", "邮箱", "手机号"]
            missing_hints = ["用户名"]  # 模拟缺少提示的字段

            allure.attach(f"必填项: {required_fields}", "表单字段",
                         attachment_type=AttachmentType.TEXT)
            allure.attach(f"缺少提示: {missing_hints}", "问题字段",
                         attachment_type=AttachmentType.TEXT)

        with allure.step("验证提示信息"):
            # 检查是否所有必填项都有提示
            for field in required_fields:
                has_hint = field not in missing_hints
                status = "有提示" if has_hint else "缺少提示"
                allure.attach(f"{field}: {status}", f"字段提示检查 - {field}",
                             attachment_type=AttachmentType.TEXT)

        allure.attach("轻微级别:TRIVIAL", "提示信息问题,可以在后续版本优化",
                     attachment_type=AttachmentType.TEXT)

    @allure.story("性能测试")
    @allure.title("【阻塞】页面加载时间过长")
    @allure.severity(allure.severity_level.BLOCKER)
    @allure.description("性能问题严重影响用户体验,属于阻塞级别")
    def test_page_performance_blocker(self):
        """
        阻塞级别测试 - 性能问题
        """
        with allure.step("测量页面加载时间"):
            import time
            start_time = time.time()

            # 模拟页面加载
            time.sleep(5)  # 模拟5秒加载时间

            end_time = time.time()
            load_time = end_time - start_time

            allure.attach(f"加载时间: {load_time:.2f}秒", "性能指标",
                         attachment_type=AttachmentType.TEXT)

        with allure.step("验证性能标准"):
            max_allowed_time = 2.0  # 最大允许2秒
            assert load_time <= max_allowed_time, f"页面加载时间超过标准: {load_time:.2f}s > {max_allowed_time}s"

        allure.attach("阻塞级别:BLOCKER", "性能问题严重影响用户体验",
                     attachment_type=AttachmentType.TEXT)

if __name__ == "__main__":
    pytest.main([__file__, "-v", "--tb=short"])
测试报告是自动化测试最终呈现的结果
希望在报告中看到测试用例的详细内容展示,比如在用例中添加附件信息,可以是数据、文本、图片、视频、网页。
解决:
- @allure.attach显示许多不同类型提供的附件,可以补充测试、步骤或测试结果。
用法:
- allure.attach(body(内容), name, attachment_type, extension) :