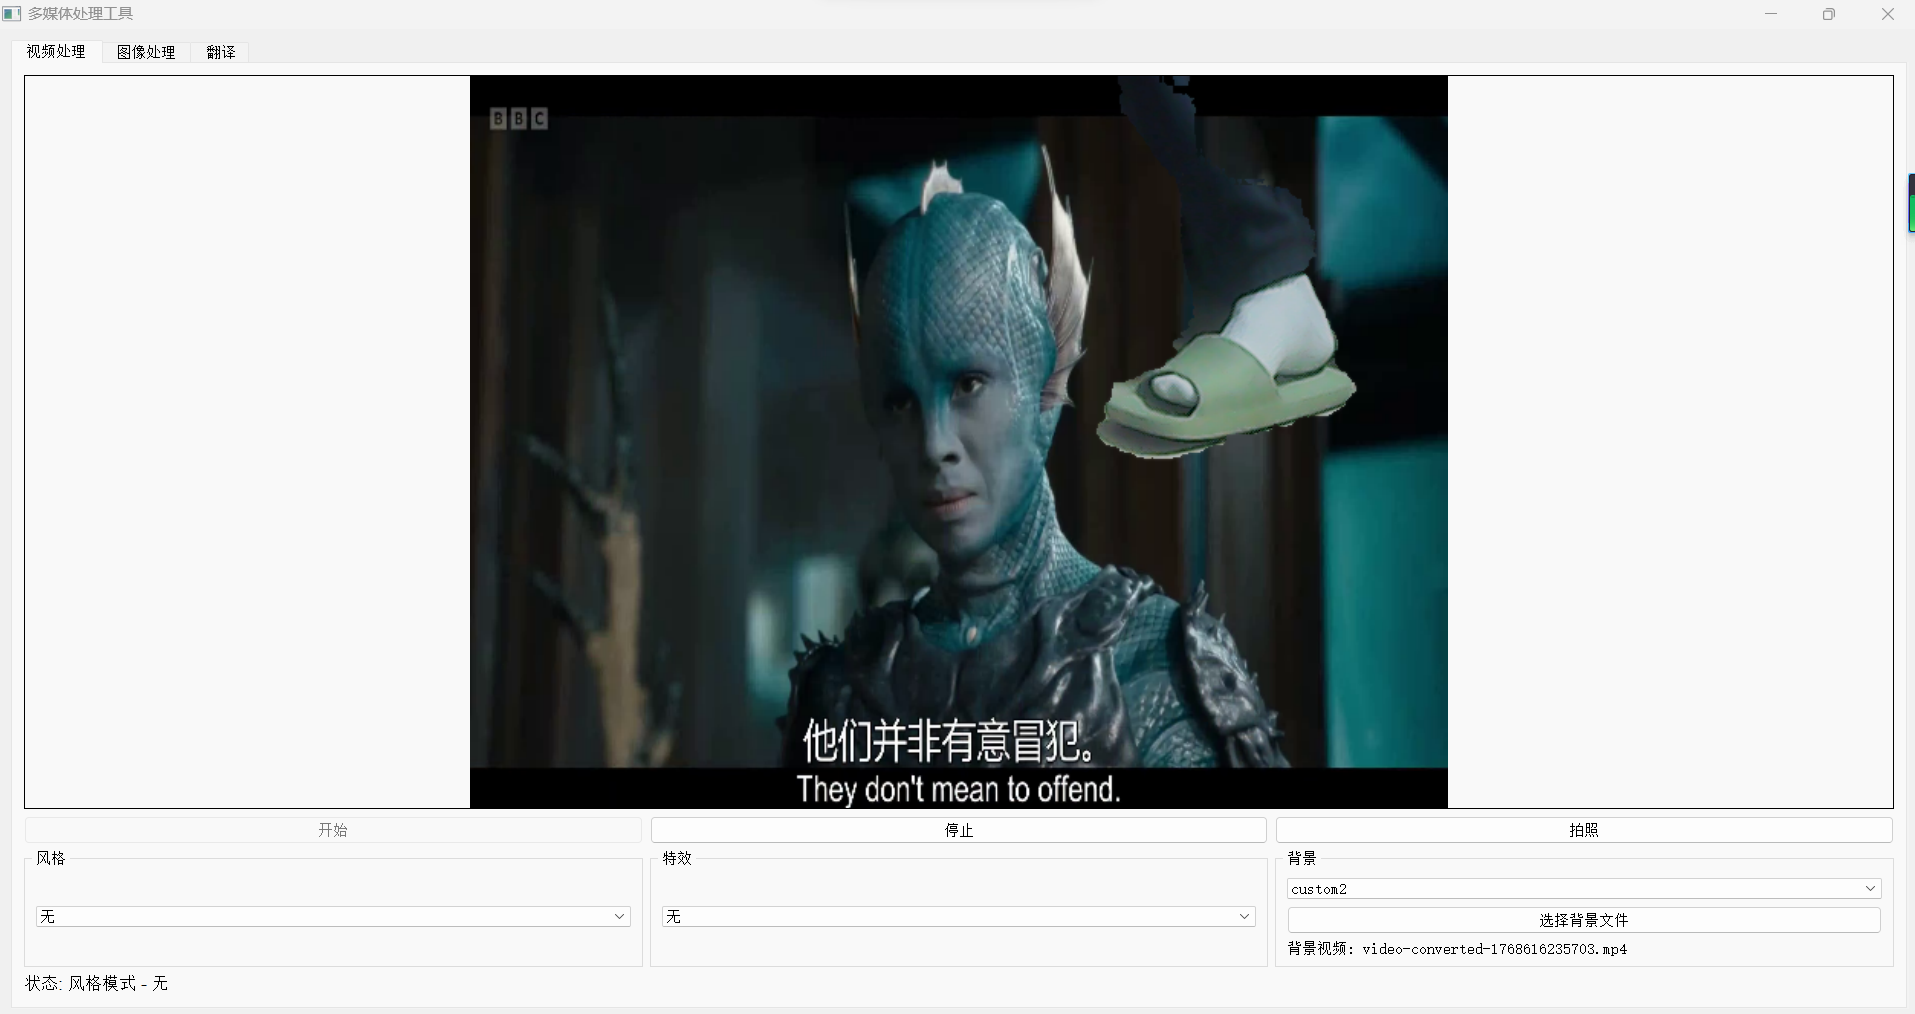
上图先~
上代码~
python
import sys
import cv2
import numpy as np
import os
from PyQt5.QtWidgets import (QApplication, QMainWindow, QWidget, QVBoxLayout, QHBoxLayout,
QLabel, QPushButton, QComboBox, QSlider, QCheckBox, QFileDialog,
QMessageBox, QTabWidget, QGroupBox, QGridLayout, QTextEdit)
from PyQt5.QtCore import Qt, QTimer, pyqtSignal, QThread
from PyQt5.QtGui import QImage, QPixmap, QFont
from gtts import gTTS
import threading
import time
# 导入现有功能
from all_in_one import change_person_with_wanxiang, generate_effects_with_duiyou, realtime_translation_with_heygen
from all_in_one_No_API_V1 import apply_korean_style
class VideoThread(QThread):
change_pixmap_signal = pyqtSignal(np.ndarray)
status_signal = pyqtSignal(str)
def __init__(self, parent=None):
super().__init__(parent)
self.running = False
self.cap = None
self.current_frame = None
self.style_mode = None
self.effect_mode = None
self.background_mode = None
self.background_image_path = None
self.background_video_path = None # 新增:视频背景路径
self.background_video_cap = None # 新增:视频背景捕获对象
self.background_video_frames = [] # 新增:视频背景帧缓存
self.background_video_frame_index = 0 # 新增:当前视频帧索引
self.segmentation_model = None # 用于人物分割的模型
self.init_segmentation_model()
def init_segmentation_model(self):
"""初始化人物分割模型"""
try:
# 尝试使用深度学习模型进行人物分割
# 这里使用一个简化的实现,实际应用中可以使用更专业的模型
self.segmentation_model = "deeplabv3" # 标记使用DeepLabv3模型
except Exception as e:
print(f"无法初始化分割模型: {e}")
self.segmentation_model = "grabcut" # 回退到GrabCut算法
def set_background_mode(self, mode):
self.background_mode = mode
def set_background_image(self, image_path):
"""设置背景图像"""
self.background_image_path = image_path
def set_background_video(self, video_path):
"""设置背景视频"""
self.background_video_path = video_path
# 释放之前的视频捕获对象
if self.background_video_cap is not None:
self.background_video_cap.release()
# 初始化新的视频捕获对象
self.background_video_cap = cv2.VideoCapture(video_path)
if not self.background_video_cap.isOpened():
print(f"无法打开背景视频: {video_path}")
self.background_video_cap = None
return
# 预加载视频帧到内存
self.background_video_frames = []
while True:
ret, frame = self.background_video_cap.read()
if not ret:
break
self.background_video_frames.append(frame)
self.background_video_frame_index = 0
# 释放视频捕获对象
self.background_video_cap.release()
self.background_video_cap = None
def set_style_mode(self, style):
self.style_mode = style
def set_effect_mode(self, effect):
self.effect_mode = effect
def run(self):
self.running = True
self.cap = cv2.VideoCapture(0) # 使用默认摄像头
if not self.cap.isOpened():
self.status_signal.emit("无法打开摄像头")
self.running = False
return
while self.running:
ret, frame = self.cap.read()
if not ret:
continue
self.current_frame = frame.copy()
# 应用风格
if self.style_mode:
frame = self.apply_style(frame, self.style_mode)
# 应用特效
if self.effect_mode:
frame = self.apply_effect(frame, self.effect_mode)
# 应用背景
if self.background_mode:
frame = self.apply_background(frame)
# 发送处理后的帧
self.change_pixmap_signal.emit(frame)
# 控制帧率
self.msleep(30)
# 释放资源
if self.cap is not None:
self.cap.release()
if self.background_video_cap is not None:
self.background_video_cap.release()
def stop(self):
self.running = False
self.wait()
def get_current_frame(self):
return self.current_frame
def apply_style(self, frame, style_name):
"""应用风格处理"""
if style_name in ["smooth", "bright", "pink", "dreamy"]:
return apply_korean_style(frame, style_name)
elif style_name == "wanxiang":
# 应用万向风格
return apply_korean_style(frame, "smooth")
elif style_name == "style1":
# 高斯模糊风格
return cv2.GaussianBlur(frame, (15, 15), 0)
elif style_name == "style2":
# 边缘检测风格
gray = cv2.cvtColor(frame, cv2.COLOR_BGR2GRAY)
edges = cv2.Canny(gray, 100, 200)
return cv2.cvtColor(edges, cv2.COLOR_GRAY2BGR)
else:
return frame
def apply_effect(self, frame, effect_name):
"""应用特效处理"""
if effect_name == "cartoon":
# 卡通效果
# 使用双边滤波平滑图像
color = cv2.bilateralFilter(frame, 9, 250, 250)
# 转换为灰度并应用中值滤波
gray = cv2.cvtColor(frame, cv2.COLOR_BGR2GRAY)
gray = cv2.medianBlur(gray, 5)
# 检测边缘并增强
edges = cv2.adaptiveThreshold(gray, 255, cv2.ADAPTIVE_THRESH_MEAN_C, cv2.THRESH_BINARY, 9, 9)
edges = cv2.cvtColor(edges, cv2.COLOR_GRAY2BGR)
# 合并颜色和边缘
return cv2.bitwise_and(color, edges)
elif effect_name == "sketch":
# 素描效果
gray = cv2.cvtColor(frame, cv2.COLOR_BGR2GRAY)
# 反转图像
invert = 255 - gray
# 高斯模糊
blur = cv2.GaussianBlur(invert, (21, 21), 0)
# 颜色减淡混合
sketch = cv2.divide(gray, 255 - blur, scale=256)
return cv2.cvtColor(sketch, cv2.COLOR_GRAY2BGR)
elif effect_name == "oil_painting":
# 油画效果
return cv2.xphoto.oilPainting(frame, 7, 1)
elif effect_name == "watercolor":
# 水彩效果
# 使用双边滤波
bilateral = cv2.bilateralFilter(frame, 15, 80, 80)
# 使用形态学操作
kernel = np.ones((5,5), np.uint8)
opening = cv2.morphologyEx(bilateral, cv2.MORPH_OPEN, kernel)
return opening
elif effect_name == "fire":
# 火焰效果
return cv2.applyColorMap(frame, cv2.COLORMAP_HOT)
elif effect_name == "water":
# 水波效果
return cv2.blur(frame, (20, 20))
elif effect_name == "lightning":
# 闪电效果
return cv2.convertScaleAbs(frame, alpha=1.5, beta=50)
elif effect_name == "blur":
# 模糊效果
return cv2.GaussianBlur(frame, (15, 15), 0)
elif effect_name == "sharpen":
# 锐化效果
kernel = np.array([[-1,-1,-1], [-1,9,-1], [-1,-1,-1]])
return cv2.filter2D(frame, -1, kernel)
elif effect_name == "emboss":
# 浮雕效果
kernel = np.array([[-2,-1,0], [-1,1,1], [0,1,2]])
return cv2.filter2D(frame, -1, kernel) + 128
elif effect_name == "edge":
# 边缘检测效果
gray = cv2.cvtColor(frame, cv2.COLOR_BGR2GRAY)
edges = cv2.Canny(gray, 100, 200)
return cv2.cvtColor(edges, cv2.COLOR_GRAY2BGR)
elif effect_name == "vintage":
# 复古效果
kernel = np.array([[0.272, 0.534, 0.131],
[0.349, 0.686, 0.168],
[0.393, 0.769, 0.189]])
return cv2.transform(frame, kernel)
else:
return frame
def apply_background(self, frame):
"""应用背景处理"""
if self.background_mode == "blur":
# 模糊背景
return self.apply_blur_background(frame)
elif self.background_mode == "green":
# 绿幕背景
return self.apply_green_background(frame)
elif self.background_mode == "office":
# 办公室背景
return self.apply_office_background(frame)
elif self.background_mode == "custom":
# 自定义图像背景
if self.background_image_path:
return self.apply_custom_background(frame, self.background_image_path)
return frame
elif self.background_mode == "custom2":
# 自定义视频背景
if self.background_video_frames:
return self.apply_custom_video_background(frame)
return frame
else:
return frame
def apply_blur_background(self, frame):
"""应用模糊背景"""
# 简单的背景模糊效果(实际应用中需要更复杂的人像分割)
return cv2.GaussianBlur(frame, (21, 21), 0)
def apply_green_background(self, frame):
"""应用绿色背景"""
# 简单的绿色背景效果(实际应用中需要人像分割)
h, w, _ = frame.shape
green_bg = np.zeros((h, w, 3), np.uint8)
green_bg[:] = (0, 255, 0) # 纯绿色
return cv2.addWeighted(frame, 0.7, green_bg, 0.3, 0)
def apply_office_background(self, frame):
"""应用办公室背景"""
# 简单的办公室背景效果(实际应用中需要人像分割)
h, w, _ = frame.shape
office_bg = np.zeros((h, w, 3), np.uint8)
office_bg[:] = (200, 200, 200) # 灰色背景
return cv2.addWeighted(frame, 0.7, office_bg, 0.3, 0)
def apply_custom_background(self, frame, background_path):
"""应用自定义图像背景"""
try:
# 读取背景图像
background = cv2.imread(background_path)
if background is None:
return frame
# 调整背景图像大小以匹配帧大小
h, w = frame.shape[:2]
background = cv2.resize(background, (w, h))
# 使用人物分割
mask = self.segment_person(frame)
# 创建前景掩码(人物)
foreground_mask = cv2.bitwise_and(frame, frame, mask=mask)
# 创建背景掩码(非人物区域)
background_mask = cv2.bitwise_not(mask)
background = cv2.bitwise_and(background, background, mask=background_mask)
# 合并前景和背景
result = cv2.add(foreground_mask, background)
# 应用边缘平滑处理
result = self.smooth_edges(result, mask)
# 应用颜色匹配调整
result = self.adjust_color_matching(result, frame, background)
return result
except Exception as e:
print(f"应用自定义背景时出错: {e}")
return frame
def apply_custom_video_background(self, frame):
"""应用自定义视频背景"""
if not self.background_video_frames:
return frame
try:
# 获取当前视频背景帧
background_frame = self.background_video_frames[self.background_video_frame_index]
# 更新帧索引,循环播放
self.background_video_frame_index = (self.background_video_frame_index + 1) % len(self.background_video_frames)
# 调整背景帧大小以匹配前景帧
background_frame = cv2.resize(background_frame, (frame.shape[1], frame.shape[0]))
# 使用人物分割
mask = self.segment_person(frame)
# 创建前景掩码(人物)
foreground_mask = cv2.bitwise_and(frame, frame, mask=mask)
# 创建背景掩码(非人物区域)
background_mask = cv2.bitwise_not(mask)
background = cv2.bitwise_and(background_frame, background_frame, mask=background_mask)
# 合并前景和背景
result = cv2.add(foreground_mask, background)
# 应用边缘平滑处理
result = self.smooth_edges(result, mask)
# 应用颜色匹配调整
result = self.adjust_color_matching(result, frame, background_frame)
return result
except Exception as e:
print(f"应用视频背景时出错: {e}")
return frame
def segment_person(self, frame):
"""使用人物分割算法创建掩码"""
if self.segmentation_model == "deeplabv3":
return self.segment_with_deeplab(frame)
else:
return self.segment_with_grabcut(frame)
def segment_with_deeplab(self, frame):
"""使用DeepLabv3模型进行人物分割"""
try:
# 这里是一个简化的实现,实际应用中需要加载真正的DeepLabv3模型
# 由于我们无法导入外部模型,这里使用一个简化的方法
# 转换为RGB
rgb_frame = cv2.cvtColor(frame, cv2.COLOR_BGR2RGB)
# 使用MediaPipe的自带分割模型(如果可用)
try:
import mediapipe as mp
mp_selfie_segmentation = mp.solutions.selfie_segmentation
with mp_selfie_segmentation.SelfieSegmentation(model_selection=1) as selfie_seg:
results = selfie_seg.process(rgb_frame)
mask = results.segmentation_mask
# 将掩码转换为二值图像
binary_mask = (mask > 0.5).astype(np.uint8) * 255
return binary_mask
except ImportError:
# 如果MediaPipe不可用,使用GrabCut
return self.segment_with_grabcut(frame)
except Exception as e:
print(f"DeepLab分割失败: {e}")
return self.segment_with_grabcut(frame)
def segment_with_grabcut(self, frame):
"""使用GrabCut算法进行人物分割"""
try:
# 创建一个与图像相同大小的掩码
mask = np.zeros(frame.shape[:2], np.uint8)
# 定义前景和背景模型
bgd_model = np.zeros((1, 65), np.float64)
fgd_model = np.zeros((1, 65), np.float64)
# 定义矩形区域,包含可能的人物
height, width = frame.shape[:2]
rect = (int(width * 0.1), int(height * 0.1), int(width * 0.8), int(height * 0.8))
# 应用GrabCut算法
cv2.grabCut(frame, mask, rect, bgd_model, fgd_model, 5, cv2.GC_INIT_WITH_RECT)
# 创建二值掩码
mask2 = np.where((mask == 2) | (mask == 0), 0, 1).astype('uint8') * 255
# 应用形态学操作改善掩码
kernel = np.ones((3, 3), np.uint8)
mask2 = cv2.morphologyEx(mask2, cv2.MORPH_OPEN, kernel)
mask2 = cv2.morphologyEx(mask2, cv2.MORPH_CLOSE, kernel)
# 应用高斯模糊平滑边缘
mask2 = cv2.GaussianBlur(mask2, (5, 5), 0)
return mask2
except Exception as e:
print(f"GrabCut分割失败: {e}")
# 返回一个简单的中心区域掩码作为回退
height, width = frame.shape[:2]
mask = np.zeros((height, width), dtype=np.uint8)
center_x, center_y = width // 2, height // 2
radius = min(width, height) // 3
cv2.circle(mask, (center_x, center_y), radius, 255, -1)
return mask
def smooth_edges(self, result, mask):
"""平滑边缘,使融合更自然"""
try:
# 创建边缘掩码
edges = cv2.Canny(mask, 50, 150)
edges = cv2.dilate(edges, np.ones((3, 3), np.uint8), iterations=1)
# 应用高斯模糊到边缘区域
blurred = cv2.GaussianBlur(result, (5, 5), 0)
# 创建边缘区域掩码
edge_mask = cv2.dilate(mask, np.ones((5, 5), np.uint8), iterations=1) - mask
# 在边缘区域混合原图和模糊图
result = np.where(edge_mask[..., np.newaxis] == 255,
0.7 * result + 0.3 * blurred,
result).astype(np.uint8)
return result
except Exception as e:
print(f"边缘平滑失败: {e}")
return result
def adjust_color_matching(self, result, original_frame, background_frame):
"""调整颜色匹配,使融合更自然"""
try:
# 计算原始帧和背景帧的平均颜色
orig_mean = np.mean(original_frame, axis=(0, 1))
bg_mean = np.mean(background_frame, axis=(0, 1))
# 计算颜色调整因子
color_factor = bg_mean / (orig_mean + 1e-6)
# 应用颜色调整到前景区域
mask = self.segment_person(original_frame)
mask_3d = np.stack([mask/255.0] * 3, axis=-1)
# 轻微调整前景颜色,使其与背景更协调
adjusted = result * (1 - 0.2 * mask_3d) + result * color_factor * 0.2 * mask_3d
return adjusted.astype(np.uint8)
except Exception as e:
print(f"颜色匹配调整失败: {e}")
return result
class MainWindow(QMainWindow):
def __init__(self):
super().__init__()
self.setWindowTitle("多媒体处理工具")
self.setGeometry(100, 100, 1000, 700)
# 创建输出目录
self.output_dir = "output"
os.makedirs(self.output_dir, exist_ok=True)
# 初始化视频线程
self.video_thread = VideoThread()
self.video_thread.change_pixmap_signal.connect(self.update_image)
self.video_thread.status_signal.connect(self.update_status)
# 背景图像路径
self.background_image_path = None
# 背景视频路径
self.background_video_path = None
# 创建中央部件和主布局
central_widget = QWidget()
self.setCentralWidget(central_widget)
main_layout = QVBoxLayout(central_widget)
# 创建选项卡
tab_widget = QTabWidget()
main_layout.addWidget(tab_widget)
# 创建视频处理选项卡
video_tab = QWidget()
video_layout = QVBoxLayout(video_tab)
tab_widget.addTab(video_tab, "视频处理")
# 视频显示区域
self.video_label = QLabel()
self.video_label.setAlignment(Qt.AlignCenter)
self.video_label.setMinimumSize(640, 480)
self.video_label.setStyleSheet("border: 1px solid black")
video_layout.addWidget(self.video_label)
# 控制按钮区域
button_layout = QHBoxLayout()
self.start_button = QPushButton("开始")
self.start_button.clicked.connect(self.start_video)
button_layout.addWidget(self.start_button)
self.stop_button = QPushButton("停止")
self.stop_button.clicked.connect(self.stop_video)
self.stop_button.setEnabled(False)
button_layout.addWidget(self.stop_button)
self.capture_button = QPushButton("拍照")
self.capture_button.clicked.connect(self.capture_image)
self.capture_button.setEnabled(False)
button_layout.addWidget(self.capture_button)
video_layout.addLayout(button_layout)
# 选项区域
options_layout = QHBoxLayout()
# 风格选择
style_group = QGroupBox("风格")
style_layout = QVBoxLayout(style_group)
self.style_combo = QComboBox()
self.style_combo.addItems(["无", "smooth", "bright", "pink", "dreamy", "wanxiang"])
self.style_combo.currentTextChanged.connect(self.change_style)
style_layout.addWidget(self.style_combo)
options_layout.addWidget(style_group)
# 特效选择
effect_group = QGroupBox("特效")
effect_layout = QVBoxLayout(effect_group)
self.effect_combo = QComboBox()
self.effect_combo.addItems(["无", "cartoon", "sketch", "oil_painting", "watercolor"])
self.effect_combo.currentTextChanged.connect(self.change_effect)
effect_layout.addWidget(self.effect_combo)
options_layout.addWidget(effect_group)
# 背景选择
background_group = QGroupBox("背景")
background_layout = QVBoxLayout(background_group)
self.background_combo = QComboBox()
self.background_combo.addItems(["无", "blur", "green", "office", "custom", "custom2"]) # 添加"custom2"选项
self.background_combo.currentTextChanged.connect(self.change_background)
background_layout.addWidget(self.background_combo)
# 背景文件选择按钮
button_layout = QHBoxLayout()
self.select_background_button = QPushButton("选择背景文件")
self.select_background_button.clicked.connect(self.select_background_file)
self.select_background_button.setEnabled(False)
button_layout.addWidget(self.select_background_button)
background_layout.addLayout(button_layout)
# 背景文件路径显示
self.background_path_label = QLabel("未选择背景文件")
background_layout.addWidget(self.background_path_label)
options_layout.addWidget(background_group)
video_layout.addLayout(options_layout)
# 状态显示
self.status_label = QLabel("状态: 待机")
self.status_label.setFont(QFont("Arial", 10))
video_layout.addWidget(self.status_label)
# 创建图像处理选项卡
image_tab = QWidget()
image_layout = QVBoxLayout(image_tab)
tab_widget.addTab(image_tab, "图像处理")
# 图像选择区域
image_select_layout = QHBoxLayout()
self.image_path_label = QLabel("未选择图像")
image_select_layout.addWidget(self.image_path_label)
self.select_image_button = QPushButton("选择图像")
self.select_image_button.clicked.connect(self.select_image)
image_select_layout.addWidget(self.select_image_button)
image_layout.addLayout(image_select_layout)
# 图像处理按钮
image_process_layout = QHBoxLayout()
self.process_style_button = QPushButton("应用风格")
self.process_style_button.clicked.connect(self.process_image_style)
image_process_layout.addWidget(self.process_style_button)
self.process_effect_button = QPushButton("应用特效")
self.process_effect_button.clicked.connect(self.process_image_effect)
image_process_layout.addWidget(self.process_effect_button)
image_layout.addLayout(image_process_layout)
# 创建翻译选项卡
translation_tab = QWidget()
translation_layout = QVBoxLayout(translation_tab)
tab_widget.addTab(translation_tab, "翻译")
# 文本输入区域
text_input_group = QGroupBox("输入文本")
text_input_layout = QVBoxLayout(text_input_group)
self.text_input = QTextEdit()
self.text_input.setPlaceholderText("请输入要翻译的文本...")
text_input_layout.addWidget(self.text_input)
translation_layout.addWidget(text_input_group)
# 语言选择和翻译按钮
translation_control_layout = QHBoxLayout()
lang_group = QGroupBox("目标语言")
lang_layout = QVBoxLayout(lang_group)
self.lang_checkboxes = {}
languages = ["中文", "英语", "日语", "韩语", "法语", "西班牙语", "德语", "俄语"]
lang_codes = ["zh", "en", "ja", "ko", "fr", "es", "de", "ru"]
for lang, code in zip(languages, lang_codes):
checkbox = QCheckBox(lang)
self.lang_checkboxes[code] = checkbox
lang_layout.addWidget(checkbox)
translation_control_layout.addWidget(lang_group)
translate_button_layout = QVBoxLayout()
self.translate_button = QPushButton("翻译")
self.translate_button.clicked.connect(self.translate_text)
translate_button_layout.addWidget(self.translate_button)
translation_control_layout.addLayout(translate_button_layout)
translation_layout.addLayout(translation_control_layout)
# 翻译结果显示
result_group = QGroupBox("翻译结果")
result_layout = QVBoxLayout(result_group)
self.translation_result = QTextEdit()
self.translation_result.setReadOnly(True)
result_layout.addWidget(self.translation_result)
translation_layout.addWidget(result_group)
def start_video(self):
"""开始视频捕获"""
self.video_thread.start()
self.start_button.setEnabled(False)
self.stop_button.setEnabled(True)
self.capture_button.setEnabled(True)
self.status_label.setText("状态: 视频运行中")
def stop_video(self):
"""停止视频捕获"""
self.video_thread.stop()
self.start_button.setEnabled(True)
self.stop_button.setEnabled(False)
self.capture_button.setEnabled(False)
self.status_label.setText("状态: 待机")
def capture_image(self):
"""捕获当前帧"""
frame = self.video_thread.get_current_frame()
if frame is not None:
# 生成文件名
timestamp = int(time.time())
filename = f"captured_image_{timestamp}.jpg"
filepath = os.path.join(self.output_dir, filename)
# 保存图像
cv2.imwrite(filepath, frame)
self.status_label.setText(f"状态: 已保存图像 {filename}")
# 显示保存成功消息
QMessageBox.information(self, "保存成功", f"图像已保存至:\n{filepath}")
else:
QMessageBox.warning(self, "保存失败", "无法获取当前帧")
def change_style(self, style_name):
"""更改风格模式"""
if style_name == "无":
self.video_thread.set_style_mode(None)
else:
self.video_thread.set_style_mode(style_name)
self.status_label.setText(f"状态: 风格模式 - {style_name}")
def change_effect(self, effect_name):
"""更改特效模式"""
if effect_name == "无":
self.video_thread.set_effect_mode(None)
else:
self.video_thread.set_effect_mode(effect_name)
self.status_label.setText(f"状态: 特效模式 - {effect_name}")
def change_background(self, background_mode):
"""更改背景模式"""
if background_mode == "无":
self.video_thread.set_background_mode(None)
self.select_background_button.setEnabled(False)
self.background_path_label.setText("未选择背景文件")
elif background_mode in ["custom", "custom2"]:
self.video_thread.set_background_mode(background_mode)
self.select_background_button.setEnabled(True)
if background_mode == "custom" and self.background_image_path:
self.background_path_label.setText(f"背景图像: {os.path.basename(self.background_image_path)}")
elif background_mode == "custom2" and self.background_video_path:
self.background_path_label.setText(f"背景视频: {os.path.basename(self.background_video_path)}")
else:
self.background_path_label.setText("请选择背景文件")
else:
self.video_thread.set_background_mode(background_mode)
self.select_background_button.setEnabled(False)
self.background_path_label.setText(f"背景模式: {background_mode}")
self.status_label.setText(f"状态: 背景模式 - {background_mode}")
def select_background_file(self):
"""选择背景文件"""
background_mode = self.background_combo.currentText()
if background_mode == "custom":
# 选择图像文件
file_path, _ = QFileDialog.getOpenFileName(
self, "选择背景图像", "",
"图像文件 (*.jpg *.jpeg *.png *.bmp);;所有文件 (*)")
if file_path:
self.background_image_path = file_path
self.video_thread.set_background_image(file_path)
self.background_path_label.setText(f"背景图像: {os.path.basename(file_path)}")
self.status_label.setText(f"状态: 已加载背景图像")
elif background_mode == "custom2":
# 选择视频文件
file_path, _ = QFileDialog.getOpenFileName(
self, "选择背景视频", "",
"视频文件 (*.mp4 *.avi *.mov *.mkv);;所有文件 (*)")
if file_path:
self.background_video_path = file_path
self.video_thread.set_background_video(file_path)
self.background_path_label.setText(f"背景视频: {os.path.basename(file_path)}")
self.status_label.setText(f"状态: 已加载背景视频")
def select_image(self):
"""选择要处理的图像"""
file_path, _ = QFileDialog.getOpenFileName(
self, "选择图像", "",
"图像文件 (*.jpg *.jpeg *.png *.bmp);;所有文件 (*)")
if file_path:
self.image_path = file_path
self.image_path_label.setText(f"已选择: {os.path.basename(file_path)}")
self.status_label.setText(f"状态: 已选择图像 {os.path.basename(file_path)}")
def process_image_style(self):
"""处理图像风格"""
if not hasattr(self, 'image_path') or not self.image_path:
QMessageBox.warning(self, "错误", "请先选择要处理的图像")
return
style_name = self.style_combo.currentText()
if style_name == "无":
QMessageBox.warning(self, "错误", "请先选择要应用的风格")
return
try:
# 读取图像
image = cv2.imread(self.image_path)
if image is None:
QMessageBox.warning(self, "错误", "无法读取图像文件")
return
# 应用风格
processed_image = self.video_thread.apply_style(image, style_name)
# 保存处理后的图像
timestamp = int(time.time())
filename = f"style_{style_name}_{timestamp}.jpg"
filepath = os.path.join(self.output_dir, filename)
cv2.imwrite(filepath, processed_image)
self.status_label.setText(f"状态: 已保存风格处理图像 {filename}")
QMessageBox.information(self, "处理成功", f"风格处理完成,图像已保存至:\n{filepath}")
except Exception as e:
QMessageBox.critical(self, "处理失败", f"图像风格处理失败:\n{str(e)}")
def process_image_effect(self):
"""处理图像特效"""
if not hasattr(self, 'image_path') or not self.image_path:
QMessageBox.warning(self, "错误", "请先选择要处理的图像")
return
effect_name = self.effect_combo.currentText()
if effect_name == "无":
QMessageBox.warning(self, "错误", "请先选择要应用的特效")
return
try:
# 读取图像
image = cv2.imread(self.image_path)
if image is None:
QMessageBox.warning(self, "错误", "无法读取图像文件")
return
# 应用特效
processed_image = self.video_thread.apply_effect(image, effect_name)
# 保存处理后的图像
timestamp = int(time.time())
filename = f"effect_{effect_name}_{timestamp}.jpg"
filepath = os.path.join(self.output_dir, filename)
cv2.imwrite(filepath, processed_image)
self.status_label.setText(f"状态: 已保存特效处理图像 {filename}")
QMessageBox.information(self, "处理成功", f"特效处理完成,图像已保存至:\n{filepath}")
except Exception as e:
QMessageBox.critical(self, "处理失败", f"图像特效处理失败:\n{str(e)}")
def translate_text(self):
"""翻译文本"""
text = self.text_input.toPlainText().strip()
if not text:
QMessageBox.warning(self, "错误", "请输入要翻译的文本")
return
# 获取选中的目标语言
target_languages = []
for code, checkbox in self.lang_checkboxes.items():
if checkbox.isChecked():
target_languages.append(code)
if not target_languages:
QMessageBox.warning(self, "错误", "请至少选择一种目标语言")
return
try:
# 调用翻译函数
translations = realtime_translation_with_heygen(text, target_languages)
# 显示翻译结果
result_text = ""
for i, (lang, translation) in enumerate(zip(target_languages, translations)):
result_text += f"{lang.upper()}: {translation}\n\n"
self.translation_result.setPlainText(result_text)
self.status_label.setText("状态: 翻译完成")
except Exception as e:
QMessageBox.critical(self, "翻译失败", f"文本翻译失败:\n{str(e)}")
def update_image(self, cv_img):
"""更新视频显示"""
"""更新视频显示"""
# 转换OpenCV图像(BGR)到Qt图像(RGB)
rgb_image = cv2.cvtColor(cv_img, cv2.COLOR_BGR2RGB)
h, w, ch = rgb_image.shape
# 转换为QImage
bytes_per_line = ch * w
qt_image = QImage(rgb_image.data, w, h, bytes_per_line, QImage.Format_RGB888)
# 调整图像大小以适应标签
pixmap = QPixmap.fromImage(qt_image)
scaled_pixmap = pixmap.scaled(self.video_label.size(), Qt.KeepAspectRatio, Qt.SmoothTransformation)
# 显示图像
self.video_label.setPixmap(scaled_pixmap)
def update_status(self, status):
"""更新状态显示"""
self.status_label.setText(f"状态: {status}")
def closeEvent(self, event):
"""窗口关闭事件"""
# 确保视频线程已停止
if self.video_thread.isRunning():
self.video_thread.stop()
self.video_thread.wait()
# 释放资源
if self.video_thread.cap is not None:
self.video_thread.cap.release()
event.accept()
if __name__ == "__main__":
app = QApplication(sys.argv)
window = MainWindow()
window.show()
sys.exit(app.exec_())