欢迎来到鸿蒙端云一体化开发教程的最后一篇。前三篇我们分别学习了云函数、云数据库和云存储,今天咱们来聊聊如何让应用"快人一步"------预加载服务。
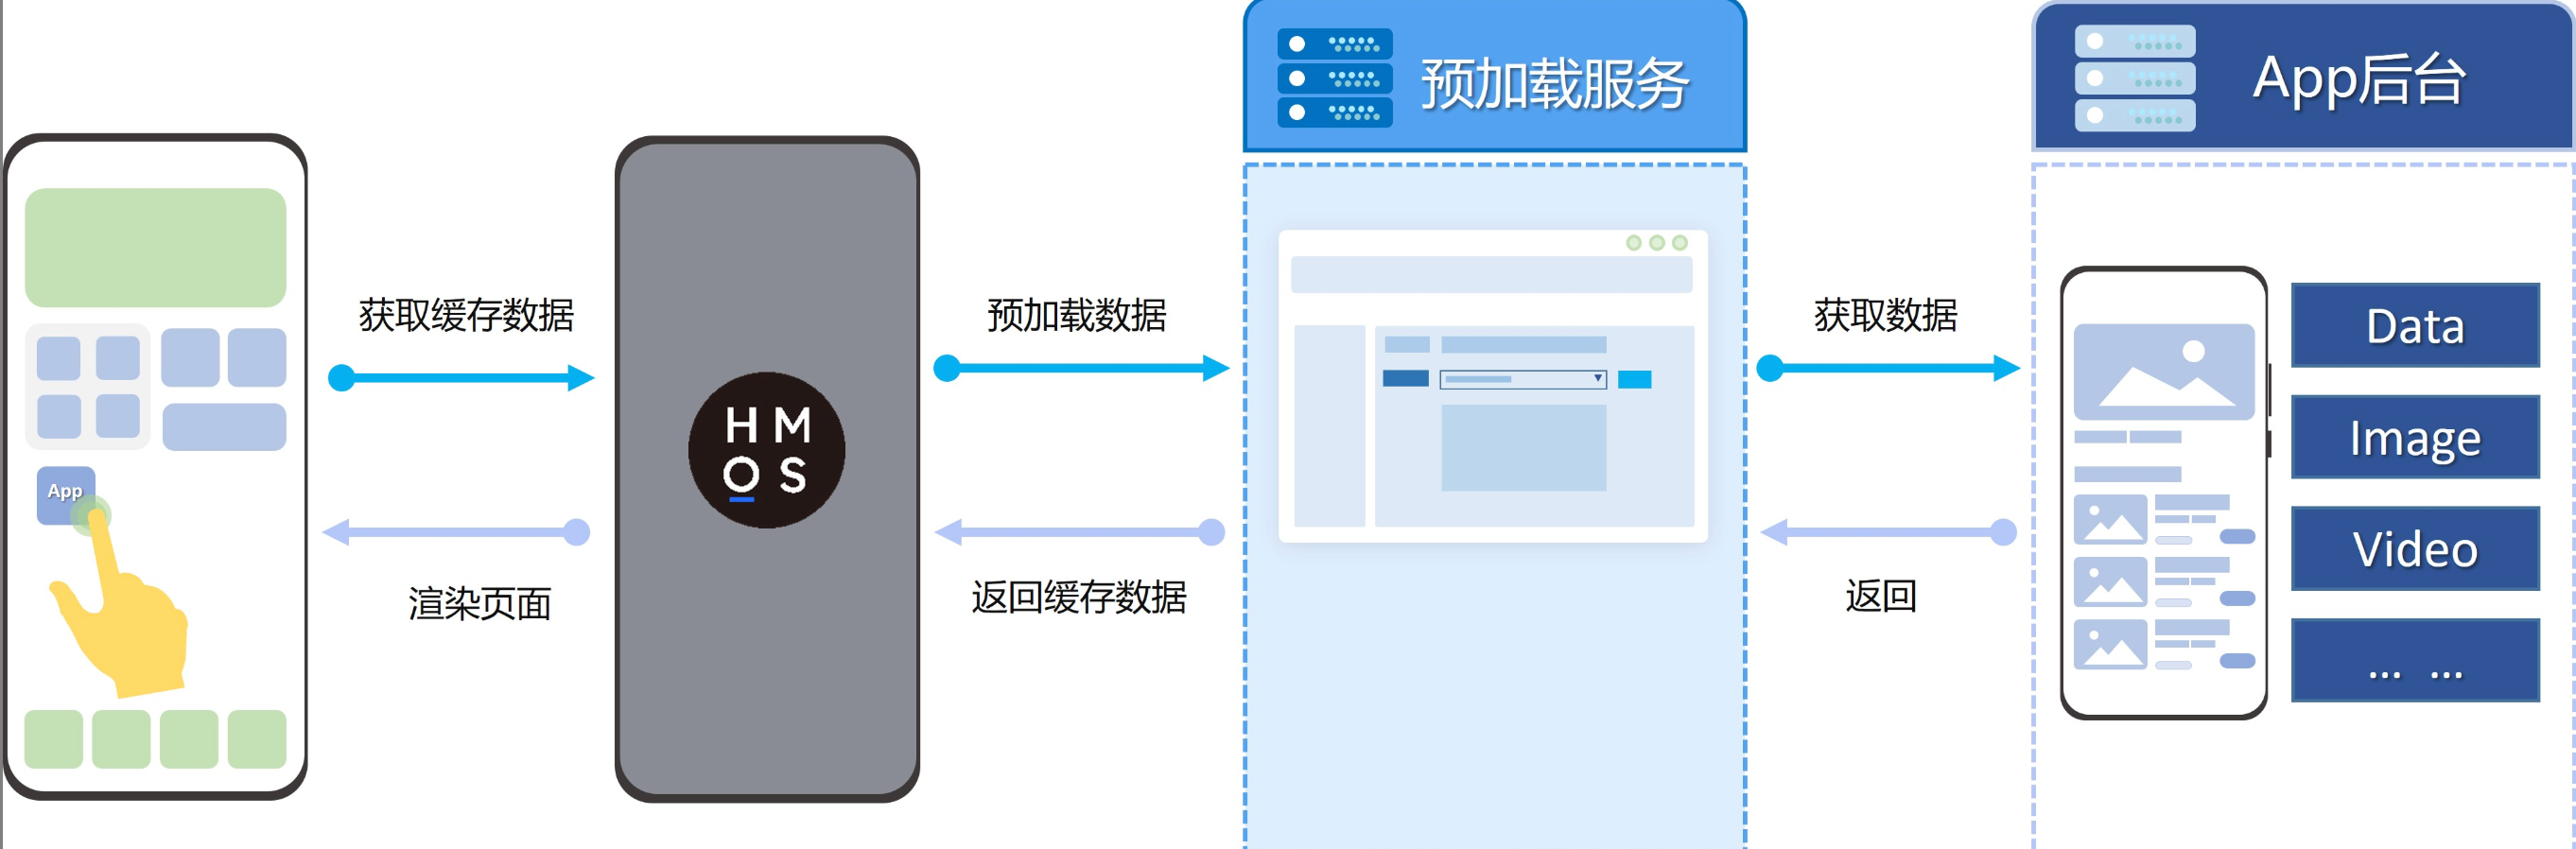
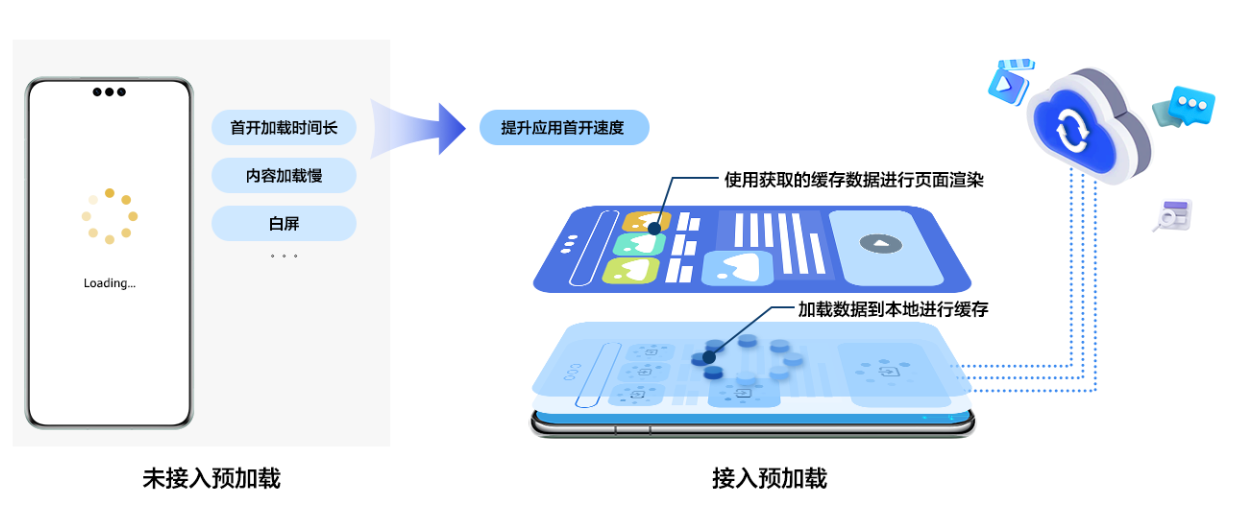
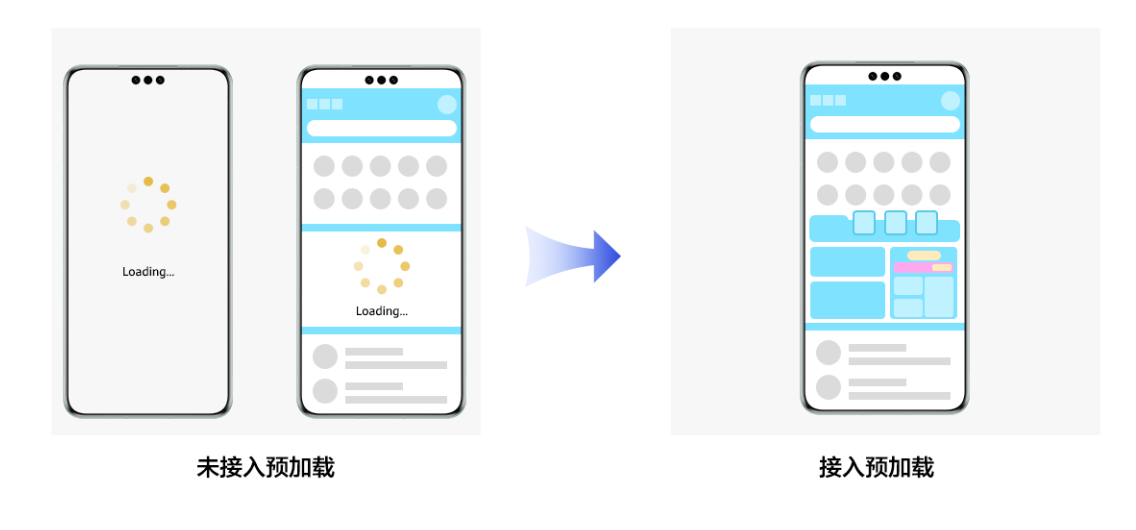
在应用开发中,首屏加载速度直接影响用户体验。如果每次打开应用都需要现去服务器拉取数据,网络不好的时候用户就得盯着白屏转圈圈。Cloud Foundation Kit的预加载服务就是为了解决这个问题。它可以在应用安装时或者后台周期性地提前拉取数据并缓存到本地,这样用户打开应用时就能"秒开"。
预加载原理
一、预加载的两种模式
预加载服务支持两种模式:
-
安装预加载 :应用安装后首次打开时使用。系统会在安装期间就去云端拉取数据,用户第一次点开APP时,数据已经在本地准备好了。
-
周期性预加载 :适用于日常使用。系统每隔12小时会在后台自动拉取一次数据,保证用户每次打开看到的都是较新的内容,比如节日主题、每日推荐等。
二、开发流程概览
要实现预加载,我们需要分三步走:
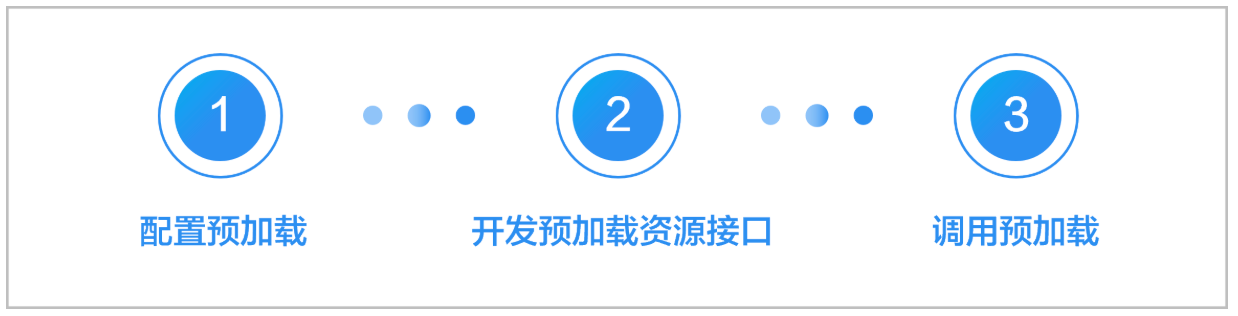
- 云侧配置:在AGC控制台配置数据来源(云函数或开发者服务器)。
- 云侧开发:开发云函数或接口,返回需要预加载的数据。
- 端侧开发:在应用代码中调用预加载接口,获取并使用数据。
三、云侧配置与开发
我们以云函数作为数据来源为例。
3.1 开发云函数
我们需要写一个云函数,返回应用需要的预加载数据。
在cloudfunctions目录下创建一个新函数(例如prefetch-data),代码如下:
javascript
// cloudfunctions/prefetch-data/index.js
let myHandler = async function (event, context, callback, logger) {
  logger.info("预加载函数被触发");

  try {
    // 模拟返回一些首页配置数据
    let result = {
      "bannerUrl": "https://example.com/banner.jpg",
      "welcomeMsg": "欢迎回来,这里是今日推荐!",
      "themeColor": "#FF5722",
      "timestamp": Date.now()
    };

    // 实际业务中,你可以根据event.body.appId等参数去查询数据库

    callback(result);
  } catch (error) {
    logger.error("Error: " + error);
    callback({ error: error.message });
  }
};

export { myHandler };
3.2 在AGC配置预加载
-
登录AppGallery Connect,进入"云开发 > 预加载"页面。
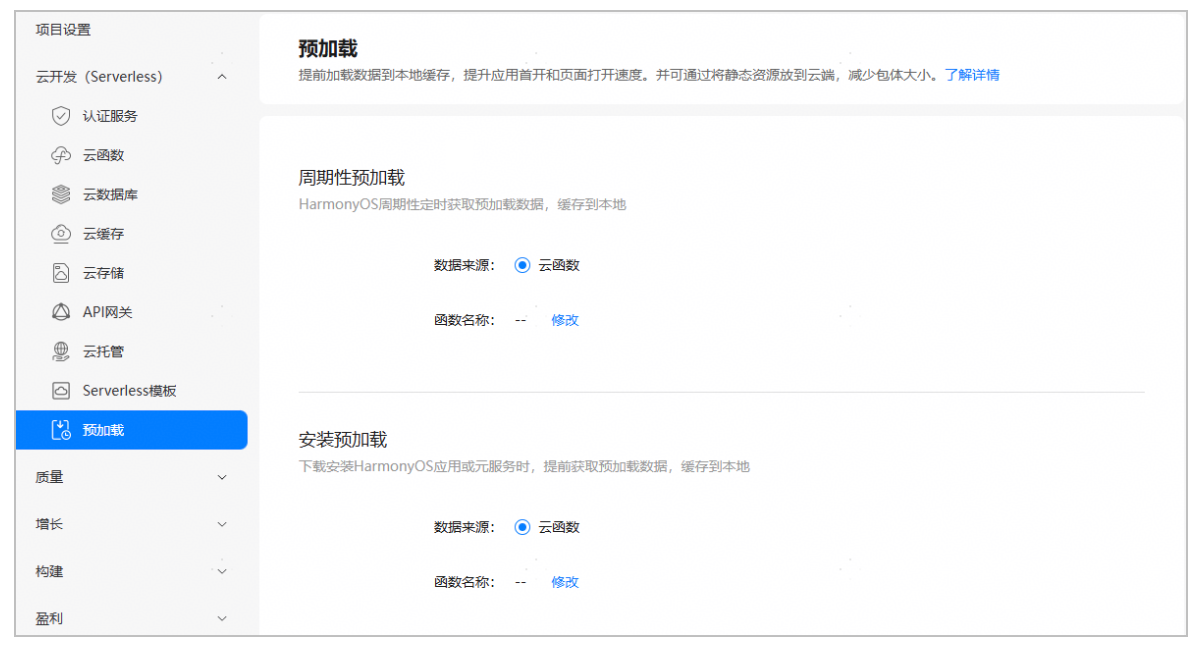
-
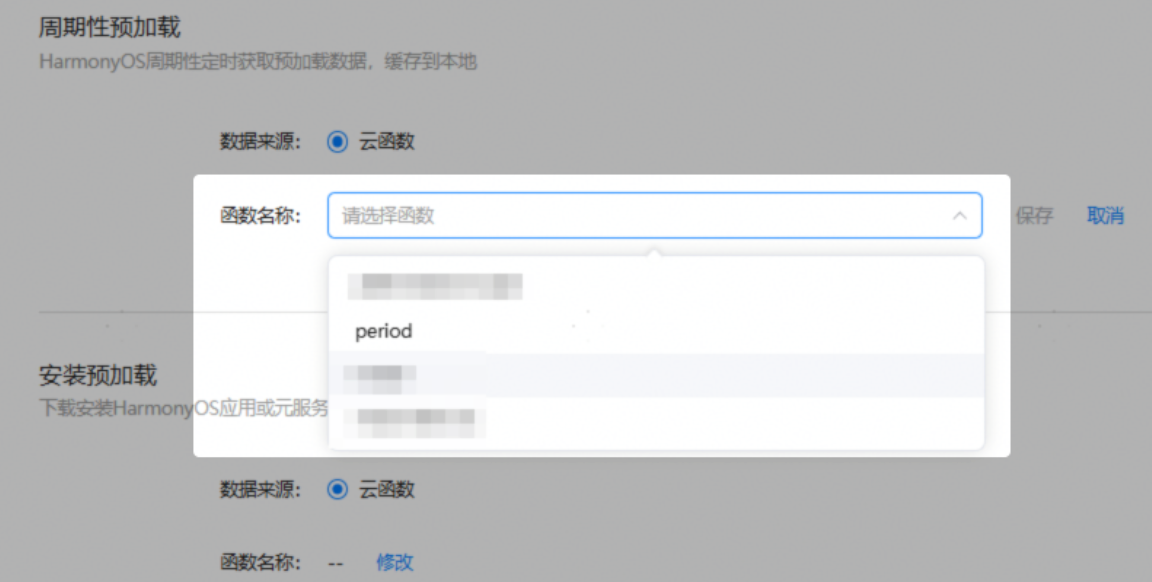
在"安装预加载"区域,数据来源选择"云函数",选择刚才创建的
prefetch-data函数。
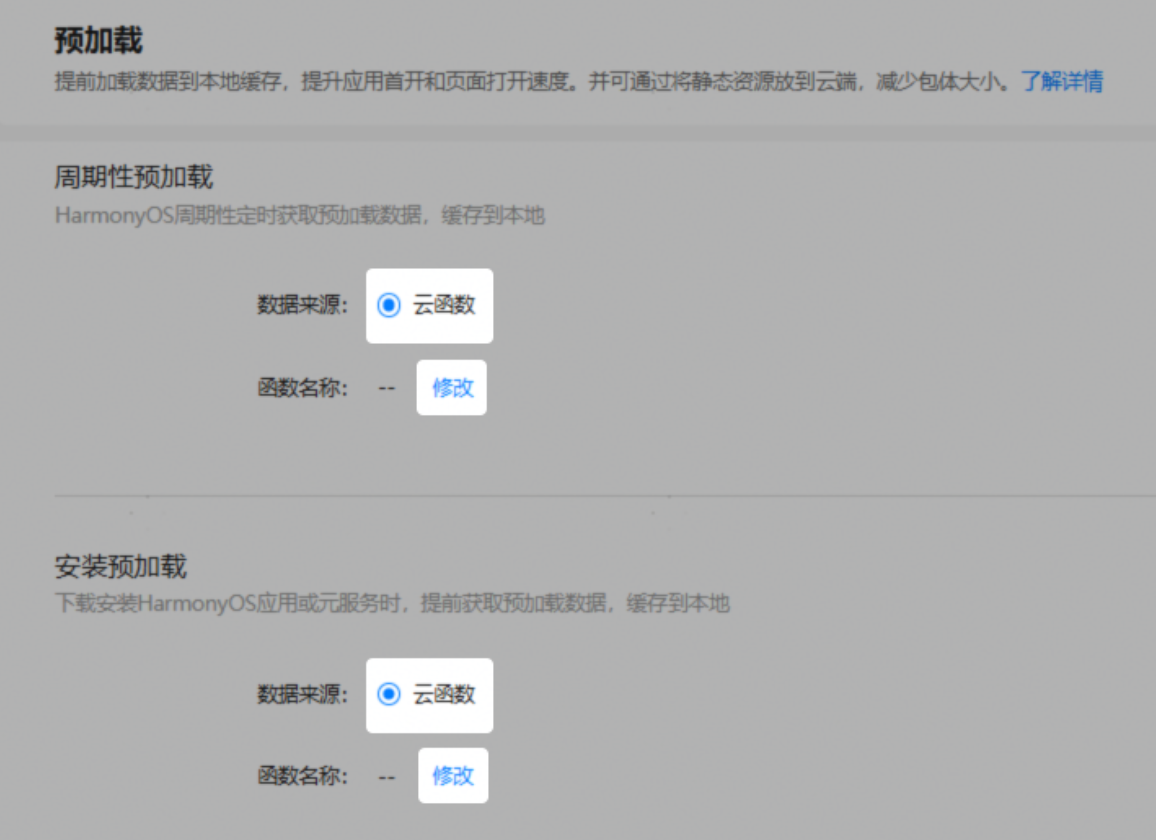
-
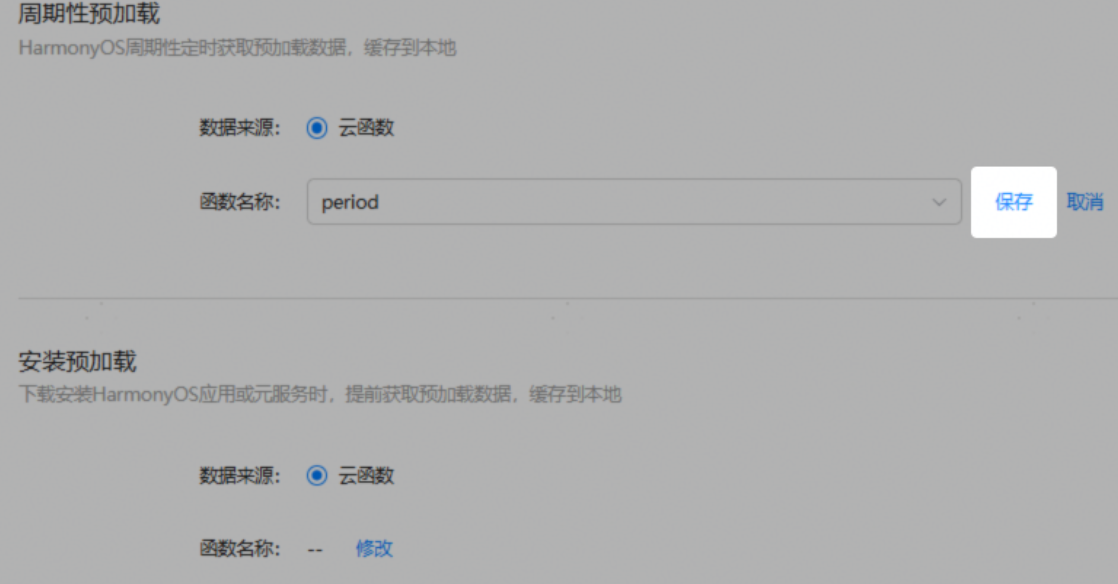
在"周期性预加载"区域,同样选择这个云函数(也可以选择不同的)。
-
点击保存。
四、端侧开发
端侧开发稍微复杂一点,我们需要封装一些工具类来处理缓存和任务注册。
4.1 添加工具类
为了方便管理,我们需要在项目中添加几个工具类。
1. GlobalContext (全局上下文)
位置:entry/src/main/ets/common/GlobalContext.ets
(如果之前教程中已经创建过,可以复用)
typescript
import { common } from '@kit.AbilityKit';

export class GlobalContext {
  private static context: common.UIAbilityContext;

  public static initContext(context: common.UIAbilityContext): void {
    GlobalContext.context = context;
  }

  public static getContext(): common.UIAbilityContext {
    return GlobalContext.context;
  }
}
2. PreferenceUtil (首选项工具)
位置:entry/src/main/ets/common/PreferenceUtil.ets
用于存储预加载任务的状态和注册时间。
typescript
import dataPreferences from '@ohos.data.preferences';
import { Context } from '@kit.AbilityKit';
import { hilog } from '@kit.PerformanceAnalysisKit';

const DOMAIN = 0x0000;
const TAG = 'PreferenceUtil';
const DEFAULT_STORE_NAME: string = "prefetchDefaultStore";

export class PreferenceUtil {
  private static cachedPreferences: Map<string, dataPreferences.Preferences> = new Map();

  // ... (完整代码请参考官方文档或前面的输入内容,此处省略部分实现细节以保持简洁)

  public static getValueSync(context: Context, storeName: string, key: string): dataPreferences.ValueType | null {
    try {
      let store = PreferenceUtil.getStoreSync(context, storeName);
      PreferenceUtil.updateStoreCache(storeName, store);
      return store.getSync(key, '');
    } catch (err) {
      return null;
    }
  }

  public static async setValue(context: Context, storeName: string, key: string, value: dataPreferences.ValueType): Promise<void> {
    try {
      let store = await PreferenceUtil.getStore(context, storeName);
      PreferenceUtil.updateStoreCache(storeName, store);
      await store.put(key, value);
      await store.flush();
    } catch (err) {
      hilog.error(DOMAIN, TAG, `setValue error: ${err.message}`);
    }
  }

  // ... getStore, getStoreSync, updateStoreCache 方法实现
  private static async getStore(context: Context, storeName: string): Promise<dataPreferences.Preferences> {
    let actualStoreName = !storeName ? DEFAULT_STORE_NAME : storeName;
    let store = PreferenceUtil.cachedPreferences.get(actualStoreName);
    if (store) { return store; }
    return dataPreferences.getPreferences(context, actualStoreName);
  }

  private static getStoreSync(context: Context, storeName: string): dataPreferences.Preferences {
    let actualStoreName = !storeName ? DEFAULT_STORE_NAME : storeName;
    let store = PreferenceUtil.cachedPreferences.get(actualStoreName);
    if (store) { return store; }
    return dataPreferences.getPreferencesSync(context, { name: actualStoreName });
  }

  private static updateStoreCache(storeName: string, store: dataPreferences.Preferences): void {
    if (!PreferenceUtil.cachedPreferences.has(storeName)) {
      PreferenceUtil.cachedPreferences.set(storeName, store);
    }
  }
}
3. PrefetchUtil (预加载工具)
位置:entry/src/main/ets/prefetchUtil/PrefetchUtil.ets
负责调用系统API,管理任务注册逻辑。
typescript
import { cloudResPrefetch } from '@kit.CloudFoundationKit'
import { hilog } from '@kit.PerformanceAnalysisKit';
import { PreferenceUtil } from '../common/PreferenceUtil';
import { GlobalContext } from '../common/GlobalContext';

// ... 常量定义 (PREFERENCES_PREFETCH_STORE_NAME, etc.)

export class PrefetchUtil {
  // ... 静态变量定义

  public static async getPrefetchResult(type: cloudResPrefetch.PrefetchMode) {
    return cloudResPrefetch.getPrefetchResult(type);
  }

  public static async registerPrefetchTask(token: string, params: string | object, forceRegister: boolean = false) {
    // ... 注册任务逻辑,判断时间间隔是否超过24小时
    // 完整逻辑请参考文档,核心是调用 cloudResPrefetch.registerPrefetchTask
  }

  public static hasPrefetchTaskData() : boolean {
    return PrefetchUtil.hasPrefetchedData;
  }

  // ... updatePrefetchTaskInfo, registerPrefetchTaskForced 等辅助方法
}
4. PrefetchWrapper (预加载封装类)
位置:entry/src/main/ets/prefetchUtil/PrefetchWrapper.ets
这是业务层直接调用的类,封装了"安装预加载"和"周期性预加载"的策略切换。
typescript
import { hilog } from '@kit.PerformanceAnalysisKit';
import { cloudFunction, cloudResPrefetch } from '@kit.CloudFoundationKit';
import { PrefetchUtil } from './PrefetchUtil';
import { PreferenceUtil } from '../common/PreferenceUtil';
import { GlobalContext } from '../common/GlobalContext';

const TAG = 'PrefetchWrapper';
const PREFETCH_MODE = "prefetchMode";
const PREFERENCES_PREFETCH_STORE_NAME = 'defaultStore';

export class PrefetchWrapper {
  private static instance: PrefetchWrapper;

  public static getInstance(): PrefetchWrapper {
    if (!PrefetchWrapper.instance) {
      PrefetchWrapper.instance = new PrefetchWrapper();
    }
    return PrefetchWrapper.instance;
  }

  // 核心入口方法
  public doPrefetch() {
    let context = GlobalContext.getContext();
    let prefetchMode = PreferenceUtil.getValueSync(context, PREFERENCES_PREFETCH_STORE_NAME, PREFETCH_MODE) as number;

    if (!prefetchMode) {
      // 模式不存在,说明是首次打开,执行安装预加载
      hilog.info(0x0000, TAG, '执行安装预加载');
      this.installPrefetch();
      // 标记下次使用周期性预加载
      PreferenceUtil.setValue(context, PREFERENCES_PREFETCH_STORE_NAME, PREFETCH_MODE, cloudResPrefetch.PrefetchMode.PERIODIC_PREFETCH);
    } else {
      // 非首次打开,执行周期性预加载
      hilog.info(0x0000, TAG, '执行周期性预加载');
      this.periodicPrefetch();
    }
  }

  private installPrefetch() {
    PrefetchUtil.getPrefetchResult(cloudResPrefetch.PrefetchMode.INSTALL_PREFETCH)
      .then((data) => {
        hilog.info(0x0000, TAG, '获取安装预加载数据成功: ' + JSON.stringify(data.result));
        // TODO: 将数据保存到全局变量或状态管理中,供页面渲染使用
      })
      .catch((err) => {
        hilog.error(0x0000, TAG, `获取失败: ${err.message}, 降级为云函数调用`);
        this.cloudFunctionCall();
      })
  }

  private periodicPrefetch() {
    // 注册下一次的任务
    PrefetchUtil.registerPrefetchTask('', '');

    if (!PrefetchUtil.hasPrefetchTaskData()) {
      hilog.info(0x0000, TAG, '暂无周期性数据,降级处理');
      this.cloudFunctionCall();
      return;
    }

    PrefetchUtil.getPrefetchResult(cloudResPrefetch.PrefetchMode.PERIODIC_PREFETCH)
      .then((data) => {
        hilog.info(0x0000, TAG, '获取周期性预加载数据成功: ' + JSON.stringify(data.result));
        // TODO: 处理数据
      })
      .catch((err) => {
        this.cloudFunctionCall();
      })
  }

  private cloudFunctionCall() {
    // 降级逻辑:直接调用云函数获取数据
    // ...
  }
}
4.2 在Ability中调用
最后,在EntryAbility.ets的onCreate方法中调用:
typescript
import { GlobalContext } from '../common/GlobalContext';
import { PrefetchWrapper } from '../prefetchUtil/PrefetchWrapper';

export default class EntryAbility extends UIAbility {
  onCreate(want, launchParam) {
    GlobalContext.initContext(this.context);

    // 启动预加载流程
    PrefetchWrapper.getInstance().doPrefetch();
  }
}
五、调试技巧
周期性预加载默认每12小时才拉取一次,调试起来很慢。幸好鸿蒙提供了命令行工具prefetch_test_tool来强制触发。
-
连接手机,打开DevEco Studio的Terminal。
-
输入
hdc shell进入shell环境。 -
输入命令强制获取数据:
bashcf_prefetch getcache -m <你的应用包名>例如:
cf_prefetch getcache -m com.example.myapp
如果成功,你会看到"fetch data success"的提示。
六、常见问题
- App ID不在白名单:如果在日志中看到"appid ... is not in white list",说明云端服务没开通或者配置未生效。尝试将手机时间往后调1天,然后卸载重装应用。
- Read timed out:云函数没有启动实例。去AGC控制台手动测试一下云函数,确保它能正常运行。
- 数据未更新:检查命令行工具返回的时间戳,如果时间戳没变,说明拉取失败,检查网络和云函数日志。
七、总结
至此,我们的鸿蒙端云一体化开发系列教程就全部结束了!
从云函数、云数据库、云存储到预加载,我们完整地走了一遍Cloud Foundation Kit的核心能力。希望这些教程能帮助你构建出更强大、更流畅的鸿蒙应用。
祝大家开发愉快,应用大卖!